Sabrina is a Lifestyle, Parenting and Product Review Blogger. A Writer, Photographer, Reviewer, Home Cook, Crafter & Nature Enthusiast. You will find a bit of all those categories here on Severn Wishes Blog, Welcome to Sabrina's Lifestyle Blogging & Honest Reviews.
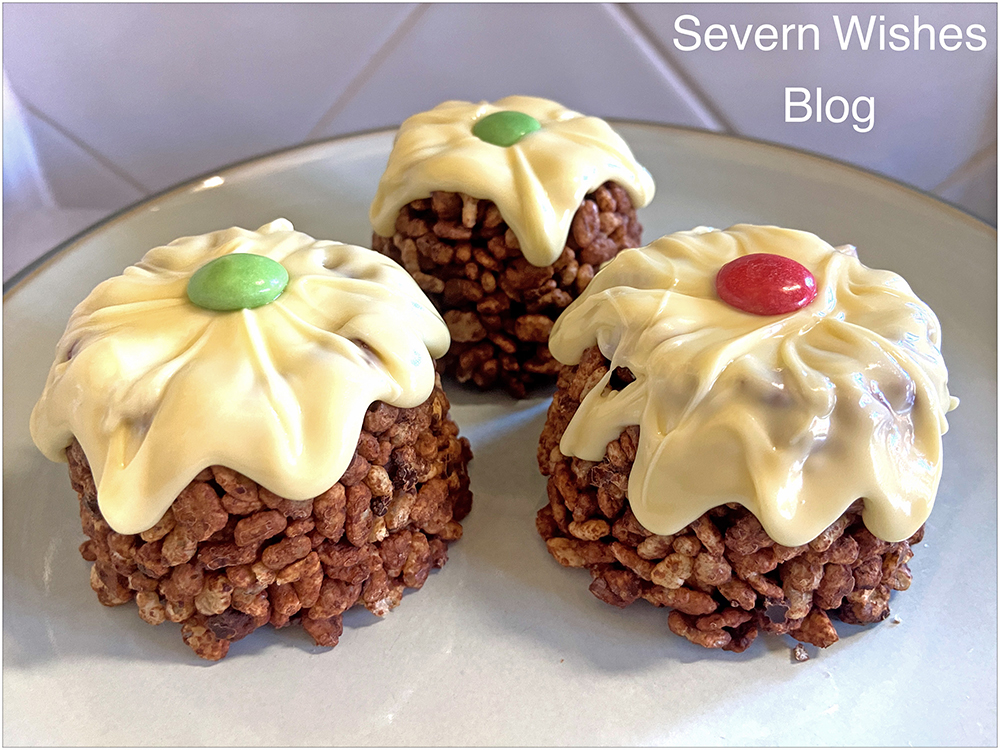
If you’re looking for a fun dessert for a Christmas Party that lots of children are attending then this might be the one for you! Look no further than these Christmas Puds! You can make them the day before and leave them to set overnight in a fridge. It will take just half an hour to make up to six Crispy Puds!
What You Will Need
Saucepan Wooden Spoon Rounded Moulds – I use an empty fruit pot that is from Tesco! They are the perfect size! Teaspoon
Crispy Cereal 300g-400g (depends on how coated in chocolate you want them to be) Milk or Plain or Free From Milk Chocolate 200g White or Free From White Chocolate (for the topping) 60-100g Decorative Item such as a Sweet or Smartie
How To Make
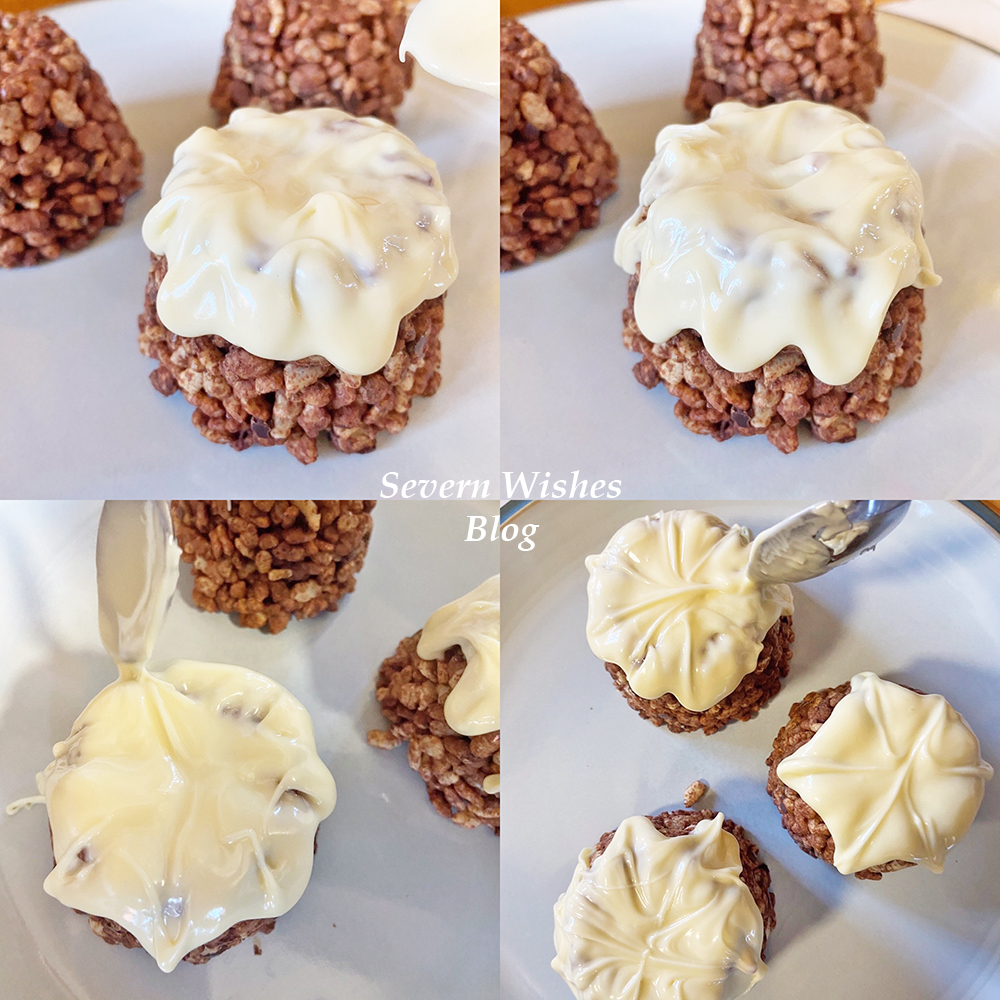
1. Melt the Chocolate on a low heat. 2. Once Smooth take off the heat and Stir in Crispy Cereal. 3. Push into Moulds of your Choice Firmly.
4. Refrigerate for a minimum of 4 Hours or Overnight. 5. Remove from Fridge, Turn Upside Down and Squeeze Gently to Remove from Moulds. 6. Melt the White Chocolate, Pour Over Each Pudding and Let it Drip down the Sides.
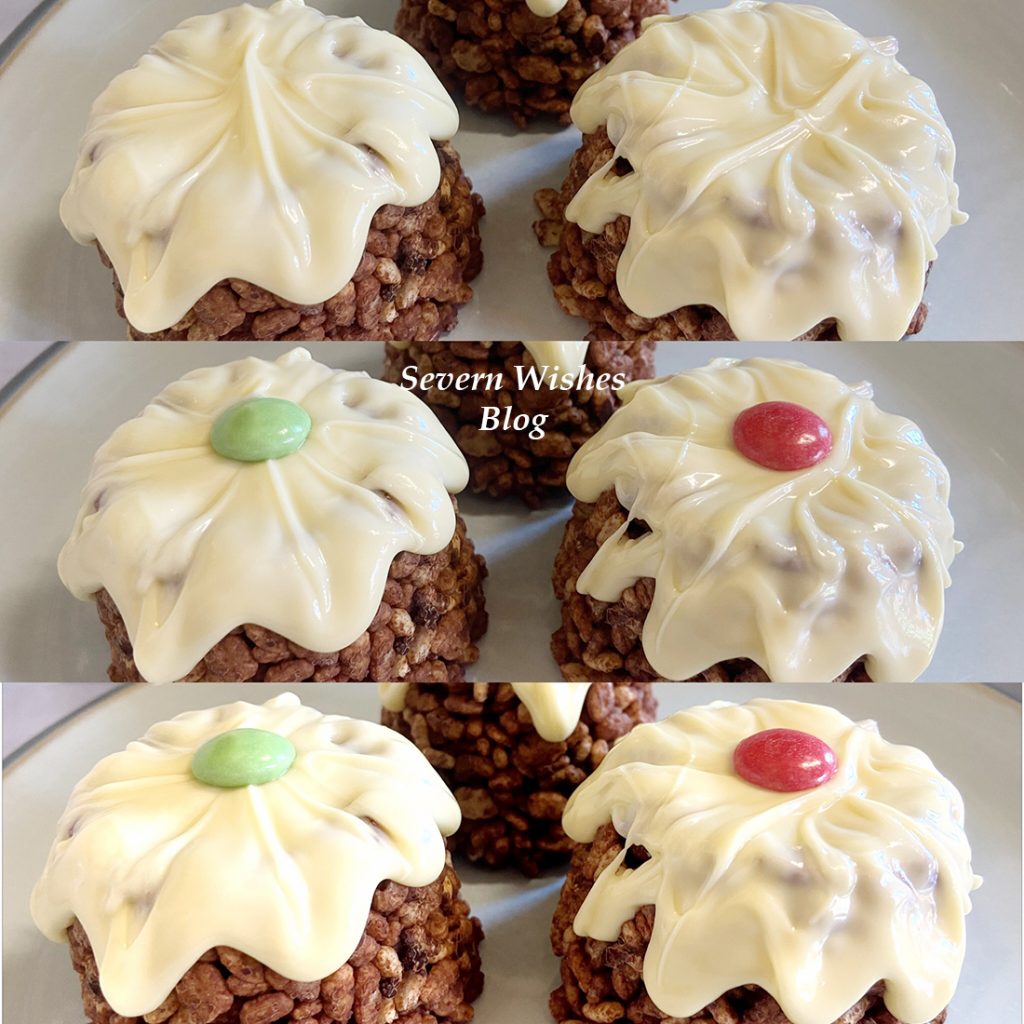
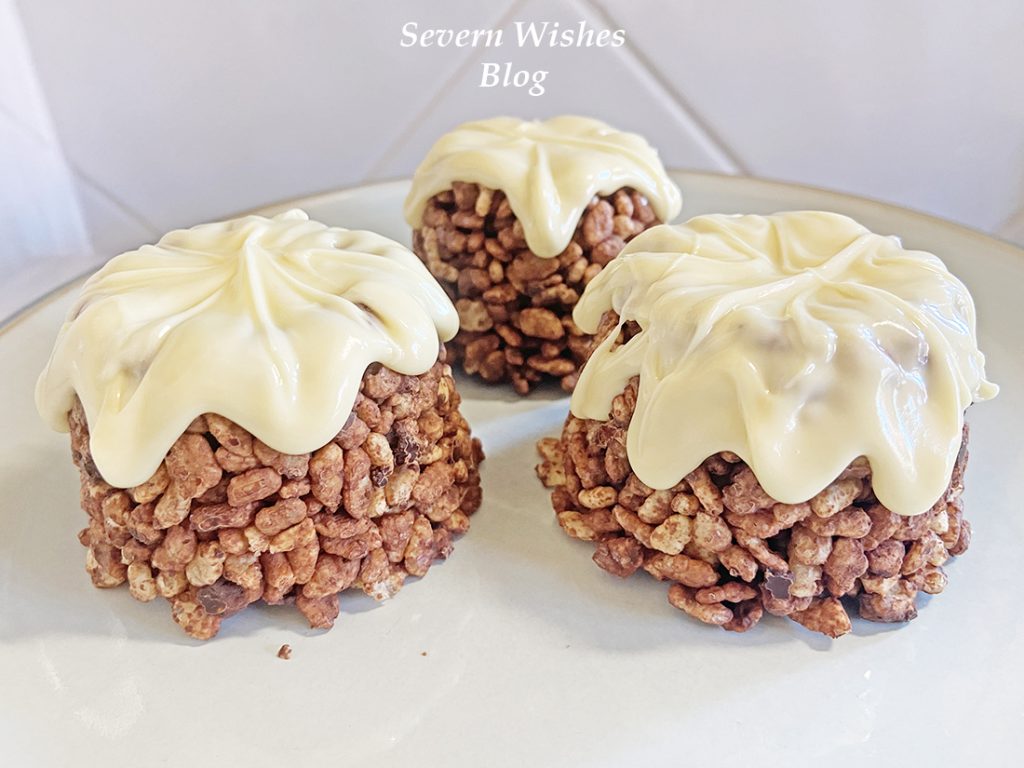
7. Using the End of a Tea Spoon Drag the White Chocolate to Form a Star Shape on Top of the Pudding .
8. Add a Sweetie or a Smartie on the Top to Decorate. 9. Pop Back in the Fridge until the Hour of Serving. 10. Keep in an Airtight Container for up to 3 days.
EASY PEASY!
Thank you for reading this blog post today, I hope that you like my recipe. If you make any of these yourself I would love to see a photo of how they turn out! Please tag me on Social Media! #SabrinasRecipes #SabrinasHowToMake
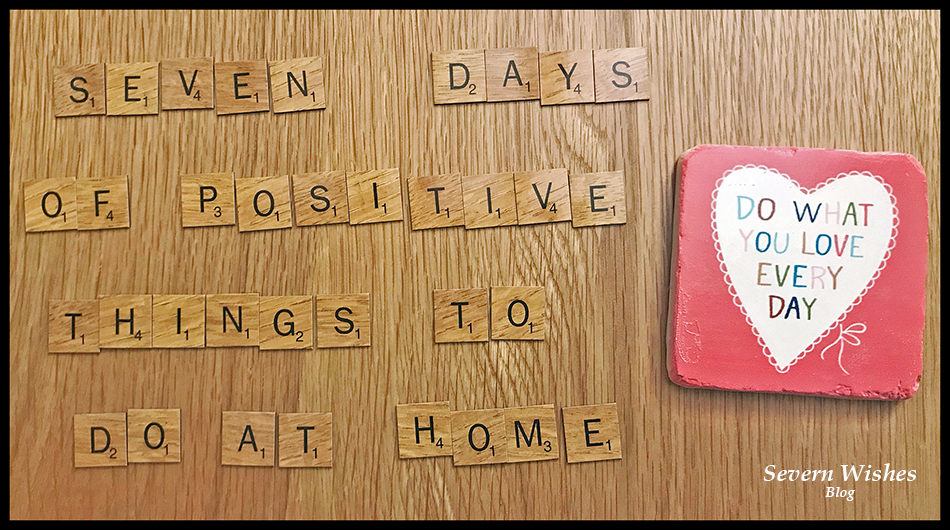
Sabrina’s Top Tips for having a more Positive 7 Days
Everyone seems to be feeling a bit low lately, it’s bound to be the Winter Blues mixed in with everything to do with the Pandemic. There are so many people who have found themselves working from home again, and many young people who are studying at home again too. With all this time stuck at home there are lots of anxious feelings and negativity, so I’m here with some suggestions to try and put a positive spin back into your home environment!
So here is my solution to tackle the blues, try to take half an hour out of your day as a family unit, every afternoon for the next week, after work is over and after the schooling is done for the day. Pick one of these ideas of mine to do together, a different one every day in any order you like.
I guarantee they will have you feeling more positive by the end of day 7! You can do them in any order you like! Or do one of them twice if it’s a hit! If you play along please comment on this post or on my socials at the end of the week and tell me which activity your family preferred and whether these activities did in fact work for you and increase your family’s positive attitudes.
Go for a Walk (Weather Dependent) and play a game as you go! Ideal for parents with younger children who are still enthralled by the nature of “eye spy”. But the fresh air and endorphins combined should make all of you feel better too. Older children may want to go for a jog or a bike ride if that’s more your thing, so long as it’s half an hour outdoors with your family, all together.
Watch a Funny TV Show or Cartoon. Laugher really can help you to feel better, even for a brief moment, so why not stick on a tv show or a favourite cartoon that never failed to make you laugh and giggle together. Tom and Jerry is a good one!
Bake or Make Something Delicious! I have a ton of recipes on my blog and some don’t even take that long to do. So why not make some chocolate crispy cakes or even some rocky road, something simple and even something that doesn’t require baking to save you time! Then you’ll have a tasty treat for a few afternoons to come! See what you’ve got in the cupboard! Here is my baking section HERE.
Get Creative. You can do one of two things with this creative activity depending upon the age of the people in your household. Either, do a rotating draw-off where by you each start with a piece of A4 paper and one coloured pen (all varying colours) and you keep rotating the papers every minute, do this until 4 minutes is up. Everyone should’ve drawn on each of the pieces of paper. No talking! See what you’ve come up with! Share them with me on social media! #SabrinasCreativeCrafts OR You can play the Sentences Game. The idea is to make up a creative story, it should be funny, and you once again rotate the papers. This time you want long strips and not A4. Cut a vertical A4 in half twice or get your strips. Once the first minute is up and the first sentence has been written, you all fold over the section and pass it on. When the time is up you each open up the papers to find a story.
For example; There once was a man who couldn’t find his shoes. I think I want some KFC he thought. He headed off in the direction of the sunset. In the end his dog ran away and joined the circus.
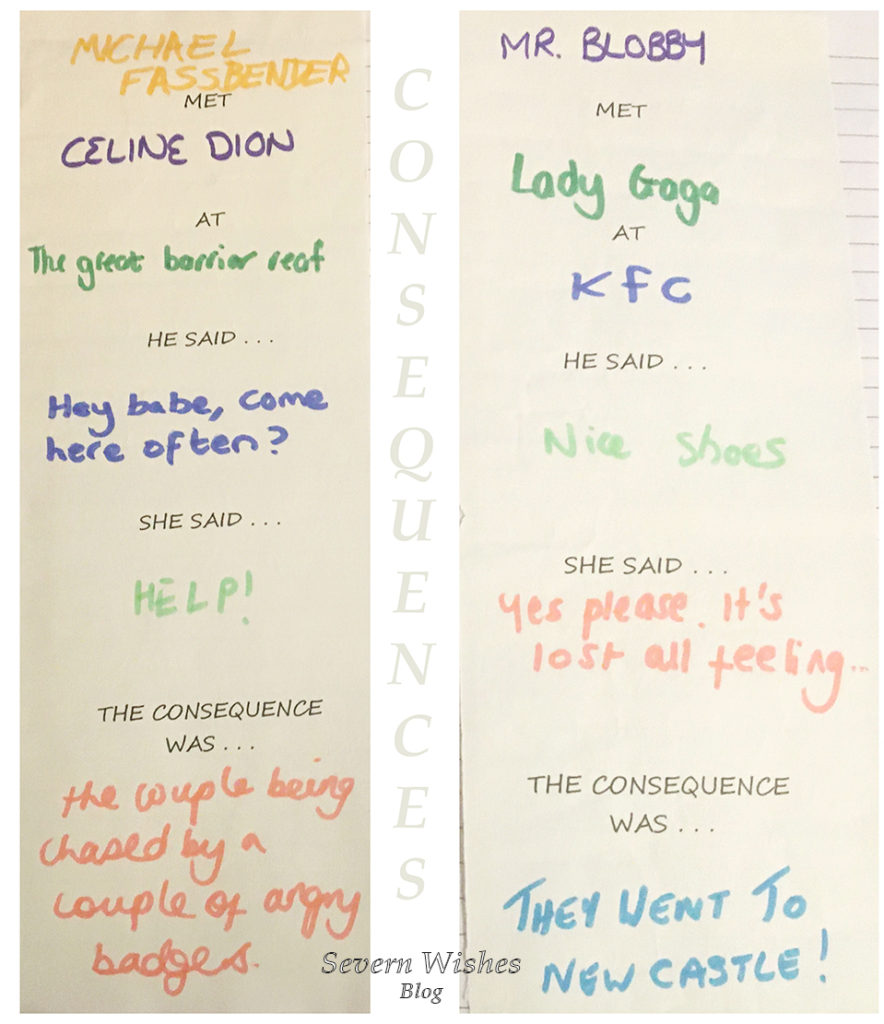
If you have teenagers then you could play the game another way, this is called CONSEQUENCES, you start by writing on each of the papers the following things, add extra if you have a large family so that everyone will get a go at each section when the papers are passed on. They usually go like this… ___ Met ___ At ___ They said ___ What happened next was ___ OR The Consequence was ___
Then unroll it after everyone has had their turn and the sections are completed, then take turns in reading them out. See my photo below this list for an idea of what it would look like when you finished! Warning my examples may cause laughter!
Photos! Another fun thing that would brighten your spirits is to look back at any photo albums that you have or digital slideshows. You could even play a game while you look through them. Every time that your mum is seen with sunglasses on she gets a point, each time someone hasn’t got their hat on when they should you lose a point! First person to spot the water in the photos gets a point. Etc etc! Make up some rules before you start and say that the first person to 10 points gets out of doing the washing up tonight! Or the winner chooses what’s for dinner the next night! Involve one another in every day things.
Write a List of Goals and Aspirations for 2021 – but only write the do-able ones! For example, I want to bake a cake for mums birthday. OR I would like to walk a mile on the next weekend that is dry and sunny. When you achieve something, even if it’s a little thing, you feel so much better about having accomplished it. Setting some realistic goals now for the year might seem silly when we don’t know what’s around the corner, however even if the goals are just for the people in your bubble, it’s still doable. Put them up on your fridge or board and tick yours off when you have completed it.
Make a Meal Together. No matter how old you all are there is something fun about making dinner together. May I suggest something that everyone can get stuck into such as Fajitas, Curry, Sausages and Mash or Lasagne (dietary requirements permitting). I have tons of recipes on my blog if you need inspiring! But making and preparing food together before you eat it can be a real bonding experience, and it can also be important for teaching younger children where foods come from or that by mixing this with that you achieve this outcome. Food is something that has been so important during the first lockdowns so I thought I would continue on with that and try and get you back into your kitchen to make something you love together. Check out my Recipes HERE.
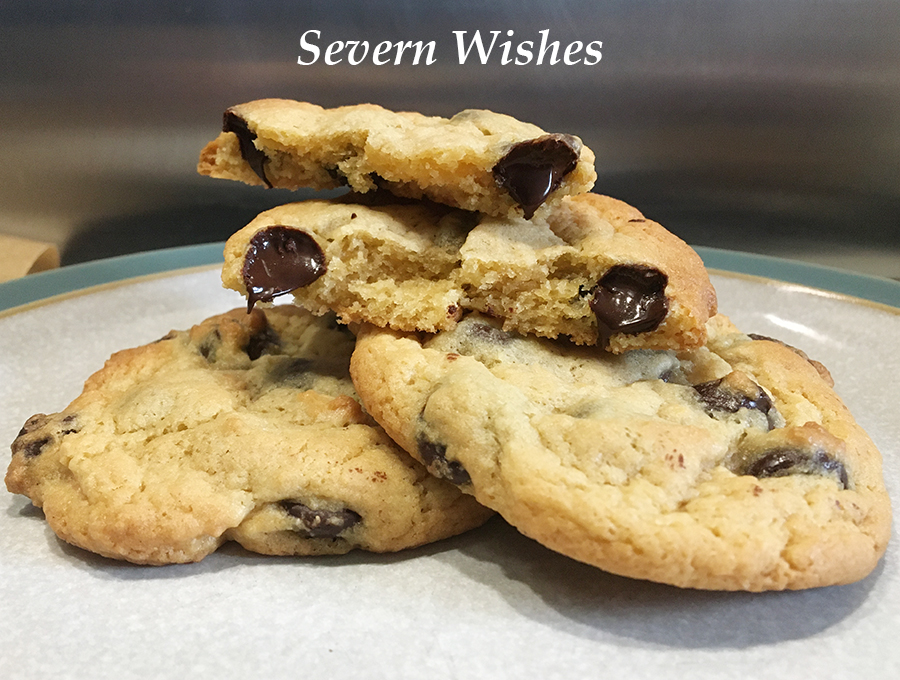
Why Not Try And Make My Delicious Cookies? Click the link in section 3 for the recipe!
The Consequences Game – Imaginative Fun for the older children in your family.
I really hope that you’ve enjoyed this blog post and that you would like to participate in my week of positivity. If you do participate in any of them or attempt to get those in your bubble to do so, then please let me know how you got on! I can’t wait to see if you make anything as well 🙂 tag me online! And thanks for joining me!
Halloween is one of those holidays where people either love it or loathe it. Whether or not you like Fancy Dress and Decorating your Home, it’s an important right of passage for your little ones to experience the fun of a Halloween.
If it’s their first Halloween then I have lots of ideas that you could achieve easily at home and make some nice memories and keepsakes to show the child when they are older.
With the pandemic still affecting us all, there are many children who would love to be trick or treating and having fun and games with their friends. It’s highly likely not to happen this Halloween 2020, however that doesn’t mean you cannot do things at home.
WHAT IS IN THIS BLOG POST… HALLOWEEN 2020
Fancy Dress Photo Shoot Fun – My Tips and Tricks
Hand and Feet Print Halloween Decorations – Fun Family Keepsakes
Halloween Games with Treats to be Found (at home) – My Lockdown Halloween Trick or Treat Ideas
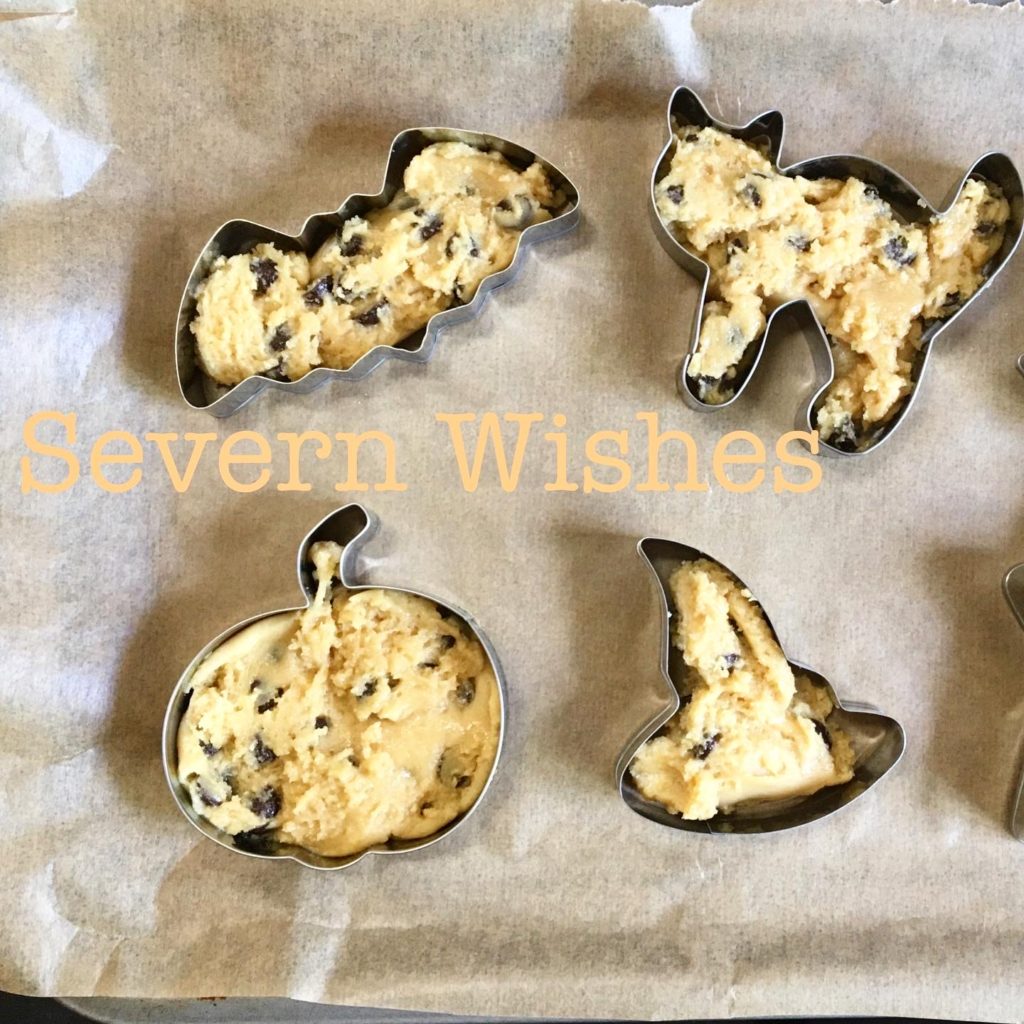
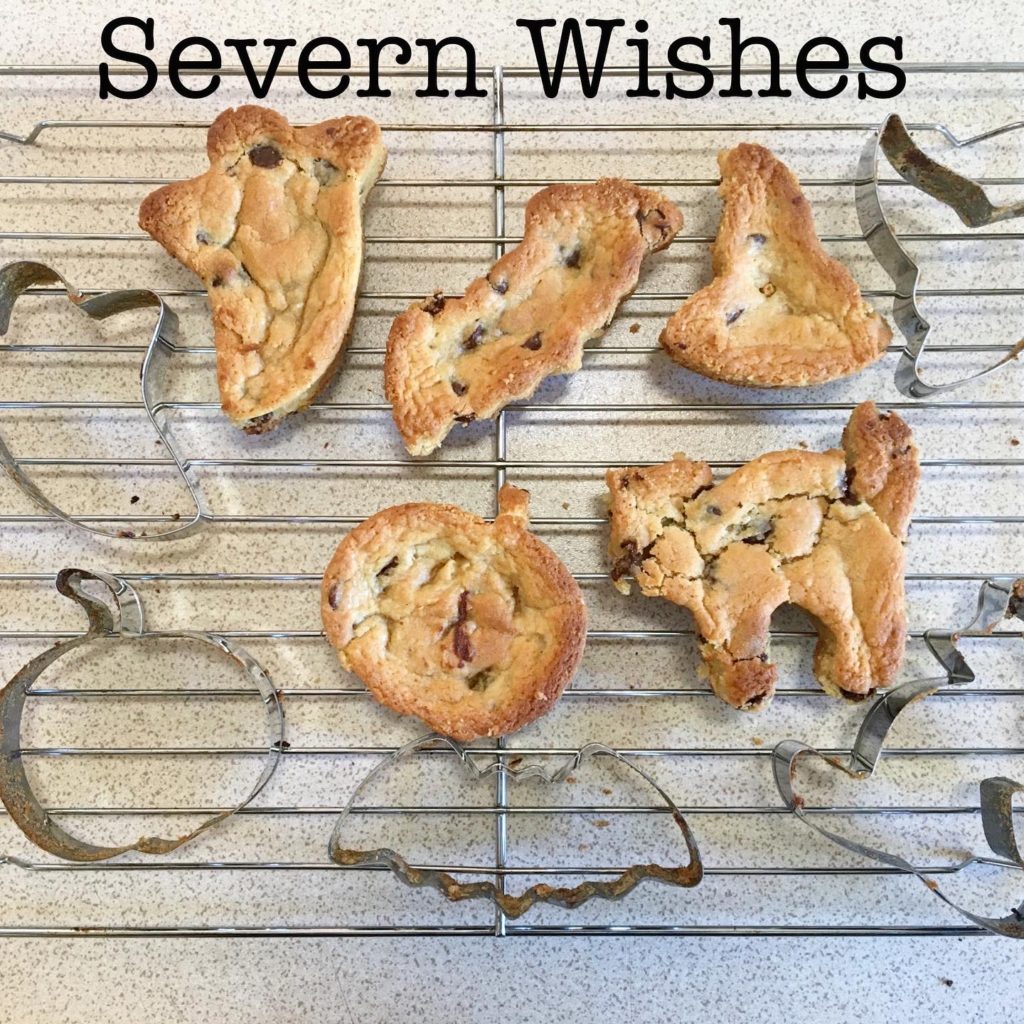
Baking with Halloween Shapes – Fun Baking Tips for the Family to do together
What Else Can You Do With Halloween Baking Cutters as Stencils!
Fancy Dress Photoshoot at Home
One way in which I always like to remember a holiday event or day is to do a photo shoot. For the last two years I have dressed my son up and surrounded him with a variety of Halloween related items. I got some good photographs doing this at home that I can treasure. If you set it up correctly you won’t need to pay anyone to take photographs for you.
You Will Need
A decent camera or a phone with a decent camera A camera which has a timer if you want to do a family portrait Natural light coming through a door or window is best for colours Fancy Dress items and any props that you would like to include
My Photography Tips
Natural Light is important to get clear and sharp imagery.
Use fairy lights to add depth to your image (supervised around the child/ren of course).
Props are important and make sure you arrange them so they can be seen, if you’re going for a theme try and stick to it.
If you want things to be inside the frame then choose your layout carefully and keep looking through the camera lens as a guide.
A sofa or chair is ideal to sit a baby on or you could even use a ball pit or a rocker with a sheet over it to block out any unwanted branding or colours.
Set up your photo shoot before you get a baby ready otherwise they may get fed up rather quickly if you ignore them to move things around.
If you can get a large pumpkin or a cushion you can sit babies inside or on top, just make sure to always have their necks supported!
If you can’t pull off a Photoshoot then why not use some Free Filters on some Photo Apps. Some of them are highly detailed. We did one to show you just how cool! And if you have older children they might be more interested in that too!
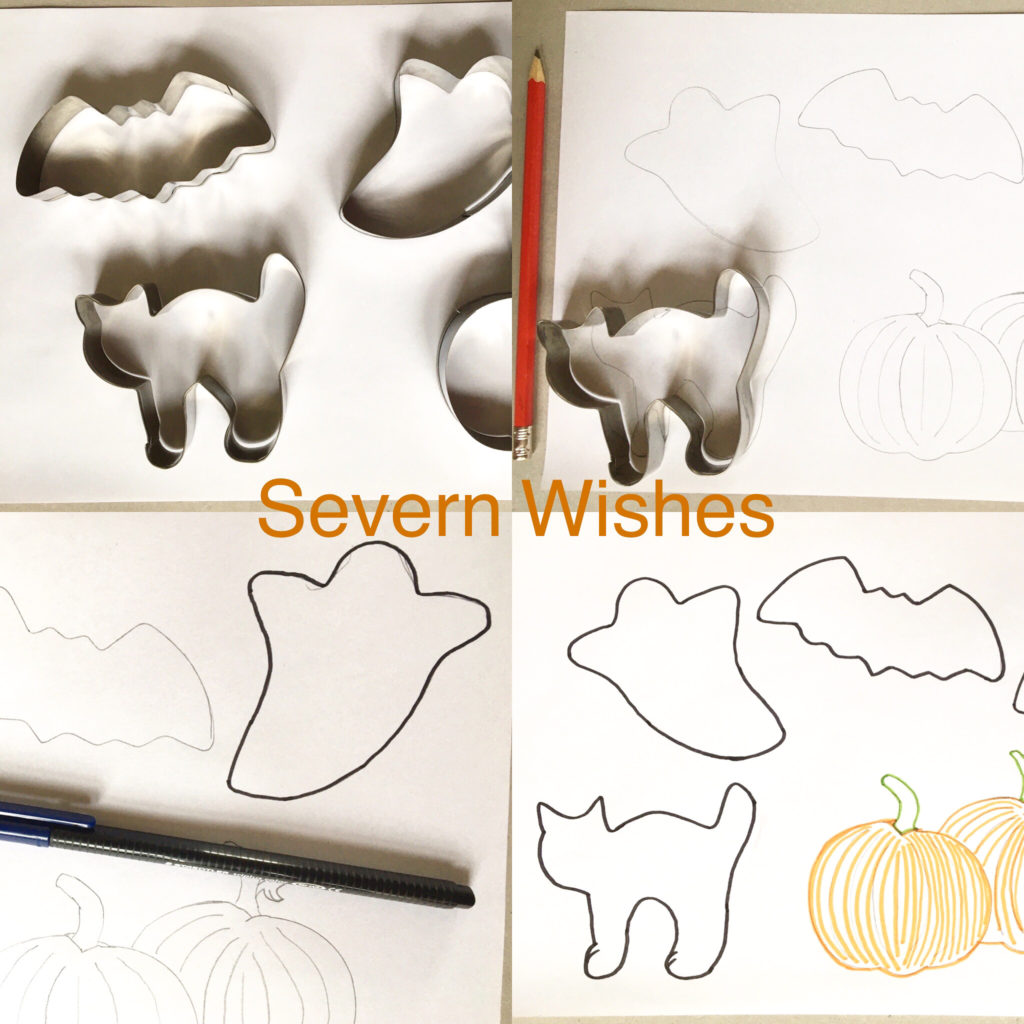
4 WAYS TO USE HALLOWEEN BAKING CUTTERS AS STENCILS
I’m not very good at drawing so using these cutters as outlines was a great idea for me! If you can draw well you won’t need to do this! Ha! Ha!
Halloween Decorations
Halloween Posters
Halloween Colouring In
Halloween Baking
I drew around the shapes and outlined them in pen, then let my child colour it in.
Halloween Decorations
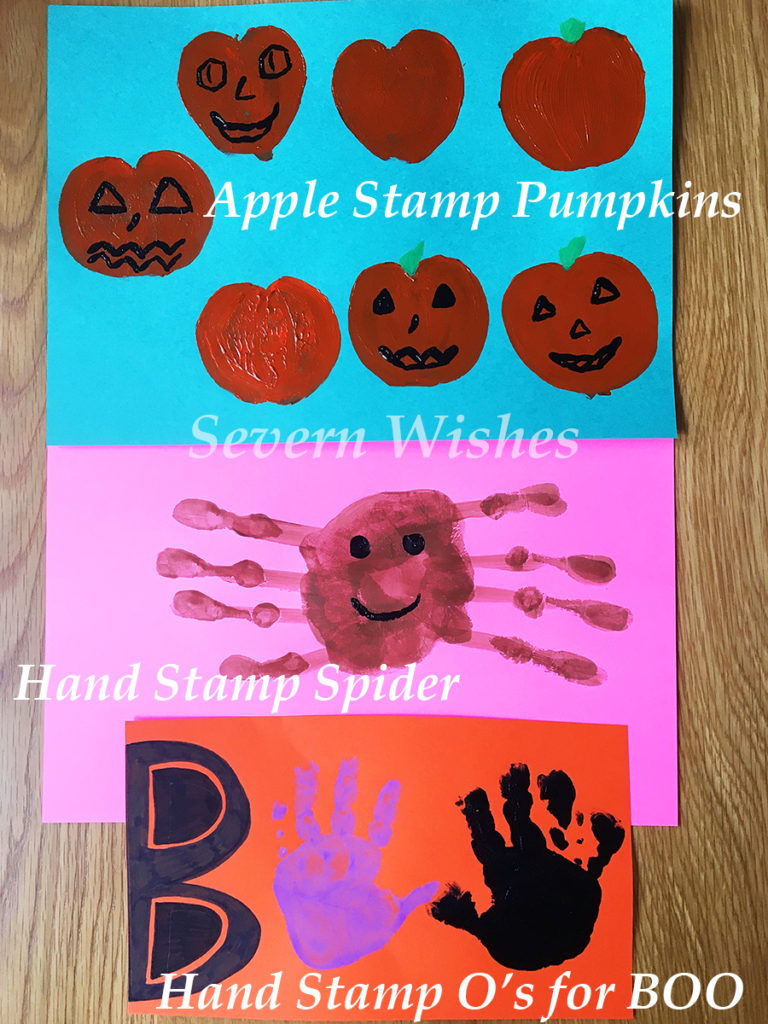
Making Halloween Decorations is easier than you think! So long as you have got some card and some paint. There are tons of ways you can make nice posters or decorations. Here is how I have made mine…
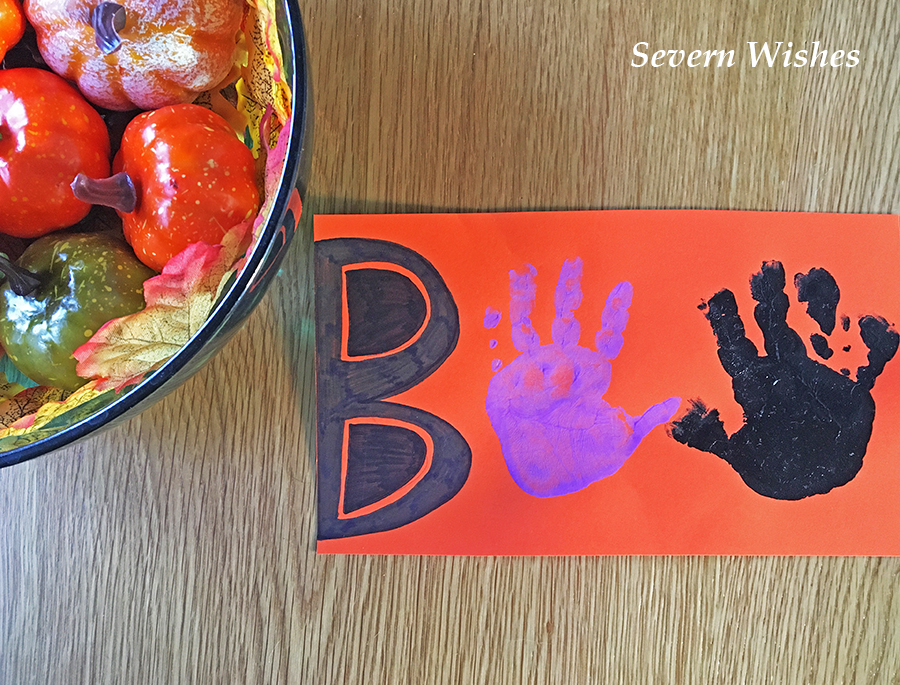
Pumpkins – Apples Halved and Dipped in Paint. Spider – Hand Prints leaving off the thumb so fingers make 8 legs. BOO – B and two hands for the O’s. Ghost – Foot Print (upside down)
I’m planning to cut out the Pumpkins once they are fully dry and hang them up against my window.
You can make a Halloween poster for your window or you can cut the items out and hang them up with string.
Trick or Treat at home won’t be the same, but it can still be fun! Check out my ideas below!
1. Make Every Room A Different Theme with a Different Sweet to Find. You can tailor them to meet the needs of your family, no choke-able sweets for little ones etc. If you don’t do Sweets you could use Numbered Fruit like Apples which result in a Toy prize if they find them all.
2. Make It A Halloween Treasure Hunt with the Treasure being Sweets! Write little clues on paper for the kids to follow. Create traps and fun obstacles for them to overcome, riddles and rhyming works well too! “Where you Sleep, Often Deep, Beneath the Covers is what you Seek!” things like that, E.G Under their bed covers is a Sweet or another Clue.
3. Use A Dice And Clues to Make a Halloween Game of your Own! Using how many rooms you have and how many children, you can send each child off to a room where they have to either complete a task or seek and find the next clue, which once put together with their siblings answers, will reveal their bounty of Treats! E.G Two Siblings, they each find a clue on paper, one reads KITC and the other HEN and when put together they go to the KITCHEN for the next clue etc.
HALLOWEEN BAKING
I have done some step by step baking videos on my Halloween cookie baking and these are available to watch on my Facebook page, I will drop you the link here Severn Wishes on Facebook.
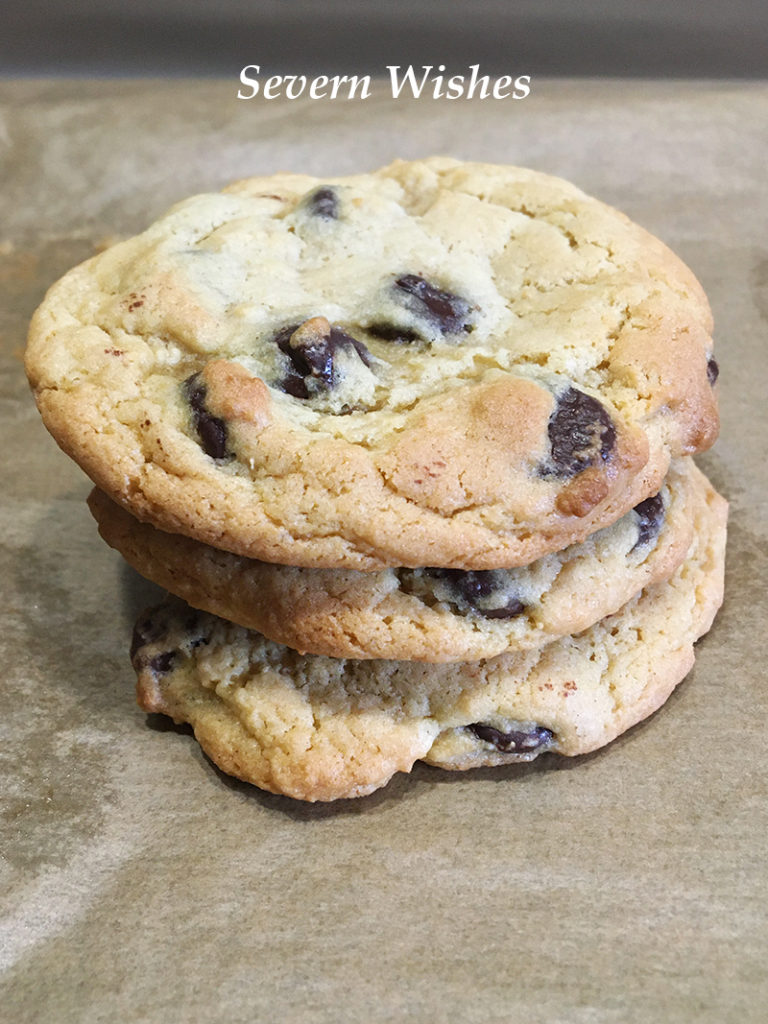
These cookies of mine are not only delicious, but dairy free and made with dark chocolate chips which add a real depth of flavour too! I haven’t baked anything else since I perfected this recipe! I can guarantee you’ll love them too! I have been trying and testing my cookie bakes for years and I have finally found a bake that I am totally happy with, I was so happy with the recent batches of cookies that I just had to share them with you. Did you see my images and videos all over my social media?
Trust me when I say you’ll love these cookies, I don’t even contemplate buying cookies anymore because these are just as good, in fact they taste even better in my honest opinion! So why don’t you give them a go and see what you reckon? If you need them to be GF then change the Flour, if you don’t need them to be DF then alter the spread to regular butter. Just make sure you follow my other ingredient amounts and the method exactly!
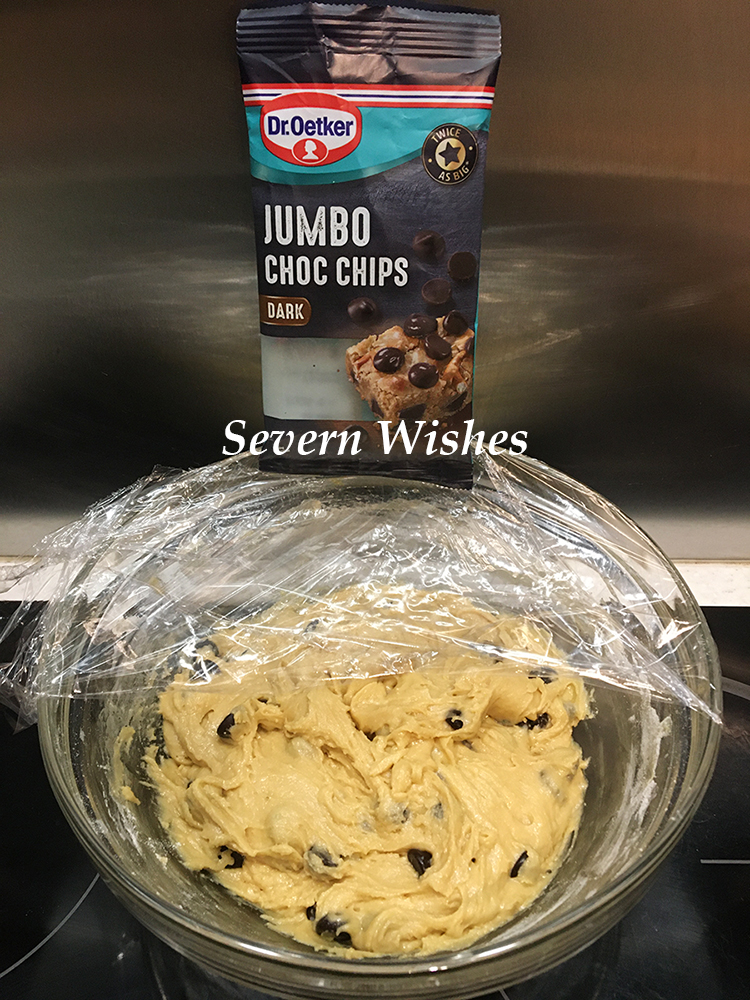
The trick with these cookies is to refrigerate the dough for a minimum of 20 hours, and then you must bake all the cookie dough batches within 3 days of making the dough. It will keep for a couple of days in the fridge if it’s well wrapped and air tight. This time around I baked one batch of cookies at 20 hours and the next batch the morning after around 36 hours after I first mixed my dough. The second batch tasted the best!
The longer you refrigerate the dough for the chewier the cookies will be. You could freeze some dough if you weren’t going to use it all in the time frame, but make sure you use it within a month if you do that. You will also need to add extra minutes to the cook time if you’re baking the dough from frozen too.
Because this is one of my quicker prep time recipes I used an average sized Mug as a measurement for the ingredients instead of scales and grams. Sometimes I don’t get a lot of time to bake with my toddler in tow! So if you want a recipe that is fast to prepare in an evening, ready to bake the following afternoon, then this is the one for you! This amount of ingredients made approximately 14 Cookies. If you make my cookies please share and tag me on social media.
Author: Severn Sabrina Prep Time: 15 Minutes Refrigerate Time: 20 to 40 Hours Cook Time: 8 to 10 Minutes Serves: 14 Cookies Allergens: Contains Egg, Gluten, Soya Lecithin.
Ingredients
½ a Cup of Dairy Free Spread (softened in the microwave in a small bowl) 1/3 a cup of Caster Sugar 2/3 a cup of Soft Brown Sugar 1 Egg 1 Teaspoon of Vanilla Essence 1 Teaspoon of Baking Powder ½ Teaspoon of Salt 1 and ½ Cups of Plain Flour A Bag of Dark Chocolate Chips (100g ish)
You Will Need
Two Bowls – 1 Large and 1 Medium A Sieve A Tablespoon and A Teaspoon A Wooden Spoon A Flat Oven Tray Baking Parchment A Microwave and a Small Microwavable Bowl
SABRINA’S TOP TIPS! Don’t over microwave the spread, just twenty seconds should be enough and then stir it gently until it melts and is smooth and pourable. You can use the same piece of baking parchment if you’re baking two lots of cookies, just place the next set of cookie dough mounds in the gaps that weren’t touched on the paper on the previous bake!
Method
1. In a large bowl you need to mix up the two sugars with the softened spread. Mix with a spoon until it is all smooth.
2. Next you add the egg and vanilla and once mix until it’s smooth and combined. I always do it by hand because this is a quick recipe, just put some effort into the hand mixing for a good 60 seconds. It should look smooth and pale.
3. In a separate bowl, sieve the flour to remove any large lumps, and then add the baking powder and the salt. Mix together well.
4. You now want to take your time combining the wet and dry ingredients. So use the sieve once again to sieve the dry ingredients into the wet, do this a quarter at a time, and between each quarter you want to stir the bowl and combine them. Once that quarter is mixed in to the wet ingredients you start with another quarter of dry, and so on. Once you have mixed all the ingredients together you will be left with a smooth and pale dough.
5. Now it’s time to add the dark chocolate chips or chunks, I prefer chunks because they stay a little more stable in the dough.
6. Refrigerate the dough overnight at least, and when it comes to baking you can do as little or as much as you’d like. It’s best to test a couple of cookies on your oven for a time frame before doing a full batch. Everyone has a different oven.
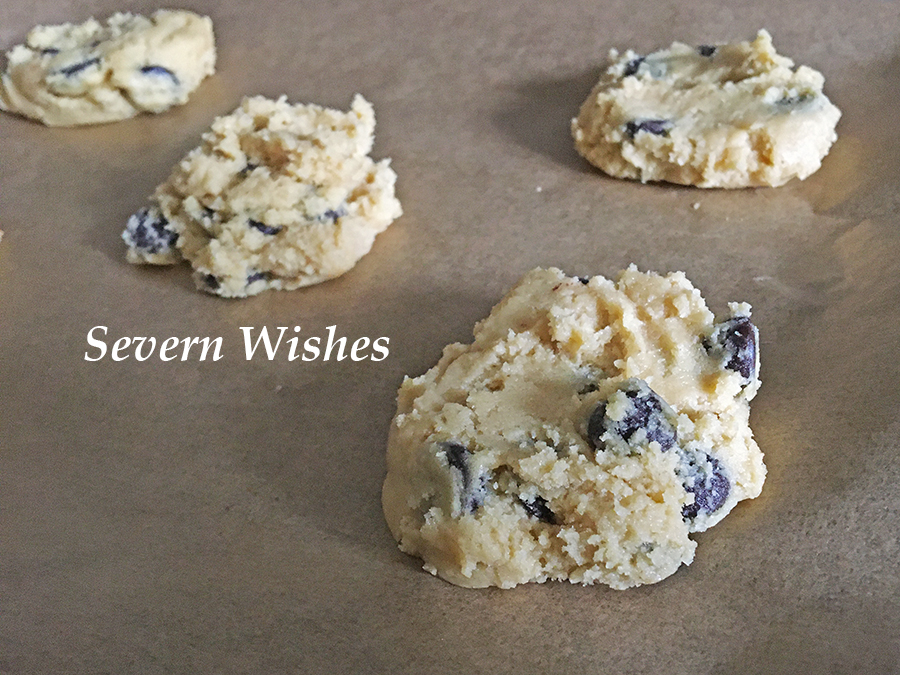
7. When you get to the baking stage I always recommend you take a Tablespoon size of cookie dough, using two spoons to press the dough together, and then gently make a little round mound of it as your cookie size. I use baking parchment over a flat oven tray so as to stop the cookies from sticking. Leave a space of approximately 6cm between each mound so they have space to spread out.
8. Bake for around 8 minutes, the best way to tell if they are done is that the colour changes around the edges of the cookie. You don’t want them to go too browned otherwise they will be overdone and more crunchy than chewy. I do mine at 180’c fan assisted oven for around 8 minutes. Set for 6-8 and then check them, some cookies could take up to 10 minutes.
9. Once they’ve begun to change colour on the edges remove them from the oven and leave them to sit for five minutes. Then you can gently pull them off and let them cool completely before eating them or storing them in an airtight container. They will last for 3 days if you make them air tight about an hour after baking.
Before…
You Can Make This Recipe Gluten Free by Using Gluten Free Flour!
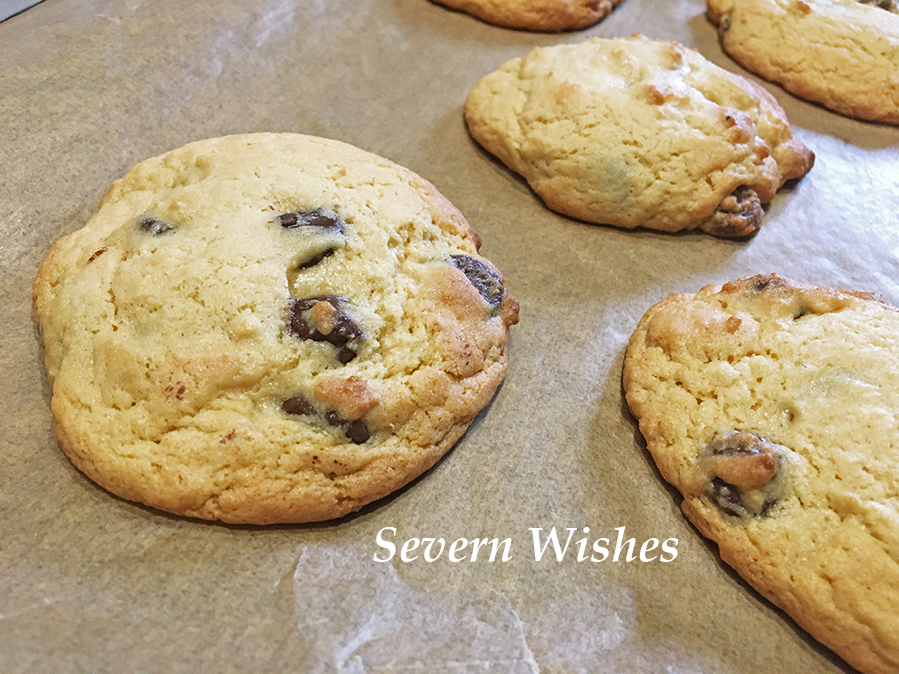
After…
Thank you very much for reading this post today, if you do try my recipe please let me know how you got on. If you have any questions about my bakes then feel free to leave a comment, I’m more than happy to answer them and give you more tips.
You can keep up with all my cooking and baking by following me on my various social media pages.
Have a lovely weekend!
✩ Sabrina ✩
You should refrigerate the dough before baking it!
Freshly Baked!
Thanks for visiting Severn Wishes blog! See you soon!
Welcome to Sweet Treats Week on Severn Wishes. This half term I wanted to share my top 5 baking treats with you all, hopefully you’ve got some time this week to make them with me! I cannot believe this is Day 5 already! I hope you’ve had as much fun baking these as I have!
Check out my Instagram and Facebook page for more food pictures, videos and future recipe ideas too!
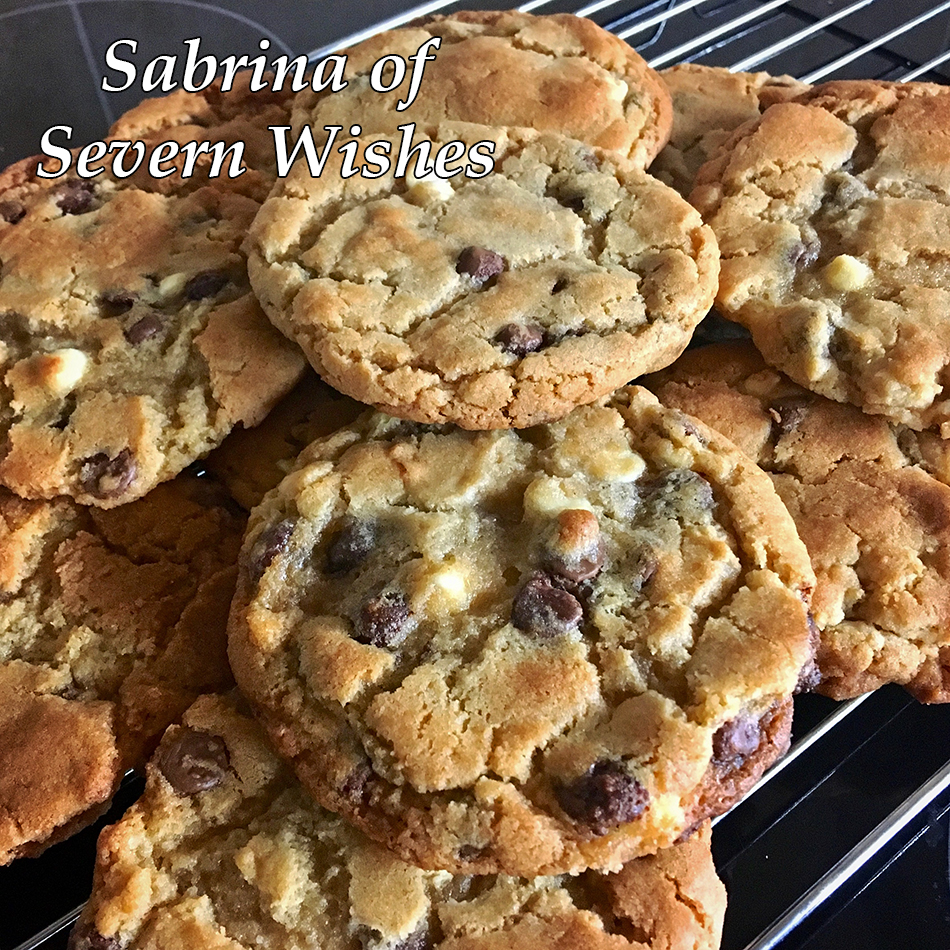
Day 5 is Sabrina’s Customisable Cookies!
And the great thing with these is that you can literally add anything into them… I like mine to have chocolate chips. But you could put tiny marshmallows in them or different kinds of chocolate confectionery. Just follow my basic recipe and then add in whatever you feel like! This is a great one to get the children involved in too and perhaps they could each make two or three cookies just for them!
My recipe will make between 12 and 16 cookies with a prep time of 20 minutes and a fridge time of 3 hours. When you bake they take as little as 15 minutes and only a five minute cool time, so before you know it you could have cookies to enjoy as a mid afternoon snack today!
What You Will Need
A Flat Oven Tray or two Baking Paper or Parchment A Large Mixing Bowl for the main mixture Small Mixing Bowls if your children are doing their own A Wooden Spoon A Tablespoon or Ice Cream Scoop A Sieve A Cooling Rack Something To Store The Cookies In After They Are Cooled
You can use other colourful confectionery like Smarties, M&Ms, Chocolate Chips of different sorts or even chop up your favourite chocolate bars and use those. (Get an adult to do this chopping up). You can use as much or as little as you want.
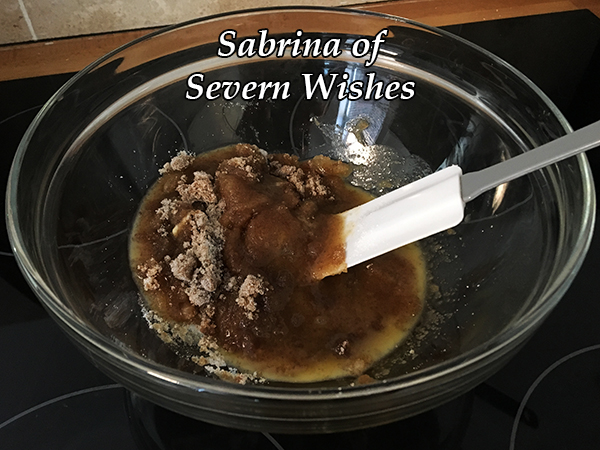
Step 1. Mixing Sugar and Butter and Salt
Method Steps
1. In a Large Bowl start by mixing the melted butter with the sugar and salt. You should have a thick brown liquid when it’s mixed enough.
2. Next you need to add the egg and once again mix thoroughly.
3. Make sure you sieve the flour and baking powder into the mixture and stir gently to combine as you do so. Once it’s all mixed in you can add your chocolate chips. If you’re doing different cookies you can now transfer some of the mix into smaller bowls and add the various confectionery. If your mixture is looking dry add one tablespoon of water at a time until it becomes more like cookie dough.
4. Place cling film over each bowl you have and let them cool in the refrigerator for up to 3 hours. TOP TIP While you wait you could play a game!
5. Then coming up to the end of the 3rd hour you can preheat your oven to 180’c and place some baking parchment onto a flat tray ready for your cookies.
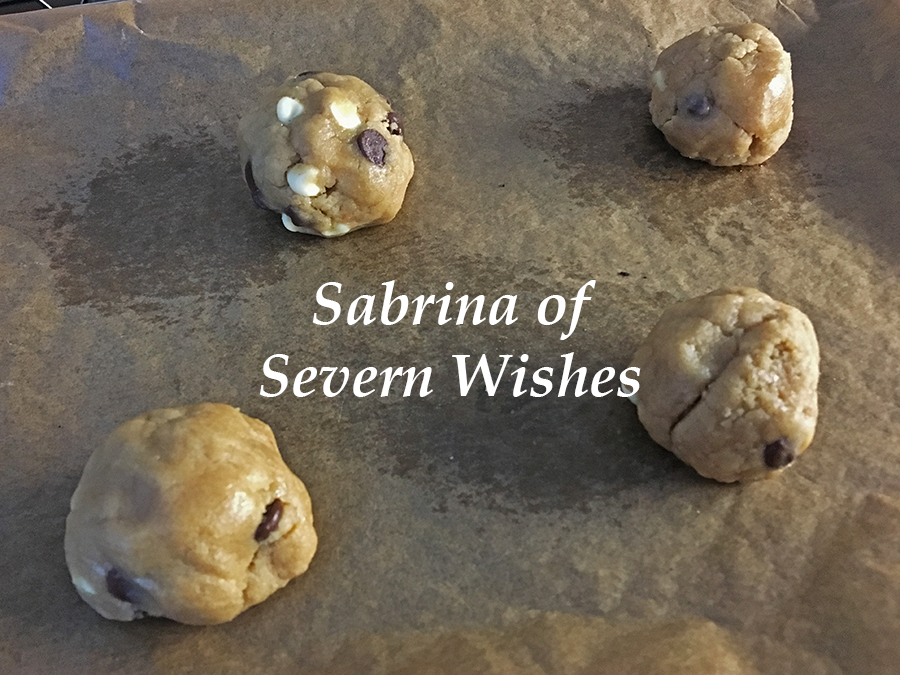
6. In order to make your cookies the same size either use a tablespoon or an ice cream scoop to get a measurement out of the bowl. You want to make heaped almost ball shape but press them lightly to the baking paper. TOP TIP Leave at least 4 cm between each cookie! You may need 2 trays!
7. Bake the cookies but stay close by and keep an eye on them! I always have to rotate my tray half way! They will take between 12 and 15 minutes in a fan assisted oven, and you need to let them cool on a rack before you tuck in!
Step 6. Ready to Bake
TOP COOKIE TIPS
Don’t over handle your cookie dough! Mix in your chosen confectionery into the dough but don’t over mix it. When laying the cookies on the tray leave them heaped, they will flatten on their own. Bake your cookies straight from the fridge for best results. Keep an eye on them so they don’t over bake, it’s a fine line!
Cookies Freshly Baked and Cooling Down on the Rack
Thank you for joining me for Sweet Treats Week! I do hope you have enjoyed it and if you do make any of my bakes then please let me know how they turn out!
If you make any of my recipes be sure to tag me on social media, leave me a comment here on my blog. Any questions about a recipe please don’t hesitate to ask them! If you recreate this recipe somewhere else please credit me for it and name me and my blog, or even better link back to this original post too! Thanks everyone!
Welcome to Sweet Treats Week on Severn Wishes. This half term I wanted to share my top 5 baking treats with you all, hopefully you’ve got some time this week to make them with me! Check out my Instagram for more food pictures, videos and recipe ideas too!
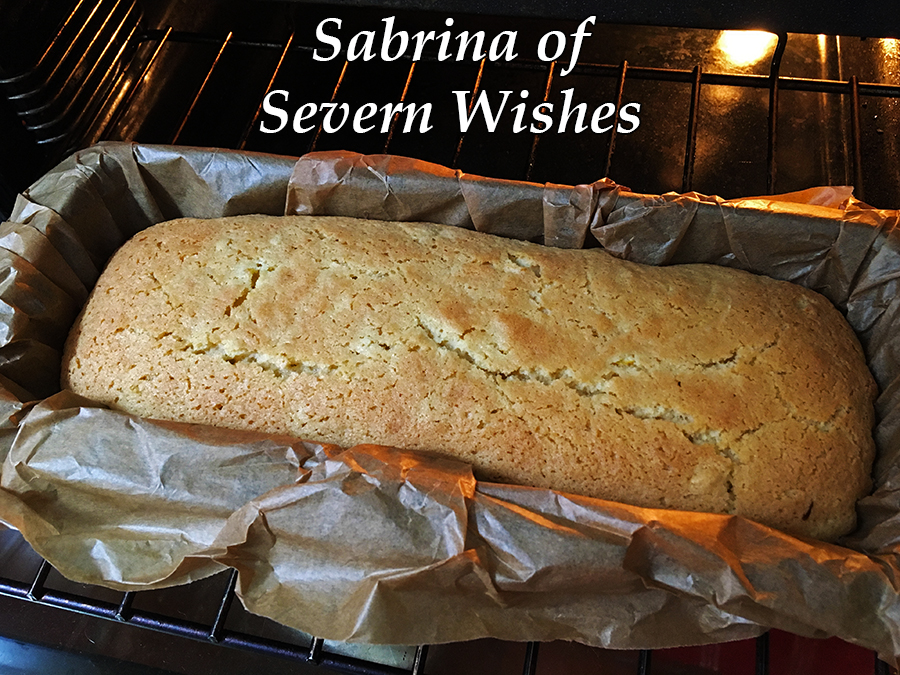
Chocolate and Banana Loaf Cake
Day 4 is Sabrina’s Loaf Tin Cake
I know some people aren’t fond of eating loads of chocolate things so I figured I’d have to put my next favourite baking combination out there, which is Loaf Tin Cake! This can be my favourite cake which is a Lemon Drizzle cake! Or we can do a Banana and Chocolate Chip flavour!
I make this delightful and refreshing cake in a loaf tin because it’s easier to cook it, easier to cut it and easier to store it too! You have lots of options to customise your own cake too! I will be giving you two versions, Lemon or Banana and Chocolate, you can choose which to try or even do both!
When baking you’re looking for a gorgeous golden colour on top!
A loaf tin cake is much easier to judge than a round cake, I think!
It’s also easier to store, cut it into slices and it’s ready whenever you want a piece! One tin gives you around 8 slices! This cake keeps best for up to 3 days, but because there aren’t many slices it’s usually enjoyed during a day or two when it is at it’s best. TOP TIP Store this cake in a cake tin with a piece of kitchen roll underneath the baking parchment to help absorb any moisture.
Fresh Out Of The Oven
What You Will Need
A Loaf Tin Baking Paper or Parchment A Large Mixing Bowl A Small Mixing Bowl A Wooden Spoon A Tablespoon A Sieve A Knife A Whisk (Manual or Mechanical) Something To Store The Slices In After They Are Cooled
Lemon Drizzle Cake
Banana and Chocolate Chip Cake
Author: Severn Sabrina Prep Time: 20 Minutes Cook Time: 25 Minutes Serves: 6 people per loaf made Allergens: Wheat Flour, Dairy, Egg and Soya (unless you use my alternatives listed below)
Ingredients To Make Any of Sabrina’s Loaf Cake Recipes
1 Free Range Egg (Fresh is best for baking) 125g Butter (or Dairy Free Spread) Melt in the Microwave 100g White Caster Sugar 50g Golden Caster Sugar 190g Self Raising Flour 1 Tablespoon of Vanilla Essence 1 Tablespoons of Milk or a Milk Alternative
Additionals to Flavour the Cake
Lemon Drizzle Cake For the Cake: 30ml of Lemon Juice For the Drizzle: 30g Icing Sugar, Lemon Juice, Lemon Rind (Optional) In a small bowl Mix Lemon Juice one Spoonful at a time to Icing Sugar, how much you want to make depends on your personal preference. Pour this over your cake when it’s baked. Add the Lemon Juice at Step Number 2. Add the Drizzle only when the Cake has cooled but still on its parchment.
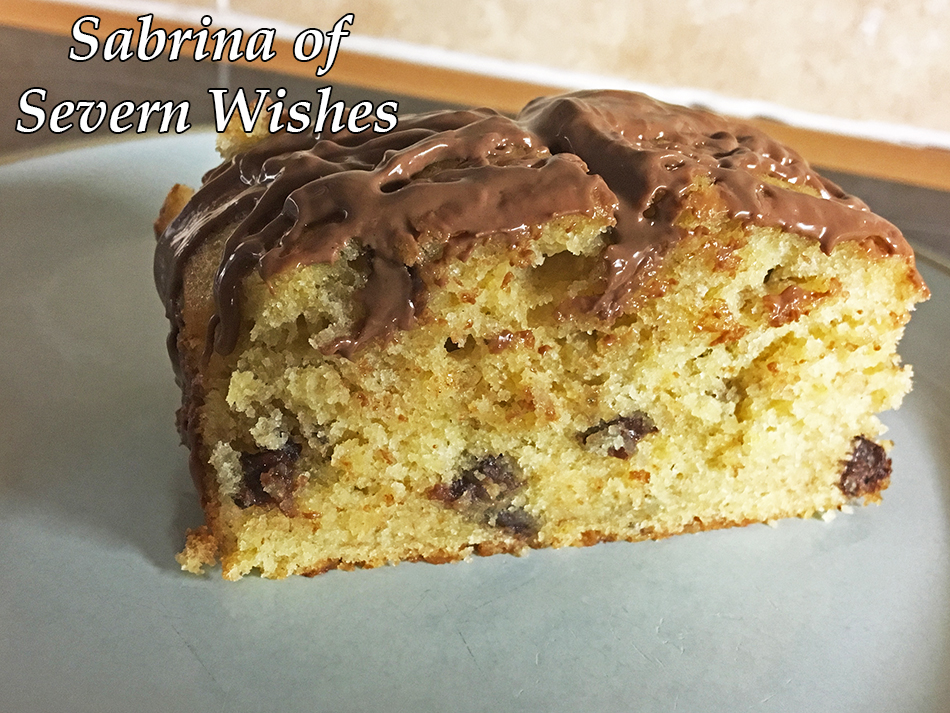
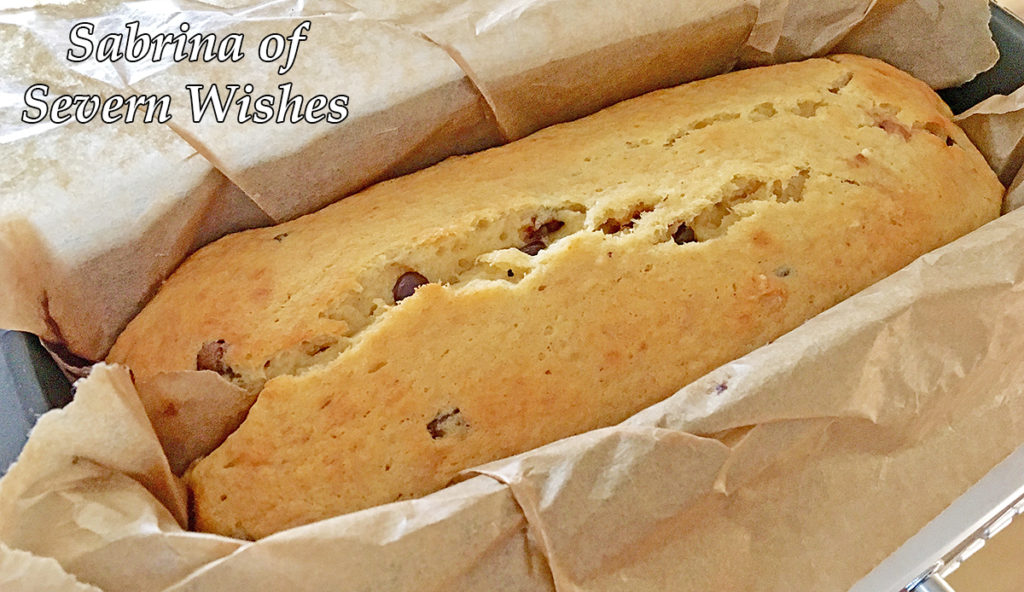
Banana and Chocolate Chip Cake For the Cake: 1 Banana – The Softer the Better! Mushed Up! 50g Chocolate Chips (I use Dark and Dairy Free) 25g Chocolate to Melt and Pour on Top of the Cooled Cake (Optional) Add the Mushed Up Banana and Chocolate Chips at Step Number 2.
Method Steps
1. In a Large Bowl mix the egg and sugars together with a wooden spoon until smooth. Then add the milk and vanilla. Add the melted butter which has cooled and combine all these ingredients together using a whisk.
2. Now is the time to add your additional filling, use your small bowl to measure out anything you want, then transfer it to the large bowl and mix in.
3. Next you need to sieve the self raising flour into the bowl, do this a little at a time, stirring it together constantly mixing until the mixture is smooth.
4. Make sure you cut a piece of parchment to the correct size for your tin, it needs to stick out above the sides to allow the cake to rise and not spill over.
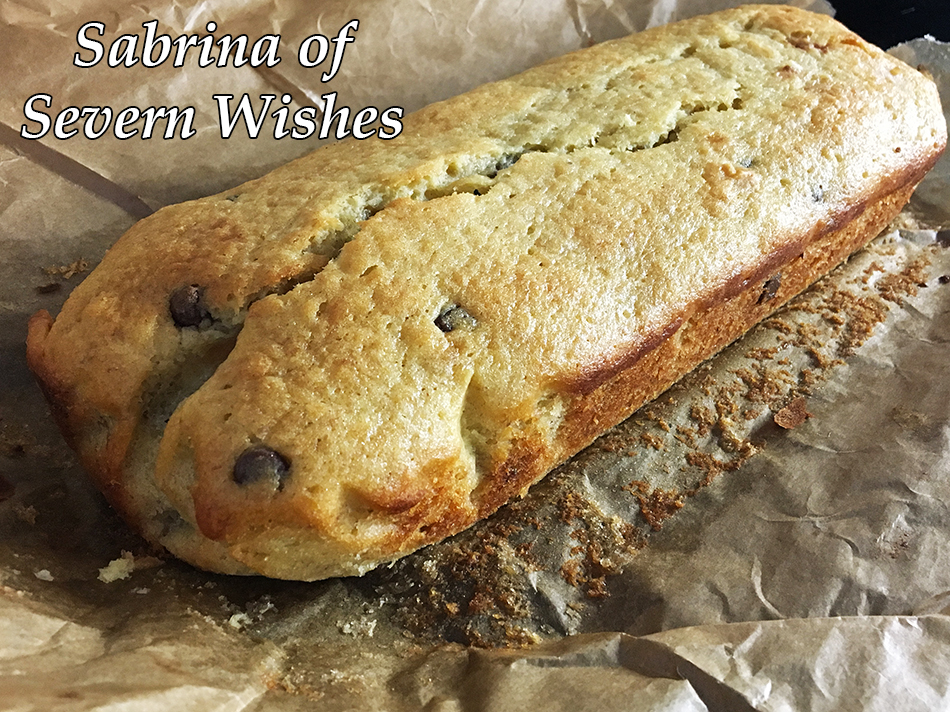
5. Bake this Cake at 160’c or 150’c (Fan) for 30 – 35 minutes. Check the cake at 25 minutes with a knife or skewer and then check it again at 30 minutes. The knife should come out clean and the top of the cake should be golden like my image below.
6. Once baked remove the cake from the tin by lifting it out using the parchment, and leave it to stand on a flat surface to cool down. Once cooled you can either add the additional options as outlined above or cut it and serve.
Chocolate Chip Loaf Cake
Thank you very much for joining me for Sweet Treats Week! I hope to see you again tomorrow for our final baking day!
If you make any of my recipes be sure to tag me on social media, leave me a comment here on my blog. Any questions don’t hesitate to ask them! If you recreate this recipe somewhere else please credit me for it and name me and my blog or even better link back to this original post! Thanks everyone!
Welcome to Sweet Treats Week on Severn Wishes. This half term I wanted to share my top 5 baking treats with you all, hopefully you’ve got some time this week to make them with me! Check out my Instagram for more food pictures and recipe ideas too!
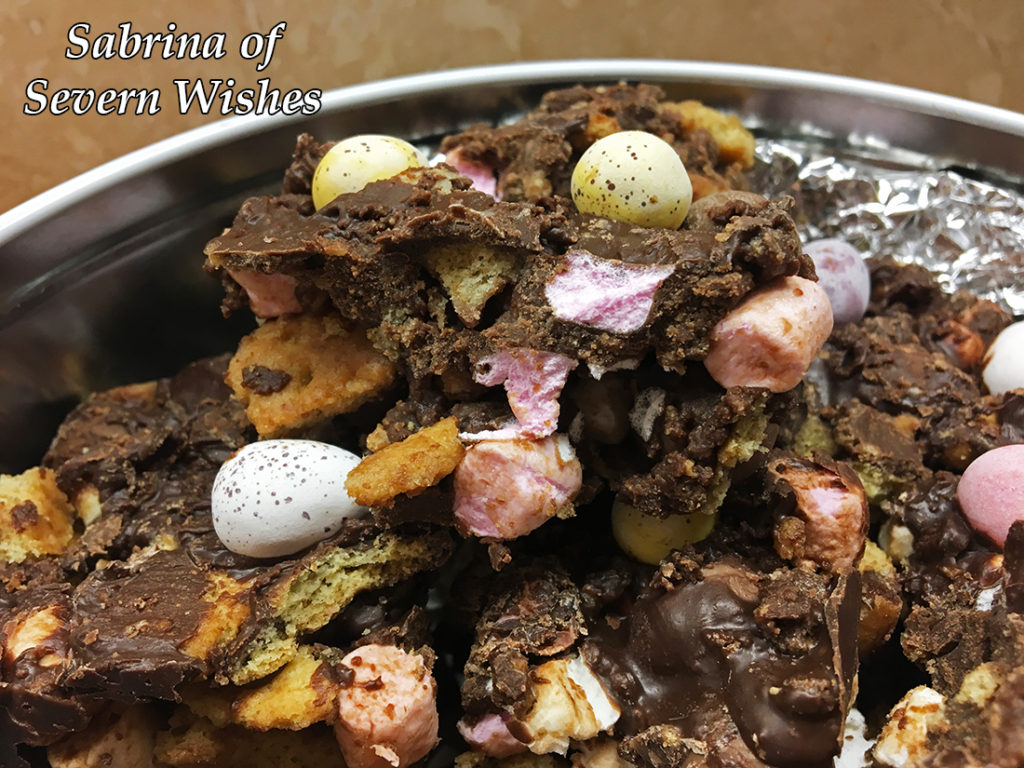
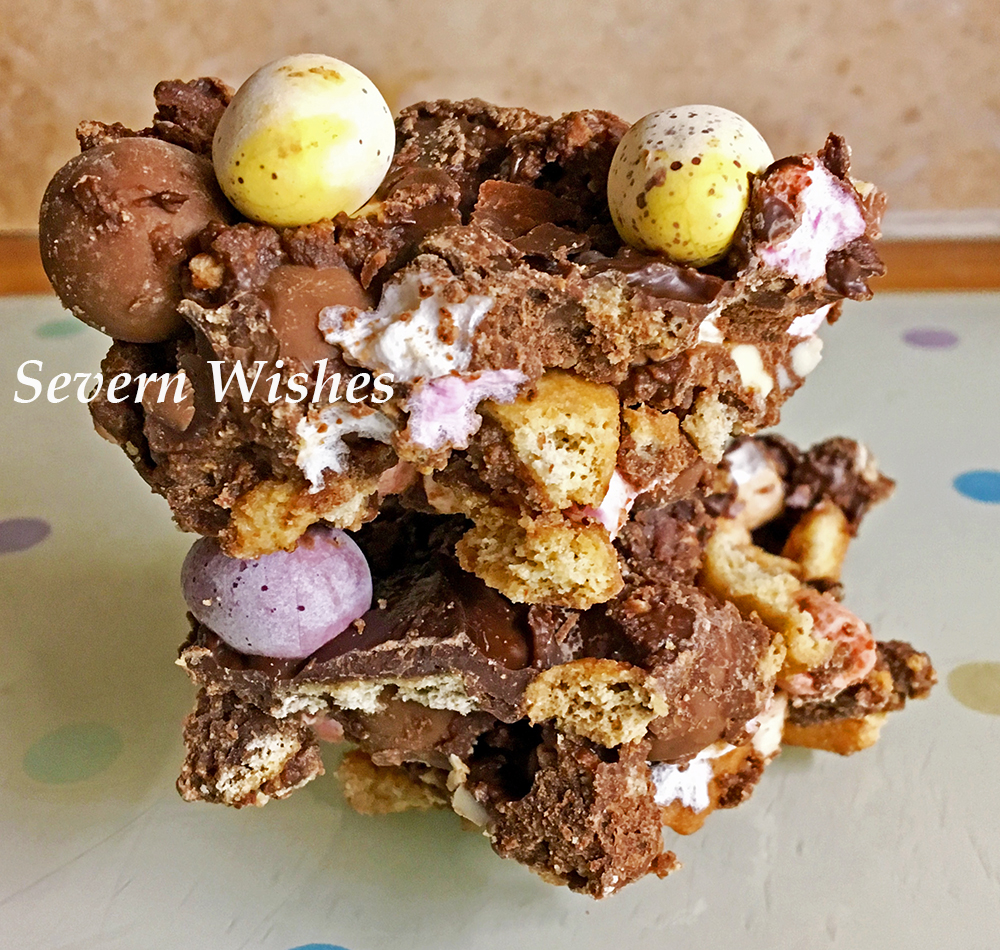
Day 3 is Sabrina’s No Bake Needed Rocky Road
Definitely one that the kids can get involved in, and this tray bake requires zero baking! You just need an adult to do some melting and chopping! This recipe will make 24 delicious squares of Rocky Road and you can do a custom set of ingredients to suit your family too!
Start by gathering all of your favourite things and a giant bowl to mix them! You’ll need chocolate for melting which will be the glue to hold all of the other ingredients together! You also need a deep tray to squash it all down into before you refrigerate it too!
The best thing about Rocky Road is that it’s totally customisable to your family and you can’t really get it wrong! Plus it’s fun for everyone! There’s only one danger with Rocky Road! Just don’t go eating all the singular ingredients while you’re making it!
I love to put things in mine you don’t usually find in a supermarket style tray bake, sometimes you find Nuts and I don’t put any of those in, some also contain fruit, which is a personal preference to whether or not you add this in. I will outline all the measurements below, and you can make your selection of your favourites.
Step 6.
What You Will Need
A Large Mixing Bowl – the bigger the better! A Wooden Spoon or Two A Saucepan (to do the melting part) A Spatula A Sharp Knife Tea Towel and Rolling Pin (Or something to smash the biscuits with) Baking Parchment to line your tray A Large Tray that will still fit in your Fridge minimum of 1.5 inches deep
Ingredients
Mini Marshmallows 50g to 60g Maltesers or Honeycomb Shards 50g to 60g White Chocolate Chips 30g to 40g Biscuits 150-200 grams (You can use a mixture of biscuits like I do, Digestive, Shortbread and Ginger are my faves, Ginger give a nice taste!) ☆ Milk Chocolate (for the melting) 250 grams Dark Chocolate (for the melting) 120 grams Butter (for the melting) 140 grams Golden Syrup (for the melting) 4 tablespoons
Additional Ingredients to Personalise your version of Rocky Road
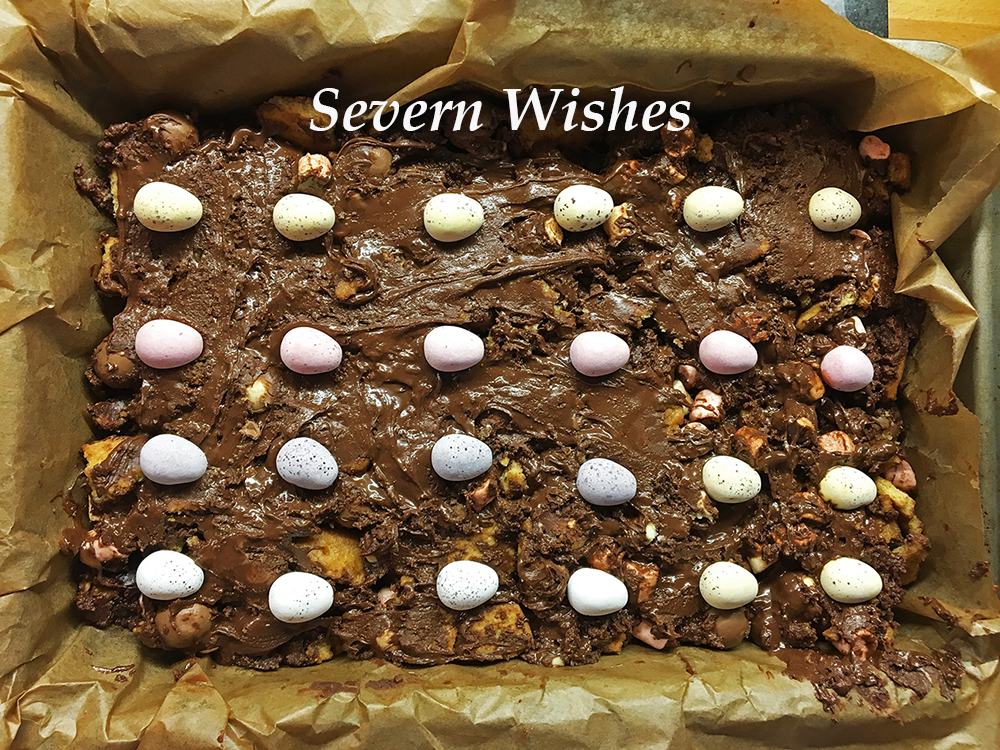
Your “Special Ingredient” can be anything, between January and April I tend to use Mini Eggs or other Easter related Mini Chocolate Eggs etc. I just cut some of them up for going inside the bake. Other things that go well and add colour are Smarties, Aero Bubbles anything that sort of size etc.
Use around 70g to 100g of your chosen ingredient and remember to save around 30g of it for the topping!
You can also add any of the following things that all go brilliantly with this type of non-bake recipe – Cherries / Cranberries / Nuts / Raisins etc…
You will need 50 grams of your chosen one/s and make sure you then increase the depth of your tray by half an inch / 2 cm if you decide to include more than one of these ingredients. You could also choose to remove say, the white chocolate from my main list, and add in Raisins instead, just keep the ratio the same…
The customization is all down to you and your family! Go crazy! Have fun!
Method
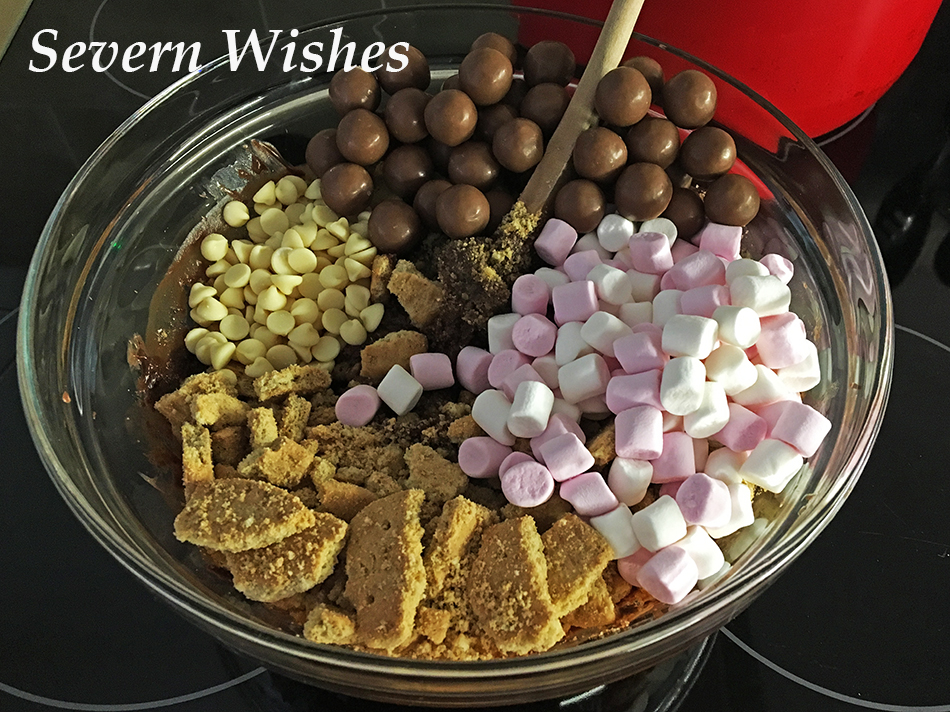
1. Measure out and then Crush the Biscuits into mixed bite size pieces and add them to a large bowl.
2. Next, gather all your additional ingredients as outlined above, measured correctly and add these to your large bowl. The aim is to then mix all these dry ingredients together so they are evenly distributed.
3. Melt the Milk and Dark Choc with the Syrup and Butter until Smooth. Set 150ml of this melted chocolate mixture to one side in a jug to cool a little (you need this for the top of the mixture).
4. Add your melted mixture from the saucepan to your large bowl, coating all of the dry ingredients, keep mixing it quickly but carefully. You need to cover all of them in a light chocolate covering before it cools down too much.
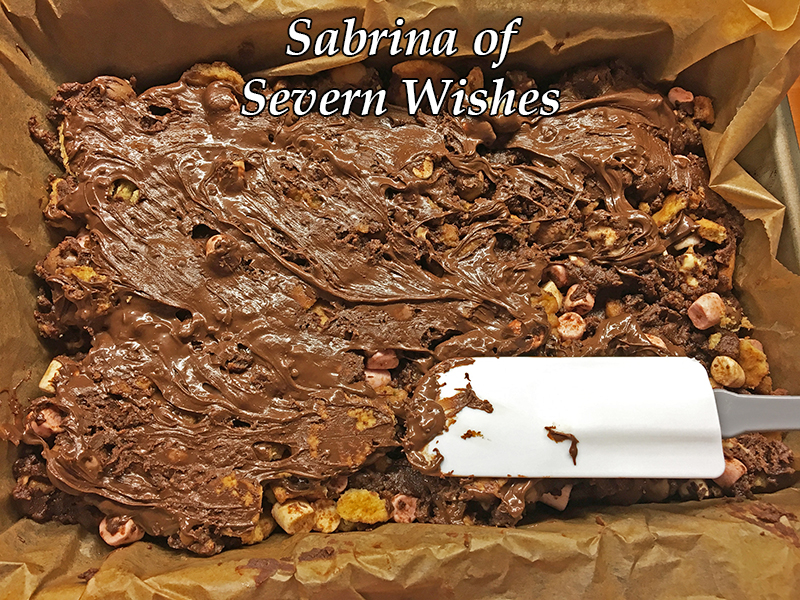
Step 5.
5. Transfer from the bowl to the tray making sure the parchment is already lined inside it and smooth the rocky road out as flat as possible, push it down gently using a wooden spoon. Then pour the remaining melted chocolate (from the jug) over the mixture and smooth that all over the top with a spoon or a spatula, you need to try and coat most of the mix if not all of it, TOP TIP don’t forget to coat up to the corners!
6. Finally add your chosen Chocolate Decorations like Mini Eggs. Push them down a little so that they stick to the melted chocolate. Score the pieces of size you want to cut once it’s solid, using a knife (adult part only). Then put the whole tray in the fridge to set for a couple of hours.
7. To serve it, gently remove the paper from the baking tray, lay flat and cut the Rocky Road where you scored into it earlier, do this using a knife that has been run under hot water (another adult only part). Remember to put the pieces into a seal-able tin or tub afterwards to make sure it stays fresh. Once set and cut you just store it at room temperature, for the best results eat it within 3 days.
Step 2.
Thanks very much for joining me for this recipe on Sweet Treats Week! I do hope to see you here again tomorrow! See my social media for some videos while I am baking these as well! Including versions and what I use to make my bakes dairy free too!
If you make any of my recipes be sure to tag me on social media, leave me a comment here on my blog. Any questions about a recipe please don’t hesitate to ask them! If you recreate this recipe somewhere else please credit me for it and name me and my blog, or even better link back to this original post too! Thanks everyone!
Welcome to Sweet Treats Week on Severn Wishes. This half term I wanted to share my top 5 baking treats with you all, hopefully you’ve got some time this week to make them with me! Check out my Instagram for more food pictures and recipe ideas too!
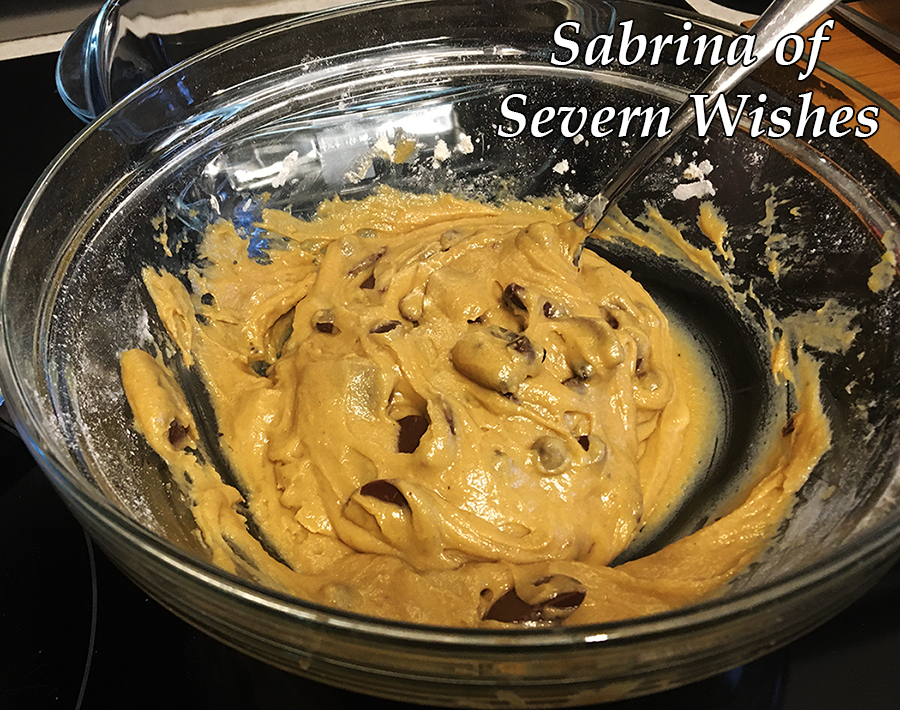
Finished Cookie Dough, Yummy!
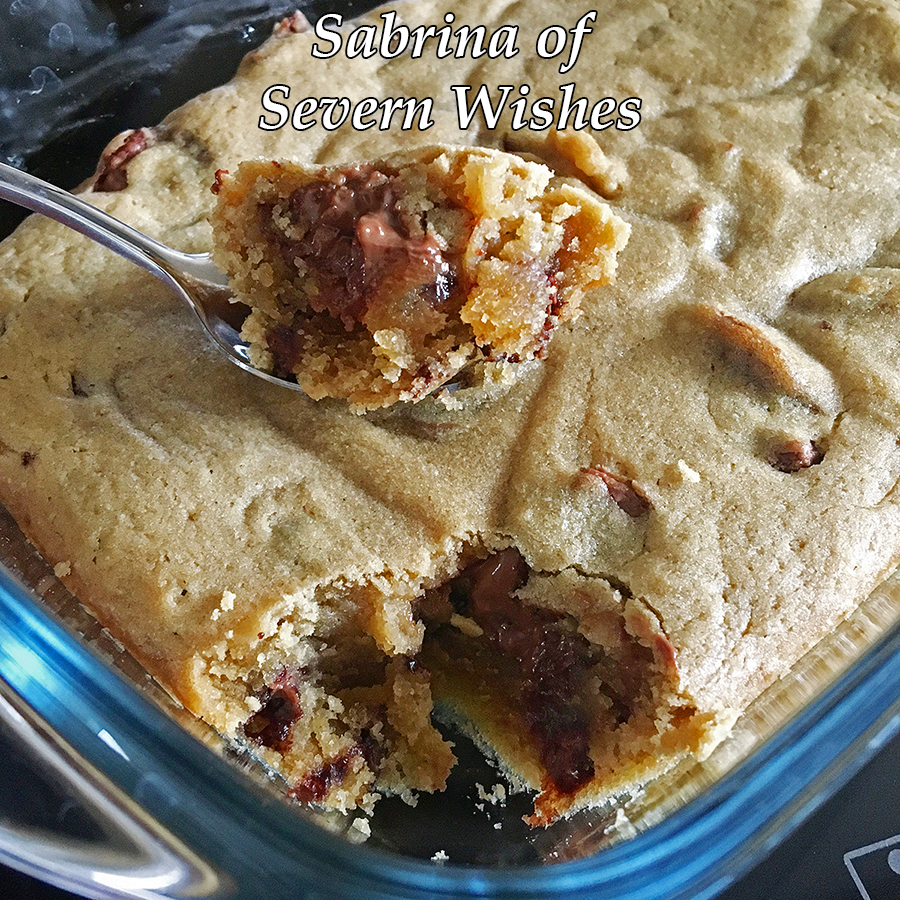
Day 2 is Sabrina’s Warm and Gooey Cookie Dough Recipe.
This fantastically easy recipe is great if you want a hot desert ready in under an hour. It’s egg free too! I make mine with a dairy free butter and use dairy free chocolates. But you don’t have to if you prefer the real thing. This warm desert is best served about thirty minutes after it’s finished baking, cooled off a little bit but while it’s still warm and gooey. Great on its own or you can pair it with a nice vanilla or coconut ice cream for example.
What You Will Need
A Glass Dish measuring approximately 12cm x 17cm / 5″ x 7″ and preferably with a lid for easy storage after its cooled down! A Large Mixing Bowl A Wooden Spoon A Sieve
Ingredients
150g Plain Flour 115g Butter (Dairy Free Spread) 110g Light Brown Sugar Water (Per Tablespoon – See Method) 1 Tablespoon of Vanilla Chocolate Chips or Chunks (As many as you like but a nice ratio between dough and chocolate) I used around 60g of dairy free chocolate chips.
Additional Information: This sized portion will make 4 portions when transferred into pudding bowls. This is a rich desert and you can divide it up into 8 portions if you want to have it accompanied with something else such as ice cream. Keep any leftovers inside the glass dish with the lid on at room temperature, eat it within 48 hours. If you want it warm and extra gooey then microwave a portion for 20 seconds in the microwave.
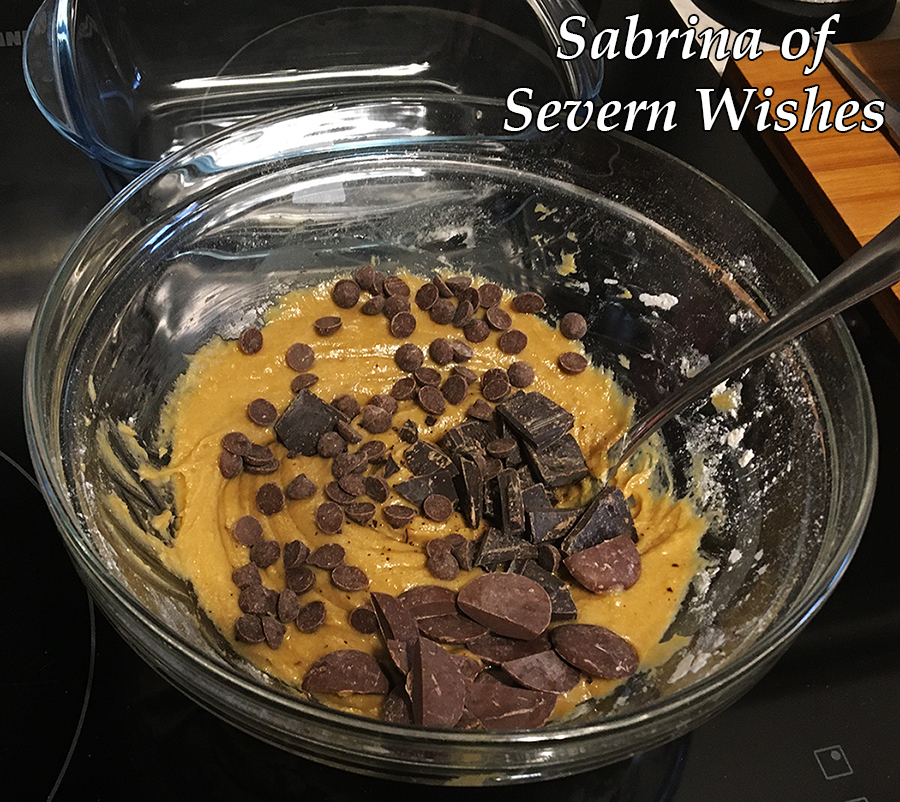
Dairy Free Cookie Dough with Various Dairy Free Chocolates
Cookie Dough Variations
Add Chunks of Chocolate Brownies. If you have already made brownie earlier in the week you could put small lumps of your softest brownie into the cookie dough along with some chocolate chips. Just ensure they are submerged in the dough so as not to overcook near the top!
Method Steps
1. First you will need to soften the butter a little, add the measured out spread into the large mixing bowl, melt it at 10 second intervals in the microwave and stir after each one. Once softened you add your measured out sugar. Mix until smooth and combined.
2. Sieve your measured flour into the bowl now, make sure once it’s all in you carefully mix it. Then when smooth you add your Vanilla and Chocolate Chips.
3. You now need to add some water to the mixture, add it a tablespoon at a time until you achieve a Cookie Dough consistency. It usually takes between 4 and 8 tablespoons to achieve the dough like substance. Once you’re happy transfer it to your preferred baking dish.
Step 3. Ready to Bake!
4. Now it’s time to bake! Preheat your oven to 180’c and cook in the centre of your oven until the cookie dough top goes golden and slightly brown. The best way to test the dough is right for you is to carefully touch the top, beware it will be hot, so leave it a minute outside of the oven and push down on the top. I like mine to be like a Cookie on the top, and then soft and gooey underneath! Mine took around 24 minutes!
5. As I described above, leave the glass dish out of the oven for around 30 minutes after the bake is complete. Serve the dough after this, it won’t be too hot that way, it should just be warm and gooey!
Thanks very much for joining me on my blog for this recipe! Thank you very much for joining me for Sweet Treats Week! I do hope to see you here again tomorrow!
If you make any of my recipes be sure to tag me on social media, leave me a comment here on my blog. Any questions about a recipe please don’t hesitate to ask them! If you recreate this recipe somewhere else please credit me for it and name me and my blog, or even better link back to this original post too! Thanks everyone!
Welcome to Sweet Treats Week on Severn Wishes. This half term I wanted to share my top 5 baking treats with you all, hopefully you’ve got some time this week to make them with me! Check out my Instagram for more food pictures and recipe ideas too!
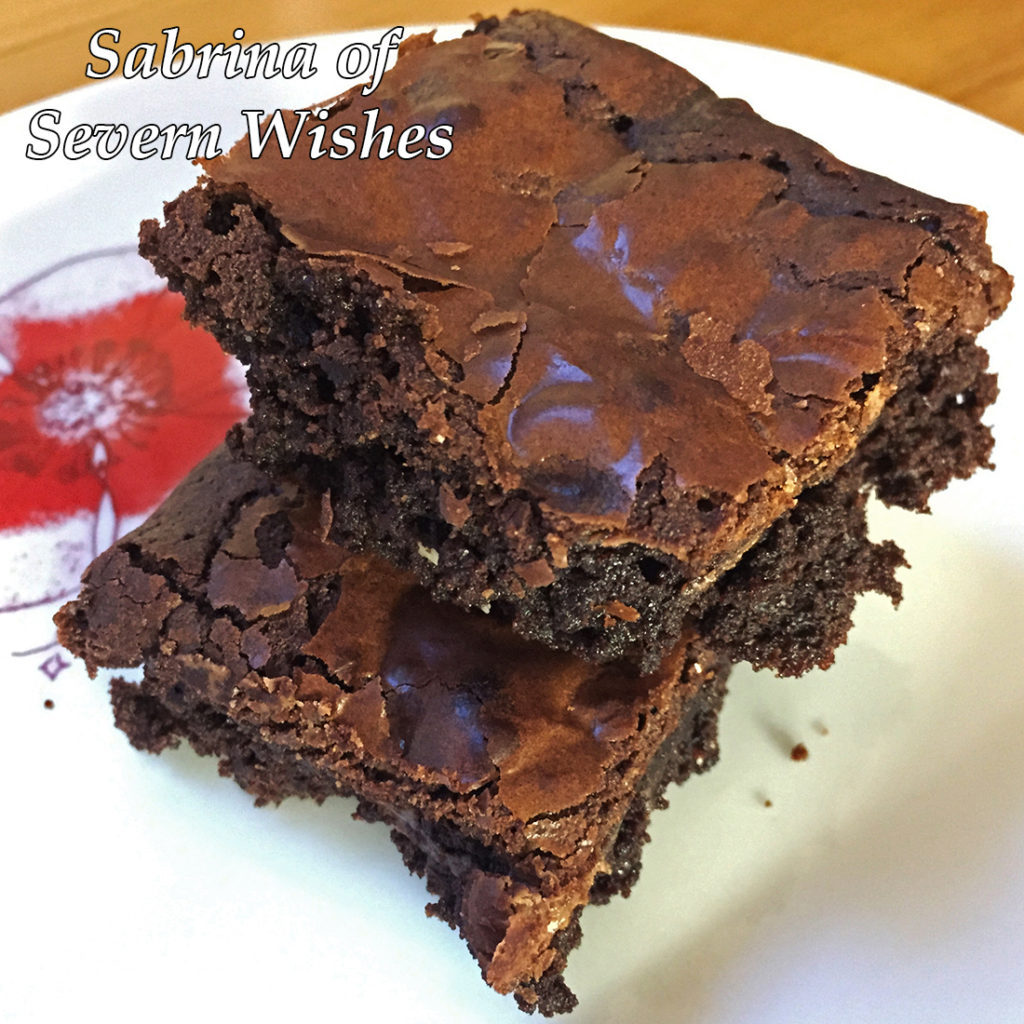
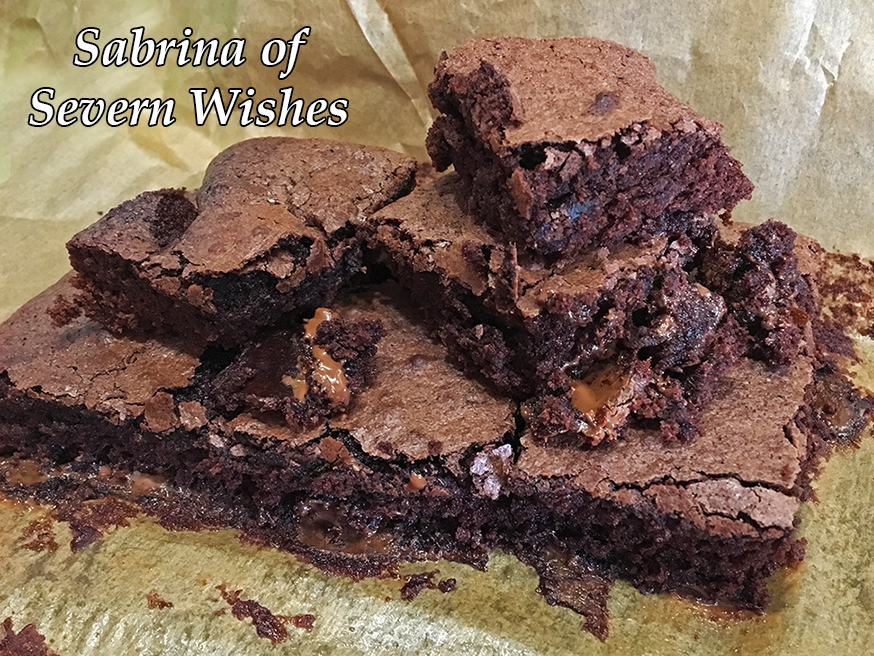
Sabrina’s Chocolate Brownies
Day 1 is Sabrina’s Extra Special Chocolate Brownies
Brownies can be tricky, but if you follow my recipe one step at a time you should be able to recreate my incredible triple chocolate brownies! Since needing to go dairy free I’ve even made these brownies free from dairy by substituting the butter for a dairy free spread and then I swapped the triple chocolate chips for only dairy free chocolates, and they still taste incredible! So do whichever version you would prefer, the difference in butter doesn’t change the end result.
My recipe will make around 20 brownies once you cut them after they have cooled. They are quite rich which is nice because they will last longer! They will last around 3 days in a sealed container, the best way to keep them is to store them at room temperature. TOP TIP Reheat a square or two for between 10 and 20 seconds in the microwave and serve them with ice cream! Yum!
Sabrina’s Triple Chocolate Style Brownies (A.)
What You Will Need
A Glass Dish or Baking Tray measuring approx 26cm x 20cm (8 x 10″) Baking Paper or Parchment A Saucepan A Large Mixing Bowl A Wooden Spoon A Metal Spoon A Whisk – Manual or Mechanical A Sieve A Knife A Cooling Rack Something To Store Them Inside After They Are Cooled
Step 5. Once Smooth Add Your Chocolates To The Mix!
Ingredients
3 Free Range Eggs (Fresh is best for baking) 175g Plain Chocolate (for melting) (You can use dairy free chocolate too) 175g Butter (or Dairy Free Spread) 200g Caster Sugar 75g Plain Flour 50g Cocoa Powder
Additional Flavours or Additional Chocolates… There Are Endless Possibilities! What Would You Do? Here are my favourites…
BrownieVariations
A. Triple Chocolate Brownies require 75g of White Chocolate Chips and 75g of Milk Chocolate Chips (or use different varieties of dairy free chocolates). Add these at Step 5. B. Chocolate Orange Brownies require 100g of Chocolate that is Orange Flavoured, dairy free choc orange bars from Asda are fab or a few broken segments of a Terry’s Chocolate Orange are best! Put these pieces in the mixture at Step 5 instead of chocolate chips. C. Mint Chocolate Brownies require 75g of Chocolate that is Mint flavoured, with such a strong flavour of chocolate it can be used as part of the melted part at the start of the bake. For a more Minty flavour later on you could add some Aero Mint Chocolate Balls when the brownie is almost cooked! Push them into the top of the brownie before the top is solid leaving just a little sticking out so they don’t melt and or burn!
Sabrina’s Chocolate Orange Brownies (B.)
Method Steps
1. First you need to place your butter and plain chocolate into a saucepan. Break the chocolate into small bits so it melts faster. Only melt on a low heat slowly. Keep stirring the melting mixture frequently until it is smooth with no lumps left. TOP TIP I only have my hob one setting 1 or 2 for melting, you don’t want to burn the mixture! I don’t like melting chocolate in a microwave, it’s too easily burnt!
2. Set the melted chocolate mixture to one side and allow it to cool. You can now preheat your oven to 180’c, 160’c for a Fan Assisted or 350F or Gas Mark 4. Cut a piece of baking parchment for your tray and push it inside.
3. In a large bowl break the 3 Eggs, make sure no shell falls in. Using a wooden spoon mix them up, add the Caster Sugar gradually while stirring. You then need to Whisk them both up together until they are combined and smooth with a light and creamy colour.
4. Using a Large Metal Spoon, you now fold in the cooled melted chocolate and butter mixture, one spoonful at a time. Keep stirring it through the creamy mixture, keep going one spoon at a time until all of the smooth thick liquids are combined into one large one. It should be a lot and not lumpy. TOP TIP If the chocolate mixture is still hot it instantly cooks the eggs and you end up with a curdled concoction! Make sure its cool, lukewarm is best, and stick to my one spoon at a time method!
5. Finally you need to Sieve the Cocoa Powder and the Plain Flour into your liquid, again you do this gradually, shaking a little into the bowl and mixing it through until it disappears. Repeat until all the dry ingredients are in the bowl and the mixture should now be a thick pour-able liquid. Add your chocolate chips or buttons or other bits now! Mix them in thoroughly.
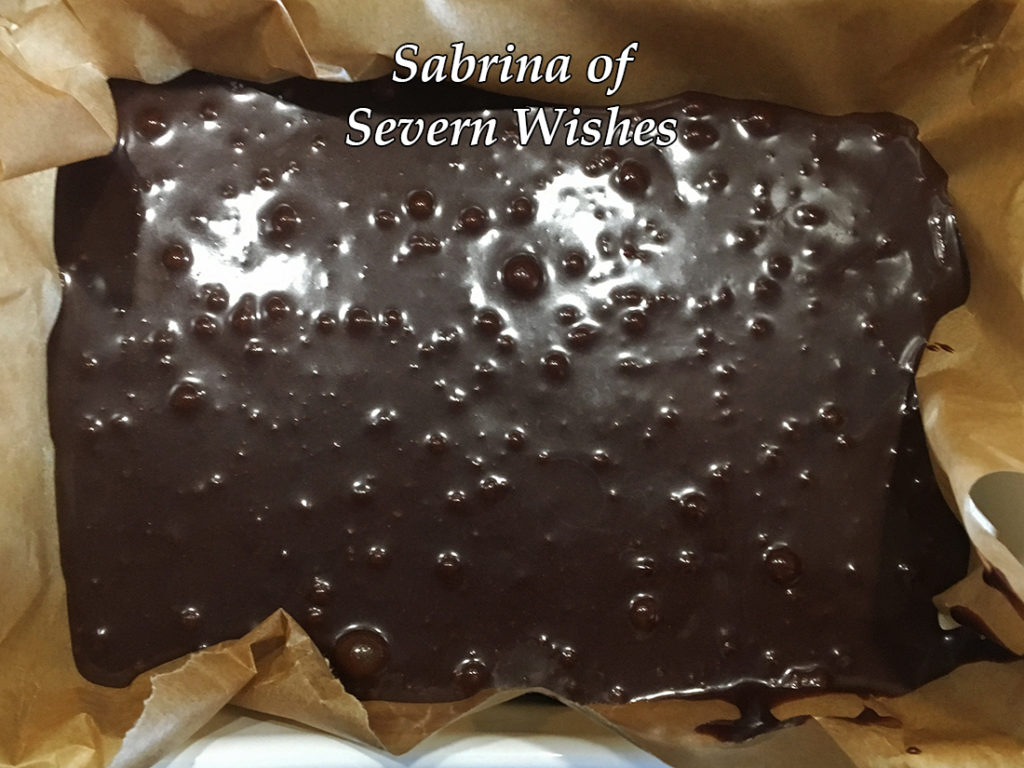
6. Pour the mixture entirely into your tray with the parchment inside it. The mixture should sit just over half way inside giving it a little room to rise up slightly. Add any toppings like chocolate chips now, or part way through if they are not bake stable. Shake the tray from side to side before pushing it into the oven, so the bake is level.
7. Bake it with the correct setting for your oven, you’re looking for an even bake with the slightly crisp topping, it should change colour, it should be soft but cooked in the centre. On average this bake takes between 20 and 30 minutes, depending upon tray used and oven type. Just keep an eye on it, take it out and stick a knife into it. When the knife comes out almost clean, pull the tray out. Leave it on top of your oven for ten minutes, try the knife again. Remember if you hit a melted chocolate chip you may think it’s not cooked when it is! For this reason don’t be tempted to over cook it! They should be soft with the additional chocolates melted inside when you cut it!
Remember to wobble the tray so the mixture goes flat!
Thank you very much for joining me for Sweet Treats Week! I hope to see you again tomorrow!
If you make any of my recipes be sure to tag me on social media, leave me a comment here on my blog. Any questions don’t hesitate to ask them! If you recreate this recipe somewhere else please credit me for it and name me and my blog or even better link back to this original post! Thanks everyone!
✩ Sabrina ✩
Sabrina’s Chocolate Orange Brownies (B.)
By continuing to use the site, you agree to the use of cookies. more information
The cookie settings on this website are set to "allow cookies" to give you the best browsing experience possible. If you continue to use this website without changing your cookie settings or you click "Accept" below then you are consenting to this.