
Having taken note of several Birchbox reviews and recent boxes I have been waiting for the right time to sign up and I chose this month for two reasons. The first is because they had a fabulous deal on with free gifts, and the box also contains a Spectrum Brush that is only usually available inside the set of its colour…
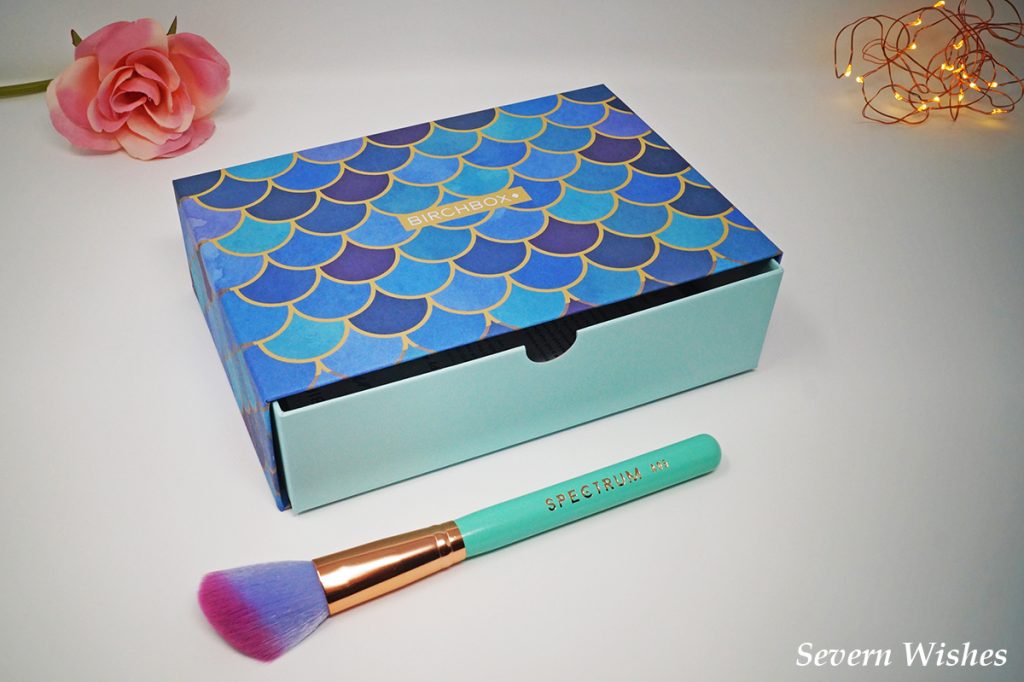
So I have had delivered a one off Birchbox to Reveal its contents and Review honestly for you all this week. This unboxing is the contents of the August Box, which has a theme of Mermaids. The box itself is beautiful, a detailed scales design of Blues, Greens and Purples, with a golden trim.

I will tell you honestly why I wanted this box, and it’s more for the Spectrum Brush than any of the other items. Though I was pleasantly surprised by the actual box design quality and the other contents, and I will of course try any product once, and plan to do so with what Birchbox have chosen to send me.
The Birchbox measures 18.2cm in Length, by 12cm Wide and 5cm Deep. The design really stands out against my white backdrop as I begin to photograph the unopened contents.
 Now it’s time for the Reveal! Let’s open my Mermaid themed box!

The free gift that I managed to get with my order was a fabulous summery and rather stripey makeup bag, and a Nails Inc Nail Polish. The bag is lilac and yellow and measures 22cm by 16cm. It is adorned with a yellow rope and pink trim that includes zip and the word Birchbox in a clear plastic. The Nails Inc Nail Kale Polish is in the colour of Regal Close and is a nude shade.
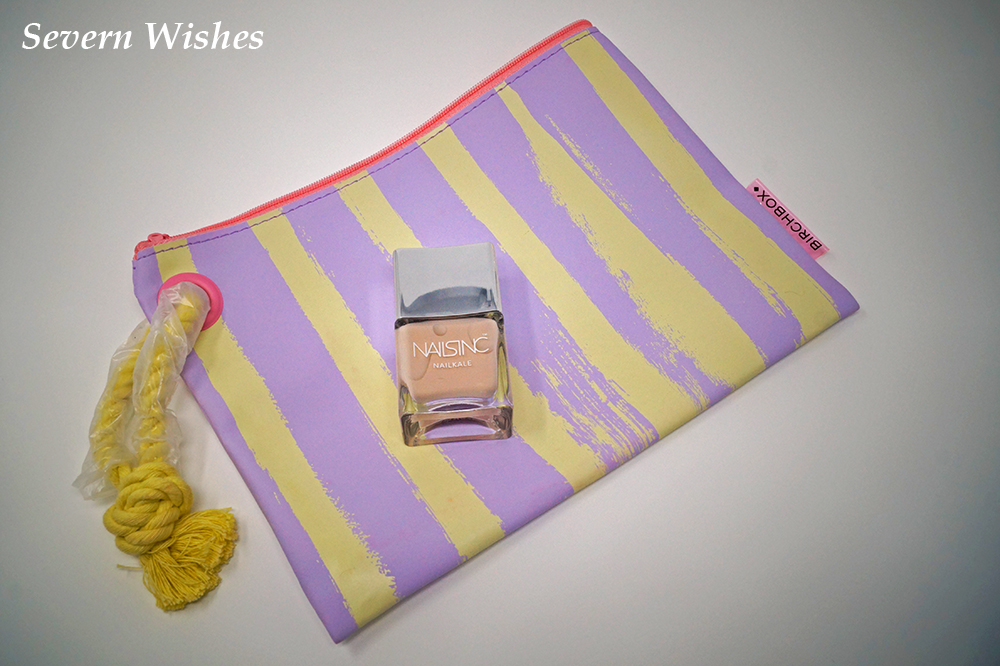 Nails Inc is a good brand that I have tried and tested before. I was happy that I was receiving something that was well known. The makeup bag reminds me of Summer with the shades of its stripes. They are two free gifts that I will certainly enjoy.

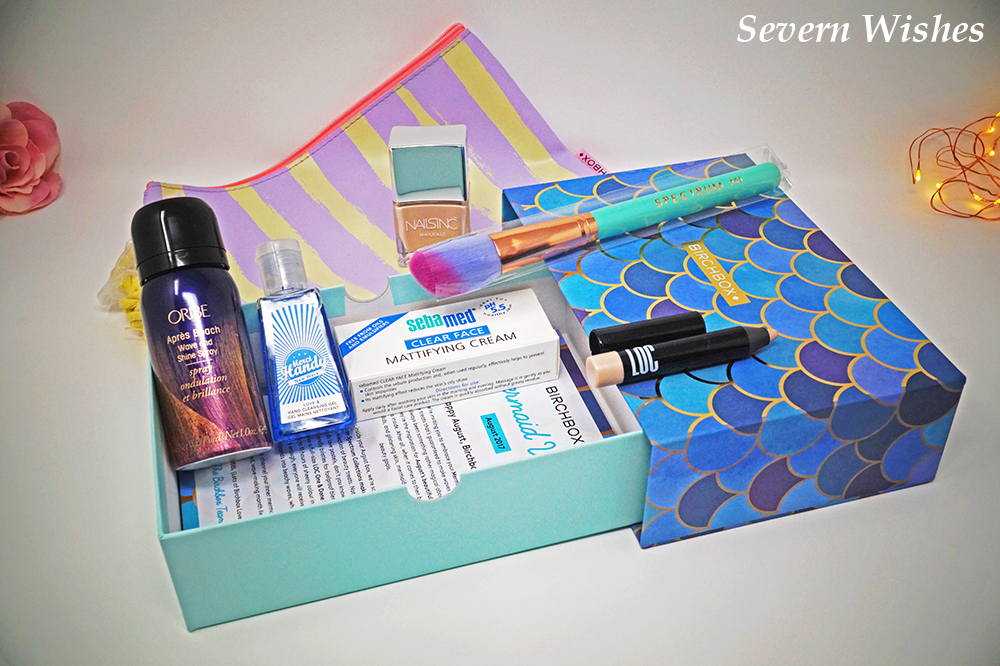
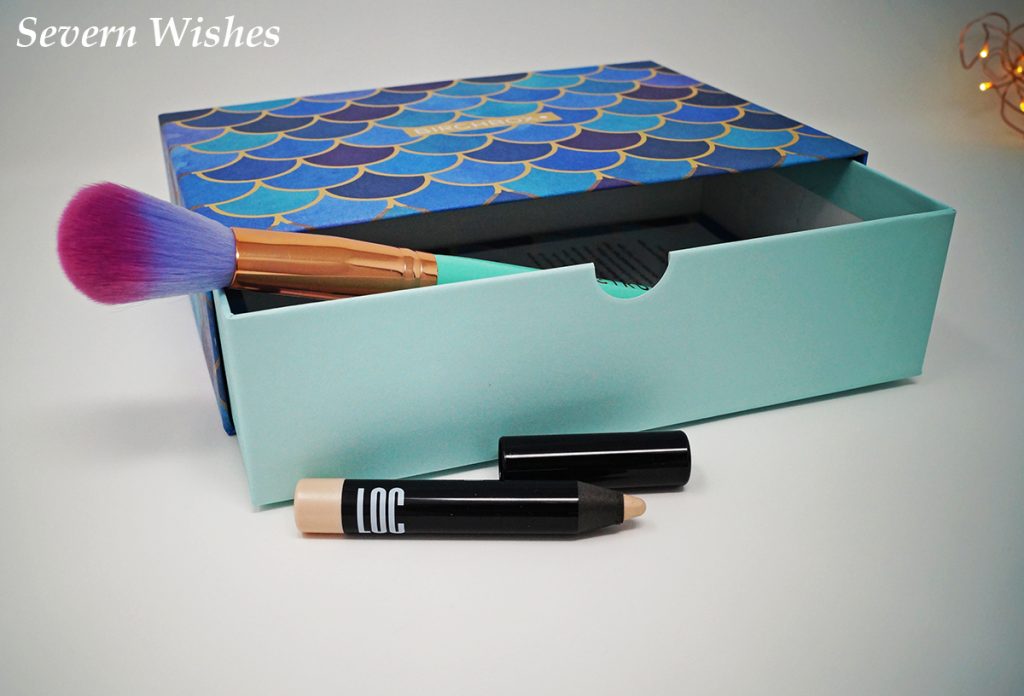
Here is the full list of the items that I received in my Birchbox. I will be looking at them individually, and photographically, in just a moment.
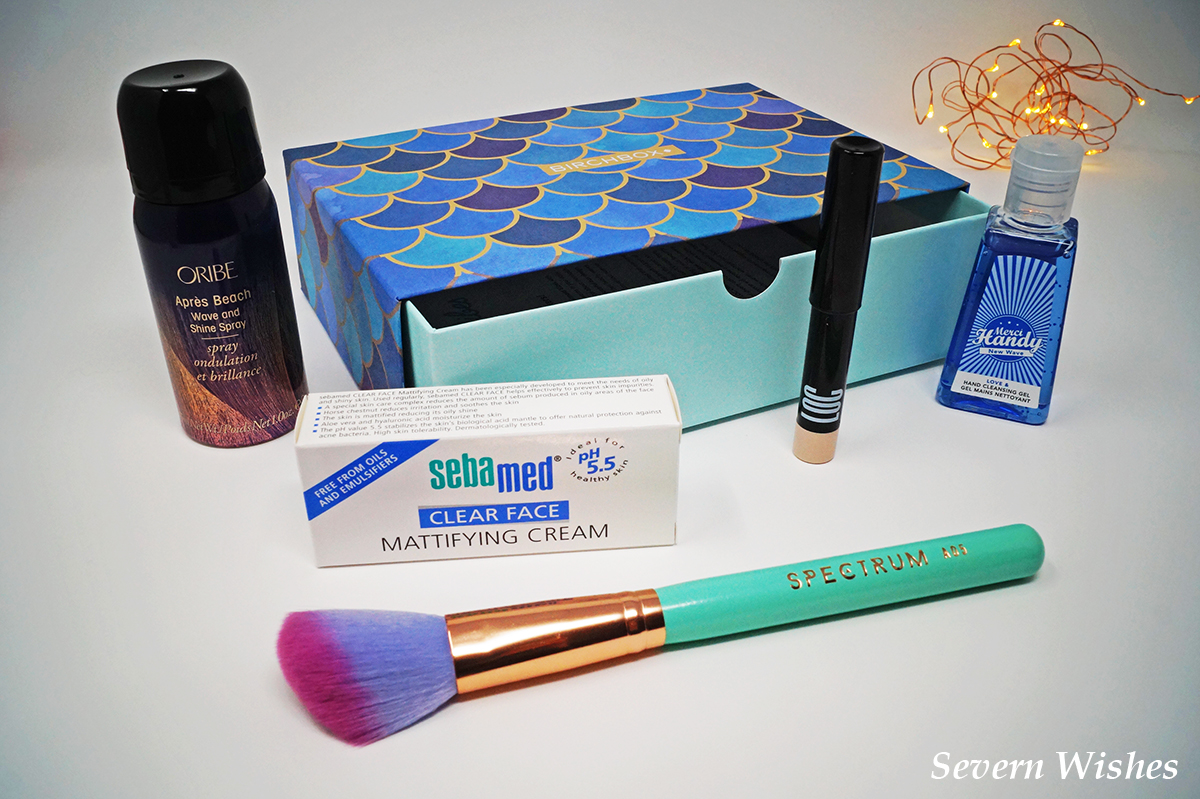
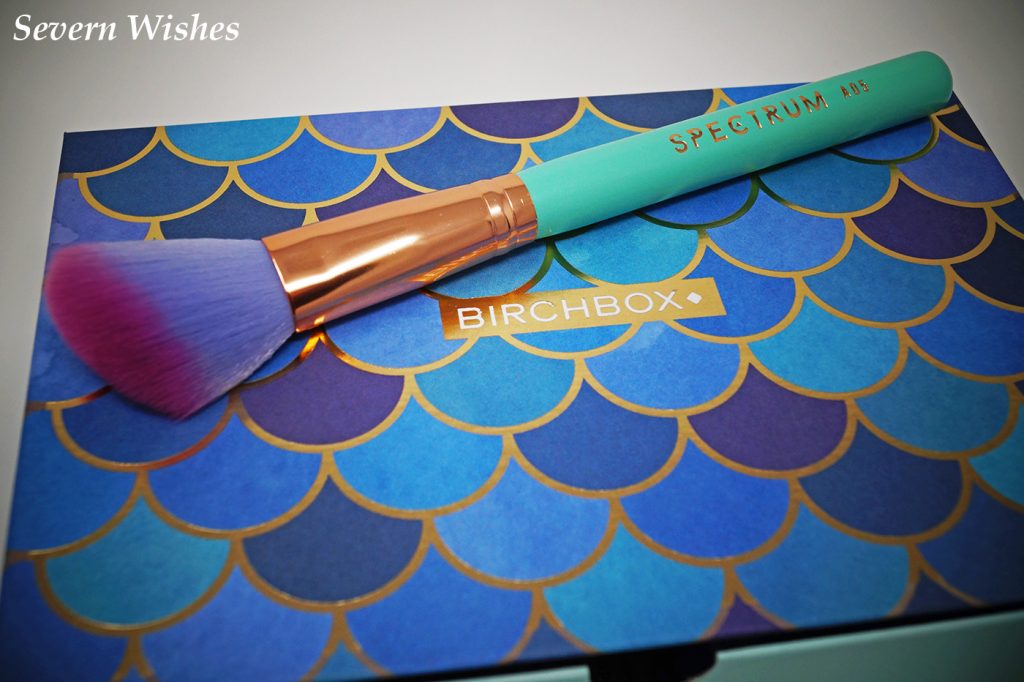
Spectrum Clam Brush A05
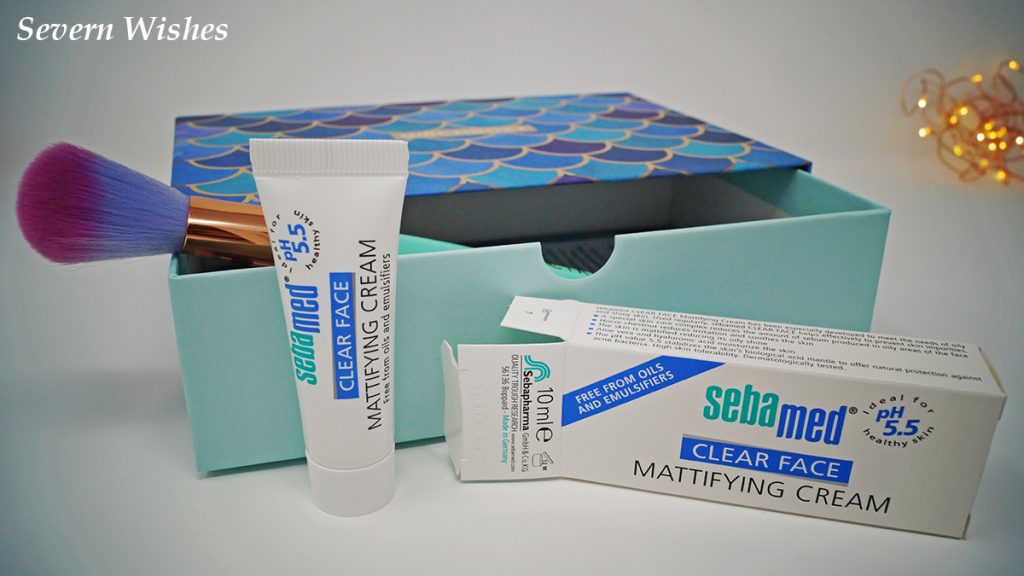
Seba Med Clear Face Mattifying Cream
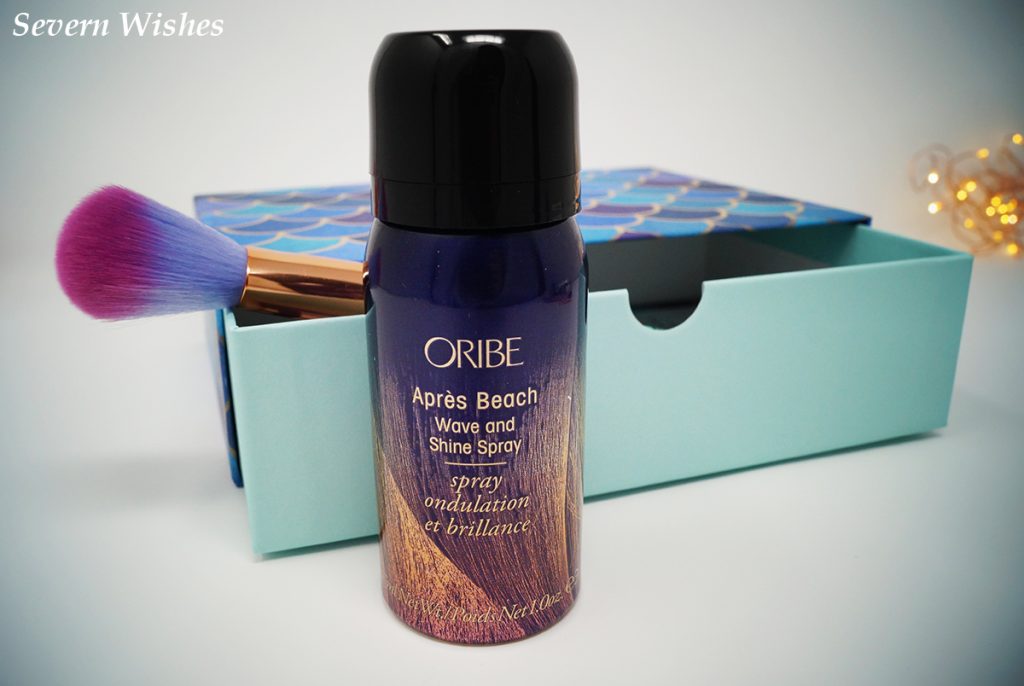
Oribe Apres Beach Wave and Shine Spray
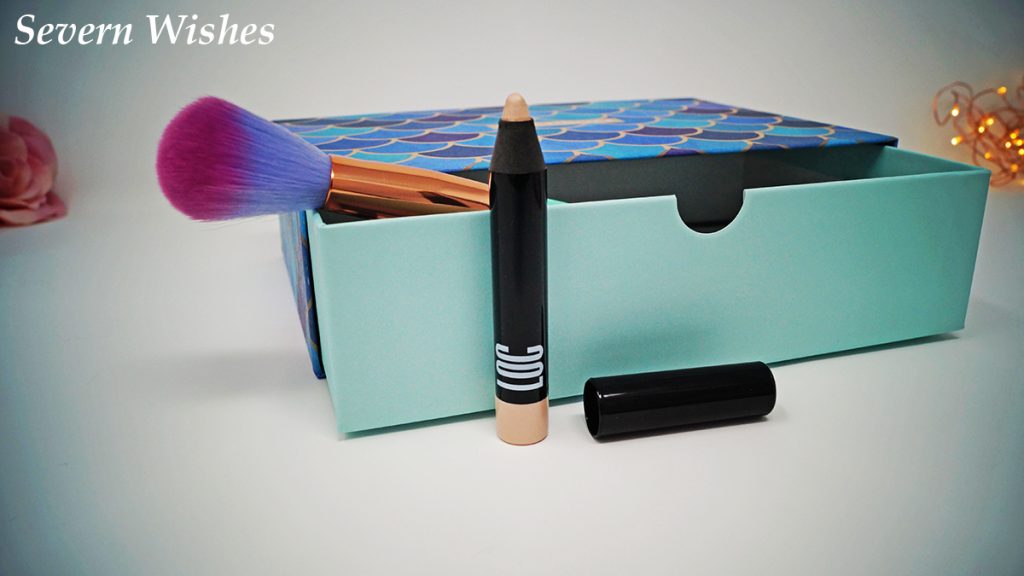
LOC Eye Shadow Stick
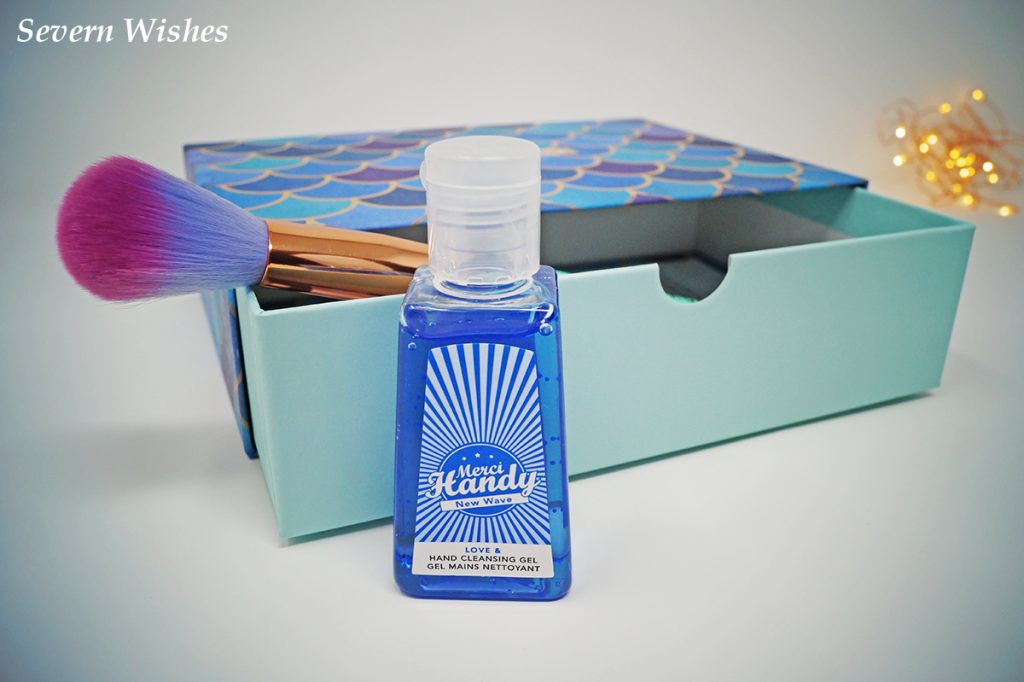
Merci Handy New Wave Love & Hand Gel
Spectrum Clam Brush A05
The A05 Brush by Spectrum Collections is designed for applying blusher or bronzer with precision. It is a beautiful brush that is part of the Spectrum Atlantis Collection, usually only supplied inside the Glam Clam. A turquoise handle and a brush end with bristles of lilac and pink, this makeup brush is finished with a rose gold ferrule.
Seba Med Clear Face Mattifying Cream
This Seba Med Clear Face Cream is designed to be free from oils, it is the ideal PH for the skin at 5.5. A non-greasy and shine-reducing cream, this is meant to be moisturising for oily skin. Containing Aloe Vera and Hyaluronic Acid to keep your skin hydrated and smooth, without clogging pores. This travel size at 10ml is great for a handbag or for travelling.
Oribe Apres Beach Wave and Shine Spray
The Oribe Spray can add texture and shine by adding a tousled waves to the hair. It has added proteins and vitamins to give the hair a boost, and can be applied to wet or dry locks. It contains ingredients that have a natural dose of UV protection and natural oils like sunflower and others such as marigolds and amber, to ensure the hair gets nourished. This can is a 37ml size, ideal for going away but be aware this might not be allowed in aeroplane luggage due to being an aerosol.
LOC Eye Shadow Stick
A Birchbox Exclusive, the LOC stick is a precise eye liner shadow pencil which claims to have 11 hours of crease free staying power. It is a compact size but I think from the swatch that I did it will go a long way. In my opinion it is an ideal base for other eye shadow colours to be built up on. Mine was named “Out of your Shell”. The One and Done Eye Shadow Stick is supposed to be easy to apply and comes in a travel size at 1.35g.

Merci Handy New Wave Love & Hand Cleansing Gel
A handy sized sanitiser which is great for handbags or travelling. A simple item but a rather useful one. I received this blue one, called New Wave. I like that it smells nice, it even has glitter inside it for a touch of glam, and it is also supposed to nourish your skin while killing bacteria because it contains Vitamin E and emollient beads. It smells like fruity and clean all at the same time, and is a ‘handy’ 30ml size.
 My favourite items from the box are the LOC Eye Shadow Stick and the Spectrum Collections Glam Clam A05 Brush.
My reasons are because I will definitely use these pieces. I wanted the brush so badly to use in blogging and in my makeup. The other items I will all use and/or test, so I just see them as a bonus. I quietly hope that I can use them all despite my sensitive skin.
 Here is another image of my items that were inside my August Birchbox.
And below is another shot of the free nail polish and the makeup bag.
![]()
Overall I am pleased that I did this Reveal, If I am very happy with any of the individual products then you will no doubt see individual reviews of the items.
Thank you very much for reading this blog post today, I really hope you’ve enjoyed this reveal and of course all of my detailed photography.
If you’re interested in some Birchbox products then please check out their website, they have a shop and you can subscribe to the boxes if you wish to.
If you liked this but want to ‘See’ more then check out my unboxing video, reveal and honest review of the box over on my YouTube Channel.
Thanks Severn Wishes followers, until next time!
✩ Sabrina ✩
 A Uniqlo Store T-Shirt Haul – Featuring Designs from the UTGP 2017 in Association with Nintendo.
 My husband bought me this one, he knows I adore Pikachu!
 This tee brought back so much of my childhood, Mario, DK and hours of fun!
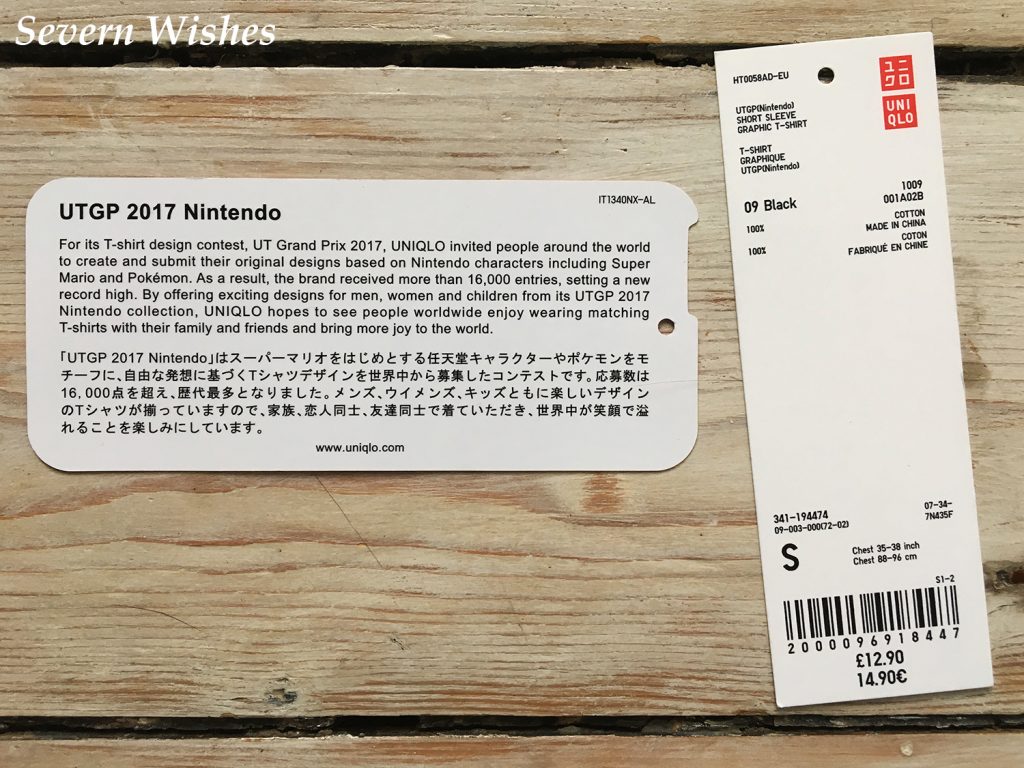 For the UT Grand Prix for 2017 and they received more than 16,000 entries, a new record high for the competition. By offering these unique and exciting designs for both men, women and children from its UTGP 2017 Nintendo collection, UNIQLO hopes to bring more joy to the world by giving people the chance to own these one off designs. With the standard being so high this year I cannot wait to see what people come up with for the next one!

 (The Sunflower, Palm Tree and Eye were already sown on).
 If you ever did this as a child, then you had a great childhood! Picking an iron patch in the local shop, taking it home and choosing an item of your clothing for it to go on to. Usually a denim jacket in the 1990’s with patches covering the back! But I wanted to spruce up these already great shorts! I hope you like what I did!
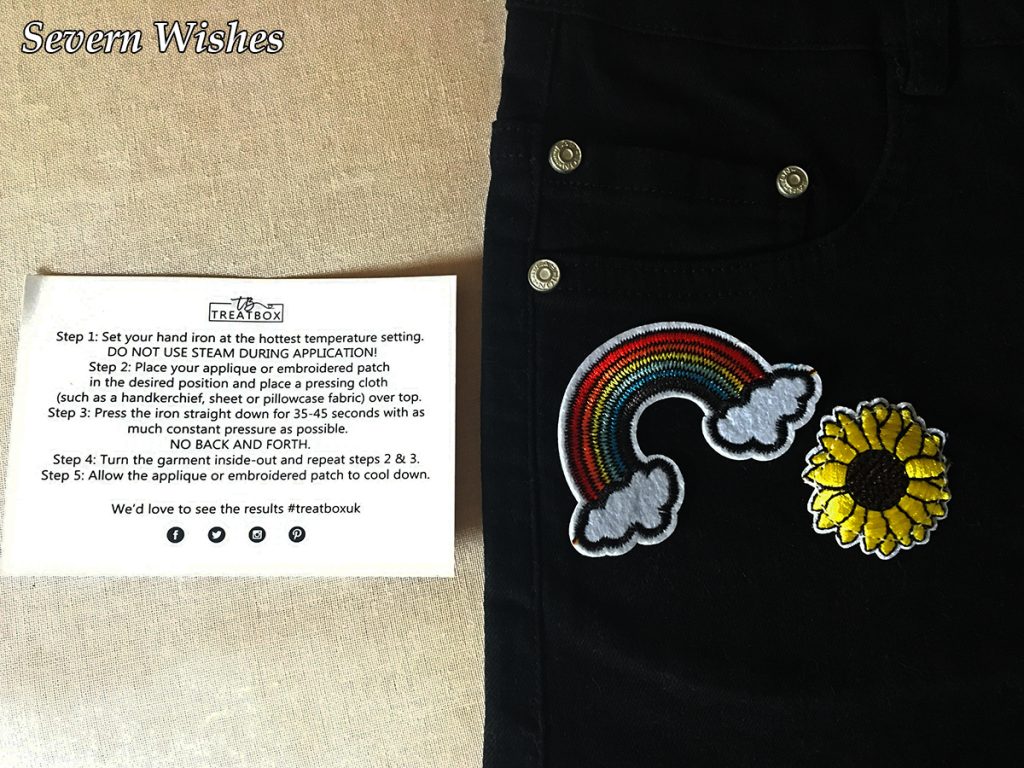 Here are the Treatbox Iron On Instructions and a closer look at the beautiful Rainbow patch that we had last year in our August 2016 box.
 Here is a closer look at the Flamingo and Pineapple which were in the July 2017 box.
 Recommending to use a handkerchief or an old pillow case to place over the patch while you are ironing is not only a tip but a definite necessity.
 Revisiting the Urban Decay Urban Eyeshadow Vault
 There are twenty wonderful pots inside this vault, and they are all gorgeous eyeshadow shades. I am going to show off some brand new swatch images, and then just a whole lot of random shots that I love. I have experimented for hours with photographing the pots and also added some of my spectrum brushes in some photographs too, to bring a whole lot of awesomeness to my blog today!
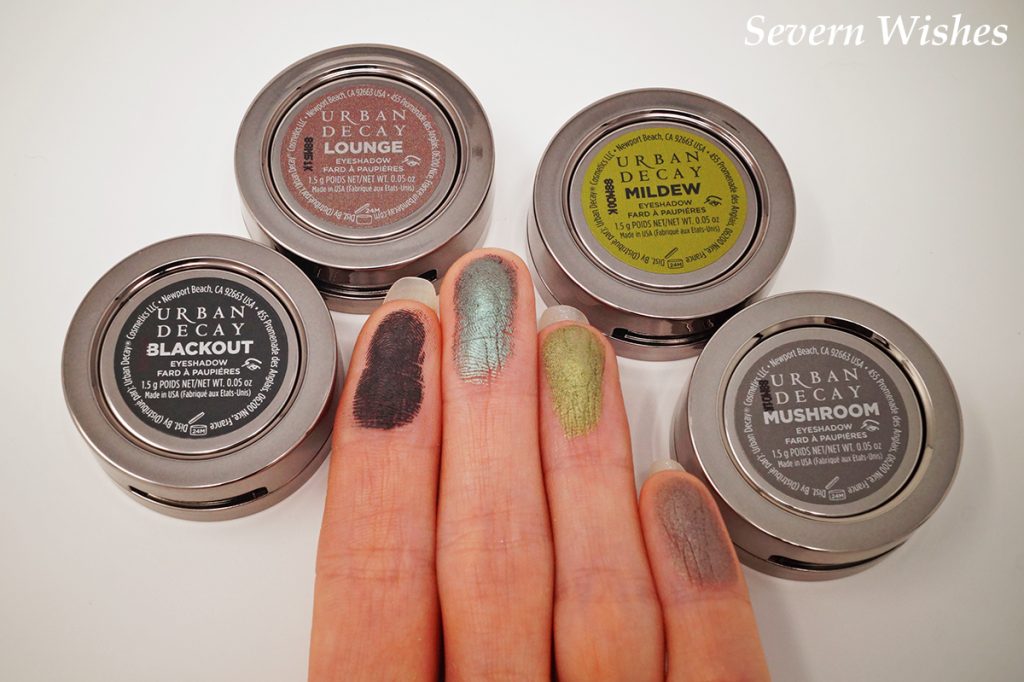 Last Call
 Rockstar
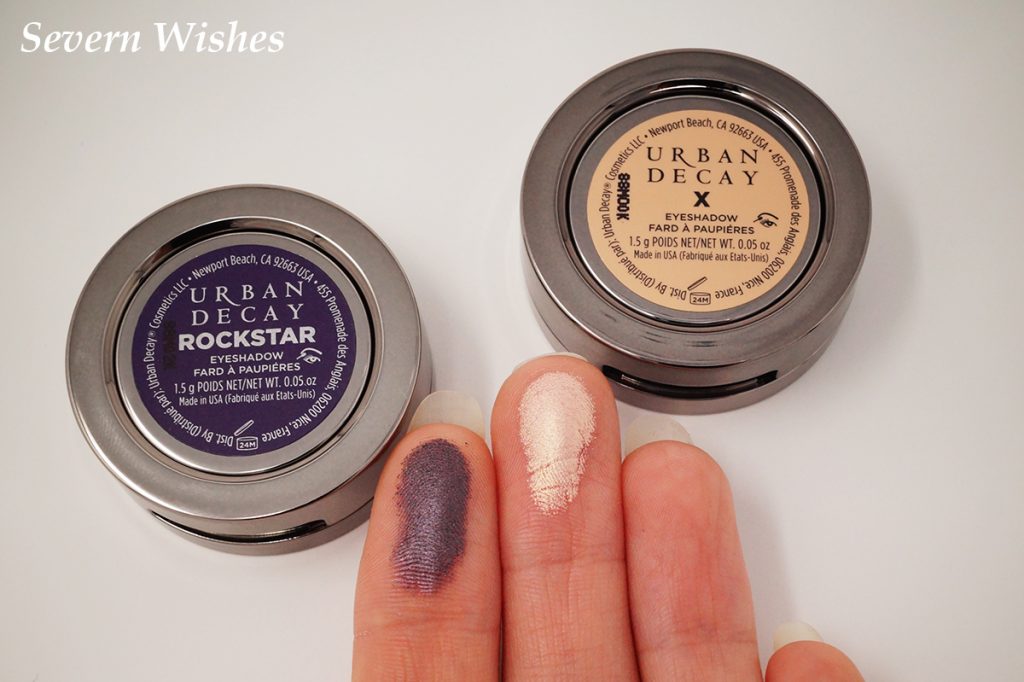 The Moondust Collection are in the Silver Pots. Here are my swatches.
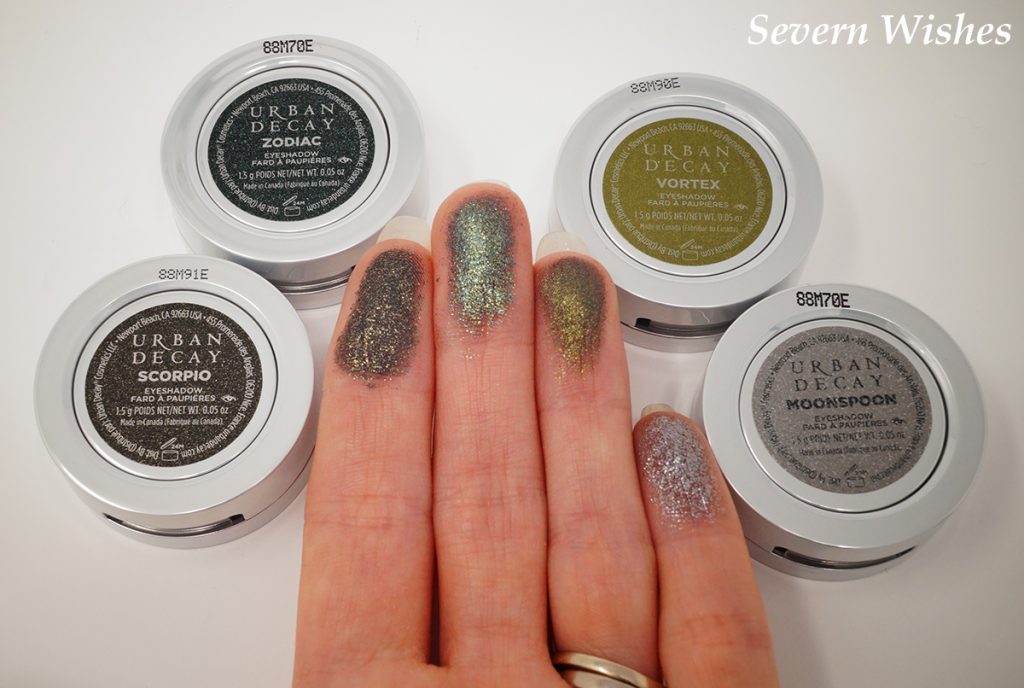 Solstice
 Shockwave
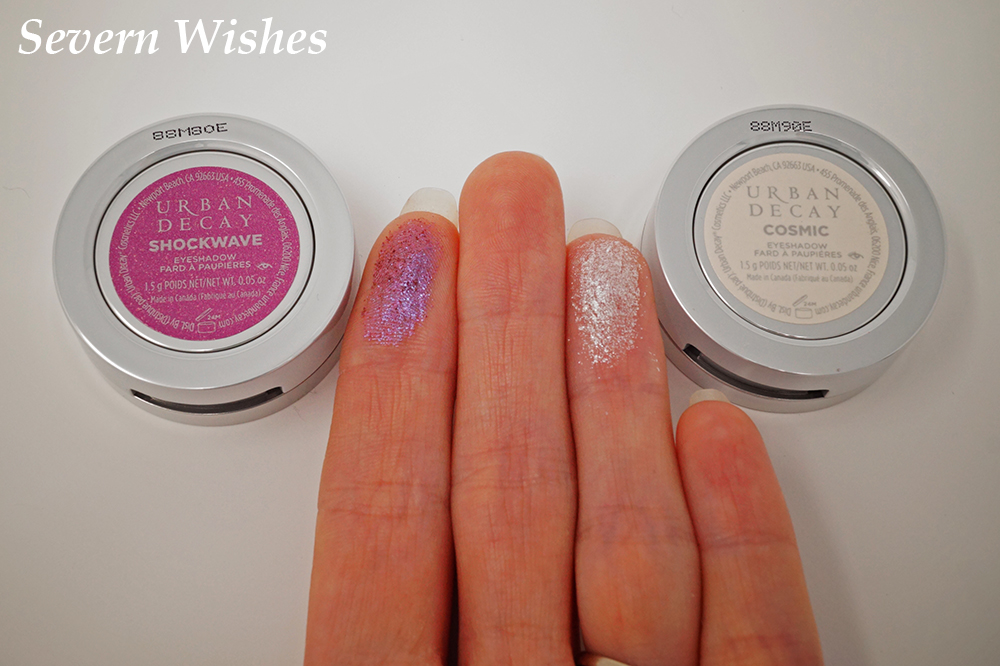 What I loved most about photographing these eyeshadow pots was the variety in the colours. They are wonderfully designed with such detail.
 A Little Mixture
 Stack and See
 An Incredible Set


 Welcome to today’s Blog Post, in this piece I am going to be discussing the main Fashions for this Spring and Summer. How you can wear them this season, and how you can combine new items with your current wardrobe to stay on trend.
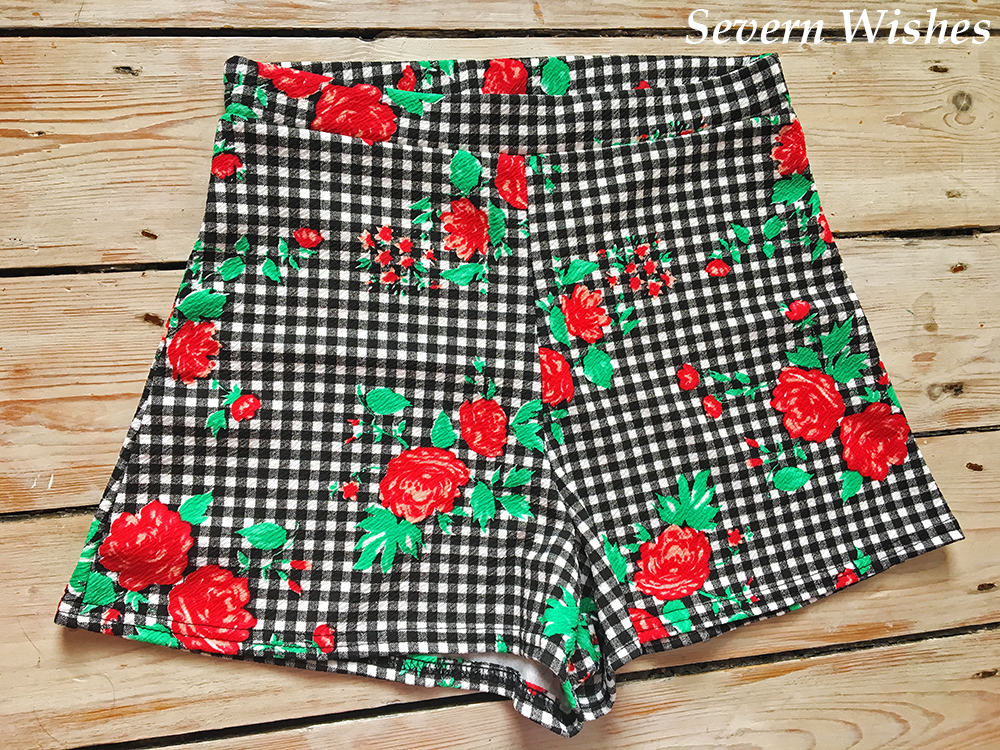
 Here I am in my Gingham and Floral outfit. I love how the flowers really stand out on the pattern.


 (Primark Original)
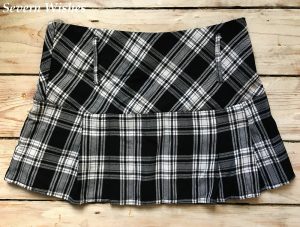
 (New Look Original)
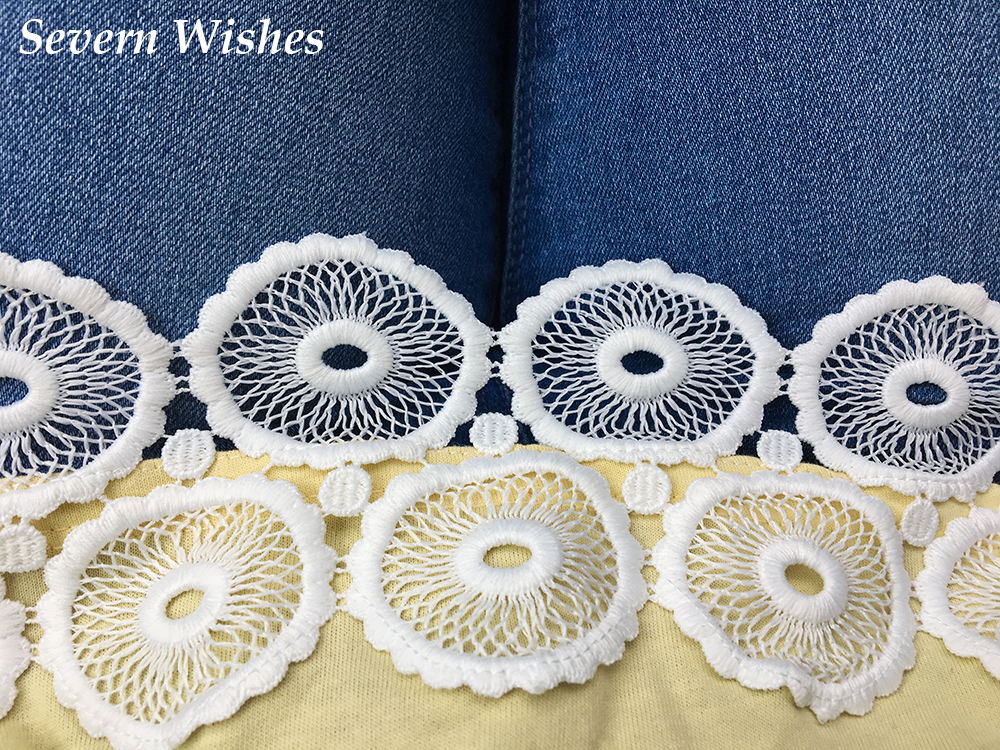
 You could choose to put patches on any kind of Denim item, I liked how these would brighten up the black, but they work just as well with blue too!
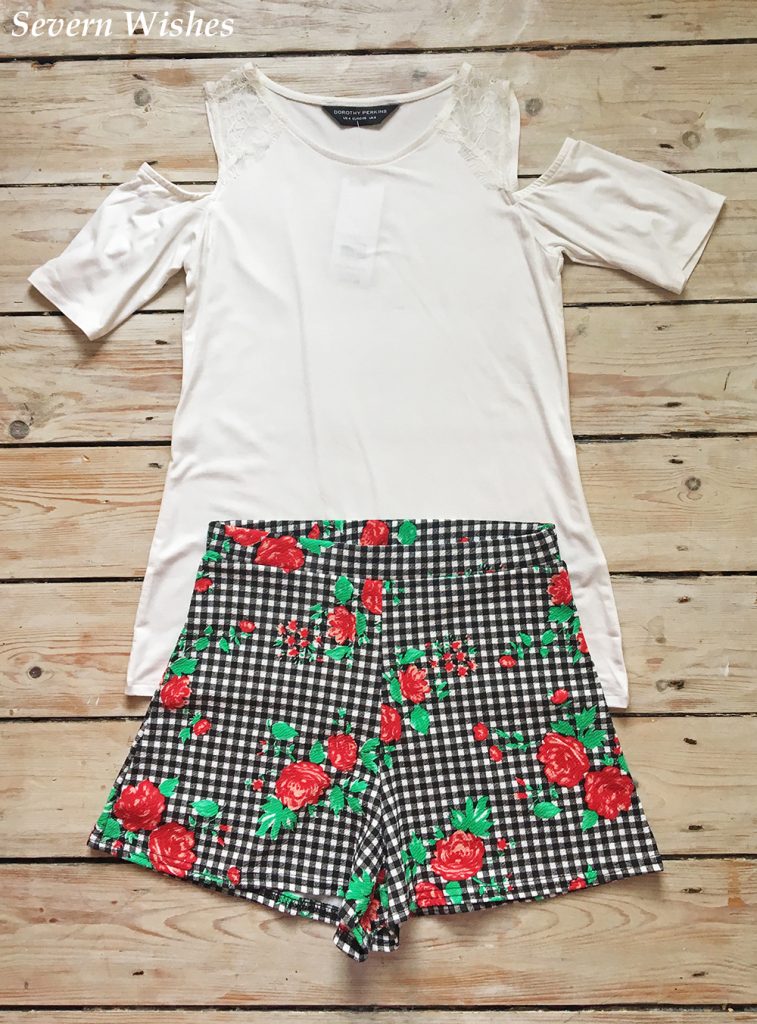
 Here I am in this outfit. I really like combining trends like these to make my own style.
 (Here are a few of my examples to get you thinking…)


 ✩✩✩
✩✩✩
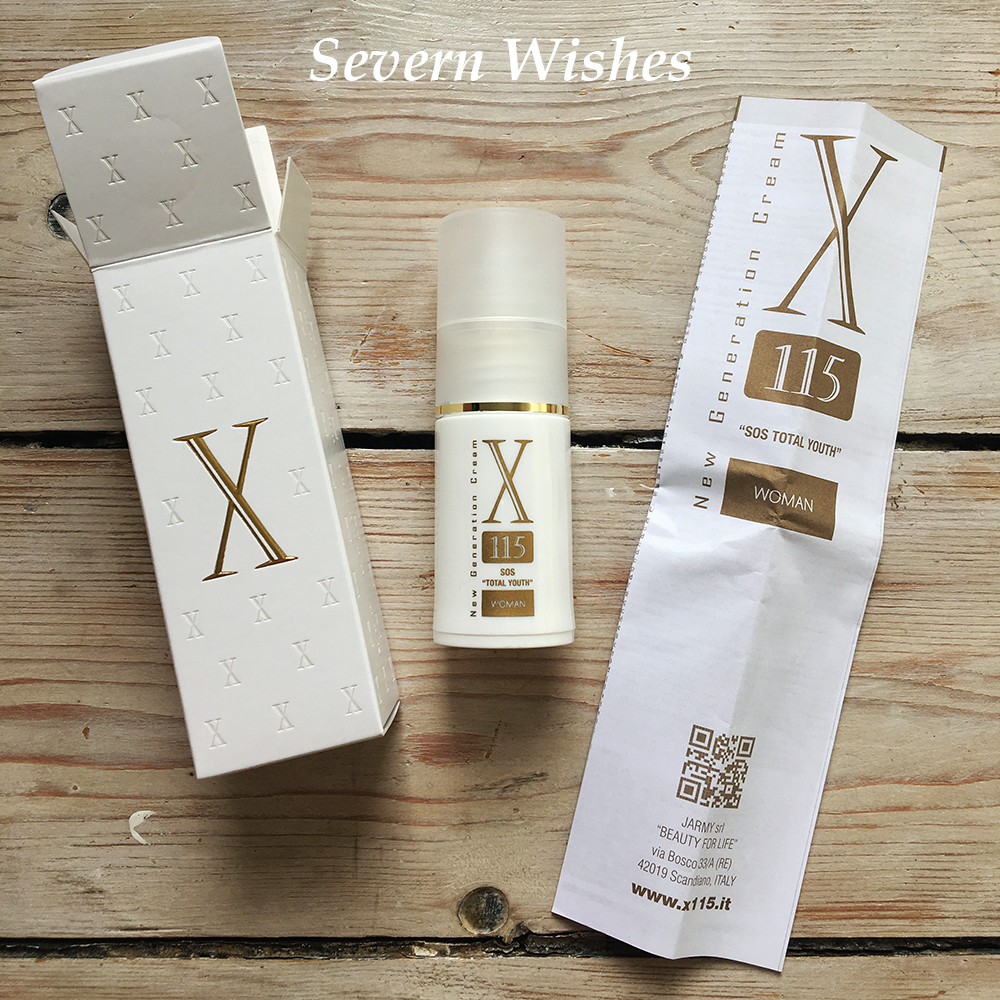 An in depth Review of the X115 New Generation “SOS Total Youth” Cream for Women from Jarmy SRL in Italy.
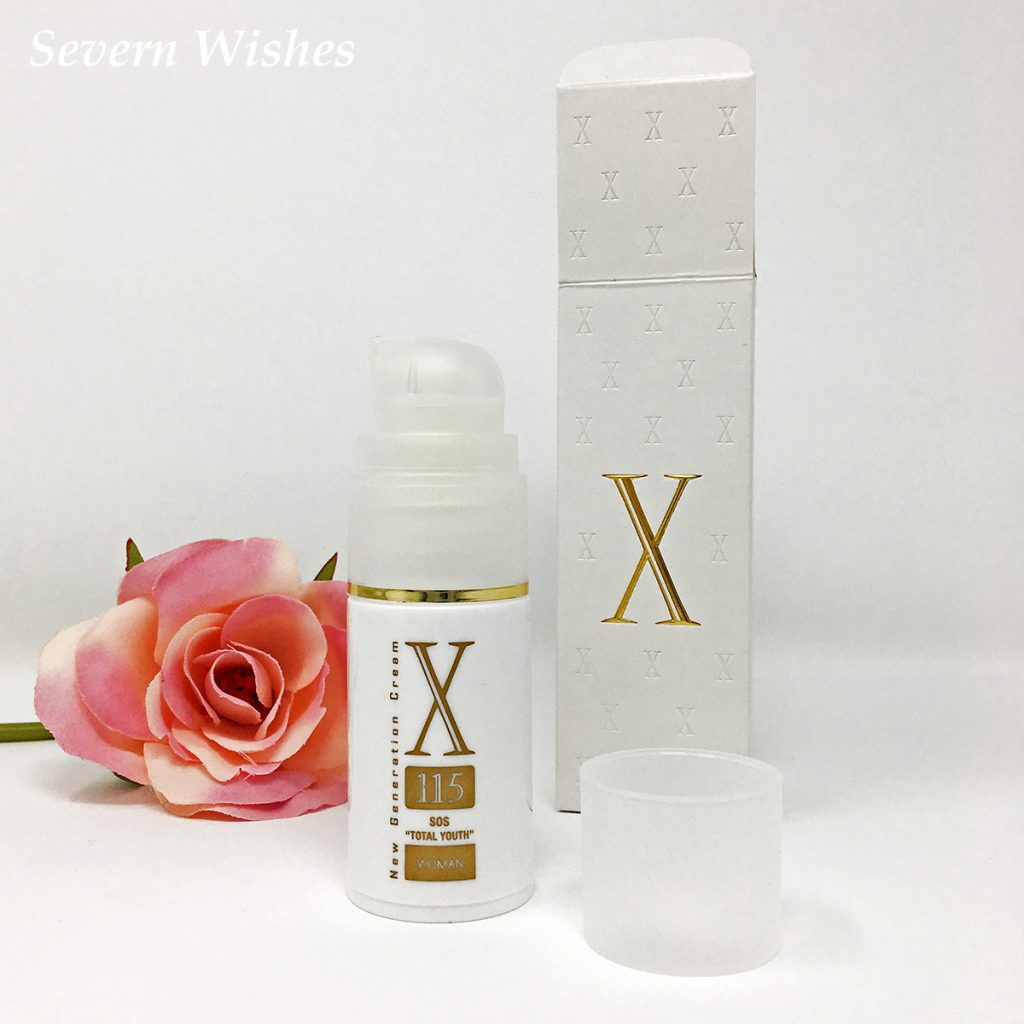 The first thing that I noticed when I began testing this product was that it had no smell, only a light plastic sort of smell and a slight oily scent, I take it that was from being encased in its packaging. However once applied there was no lingering smell. The cream was very light to apply and with a few strokes it soaked into my skin with ease. Even though I have sensitive skin I have had no issues with using this product whatsoever.
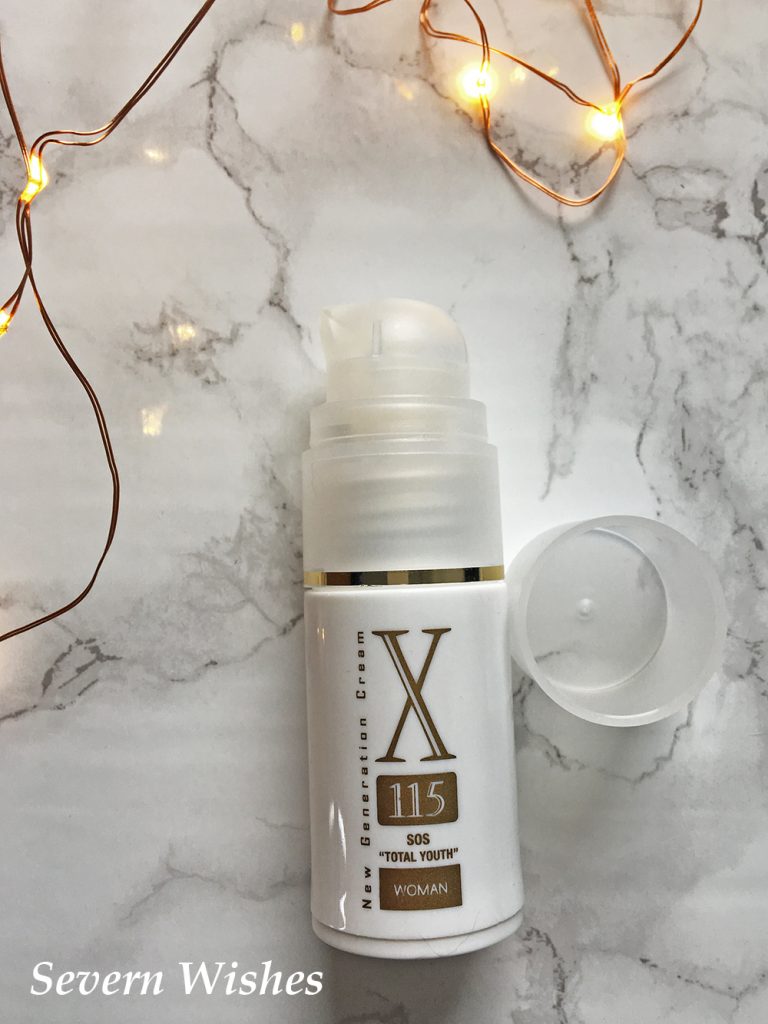 The X115 is designed to be applied at either the morning routine or the evening one, whichever suits the customer better. I have always preferred to do my more complex routine just before going to bed, that is because I usually struggle to remember to apply everything in a morning when I’m still half asleep!
 Over all I have found the cream easy to use, and because the bottle is so small it’s easily portable too. I went away for a weekend and just tossed it in my bag with my makeup. The small bottle went a very long way, with an evening routine I have used it consistently for almost six weeks now, with a very small amount remaining.
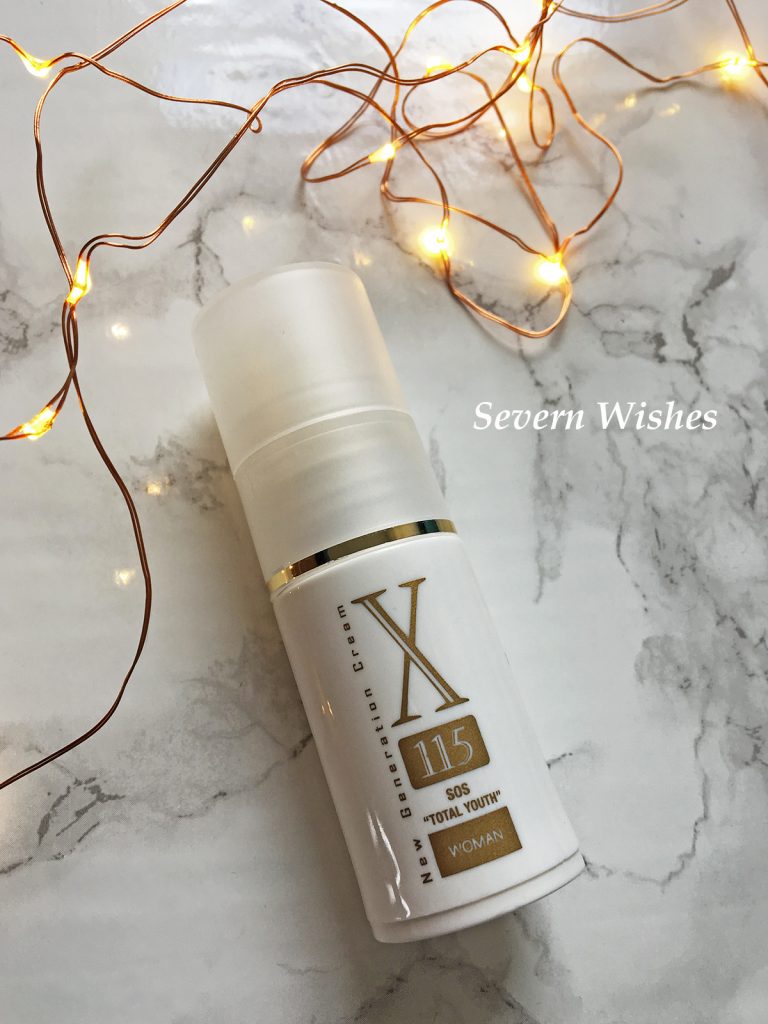 I don’t really believe in a ‘before’ and ‘after’ image, because your skin is made up of so many factors, like diet, exercise and hormones. But I have definitely noticed a difference in my facial areas, so much so that I stopped using two other creams a month ago, just so that I was focusing all my attention on the X115. I wanted to see what it could do and see if it could do, in a shorter time period, what my usual products had been attempting to do for months.
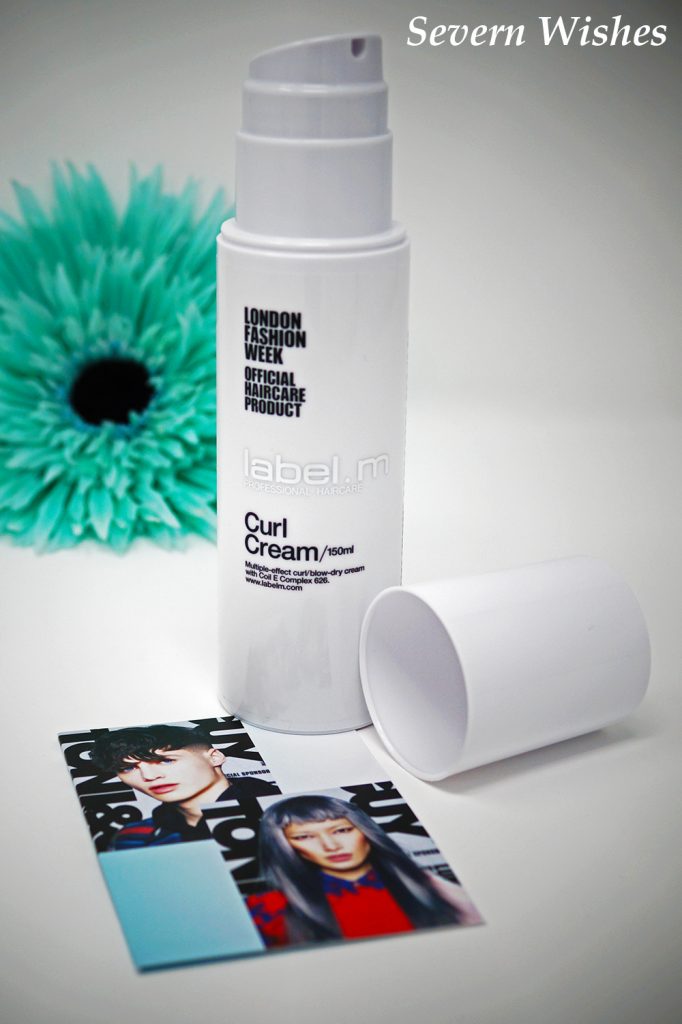 On my most recent visit to my favourite Hair Dressers, Toni and Guy, my stylist used their latest curl cream on my hair after my cut. To style this cream she scrunched it through my wet and freshly cut hair and then placed me under a hooded drier for thirty minutes.
 (Above; My Hair straight after having it cut and styled with the curl cream).
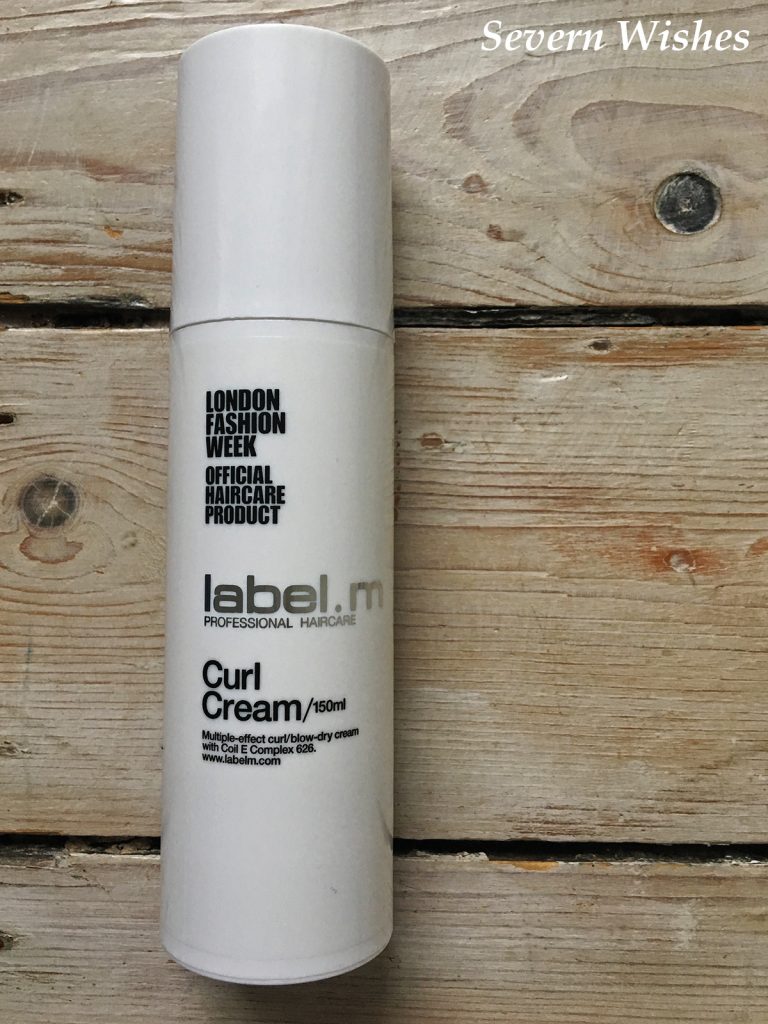

 (Above; My hair after using the product at home).
 I had a warm feeling in my soul while revisiting Albrighton Hall Hotel and Spa again.
 My mum and I decided on a Spa Day, where, for a package price, we received lunch and a hot drink included, with full use of the facilities, plus two spa treatments of our choice from a set list. We were also given complimentary bath robes and slippers to wear during our stay, and towels for the pool area too, so there was very little you required to bring with you.
 For lunch we were given a menu to choose from, there was a nice variety, some were cold and some were hot. I decided to be semi healthy and go for a Chicken Caesar with egg (not fish) salad, and an orange juice. As you can see it was well presented, and actually I thought the dish was very tasty for a salad.