Happy Easter! I hope you’re having a wonderful long weekend!
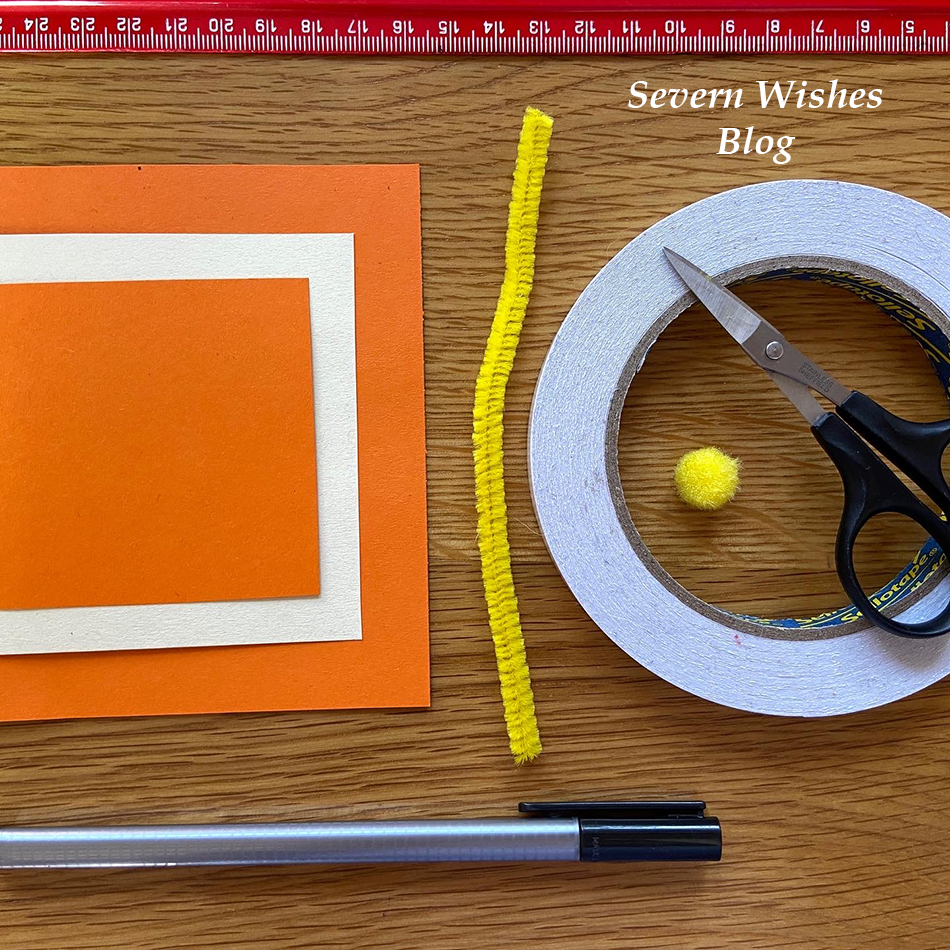
If you’ve already been out and about and are now looking for something to do within your home to keep the children entertained, then why not check out all my craft pieces below, show your children and they might want to give them a go! They are all really easy and just need a few minutes of your time as the adult to deal with some scissor cutting and poking holes, and then they can begin! You won’t need any fancy craft equipment for any of these either, just gather the following items on my list below and you’re good to go!
If you were wondering what it cost me to make all of the craft items I have done in recent posts it was about £15. That includes all of the double sided tape, various packs of white and coloured card, good quality colouring pens, craft balls and pipe cleaners among other things. But I have lots of them left over from these purchases too for use in future craft projects. I actually have more crafty items in the works and I’m still using up the same items and haven’t needed to buy any additional ones.
Sabrina’s TOP TIP: Making up a Craft box is a great idea, it will keep everything neat and tidy. Throw in left over pieces of card, toilet rolls and crafting left overs. I recommend a Really Useful Box or a similar one which has a tight fitting lid. These are also really strong and stackable for easy storing away.
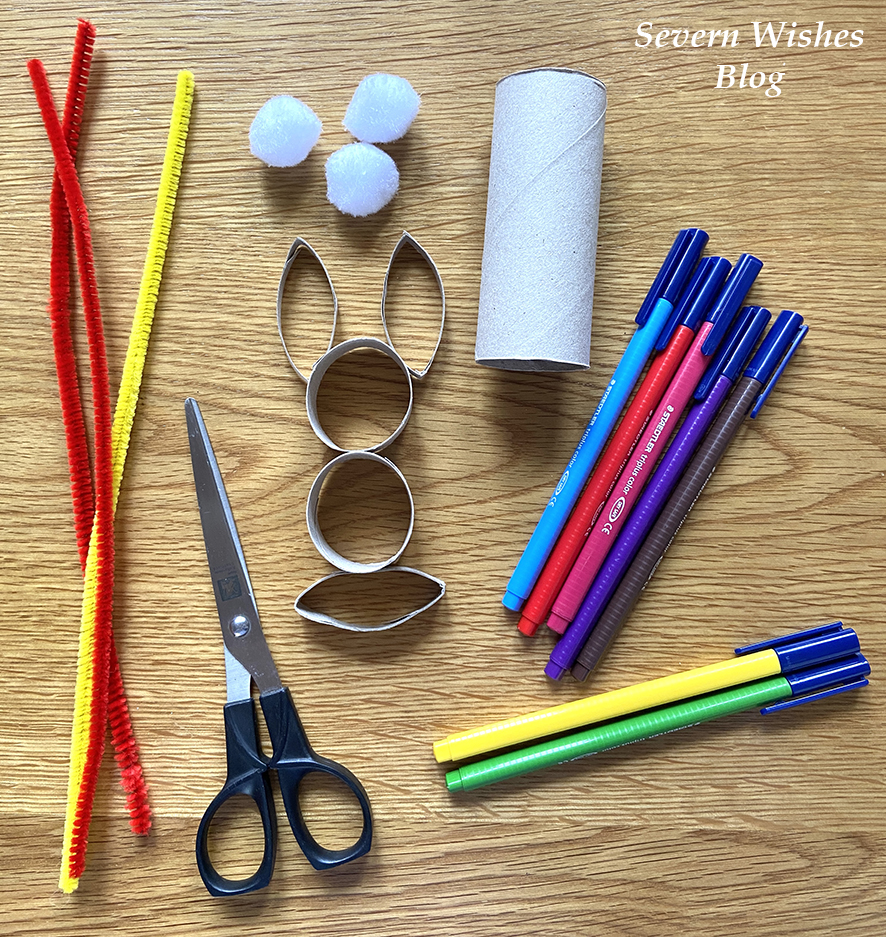
✩✩✩ What Will We Need for all these Projects ✩✩✩
Toilet Rolls
Cereal Box Cards
Pens to Decorate
Scissors
A Pen or Pencil
A Ruler
Pipe Cleaners
Fluffy Craft Balls
Coloured Card
Googly Eyes
Double Sided Tape
Pritt Stick or PVA used sparingly
✩✩✩

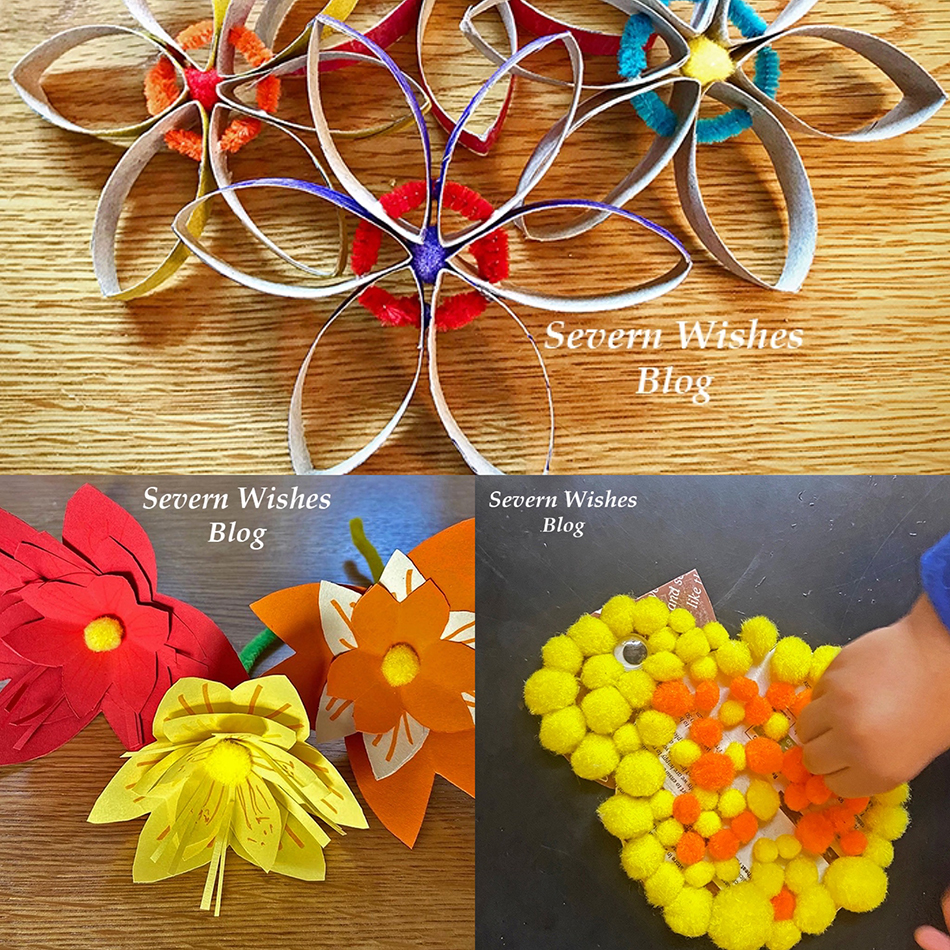
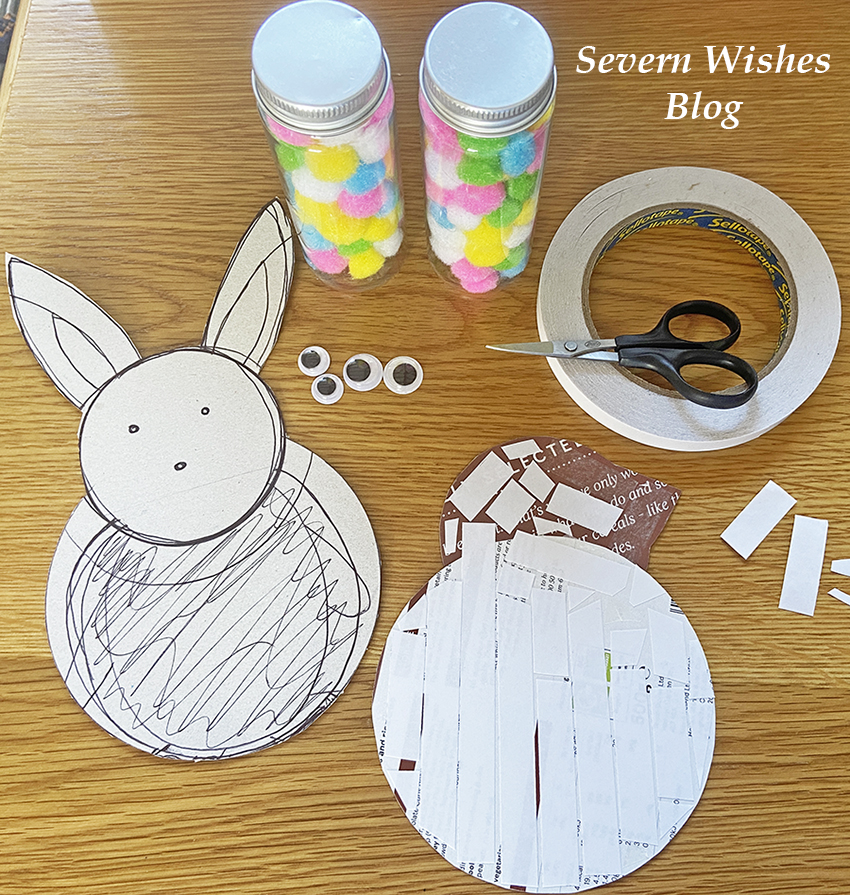
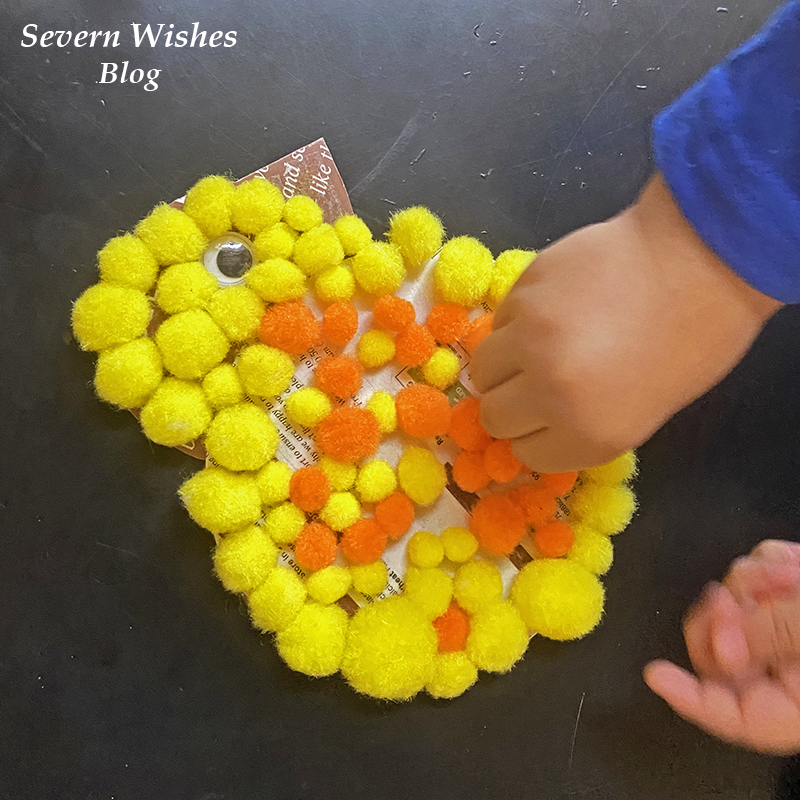
How to Make Sabrina’s Fluffy Craft Easter Animals
These cute and fluffy animals were made using cereal box card, double sided tape and a bag of craft balls! In all it cost me about £2! And we have a ton of balls left over which we can use as flower middles and things like that – I use them in other projects too. This one is easy for little children, you do the templates and then add the glue on and then they can go to town with all the sticking!
Step 1. Draw on a cereal box, inside on the flat side piece, whatever shape you like, a Rabbit, a Chick, an Easter Egg, whatever you like or your children want.
Step 2. Cut out your templates, make them as big or as small as you like.
Step 3. Use PVA or Pritt Stick or Doubled Sided Tape to coat your template with glue.
Step 4. Provide a clean and flat surface for your little ones to sit and stick the fluffy craft balls to their card template.
Step 5. Add googly eyes or card beaks or any other items you want to finish them off.
Step 6. Let them dry overnight, place a piece of kitchen roll or newspaper on a flat surface, add the template, add another layer of tissue or newspaper, and then place a heavy book on top overnight to flatten them down and help the balls to stick.
Step 7. Next day you can display them around your home.

✩✩✩
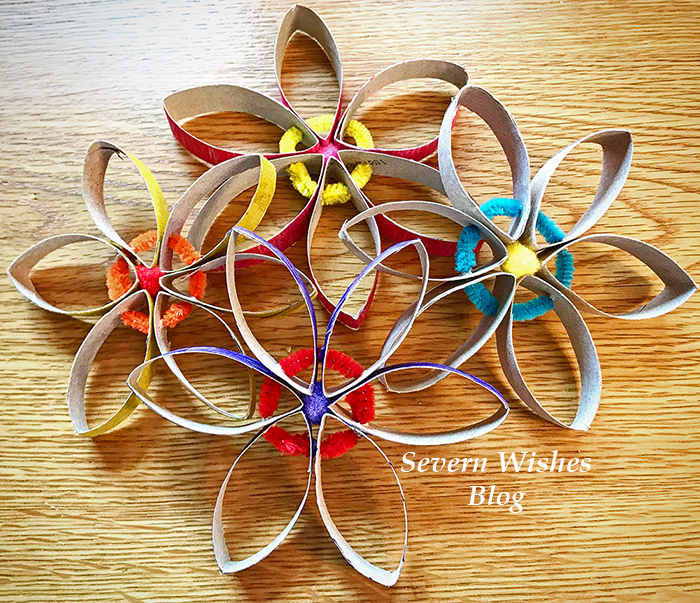
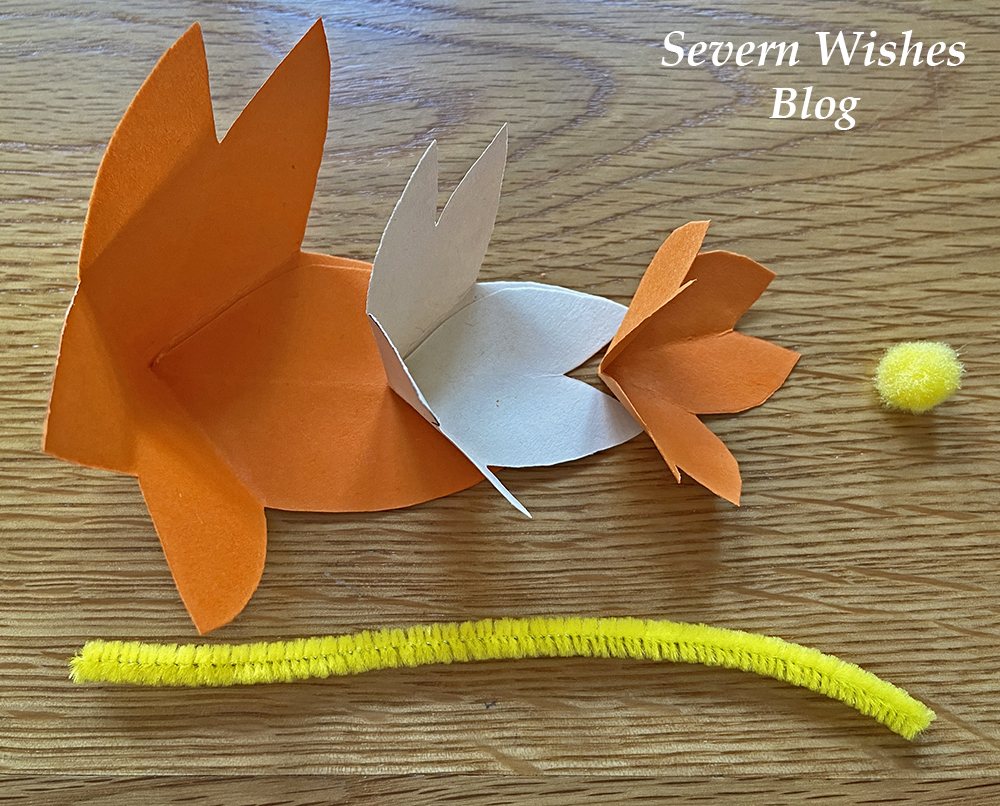
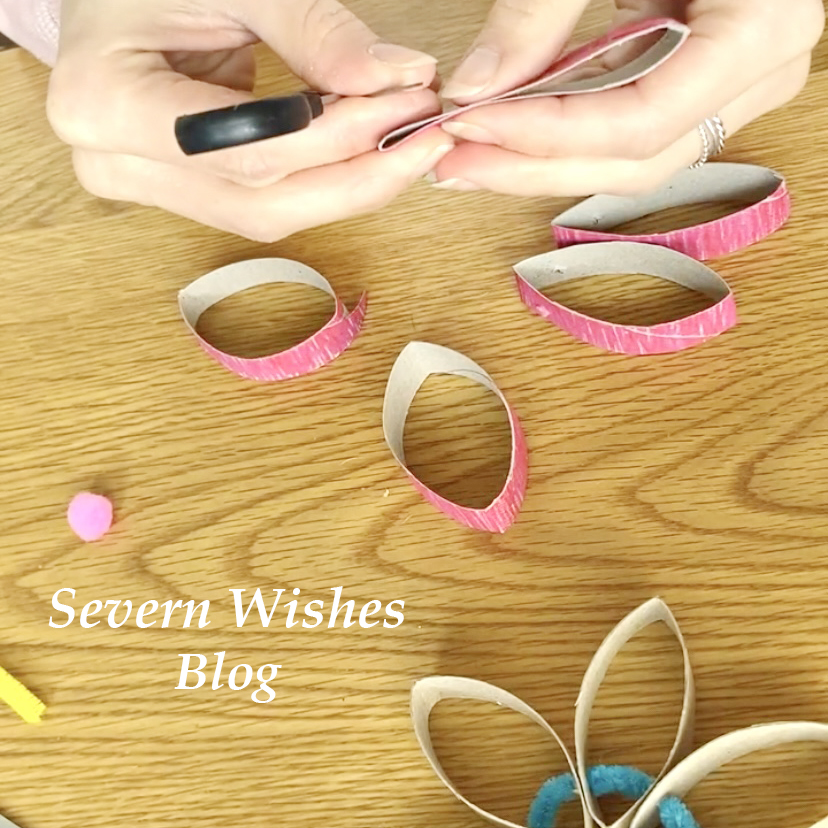
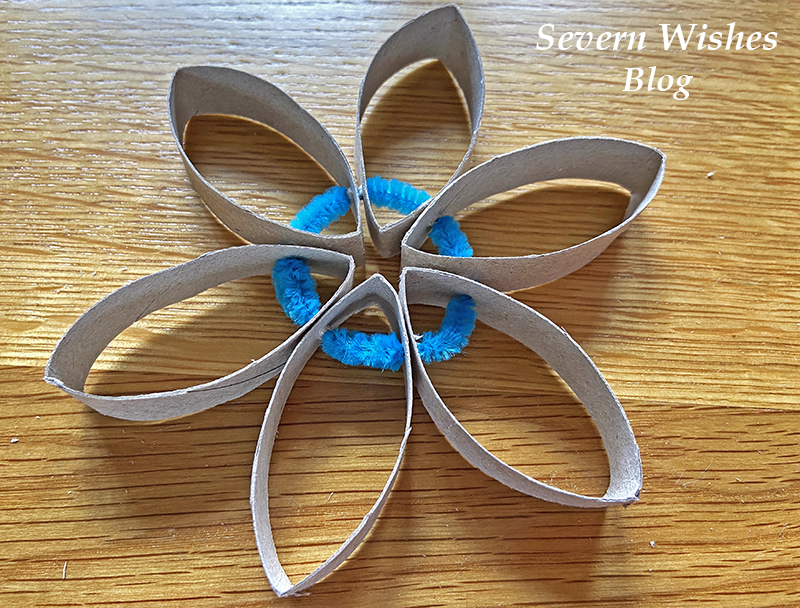
How to Make Sabrina’s Toilet Roll Flowers
My easy toilet roll flowers are so simple to do! They only take about ten minutes to make once your toilet roll is decorated and dry. You could make a load of these, if you have a kitchen roll tube you may even get 3 flowers worth of petals from one tube! I would like to try and make a Rainbow of these!
Step 1. Let the Children decorate their toilet rolls and let them dry.
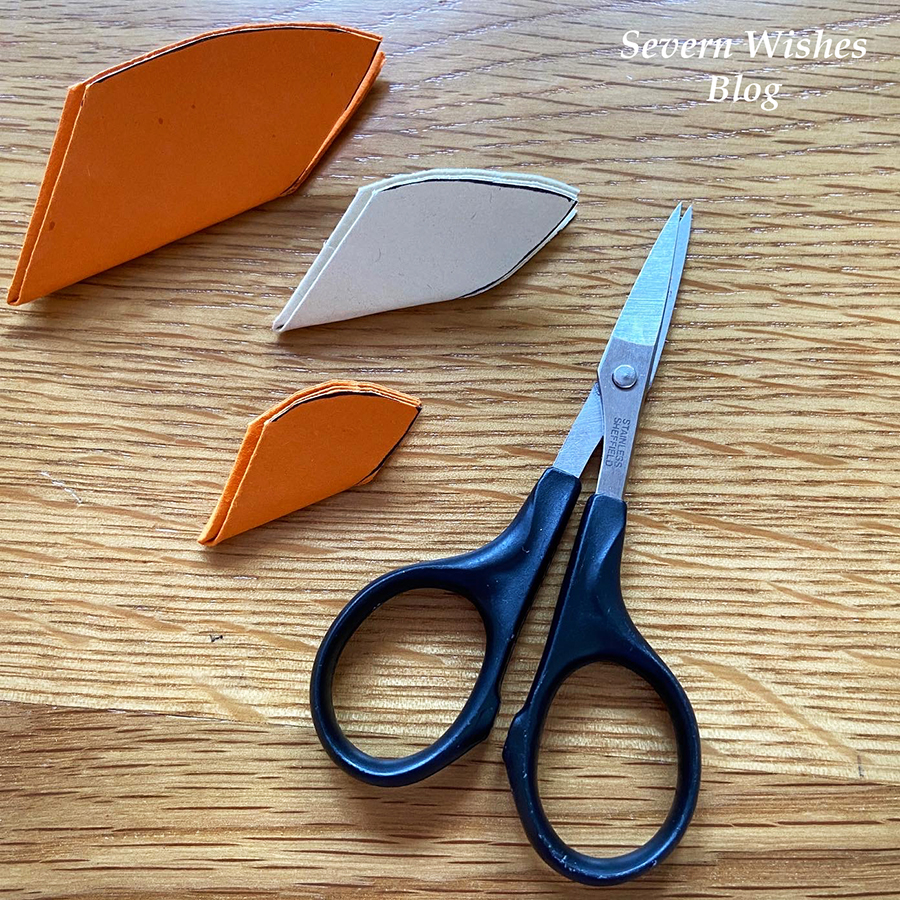
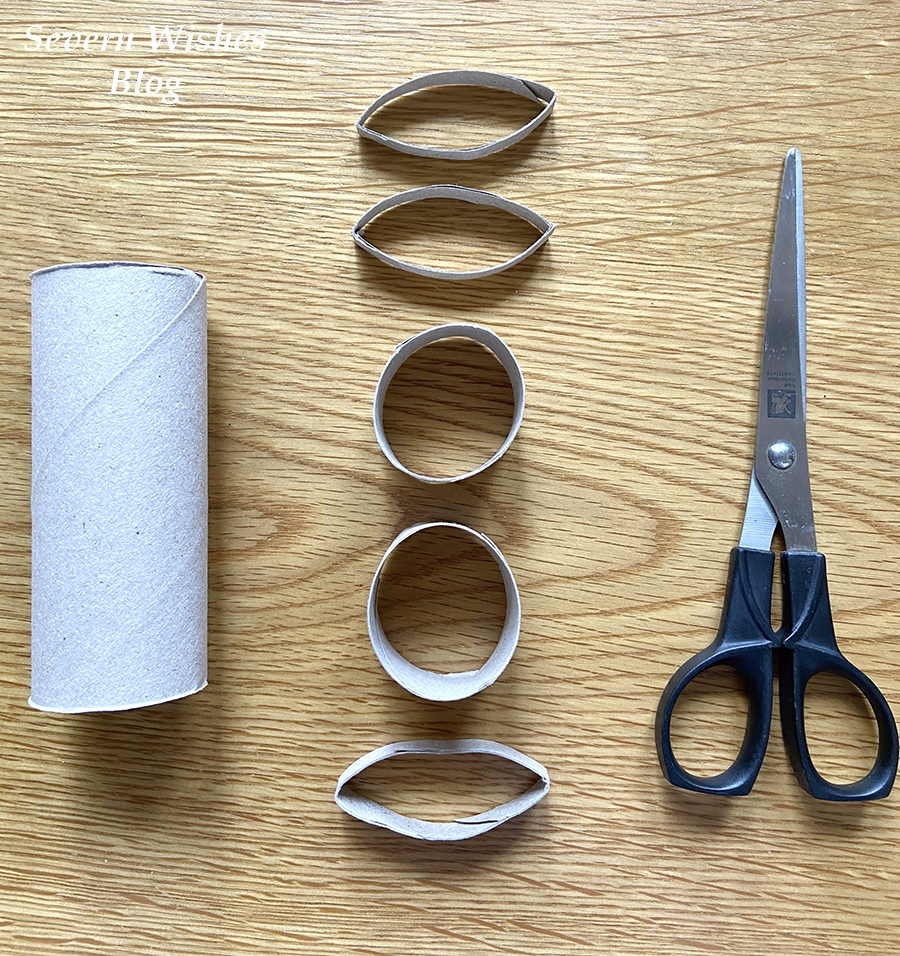
Step 2. An adult then cuts the toilet rolls into equal width pieces to make the petals.
Step 3. An adult also then uses the pointy end of their open scissors to poke holes that are 1cm up from the end and through both sides of each petal. (See my photo).
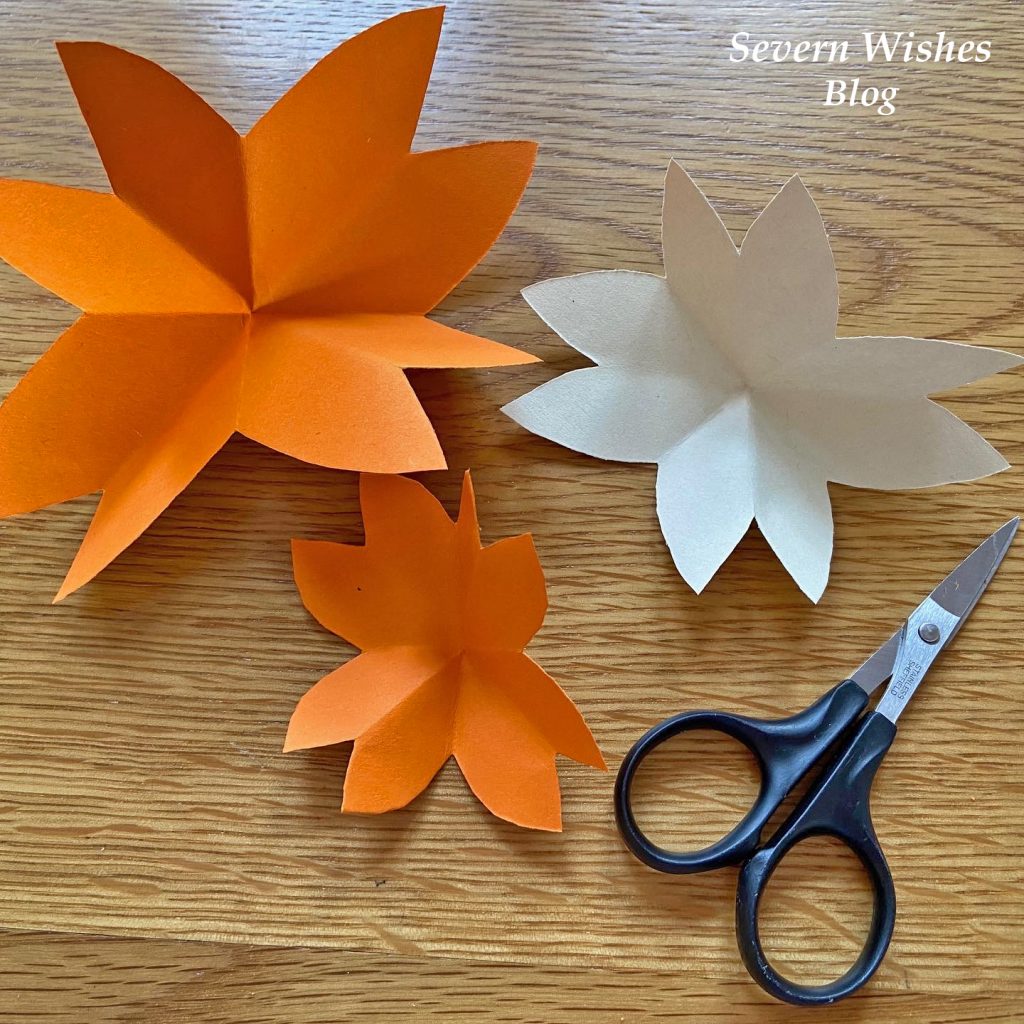
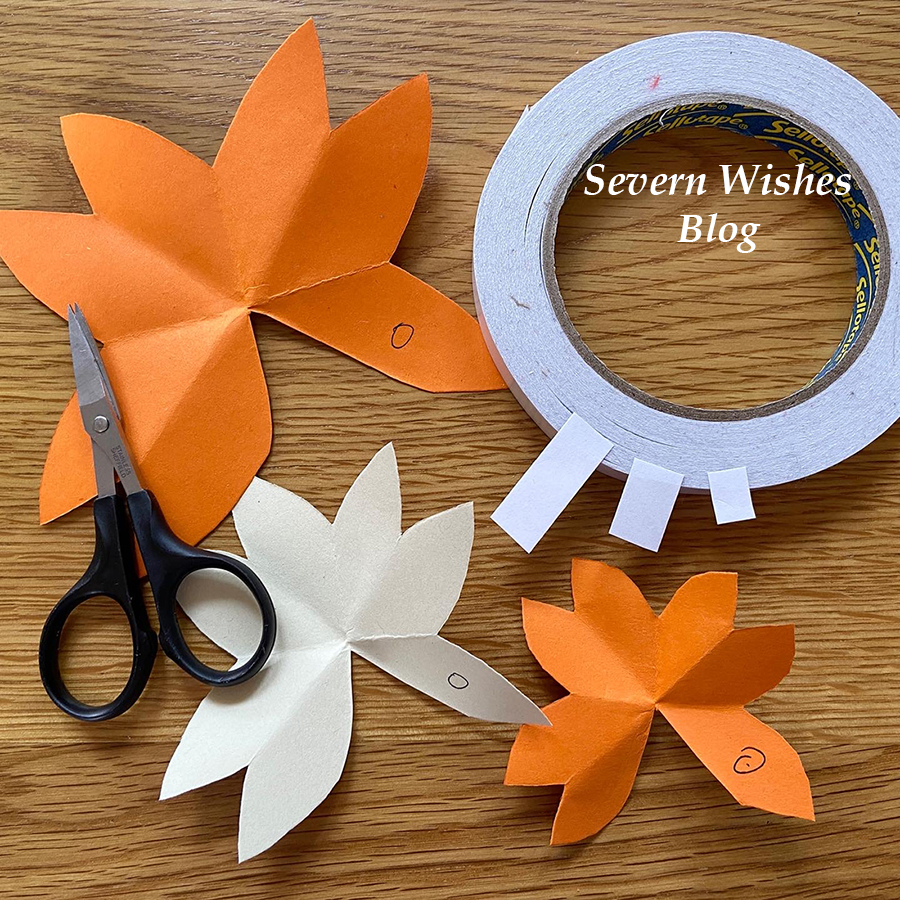
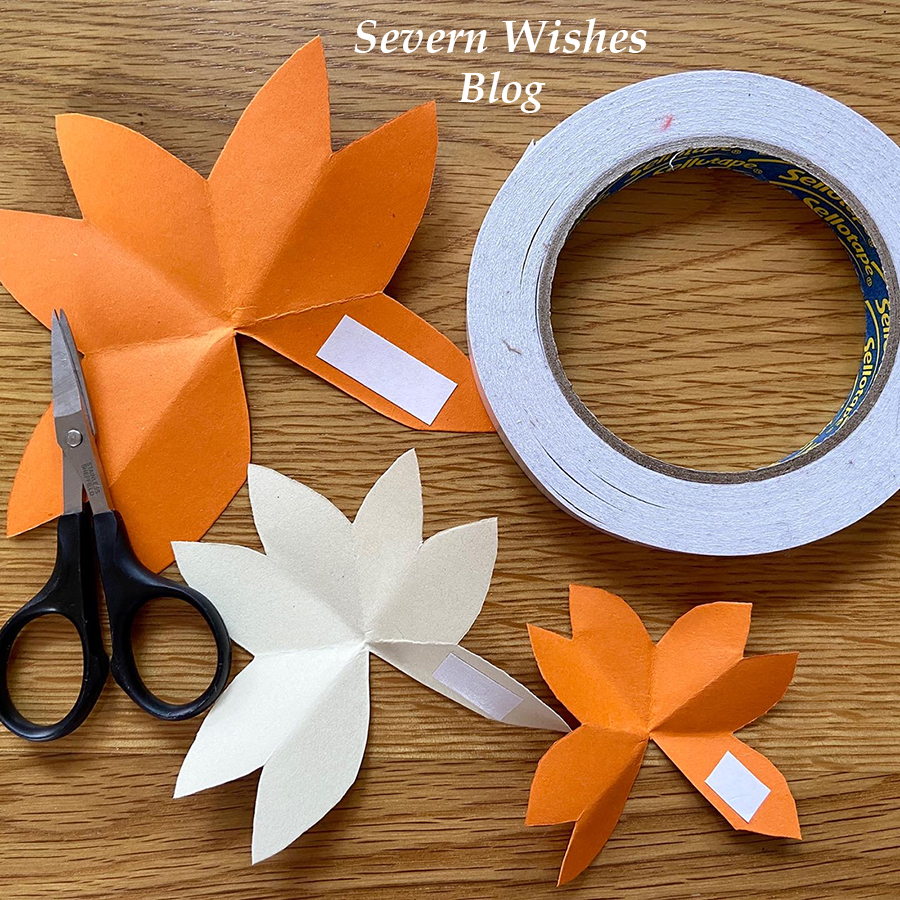
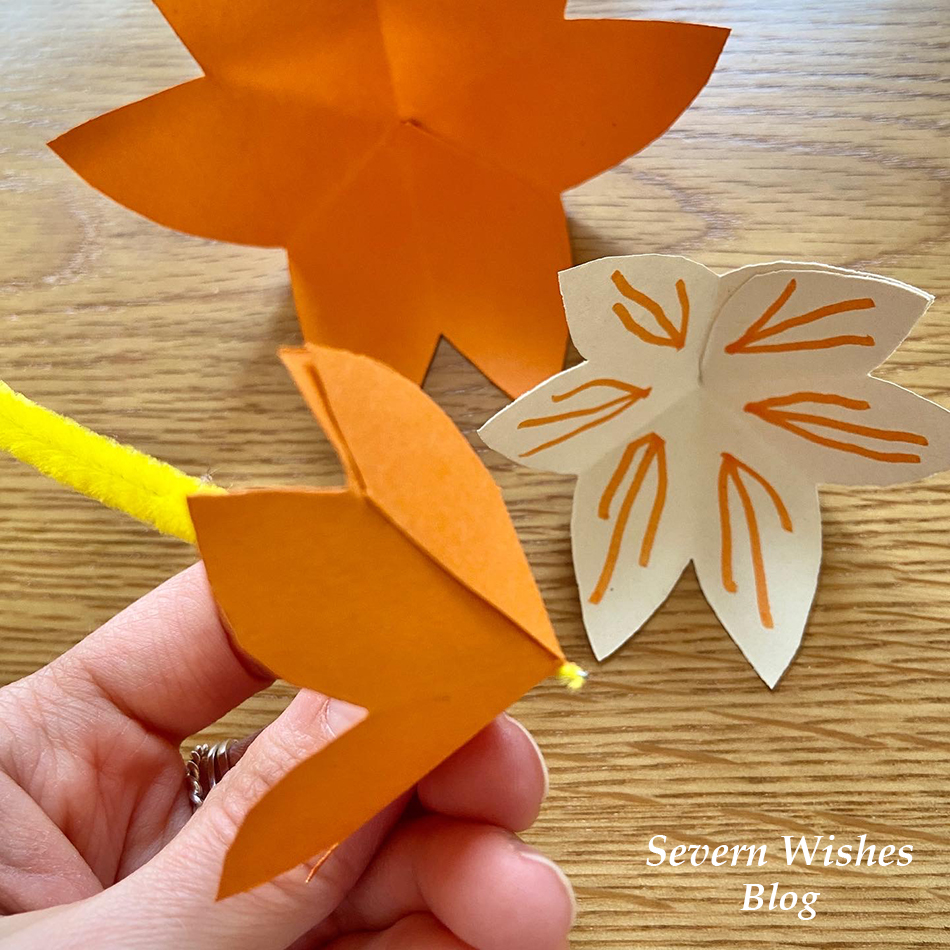
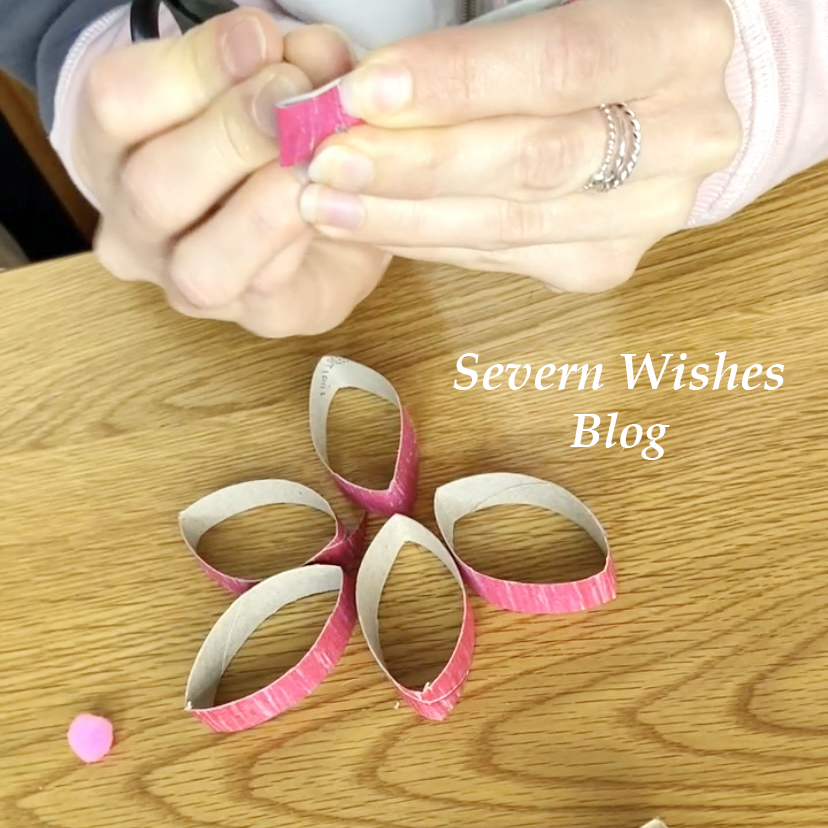
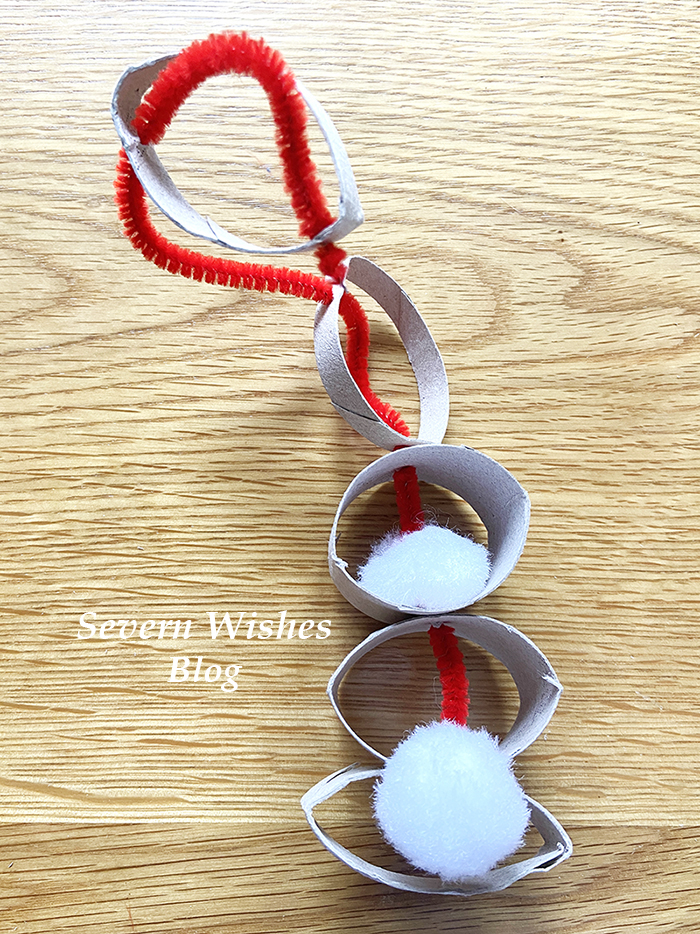
Step 4. The petals can now be opened out and gently threaded on to a pipe cleaner through the holes made with the scissors. Push them on until they hit the middle of the pipe and keep adding round.
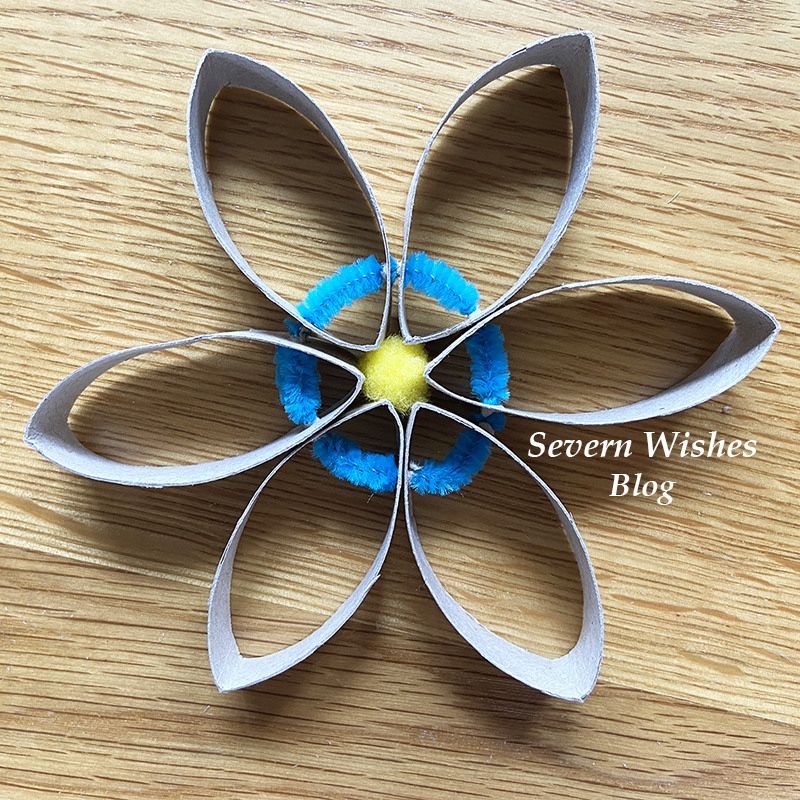
Step 5. Curve the Pipe Cleaner round as you go, after each petal, and then after the final one is added you push the ends of the pipe back through the final petal holes to neaten it up. Line it up spaced between the petals while it is flat on a table and then push a fluffy craft ball into the middle.
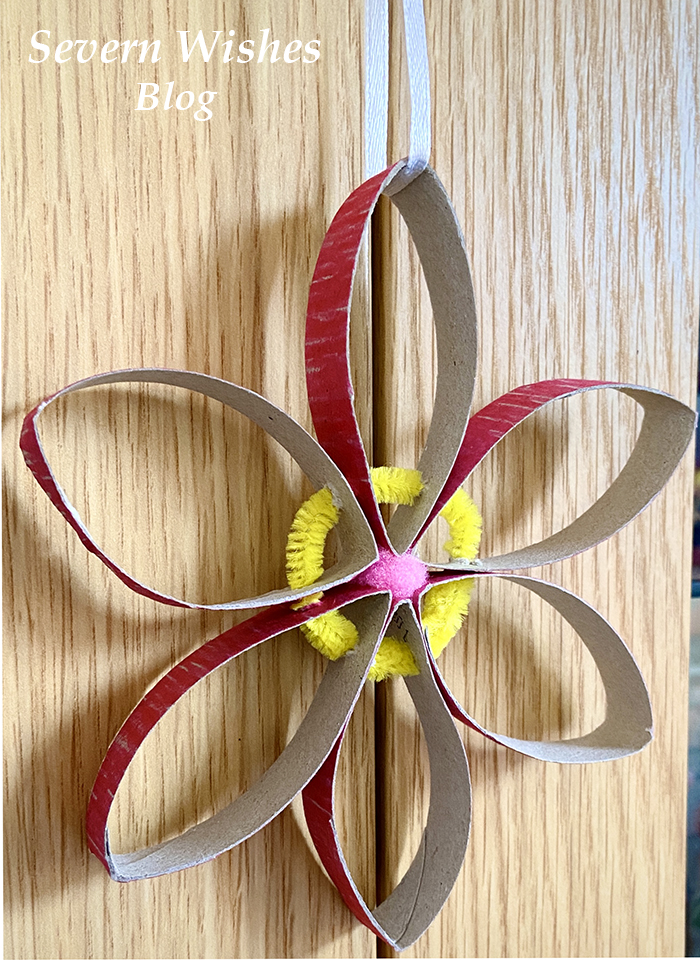
Step 6. Hang your flowers up around your home on ribbon or string for a nice decoration.
✩✩✩
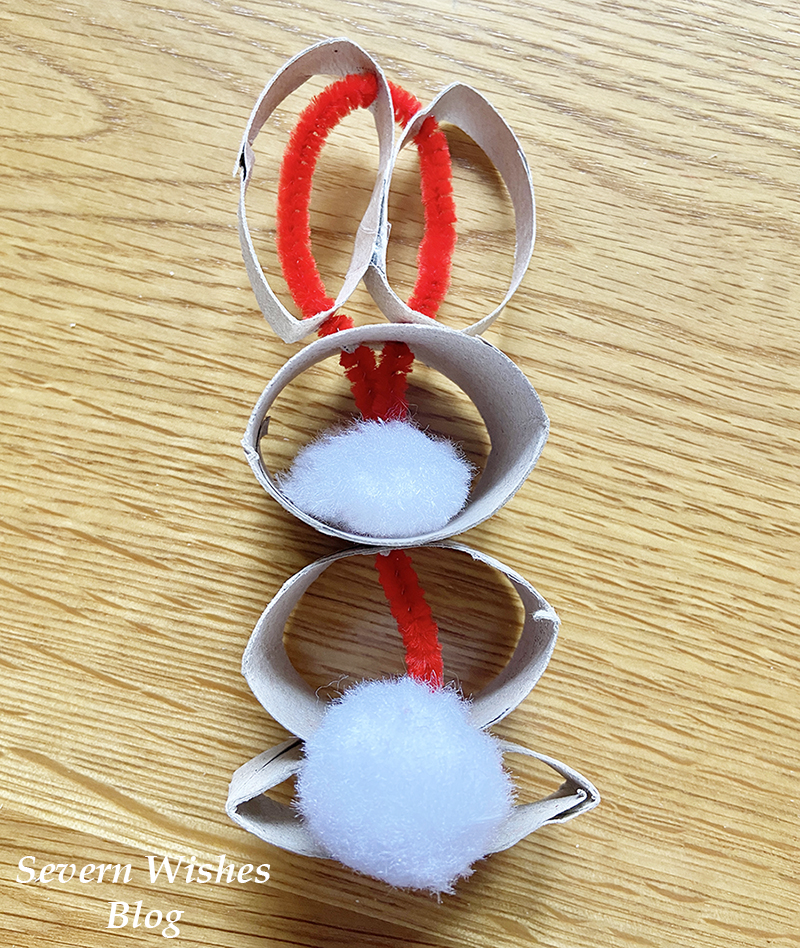
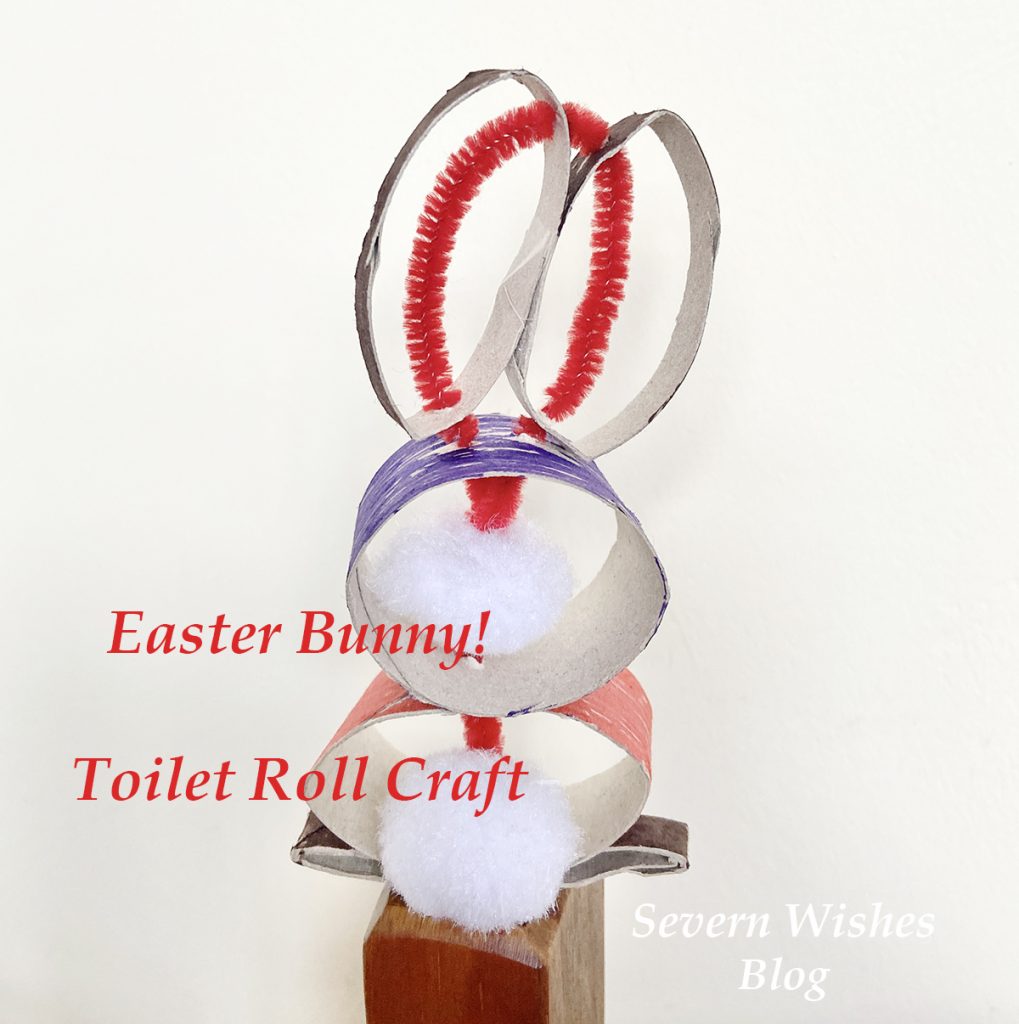
How to Make Sabrina’s Toilet Roll Easter Bunny
My cute toilet roll bunny’s are great for the Easter break! And they should stand up all by themselves! They are a little trickier than the flowers, but lots of fun still! They all start with a decorated toilet roll anyway so make sure you just save them up and get little ones to colour them in.
Step 1. Children decorate toilet rolls and let them dry.
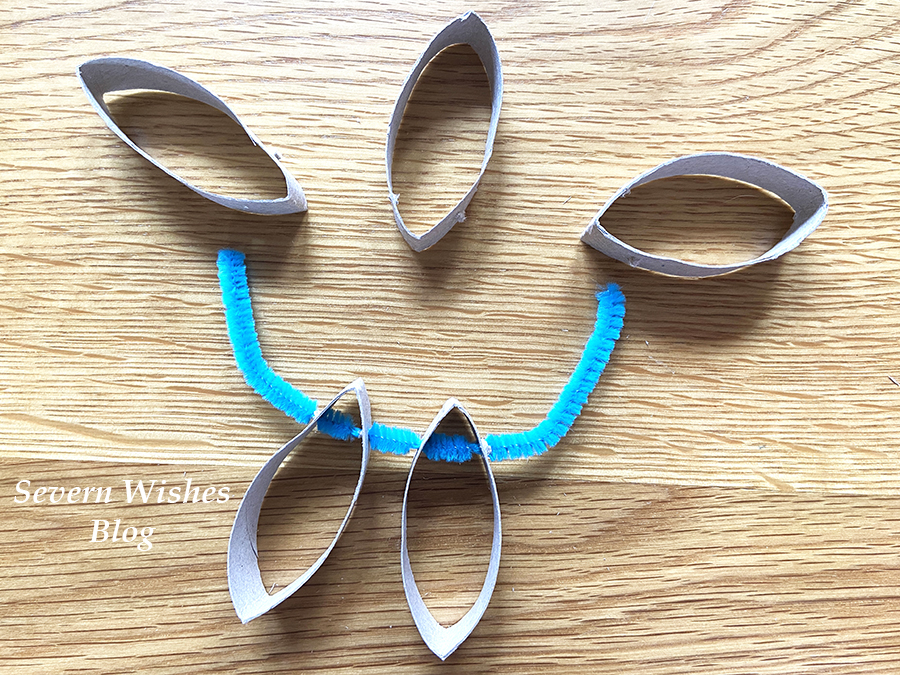
Step 2. An adult cuts the toilet rolls into 5 pieces, a base, two ears, a middle and a head. (See Photo).
Step 3. An adult uses the pointy end of scissors to poke holes in the pieces, each one is specific. So…
Base is one hole, central on one side. Middle piece is two holes, one top one bottom just push the card flat together and the scissor end straight through. The Head piece needs one hole in the base at the centre, and off centre at the top it needs two holes. Each ear needs two holes, both on the same side at either end before the point. (See My Photo).
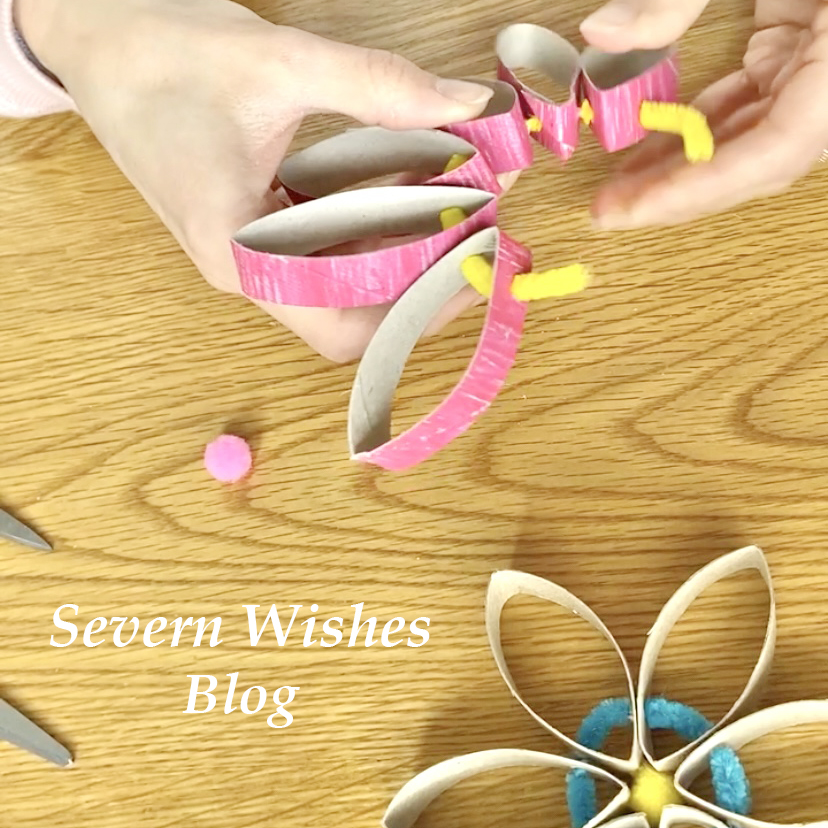
Step 4. Using a Pipe Cleaner push it on to the base and bend the end, attach the fluffy tail.
Step 5. Add the Middle to the pipe cleaner, push it down until it is flush and flat against the base.
Step 6. Take the Head piece, thread it on through the single hole, make it flush on the Middle piece of roll and then push another fluffy ball down the pipe cleaner until it sits in the middle of the roll.
Step 7. Push the pipe cleaner up through one of the holes in the top, and curve the pipe cleaner round, make sure the bunny parts are all flush and together for the body.
Step 8. Add each ear by pushing the pipe cleaner up through one side with the holes on, in through the bottom hole and out of the top hole, bend the pipe cleaner round and then through the top hole of the final ear and down through the bottom hole.
Step 9. The final step is to push the rest of the pipe cleaner down through the second hole on the bunny head, if you have more than 1cm of pipe left cut it off, then push the last 1cm into the fluffy ball within the roll bunny head, this neatens it up and gets the pointy end of the pipe cleaner hidden away.
Step 10. Adjust your bunny feet base and middle parts so that the bunny is aligned and he should stand up all by himself!

My bunny making video tutorial can be found on my Facebook page if you get stuck which is right here

✩✩✩
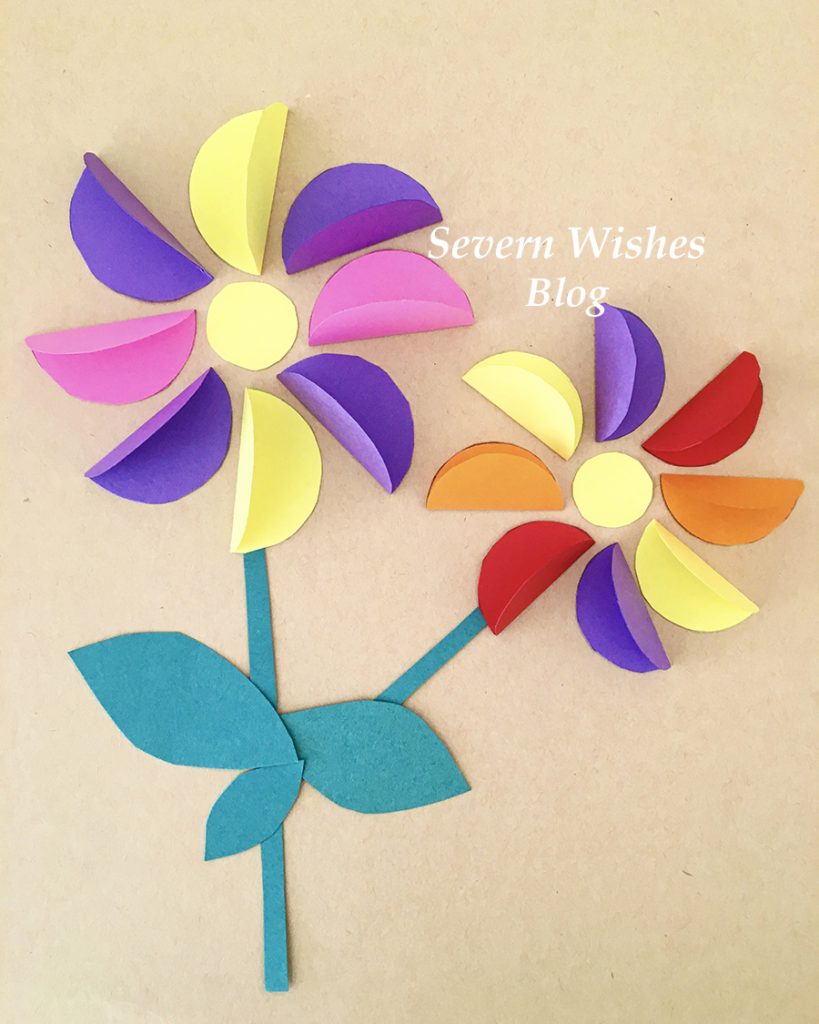
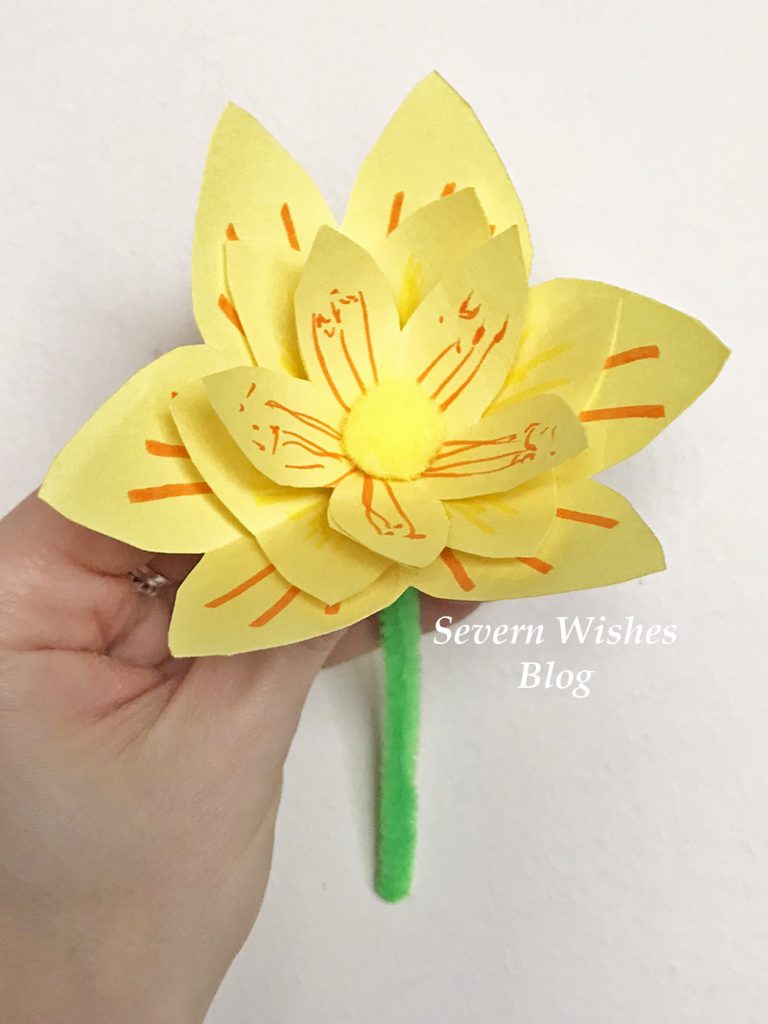
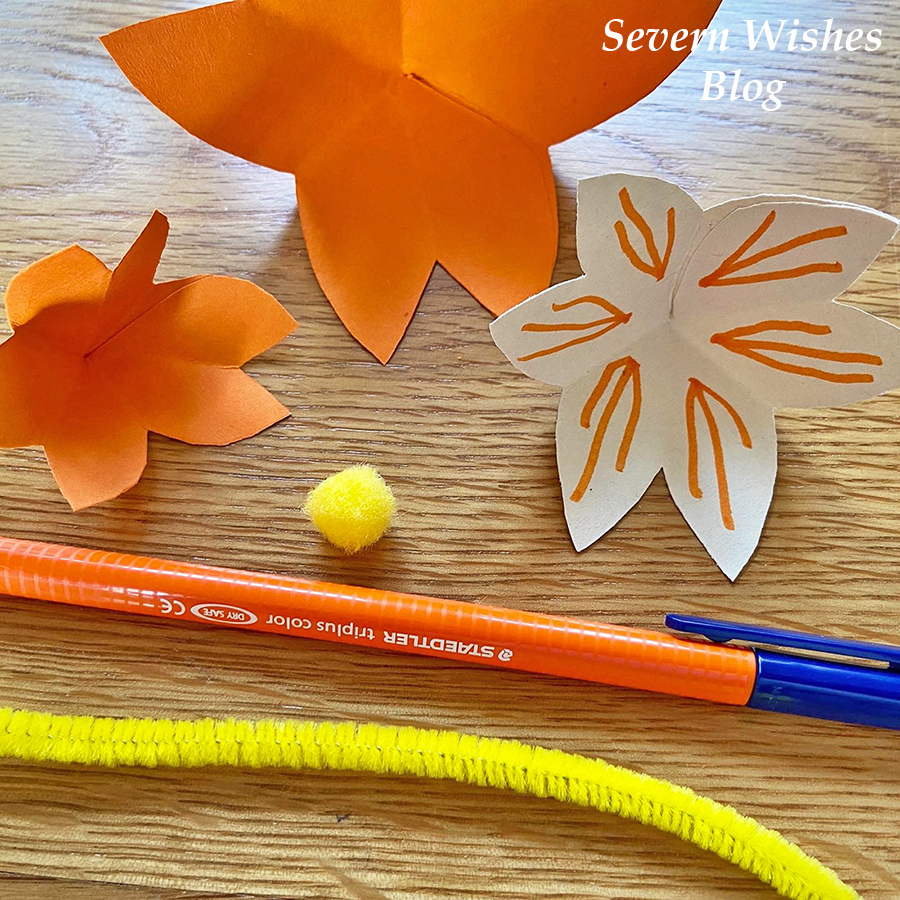
How to Make Sabrina’s Circle Petal Flower Card
This one is nice and easy and once all the cutting out is done, children can stick them down however they like to design their own flowers.
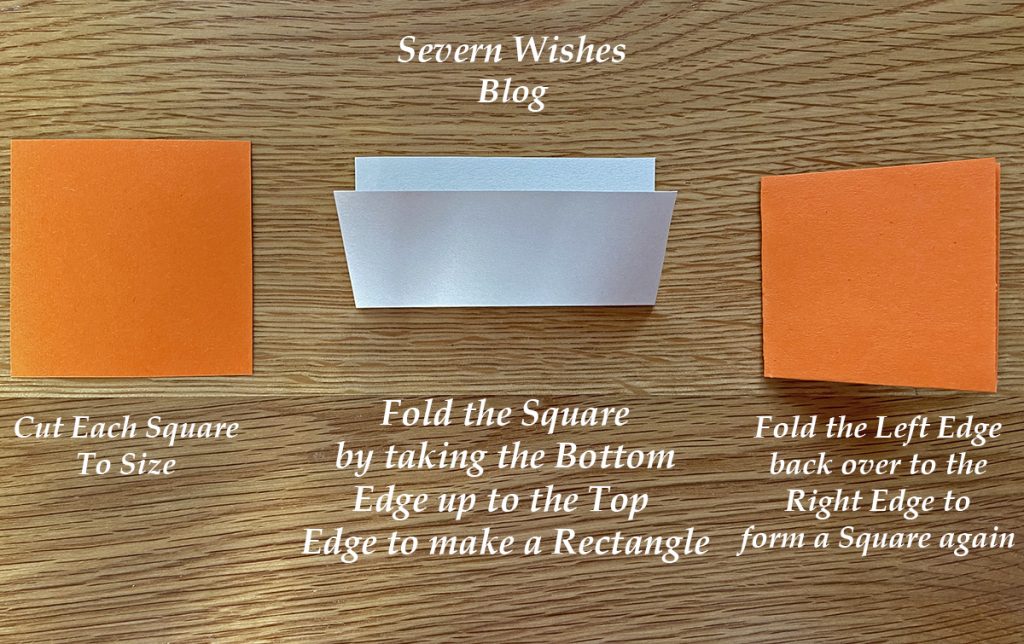
Step 1. Fold a Piece of Card in half for your card base.
Step 2. Draw around a circular object many many times on some different pieces of coloured card.
Step 3. Cut out these circles carefully and assemble flat.
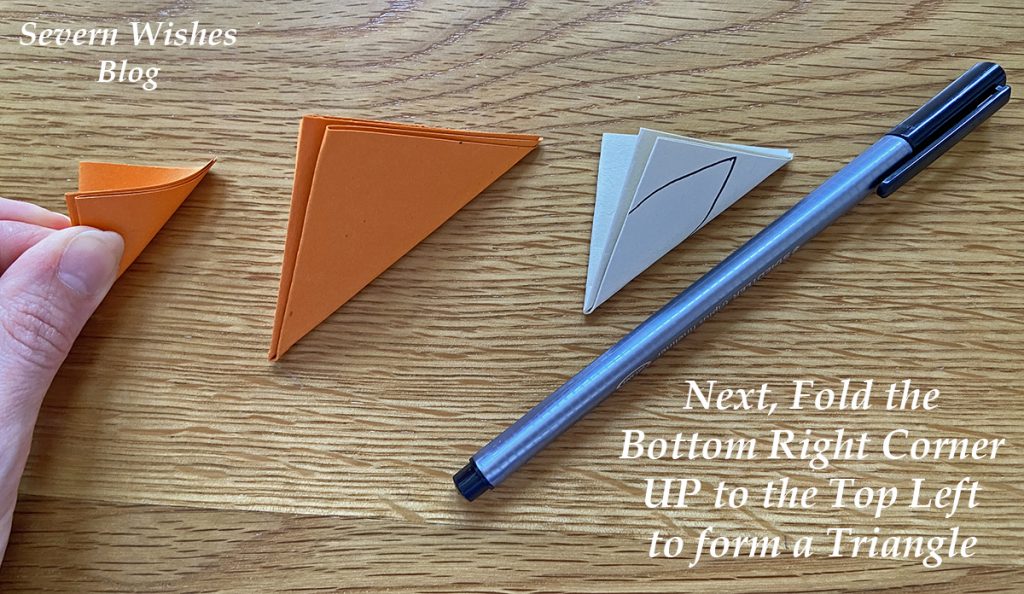
Step 4. Every circle needs to be folded in half.
Step 5. Assemble your Flower by arranging the petals with one side sticking up to make it 3D.
Step 6. Cut out a small circle in a bright colour for the centre of each flower.
Step 7. Once happy with the design either pritt stick or double sided tape each petal down to the card.
Step 8. Make leaves or stems from card, or use pens to decorate your card.
✩✩✩
Thank you for reading this (long) Craft related blog post today, I always showing you my latest “Sabrina’s How To Make’s”! And if you have any questions for me about how to do something you’ve seen on my blog then please comment below on this post and I will happily answer them for you. I hope that you have seen something you would like to try and make yourself!
If you do make any of my craft items please tag me on social media using the hashtag #SabrinasHowToMake I really look forward to seeing them!
✩ Sabrina ✩