Are You Looking for Personalised Stickers? Do you want High Quality and a Unique Style? Then you should consider Sticker Market UK

Sticker Market is an online custom sticker printing provider in the UK. We are a one-stop-shop for stickers, labels, postcards, business cards, magnets, swing tags and many more.”

This month I am collaborating with the UK business Sticker Market UK. I was approached by them due to my honest reviews and already having worked with many UK based businesses. Thank you for choosing and trusting me to give your business the shout out that it so definitely deserves.

I have been really looking forward to bringing you this blog post, I have had lots of fun designing, and then testing and photographing this particular unique product. As someone who likes to stay organised I am always using stickers, be it on my wall planner, journal, calendar, reward chart for my son (the list goes on), but to be able to design and have printed my very own sticker, now that was something I had never done before.

Sticker Market provides printing for your own custom designs and can print a wide range of sizes and shapes to suit your needs. I chose Circle stickers for my set, however Rectangle and Square are available too.

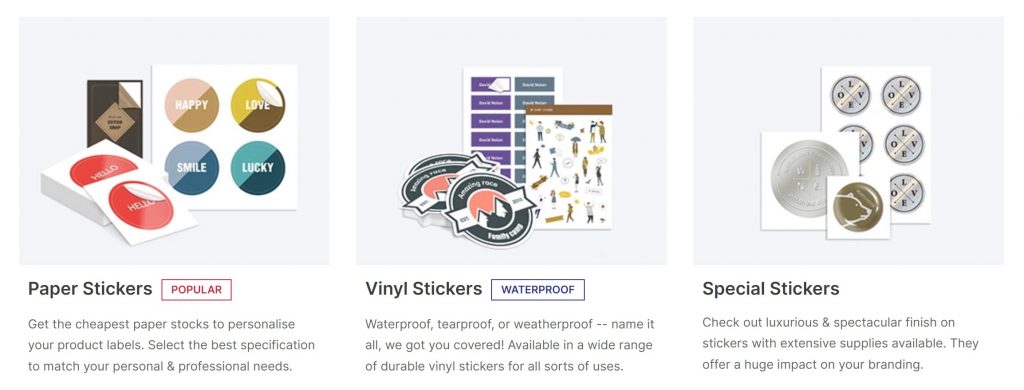
Some of the types of stickers available include Art Paper Stickers (in Gloss/Matte/Uncoated). Kraft Paper Stickers. Standard Vinyl Stickers. Bumper Stickers (available in PVC Gloss/PVC Matte/Transparent Gloss/Hologram).

Sticker Market pride themselves on offering Cheap Personalised Sticker Printing in the UK and offer competitive prices. They also do Business Cards.

What Did I Design and Why?

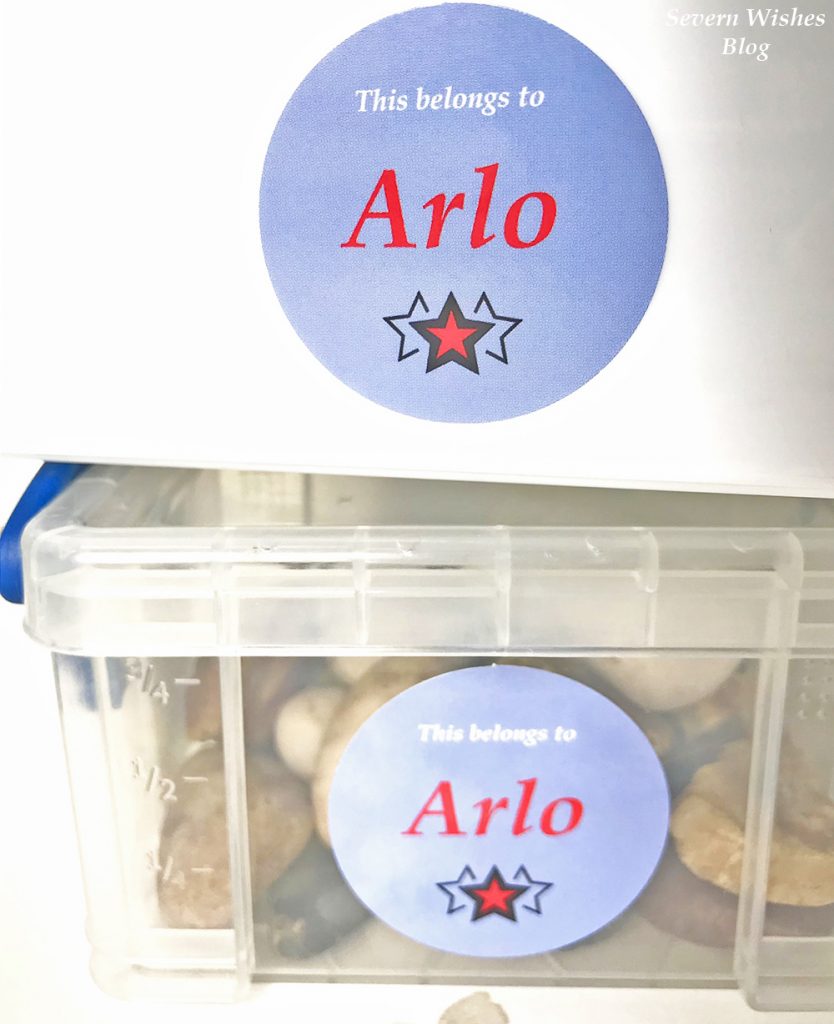
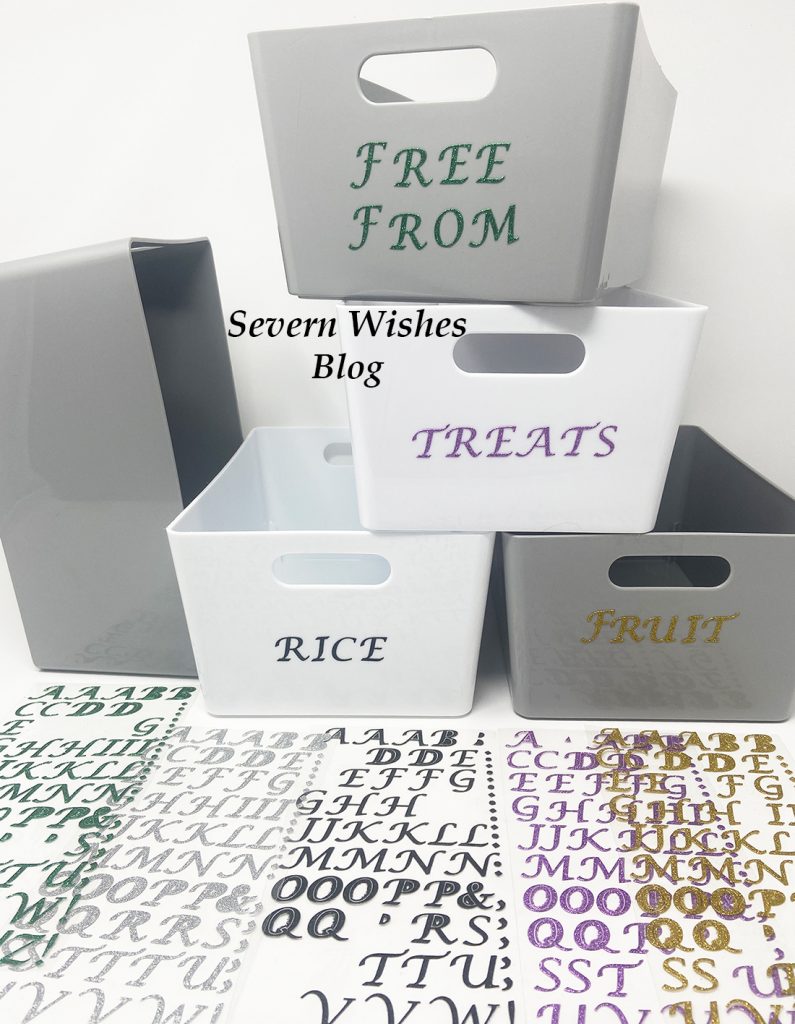
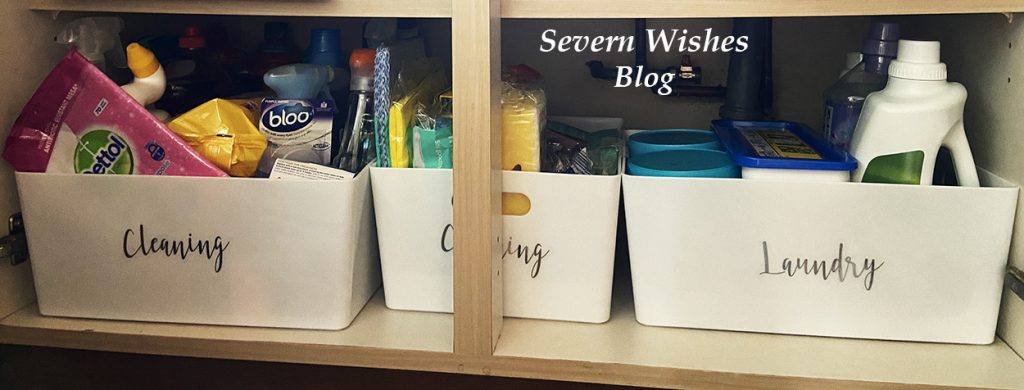
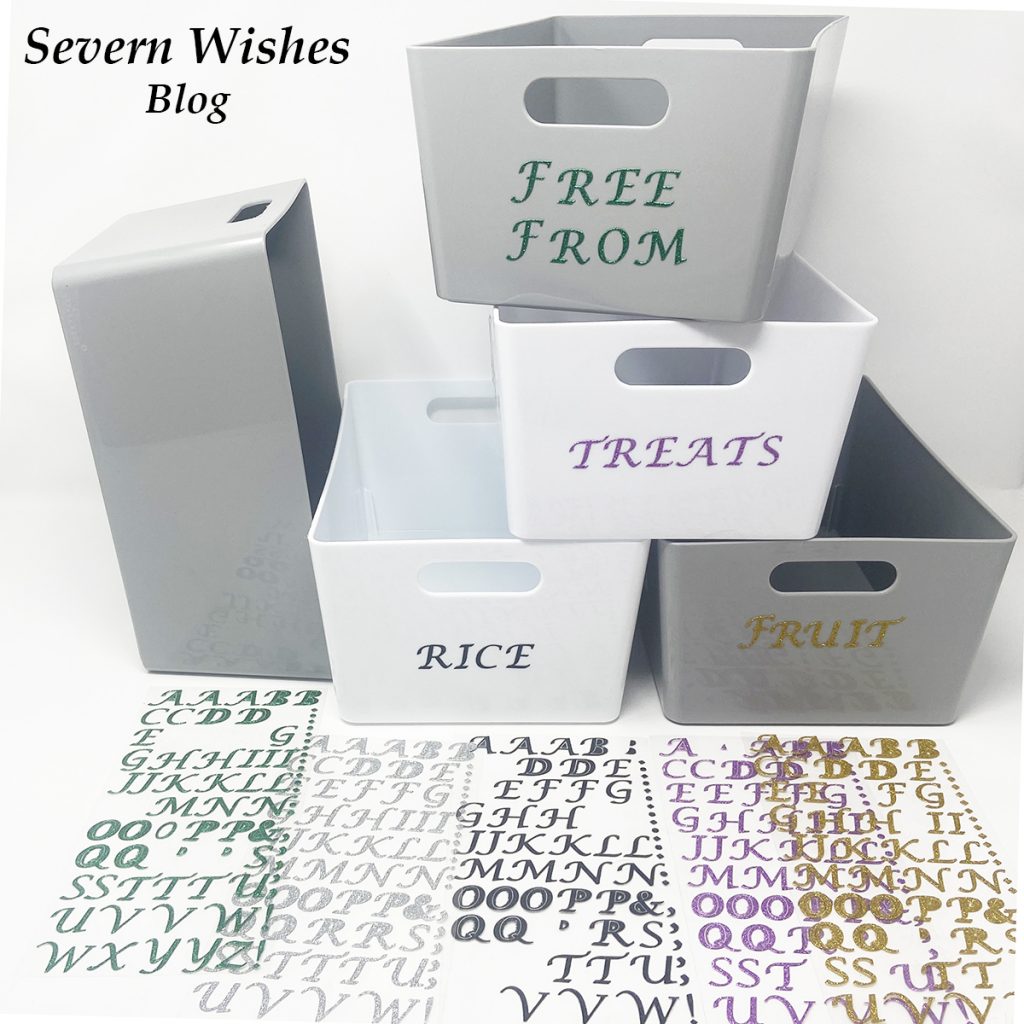
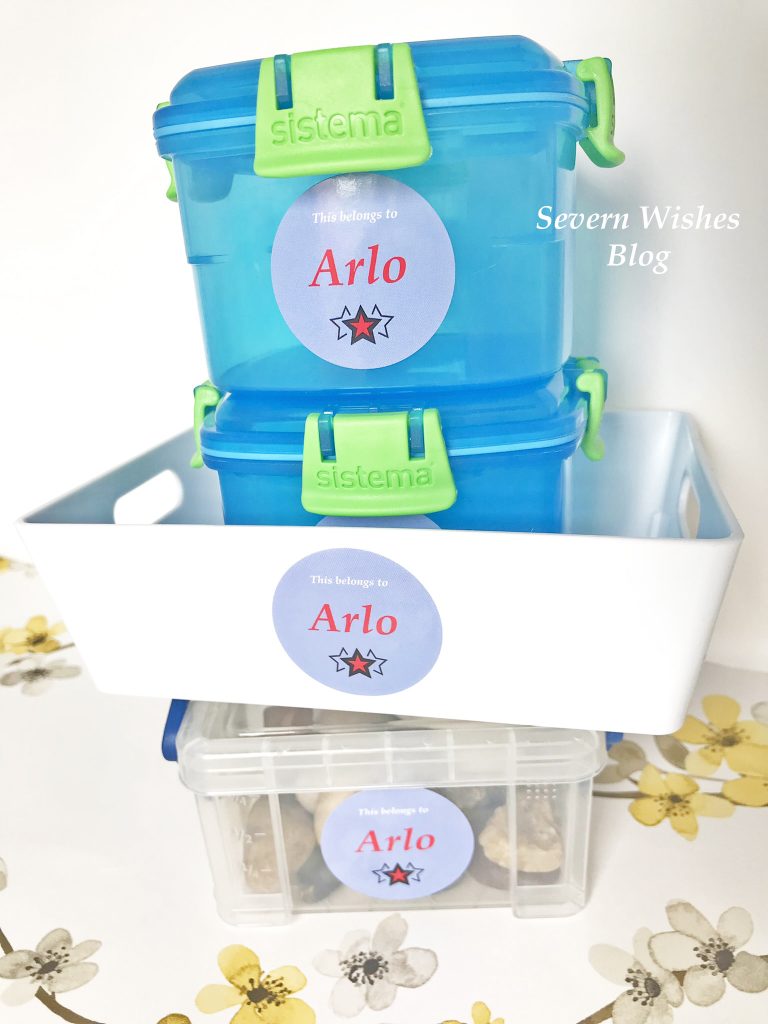
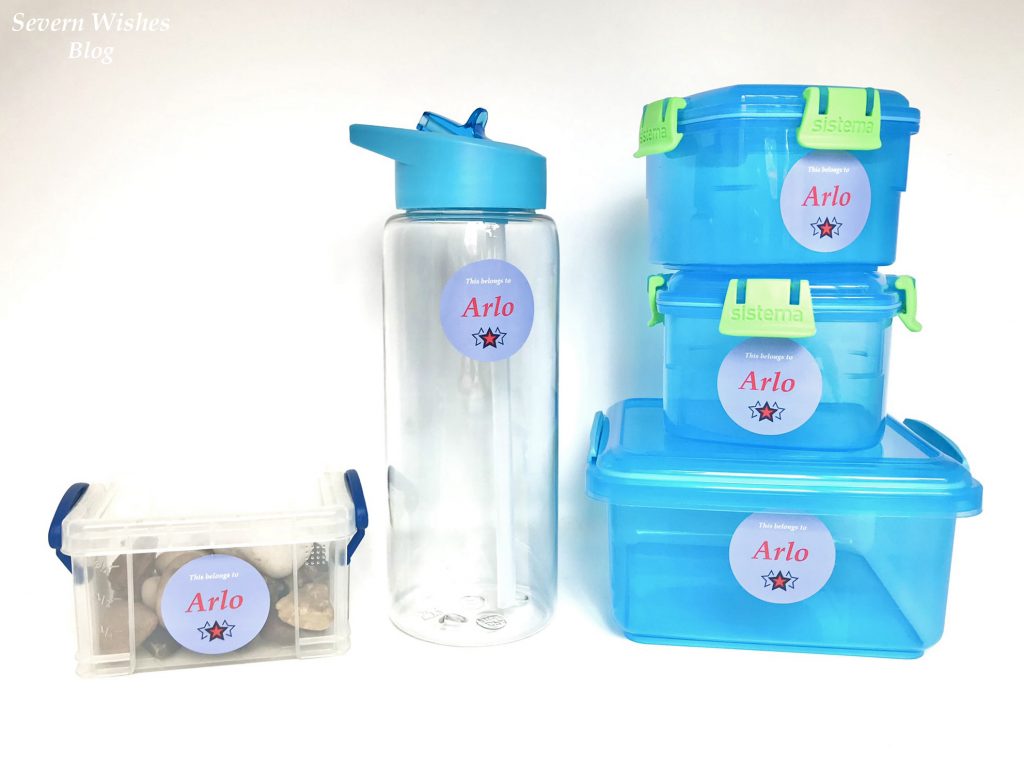
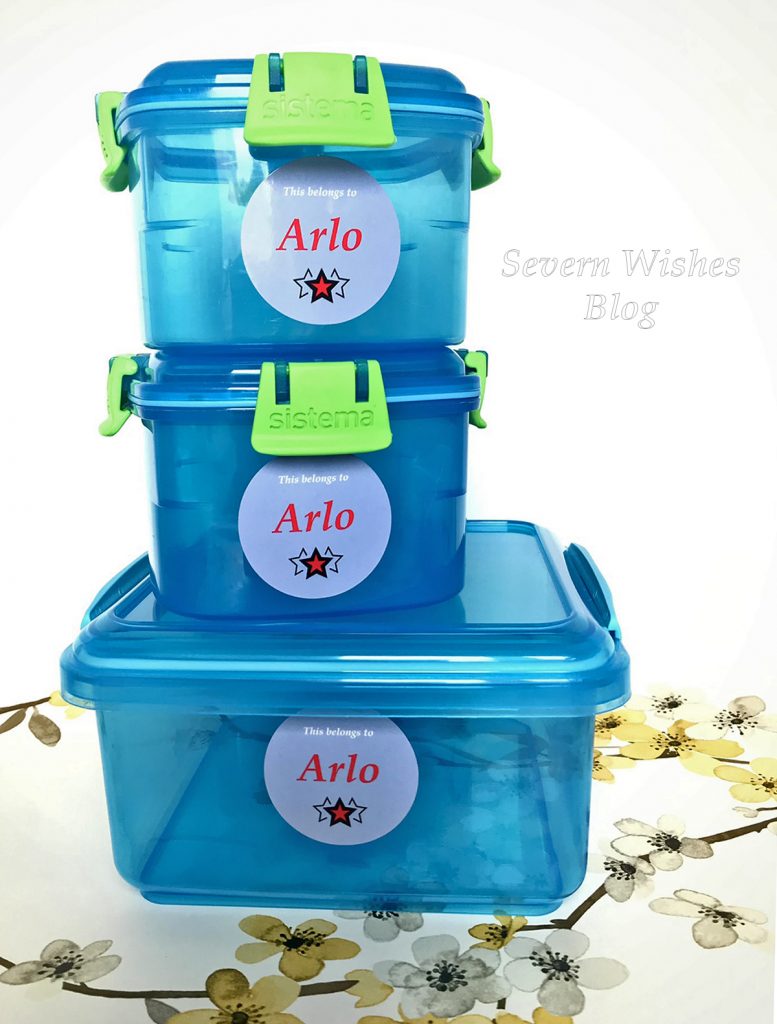
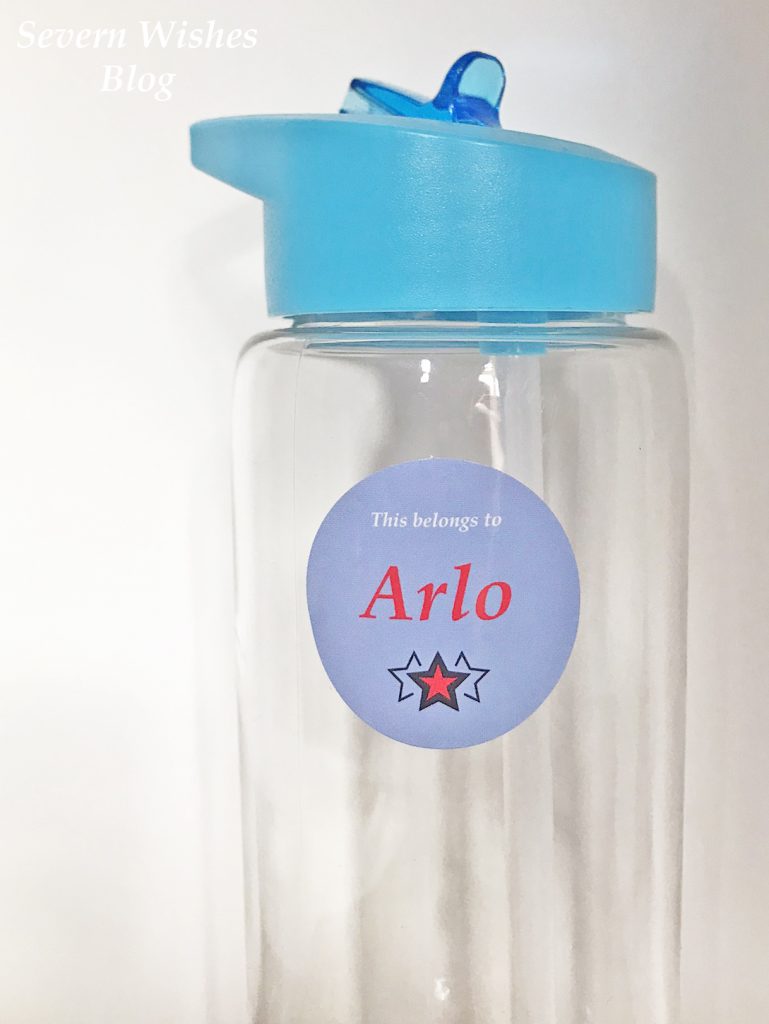
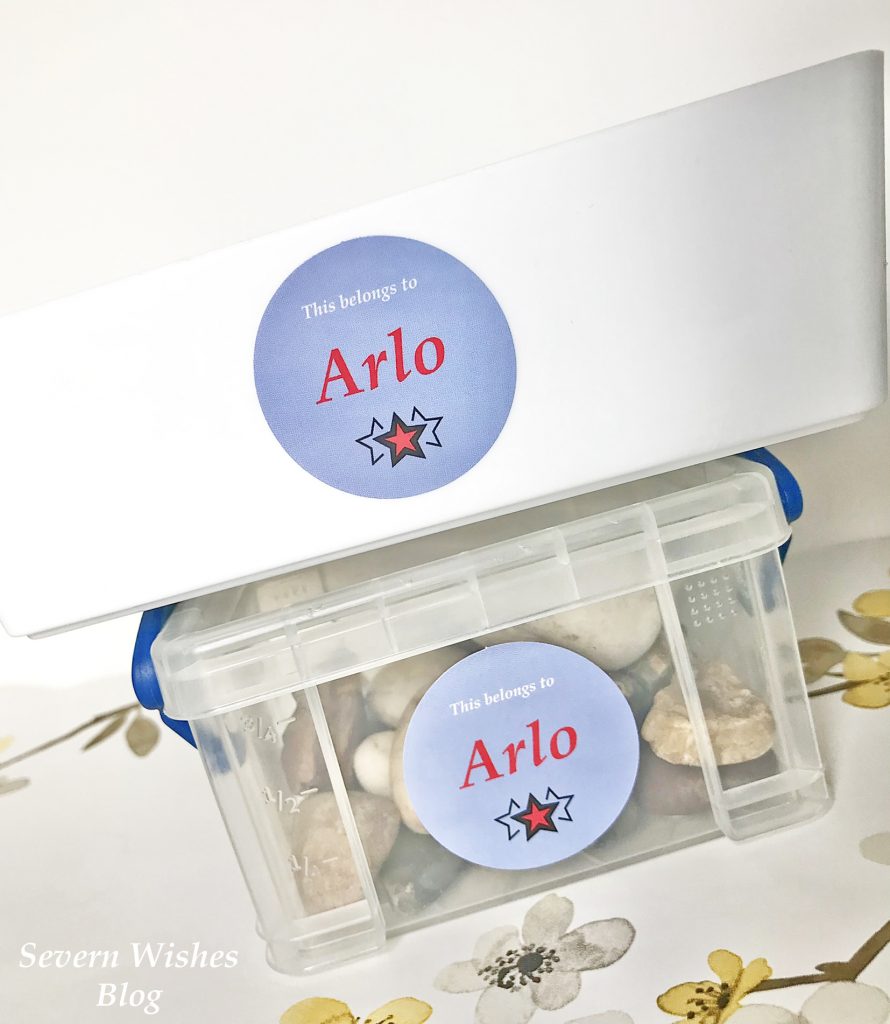
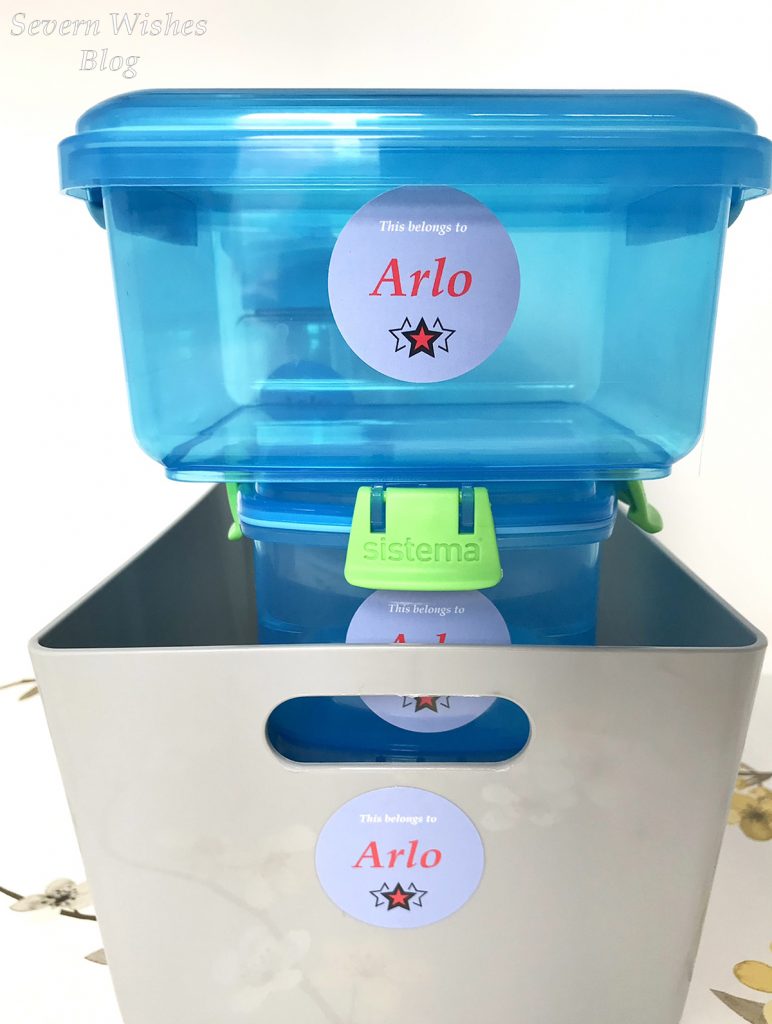
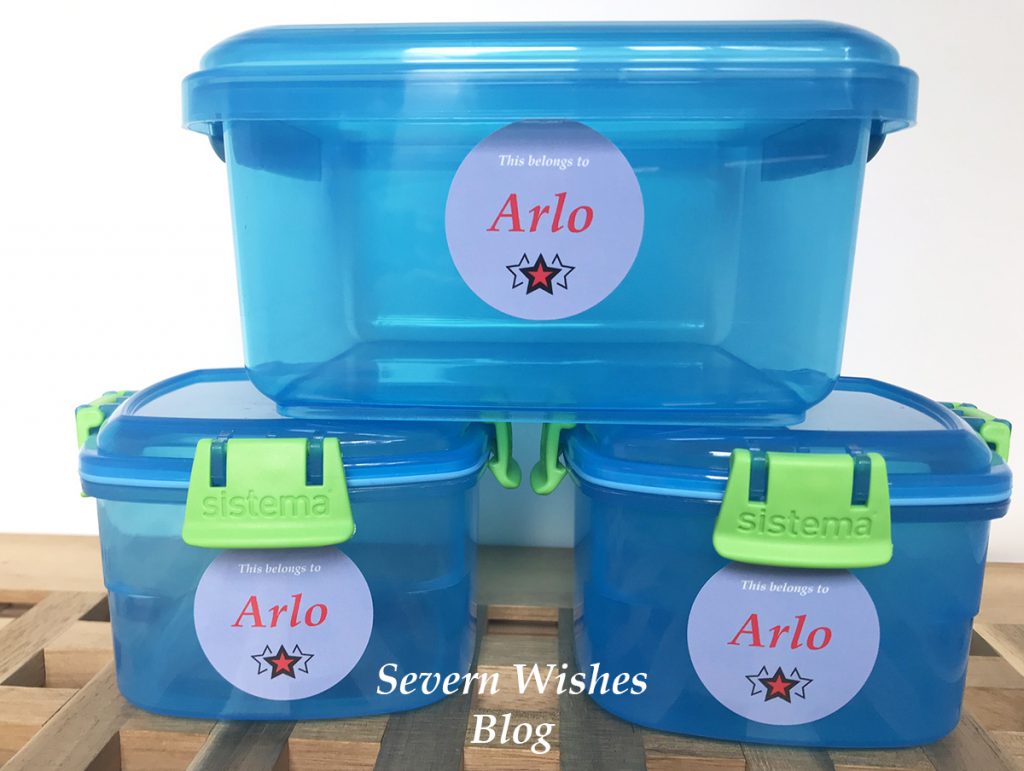
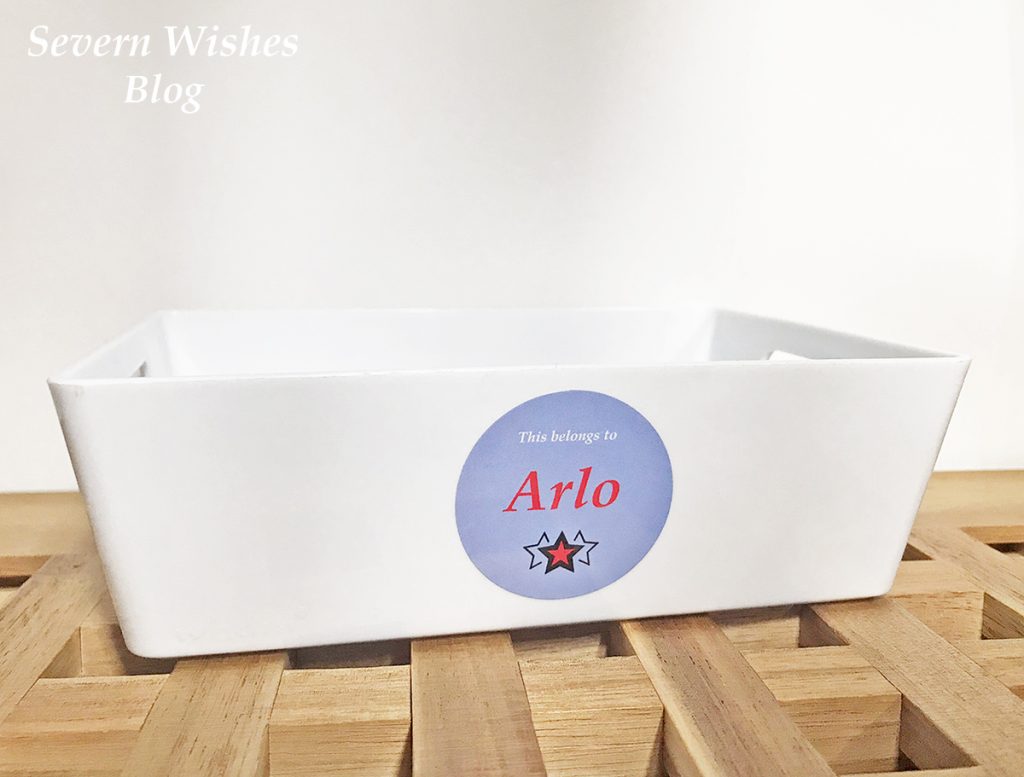
I have designed my own personal Sticker so that I can easily organise my sons school items, water bottle, lunch box, snack box etc. It’s so much faster than writing out a label and sticking it on, it’s neater and far more legible too! Plus my son chose stars on my design so he knows that it is “his” sticker. I have also used them around my home for items that only my son uses such as his nature pot which houses all the rocks we find on walks and days out. As well as his lunch items I labelled his tray that we use for school paperwork every week.


Stickers are a fun and easy way to keep things organised and in this case so that people know what item belongs to whom etc. I chose to use this collaboration for my sons benefit, but during the product photography I found myself dreaming up all sorts of ways you could utilise this type of product.

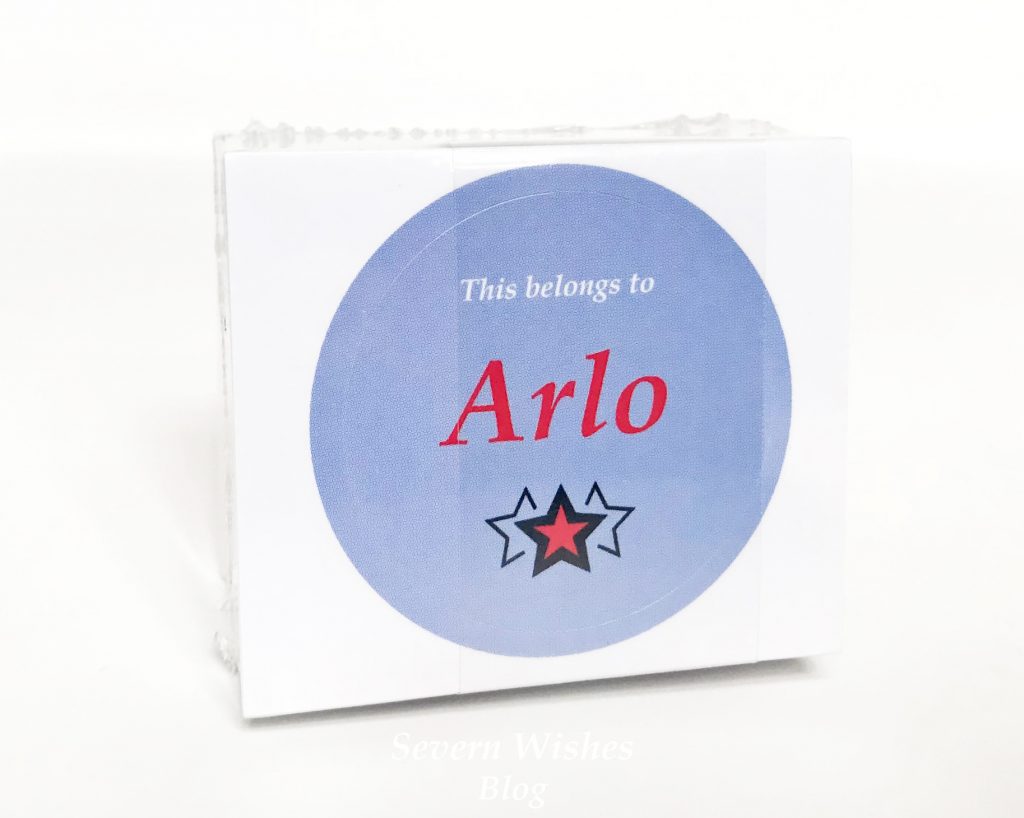
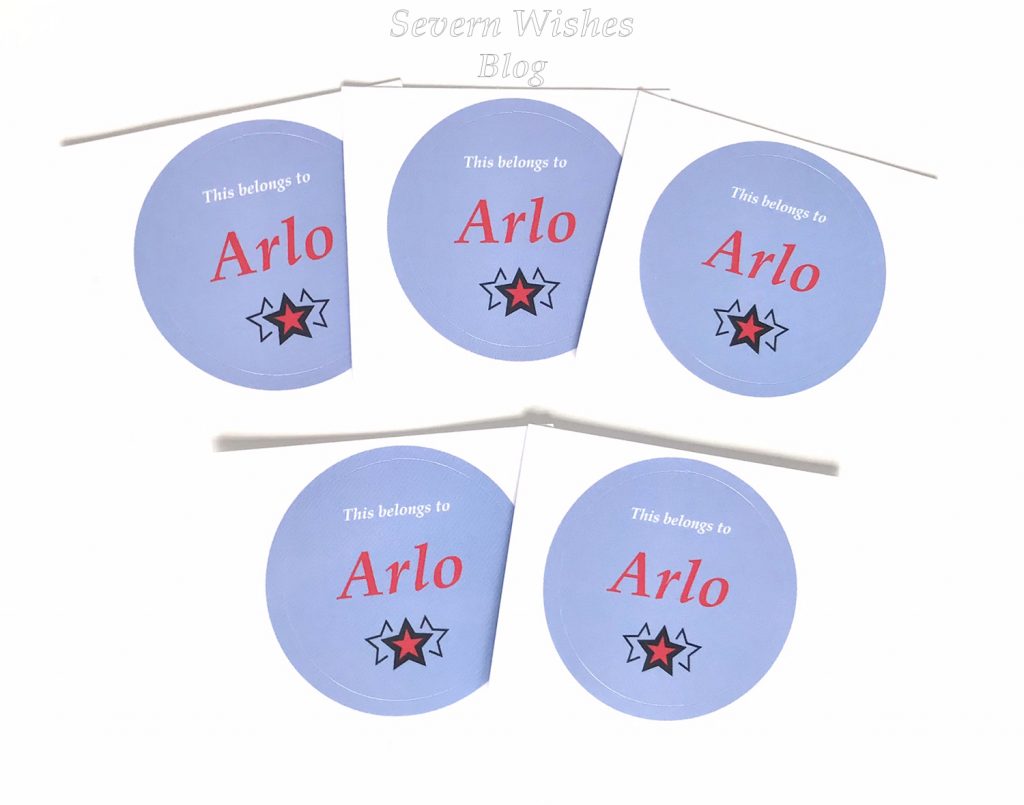
So my final design reads “This belongs to Arlo” and my son chose stars as a symbol to make it his own.

When I realised I was able to design my own sticker it took me a few hours to consider that I was better off designing one to make my life easier. And that’s why I chose to make one to label all of my sons belongings that will be heading to school with him in September!

It took me a couple of hours to nail the design that I wanted, and then another hour to knock it out on my Photoshop software – bearing in mind I had to Google how to do a few things because I only ever use the basic editing tools for my photography like the brightness! – but making my own sticker was lots of fun!

I showed my son the final product and he read his name out loud before giving me the thumbs up. It was a simple yet effective design that I hoped he would soon learn was just for his items. After emailing it in and receiving the final proof from Sticker Market, I was very happy to go ahead and they got to printing. The whole start to finish was slick and I was well informed of the progress right up to when they shipped the box out to me.

Products in Use and Product Testing

Once the stickers were in my possession I found it really useful that they were cut individually, and not in sheets. This saves so much time and also storage space by having them in a neat little stack this way. Sheets take up so much more room I think (and yes I’m a parent with many sticker sheets and reward charts!). The Sticker is printed Bright and Bold and Sharp. My Sticker design looked just like it did on my screen from when I created it, I was very happy.

Now the time had come to get peeling and get sticking!

I gathered all of the items that I wanted to place stickers on to, and began to photograph them as well as test out the stickers durability by handling the items the stickers were attached to. I was impressed with how sticky they were on the variety of surfaces that I chose to use them on.

As you can see in my photography the Stickers I created stand out on a variety of different coloured surfaces and I was happy with their overall look. I chose my background colour so that it would stand out against many things. Knowing the lunch boxes were all blue, I didn’t want anything that would get lost against their vibrant colour. People need to bear these things in mind when designing their own stickers and think, what am I going to use them on. You might also consider whether or not you will need waterproof stickers and other aspects too.

My Overall Opinion

From start to finish this collaboration has been smooth and the customer service has been excellent. During the design process every question that I had was answered and my needs met.
Delivery was fast and I was kept up to date with regards my stickers being printed and posted. I was also sent an email with a proof of what my sticker would be like which was an excellent feature.

The quality of the Art Stickers that I chose are excellent, they are sharp and the colour is bold, the text is easy to read and the sticker itself is printed smoothly, there are no definitive lines from the printing process. I would definitely use Sticker Market UK in the future if I wanted any stickers printing.

As I mentioned earlier I was imagining lots of ways these Stickers could be utilised in daily life, so here are nine ways I have come up with, in which you could use Sticker Market products.

1. Weddings – Personalised Stickers for Wedding Favour Bags or Gifts or even sealing Invitations
2. Birthday Party – Design your own Stickers for a special birthday party or for Party Invitations
3. School – Whether you’re a teacher or a parent you could design a personalised set of stickers for your child/children or for saying “Great Work” to your class.
4. Keeping Belongings in Check – you might have several children with similar items, by designing their own stickers that they can attach to various items, nobody will argue again over what is there’s.
5. Holiday – Going on Holiday? It’s a good idea to mark up personal items and stickers are a fast way to do just that.
6. Small Business – Do you send out products as a small business? You could get business cards or seal packaging with your own unique stickers printed by Sticker Market UK.
7. Journals / Planners – You could design yourself a motivational sticker “You’ve Got This” and stick them where you need extra motivation to achieve, you can design many possible combinations.
8. Calendars – Need Stickers with peoples names on OR activities such as Swimming or Music Lesson, to save time writing it all out you could use stickers to keep track of your busy schedule.
9. Work Space – People in the office always stealing your stapler or holepunch? Not anymore because you can get your name put on some unique stickers and then put them on everything.

My Product Testing Ratings

Overall Appearance When in Use 5✩
Overall Product Quality 5✩
Customer Service 5✩
Delivery 5✩

I have based these ratings over a week worth of product testing including the sticker holding in place while objects are used and handled. I am satisfied with the durability and overall look of the stickers and rate this service as a 5/5.

Where Can You Find Sticker Market UK

If you want to find out more and browse products and current prices for yourself then please visit any of the following links I have supplied below. The website is your first port of call, because you can see exactly what is currently trending and any offers available. You can also contact Sticker Market directly from the website for any queries you might have.

The Sticker Market UK Website is Available HERE
The Sticker Market UK Facebook Page HERE
The Sticker Market UK Twitter Feed HERE
The Sticker Market UK Instagram Reel HERE


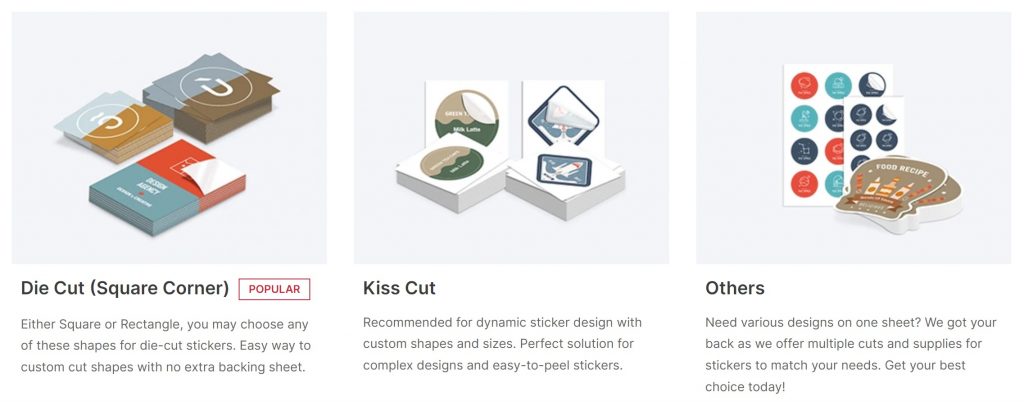
Below are some examples of the types and styles of Stickers available at Sticker Market UK.

Sticker Market Quote “Premium Experts in sticker printing with endless product labelling possibilities. Premium quality custom stickers at the cheapest price.”

How I Created This Review

I have been provided with a sample of Stickers in order to provide this Review. Product Testing and Honest Reviews are what I pride myself in giving my readers. Compared to other collaborations this blog post is slightly different, I was first asked to design the sticker that I wanted. That way it was more personal to me, as if I were an actual customer. So I did this, emailed it over and then this design was printed and sent out to me in order for me to test it. I got to keep the product (stickers) in exchange for this honest blog post and the product photography. The company outlined below contacted me directly for the purpose of this review.

Sticker Market, 8 St James’s Square, London, SW1Y 4JU.

Thank you for choosing to read Severn Wishes Blog today, I hope that you have found this review interesting and insightful. I certainly learned a lot more about the types of stickers that were available nowadays through exploring what Sticker Market UK had to offer.

I hope to see you again soon for my next product review, you never know what I might be asked to test next! How exciting!

Have a wonderful final few days of June 2022!

✩ Sabrina ✩

Sabrina’s Top Twelve Ways to Save Money, Spend Less and Use Less Energy Around the Home

Welcome to todays lifestyle blogging article “Sabrina’s Top Twelve Ways to Save Money, Spend Less on Electric and Use Less Energy Around the Home”. With the rising cost of living and lots of other prices changing, I figured I would share the ways in which I, Sabrina, a single parent, save money on a daily basis. And by drilling some of these into your head and completing them daily, you will soon see how great they are and hopefully I can help save you some money! Lets begin!

✩✩✩

Close Your Curtains – either to keep the heat inside during colder months or to keep the heat out and keep your home cool during hot days. I often see people not closing their curtains in an evening and I wonder if they know how much energy they’re losing. As for the summer it works the same way, don’t open them in a morning to let the heat in, just leave them shut and return to a much cooler room than if you had opened them.

Time your Showers – We can all be guilty of letting the hot water run over us and our minds drift off into a tangent of thoughts and procrastinations. However by either setting alarms or by playing a timed playlist on your phone while you shower, you will be saving yourself water and electricity and even time! I personally have a selection of 30 minute music playlists, and I know that when I reach the final song my half an hour of bathroom ablutions time is up! Give it a go yourself and see how you get on.

Close Your Doors – even by pushing your doors within an inch or twos gap of the frame will prevent lots of heat escaping in the winter. I usually pop a door stopper on the other side of said door once we are in (for example) the lounge with no intention of moving for an hour or two. This stops children or pets pushing the door open too far and letting your heat escape into a hallway for example.

Invest in some USB Chargeable Lights – So I have several of these around my home and various types. I have bars in the hallways so I don’t have to bother turning any lights on, they have sensors so when you walk within range they just pop on. Useful for saving money on electricity! Also great if you forget to turn lights off because these USB ones turn off after 30 seconds to 1 minute (depending on brand). Other chargeable lights include ones that are freestanding and you simply charge them up and then turn them on and let them drain down. One that I have takes about an hour to charge but lasts up to six hours – great in an evening if I don’t need much light.

USB Chargeable Motion Sensor Light Bars

Light Bulbs – one weekend or day off pop around your home with another person. One goes up a ladder and checks bulbs and the other writes down on a piece of paper what types and if they are energy saving and how many watts are the maximum. Then, next time you’re out shopping go and buy the bulbs that are energy saving and cost less to run. These bulbs usually last for ten years or up to 10,000 hours – whichever comes first!

Watering a Garden – if you spend water from inside your home to water your garden it will slowly start to become a lot of expense. Instead buy one or two black dustbin type plastic barrels (roughly £14 each) and they come with a lid too! Use a watering can to dip into them and remove water as and when you need it. Set them up in a part of your garden where rain water can easily fill them up. You’ll be surprised how fast they fill on a rainy day! Use the water from the butts for your garden plants before turning your home taps on! It will save you money on your water bill especially if you’re on a meter.

Buy or Make Draught Excluders – I have one on the inside of each door of my home, they keep draughts out and stop your heat escaping through holes under doors. If you cannot afford one because they often retail at around £15 these days, and you are good at seeing! Then you could always try and make one out of some old clothes and some stuffing. Might be fun to do with your children!

Draught Excluders for Doors

Buy Thicker Curtains or Lined Curtains ready for Winter – I bought lined curtains for £15 in the fabulous Dunelm sale last year. And I also built a pole above my front door and put two curtains up there as well. One reason was to keep the heat inside during the winter because doors easily let your heat escape. Two is also from a security aspect, if you have a window next to your front door then people may be able to look inside easily, a curtain across prevents them from seeing anything.

Invest in Fleece Throws – I love a nice comfortable throw, but by putting a couple where you frequently sit down will also save you money. I have one folded up across the bottom of my bed, I have two on my sofa. If I’m cold in an evening I will put that over me or around me and not touch the thermostat on the heating. Maintaining an optimum temperature for your heating is also a great start, then use other things such as wearing another layer of clothing or by covering yourself up with a throw while sitting down to help save the pennies. Fleece Throws can start from as little as £4 each in places like Tesco and Dunelm, I bought 3 at £6 each last year. They are large ones and one covers both mine and my sons legs when we sit and watch television in an evening. Fleece throws are also easy to wash and fast to dry due to the material.

Clothes Airers and Camping Pegs – no I’m not mad! I’m letting you in on my clothes drying secrets! So for £20 or less you can buy a large freestanding clothing airer at a supermarket and a packet of camping peg hooks from a local do it all shop. You’ll be able to dry more clothes outside this way and in more weather types simply by pinning the airer down to your lawn with the pegs. This way it doesn’t blow over, but you can easily pull up the pegs and pick up the whole thing to move it indoors if the weather takes a turn. I regularly do this with small thinner items all year round if it’s windy and the sunshine is out. Any reason to not use the tumble drier I will surely take it! You can save lots of money by drying even half a load of washing outdoors.

Turning it OFF! – I’m a big believer in “if you aren’t using it then turn it off” and this goes for lights, appliances and electronics. There are only 6 things that are always on, either because they are constantly running or on standby in my home, they are the Broadband Box, the Sky TV Box, the Boiler, the Washing Machine, my electronic Doorbell and the Fridge/Freezer. Everything else is off, I only put the oven or microwave or drier on when they are actually going to be used. It saves me a ton of electricity by turning things off at the socket and not leaving them standing idle – plus with a small child you don’t want them turning on appliances that might get hot! So there are double reasons for clicking that off switch on the wall. It’s the same with main lights, if you leave a room just turn it off. Finished cooking dinner and done with that Oven? Just turn it off.

Grow Your Own – Every year I try and grow things but this year I am pulling out all the stops to try and grow more fruit and vegetables. Combining my rain catching water tubs with a watering can, I can easily water the tubs I have created. Follow me on my social media for updates on this because I will be documenting photographically just how well we do through the Summer and into the Autumn. Even if you have a balcony not a garden, you can get vertical planters nowadays where you can grow things such as herbs, raspberries or strawberries, tomatoes and chill peppers. I don’t have a patch that I am able to dig up, so I am simply using pots to grow everything. Check out my Instagram for more photographs on how I am managing to do this. Also, teaching your children (if you have any) about the importance of nurturing something while it grows is an excellent life lesson.

✩✩✩

Thanks for reading this blog post today. I would love it if you would get in touch, write a comment below if you found any of this useful or you liked some of my ideas. Do you have any awesome ideas yourself for saving money?

If you implement any of my hacks yourself I would love to hear from you on here or on social media. You can tag me #SevernSabrina if you want me to see it too.

Have a great remainder of June!

✩ Sabrina ✩

Sabrina’s Kitchen Storage and Tidying Hacks and How to Make your own Labelled Storage Boxes

✩ Sabrina’s Kitchen Storage and Tidying Hacks ✩

My blog post today is all about Kitchen Hacks for Tidying and Storage! I hope you are excited! I love helping people to get the most out of their homes!

Have you ever seen those awesome flat pack storage ideas? IKEA sell a load of them, but you can also get them from good homeware stores too. Well I have a few awesome life hacks for you for the kitchen, using this type of storage essential! They are normally designed for clothing but that doesn’t mean you can’t use them in other rooms.

For Example. I use a Sock Storage for the kitchen drawer! I use mine for my Tea Towels and cloths! You can also use this style of storage for your bedroom drawers for a variety of items, not just socks, but anything that is around that size.

I use a large coffee jar as a vase, and I also use a large coffee jar and its lid for cosmetic pad storage.

Just because an item used to have one purpose, does not mean you can’t then use it for something entirely different. I am always reusing items around my home to suit my needs at that moment in time. Let us take a look at some of my hacks now.

I use a sock organiser for tea towels in the kitchen drawer.

✩ Other Kitchen Hacks ✩

Reusing and Repurposing Glass Jars

An empty Herb Jar makes a great kitchen pen pot, stick 2 magnets on the back and it will be attachable to your fridge! I use mine for pens and fridge magnets!

Do you drink Coffee? Some large coffee jars are made of very sturdy and strong glass, not only that but they are often nice shapes too. You can reuse these as Pasta Jars, Vases for Flowers, Cosmetics Storage and so much more. Do you have a use I’ve not thought of that you love or already do at home? Please leave me a comment I would love to hear your ideas too.

Small Fat Jars from such things as Salsa, Jam, Apple Sauce and Chutney etc are a great size for when you make your own Chutney or Jam at home. If you don’t do a lot of cooking you could repurpose these jars as kitchen storage, one for loose buttons, elastic bands and the like. One could be for chewing gum and mints, or even sauce sachets and seasonings when you get spare from a takeaway say. Reusing glass is very economical, especially now that places have started to do “fill your own” with refillable food items.

Kitchen Storage Hacks – Labelled Boxes

So since I moved house I wanted to create some labelled storage boxes for my kitchen cupboards, but I was shocked to see online retailers offering just the labels at £2 plus each! Boxes that had names printed on for you started at around £15 a single box! Then you had to pay postage! Queue me putting my face in my hands… On a visit to B&M in my nearby town I saw a sheet with some lovely swirled writing silver stickers on which said Laundry, Cleaning, Cloths etc. I bought one for £2 and got inspired to make tidying up boxes to go under my sink. But I wanted to do the whole kitchen at this point too!


I looked at my budget which was £20 and I figured out that I needed at least 8 boxes for my cupboard, if not more. I shopped around and found some fantastic letters on Amazon, a pack of 8 alphabet stick on glittery letters that would only cost me £4 with free Prime delivery. Get in! Yes! I ordered them and then went on the hunt for boxes. Having purchased Curver and Wham boxes in the past and being happy with their quality, I thought I wanted something similar. I used google to find that Wham were the only ones who did solid sided boxes that came in a range of sizes.

Once I knew what I wanted I matched their size to the width of my cupboards and searched for who was doing them on any deals. I managed to get them for just £1 a box while they were on offer online, and although I ended up having to pay for delivery it arrived in two days and I had just what I needed. I ordered 8 boxes of one size, 4 White and 4 Grey. Then I ordered 3 larger White boxes for my “Laundry / Cleaning” cupboard. I only have my kitchen and no utility or storage area, so every inch of space matters a great deal to me.

It took me 3 hours to stick down all of the lettering on to my boxes, working out which colour went well on each box so it stood out, and carefully making sure they were also in a straight line across the boxes. Then it took another hour sorting my cupboard out and placing the corresponding products into their labelled boxes. Overall I am really happy with how it has turned out, and I saved myself a ton of money in the process!

BEFORE
AFTER

Here are my before and after pictures for my kitchen cupboard, I can now see exactly what I have got and also when I am running low on something. As a single mother on a strict budget each month I find it very important to be able to do this effectively, meaning I don’t waste time looking through things every week. By having these organised boxes I can simply look at what remains in each one when writing out my shopping list.

When I finally got all the boxes into place I had wished I had found the time to do this sooner. It has made my cleaning and shopping life ten times easier.

Wow! Don’t they look great! I’m really happy with how they turned out!

I purchased the Wham Boxes online and the Letter Stickers I found came from Amazon UK.

I give the Quality of the Wham Boxes 5 and would buy them again.

Thank you for reading this blog post today and I hope I have inspired you to make some changes for the better, in your own home. It’s easy when you know how! Any questions just pop me a comment and I will happily get back to you.

✩ Sabrina ✩

July 2021 Treatbox Reveal and Review

Oh isn’t this July Treatbox just Peachy!


Hey Everyone! I am hoping this blog Reveal and Review finds you all keeping well! I’m back on my blog after a short blogging break where I was spending time with family, just in time to bring you this unboxing! It was my son’s third birthday last week! I know, right? Three! Time is flying! It doesn’t feel like more than a week since I did the last Review! So here we go! Thanks for joining me today it means a lot!

So what was inside the July box? Well…

Peaches Fridge Magnet
Just Peachy Notes
“You’re Braver than you Think!” Keyring
Peach Hand Cream from BubbleT
TreatboxUK Original Meal Planner Pad

The Juicy Peach – Tasty Mates – Peaches and Cream Gummy Sweets
Treatbox Original Poster (to Colour in at Home) “Do NOT Forget to be Kind to Yourself”

What My Opinion Is Overall…

I loved the theme this month! Peaches was a very cool theme! With some Treatbox Original items amongst the fun vegan sweets and the useful hand cream, July was a fun box overall! A lovely little Keyring with its positive quote, a colouring page with an important reminder to all, and cute little notes with “just peachy” on them. I loved that we received a magnet tis month because it’s been quite a while since we had one. I am forever using my Treatbox pads as meal planners so to have one this month is really useful in my eyes! I love staying organised! I’m generally very happy with the July box and I’m looking forward to using the items and trying those delicious sweets!

Thank you for reading this unboxing post today, I hope you enjoyed it. Hopefully I will see you pop by Severn Wishes Blog again soon. Enjoy the summer sunshine safely!

✩ Sabrina ✩

June 2021 Treatbox Reveal and Review

That time has come around again for me to Reveal the contents of the Treatbox for the month. And I will then Review the products I have found inside. Welcome to the June 2021 Treatbox Reveal and Review.

Inside the June 2021 Box there was…

Treatbox Print “Note to Self”
A Bag of Popcorn Shed Cherry Bakewell Flavour
A Willow & Rose Compact Mirror
Grey Socks with Hearts
Vitamasques Vitamin C Cherry Brighten Mask
Treatbox Original Pin “You Got This”
Treatbox Notebook “You’re So Cool & I’m Not Even Mad About It”


My Honest Opinion


June 2021 was a box that I was feeling So So about to be honest with you, I opened it and got excited by only half of the box. As someone who is not a fan of cherry smell or taste I will be passing on some of these gifts to family members. I did however LOVE the Socks! Right up my alley! I didn’t think I needed yet another compact mirror, until I broke one of mine *face palm* so that ended up being a very appropriate item for me this month! The other products include the Treatbox original pin which is very cool! A little reminder of “You Got This” is always useful when I have moments when I am doubting myself! I was thinking of putting this one somewhere in my car! (Because my hallway and bedroom already have some pins on show!) The print is also pretty cool as is the little notebook. I would have just loved some stationery for a change instead of yet another notepad! I make lots of lists and notes and I have still not finished all the notepads I have received from my Treatbox subscriptions. That is food for thought perhaps! I would also love to see a month with no mask too, and replaced by something we could get stuck in to instead, like adult colouring, craft or something useful…

Thank you for reading this blog post review today, I hope you have enjoyed it, and that you pop by Severn Wishes Blog again sometime soon.

✩ Sabrina ✩

May 2021 Treatbox Reveal and Review

It’s time to Reveal the May 2021 TreatboxUK box!

I saw the sticker said “Bee Happy” and wondered if that was a clue!

Inside the May box was… “Bee Kind to Yourself” Themed Products ✩

The May 2021 Calendar Print / What’s Inside May Treatbox Information

Treatbox Original Print “Sunshine and Happy Days”

Treatbox Original Bag “You’re So Golden”

Treatbox Packet of Sunflower Seeds “no rain, no flowers”

Yummy Comb – Honeycomb Bar Smothered in Sea Salted Caramel Belgian Milk Chocolate

our tiny bees – Mini Floral Hand Balm 21ml Ylang Ylang and Lemon

by Jessica Alice – English Pear & Freesia – Wax Melt – Hand Poured & Vegan

Treatbox Original Positivity / Self Care/ Wellness Cards – 10 Designs

It’s World Bee Day on the 20th of May!!!

✩ My Opinion of the May Box Contents 

What I really liked this time around were the themed products and how most of them were handbag size. Most were Vegan and Cruelty Free as well. I am looking forward to enjoying the honeycomb chocolate on a day that my son is away (as it contains dairy and he has allergies). And the Wax Melts smell lovely! They are currently making my lounge smell beautiful without even the need to melt them, it smells so strong through the packaging and such a Spring like scent!

The bag is so cool! Cannot believe you’re now doing things like this in house at Treatbox HQ! They look amazing! The hand cream is lovely and smells nice.

Love the Bee theme! The Print and the Cards are all lovely and very well appreciated during this difficult time. It’s nice to get little reminders to look after yourself. As a single mum some days I might not get another adult conversation and I am often busy and tired. Treatbox is a little pick me up which contains even more little bits and bobs to remind me that “I’m Amazing” – so thanks Treatbox!

Did you know that you can view all of my previous Treatbox unboxing posts in this unique category of mine called ‘Treatbox’ it is specifically for these box reviews and reveals – Severn Wishes Treatbox.

Thank you for joining me while I Review and Reveal this May Treatbox! If you liked it why not check out my other reviews too! Have a great remainder of May!

✩ Sabrina ✩

How to Make Pretty Mother’s Day Cards For Your Loved Ones and How to Create Beautiful Paper Flowers

With much of the United Kingdom still in lockdown and people unable to purchase their usual items for loved ones, I have decided to write this blog post to help people out. Mother’s Day is a special day for everyone who is classed as a Mummy, whether that is to furry children, human children, step children or children who may still reside inside us. It’s for Grandmothers, Nan’s and Great Grandparents too don’t forget, so why not make a loved one a card and let them know you’re thinking of them.

I have several ideas that should suit most people, because Mother’s Day Cards are usually floral or feminine, but you can personalise your design to fit the people in your life. If you can draw then even better! I’m not very good at drawing so I prefer to use paper and card to create pretty cards instead. This blog post is all about how I make cards using coloured card and paper.

WHAT YOU WILL NEED

Coloured Paper and Coloured Card
A Pencil
Items to Draw Around – to make the Circles for the Flowers
Scissors
Coloured Pencils or Crayons if you are Drawing
Pens – Mixed Colours and Thickness
Glue or Sticky Tape
Ruler
Coloured Tissue Paper
Pipe Cleaners

HOW TO MAKE YOUR CARD – 3D FLOWERS

Step 1. Take a piece of pale coloured card and fold it in half to get your card shape. Decide if your design is going to be a landscape or portrait style.


TOP TIP 1. When you come to make your shapes maximise the paper by doing them close to one another and along one edge. It makes it easier to cut them out but also and more importantly you’re not wasting any of the paper, and the leftovers can be used on your next awesome project!

Step 2. Draw around circular items in order to make your petals. Carefully cut them out and then fold them in half to create your three dimensional petals.


TOP TIP 2. The ideal size for the petals for an A4 Card design (an A5 when it is folded) are the size of a Nail Varnish bottle. Draw around the base of the bottle when it is stood up on the card. Another tip is to cut out one shape and use that as a guide to cut out the other petals so you get them the same size.

Step 3. Arrange your design on the Card first before gluing anything down, so as to make sure it all fits nicely.


Step 4. Glue or Stick the Card pieces down and finish decorating with any details or wording that you choose.

HOW TO MAKE A TISSUE PAPER FLOWER

You Will Need;
A Coloured Pipe Cleaner
Sheets of Coloured Tissue Paper

Step 1.
Lay out your tissue paper flat, you want to cut it into equal rectangles. Once cut you stack them one on top of the other.

Step 2. Fold the tissue paper stack into a concertina, like a fan, until it is all folded and flatten it down. Stick the pipe cleaner in the middle, folding it over and under the stack, then wrap the remainder of it around.

Step 3. Next you need to trim the edges of the tissue paper, you can round them off or make them pointed, it depends on how you would like your flower to look like at the end. This determines the shape of the petals of your flower.

Step 4. Once the ends are trimmed lay the flower concertina across your hand with the pipe cleaner part pointing down. You want to gently and carefully tease the layers of the flower up and out. Once they are all up spread them out and make it look like the petal layers of a real flower.

(There is a video tutorial on this on my Facebook page as well).

Check out my images below!

My Tips for Opening your Flower: Open the tissue paper out gently and carefully, you should start to see a fan shape at first, and then you can raise the inner layers of the flower, just start by pulling upwards towards the middle part where the pipe cleaner is so as to make the flower look three dimensional.

Step 5. When you are finished it should look like my images below. Bend the pipe cleaner a little to make it look like a flower. Fan the petals out gently to make it three dimensional.

Paper Flower Dimensions

It depends upon how much you trim on the ends to create the petal shapes of your flower, but here are some rough dimensions of the size that your flowers will be. The larger the flower the easier it is to fluff up. Why don’t you experiment like I have below with different shaped petals and layering different colours of tissue paper too!

Rectangle Size 20cm equals a 17cm flower
Rectangle Size 15cm equals a 12cm flower
Rectangle Size 7.5cm equals at 7cm flower

HOW TO MAKE YOUR CARD – Happy Mother’s Day – Their Favourite Flower or Favourite Item

Step 1.
Work out what your loved ones favourite thing is, then you want to write the words Happy Mother’s Day either vertical or horizontal on the folded A5 card. You incorporate those words into the item, such as the stem of the flower, or the base of an item like a slice of cake. (See my photo below for inspiration).

Step 2. To make a flower you need to cut twelve identical coloured card petals. Layer them up on the card to make the flower, don’t forget the middle bit either.

TOP TIP 3. If you want the petals to all be the same cut one and then use that one to draw around to make the additional ones.

Step 3. Other things you could do include a slice of cake with a triangle piece of card decorated with smaller shaped pieces. Or draw an outline and let smaller children colour them in.

Another easy thing to do is a card of family hand prints.

Other Card Designs that are Easy to Achieve are…

Flat Flowers
Three Dimensional Flowers
Drawing Bouquet of Flowers
Family Hand Prints
Cake Slice Drawing
Favourite Animal

Use a Ruler and Pen to make the stem lines and the bow, colour them in with pens and draw little flowers on the end of the stems. I did daisy like shapes, but if you can draw better then me be creative with it! Do any colour combination that you like. Add some wording around your design like “Happy Mother’s Day”.

I really hope that you have enjoyed this blog post and find it beneficial. If you do make some cards I would love to see them! Please tag me on any of my social media using the hashtag #SabrinasArtandCrafts

Thank you and I wish you all a lovely Mother’s Day.

✩ Sabrina ✩

February 2021 Treatbox Reveal and Review

Welcome to the February 2021 Reveal and Review of Treatbox.

Here I am, photographing and reviewing the items within my 59th Box. My box of Treats arrived a little late this time around so I’m sorry for bringing this to you a little later into the month than I would have liked! Hopefully the March box won’t be too late and I would love it to arrive on my birthday!

What is inside the February Box?

A “Ginger Ray” Pop Up Box to put Popcorn or Treats inside on Movie Night at home

Propercorn – A bag of Microwavable Popcorn

AfterSpa Exfoliating Gloves

Treatbox Print “it’s okay if…”

Treatbox “Affirmation Word Search” A5 activity sheet

Unwind Bath Soak

Vitamasques Lip Mask

Get It Girl – Choker Necklace – Stay Fierce – Lightning Bolt on a Leather Cord

My Opinions on the Box

I love that this box was all about relaxation and taking time for myself. I am saving the bath soak and gloves for this upcoming weekend when I will be dyeing my hair and having a relaxing bath.

The word search and print were both lovely and nice reminders that I don’t have to have my stuff together every day and it’s okay to take a mental health day or a self care Saturday!

I am really looking forward to box number 60 in March because it’s also my birthday! So it’s like an extra little treat to myself!

Did you know that you can view all of my previous Treatbox unboxing posts in this unique category of mine called ‘Treatbox’ it is specifically for these box reviews and reveals – Severn Wishes Treatbox.

Thank you for reading this Review and Reveal of the February Treatbox, I hope you pop back here again soon for the next one.

✩ Sabrina ✩

Argos Tester Review of the Chad Valley Bright Stars Pop Up Play Tunnel

I am fortunate to be an Argos Tester, this means that I often get items sent to me for the purpose of an online review. I test products and take photographs of them before submitting my findings and thoughts to Argos. For February I was offered Children’s Toys. I was excited at the thought of testing something that my young son would be a huge part of, and his opinions would matter during the reviewing process.

#ArgosTester #ArgosTesters #ArgosTestersCommunity

I have written this article about a product that I have been supplied for free, in order to test and then review it. This is my experience with said product and my honest review about the product which is listed below. I have already submitted my product review to the Argos Website when this post has been published.

My Honest Opinion on the Product

I have been rather happy with the overall look and quality of this product. The Pop Up Tunnel is something that doesn’t only entertain my toddler, but we can add learning into play and he also gets exercise indoors on poor weather days. It is bright and inviting and my son wanted to play with it immediately after I had set it up for him. I look forward to setting it up outside in the summer too on some outdoor play mats. I think it’s an excellent product for the price it is available at, and most children would have the imagination to be able to use it effectively. Because it folds away neatly it even fits into our large toy chest so it takes up no additional room. This product is ideal for any parents who may have a toddler or young child with lots of energy like mine. The best features are the ideal length (it is not too long to overtake your floor but long enough for a toddler to crawl through and have lots of fun), its bright colours and fun stars pattern, the genius tabs at either end so it can be securely fastened and put away for another day, and finally the imagination factor of it!

✩✩✩

Sabrina’s Top Tips for Using this Tunnel for Learning during Play

Once your child is used to the tunnel and is having fun with it, then there are several ways you can use it to increase learning while your child is playing. Words such as “Through” for them crawling through the tunnel is a good one, as well as “In”, “Out” and “Under”. You can also name the various Colours such as “Red”, “Yellow” and “Blue” and the “Stars” on the pattern too. See if your toddler can indicate which is which and say them back.

✩✩✩

Usage of the Product

The tunnel is made from material that is not waterproof, and is only wipe clean, so it is best used indoors and on a soft surface such as carpet, a rug or play mats. Keep food and drink away from it in my opinion. It will move around and slip easily on a wooden floor so perhaps look at where is safest in your home to set it up. Always supervise your child or children when using toys. The tunnel can be used outdoors in dry weather but I would suggest it was still set up on play mats still to avoid the material getting torn by anything sharp or pointed.

Product Name: Chad Valley Bright Stars Pop Up Play Tunnel

Product Details: A Red, Yellow and Blue Tunnel with White Stars. Ideal for children aged 2 years and over. Pop Up means it has minimal assembly required and also folds away neatly using the tabs at either end to secure and store reasonably flat. It is advisable to supervise children at all times while using this toy tunnel and to keep any sharp toys or furniture away from the material to prolong use. It can be used indoors or outdoors, but should only really be used on a flat and soft surface indoors, ideally set up on play mats or carpet. Due to the nature of the material it should be stored appropriately. Play Mats that can be set up outdoors is also a good idea when planning to use this outside because this tunnel is not waterproof.

Product Dimensions: H42cm W80cm D42cm

Product Description: Ideal for bringing children into a world of imagination. This tunnel can be anything they want it to be, and you can also use it with other items such as when children want to build a den for example. A tunnel to a secret dinosaur world, a secret passageway out into the world of spies… this can be whatever your child can dream up.

Argos Website Link: Chad Valley Bright Stars Pop Up Play Tunnel

Argos Website Price: £8.00 (Correct as of 14th February 2021)

My Argos Tester Review Submission

My son was over the moon with this bright & fun tunnel he loves anything with stars on. It took no time to set up & easily packed away again, tabs either end secure it together almost flat so storage is no issue when not in use. A lovely item filled with possibilities with a bit of imagination, good for learning, teaching & great exercise on days we can’t get out of the house.

If you are interested in finding out more about this product then please click the link above in my Product Details section to go to the Argos website.

Thank you for reading this review, have a lovely day.

✩ Sabrina ✩

A Week of Positive Things – Sabrina’s Tips for having a more Positive 7 Days at Home

A Week of Positive Things

Sabrina’s Top Tips for having a more Positive 7 Days

Everyone seems to be feeling a bit low lately, it’s bound to be the Winter Blues mixed in with everything to do with the Pandemic. There are so many people who have found themselves working from home again, and many young people who are studying at home again too. With all this time stuck at home there are lots of anxious feelings and negativity, so I’m here with some suggestions to try and put a positive spin back into your home environment!

So here is my solution to tackle the blues, try to take half an hour out of your day as a family unit, every afternoon for the next week, after work is over and after the schooling is done for the day. Pick one of these ideas of mine to do together, a different one every day in any order you like.

I guarantee they will have you feeling more positive by the end of day 7! You can do them in any order you like! Or do one of them twice if it’s a hit! If you play along please comment on this post or on my socials at the end of the week and tell me which activity your family preferred and whether these activities did in fact work for you and increase your family’s positive attitudes.

  1. Go for a Walk (Weather Dependent) and play a game as you go! Ideal for parents with younger children who are still enthralled by the nature of “eye spy”. But the fresh air and endorphins combined should make all of you feel better too. Older children may want to go for a jog or a bike ride if that’s more your thing, so long as it’s half an hour outdoors with your family, all together.

  2. Watch a Funny TV Show or Cartoon. Laugher really can help you to feel better, even for a brief moment, so why not stick on a tv show or a favourite cartoon that never failed to make you laugh and giggle together. Tom and Jerry is a good one!

  3. Bake or Make Something Delicious! I have a ton of recipes on my blog and some don’t even take that long to do. So why not make some chocolate crispy cakes or even some rocky road, something simple and even something that doesn’t require baking to save you time! Then you’ll have a tasty treat for a few afternoons to come! See what you’ve got in the cupboard! Here is my baking section HERE.

  4. Get Creative. You can do one of two things with this creative activity depending upon the age of the people in your household. Either, do a rotating draw-off where by you each start with a piece of A4 paper and one coloured pen (all varying colours) and you keep rotating the papers every minute, do this until 4 minutes is up. Everyone should’ve drawn on each of the pieces of paper. No talking! See what you’ve come up with! Share them with me on social media! #SabrinasCreativeCrafts
    OR
    You can play the Sentences Game. The idea is to make up a creative story, it should be funny, and you once again rotate the papers. This time you want long strips and not A4. Cut a vertical A4 in half twice or get your strips. Once the first minute is up and the first sentence has been written, you all fold over the section and pass it on. When the time is up you each open up the papers to find a story.

    For example;
    There once was a man who couldn’t find his shoes.
    I think I want some KFC he thought.
    He headed off in the direction of the sunset.
    In the end his dog ran away and joined the circus.

    If you have teenagers then you could play the game another way, this is called CONSEQUENCES, you start by writing on each of the papers the following things, add extra if you have a large family so that everyone will get a go at each section when the papers are passed on. They usually go like this…
    ___
    Met
    ___
    At
    ___
    They said ___
    What happened next was ___ OR The Consequence was ___

    Then unroll it after everyone has had their turn and the sections are completed, then take turns in reading them out. See my photo below this list for an idea of what it would look like when you finished! Warning my examples may cause laughter!

  5. Photos! Another fun thing that would brighten your spirits is to look back at any photo albums that you have or digital slideshows. You could even play a game while you look through them. Every time that your mum is seen with sunglasses on she gets a point, each time someone hasn’t got their hat on when they should you lose a point! First person to spot the water in the photos gets a point. Etc etc! Make up some rules before you start and say that the first person to 10 points gets out of doing the washing up tonight! Or the winner chooses what’s for dinner the next night! Involve one another in every day things.

  6. Write a List of Goals and Aspirations for 2021 – but only write the do-able ones! For example, I want to bake a cake for mums birthday. OR I would like to walk a mile on the next weekend that is dry and sunny. When you achieve something, even if it’s a little thing, you feel so much better about having accomplished it. Setting some realistic goals now for the year might seem silly when we don’t know what’s around the corner, however even if the goals are just for the people in your bubble, it’s still doable. Put them up on your fridge or board and tick yours off when you have completed it.

  7. Make a Meal Together. No matter how old you all are there is something fun about making dinner together. May I suggest something that everyone can get stuck into such as Fajitas, Curry, Sausages and Mash or Lasagne (dietary requirements permitting). I have tons of recipes on my blog if you need inspiring! But making and preparing food together before you eat it can be a real bonding experience, and it can also be important for teaching younger children where foods come from or that by mixing this with that you achieve this outcome. Food is something that has been so important during the first lockdowns so I thought I would continue on with that and try and get you back into your kitchen to make something you love together. Check out my Recipes HERE.
Why Not Try And Make My Delicious Cookies? Click the link in section 3 for the recipe!
The Consequences Game – Imaginative Fun for the older children in your family.

I really hope that you’ve enjoyed this blog post and that you would like to participate in my week of positivity. If you do participate in any of them or attempt to get those in your bubble to do so, then please let me know how you got on! I can’t wait to see if you make anything as well 🙂 tag me online! And thanks for joining me!

✩ Sabrina ✩

Severn Sabrina Instagram
Severn Wishes Blog Facebook
Sabrina of Severn Wishes on Twitter