Sabrina is a Lifestyle, Parenting and Product Review Blogger. A Writer, Photographer, Reviewer, Home Cook, Crafter & Nature Enthusiast. You will find a bit of all those categories here on Severn Wishes Blog, Welcome to Sabrina's Lifestyle Blogging & Honest Reviews.
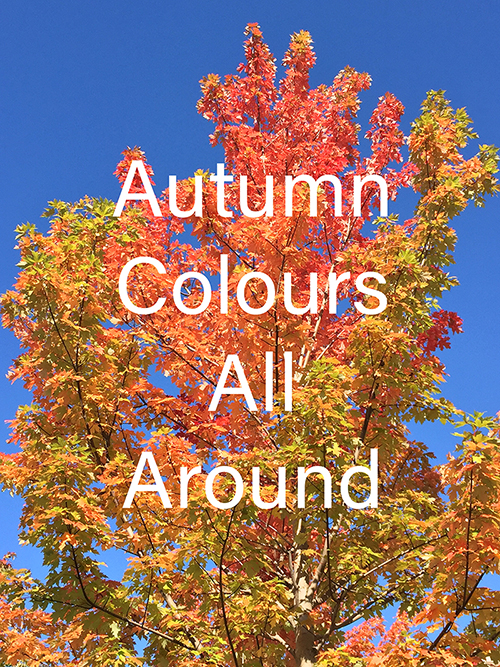
Autumn is such a beautiful time of the year, and it should be enjoyed by people of all ages and of all abilities too. But as the cost of living goes up again with our need for heating on and more food, not to mention the loom of Christmas… most people will vote to stay in, worrying they cannot afford to go out.
Well I’m in the same boat as all of you again this season, knowing that money will be tight but I also want to make the most of weekends I have my son. School takes up so many hours of the week, and the majority of children don’t really want to be stuck inside (unless the weather is gale force and torrential rain!). So it’s important to come up with some cheap ideas that will suit everyone and that can be fun of course, so here’s what I do.
See what can you do for free in your local area. Where do you begin to look?
Start off by writing down on a piece of paper the people in your household, their ages and abilities.
Do you need toilets frequently, baby changing facilities or access for a pram or wheelchair?
Once you have established the type of place you need to find you can look up on an online map what is available for free in your area.
Check local free magazines in supermarkets, check out social media by searching in events local to you by so many miles radius.
Some of these things can include;
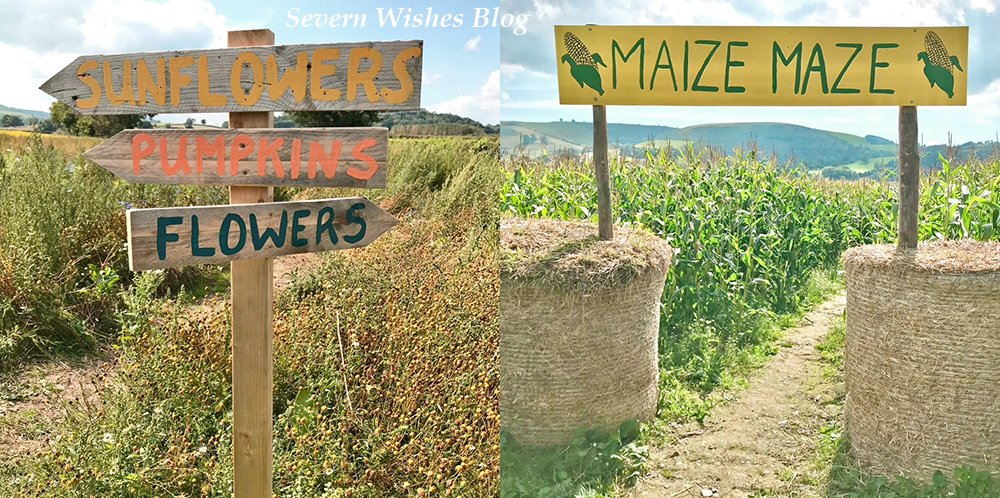
Public Footpaths. Canal Routes or Designated Walkways. Parks and Gardens. Local Heritage Sites. Castles or Stately Homes. Farms with Free Entry to look at Pumpkins, Flowers or do Maize Mazes. Nature Reserves with free car parking so you can do a Nature Walk to collect leaves. National Trust (some people will already be members, sometimes they have reduced entry fees).
What Can You Do While Out?
Enjoy a walk together as a family, don’t forget to take some photograph’s! Gather items to take home and make art and craft pieces another day. Go for a Nature Walk and talk about what you can see and hear (great for young children). Nature Bingo where you make a list before you go and then tick off the items as you find them. Discuss the life cycle of trees with older children and the importance of renewal each year.
(If you don’t mind spending a little money) Pumpkin Patch Picking Maize Maze or Woodland Trails Local Trust Properties or Heritage Sites
Sabrina’s Top Tip: Take a picnic or packed lunch with you, and drinks for everyone too which will save you money, even if you have to eat it in the car then it won’t matter because it’s still family time.
✩✩✩
Thank you for reading this blog post today, I do hope that I have given you some good ideas.
Have a great day and lots of fun if you take on board any of my tips!
How to make Birthday Bags on a Budget – it can be done!
My son recently had his birthday and a part of me was disheartened by the fact that I couldn’t afford to throw him a birthday party, one where his friends could come. We had family things going on all week but nothing with his school friends.
After talking to him about it one afternoon a week before his birthday, I asked him if he would like to do anything for his birthday on the day besides attend school, He said that he would like to share his favourite things with his school friends. I thought it was a lovely idea so we chatted about what sort of items he would include. After a lengthy conversation I decided we could do some birthday bags, and I hunted around for the best bargains. I was on a strict budget to I checked where things were on offer and started making a list.
So how do you make up a birthday bag?
You need either a birthday bag or a party bag, there are many varieties available online. You can get them usually with a handle so they are perfect for little hands to hold. I also chose to buy the plastic cones because I didn’t want Oreos to break up and/or go stale in the bags. This worked perfectly to break things up into sections, the Edibles and the Toys.
How do you stick to your Budget and get the best value?
✩ Sabrina’s Top Tips ✩
There are several ways to stick to budget and also find the best deals, here are my tips. 1. Decide your budget and make a list of what you need to buy. 2. How many are you buying for? Sometimes it’s cheaper to buy 50 bags than 20, bare this in mind. 3. Watch out for “lowest price in 30 days” and other useful slogans on offers. 4. Compare supermarkets online before you go out to do the shopping. 5. Use supermarket offers if you have a discount card with them. 6. Visit budget stores and compare the items you have seen online. 7. Always read the online reviews and filter by most recent as well. 8. Bulk Buy – Depending on whether you can reuse an item in the future for something else or even sell the remainder of the items on, bulk buying can be beneficial. (For us the Oreo’s were cheaper to bulk buy and so were the party bags). My son will happily eat any leftover biscuits let me tell you. 9. Work out the maximum you would like to spend, divide that by how many you are buying for, let’s say it’s 20 children. So divide your budget by 20, and you will understand how much it will cost to do a bag per child. Once you’ve made some essential purchases work out what is remaining of your budget and only spend what you have left. It might be that you have to buy a massive bag of sweets and divide them by hand into little sweet bags like I did with the Oreo biscuits.
Think smarter with your money and not buying things simply for convenience.
Why did we choose the items?
Picking for a mixture of genders is always tricky, but I don’t know a child who doesn’t love stickers and sweets / chocolate biscuits. Oreo is the choice because my son has food allergies but luckily he can eat original Oreo. The cars were because they were pull-back and super cool but also a car is gender neutral in my eyes, same goes for the bouncy balls. I asked all the parents (or my son told me) what peoples favourite colours were, and then labelled the bags and added the toys in accordingly. If I had someone who loved Red they got a red tie on their biscuit cone and they got a red car and a red ball. I would’ve loved to have included bubbles too but they would have sent me over budget. You could swap the bouncy balls for bubbles if your child would prefer those.
I divided the stickers between the children’s bags and kept the rest for my own reward charts at home, meaning each sheet only cost me 4 pence. Bargain!
Total Spent: £30.00 Total of Children: 16 Cost per Child: £1.79
I don’t think this was too bad, 16 happy children for less than £30 (as we had leftovers) and it was much cheaper than throwing a birthday party. My son got to share his favourite items with his friends too!
We have also got left over bouncy balls, birthday bags, cone bags, 6 sweet bags and 4 cars. The leftover pieces we can use whenever we like or give away at other occasions.
At the end of the day you can’t put a price on a child’s happiness and my son was over the moon to help me give out these little bags of joy to all of his friends at school, so that they could all celebrate his happy birthday together.
Thank you for reading this blog post today, I hope you have found it interesting and perhaps got a few useful tips in case you ever decide to do bags for your child’s birthday or a birthday party.
I am a huge believer in passing on knowledge to people when it might be useful to them, and for many years I had considered being a teacher. However my life took a different direction once I went off to university. It didn’t stop me from coming up with things that others may find handy though, it was just one of many reasons I decided to start my blog all those years ago.
After I became a parent I found I was coming up with lots of hacks and tips for my son that other parents might also find useful. This particular blog post today is all about NUMBERS! My son learnt his numbers 1 to 10 very quickly thanks to my tips and tricks, by the time he started preschool at 3 he could count to 31. He is now 4 and thanks to my encouragement he can count to a whopping 500!
The fab thing about my tips is that you may already have some of these items laying around in your home that you can use, and if not you can make your own cards like I have also done. Check out online second hand and local shops if you don’t have anything, as well as asking friends who may have slightly older children if they could have a clear out for you.Let me tell you about how I introduced and taught my son about numbers.
Child Clocks or Numbered Blocks
Your baby may already have toys with numbers on, things for age 6 month plus normally have various things on them, you may find a mix of nature and numerical combinations or well known characters with basic shapes and or numbers too. Toys and playmats also sometimes have numbers, those talking toys certainly will, but teaching your little one how to recognise a number visually is important.
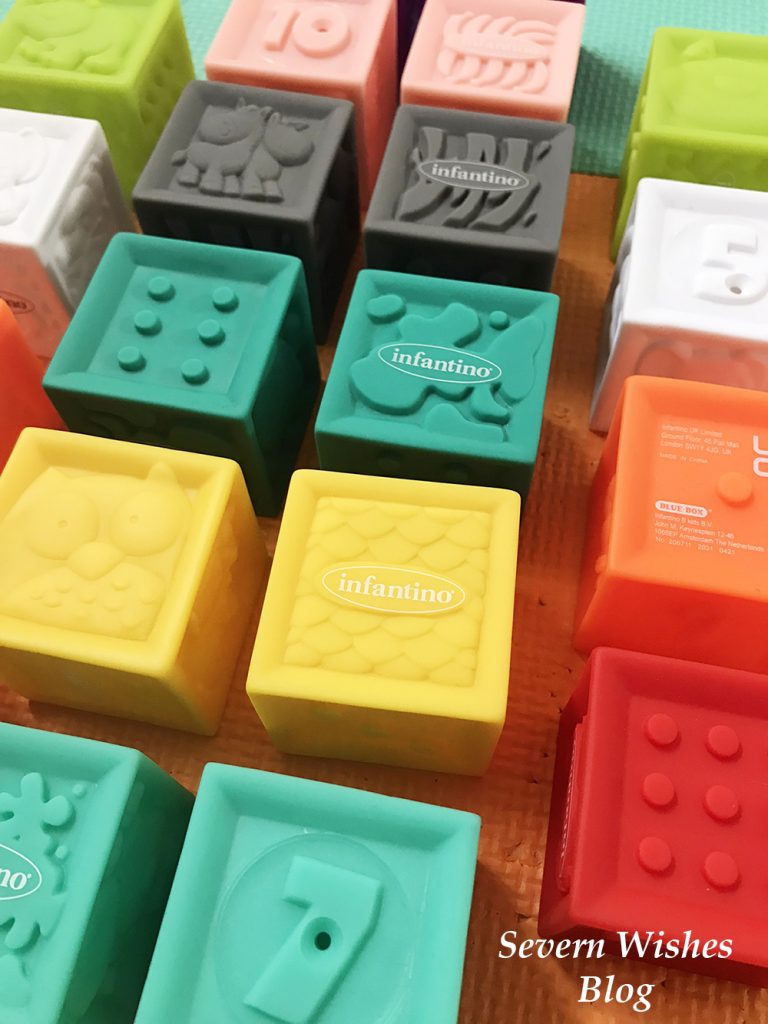
You can easily get wooden toys that contain clocks on them or boards with numbers that can be removed and set out in a numerical order. These toys are great for learning the starter numbers (1-10) but also for starting with basic mathematics too. I bought my son a board of numbers and he has a wooden clock as well gifted by a relative. The blocks in my image above were bought online and are of the brand Infantino, these BPA free plastic cubes have an array of animals and numerical variations on them such as dots and actual written numbers. They were some of the first numbers my son saw as a baby.
My son would like to count things around him, so say I gave him 4 smiley faces for his tea I would ask how many I had given him, soon he started counting everything. 2 swings at the park, 7 birds on the fence, 5 sheep in the field. And so on, and lots of praise and encouragement when they get something right is also essential. Make learning a fun thing to do and participate in.
You can also begin time telling by showing them a phone or a watch and asking them to find the time. If they have a child’s clock they can match that time. A children’s clock may just have turn-able clock hands or some have the digits that are also removeable too. For example it might be 10.30am so you ask them what that would look like on their clock and see if they select the numbers appropriately. Making it fun means that it is more likely to sink in to their mind. If they have breakfast at 7.30am every day, you could ask them what the time is on the kitchen clock if you have a steady routine, or if bedtime is 7pm too.
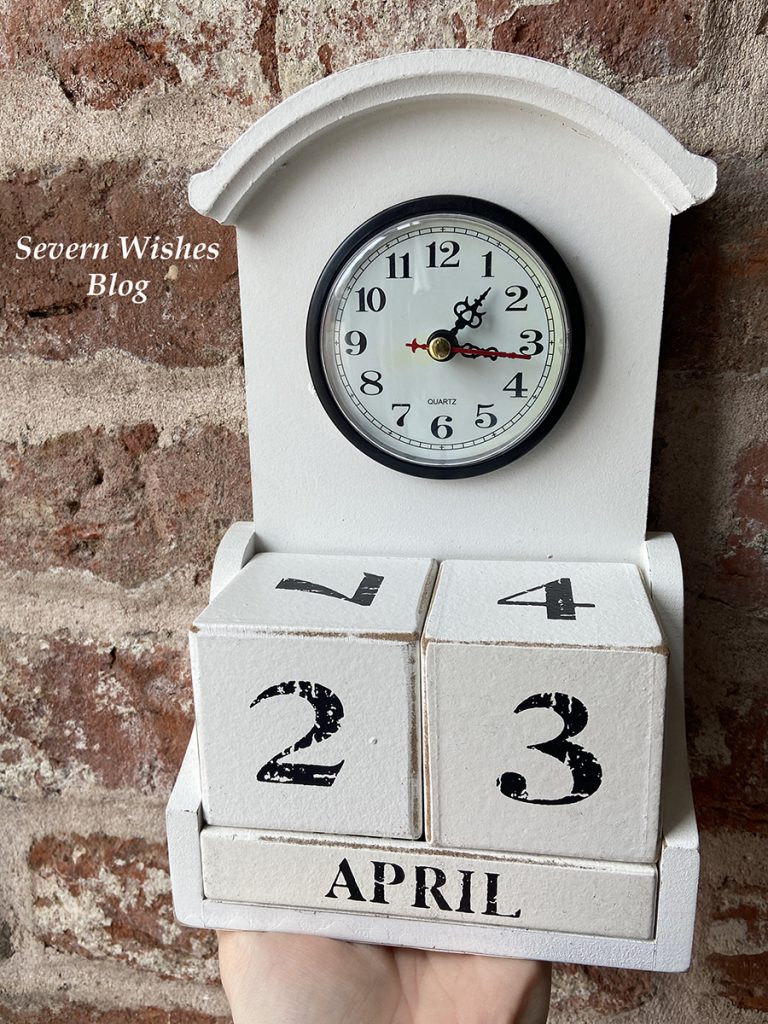
The Home Calendar Block
My calendar block is also a clock! Many of us will have a Calendar block at home, these blocks rotate daily and allow children to understand the passing of days into months. When my son was two I introduced him to my block set, and every single morning before breakfast we would rotate the blocks. I started by giving him one and me the other, I would say something like “Today is the 17th so we need a 1 and a 7, I have the 7, can you find me a 1 please?” And his interest developed from there. Soon I could ask him to find any of the numbers from One to Thirty One and he could place them on the block correctly. For the past two years we have done this every day and he has learnt to count up to 31 just by doing the calendar. My son also asked me why the months were different numbers, why it didn’t go up to Thirty Two and such, it sparked an interest which lead to me making his flashcards up to 50 numbers.
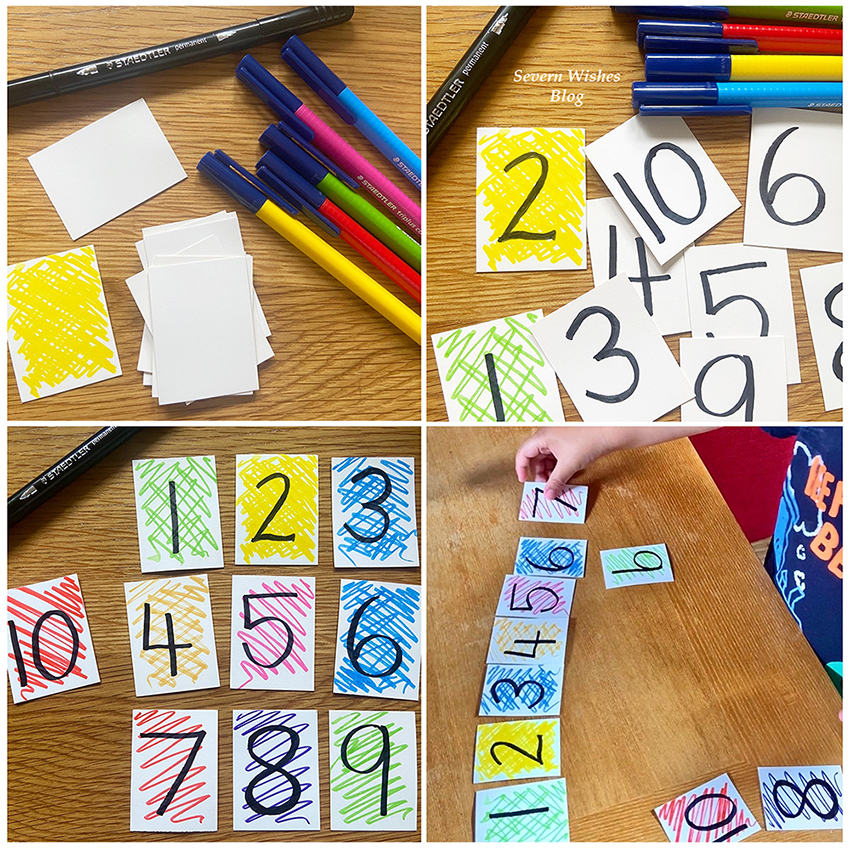
Flashcards – Bought or Homemade
Flashcards are great, you can buy them from most online toy retailers, or if are creative and have pens, like me you could make them. My son has 50 of these homemade numbers now, and thanks to some games he can count up to 500. He does number work at school, and even got an award recently for how good he was with counting numbers. Making it colourful and fun is inviting the child to participate. Always encourage but never force your child to learn, do it on their own terms when you are at home. Plus if it is fun they will be more likely to want to repeat the exercise. My son is currently doing writing practice for his letters and numbers and coming on great thanks to wipeable board books which I highly recommend because they are reusable.
Originally I only made ten numbers but my son was soon asking for more, and the more he enjoyed counting them and laying them out in their order, the more I wanted to continue making and encouraging that growth in learning.
When my son turned 3 I also made a set of flashcards that had the number and the written word such as One and 1 on them, this was so my son learnt the word associated with the number in preparation for reading and writing them.
Other Fun Number Related Activities
Playing Dominoes is another fun learning activity which requires the counting of numbers, and games like Yahtzee, Playing Cards or Rummikub are also fun to start with children of a going to school age.
However you keep using numbers in your child’s life, know this, you are helping them learn through play.
✩✩✩
Thank you for reading this parenting related blog post today. I have tons of parenting tips and hacks across my blog and social media. I even do a Monday Mum Hack on Instagram.
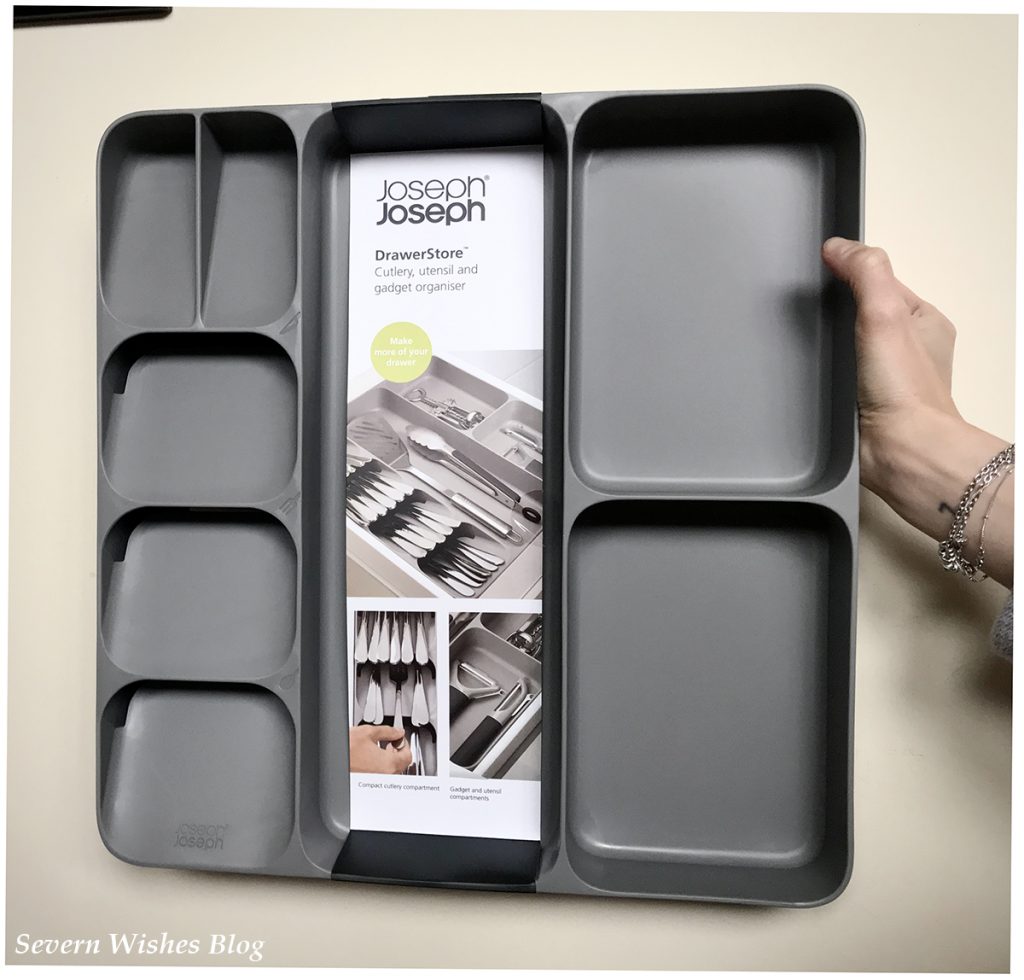
Today I am bringing you a brand new product review, my first purchase of 2023!
Featuring the DrawerStore Organiser from Joseph Joseph. Purchased on Amazon for £26.39. (Price Correct as of January 21st 2023).
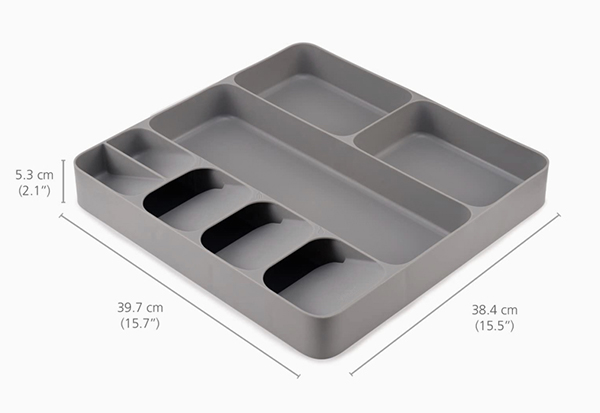
Product Information: Available in Grey, Blue, White/Green. Product Details: Only suitable for Drawers with a depth of 8cm or more. Dimensions: 38.4cm Length by 39.7cm Wide and 5.3cm Deep. Additonal Information: There are several of these DrawerStore items in different sizes and for different uses such as cutlery, whole drawer, knives only etc.
Sabrina’s Top Tips!
Always measure your own drawers and cupboards and work out the cost for the product versus how many centimetres of product you are paying for. This product was worth it for my drawer because I am not wasting any space. However there are many similar products on the market that may suit your space better, plus Joseph Joseph do smaller organiser trays as well! So always weigh up all your options before you buy and get out that ruler or tape measure.
Picture from Amazon
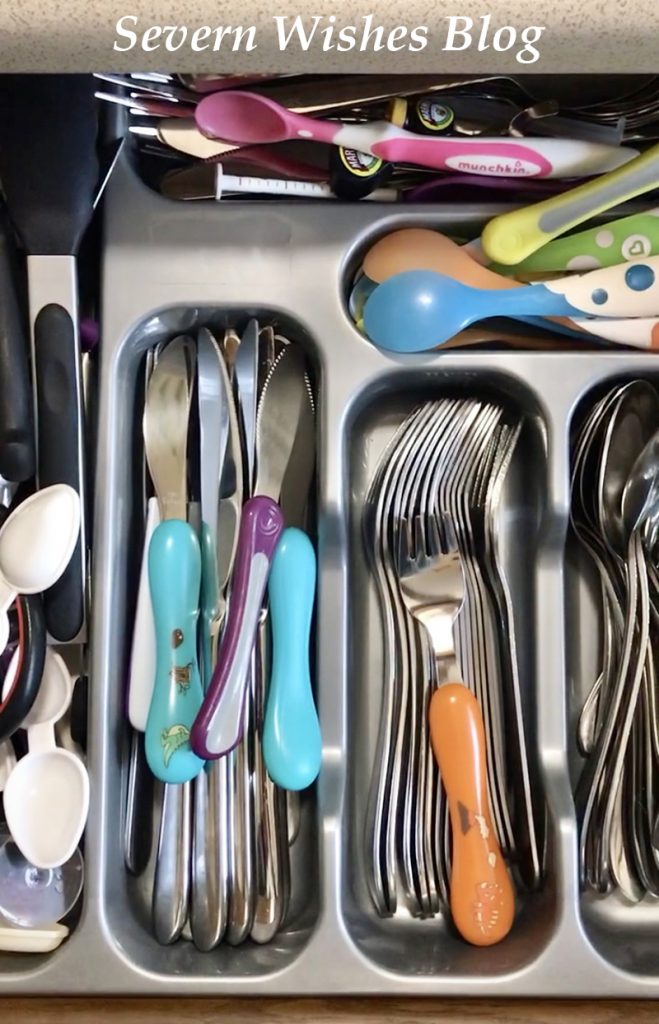
This was the situation in my kitchen drawer before I made the purchase. It was full of baby spoons and a copious amount of medicine spoons and syringes. I needed a clear out and to reorganise because types of items were all mixed together, like my sons cutlery with the adult cutlery, and so on.
My Drawer set up prior to this Joseph Joseph product purchase.
For a while now I have been reorganising my kitchen and the space within it. The issue is that I live in a small cottage which only has three rooms downstairs. I have no utility area, so my kitchen is three things in one room. It is my food prep area, my utility and my storage room for everything from food and drink, and cat food to cleaning products. I also only have 3 drawers in the room too, so maximising the space that I do have in those areas is vital.
I’m someone who loves to cook and often bulk cooks too. So I have plenty of different knives and utensils, as well as my usual cutlery. My Jamie Oliver cutlery set is my absolute favourite and I use them every single day.
I had a voucher for Christmas for Amazon, and I had been looking at getting something from Joseph Joseph. This brand is incredible for their sturdy and space saving gadgets and kitchen utensil related products. I already own two other useful items from their range, and I had seen the drawer organiser and hoped it would fit my old fashioned kitchen. Success for me because the measurements I had done worked out, so I went ahead and ordered it.
When I removed it from the Amazon box just two days later I was happy with the quality, the plastic is very strong and durable which is what I needed. I took off the packaging to recycle it and be able to give the organiser a good clean with some antibacterial spray. Once that was done I looked it over and decided where I wanted to put some of the items from my drawer, although the organiser does suggest cutlery in some spaces which are allocated with little icons.
After cleaning out my current drawer space I slotted in the Joseph Joseph piece and I got to work with the organising of it. Pleased that I was able to fit every single item from my previous draw tray and even have room to spare. I also allowed me to see just how many things I could recycle, like the fact I had managed to accumulate 17 medicine spoons, 7 Calpol syringes and several baby spoons that my son no longer needs. I kept a couple of each and tossed the rest into my plastics recycling tub.
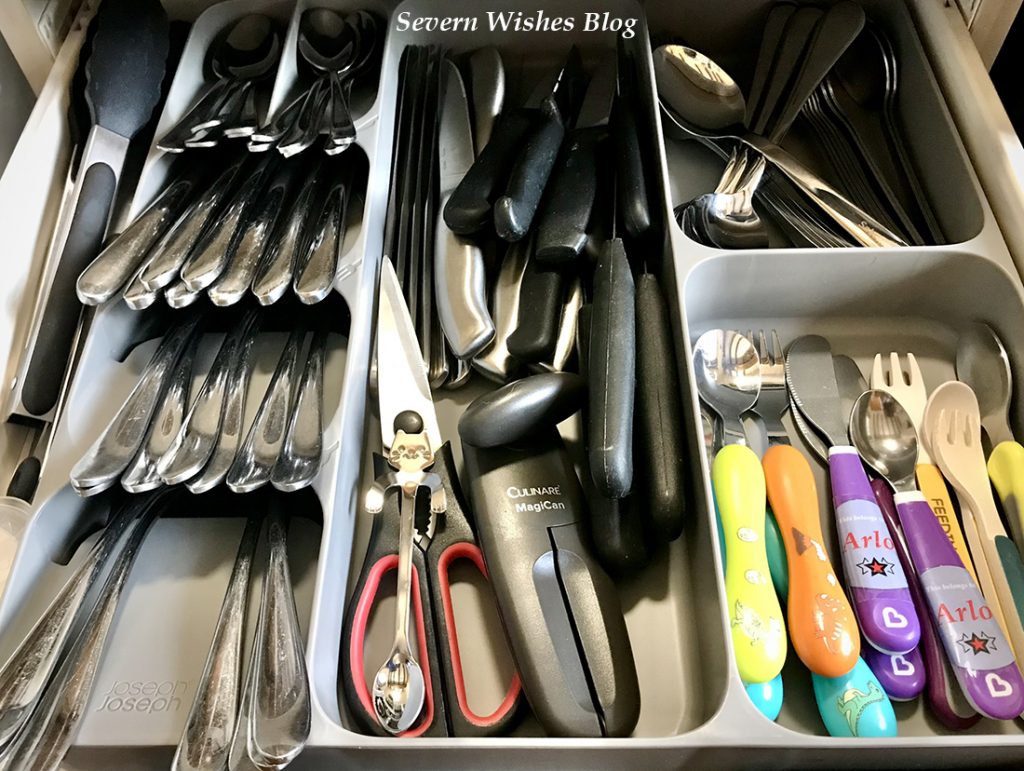
Allocating the items was simple and they slotted into the cutlery spaces with ease, all except for the Table Spoons, the larger ones did take a little manoeuvring but I got there in the end and I was pleased with the end results. It didn’t take me more than twenty minutes to do my drawer change over, and I am left with a more organised space that is much easier to find what any of us want.
I decided to place the things that my son uses (and often helps himself to) at the front in the right corner so that he could reach them easy enough. Placing the things I use least often such as Soup Spoons, Dessert Spoons and Dessert Forks at the back corner. The drawer is designed for Table Spoons, Forks, Knives and Tea Spoons in that ascending order on the left moving towards the back of the organiser tray. I would personally and usually like to have my tea spoons at the front, so this is my only bug bear with the tray. Otherwise it has been a fantastic addition to my kitchen whilst I remain vigilant on how to save space and create better organisation in other parts of the room.
My completely reorganised drawer with Joseph Joseph organiser.
Overall I would like to rate the item 4/5✩
Would I buy it again? Yes Would I recommend it? Yes
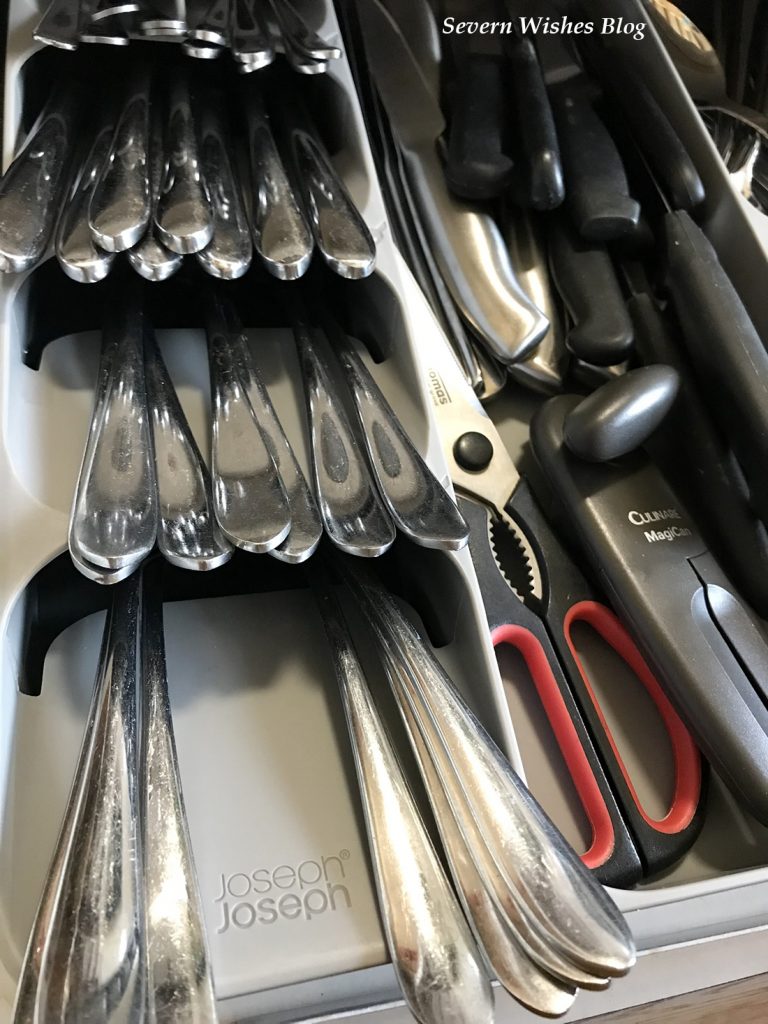
Overall the item is strong, durable and it fits the dimensions of my relatively small drawer which is excellent. I think the icons for the items should be slightly different on the left of this tray however. One of the main items we use in the United Kingdom is a tea spoon, it doesn’t make sense for these to be in the very back slot of the tray. Other than this I highly rate this organiser tray. You may have a larger kitchen and larger drawer than I have, in which case accessing the final part of the try might not be an issue for you. If you have a smaller drawer like me please check the depth of your drawer before buying, luckily mine was 8cm, but anything under 7cm will likely cause the cutlery to become stuck due to the angle of which they are laid out in the left side of the organiser. If you look at my photograph below you will see what I mean, and about the tea spoons disappearing at the back of the drawer. I actually may end up putting some with my sons cutlery at the bottom right corner for ease of access. I thought the cost was a little expensive but you are getting a branded item and it is of high quality in a manufacturing sense. The features are also good regarding the icons and the shape in which the tray is designed in which to maximise efficient use of space.
Anyone who has ever put a child in school will know that there is so much to remember that it can make your head spin. For example, last weekend I labelled shoes, 37 items of clothing, 7 lunch boxes and a variety of other smaller items. Your child will have a Bag, a Lunch Box or Bag, quite often a Book Bag, a PE Kit and Bag as well as maybe other things to take in with them too. It’s a lot of work for one person (a single parent like me) to handle, and there are time saving ways of doing things and ways to make it easier on yourself too. Let’s see what ideas I have below and what I have done during these last two weeks in preparation for school starting up again.
Yearly Wall Planner and / or Yearly Diary Get a year long wall planner and some little round stickers to keep track of everything, make a key at one side and then add any appointments, school trips, swimming days, special dates (like those where additional things are required like dressing up or concerts) and keep updating it every time you know a knew agenda item. This is useful as well for the non-school days and other important reminders too such as Dentist, Doctors or Opticians for example. I think I would be lost without my wall planner.
Weekly Planner A weekly planner is also something that I have on my dining room table, it’s so that on a weekend I can prepare for the week ahead, read up on any paperwork sent home from school on a Friday and let my child know what is expected of them for that upcoming week. It could be school photo week or they are expected to bring an item in for show and tell, but we will know not to forget because of the planner. I can also arrange this planner in a way that has both adult and child organised, as well as meal planning if I have items to be used on a certain evening. A useful item and much better than a phone calendar you may forget to look at, but if you sit down to eat as we do together as a family, the planner is there for you to go through so everyone knows what is what and where and when.
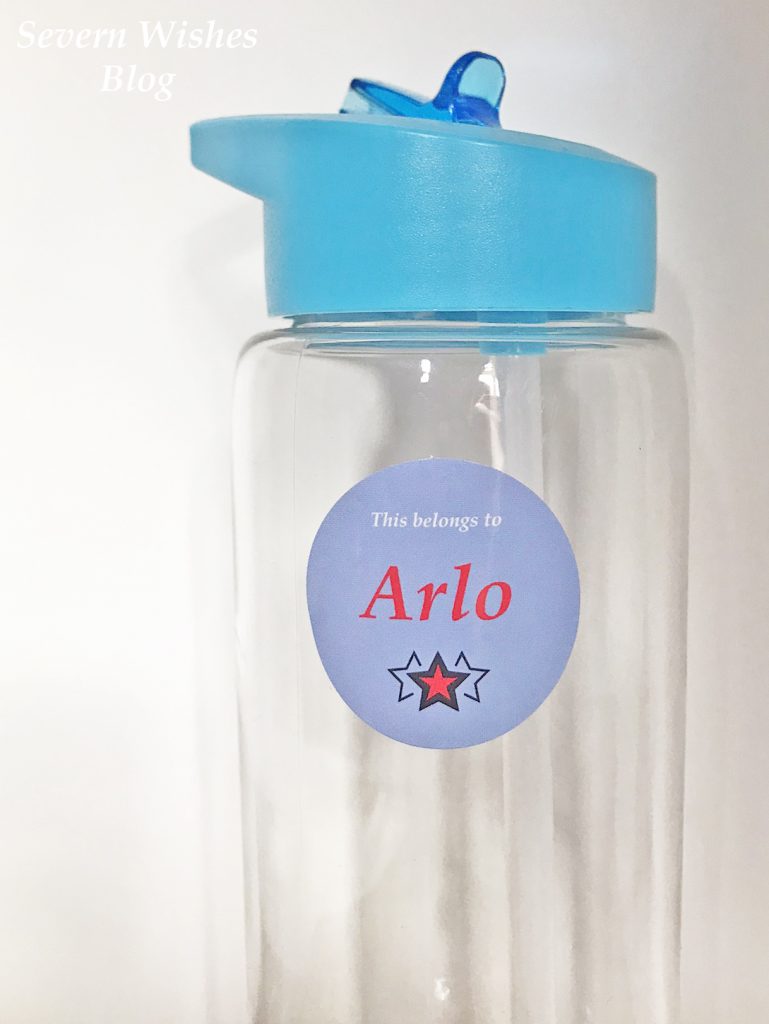
Labelling – It is so Important! Label all of your children’s items for school including their lunch boxes, clothing, bags and shoes. There is nothing worse than them going to school and losing something, and because it’s not labelled it’s unlikely to be returned to you. Schools tend to have lost property boxes that are checked at the end of every day or the end of the week and the items appropriately returned, but this cannot be done without labels. I used a permanent laundry pen to write on my sons clothing labels, and I used stickers for the more solid items. Consider using their full names or even getting their own personalised stickers printed as I have done. Especially if your child has a popular first name.
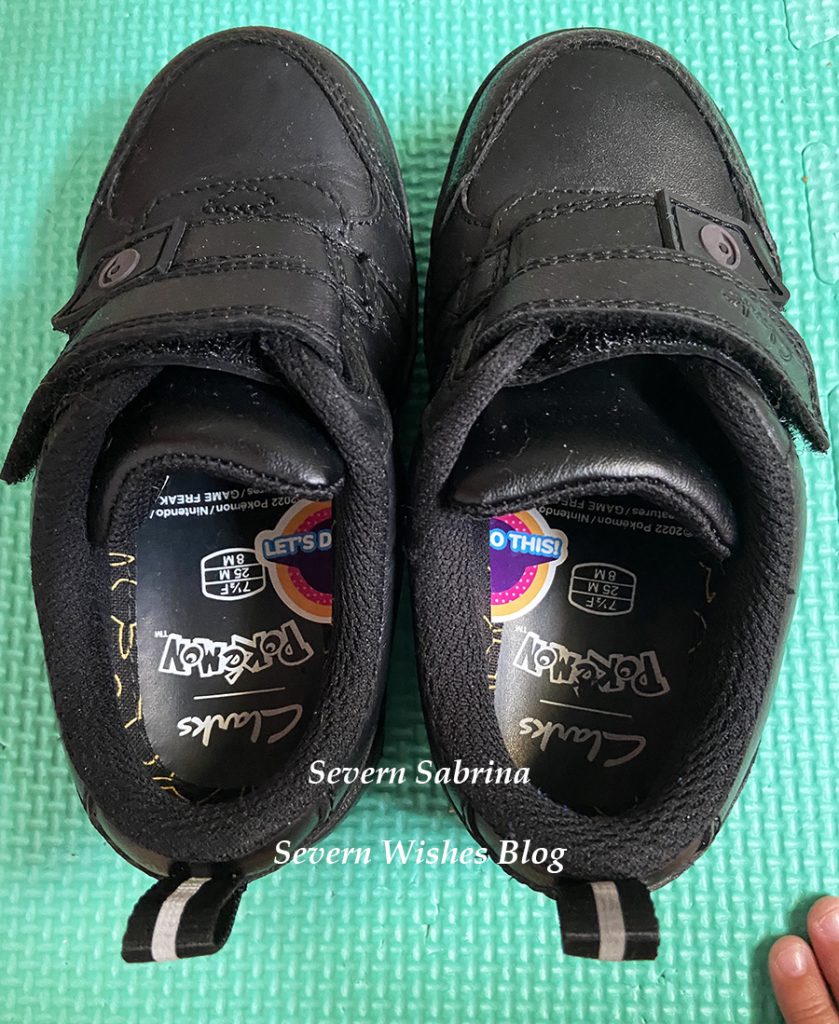
Use the halved sticker hack for getting your children to put their shoes on themselves and to ensure that everyone knows which shoe is who’s. The sticker inside hack allows them to put their shoes on the correct feet every time and it’s genius. Simply cut a large sticker in half and place either side of it into the shoes. When the shoes are correct the sticker will match and the child will know that they have the shoes the correct way to go on their feet. See my photo below for inspiration.
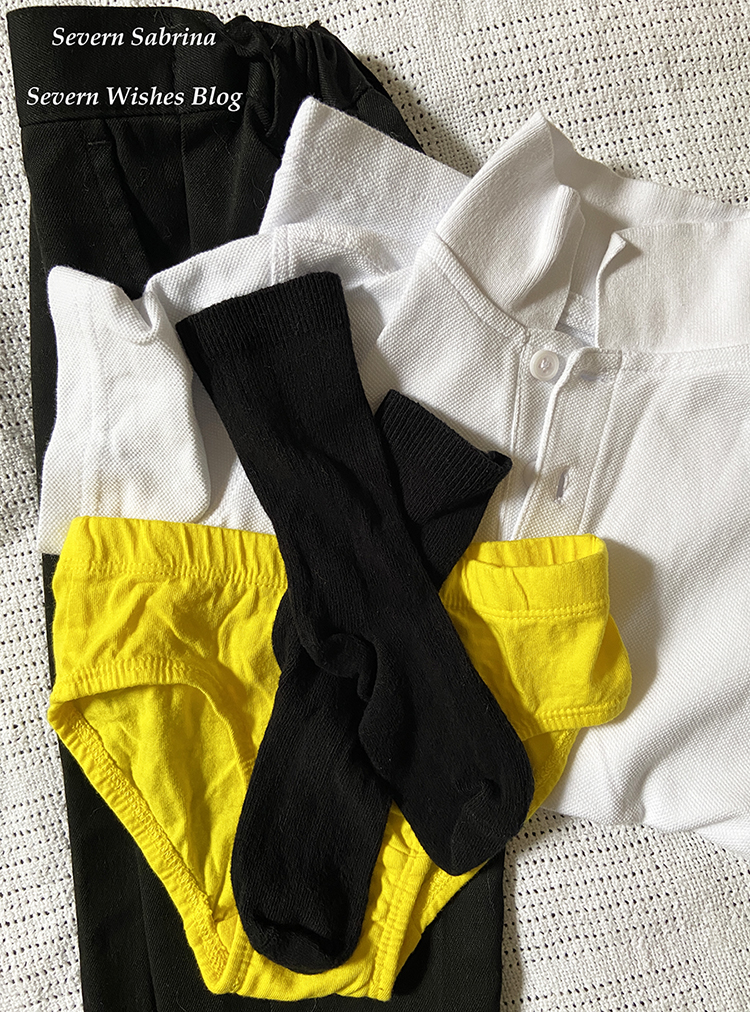
Clothes Piles per School Day Fold up any school clothing into “day piles” in their bedroom on a weekend ready for the school week ahead. This hack of mine is so useful, I did it over the summer too with day clothes as I was getting my son to practice getting dressed by himself. It’s so that I don’t have to police every single item of clothing going on every morning. My son has pants with the days of the week on them, and because that’s the item he will put on first he then has a pile beneath that. So you start with a pair of pants with his daily school uniform laying under it. Pants, Socks and Trousers, then his Polo Shirt last and his jumper is always downstairs and the last item to go on (to save any breakfast getting on it). It’s also so much easier on a Sunday to just make these piles up and put them in the correct bedrooms ready for the week. If you have to wash midweek, even doing two piles of clothing is better than searching drawers first thing on a Monday morning for that missing sock.
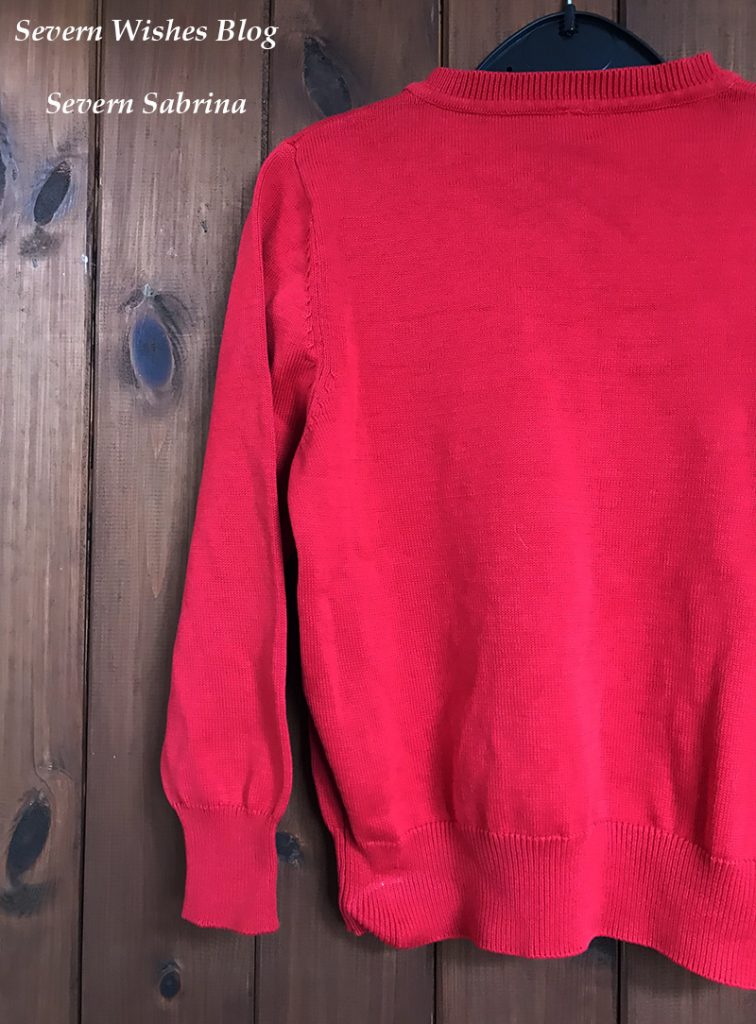
Save On Washing – Remove at the Front Door This is always a good one! Take off their school jumpers and any “still clean” uniform pieces as soon as you get home through the door before they have time to get messy and creased. Hang the jumpers up especially on hangers close to the front door ready for the next morning. This helps save on the clothes washing and the ironing by hanging them up safely as soon as they take them off. And it’s always a good idea that a school jumper be the last item to go on in a morning routine anyway, after breakfast and teeth brushing so that it stays cleaner for longer.
Something else you can do to save on washing is always wash with full loads, if that means you get to Thursday and it isn’t full yet then why not consider wearing those similar colours yourself so as to fill up the load space.
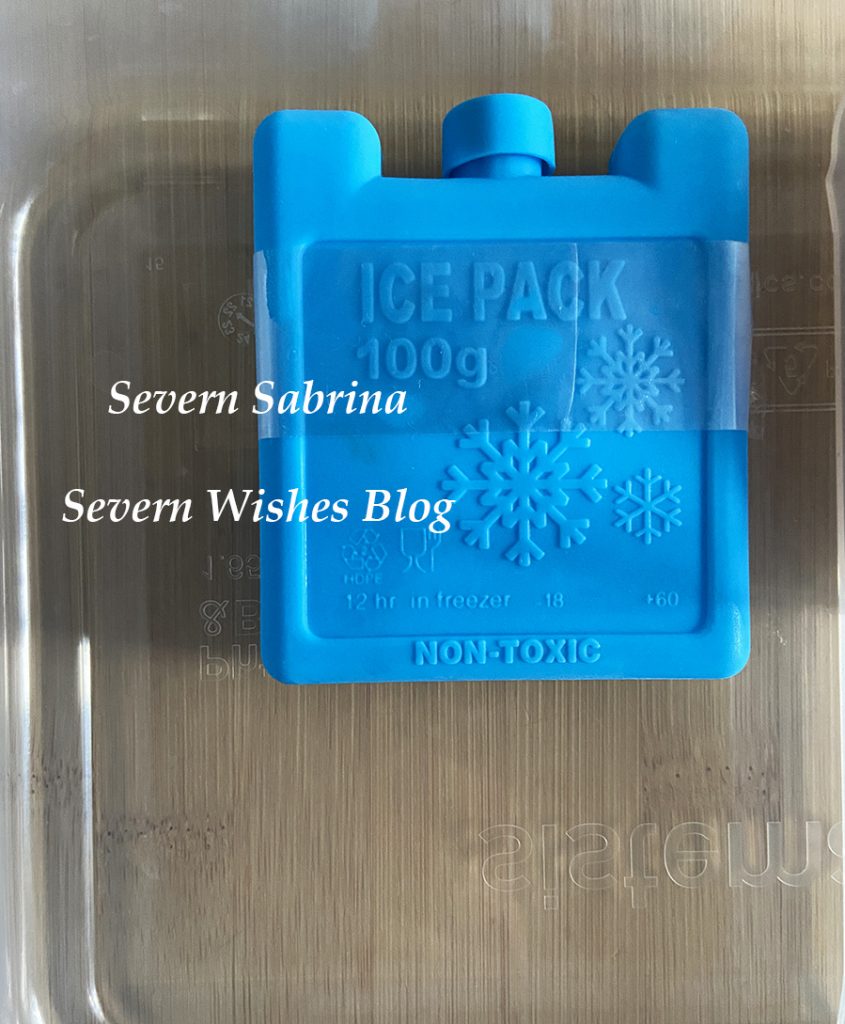
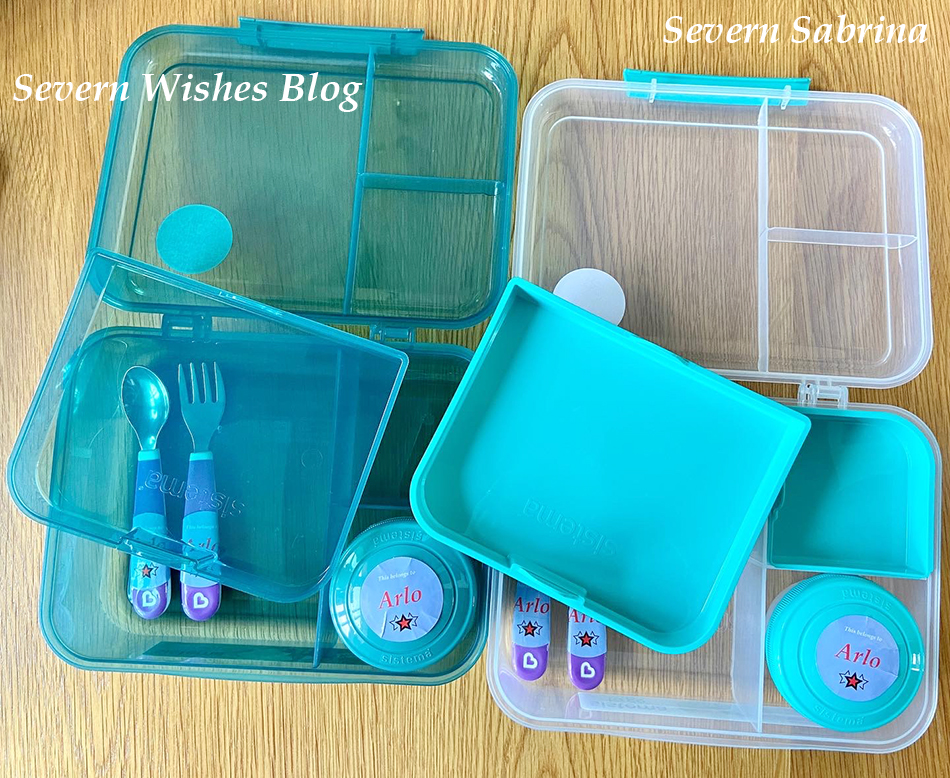
Mini Cool Blocks Investing in some mini cool blocks so that the children’s lunch food stays fresh is important during the warmer months of the year. I place a block under a removable plastic section of his large Sistema lunch box, or I place it at the bottom of the small cool bag I send with him. It’s important if he’s wanting chicken for his lunch which should be maintained at a low temperature to prevent it going off. These are great for adult lunches and days out throughout the year too.
Practice Makes Perfect and Less Stressed Children Practice the opening and closing of lunch boxes, bags with zips and coats too. We are getting to that time of the year where bags need to be closed from the weather and our coats need to be zipped up. During the summer holiday we might not have used those items very much so it’s good to refresh your children’s memories by having them practice doing these things again. Lunch boxes are another one, as they might have a new one this term and you’ll need to make sure they can safely open and close it in order to get at their food or snacks. It’s important that your children drinks enough water while they are at school too, so get them a reusable water bottle that they really like and will continue using throughout the day.
Thank you for reading this blog post today I really hope that you’ve liked it and found at least one of my ideas to be useful. By getting yourself and your family into good habits like these early on, it will make sure you have more time and energy to deal with anything else that happens. Because life nearly always throws you a curve ball when you just about have everything under control am I right?
I hope I see you again for another of my parenting articles, I hope you have a lovely month of September with (I also hope) minimal stresses.
Welcome to todays lifestyle blogging article “Sabrina’s Top Twelve Ways to Save Money, Spend Less on Electric and Use Less Energy Around the Home”. With the rising cost of living and lots of other prices changing, I figured I would share the ways in which I, Sabrina, a single parent, save money on a daily basis. And by drilling some of these into your head and completing them daily, you will soon see how great they are and hopefully I can help save you some money! Lets begin!
✩✩✩
✩Close Your Curtains – either to keep the heat inside during colder months or to keep the heat out and keep your home cool during hot days. I often see people not closing their curtains in an evening and I wonder if they know how much energy they’re losing. As for the summer it works the same way, don’t open them in a morning to let the heat in, just leave them shut and return to a much cooler room than if you had opened them.
✩Time your Showers – We can all be guilty of letting the hot water run over us and our minds drift off into a tangent of thoughts and procrastinations. However by either setting alarms or by playing a timed playlist on your phone while you shower, you will be saving yourself water and electricity and even time! I personally have a selection of 30 minute music playlists, and I know that when I reach the final song my half an hour of bathroom ablutions time is up! Give it a go yourself and see how you get on.
✩Close Your Doors – even by pushing your doors within an inch or twos gap of the frame will prevent lots of heat escaping in the winter. I usually pop a door stopper on the other side of said door once we are in (for example) the lounge with no intention of moving for an hour or two. This stops children or pets pushing the door open too far and letting your heat escape into a hallway for example.
✩Invest in some USB Chargeable Lights – So I have several of these around my home and various types. I have bars in the hallways so I don’t have to bother turning any lights on, they have sensors so when you walk within range they just pop on. Useful for saving money on electricity! Also great if you forget to turn lights off because these USB ones turn off after 30 seconds to 1 minute (depending on brand). Other chargeable lights include ones that are freestanding and you simply charge them up and then turn them on and let them drain down. One that I have takes about an hour to charge but lasts up to six hours – great in an evening if I don’t need much light.
USB Chargeable Motion Sensor Light Bars
✩Light Bulbs – one weekend or day off pop around your home with another person. One goes up a ladder and checks bulbs and the other writes down on a piece of paper what types and if they are energy saving and how many watts are the maximum. Then, next time you’re out shopping go and buy the bulbs that are energy saving and cost less to run. These bulbs usually last for ten years or up to 10,000 hours – whichever comes first!
✩Watering a Garden – if you spend water from inside your home to water your garden it will slowly start to become a lot of expense. Instead buy one or two black dustbin type plastic barrels (roughly £14 each) and they come with a lid too! Use a watering can to dip into them and remove water as and when you need it. Set them up in a part of your garden where rain water can easily fill them up. You’ll be surprised how fast they fill on a rainy day! Use the water from the butts for your garden plants before turning your home taps on! It will save you money on your water bill especially if you’re on a meter.
✩Buy or Make Draught Excluders – I have one on the inside of each door of my home, they keep draughts out and stop your heat escaping through holes under doors. If you cannot afford one because they often retail at around £15 these days, and you are good at seeing! Then you could always try and make one out of some old clothes and some stuffing. Might be fun to do with your children!
Draught Excluders for Doors
✩Buy Thicker Curtains or Lined Curtains ready for Winter – I bought lined curtains for £15 in the fabulous Dunelm sale last year. And I also built a pole above my front door and put two curtains up there as well. One reason was to keep the heat inside during the winter because doors easily let your heat escape. Two is also from a security aspect, if you have a window next to your front door then people may be able to look inside easily, a curtain across prevents them from seeing anything.
✩Invest in Fleece Throws – I love a nice comfortable throw, but by putting a couple where you frequently sit down will also save you money. I have one folded up across the bottom of my bed, I have two on my sofa. If I’m cold in an evening I will put that over me or around me and not touch the thermostat on the heating. Maintaining an optimum temperature for your heating is also a great start, then use other things such as wearing another layer of clothing or by covering yourself up with a throw while sitting down to help save the pennies. Fleece Throws can start from as little as £4 each in places like Tesco and Dunelm, I bought 3 at £6 each last year. They are large ones and one covers both mine and my sons legs when we sit and watch television in an evening. Fleece throws are also easy to wash and fast to dry due to the material.
✩Clothes Airers and Camping Pegs – no I’m not mad! I’m letting you in on my clothes drying secrets! So for £20 or less you can buy a large freestanding clothing airer at a supermarket and a packet of camping peg hooks from a local do it all shop. You’ll be able to dry more clothes outside this way and in more weather types simply by pinning the airer down to your lawn with the pegs. This way it doesn’t blow over, but you can easily pull up the pegs and pick up the whole thing to move it indoors if the weather takes a turn. I regularly do this with small thinner items all year round if it’s windy and the sunshine is out. Any reason to not use the tumble drier I will surely take it! You can save lots of money by drying even half a load of washing outdoors.
✩Turning it OFF! – I’m a big believer in “if you aren’t using it then turn it off” and this goes for lights, appliances and electronics. There are only 6 things that are always on, either because they are constantly running or on standby in my home, they are the Broadband Box, the Sky TV Box, the Boiler, the Washing Machine, my electronic Doorbell and the Fridge/Freezer. Everything else is off, I only put the oven or microwave or drier on when they are actually going to be used. It saves me a ton of electricity by turning things off at the socket and not leaving them standing idle – plus with a small child you don’t want them turning on appliances that might get hot! So there are double reasons for clicking that off switch on the wall. It’s the same with main lights, if you leave a room just turn it off. Finished cooking dinner and done with that Oven? Just turn it off.
✩Grow Your Own – Every year I try and grow things but this year I am pulling out all the stops to try and grow more fruit and vegetables. Combining my rain catching water tubs with a watering can, I can easily water the tubs I have created. Follow me on my social media for updates on this because I will be documenting photographically just how well we do through the Summer and into the Autumn. Even if you have a balcony not a garden, you can get vertical planters nowadays where you can grow things such as herbs, raspberries or strawberries, tomatoes and chill peppers. I don’t have a patch that I am able to dig up, so I am simply using pots to grow everything. Check out my Instagram for more photographs on how I am managing to do this. Also, teaching your children (if you have any) about the importance of nurturing something while it grows is an excellent life lesson.
✩✩✩
Thanks for reading this blog post today. I would love it if you would get in touch, write a comment below if you found any of this useful or you liked some of my ideas. Do you have any awesome ideas yourself for saving money?
If you implement any of my hacks yourself I would love to hear from you on here or on social media. You can tag me #SevernSabrina if you want me to see it too.
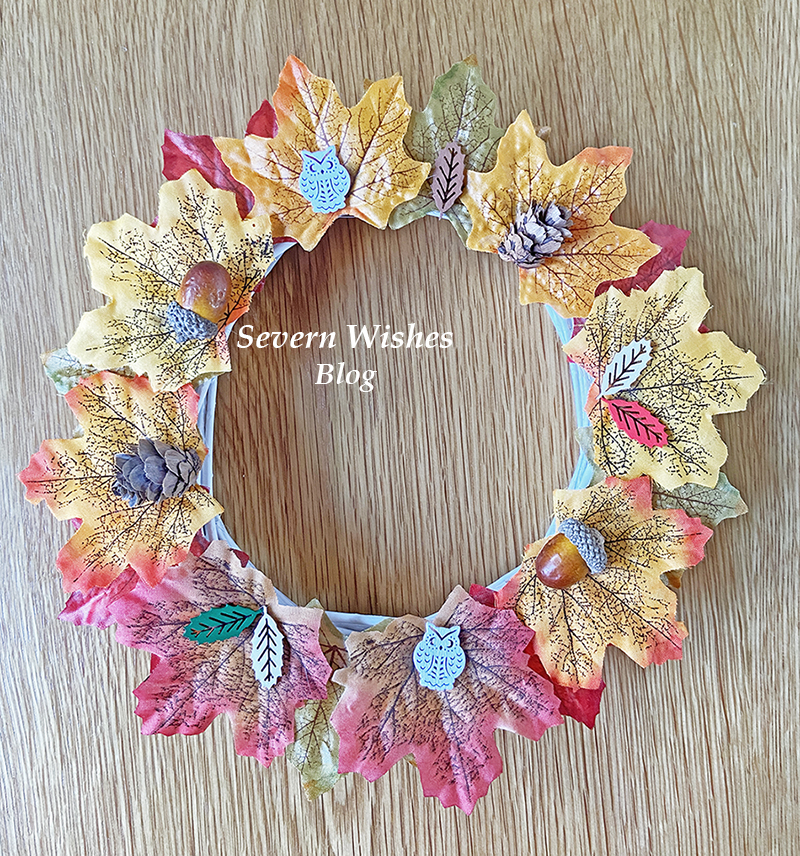
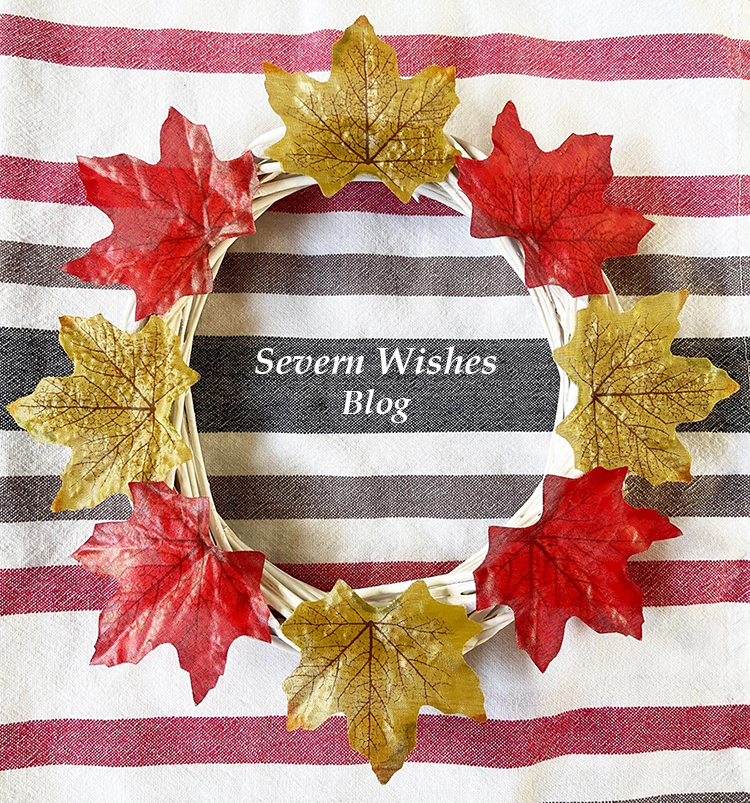
Welcome to one of my latest Craft Project posts that I am very proud of. I have been wanting to make a wreath for about four years now, and I never got around to it until this Autumn. Oops!
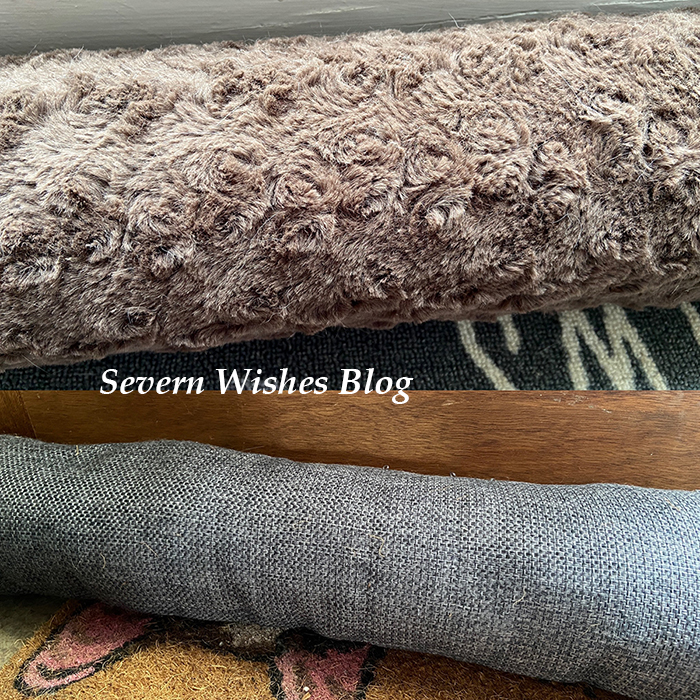
Autumn Wreaths like this can be placed indoors flat or indoors hung up. If you have a nice sheltered porch over your doorway you could even hang it outside! I chose to make an indoor wreath using false leaves, dried pine cones, acorns and wooden craft pieces.
Here are all the things I have used to make my two wreath rings.
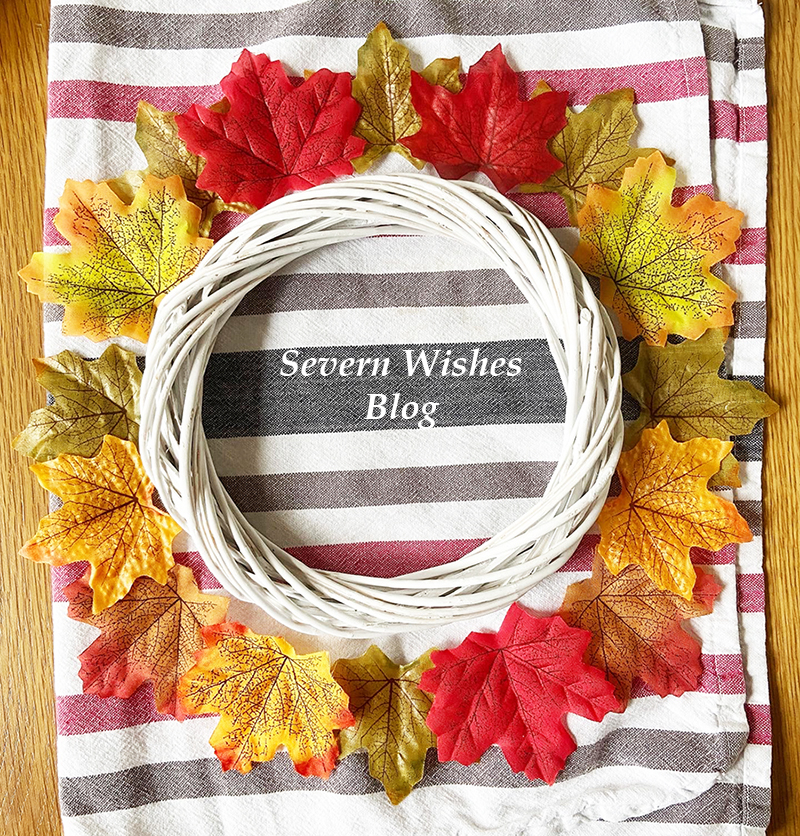
It’s a good idea to decide on your design before you start gluing anything, I place mine around the outside.
How to Make
Step 1. Prepare your design before you glue anything down.
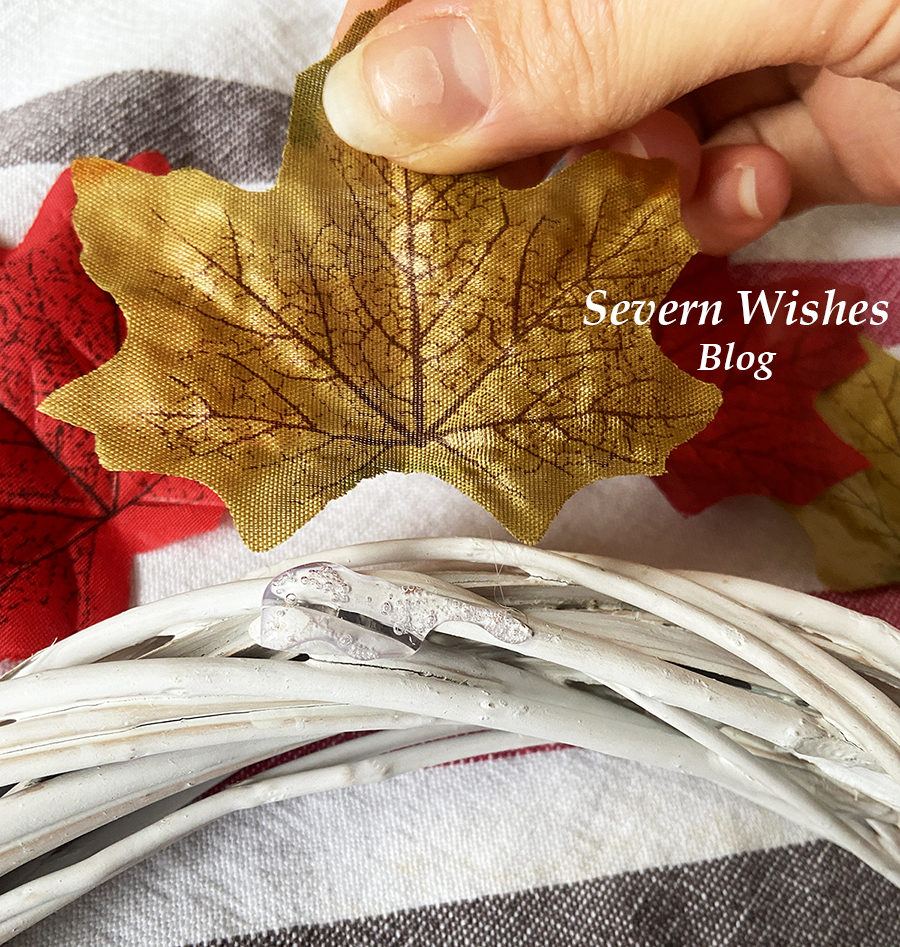
Step 2. Glue the first layer of items down using a glue gun and wait for that to dry and the glue to harden before you add the next layer. Use a blob of glue per item, just enough to stick it down because you don’t want lots of excess glue on the wreath.
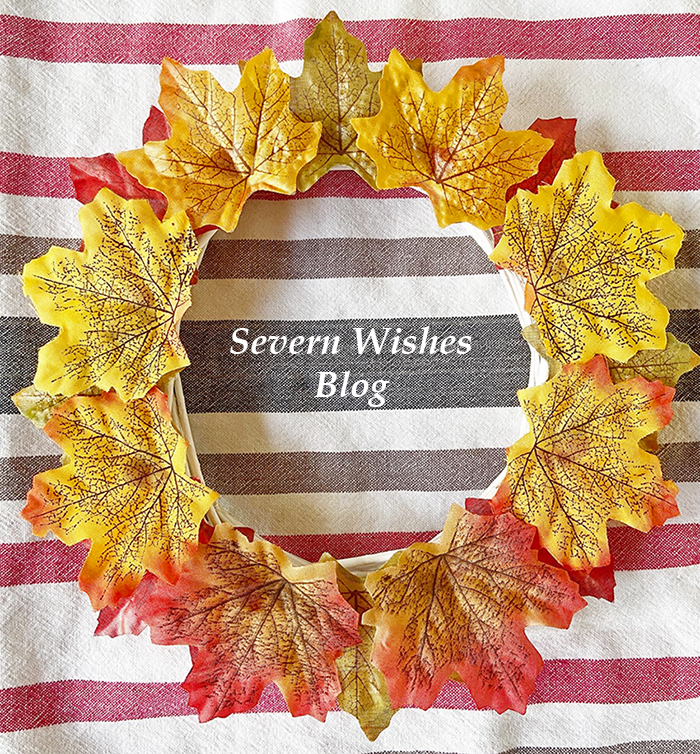
Step 3. Repeat the second layer with the glue and take care when pressing down the items when it is hot. Layer by overlapping the leaves until all the white on the front is gone. Once you’ve done the leaves let the wreath dry a few minutes and the glue harden.
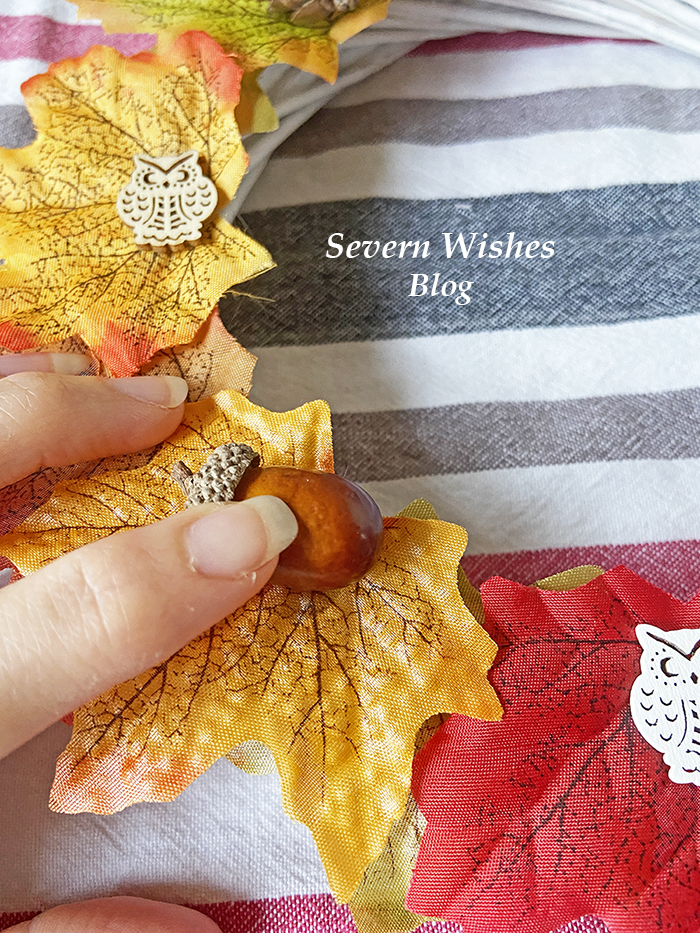
Step 4. Keep adding to your design and let the layers dry in between, it only takes a few minutes to dry each time. You can put as many layers on as you would like to, and then add the three dimensional items last.
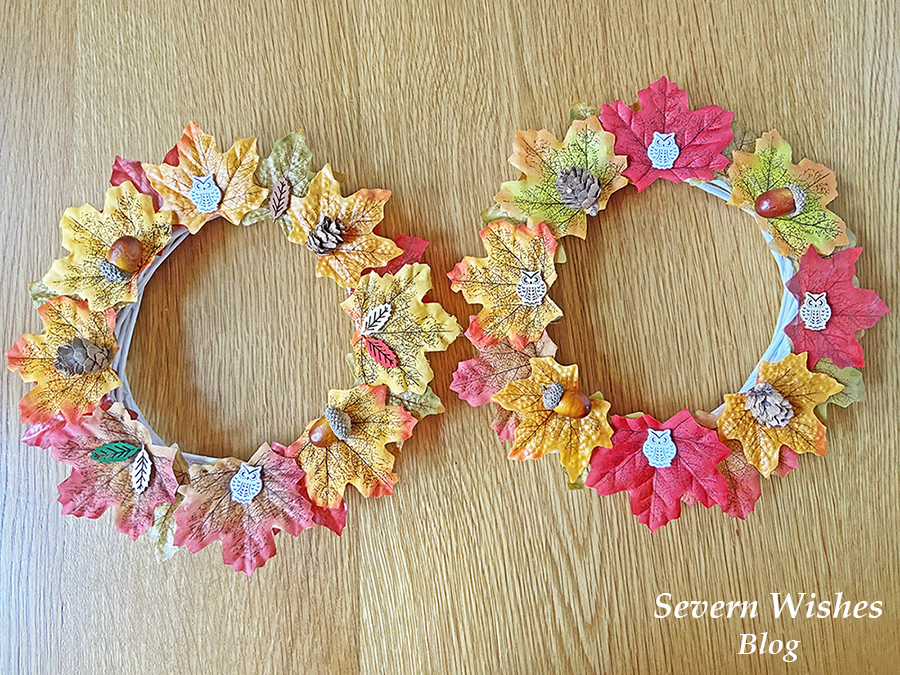
Step 5. When the design is fully dry then you are able to either lay it out or hang it up in your home. If you are hanging it up on a window you may want to repeat the design on the other side so that you can see leaves on both sides.
Take Care when Pushing the Items on the the Hot Glue
TOP TIPS! Make sure you only use a little glue, it’s hot and a little goes a long way!
TOP TIPS! Layer the leaves up until you cannot see any more of the white, overlap them slightly so as to create depth to the wreath ring.
Make sure to decide on where you want to put the items before hand so that you don’t make a mistake when gluing.
What You Need
Wreath Base – Wicker or Rattan or Wood Sticks Glue Gun and Glue Sticks Decorations or Naturally Sourced Dried Out Items (like Pinecones) or Both!
Where I Bought From
I did a Nature Foraging Walk with my son. I got the wooden pieces like owls and leaves and the artificial leaves from The Works in their craft part of the store. I got the Rattan Wreaths from eBay. I got the Glue Gun and Sticks from Amazon.
✩✩✩
Thank you for reading this crafty and make blog post today, if you have any questions for me then please comment below this post and I will happily answer them for you. If you like my wreath please let me know!
My blog post today is all about Kitchen Hacks for Tidying and Storage! I hope you are excited! I love helping people to get the most out of their homes!
Have you ever seen those awesome flat pack storage ideas? IKEA sell a load of them, but you can also get them from good homeware stores too. Well I have a few awesome life hacks for you for the kitchen, using this type of storage essential! They are normally designed for clothing but that doesn’t mean you can’t use them in other rooms.
For Example. I use a Sock Storage for the kitchen drawer! I use mine for my Tea Towels and cloths! You can also use this style of storage for your bedroom drawers for a variety of items, not just socks, but anything that is around that size.
I use a large coffee jar as a vase, and I also use a large coffee jar and its lid for cosmetic pad storage.
Just because an item used to have one purpose, does not mean you can’t then use it for something entirely different. I am always reusing items around my home to suit my needs at that moment in time. Let us take a look at some of my hacks now.
I use a sock organiser for tea towels in the kitchen drawer.
✩ Other Kitchen Hacks ✩
Reusing and Repurposing Glass Jars
An empty Herb Jar makes a great kitchen pen pot, stick 2 magnets on the back and it will be attachable to your fridge! I use mine for pens and fridge magnets!
Do you drink Coffee? Some large coffee jars are made of very sturdy and strong glass, not only that but they are often nice shapes too. You can reuse these as Pasta Jars, Vases for Flowers, Cosmetics Storage and so much more. Do you have a use I’ve not thought of that you love or already do at home? Please leave me a comment I would love to hear your ideas too.
Small Fat Jars from such things as Salsa, Jam, Apple Sauce and Chutney etc are a great size for when you make your own Chutney or Jam at home. If you don’t do a lot of cooking you could repurpose these jars as kitchen storage, one for loose buttons, elastic bands and the like. One could be for chewing gum and mints, or even sauce sachets and seasonings when you get spare from a takeaway say. Reusing glass is very economical, especially now that places have started to do “fill your own” with refillable food items.
Kitchen Storage Hacks – Labelled Boxes
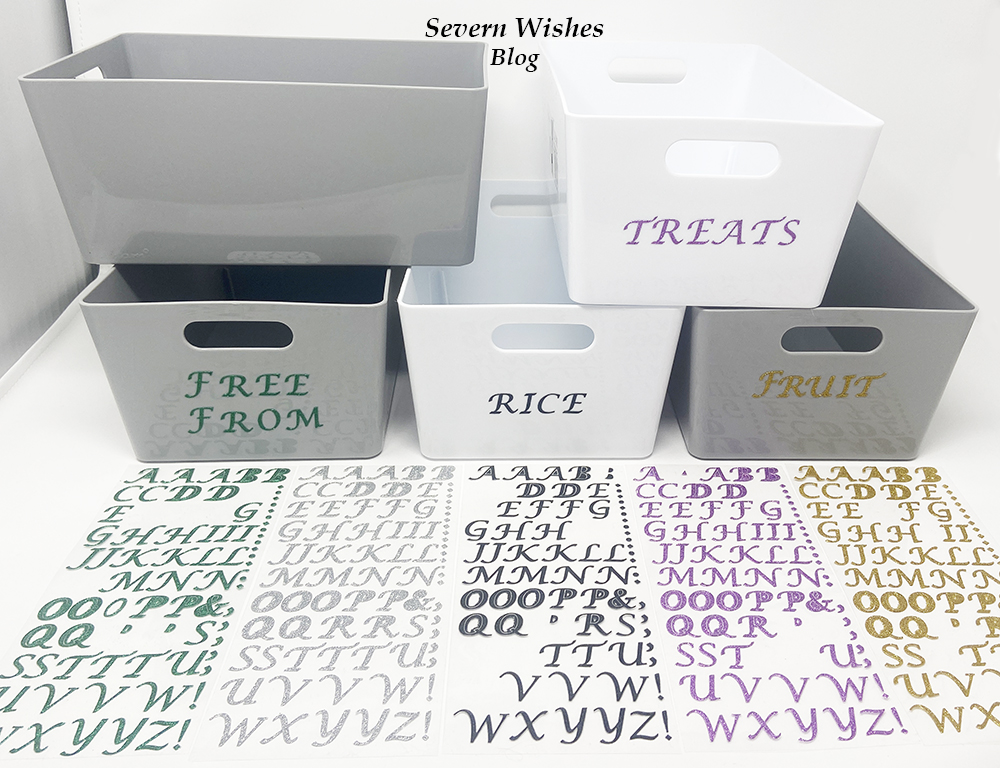
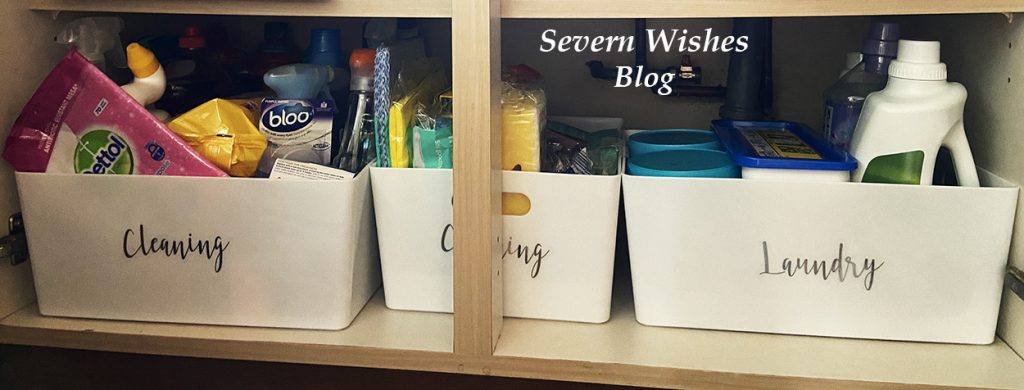
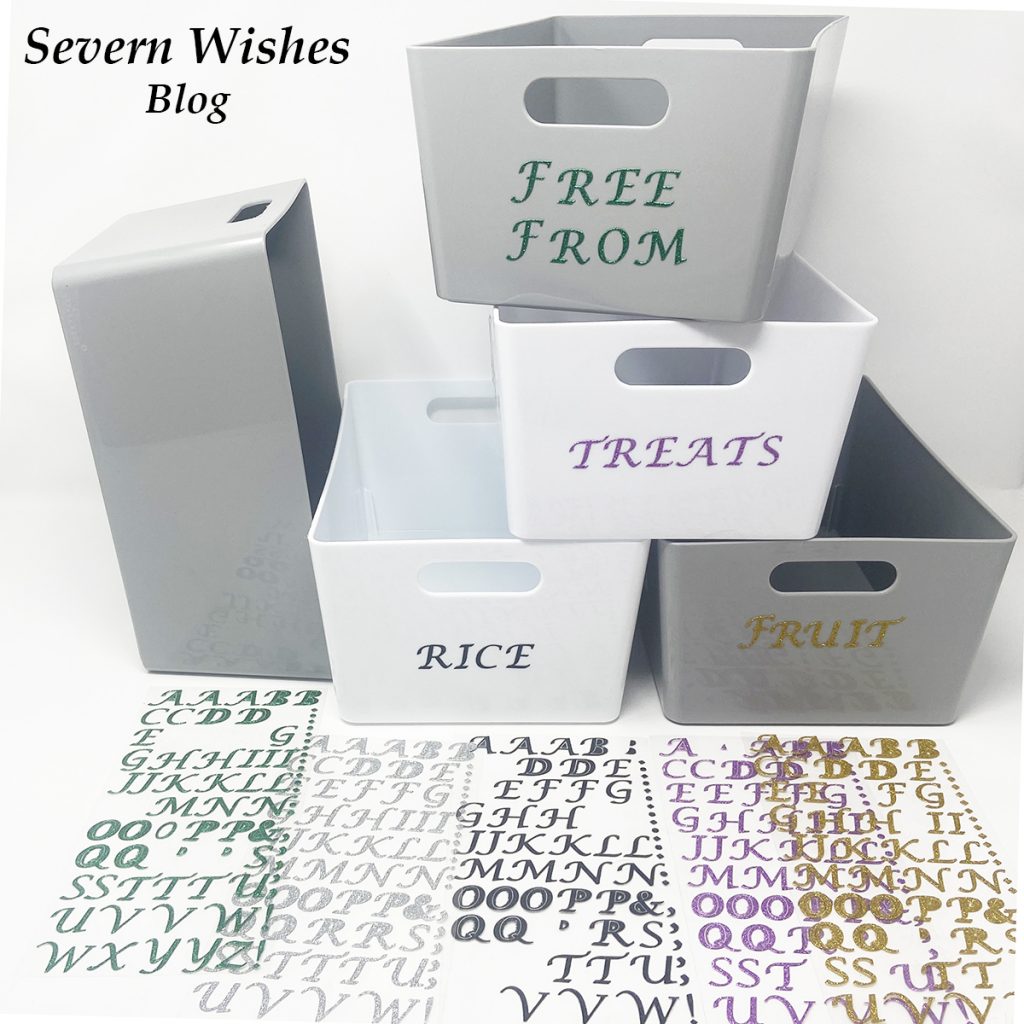
So since I moved house I wanted to create some labelled storage boxes for my kitchen cupboards, but I was shocked to see online retailers offering just the labels at £2 plus each! Boxes that had names printed on for you started at around £15 a single box! Then you had to pay postage! Queue me putting my face in my hands… On a visit to B&M in my nearby town I saw a sheet with some lovely swirled writing silver stickers on which said Laundry, Cleaning, Cloths etc. I bought one for £2 and got inspired to make tidying up boxes to go under my sink. But I wanted to do the whole kitchen at this point too!
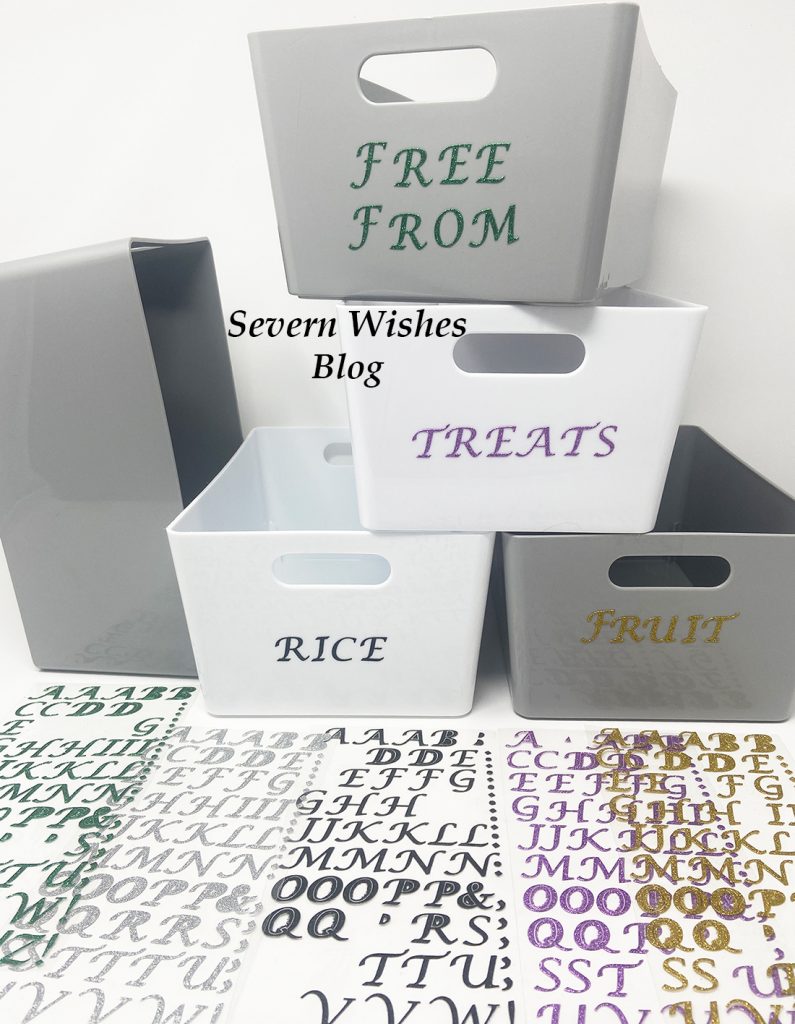
I looked at my budget which was £20 and I figured out that I needed at least 8 boxes for my cupboard, if not more. I shopped around and found some fantastic letters on Amazon, a pack of 8 alphabet stick on glittery letters that would only cost me £4 with free Prime delivery. Get in! Yes! I ordered them and then went on the hunt for boxes. Having purchased Curver and Wham boxes in the past and being happy with their quality, I thought I wanted something similar. I used google to find that Wham were the only ones who did solid sided boxes that came in a range of sizes.
Once I knew what I wanted I matched their size to the width of my cupboards and searched for who was doing them on any deals. I managed to get them for just £1 a box while they were on offer online, and although I ended up having to pay for delivery it arrived in two days and I had just what I needed. I ordered 8 boxes of one size, 4 White and 4 Grey. Then I ordered 3 larger White boxes for my “Laundry / Cleaning” cupboard. I only have my kitchen and no utility or storage area, so every inch of space matters a great deal to me.
It took me 3 hours to stick down all of the lettering on to my boxes, working out which colour went well on each box so it stood out, and carefully making sure they were also in a straight line across the boxes. Then it took another hour sorting my cupboard out and placing the corresponding products into their labelled boxes. Overall I am really happy with how it has turned out, and I saved myself a ton of money in the process!
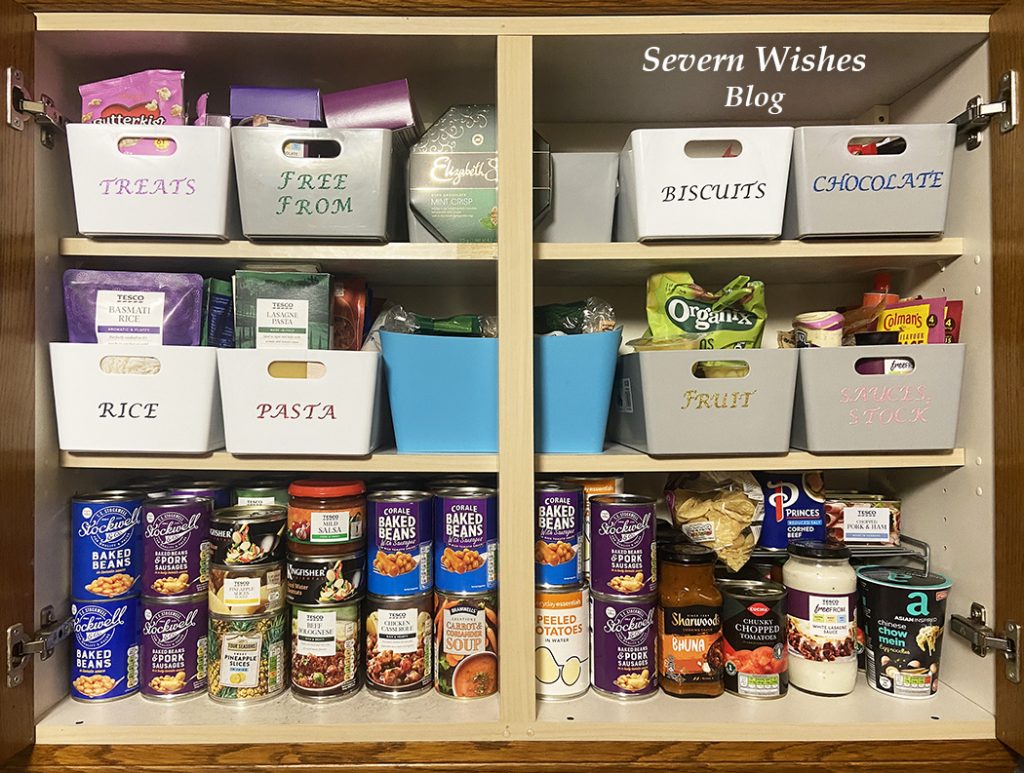
BEFOREAFTER
Here are my before and after pictures for my kitchen cupboard, I can now see exactly what I have got and also when I am running low on something. As a single mother on a strict budget each month I find it very important to be able to do this effectively, meaning I don’t waste time looking through things every week. By having these organised boxes I can simply look at what remains in each one when writing out my shopping list.
When I finally got all the boxes into place I had wished I had found the time to do this sooner. It has made my cleaning and shopping life ten times easier.
Wow! Don’t they look great! I’m really happy with how they turned out!
I purchased the Wham Boxes online and the Letter Stickers I found came from Amazon UK.
I give the Quality of the Wham Boxes 5 ✩ and would buy them again.
Thank you for reading this blog post today and I hope I have inspired you to make some changes for the better, in your own home. It’s easy when you know how! Any questions just pop me a comment and I will happily get back to you.
If you’re reading my blog today you might be in the same boat that I was last summer, which is wondering if it were time to make the move for your little one. The transition to a toddler bed is not one to be taken lightly, it is a huge step for our little person, and they deserve lots of time, patience and assistance from us (as their parent/s) to help them feel safe and secure in their new upgraded space.
Hopefully this article that I have combined with my review of the toddler bed that I bought, can help you to make informed decisions on what is best for you and your child/ren. Is it time? Only you will know by the actions and dependence your child currently has.
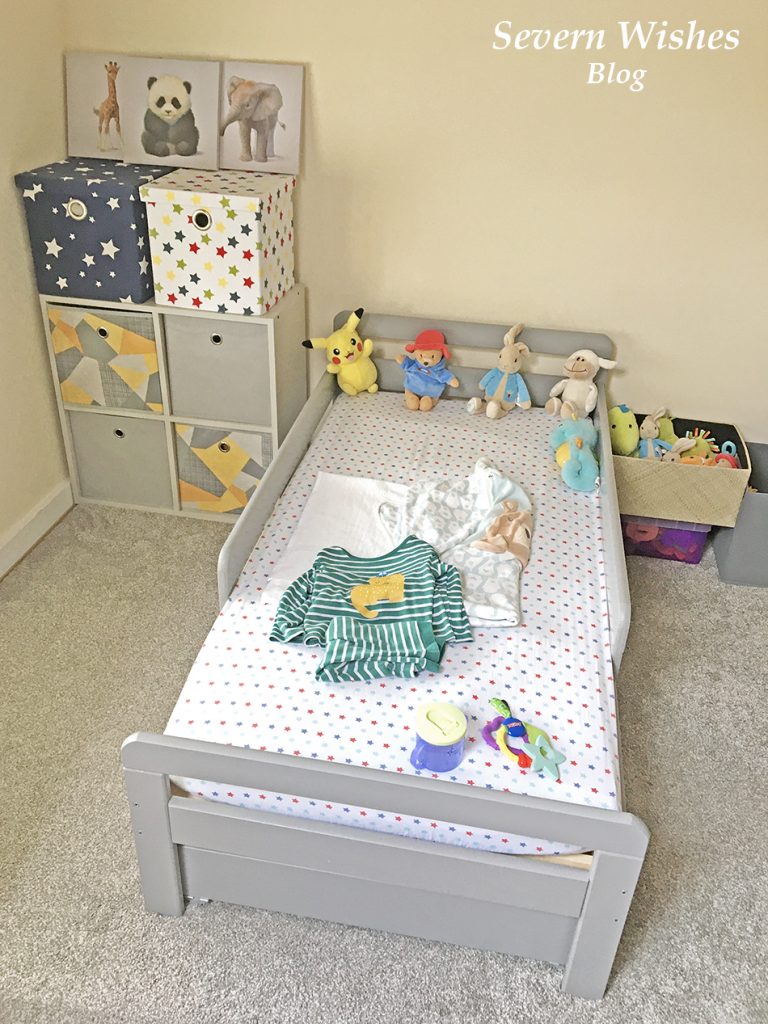
When the bed was finally in place…
When my son turned two I wanted him to start using a toddler bed and there were several reasons why I thought this needed to happen now. The first reason was that it was difficult to lower him inside his cot when he had fallen asleep in my arms, and he was now tall enough to consider trying to climb over. I didn’t want that to happen, so I purchased his first toddler bed after measuring up the space that I had in his bedroom.
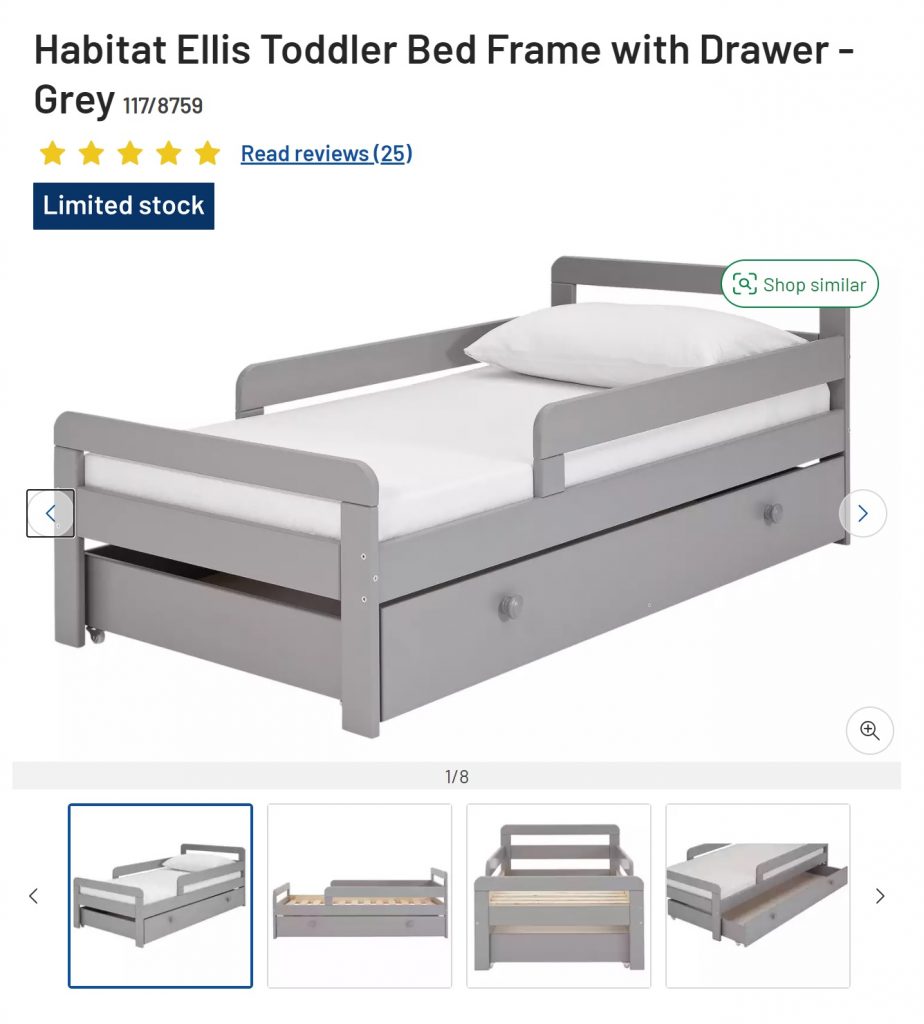
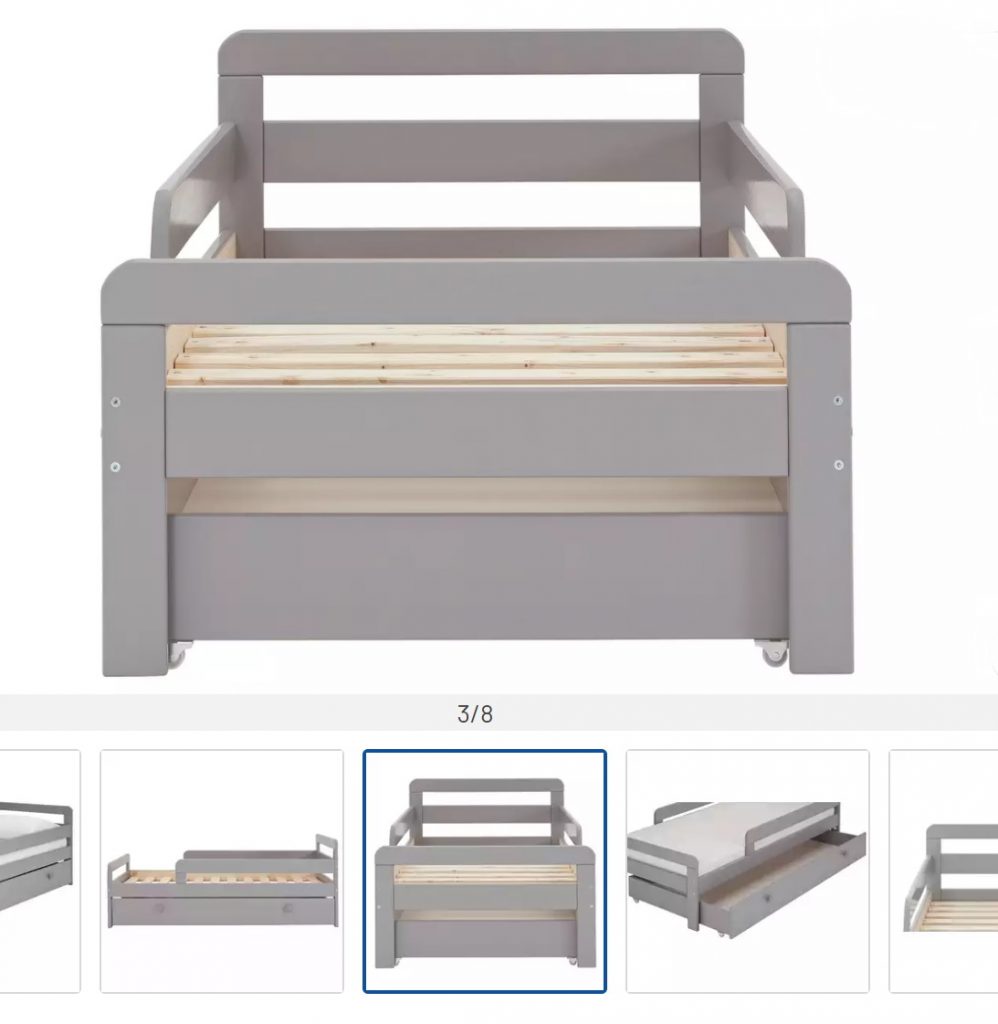
I bought the Argos “Ellis Toddler Bed” in Grey, to match my sons furniture, and then bought a mattress online. I had chosen this bed for three reasons, the first being its height from the floor, the second was that it came with a drawer for under bed storage, and the final reason was because of the three quarter sides.
My son moves frequently in his sleep and I knew that it would be quite a while before he could sleep safely without any sides to his bed. This bed was a great size for the price and I would hope it to last him two years at least due to the length. The handy draw keeps tidy all of the towels and bedding I use for my sons room and it is easy enough to slide in and out on its rolling caster wheels.
Bed Frame size L144, W75, H57cm. Required Mattress size L140, W70cm. Clearance between floor and underside of bed 19.5cm. Drawer size H18.5, W139, D73.5cm.
There are now limited stock on this bed but it does also come in different colours. Here is what I would give it on my review scores having used it now for a whole year.
Quality of Paintwork 4✩ Quality of Manufacturing 4✩ Quality of Finished Product 5✩ Correct Specifications 5✩ Product Design 5✩
Overall this product is excellent quality and although it was difficult to put together, overall we have been very happy with it. A fantastic size for toddlers and small children and my son hasn’t fallen out of it due to the great design with those side bars. Although he is average height for his age (at 3) he still has plenty of room left to grow into this bed.
The Transition from a Cot to a Bed – My Tips and Tricks
The biggest thing about change for toddlers is that it can be unnerving to them. They get anxious and have to get used to something over time, so don’t worry if this alteration in routine and sleeping area takes a few weeks for them to get used to. The best thing that you can do for the first few nights is to keep the routine the same, but just place them in the new bed. If you have a routine that ends with them being placed into bed keep doing that. Then on the second week add one new thing now that the child is older such as, can they now get into bed themselves because they are old enough to do so? It will make them feel bigger if they do it themselves and gives them confidence, but only when they are willing to get into bed on their own. Don’t forget to use positive reinforcement when they are on the bed or in the bed so that the praise gives them positive ideals of being in the furniture. Saying things as “What a lovely new bed you have!” and “Now that you are two/three you can sleep in this special big kids bed” and remember to let them know that this is a good thing, a positive step and not one away from you. Definitely praise little one when they get into bed without you having to prompt them too!
Getting the child to stay in bed is another matter though. Don’t worry if they frequently get out of bed or even tumble out of bed half asleep for the first few weeks, wondering where you are (especially if you have had them sleeping in your room up until this point). And the beauty of the toddler bed is its distance to the floor. They usually are only between 15 and 20cm from the floor. Make sure to implement rules in their new bedroom, such as no toys after bed time. The child is not too young at this age to be putting their own toys back into a box or tub or basket, so why not start them off if you haven’t already done so (good practice for preschool). I have found that it’s also a good idea to introduce a clock or show the time to a child at this age, and tell them that at “7 o’clock” (or whatever your bedtime is) their toys are put away and your bedtime routine begins. Personally we are in the room for 7.30pm but it can take up to an hour to settle my three year old, some nights a story or two is enough and other nights I’m still reading at the hour mark. But it’s just imperative that you keep the routine the same, even if the time differs slightly, it’s still the act of doing things in the order that they are used to, and the act of then getting them into their own bed.
Talk About Their Safe Space
I tell my son every single night that he is “safe in his bed” and he is “safe at home with mummy” and this has reinforced him to stay in his bed. For the first few weeks if he woke in the night he would come and find me because he wasn’t sure on things. Now he’s more than happy to climb into his bed and choose the stories he wants at bedtime. He knows that I’m never far away now, but his bedroom is a safe place for him to be. He doesn’t always come and find me now that he is older either. He often wakes (and I hear him) but he presses his singing toy and lays back down or he will have a sip of water from his bottle and then turn over and go back to sleep. Again positive reinforcement is key when organising their safe space. When little one wakes up they want to recognise where they are and that it is home or safe, favourite toys or items around the room will help.
If you find your little one is struggling initially with the bed transition then you could choose to sleep on the floor in their room for a few nights. Whenever they wake up in the night make sure they know that you aren’t far away and they are safe. It is totally normal for most children to find their new surroundings daunting, but remember to just keep praising and comforting, they will soon get there. All children are different and it could take a few weeks of patience to achieve the end goal, but everyone should sleep better once that is over with.
Ensure Comfort
Make sure that they are comfortable on a firm but soft mattress and that the room is an optimum temperature. I still use our Gro-Egg from when he was a baby to tell me the room temp! My son had sleeping bags until he was two and a half, he was happy to sleep in them until he got older then he kept trying to take them off. I gave him his own thin pillow at three years of age, and I now put him in Pyjamas and a blanket over him. I have bought a toddler duvet this summer ready for the colder winter months, now that he is old enough to be able to push it away from his own face.
Keep Stories Gentle at Bedtime
I have found that stories that talk about bedtime or going to sleep are best at bedtime, other books can just excite little ones too much. My son has an absolute favourite book about a bear and a baby bear and he’s on his way to going to sleep, and we read it every night. I can now recite it from memory while he falls asleep in my arms (that is how many hundreds of times I have read it). But it’s such a lovely and gentle book that talks about how much mummy bear loves little bear and she is never far away no matter what he is getting up to. Consider what you are doing during your bedtime routine and make sure that there is nothing that is causing your little one to become more awake as opposed to be falling asleep. The best books we have found come from The Works.
My sons favourite book that I highly recommend, we found it at The Works.
Thank you so much for reading this blog post that I have written today, I do hope that you have found it informative and if my lifestyle experience with my son can help you in some way then I am more than happy to share it.
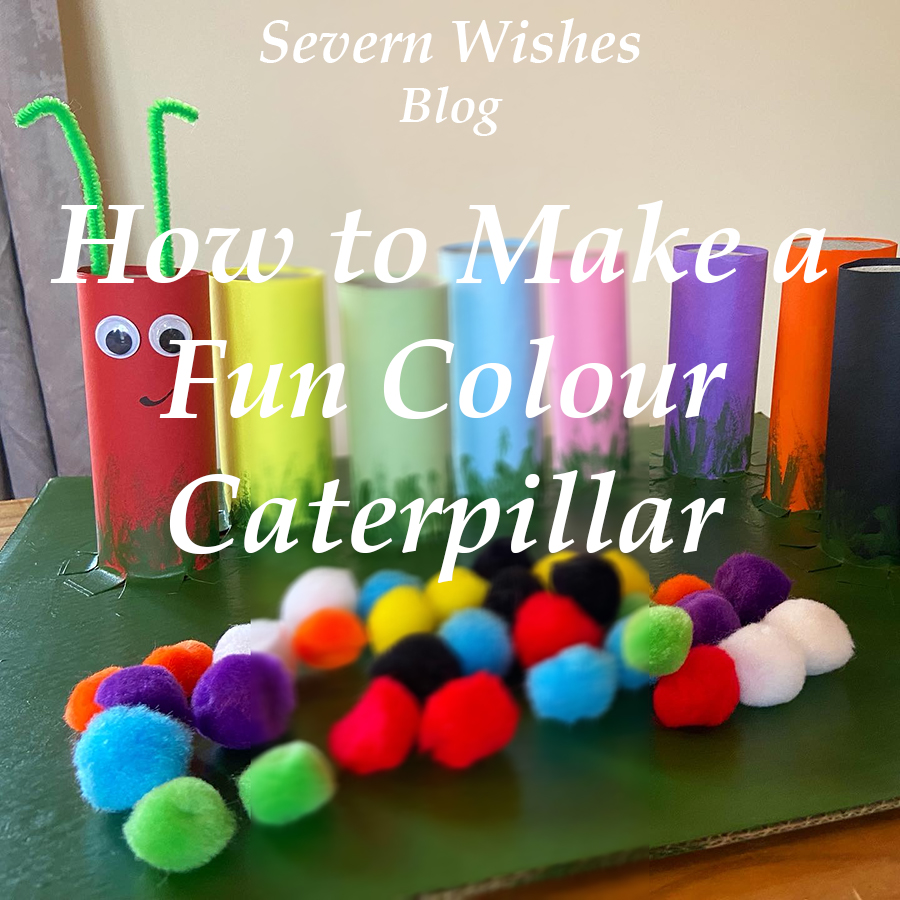
My Fun Craft Caterpillar is an easy to make craft project, that can help you to teach your toddler about colours and counting. You can make it any size you like and with only a few simple and non expensive items. Ideal for children aged two plus with good fine motor skills.
Designed for Age Group – 2 Years Plus (Supervised) Parent Difficulty to Make – 3/5 Time it takes to Make – 4 – 6 Hours Cost to Make – £10 Reasons to Make – Learning about Colours and Counting. Helps Develop Fine Motor Skills.
When my son began having issues with delayed speech I came up with several things to aid him in his communication. One of which was a Caterpillar friend that I made into several different items. Today I’m going to be showing you how I made my Fun Craft Colours Caterpillar!He is cute and great for helping little ones learn about colours, counting out and developing fine motor skills.
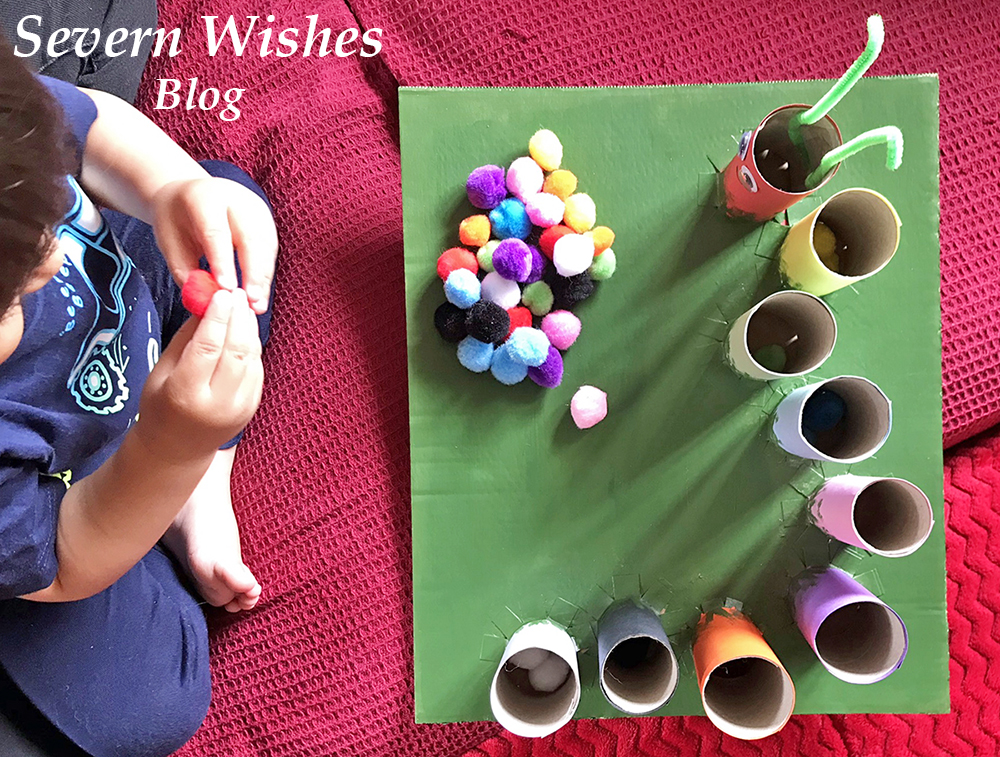
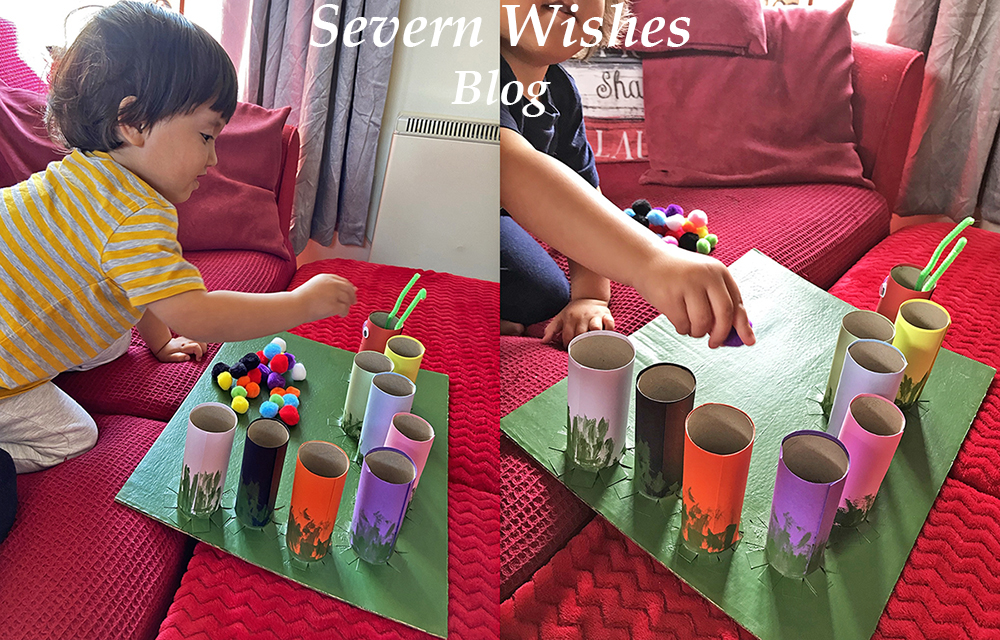
TOP TIP I wanted to help my son develop his fine motor skills as well as improve him saying different colours, picking up the Pom Poms and getting them to drop inside the correct tube does take some skills for little ones, so don’t worry if they have to learn how to do it. My son got the hang of it really quickly and was soon getting faster at doing it. One Tip is to show your little one what you want them to do, and then let them figure it out on their own a bit too. Always supervise but encourage and praise when they succeed.
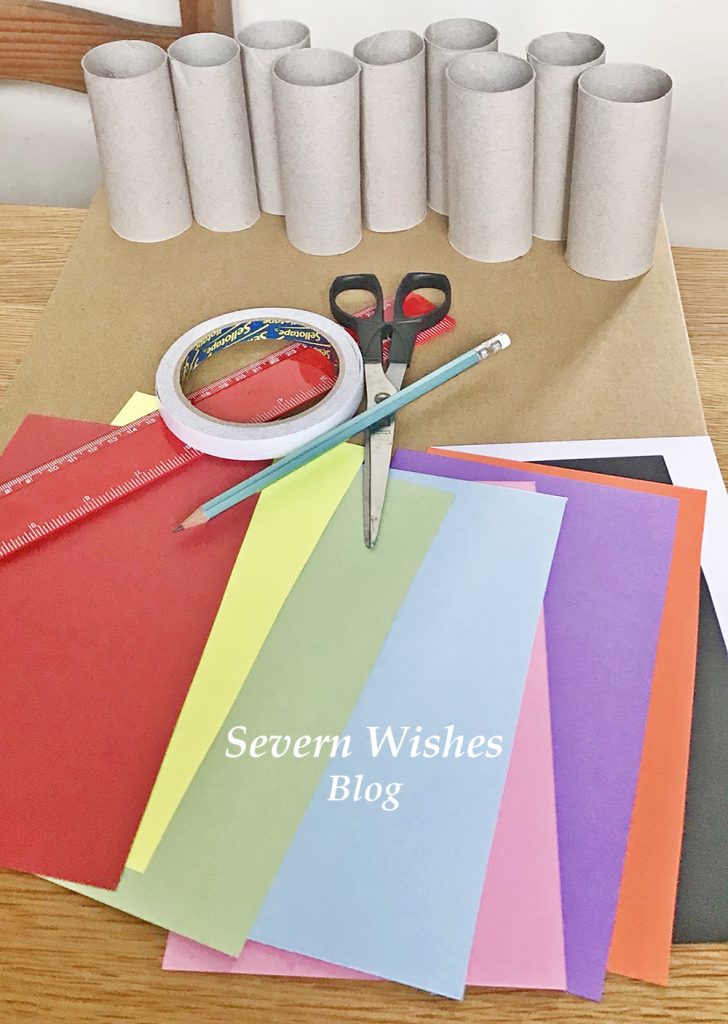
What You Will Need
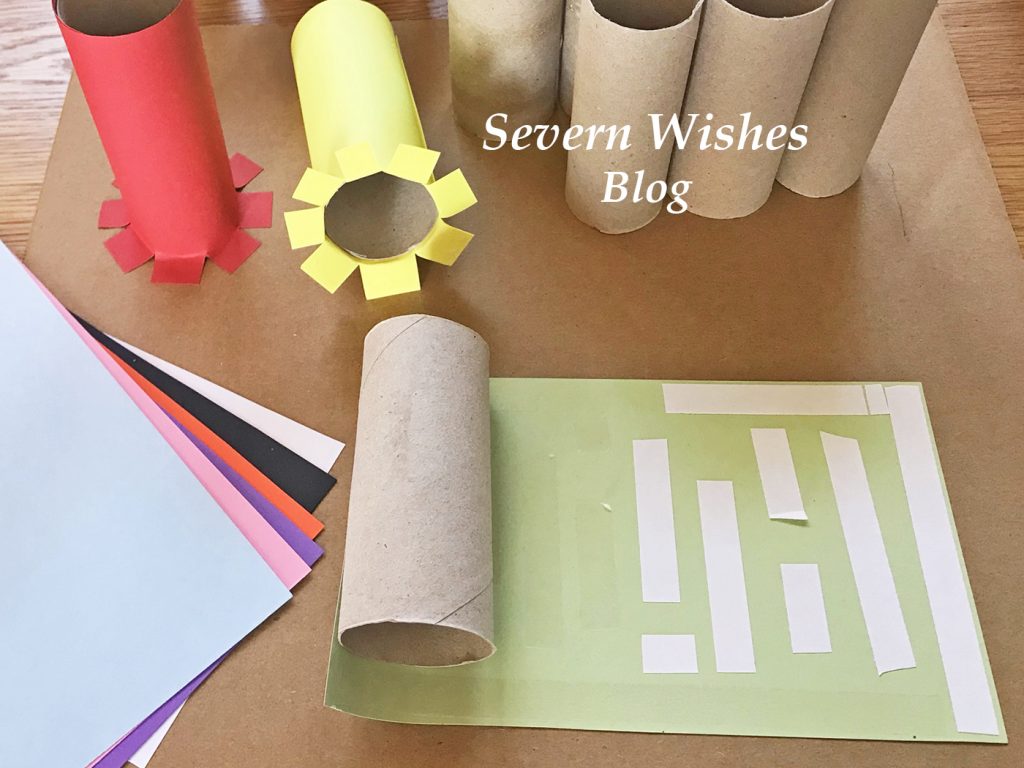
Toilet Roll Tubes – You can use toilet rolls and kitchen rolls and just trim them so they are a similar height. Order your card and Pom Poms and work out how many rolls you will need, you require one roll per colour.
A Thick Cardboard Base – Do you have a sturdy box after going shopping or have had something delivered? You need a piece of strong thick cardboard either a Square or a Rectangle for your Base that the Caterpillar will stand on.
Coloured Card – You need to try and match the coloured card with the Pom Poms you are ordering. If you want to do a simple Caterpillar just go for a pack with Red, Yellow, Green and Blue mix, sometimes you get an Orange or a Pink in those packs. I bought two packs to ensure I got black, white, purple, pink and orange for my more complex Caterpillar.
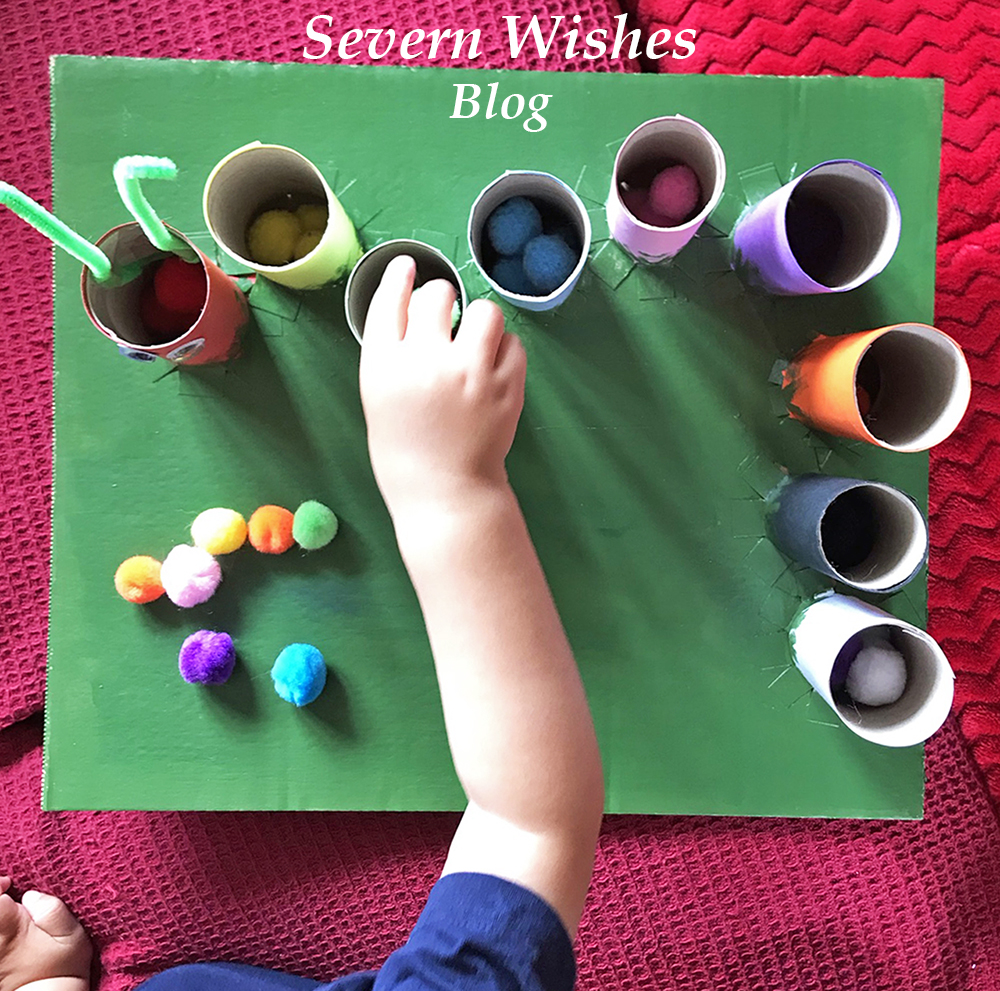
Coloured Pom Poms – A toilet roll tube is a certain width across, so make sure you only order Pom Poms that are less than this. My tubes are 4cm wide so I purchased a bag of mixed coloured 2cm Pom Poms. This means they are easy enough to tip back out after every use. Also ensure you get non toxic child friendly craft items from reputable companies.
Double Sided Tape – You need this tape for cleanly applying your Card to your Rolls, this is the most time consuming of the craft build but it’s easier and less messy than waiting for lots of paint to dry. (See my How To below).
Paint for the Base – I chose to just paint my base Green, as if the Caterpillar were on a leaf or some grass. You can be as creative as you like! You only need to paint the base, once you have fixed on all your tubes (see my How To below for more clarity).
Stationery and Craft Extras – You may want to stick on googly eyes and feelers, or draw them on, it’s totally up to you, your Caterpillar, your choice! 🙂 You will also need a Pencil and a pair of Scissors.
Where I Got My Craft Items
Coloured Card Packs – Hobbycraft Online Pom Poms – Hobbycraft Online Goggly Eyes and Pipe Cleaners – Craft Bundle from The Works Double Sided Tape – Tesco Store Green Paint and Brush – The Works
How To Make Colour Caterpillar – Sabrina’s Step by Step Guide
Step 1. Assemble all of your items as described above and ensure you have enough of what you need. Place a tube, a piece of coloured card and your desired amount of Pom Poms (I used 4 per colour) into individual piles. See what you have and how many tubes with the right colours and Pom Pom matches.
Step 2. Arrange the plain tubes on your base, and see how you would like them arranged. You need a one centimetre gap between each roll where it will be attached to the base. Bearing this in mind, arrange your tubes and mark with a pencil on the base where you would like them to go.
Step 3. Satisfied that you have all the pieces you need you can begin the card craft. Start by marking the pieces of coloured card for your tubes. For example mine were 15cm high, so I marked the card at 16cm with a pencil leaving the gap of one additional centimetre. Then cut all the card pieces to size ready for wrapping around the tube. TOP TIP ensure you leave enough card to wrap all the way around a tube with the extra at the bottom. You need at least a one centimetre section of card at the bottom of every tube for attaching it to the base.
SABRINA’S TOP TIPS: Don’t throw away pieces of card that you have left over from this make, I have plenty of Craft and Art ideas on my blog that you could use these bits for 🙂
Step 5. Cut strips of double sided tape, align them along the top and edges of the coloured card and down the centre, ensure there is enough at the edges. At what will be the base of the tube stack the pieces vertically, using a small gap between them, this will be cut in Step 7 to ensure an easy attachment to the cardboard base. Make sure you put tape on all of the coloured card pieces. TOP TIP Make sure to do this Step and on to Steps 6 to 7 at the same time and don’t leave the craft part way finished, otherwise the double sided tape will dry out before you can affix it to the base.
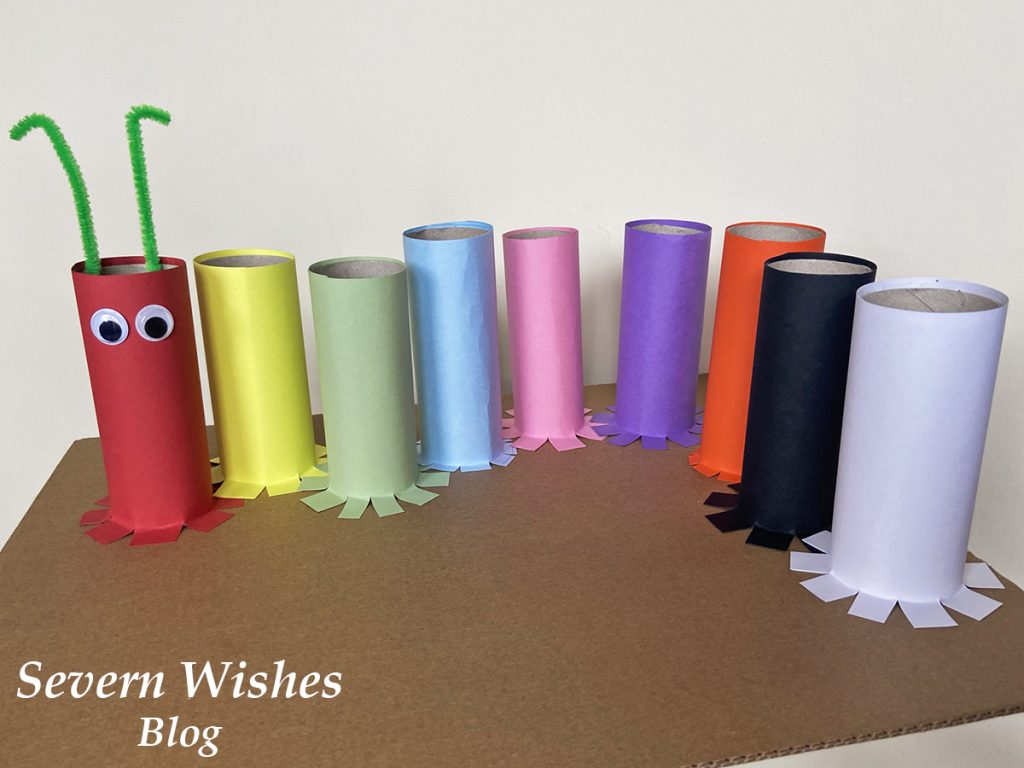
Step 6. Time to roll the card on to the tubes. Remove all of the double sided tape strips. Line up the top section of the cardboard with the edge of the tube, on a flat surface like a table, gently roll the tube along the card. The tape will stick well to the thin tube, using your thumb and first fingers you can smooth out the card as it sticks. Try keeping it in line at the top. Once you come to the end of the coloured card make sure the final line of it is secure to its tube, smooth with your fingers and hold the edge in place for a minute per tube making sure that its firmly stuck in place. Repeat this per tube, laying them down on their sides once you are finished.
Step 7. You now need to be cutting the base of each tube so that they can be attached to the base. Take the first coloured tube you want to attach to the base (I did a Rainbow so mine was Red) and using sharp scissors cut a one centimetre slice up into the card at the tube base. Rotate the tube around cutting vertical slices as you go. Then once cut all the way around, gently peel back the slices and make a base for your tube. Affix it into place on your cardboard base because they should already have the double sided tape attached. Press down firmly and hold for one minute. Repeat this action with all of the coloured tubes until they are all attached to the base. (See images above and below).
TOP TIP Painting the base last ensures the tubes stay in place after the double sided tape has helped stick them down on the base. It also neatens up any edges that may have tape sticking out or tubes that weren’t quite level.
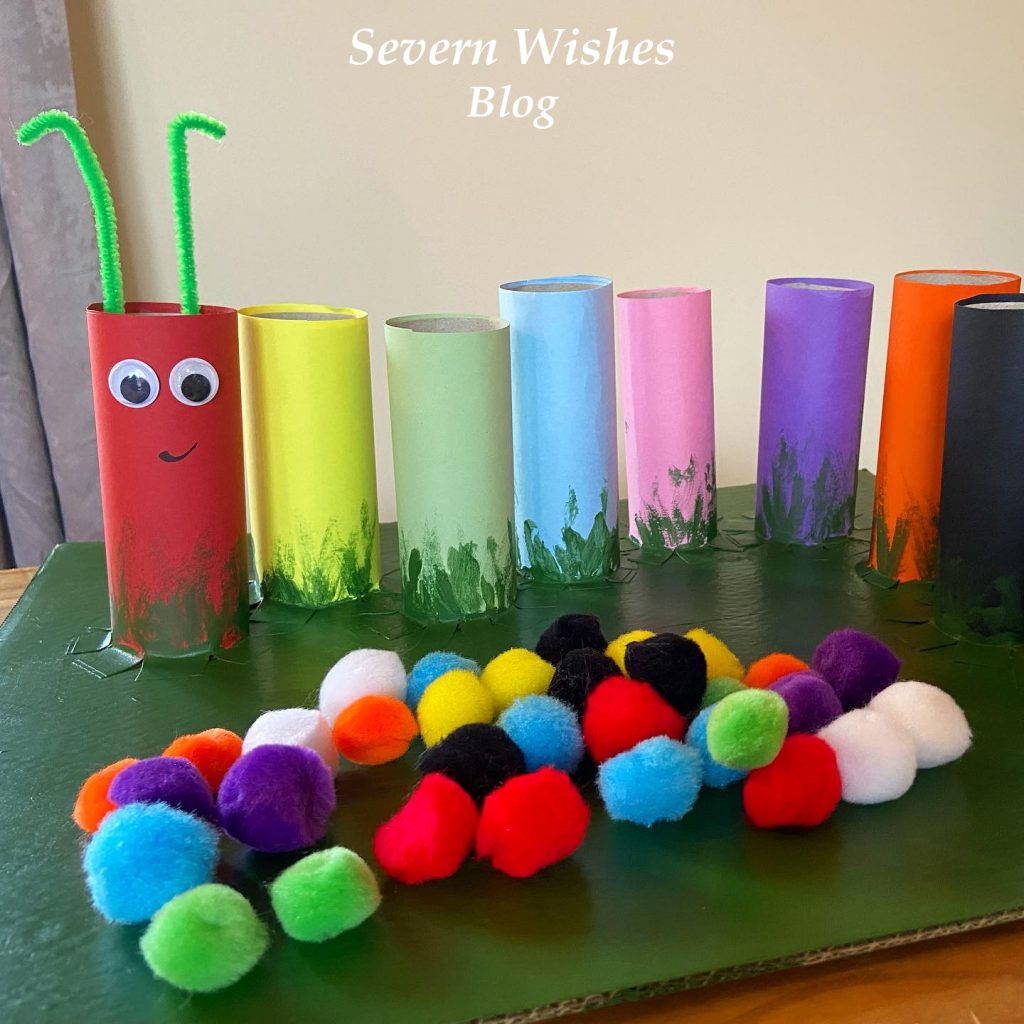
Step 8. With all your coloured tubes attached to the base you can now consider adding anything else to your caterpillar, and also paint the base with whatever paint you choose. I added googly eyes and some pipe cleaners as my Caterpillar feelers.
Step 9. Leave your Caterpillar to dry overnight before showing it to your little one. Ensure that you only play with it supervised either by you or another adult. The Pom Poms should be stored inside something that little ones can’t get into unless you are doing the toy together. Most children wouldn’t eat them at this age but better safe than sorry. I recommend a small plastic box like the really useful ones with the clip over lid handles.
TOP TIP Your Caterpillar friend can now be used to teach colours and numbers! Ask your child to count how many body parts the Caterpillar has, how many Pom Poms fit in each tube, can they separate the colours correctly and add them to the correct tube? This craft project can be used for play and learning and will keep your child occupied for hours.
Have you enjoyed this Craft Project? I would love to know what you think! Please leave me comments on the blog section below or on social media. Please tag me if you make a Caterpillar of your own! Use the hashtag #SabrinasCraftCreations
Thank you for reading this blog post today, I hope I see you again soon!
Best Wishes for a happy week ahead!
✩ Sabrina ✩
By continuing to use the site, you agree to the use of cookies. more information
The cookie settings on this website are set to "allow cookies" to give you the best browsing experience possible. If you continue to use this website without changing your cookie settings or you click "Accept" below then you are consenting to this.