
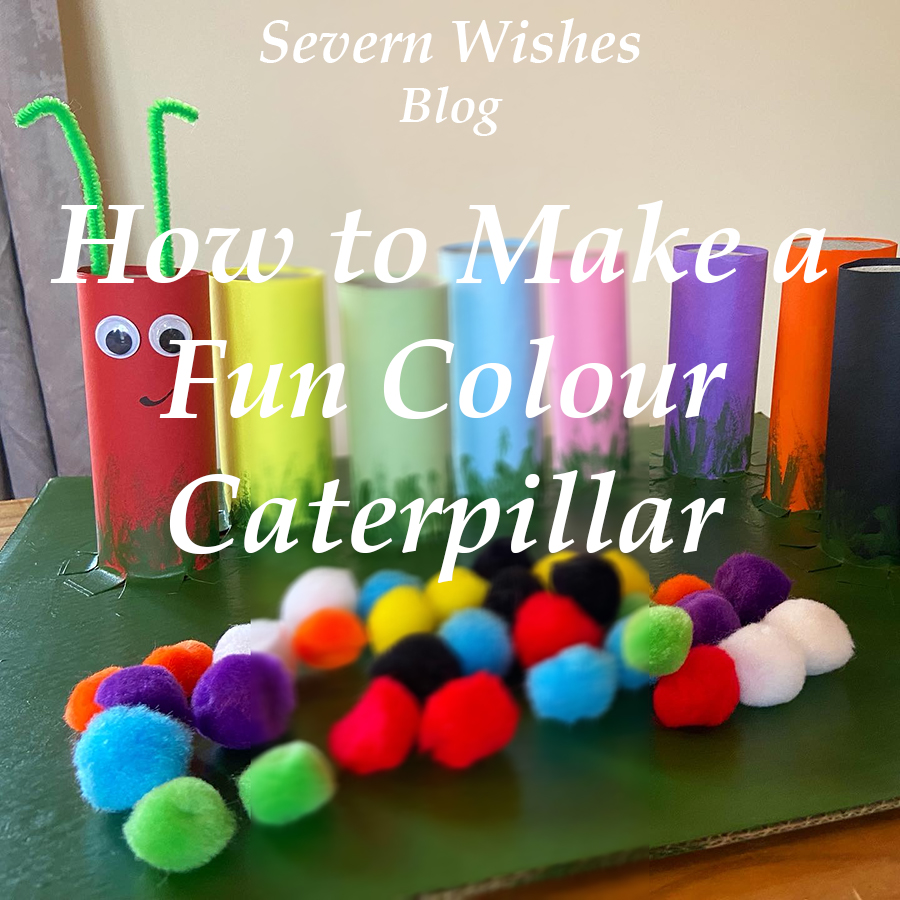
My Fun Craft Caterpillar is an easy to make craft project, that can help you to teach your toddler about colours and counting. You can make it any size you like and with only a few simple and non expensive items. Ideal for children aged two plus with good fine motor skills.
Designed for Age Group – 2 Years Plus (Supervised)
Parent Difficulty to Make – 3/5
Time it takes to Make – 4 – 6 Hours
Cost to Make – £10
Reasons to Make – Learning about Colours and Counting. Helps Develop Fine Motor Skills.
When my son began having issues with delayed speech I came up with several things to aid him in his communication. One of which was a Caterpillar friend that I made into several different items. Today I’m going to be showing you how I made my Fun Craft Colours Caterpillar! He is cute and great for helping little ones learn about colours, counting out and developing fine motor skills.
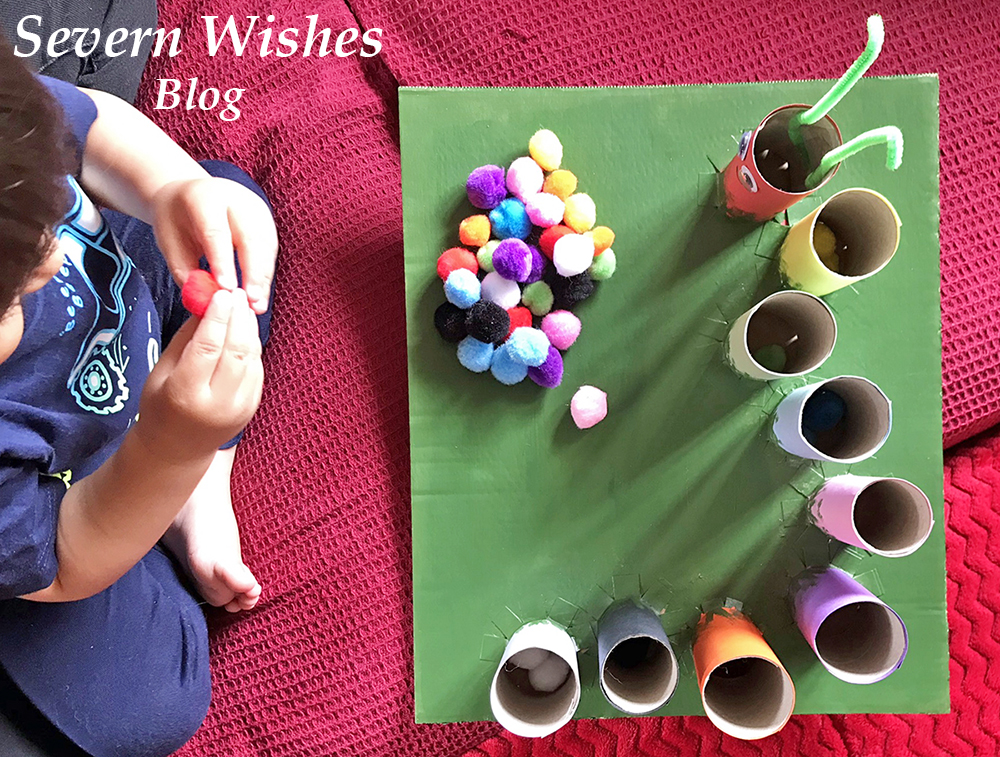
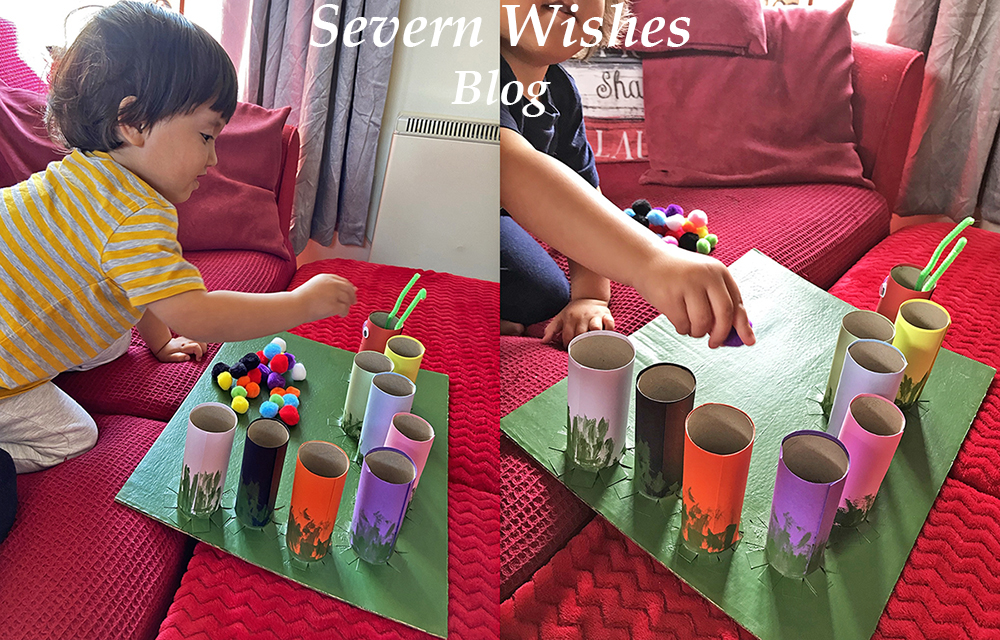
TOP TIP I wanted to help my son develop his fine motor skills as well as improve him saying different colours, picking up the Pom Poms and getting them to drop inside the correct tube does take some skills for little ones, so don’t worry if they have to learn how to do it. My son got the hang of it really quickly and was soon getting faster at doing it. One Tip is to show your little one what you want them to do, and then let them figure it out on their own a bit too. Always supervise but encourage and praise when they succeed.
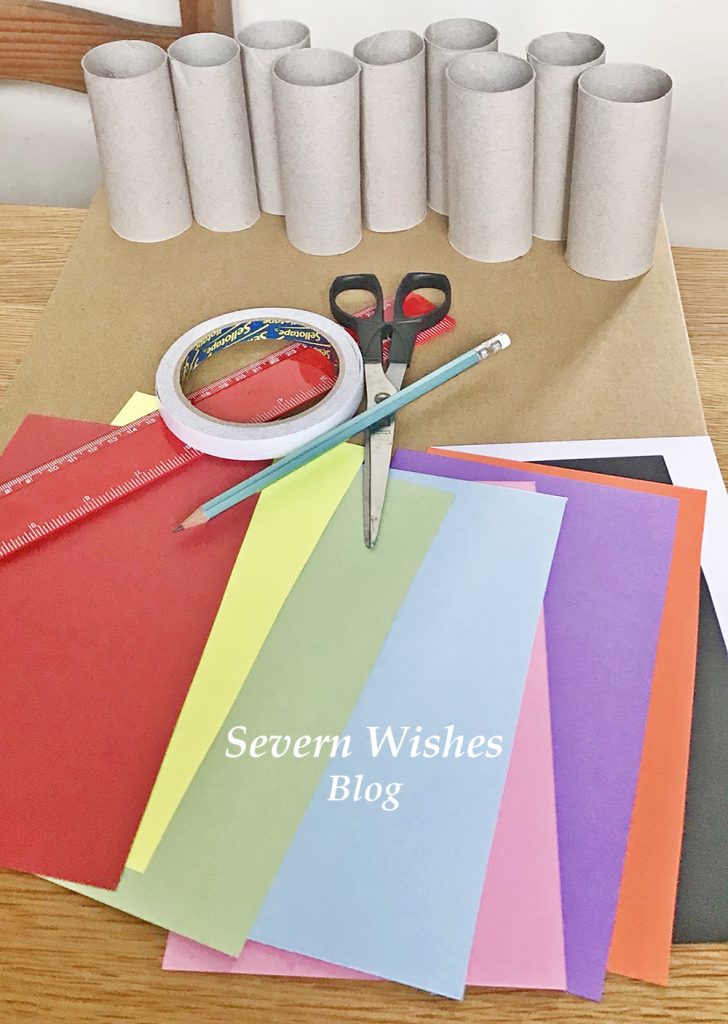
What You Will Need
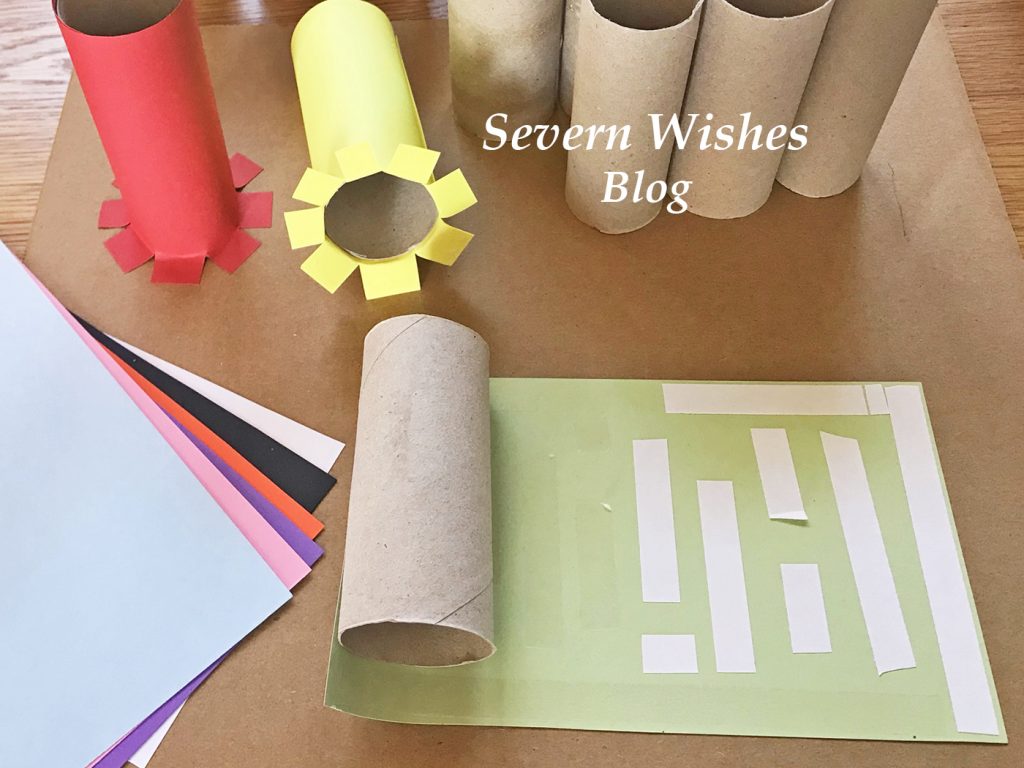
Toilet Roll Tubes – You can use toilet rolls and kitchen rolls and just trim them so they are a similar height. Order your card and Pom Poms and work out how many rolls you will need, you require one roll per colour.
A Thick Cardboard Base – Do you have a sturdy box after going shopping or have had something delivered? You need a piece of strong thick cardboard either a Square or a Rectangle for your Base that the Caterpillar will stand on.
Coloured Card – You need to try and match the coloured card with the Pom Poms you are ordering. If you want to do a simple Caterpillar just go for a pack with Red, Yellow, Green and Blue mix, sometimes you get an Orange or a Pink in those packs. I bought two packs to ensure I got black, white, purple, pink and orange for my more complex Caterpillar.
Coloured Pom Poms – A toilet roll tube is a certain width across, so make sure you only order Pom Poms that are less than this. My tubes are 4cm wide so I purchased a bag of mixed coloured 2cm Pom Poms. This means they are easy enough to tip back out after every use. Also ensure you get non toxic child friendly craft items from reputable companies.
Double Sided Tape – You need this tape for cleanly applying your Card to your Rolls, this is the most time consuming of the craft build but it’s easier and less messy than waiting for lots of paint to dry. (See my How To below).
Paint for the Base – I chose to just paint my base Green, as if the Caterpillar were on a leaf or some grass. You can be as creative as you like! You only need to paint the base, once you have fixed on all your tubes (see my How To below for more clarity).
Stationery and Craft Extras – You may want to stick on googly eyes and feelers, or draw them on, it’s totally up to you, your Caterpillar, your choice! 🙂 You will also need a Pencil and a pair of Scissors.
Where I Got My Craft Items
Coloured Card Packs – Hobbycraft Online
Pom Poms – Hobbycraft Online
Goggly Eyes and Pipe Cleaners – Craft Bundle from The Works
Double Sided Tape – Tesco Store
Green Paint and Brush – The Works
How To Make Colour Caterpillar – Sabrina’s Step by Step Guide
Step 1. Assemble all of your items as described above and ensure you have enough of what you need. Place a tube, a piece of coloured card and your desired amount of Pom Poms (I used 4 per colour) into individual piles. See what you have and how many tubes with the right colours and Pom Pom matches.
Step 2. Arrange the plain tubes on your base, and see how you would like them arranged. You need a one centimetre gap between each roll where it will be attached to the base. Bearing this in mind, arrange your tubes and mark with a pencil on the base where you would like them to go.
Step 3. Satisfied that you have all the pieces you need you can begin the card craft. Start by marking the pieces of coloured card for your tubes. For example mine were 15cm high, so I marked the card at 16cm with a pencil leaving the gap of one additional centimetre. Then cut all the card pieces to size ready for wrapping around the tube.
TOP TIP ensure you leave enough card to wrap all the way around a tube with the extra at the bottom. You need at least a one centimetre section of card at the bottom of every tube for attaching it to the base.
SABRINA’S TOP TIPS: Don’t throw away pieces of card that you have left over from this make, I have plenty of Craft and Art ideas on my blog that you could use these bits for 🙂

Step 5. Cut strips of double sided tape, align them along the top and edges of the coloured card and down the centre, ensure there is enough at the edges. At what will be the base of the tube stack the pieces vertically, using a small gap between them, this will be cut in Step 7 to ensure an easy attachment to the cardboard base. Make sure you put tape on all of the coloured card pieces. TOP TIP Make sure to do this Step and on to Steps 6 to 7 at the same time and don’t leave the craft part way finished, otherwise the double sided tape will dry out before you can affix it to the base.
Step 6. Time to roll the card on to the tubes. Remove all of the double sided tape strips. Line up the top section of the cardboard with the edge of the tube, on a flat surface like a table, gently roll the tube along the card. The tape will stick well to the thin tube, using your thumb and first fingers you can smooth out the card as it sticks. Try keeping it in line at the top. Once you come to the end of the coloured card make sure the final line of it is secure to its tube, smooth with your fingers and hold the edge in place for a minute per tube making sure that its firmly stuck in place. Repeat this per tube, laying them down on their sides once you are finished.
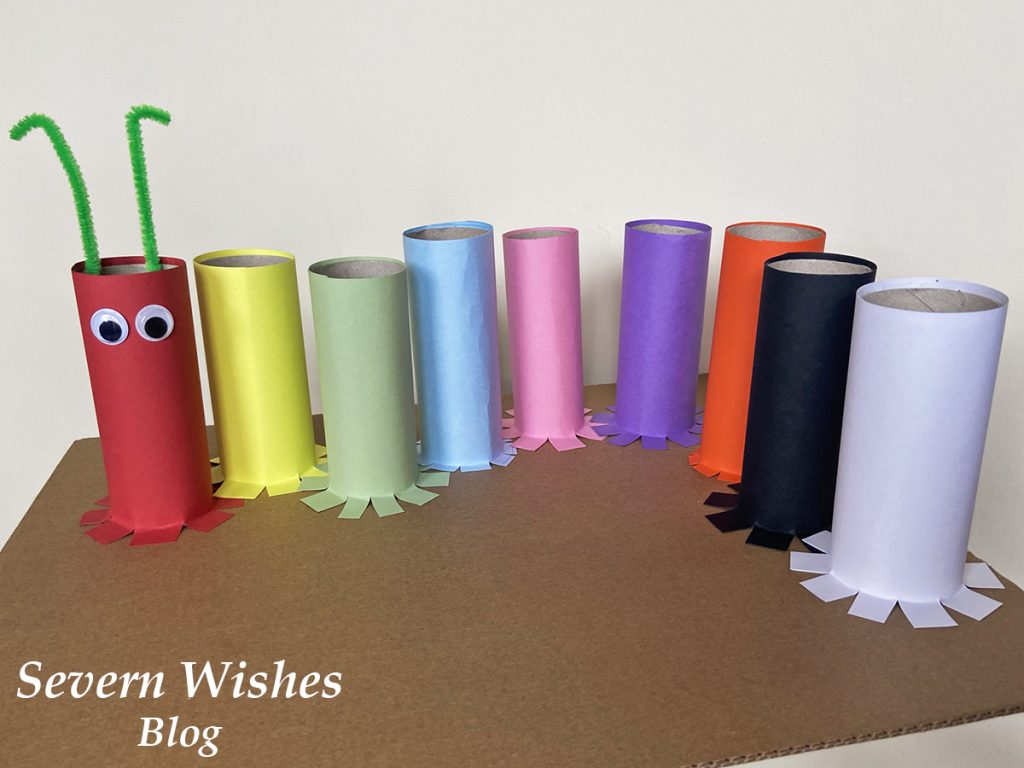
Step 7. You now need to be cutting the base of each tube so that they can be attached to the base. Take the first coloured tube you want to attach to the base (I did a Rainbow so mine was Red) and using sharp scissors cut a one centimetre slice up into the card at the tube base. Rotate the tube around cutting vertical slices as you go. Then once cut all the way around, gently peel back the slices and make a base for your tube. Affix it into place on your cardboard base because they should already have the double sided tape attached. Press down firmly and hold for one minute. Repeat this action with all of the coloured tubes until they are all attached to the base. (See images above and below).
TOP TIP Painting the base last ensures the tubes stay in place after the double sided tape has helped stick them down on the base. It also neatens up any edges that may have tape sticking out or tubes that weren’t quite level.
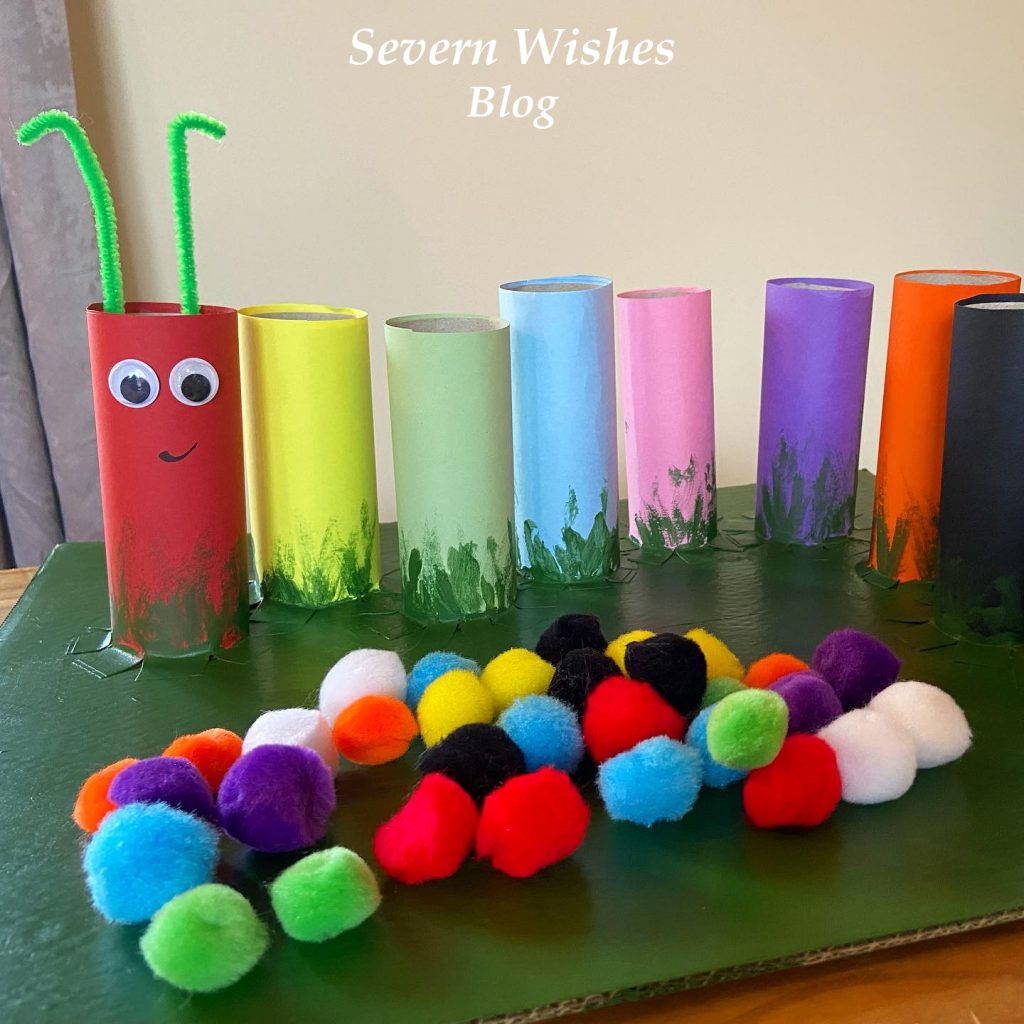
Step 8. With all your coloured tubes attached to the base you can now consider adding anything else to your caterpillar, and also paint the base with whatever paint you choose. I added googly eyes and some pipe cleaners as my Caterpillar feelers.
Step 9. Leave your Caterpillar to dry overnight before showing it to your little one. Ensure that you only play with it supervised either by you or another adult. The Pom Poms should be stored inside something that little ones can’t get into unless you are doing the toy together. Most children wouldn’t eat them at this age but better safe than sorry. I recommend a small plastic box like the really useful ones with the clip over lid handles.
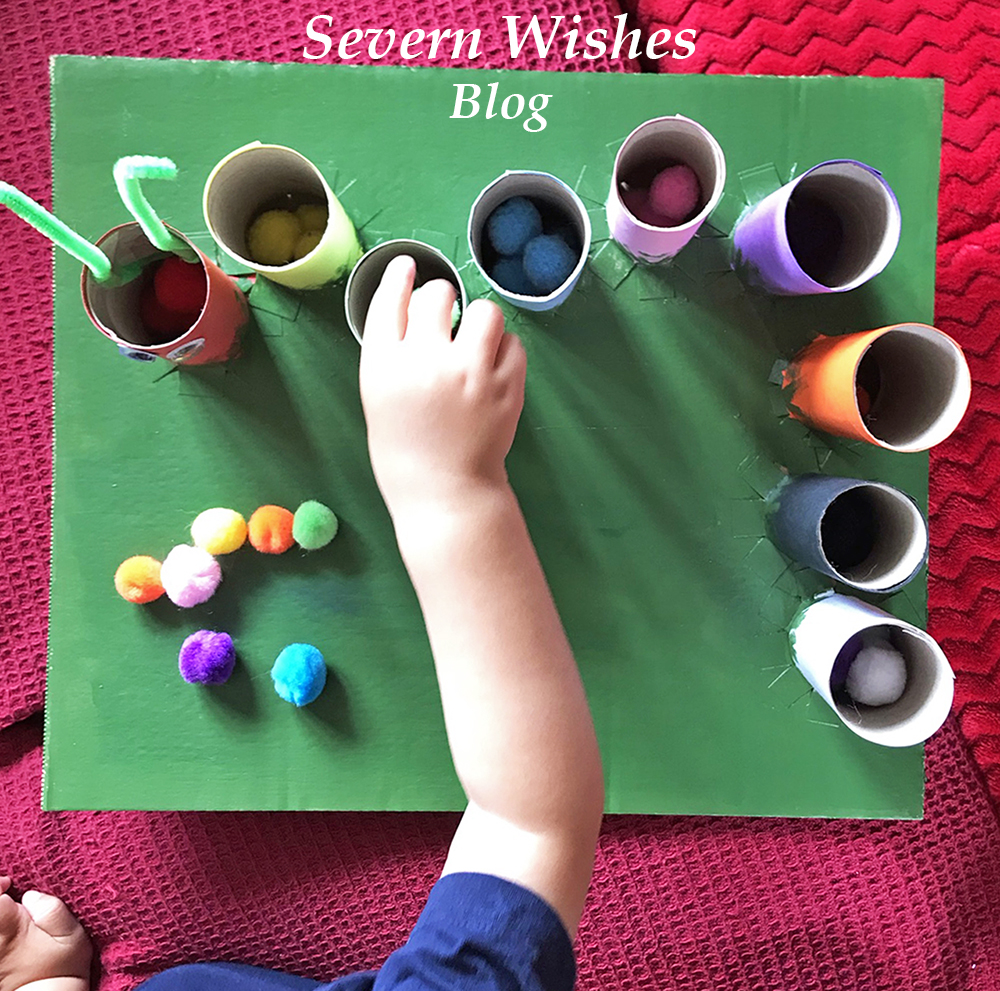
TOP TIP Your Caterpillar friend can now be used to teach colours and numbers! Ask your child to count how many body parts the Caterpillar has, how many Pom Poms fit in each tube, can they separate the colours correctly and add them to the correct tube? This craft project can be used for play and learning and will keep your child occupied for hours.

Have you enjoyed this Craft Project? I would love to know what you think!
Please leave me comments on the blog section below or on social media.
Please tag me if you make a Caterpillar of your own!
Use the hashtag #SabrinasCraftCreations
Thank you for reading this blog post today, I hope I see you again soon!
Best Wishes for a happy week ahead!
✩ Sabrina ✩