I am a huge believer in passing on knowledge to people when it might be useful to them, and for many years I had considered being a teacher. However my life took a different direction once I went off to university. It didn’t stop me from coming up with things that others may find handy though, it was just one of many reasons I decided to start my blog all those years ago.
After I became a parent I found I was coming up with lots of hacks and tips for my son that other parents might also find useful. This particular blog post today is all about NUMBERS! My son learnt his numbers 1 to 10 very quickly thanks to my tips and tricks, by the time he started preschool at 3 he could count to 31. He is now 4 and thanks to my encouragement he can count to a whopping 500!
The fab thing about my tips is that you may already have some of these items laying around in your home that you can use, and if not you can make your own cards like I have also done. Check out online second hand and local shops if you don’t have anything, as well as asking friends who may have slightly older children if they could have a clear out for you. Let me tell you about how I introduced and taught my son about numbers.
Child Clocks or Numbered Blocks
Your baby may already have toys with numbers on, things for age 6 month plus normally have various things on them, you may find a mix of nature and numerical combinations or well known characters with basic shapes and or numbers too. Toys and playmats also sometimes have numbers, those talking toys certainly will, but teaching your little one how to recognise a number visually is important.
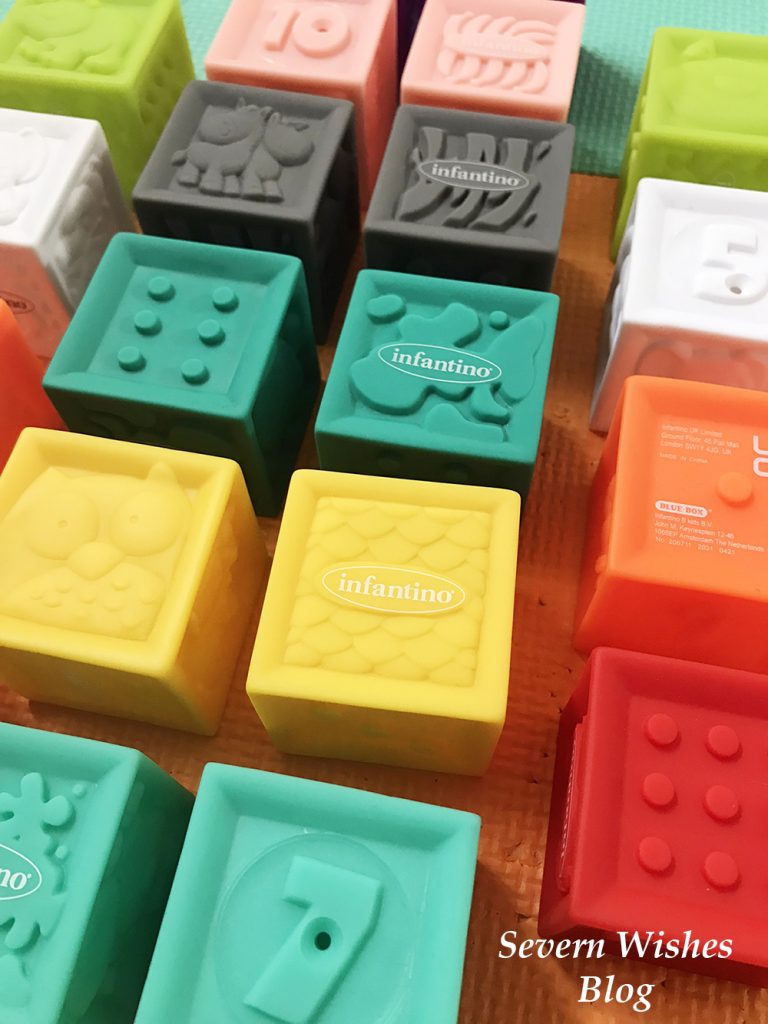
You can easily get wooden toys that contain clocks on them or boards with numbers that can be removed and set out in a numerical order. These toys are great for learning the starter numbers (1-10) but also for starting with basic mathematics too. I bought my son a board of numbers and he has a wooden clock as well gifted by a relative. The blocks in my image above were bought online and are of the brand Infantino, these BPA free plastic cubes have an array of animals and numerical variations on them such as dots and actual written numbers. They were some of the first numbers my son saw as a baby.
My son would like to count things around him, so say I gave him 4 smiley faces for his tea I would ask how many I had given him, soon he started counting everything. 2 swings at the park, 7 birds on the fence, 5 sheep in the field. And so on, and lots of praise and encouragement when they get something right is also essential. Make learning a fun thing to do and participate in.
You can also begin time telling by showing them a phone or a watch and asking them to find the time. If they have a child’s clock they can match that time. A children’s clock may just have turn-able clock hands or some have the digits that are also removeable too. For example it might be 10.30am so you ask them what that would look like on their clock and see if they select the numbers appropriately. Making it fun means that it is more likely to sink in to their mind. If they have breakfast at 7.30am every day, you could ask them what the time is on the kitchen clock if you have a steady routine, or if bedtime is 7pm too.
The Home Calendar Block
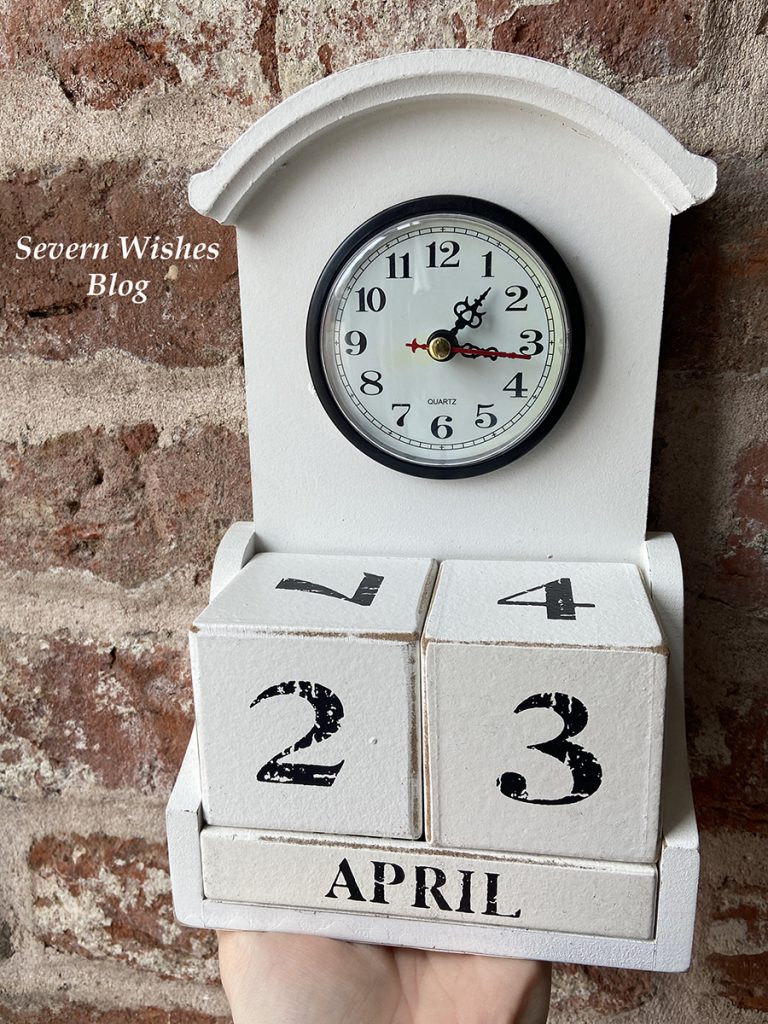
My calendar block is also a clock! Many of us will have a Calendar block at home, these blocks rotate daily and allow children to understand the passing of days into months. When my son was two I introduced him to my block set, and every single morning before breakfast we would rotate the blocks. I started by giving him one and me the other, I would say something like “Today is the 17th so we need a 1 and a 7, I have the 7, can you find me a 1 please?” And his interest developed from there. Soon I could ask him to find any of the numbers from One to Thirty One and he could place them on the block correctly. For the past two years we have done this every day and he has learnt to count up to 31 just by doing the calendar. My son also asked me why the months were different numbers, why it didn’t go up to Thirty Two and such, it sparked an interest which lead to me making his flashcards up to 50 numbers.
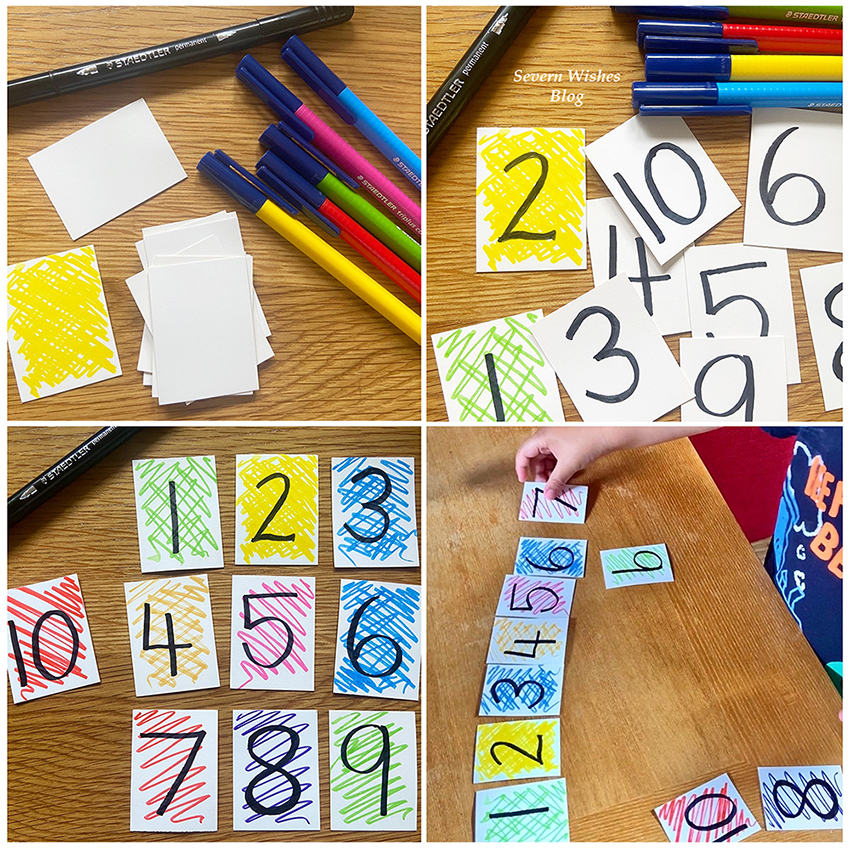
Flashcards – Bought or Homemade
Flashcards are great, you can buy them from most online toy retailers, or if are creative and have pens, like me you could make them. My son has 50 of these homemade numbers now, and thanks to some games he can count up to 500. He does number work at school, and even got an award recently for how good he was with counting numbers. Making it colourful and fun is inviting the child to participate. Always encourage but never force your child to learn, do it on their own terms when you are at home. Plus if it is fun they will be more likely to want to repeat the exercise. My son is currently doing writing practice for his letters and numbers and coming on great thanks to wipeable board books which I highly recommend because they are reusable.
Originally I only made ten numbers but my son was soon asking for more, and the more he enjoyed counting them and laying them out in their order, the more I wanted to continue making and encouraging that growth in learning.
When my son turned 3 I also made a set of flashcards that had the number and the written word such as One and 1 on them, this was so my son learnt the word associated with the number in preparation for reading and writing them.
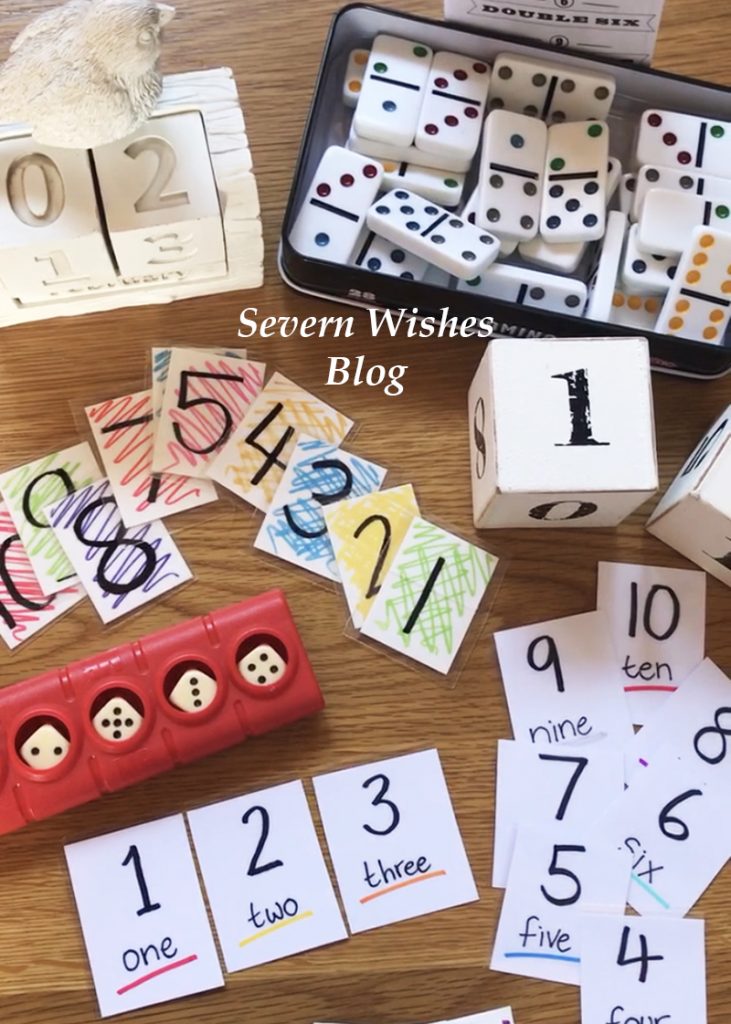
Other Fun Number Related Activities
Playing Dominoes is another fun learning activity which requires the counting of numbers, and games like Yahtzee, Playing Cards or Rummikub are also fun to start with children of a going to school age.
However you keep using numbers in your child’s life, know this, you are helping them learn through play.
✩✩✩
Thank you for reading this parenting related blog post today. I have tons of parenting tips and hacks across my blog and social media. I even do a Monday Mum Hack on Instagram.
Search #SevernSabrina and #SabrinasMondayMumHacks
Hope to see you here again soon.
✩ Sabrina ✩

