Sabrina is a Lifestyle, Parenting and Product Review Blogger. A Writer, Photographer, Reviewer, Home Cook, Crafter & Nature Enthusiast. You will find a bit of all those categories here on Severn Wishes Blog, Welcome to Sabrina's Lifestyle Blogging & Honest Reviews.
Today it’s the turn of the October 2022 box from Treatbox UK!
Are you as excited as I am? I love October! Autumn colours and Halloween! I wonder how many themes are contained in this months box! Let’s open it and see!
If you would prefer to watch my unboxing video you can find it on my Facebook here
What’s Inside the Box for October 2022?
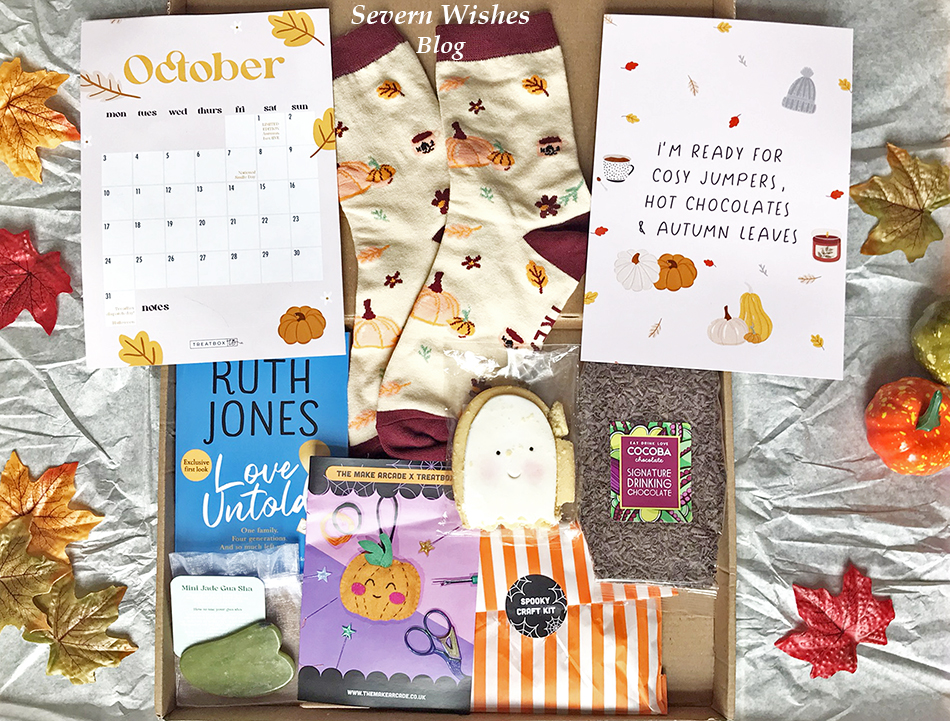
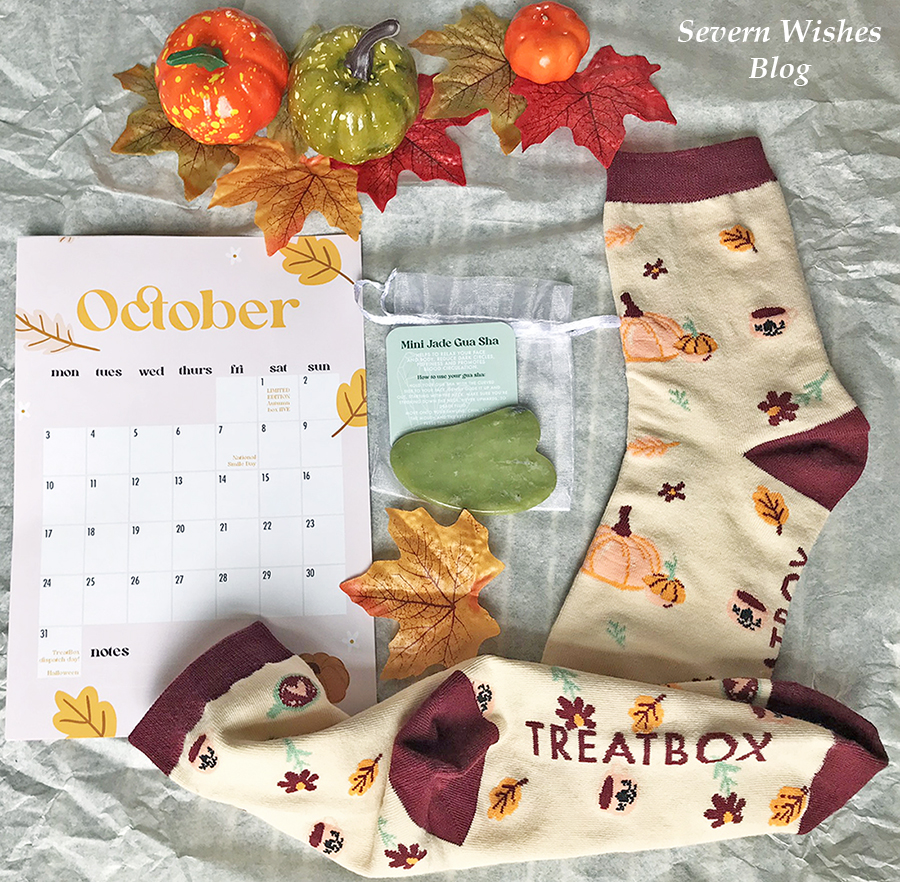
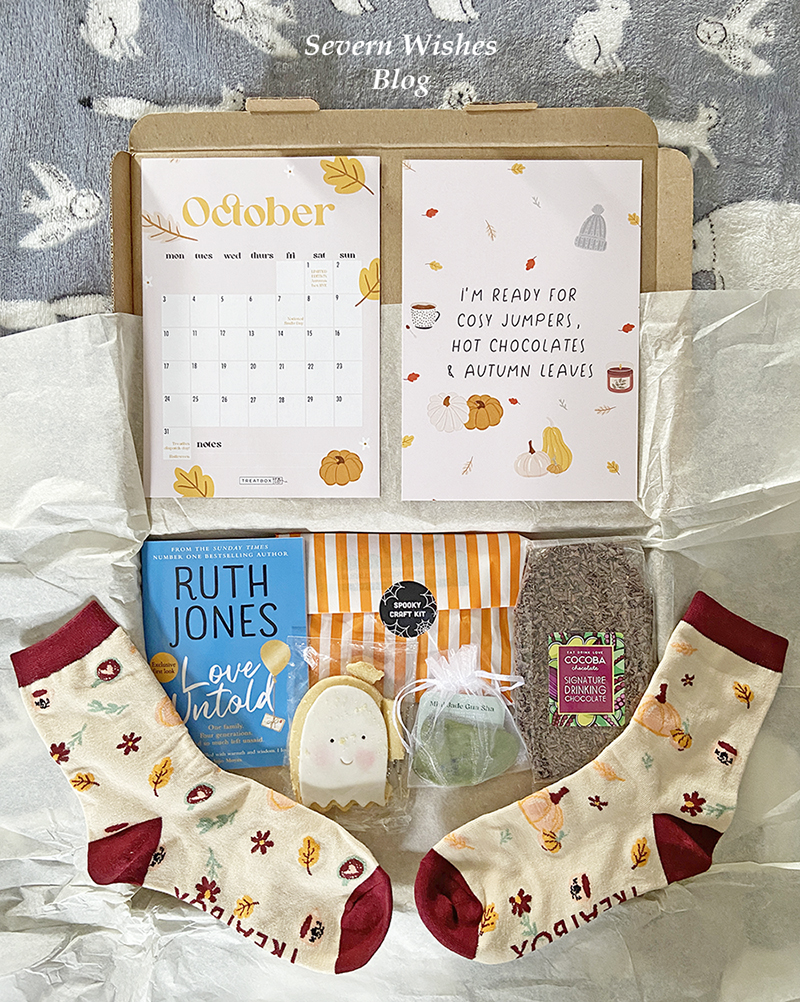
Treatbox Calendar Print – October Treatbox Original Autumn Theme Socks Treatbox Original A5 Print “I’m Ready for Cosy Jumpers…” The Make Arcade X Treatbox – Spooky Craft Kit – Pumpkin Bag of Cocoba Signature Drinking Chocolate – Eat Drink Love Mini Book by Ruth Jones – Love Untold (Excusive First Look) Mini Jade Gua Sha – Face Relaxing Tool in Organza Bag Spooky Biscuit Little Ghost
Here are more of my pictures… (leaves and pumpkins were not included in the box)
What’s my honest opinion for this month?
When I first opened this box and took a peek inside I just knew I was going to love it. I also appreciate just how hard it must be to keep regular subscribers like myself, happy, due to them not wanting to constantly repeat certain items. But this month Zoe and her Treatbox team have really out-done themselves! Where do I start?! Let’s go with my favourite item, and it has to be the socks! I’m someone who has continually said I love the socks that come in Treatbox, but this time they are extra special due to them having Treatbox sewn into the design along the base. Autumnal themed and beautiful as well makes all the difference too. Following on from the socks to receive a brand new item is excellent, the Jade Gua Sha is a face relaxing tool to help aid the skin and blood flow. We haven’t had anything of this sort before and I cannot wait to give this a go over the coming weekend. The usual Calendar Print and the A5 Print are lovely again this month, I like to rotate my prints around my home and I just put up the ones from the last three years of Autumn Treatboxes! I must get a photo of them all together for my social media to show you! We also have a make-able item this month which I love! Crafting our own little Pumpkin! Yay! It’s not the first time we’ve seen Make Arcade and Treatbox collaborate however it’s the first Spooky Craft Kit we’ve had, and every kit has so far been unique and unusual and I love that! We get to make something and keep it and by making it our own it becomes personal too!Watch out on my socials because I will update you when I do this Craft kit!
What’s next? Oh yes, the huge bag of 54% cocoa chocolate! Which can be enjoyed eaten, drunk or melted. And you can even enjoy it with your Biscuit! Mine was a little Ghost and he’s so cute! Despite being smashed up in the post he will be enjoyed over the weekend too! Finally we have the Ruth Jones mini book which is a first look chapter of an up and coming new story she’s done. Ideal to pop into your handbag if you know you’re going to be sat in a waiting room at any point this month.
Overall I think this has been one of my favourite boxes of this year so far. We have got something to eat, something to make into a drink, something to do, an item to read and something to create, an item to display and an item to wear. Plus an item which could be seen as our new self care. All of which when combined make an all rounded box or treats and will make October better for having them. With the autumn and Halloween themes combined with general luxury treats it’s a lovely box this month.
Thank you for joining me for another Reveal and Review from me, Severn Sabrina! I loved this box it was fantastic!
Don’t forget to follow me on my social media for more updates and individual product reviews as well as items in use too. Search #SevernSabrina or #SevernWishesBlog
Have a great October and don’t forget to keep up to date with my socials so that you can see when I do make my Craft Kit and use the other bits of this box too.
This month is always a great one for pictures! I share Lifestyle and Nature Photography on my Instagram as well.
Hello! Welcome to my Reveal and Review of the Treatbox UK February 2022 box!
As we all know the month of February is significant for Valentine’s Day, so I was expecting there to be a love or at least a heart theme this box. Zoe strives to make her Treatboxes about self care, self love and being kind to ourselves, so I feel this box might be poignant in that way too.
Shall we see what is inside?
What was inside the box?
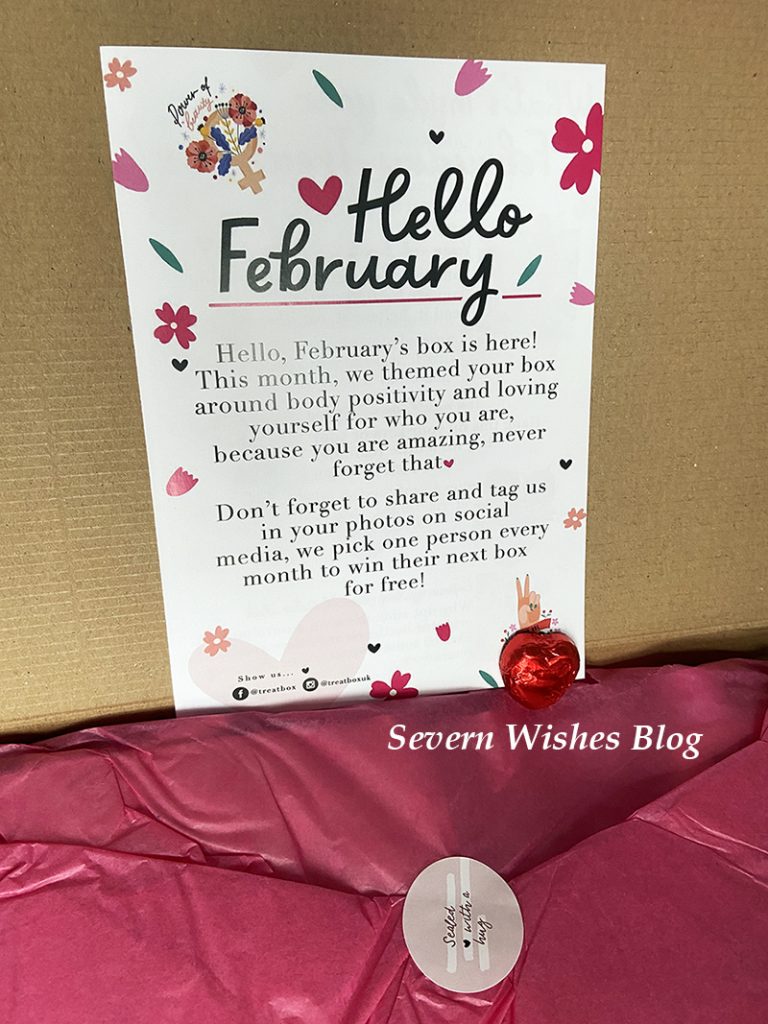
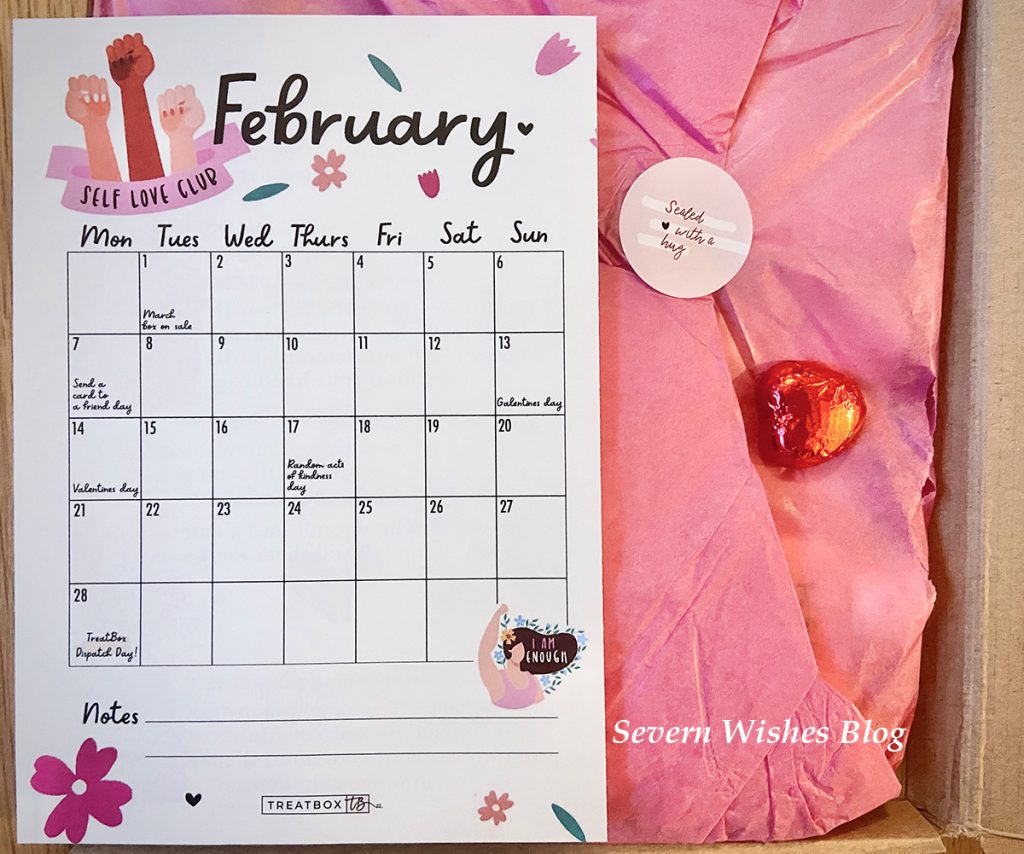
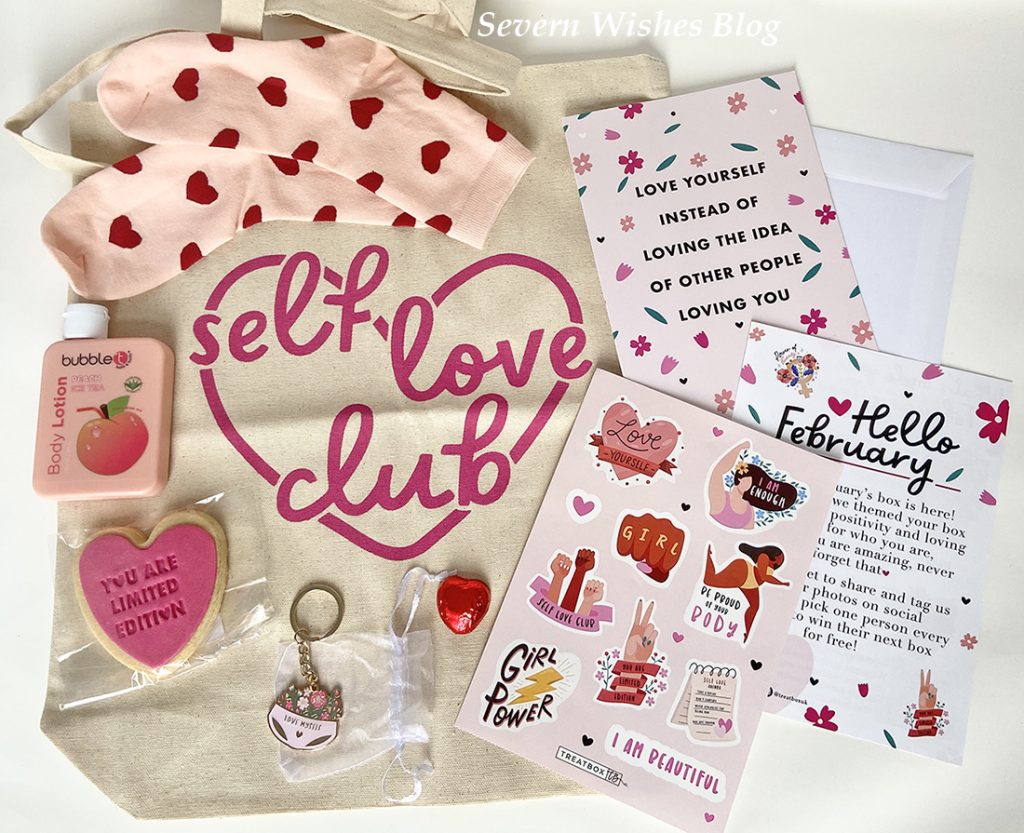
As I open the box my eyes are met with a dark pink tissue paper, a chocolate heart has made its way out of the paper (cheeky!) during transit! The sticker reads “sealed with a hug” Aw thanks! And the February Calendar Print sits on top…
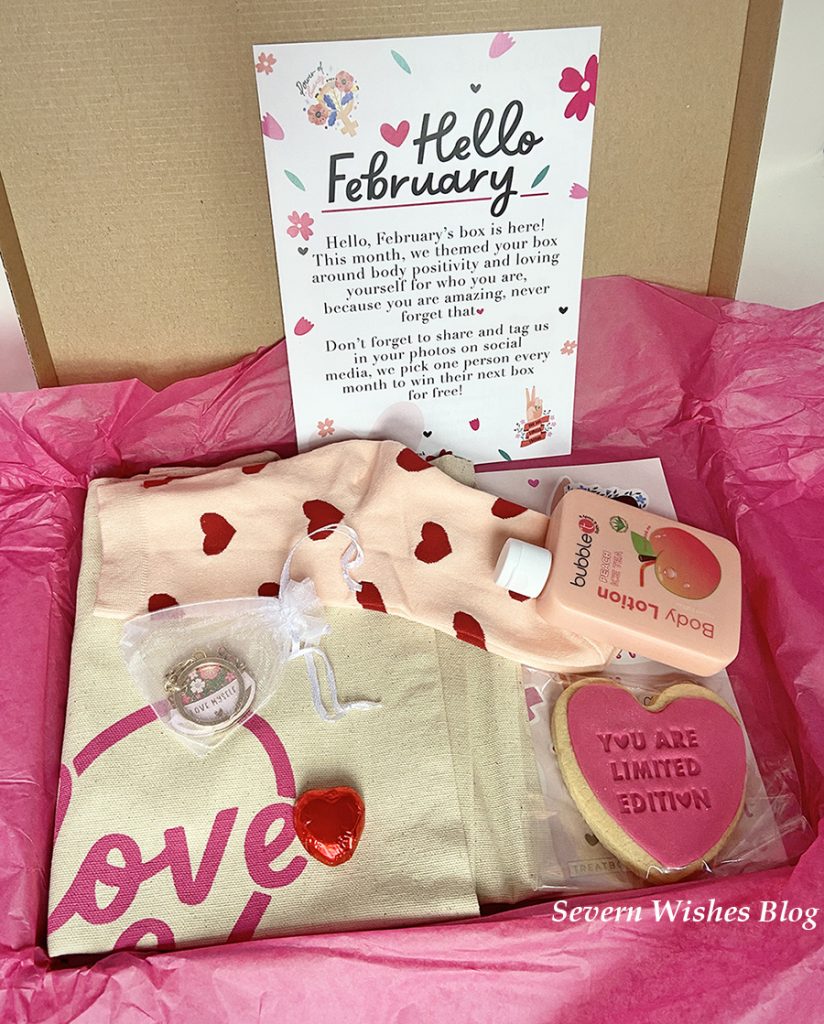
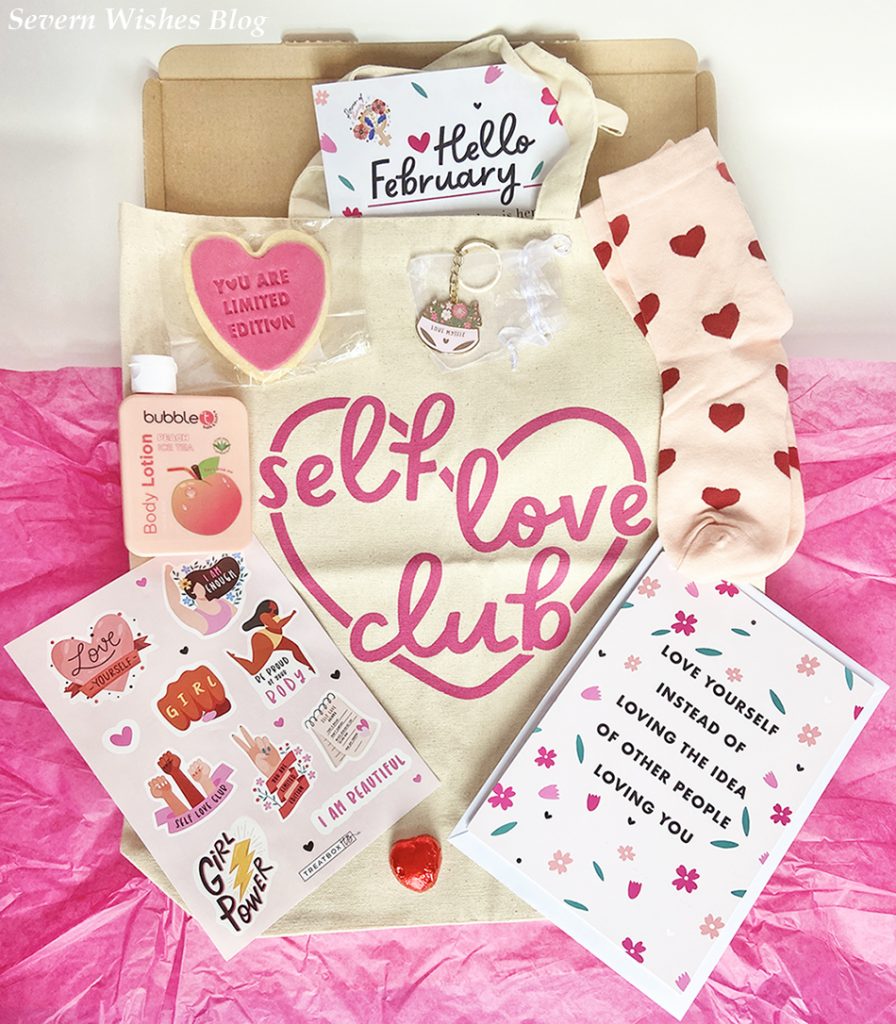
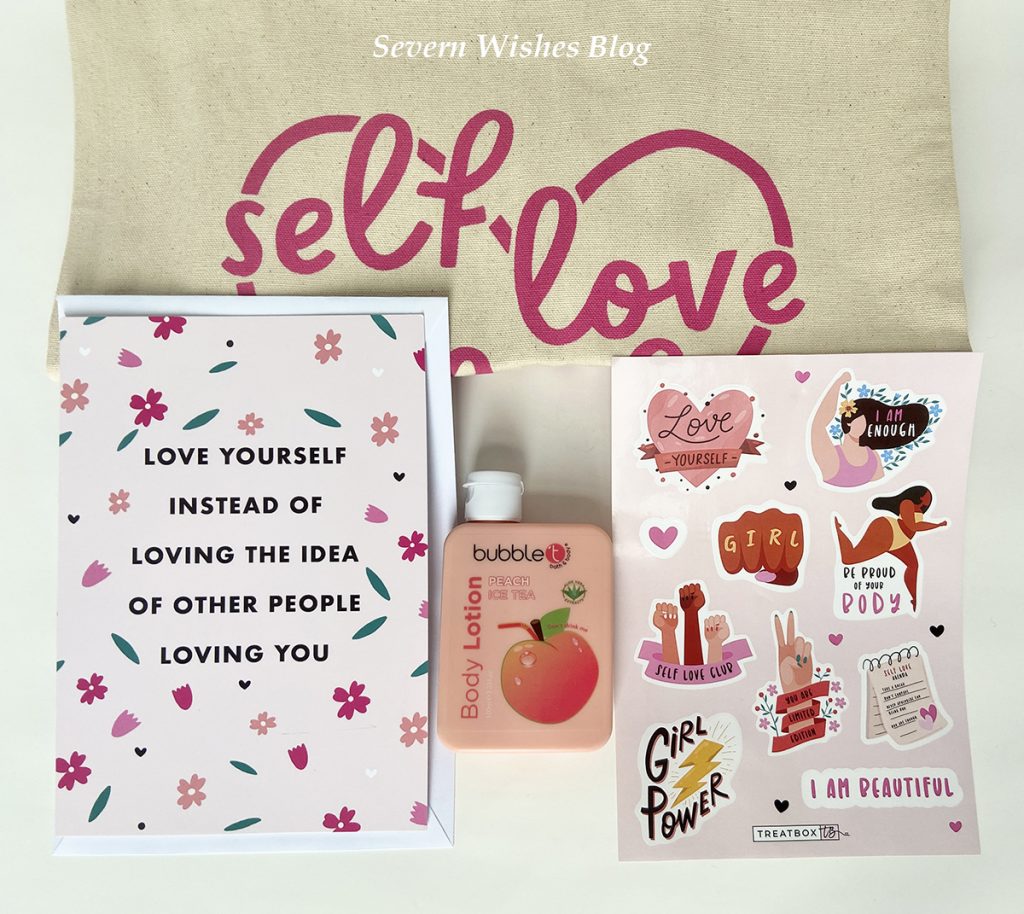
Treatbox February 2022 Calendar Print Treatbox Original Tote Bag “Self Love Club” Treatbox Original Keyring “Love Myself” Bottle of bubble t Body Lotion in Peach Heart Chocolate Pair of Heart Socks Treatbox Original Stickers Sheet Treatbox Inspirational Card “Love Yourself Instead of…” “You Are Limited Edition” Heart Biscuit
My Honest Opinion of the February 2022 box
I adore getting these socks! I never get tired of a new design because the quality is excellent, they wash and wear very well, and of course it would be hearts this month. A tasty delightful little chocolate and the heart shaped biscuit make up our edible treats this month, tasty! I’m a big believer in less plastic and more reusable items so to see a tote bag this month is excellent. A sweet key ring and a card that we can either choose to keep or to send on is a lovely gesture. We of course have the calendar print which is useful, I have started to pin mine to my fridge door and write my evening meal plans on it. Finally we have the original Treatbox sticker sheet which is super fun! And the bubble t body lotion which smells really nice. I look forward to using or eating all of these fab items! Keep an eye on my Instagram to see regular Treatbox products in use!
Thank you for reading this Reveal post today, I hope you have enjoyed seeing what was inside.
Please pop by in early March to see the next Reveal and Review I do of Treatbox UK!
Have a lovely month and I hope I see you back here again soon.
Wow didn’t December creep up on us! Happy December one and all!
As if I am sat here writing this blog post mid December! I had every intention of doing this post earlier in the month but I have had so much on and so much to do that the days have simply blurred into one
So my apologies for a late post this month, I will try and bring you the unboxing for January 2022 within the first week of the month!
What was Inside the December 2021 Box
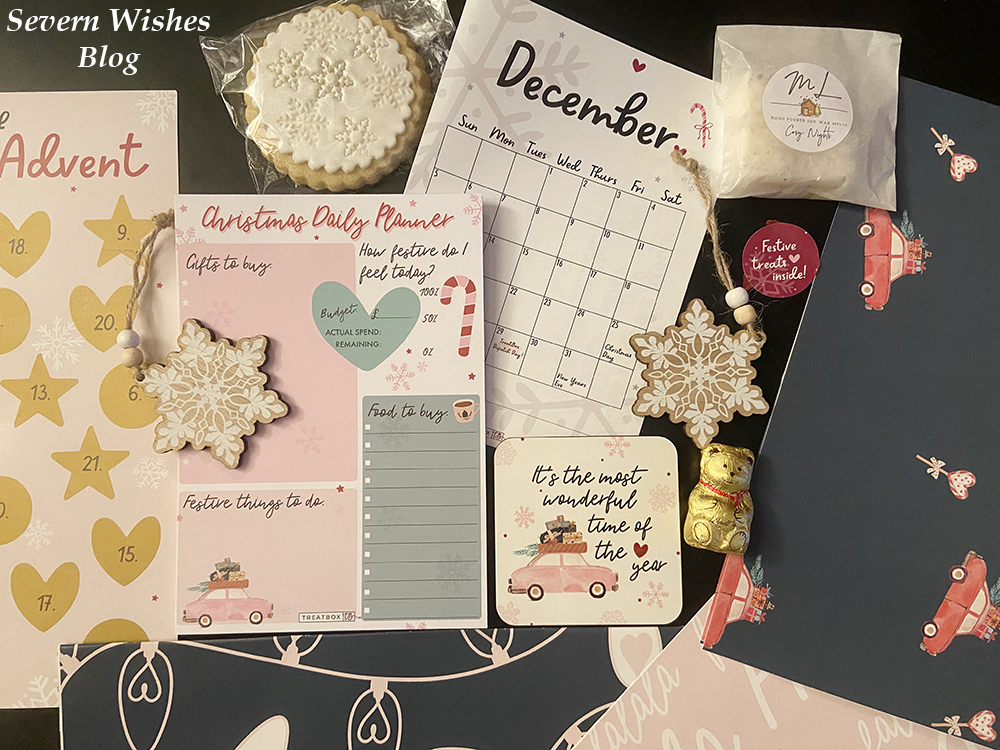
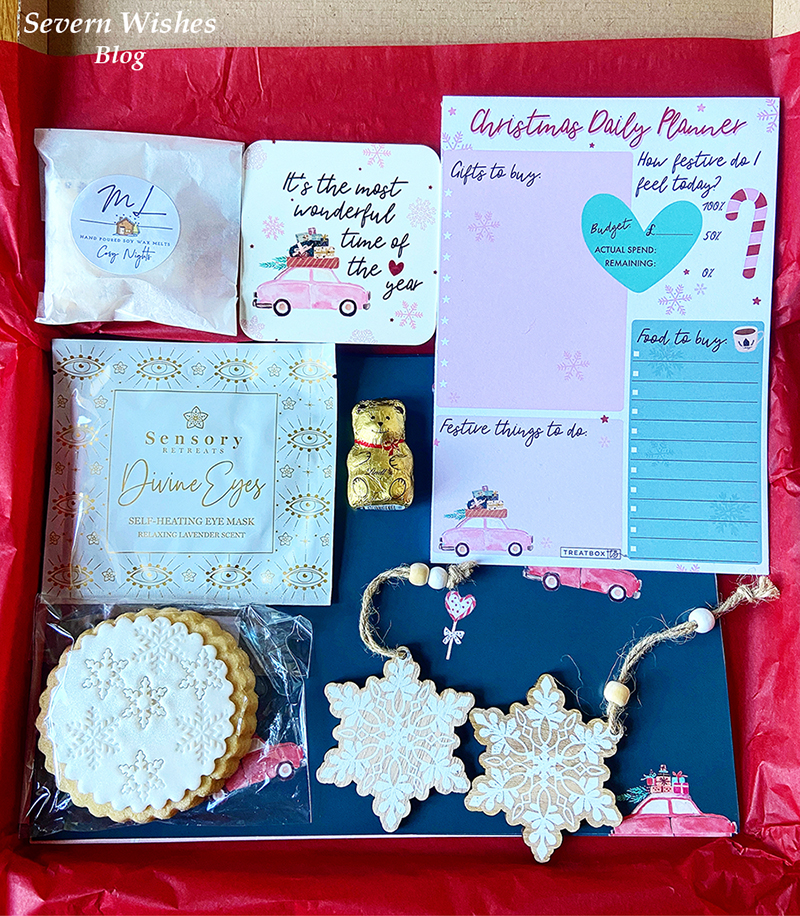
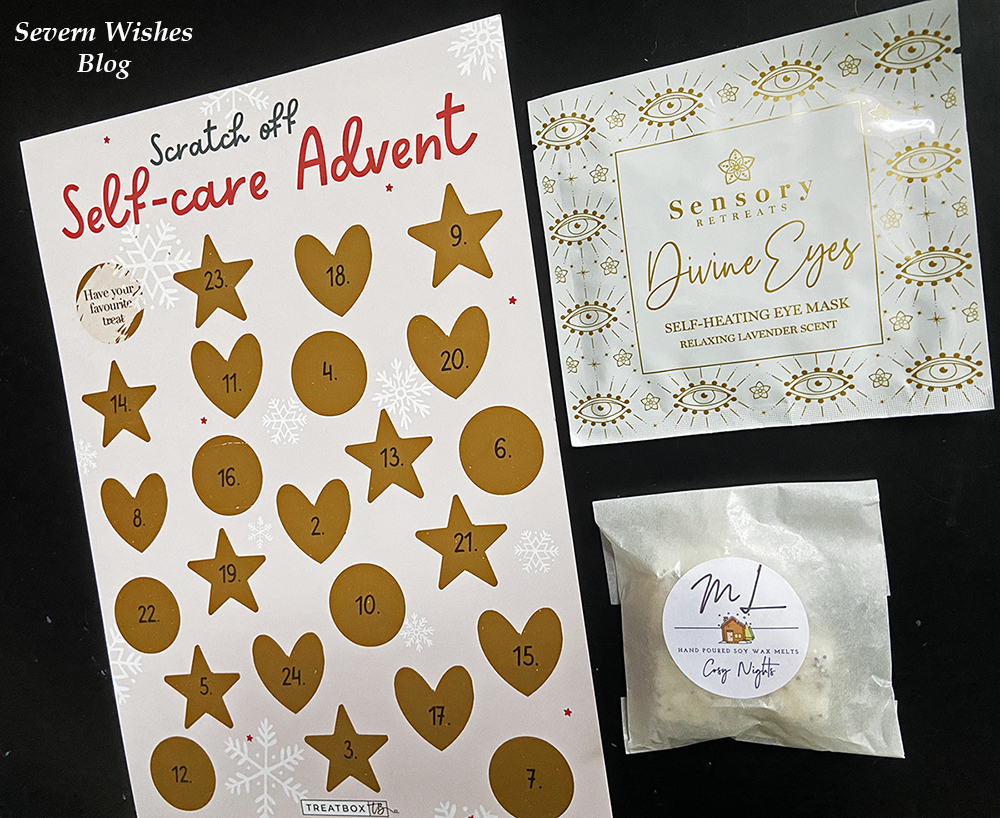
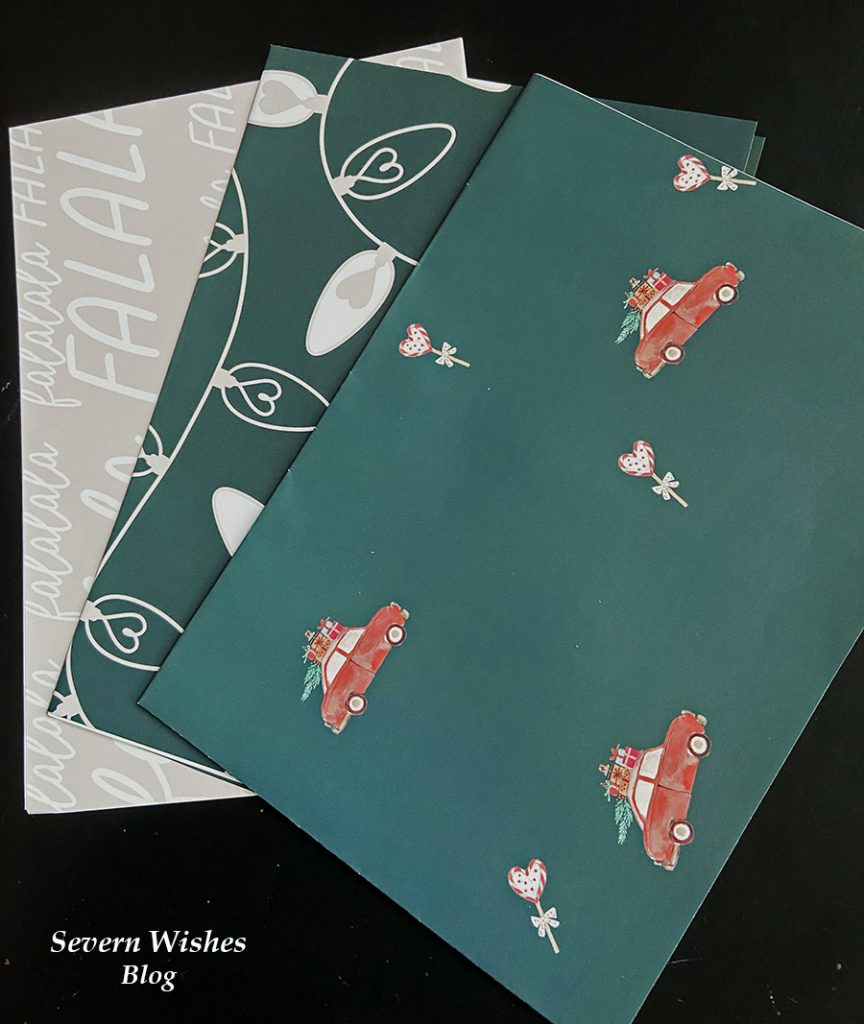
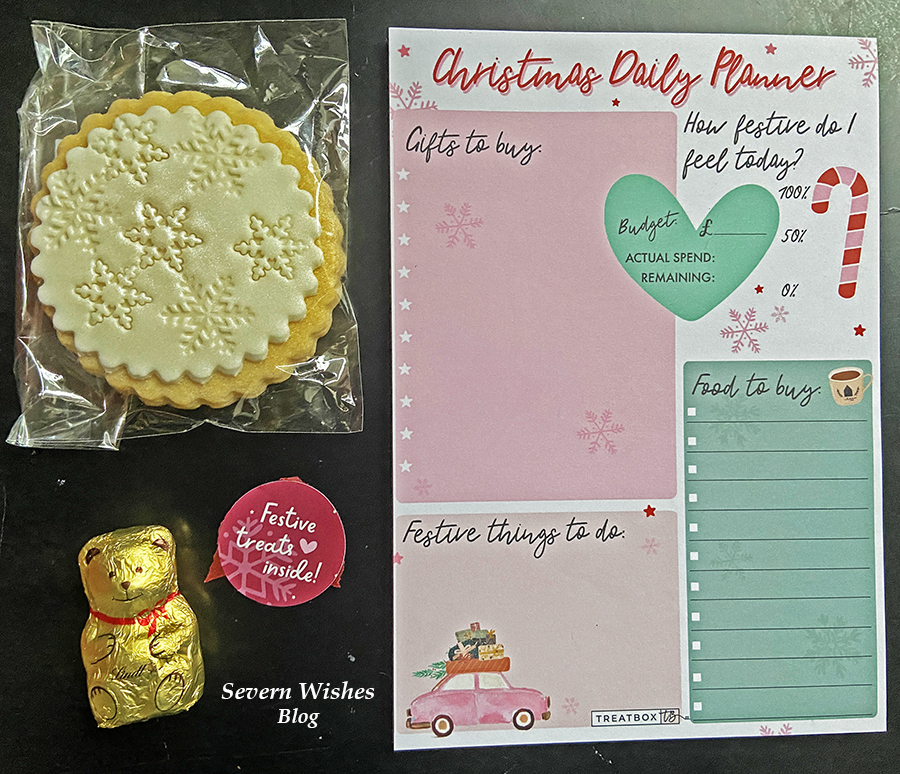
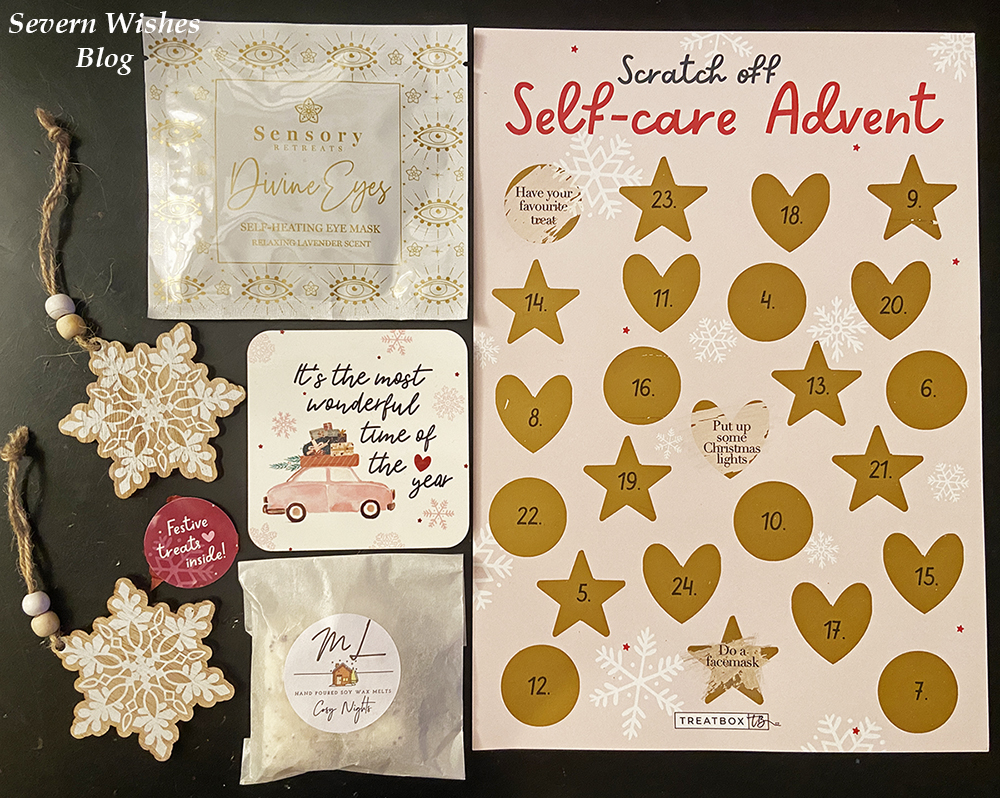
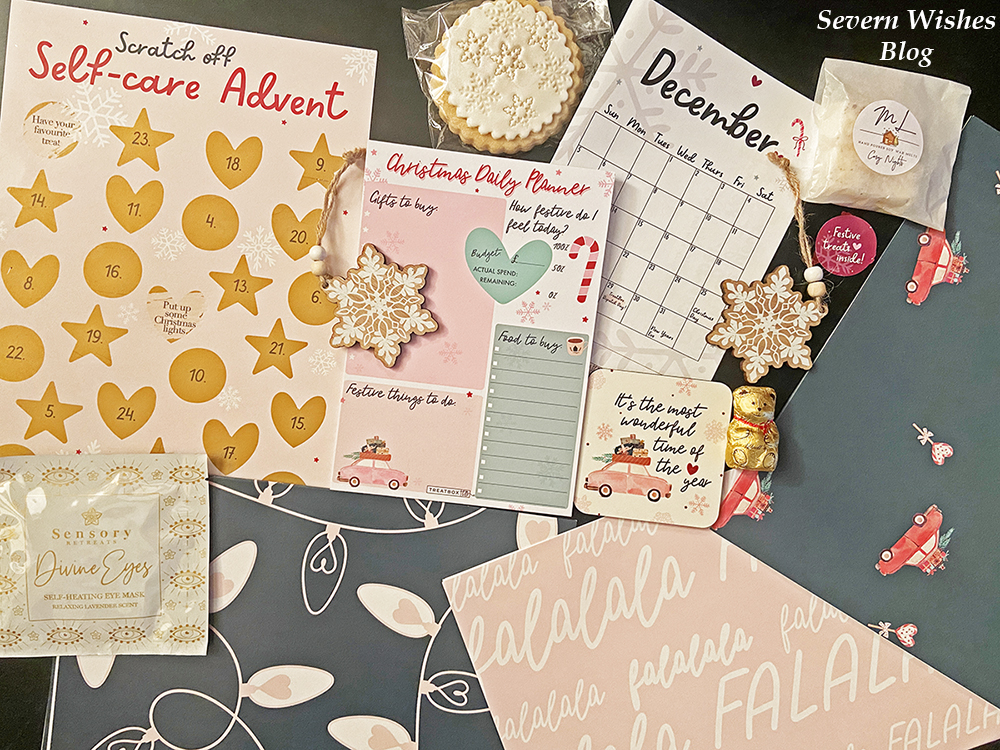
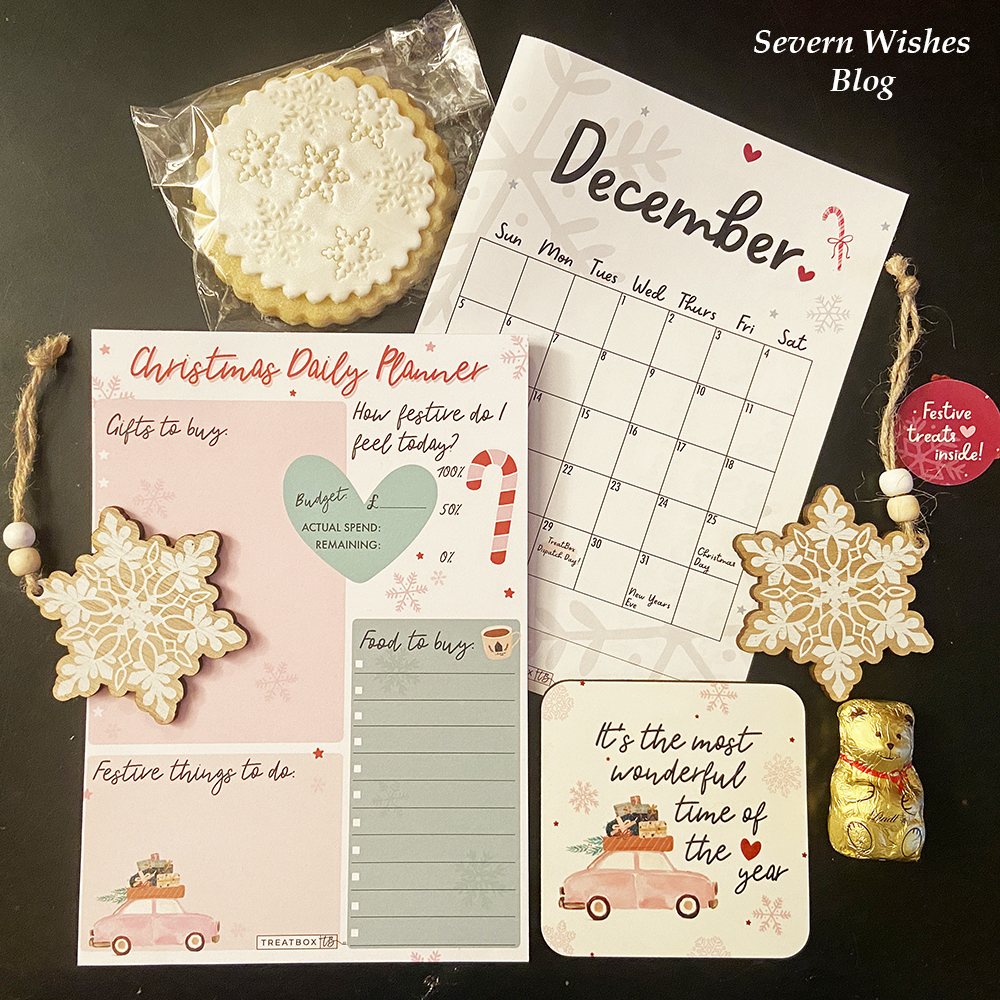
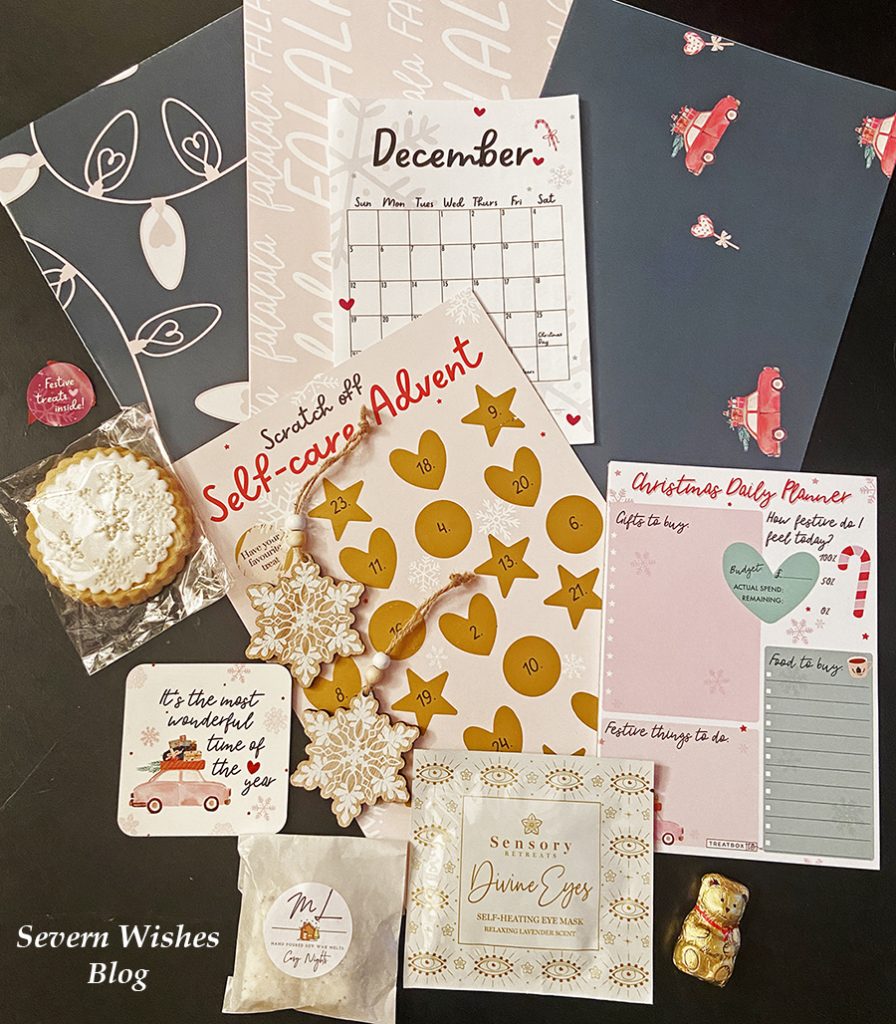
December Calendar Print Treatbox Wrapping Paper – 3 Unique Sheets Treatbox Scratch Off Self-Care Advent Card Two Wooden Snowflake Christmas Decorations Sensory Retreats Divine Eyes Eye Mask – Self Heating Treatbox Originals Christmas Daily Planner Notepad Treatbox Christmas Coaster “It’s the most wonderful time of the year” Tasty Treat of a Snowflake Biscuit Mrs L Cosy Nights Wax Melts Lindt Chocolate Teddy Bear
My Thoughts on the December Box
What a fantastic box! I really loved the contents of this month, from the wooden decorations to the organisation notepad and the fabulous TreatboxUK original wrapping paper! You can tell a lot of thought went into the preparation of this month’s box.The self care card was also pretty cool, although I kept forgetting to scratch it off and then would do two in the same day! Oops!
Overall I feel like this is a strong box, even those who don’t love this time of year would find it hard not to like the contents. Who doesn’t love a beautiful wooden snowflake or a tasty biscuit treat? I know I do! My favourite items are the decorations and the coaster. The quality of every single item in the box this month has been excellent. A great way to end the year of boxes and end TreatboxUK 2021 boxes on a high! I loved photographing this box and couldn’t decide which pictures to include in my Reveal so I chose them all! Enjoy! Have a great Christmas!
Wishing all who read this a happy and healthy end to the year. Thank you for reading this unboxing post and I hope Severn Wishes Blog has kept you entertained throughout the year.Please stick with us for 2022 because there are lots of exciting things coming up in the Spring time!
It’s time to Reveal and Review the August 2021 Treatbox!
I wanted to give time enough to let everyone receive their box before I revealed all the contents.
Contents of the August box…
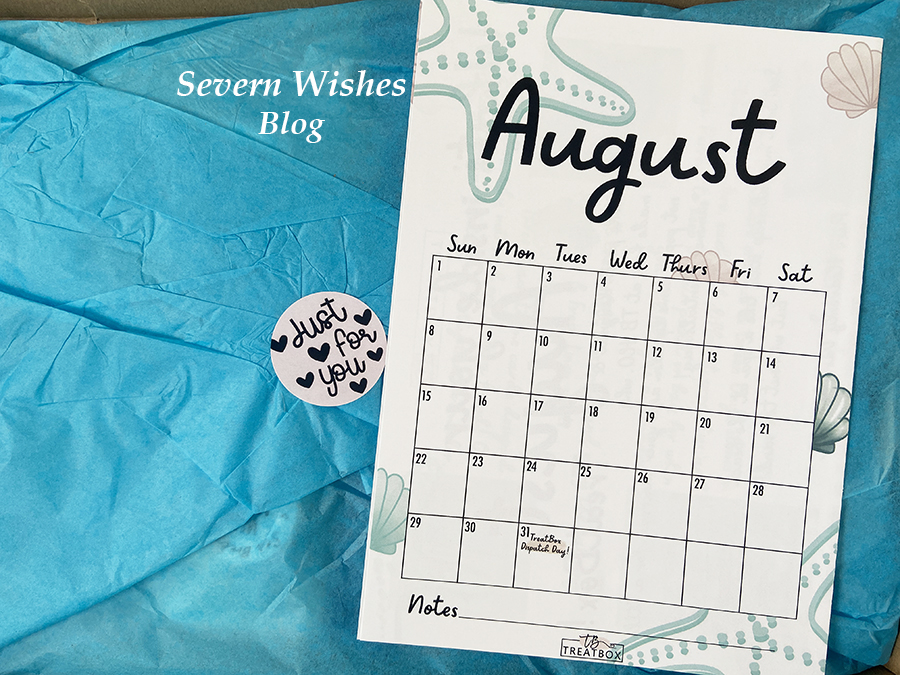
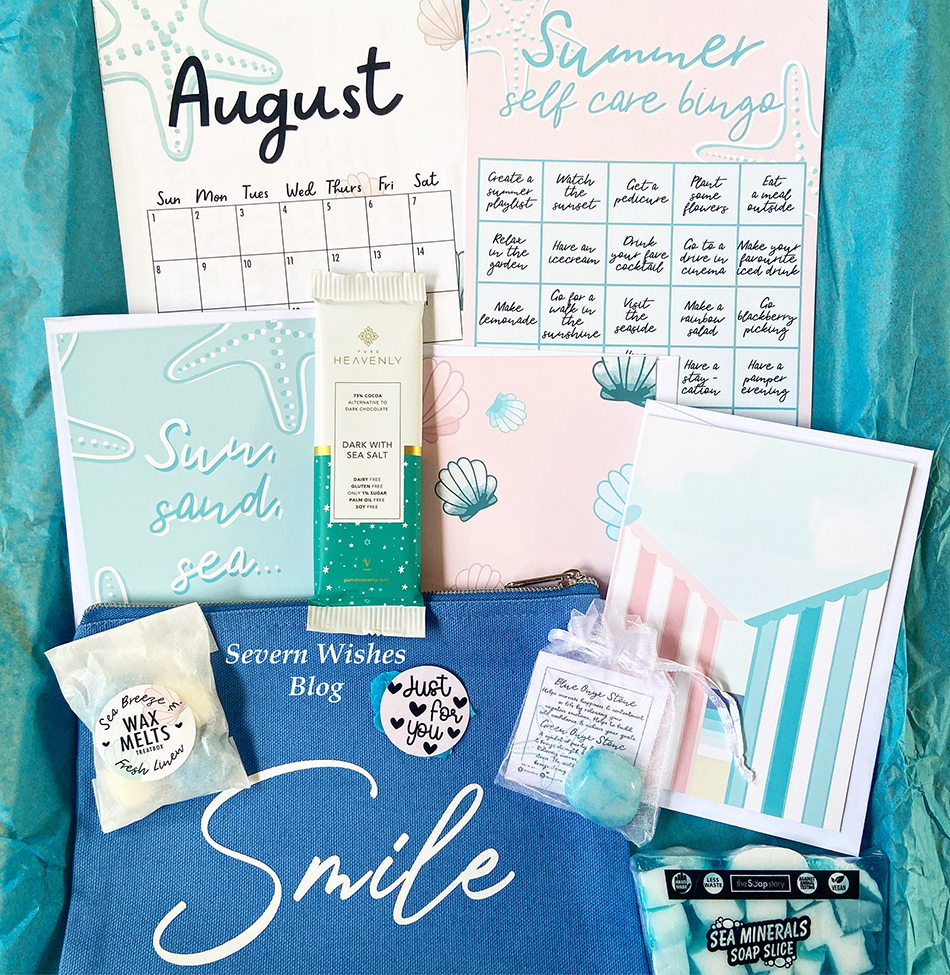
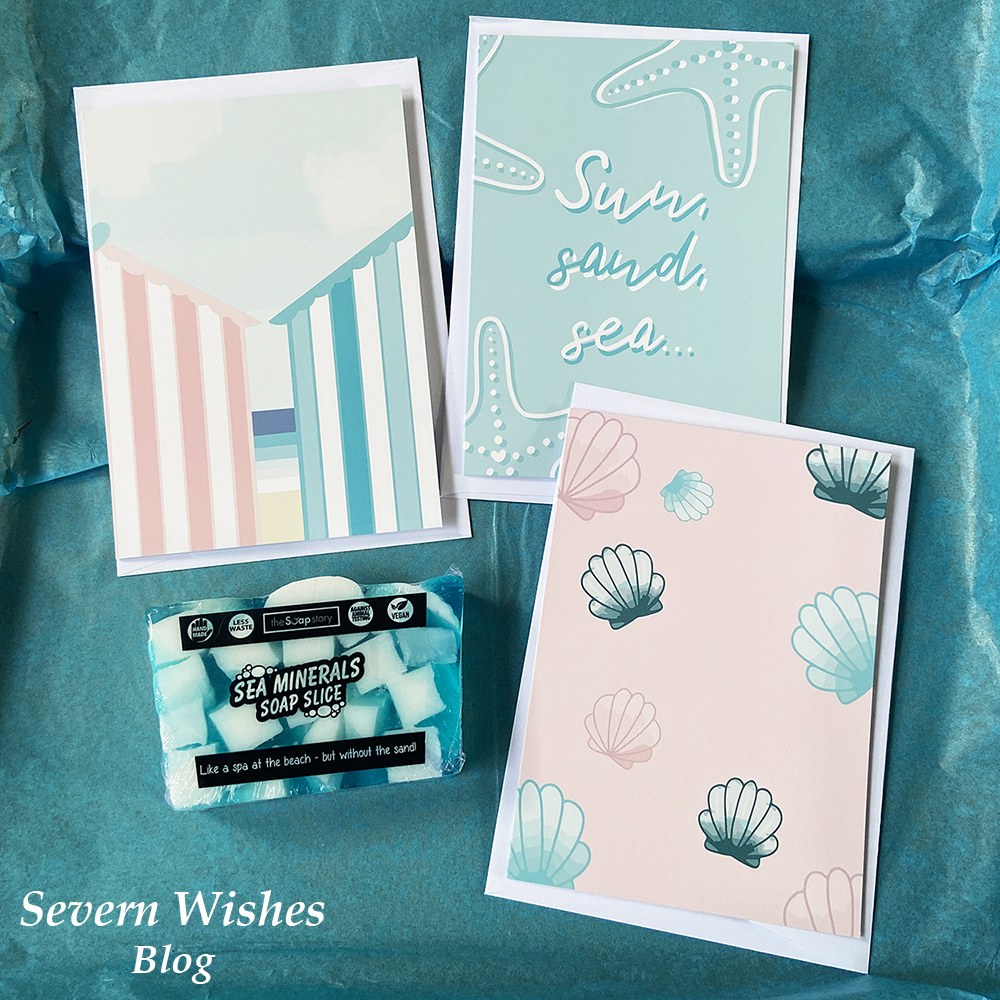
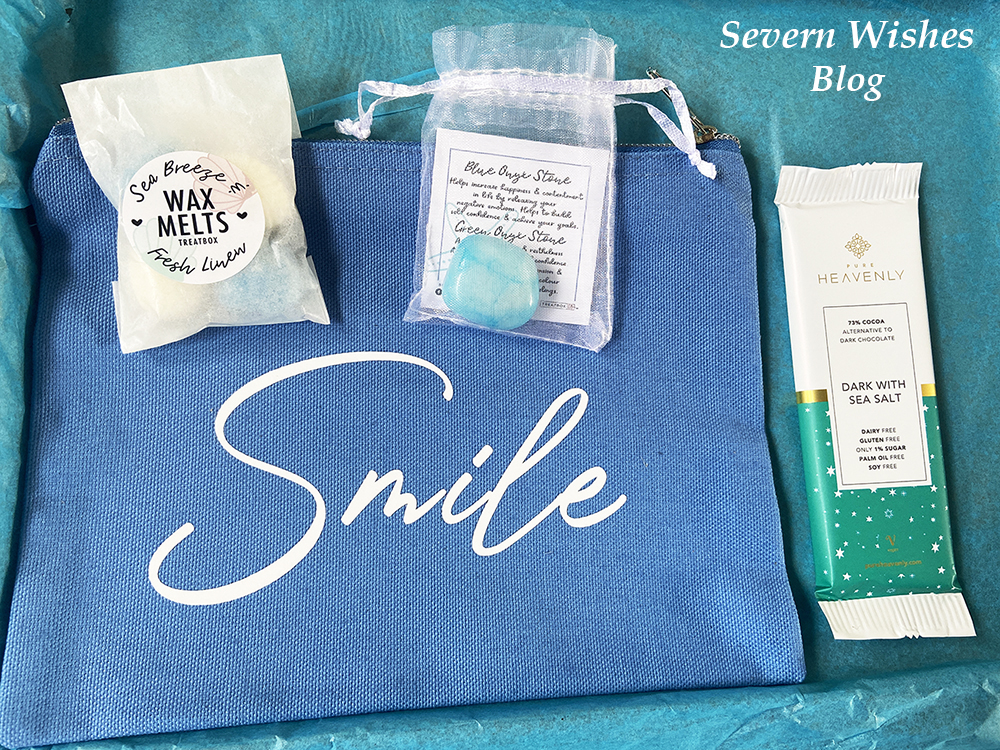
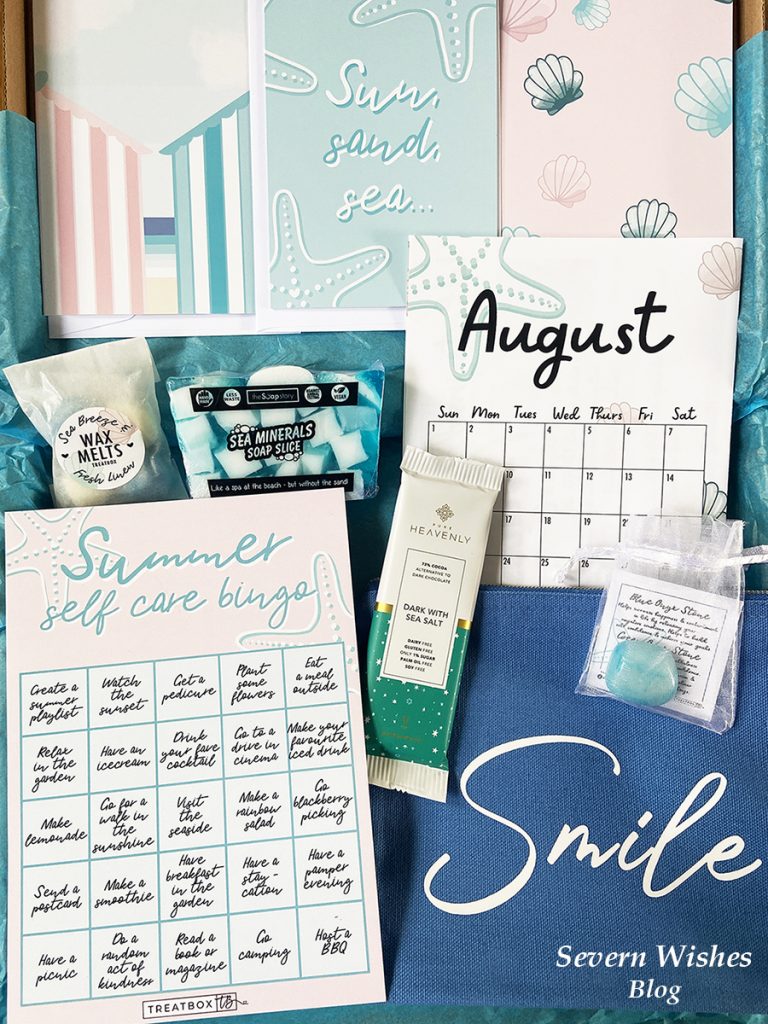
3 Treatbox Original Cards featuring a Sea Theme Blue “Smile” Toiletries Bag The Soap Story – Sea Minerals Soap Slice August Calendar Print Sea Breeze & Fresh Linen Wax Melts Pure Heavenly Chocolate – Dark with Sea Salt Blue Onyx Precious Stone in Organza Bag Treatbox Bingo Card – Summer Self Care
My Honest Opinion
What a fantastic box this month! I loved the Sea theme and how neatly all the items slotted within it. I also enjoyed seeing items that we have NEVER HAD BEFORE 😀 Yay! This makes me SO happy!!! After buying so many years of constant boxes from Treatbox I’m always hopeful to get useful items or unique pieces.
The precious stone and the smile bag are my favourite items this month. The Treatbox UK originals like the bingo card and the trio of summer sea cards are also really nice. You can choose to keep them or pass them on to someone to keep the positivity going! The soap slice made the whole box smell so nice! I am looking forward to taking a bath with that! And the chocolate looks delicious! I am saving that for a night in on my own! I am not a fan of wax melts, but they smell lovely, so I won’t be melting these but using them to make my room smell nice instead!
Thank you for reading this unboxing post, I hope you enjoyed it. Hopefully I will see you again soon. Have a great month of August!
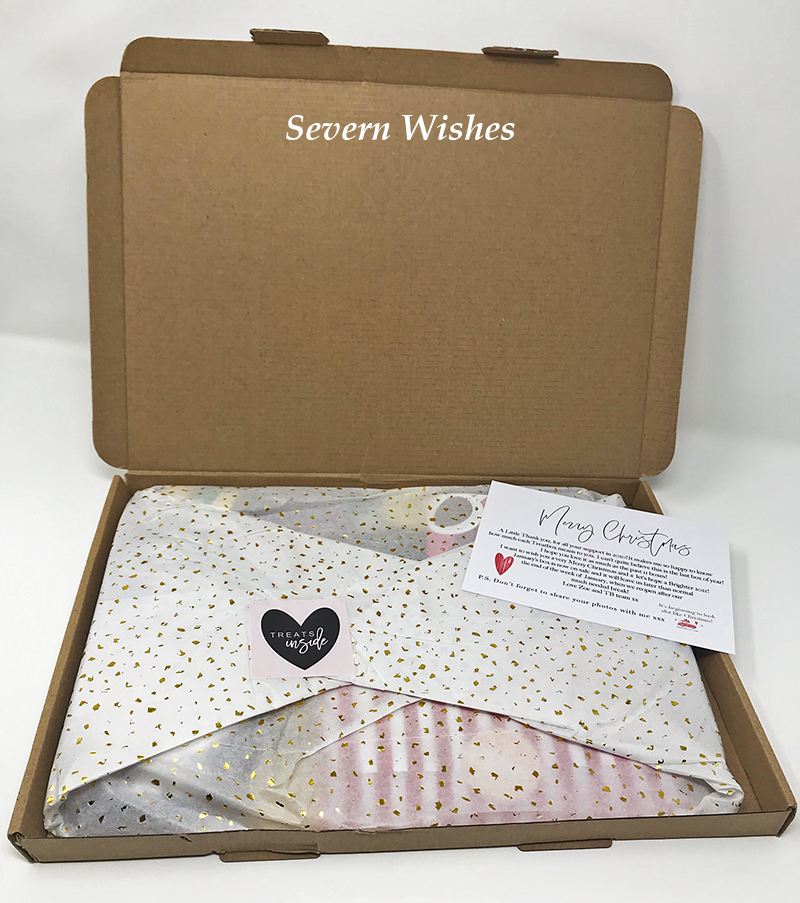
It’s that time again, but not just time to Reveal a Treatbox, oh no, but also time to Reveal the Christmas month Treatbox! Exciting stuff right? It’s usually one of my most anticipated boxes of the whole year.
This festive season the Treatbox gives us another set of treats and edible delights to enjoy. I was expecting the chocolates because I saw Zoe put something up on Instagram about tossing coins into each of the boxes before sealing them up.
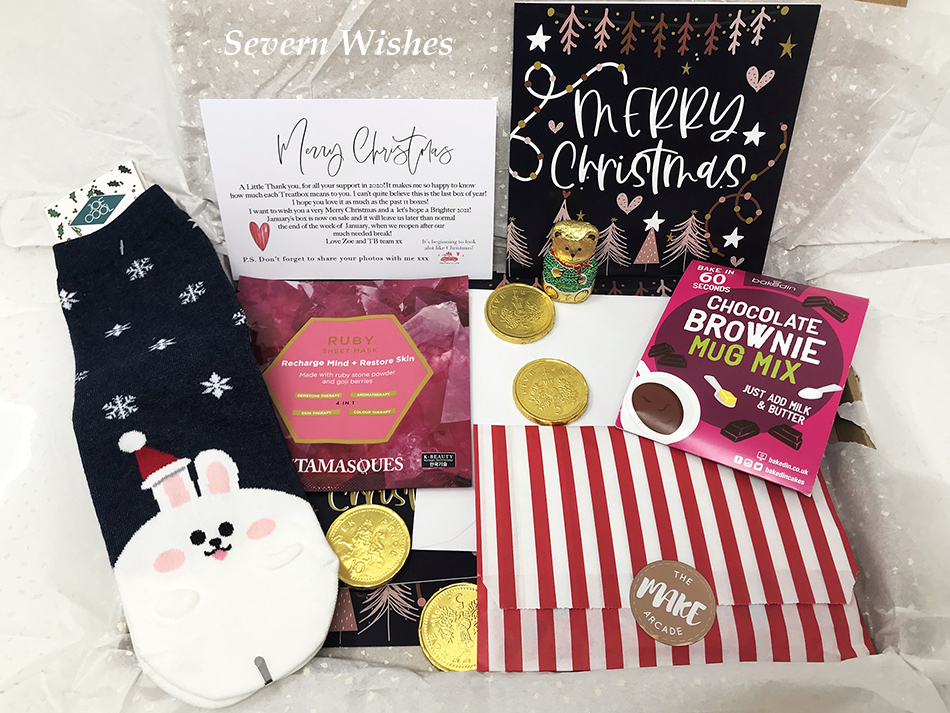
The Items I Found Inside My Box For December Were…
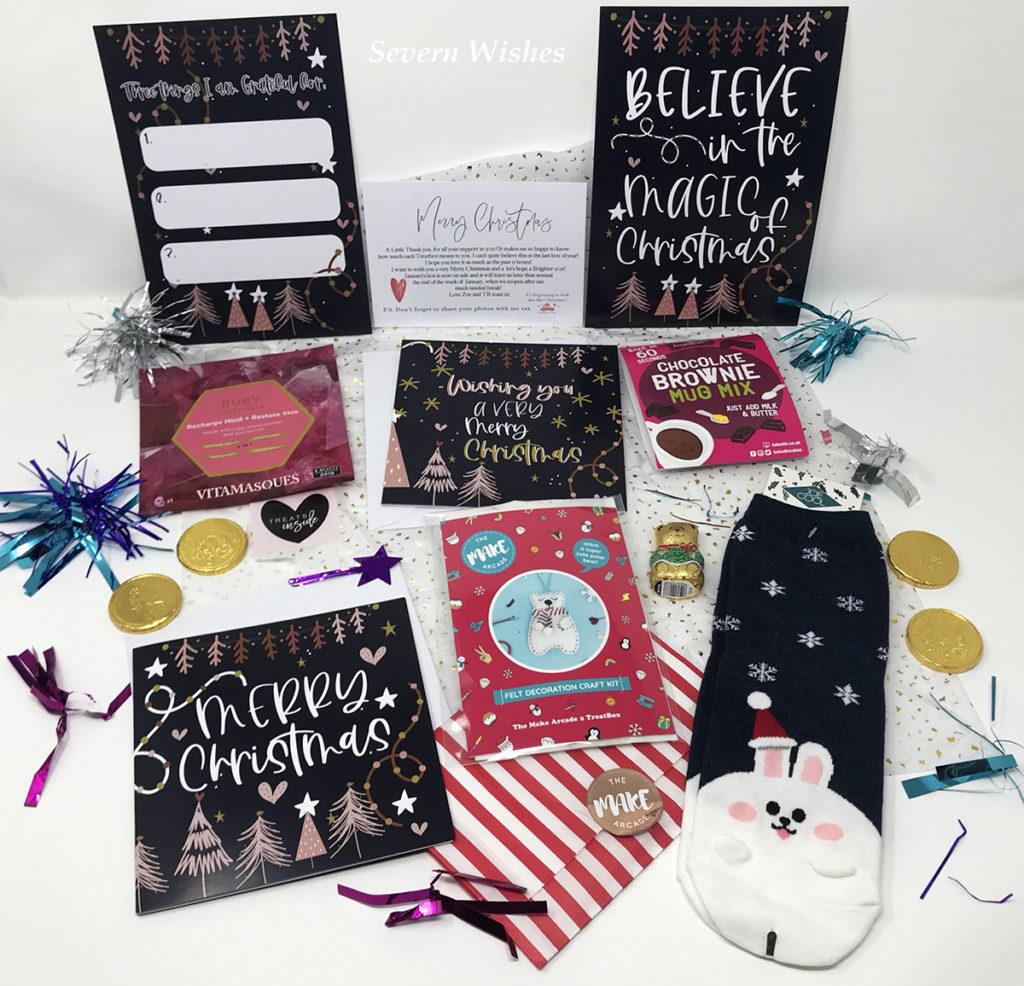
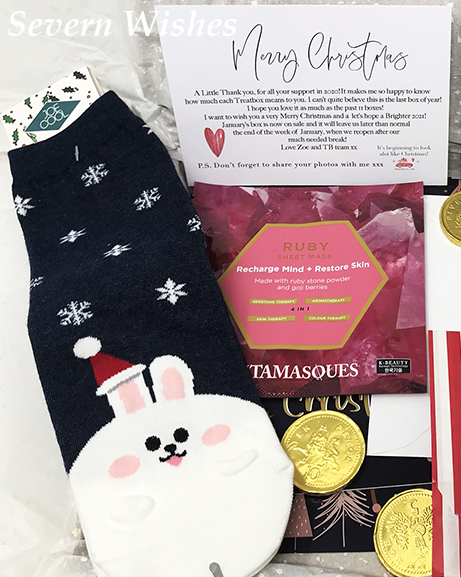
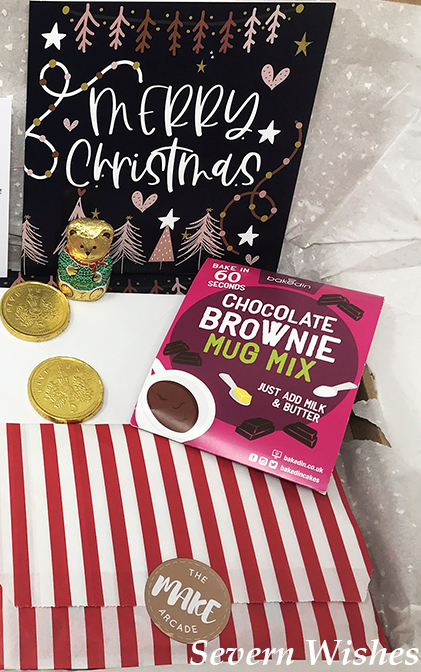
A Lindt Chocolate Teddy 4 Chocolate Coins Ruby Sheet Mask 4 in 1 Vitamasques Bakedin Chocolate Brownie Mug Mix Two Treatbox Original Christmas Cards with Envelopes A Pair of Joe Cool Christmas Socks – Christmas Bunny Two A5 print cards that read “three things I’m grateful for” and “Believe in the Magic of Christmas” “Make the Arcade” Felt Decoration Craft Kit Polar Bear
The socks are adorable! I will always be happy to receive more Joe Cool socks, I have loved every pair I’ve gotten in a Treatbox and they are such good quality. I have a little Christmas Rabbit with a hat on one ear, queue the “Aww!”.
I think the make your own Polar Bear is a particularly sweet idea and really nice to make one cold afternoon in December for you to put on to your Christmas Tree!
There are two Treatbox original Christmas Cards and two A5 Prints. I really like all of these, they are good quality and are nice enough to even frame and stick up around your home this Christmas.
We also have a Brownie in a Mug mix, Ooo! Yum! And a cute little Lindt Chocolate Bear!
And finally we have another face mask this month. I would have preferred no mask this month and seen another Christmassy related item or a Wintery item but never mind! I guess some people manage to do masks every week, I know I just don’t find the time as a single mother, ha! ha!
All in all it’s a good box of treats this month and I’m happy with it. I think if there had been a set of battery powered fairy lights included instead of the face mask, then it would’ve been up there with one of the best Christmas boxes! C’est la Vie!
Merry Christmas to Zoe and her Treatbox UK Team! Thanks for another year of boxes! I’ve been doing this for rather a Looooooooong time now! Years in fact!
Did you know you can view my previous Treatbox unboxing posts in this unique category of mine called ‘Treatbox’ it is specifically for these box reviews and reveals – Severn Wishes Treatbox.
Thank you for visiting Severn Wishes today, I hope you have enjoyed this Review of the December box! Wishing you and yours a very Merry Christmas!
Welcome to Sweet Treats Week on Severn Wishes. This half term I wanted to share my top 5 baking treats with you all, hopefully you’ve got some time this week to make them with me! Check out my Instagram for more food pictures and recipe ideas too!
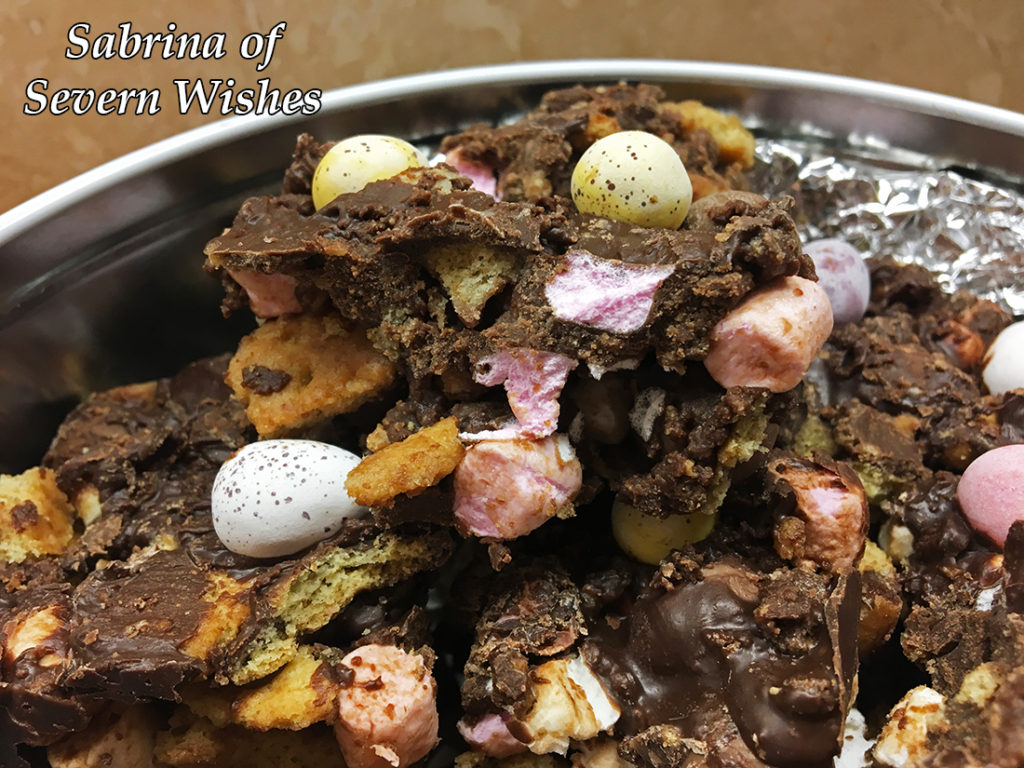
Day 3 is Sabrina’s No Bake Needed Rocky Road
Definitely one that the kids can get involved in, and this tray bake requires zero baking! You just need an adult to do some melting and chopping! This recipe will make 24 delicious squares of Rocky Road and you can do a custom set of ingredients to suit your family too!
Start by gathering all of your favourite things and a giant bowl to mix them! You’ll need chocolate for melting which will be the glue to hold all of the other ingredients together! You also need a deep tray to squash it all down into before you refrigerate it too!
The best thing about Rocky Road is that it’s totally customisable to your family and you can’t really get it wrong! Plus it’s fun for everyone! There’s only one danger with Rocky Road! Just don’t go eating all the singular ingredients while you’re making it!
I love to put things in mine you don’t usually find in a supermarket style tray bake, sometimes you find Nuts and I don’t put any of those in, some also contain fruit, which is a personal preference to whether or not you add this in. I will outline all the measurements below, and you can make your selection of your favourites.
Step 6.
What You Will Need
A Large Mixing Bowl – the bigger the better! A Wooden Spoon or Two A Saucepan (to do the melting part) A Spatula A Sharp Knife Tea Towel and Rolling Pin (Or something to smash the biscuits with) Baking Parchment to line your tray A Large Tray that will still fit in your Fridge minimum of 1.5 inches deep
Ingredients
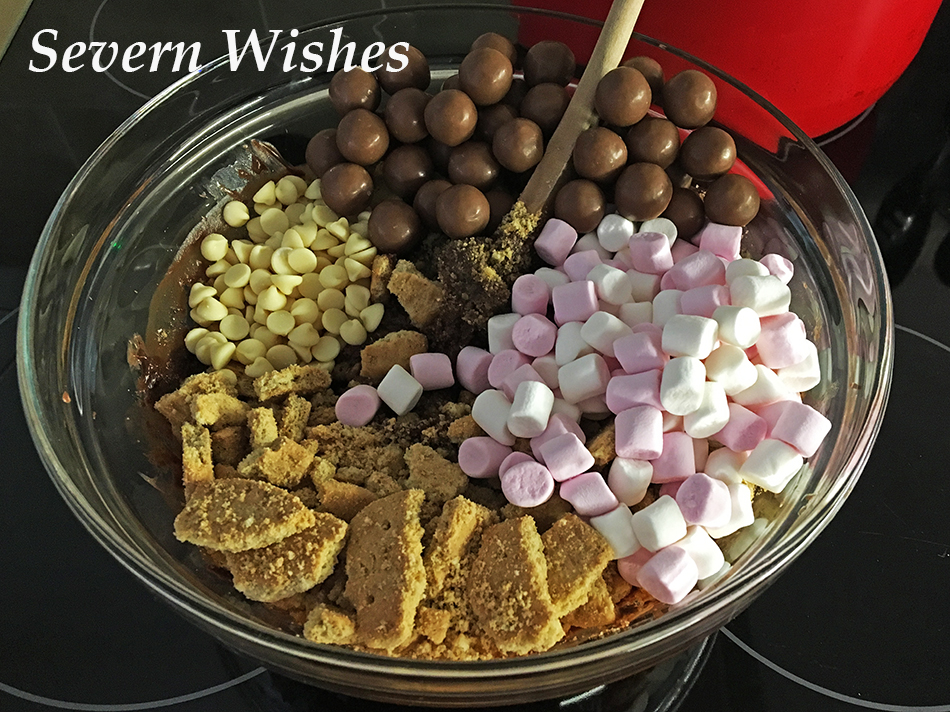
Mini Marshmallows 50g to 60g Maltesers or Honeycomb Shards 50g to 60g White Chocolate Chips 30g to 40g Biscuits 150-200 grams (You can use a mixture of biscuits like I do, Digestive, Shortbread and Ginger are my faves, Ginger give a nice taste!) ☆ Milk Chocolate (for the melting) 250 grams Dark Chocolate (for the melting) 120 grams Butter (for the melting) 140 grams Golden Syrup (for the melting) 4 tablespoons
Additional Ingredients to Personalise your version of Rocky Road
Your “Special Ingredient” can be anything, between January and April I tend to use Mini Eggs or other Easter related Mini Chocolate Eggs etc. I just cut some of them up for going inside the bake. Other things that go well and add colour are Smarties, Aero Bubbles anything that sort of size etc.
Use around 70g to 100g of your chosen ingredient and remember to save around 30g of it for the topping!
You can also add any of the following things that all go brilliantly with this type of non-bake recipe – Cherries / Cranberries / Nuts / Raisins etc…
You will need 50 grams of your chosen one/s and make sure you then increase the depth of your tray by half an inch / 2 cm if you decide to include more than one of these ingredients. You could also choose to remove say, the white chocolate from my main list, and add in Raisins instead, just keep the ratio the same…
The customization is all down to you and your family! Go crazy! Have fun!
Method
1. Measure out and then Crush the Biscuits into mixed bite size pieces and add them to a large bowl.
2. Next, gather all your additional ingredients as outlined above, measured correctly and add these to your large bowl. The aim is to then mix all these dry ingredients together so they are evenly distributed.
3. Melt the Milk and Dark Choc with the Syrup and Butter until Smooth. Set 150ml of this melted chocolate mixture to one side in a jug to cool a little (you need this for the top of the mixture).
4. Add your melted mixture from the saucepan to your large bowl, coating all of the dry ingredients, keep mixing it quickly but carefully. You need to cover all of them in a light chocolate covering before it cools down too much.
Step 5.
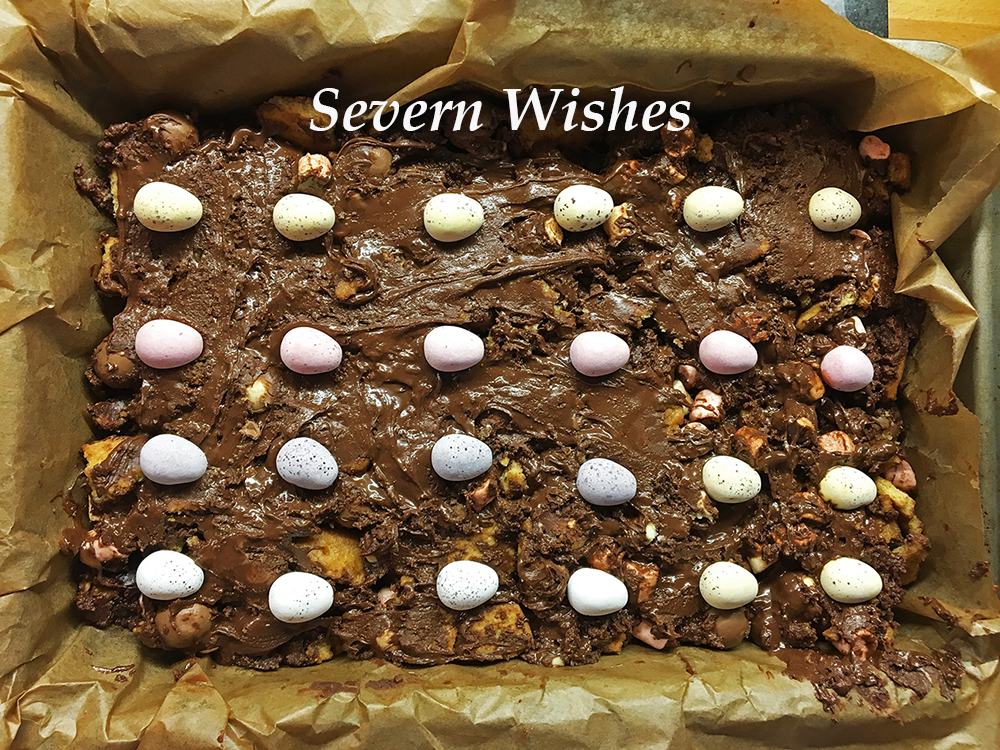
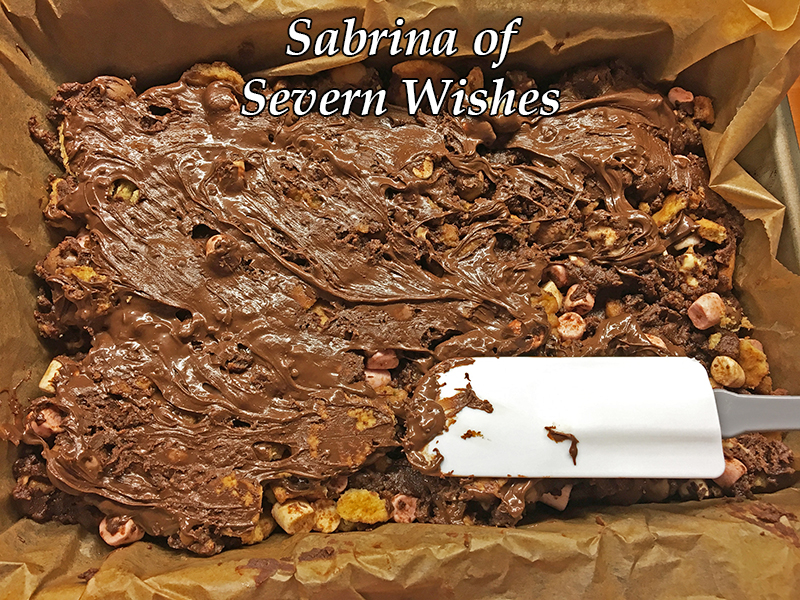
5. Transfer from the bowl to the tray making sure the parchment is already lined inside it and smooth the rocky road out as flat as possible, push it down gently using a wooden spoon. Then pour the remaining melted chocolate (from the jug) over the mixture and smooth that all over the top with a spoon or a spatula, you need to try and coat most of the mix if not all of it, TOP TIP don’t forget to coat up to the corners!
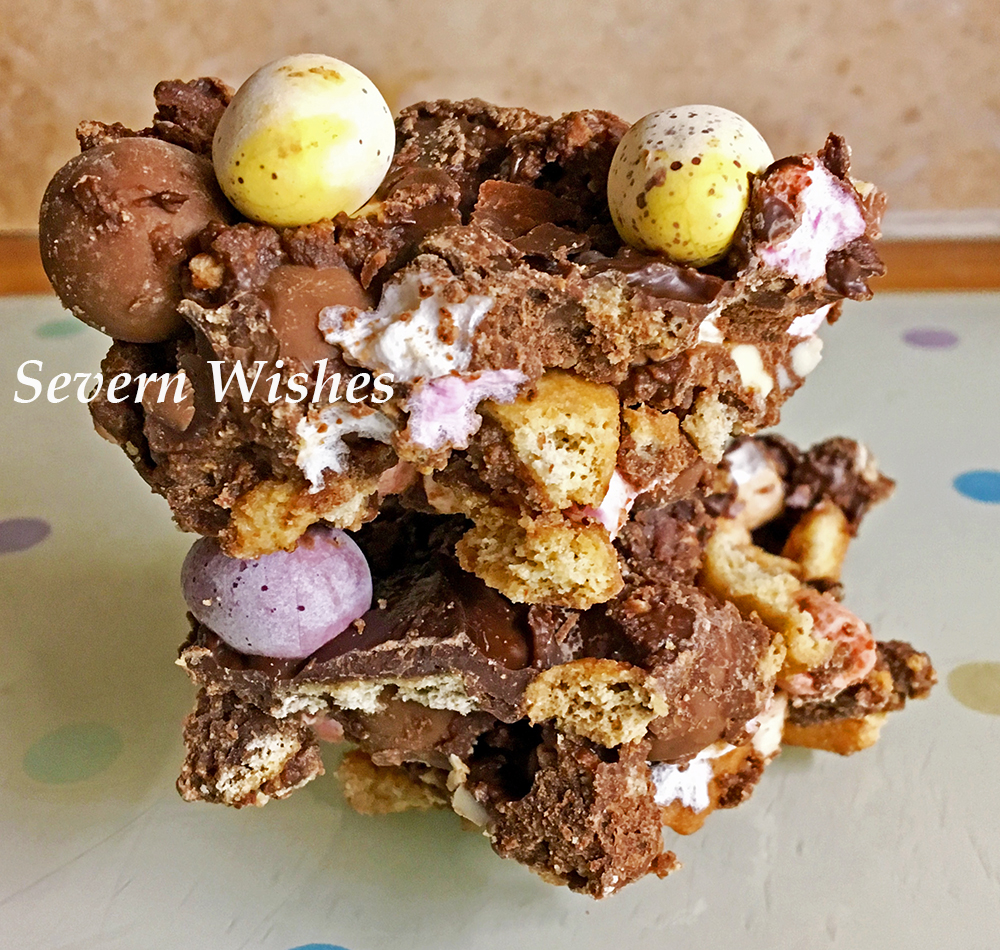
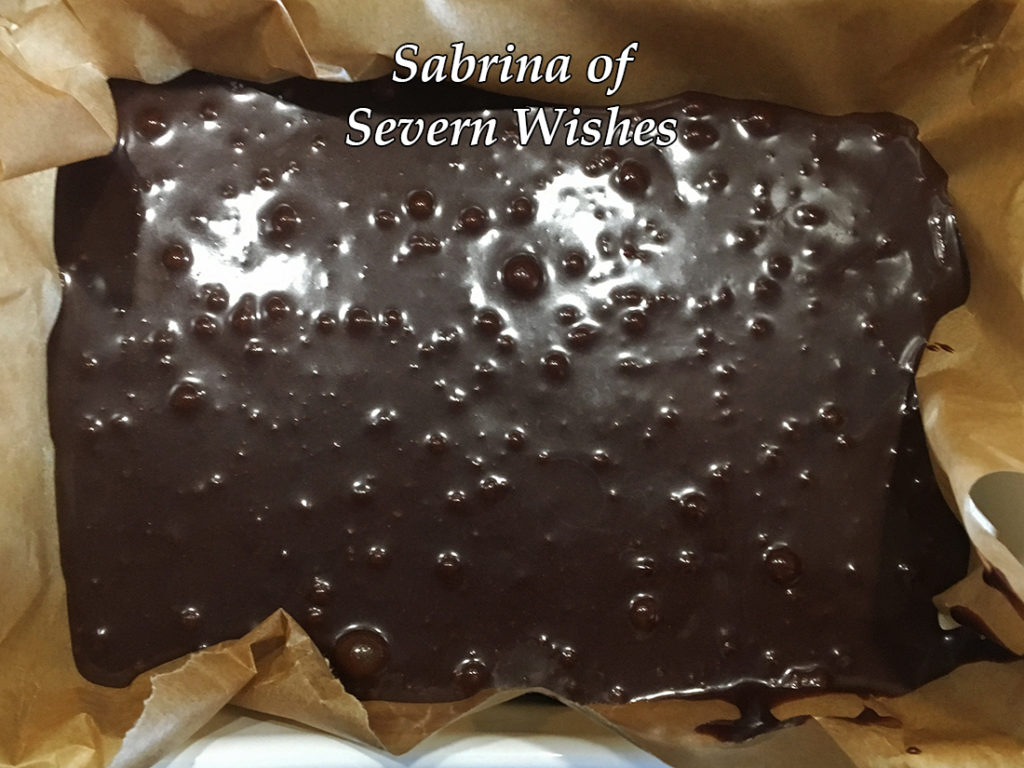
6. Finally add your chosen Chocolate Decorations like Mini Eggs. Push them down a little so that they stick to the melted chocolate. Score the pieces of size you want to cut once it’s solid, using a knife (adult part only). Then put the whole tray in the fridge to set for a couple of hours.
7. To serve it, gently remove the paper from the baking tray, lay flat and cut the Rocky Road where you scored into it earlier, do this using a knife that has been run under hot water (another adult only part). Remember to put the pieces into a seal-able tin or tub afterwards to make sure it stays fresh. Once set and cut you just store it at room temperature, for the best results eat it within 3 days.
Step 2.
Thanks very much for joining me for this recipe on Sweet Treats Week! I do hope to see you here again tomorrow! See my social media for some videos while I am baking these as well! Including versions and what I use to make my bakes dairy free too!
If you make any of my recipes be sure to tag me on social media, leave me a comment here on my blog. Any questions about a recipe please don’t hesitate to ask them! If you recreate this recipe somewhere else please credit me for it and name me and my blog, or even better link back to this original post too! Thanks everyone!
Welcome to Sweet Treats Week on Severn Wishes. This half term I wanted to share my top 5 baking treats with you all, hopefully you’ve got some time this week to make them with me! Check out my Instagram for more food pictures and recipe ideas too!
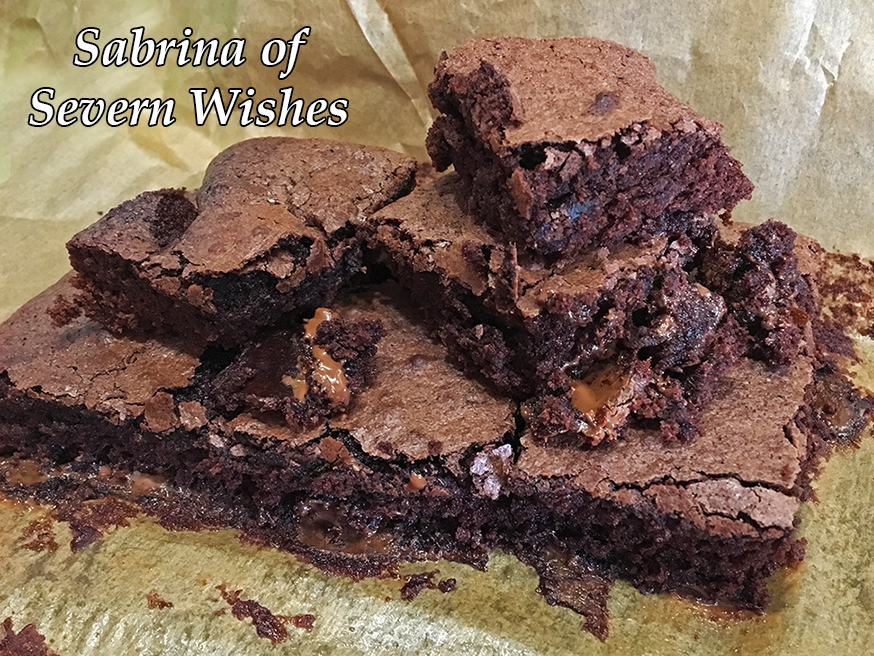
Sabrina’s Chocolate Brownies
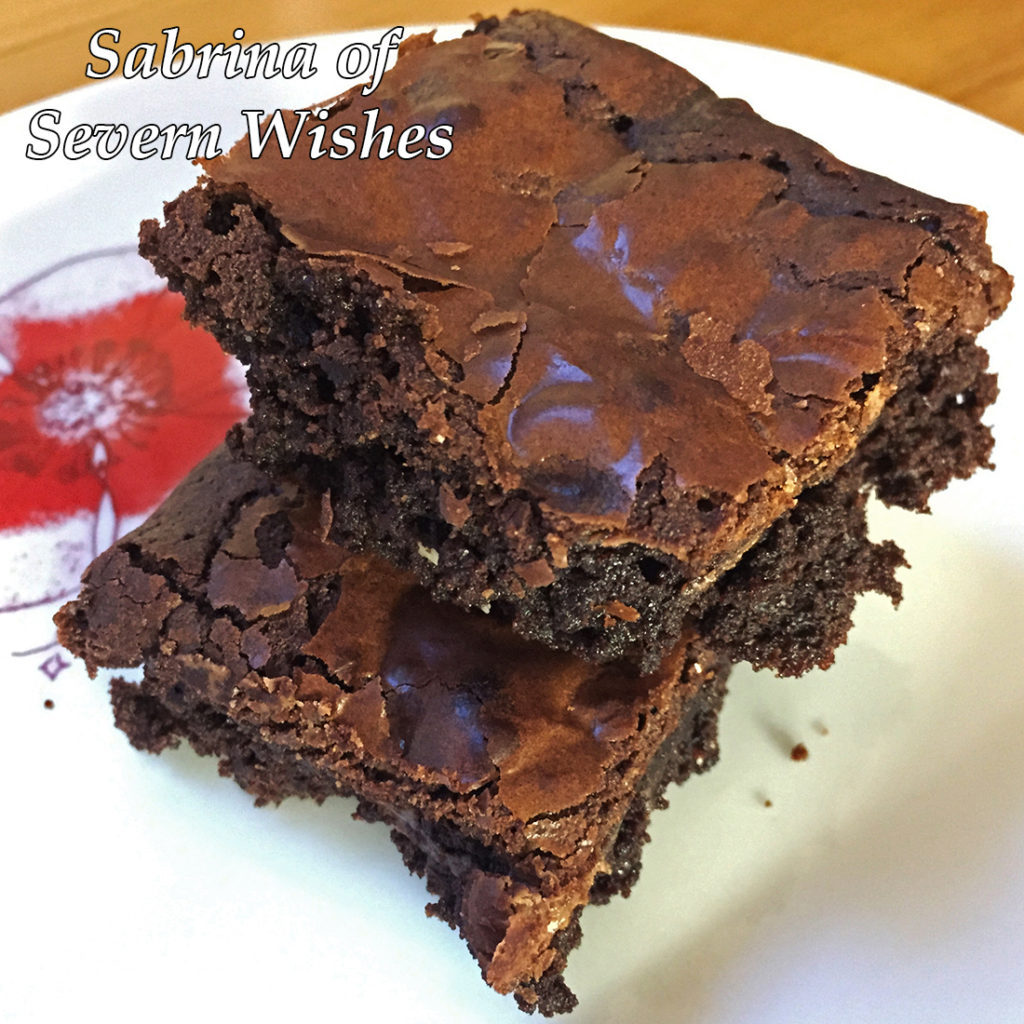
Day 1 is Sabrina’s Extra Special Chocolate Brownies
Brownies can be tricky, but if you follow my recipe one step at a time you should be able to recreate my incredible triple chocolate brownies! Since needing to go dairy free I’ve even made these brownies free from dairy by substituting the butter for a dairy free spread and then I swapped the triple chocolate chips for only dairy free chocolates, and they still taste incredible! So do whichever version you would prefer, the difference in butter doesn’t change the end result.
My recipe will make around 20 brownies once you cut them after they have cooled. They are quite rich which is nice because they will last longer! They will last around 3 days in a sealed container, the best way to keep them is to store them at room temperature. TOP TIP Reheat a square or two for between 10 and 20 seconds in the microwave and serve them with ice cream! Yum!
Sabrina’s Triple Chocolate Style Brownies (A.)
What You Will Need
A Glass Dish or Baking Tray measuring approx 26cm x 20cm (8 x 10″) Baking Paper or Parchment A Saucepan A Large Mixing Bowl A Wooden Spoon A Metal Spoon A Whisk – Manual or Mechanical A Sieve A Knife A Cooling Rack Something To Store Them Inside After They Are Cooled
Step 5. Once Smooth Add Your Chocolates To The Mix!
Ingredients
3 Free Range Eggs (Fresh is best for baking) 175g Plain Chocolate (for melting) (You can use dairy free chocolate too) 175g Butter (or Dairy Free Spread) 200g Caster Sugar 75g Plain Flour 50g Cocoa Powder
Additional Flavours or Additional Chocolates… There Are Endless Possibilities! What Would You Do? Here are my favourites…
BrownieVariations
A. Triple Chocolate Brownies require 75g of White Chocolate Chips and 75g of Milk Chocolate Chips (or use different varieties of dairy free chocolates). Add these at Step 5. B. Chocolate Orange Brownies require 100g of Chocolate that is Orange Flavoured, dairy free choc orange bars from Asda are fab or a few broken segments of a Terry’s Chocolate Orange are best! Put these pieces in the mixture at Step 5 instead of chocolate chips. C. Mint Chocolate Brownies require 75g of Chocolate that is Mint flavoured, with such a strong flavour of chocolate it can be used as part of the melted part at the start of the bake. For a more Minty flavour later on you could add some Aero Mint Chocolate Balls when the brownie is almost cooked! Push them into the top of the brownie before the top is solid leaving just a little sticking out so they don’t melt and or burn!
Sabrina’s Chocolate Orange Brownies (B.)
Method Steps
1. First you need to place your butter and plain chocolate into a saucepan. Break the chocolate into small bits so it melts faster. Only melt on a low heat slowly. Keep stirring the melting mixture frequently until it is smooth with no lumps left. TOP TIP I only have my hob one setting 1 or 2 for melting, you don’t want to burn the mixture! I don’t like melting chocolate in a microwave, it’s too easily burnt!
2. Set the melted chocolate mixture to one side and allow it to cool. You can now preheat your oven to 180’c, 160’c for a Fan Assisted or 350F or Gas Mark 4. Cut a piece of baking parchment for your tray and push it inside.
3. In a large bowl break the 3 Eggs, make sure no shell falls in. Using a wooden spoon mix them up, add the Caster Sugar gradually while stirring. You then need to Whisk them both up together until they are combined and smooth with a light and creamy colour.
4. Using a Large Metal Spoon, you now fold in the cooled melted chocolate and butter mixture, one spoonful at a time. Keep stirring it through the creamy mixture, keep going one spoon at a time until all of the smooth thick liquids are combined into one large one. It should be a lot and not lumpy. TOP TIP If the chocolate mixture is still hot it instantly cooks the eggs and you end up with a curdled concoction! Make sure its cool, lukewarm is best, and stick to my one spoon at a time method!
5. Finally you need to Sieve the Cocoa Powder and the Plain Flour into your liquid, again you do this gradually, shaking a little into the bowl and mixing it through until it disappears. Repeat until all the dry ingredients are in the bowl and the mixture should now be a thick pour-able liquid. Add your chocolate chips or buttons or other bits now! Mix them in thoroughly.
6. Pour the mixture entirely into your tray with the parchment inside it. The mixture should sit just over half way inside giving it a little room to rise up slightly. Add any toppings like chocolate chips now, or part way through if they are not bake stable. Shake the tray from side to side before pushing it into the oven, so the bake is level.
7. Bake it with the correct setting for your oven, you’re looking for an even bake with the slightly crisp topping, it should change colour, it should be soft but cooked in the centre. On average this bake takes between 20 and 30 minutes, depending upon tray used and oven type. Just keep an eye on it, take it out and stick a knife into it. When the knife comes out almost clean, pull the tray out. Leave it on top of your oven for ten minutes, try the knife again. Remember if you hit a melted chocolate chip you may think it’s not cooked when it is! For this reason don’t be tempted to over cook it! They should be soft with the additional chocolates melted inside when you cut it!
Remember to wobble the tray so the mixture goes flat!
Thank you very much for joining me for Sweet Treats Week! I hope to see you again tomorrow!
If you make any of my recipes be sure to tag me on social media, leave me a comment here on my blog. Any questions don’t hesitate to ask them! If you recreate this recipe somewhere else please credit me for it and name me and my blog or even better link back to this original post! Thanks everyone!
Welcome to today’s post as I discuss Free From Easter Eggs with a Taste Testing and Ingredients Comparison.
This Easter time I might be on a Dairy Free diet, but that hasn’t stopped me hunting for treats! I wanted to share my findings with you all, my opinion, product information, photo’s and all! Here is my Review of several Free From Chocolate Easter Eggs.
So I’m trying a few chocolate eggs that are known as free from, I require dairy free but a lot of these eggs come as free from several allergens. Wheat or Gluten or Dairy, most of these go together. I will be outlining Allergens and Ingredients with each egg below.
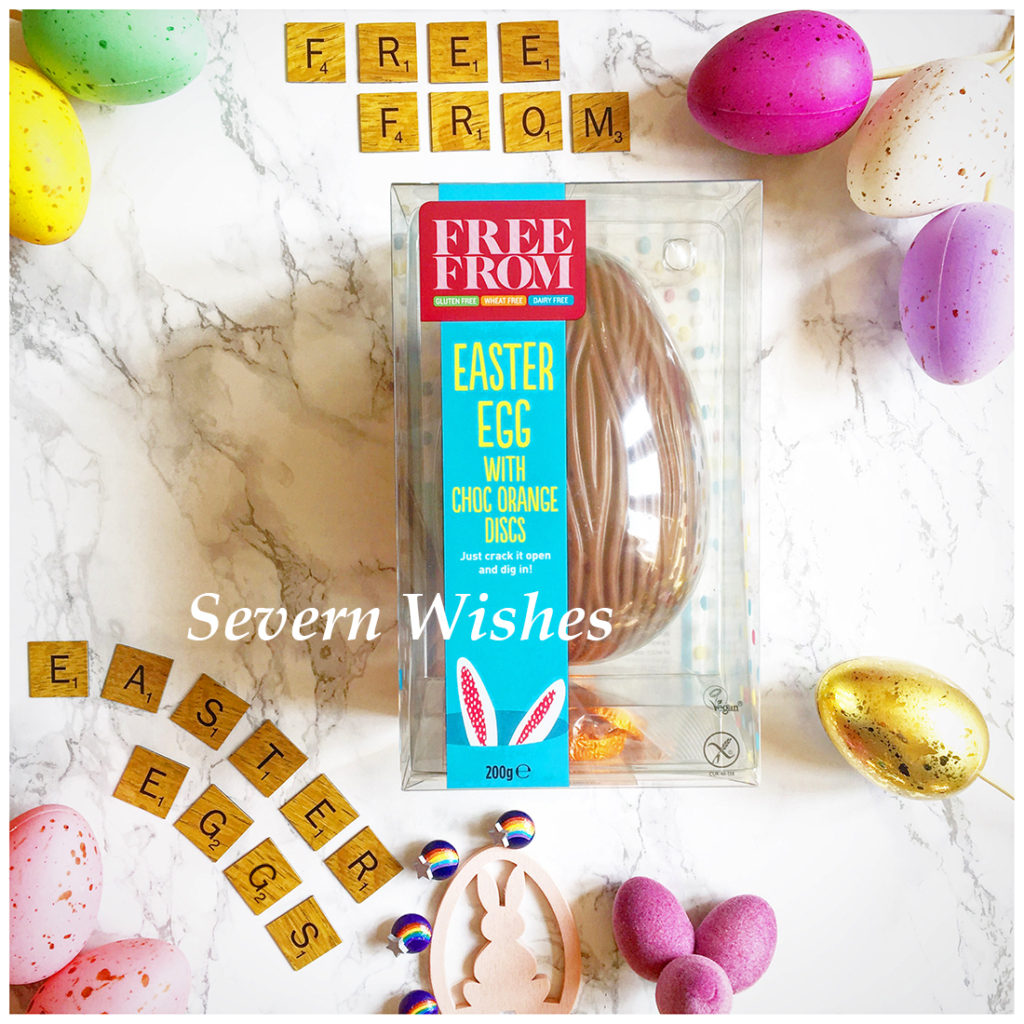
Number 1. The first egg I have is an Asda Free From Easter Egg with Chocolate Orange Flavour Disks. The pack is available for £4.00 for it’s 200g. LINK
This Egg is Vegan, Gluten Free, Wheat Free and Dairy Free. The Asda Chocolate also has No Artificial Flavours, Colours or Hydrogenated Fats.
Ingredients and Allergens Sugar, Cocoa Butter, Cocoa Mass, Rice Syrup, Inulin, Coconut Oil, Rice Flour, Flavourings, Emulsifier (Soya Lecithins). Soya is the only allergen present. This Egg should be suitable for those who have Nut allergies because Nuts are not part of the ingredients. The Pack provides 6 servings. 1/6 of the pack (1 serving) Energy kJ 778, Energy kcal 186, Fat 12g, Of Which Saturates 7.1g, Carbohydrate 19g, of Which Sugars 12g Fibre 0.9g Protein 0.8g Salt 0.02g.
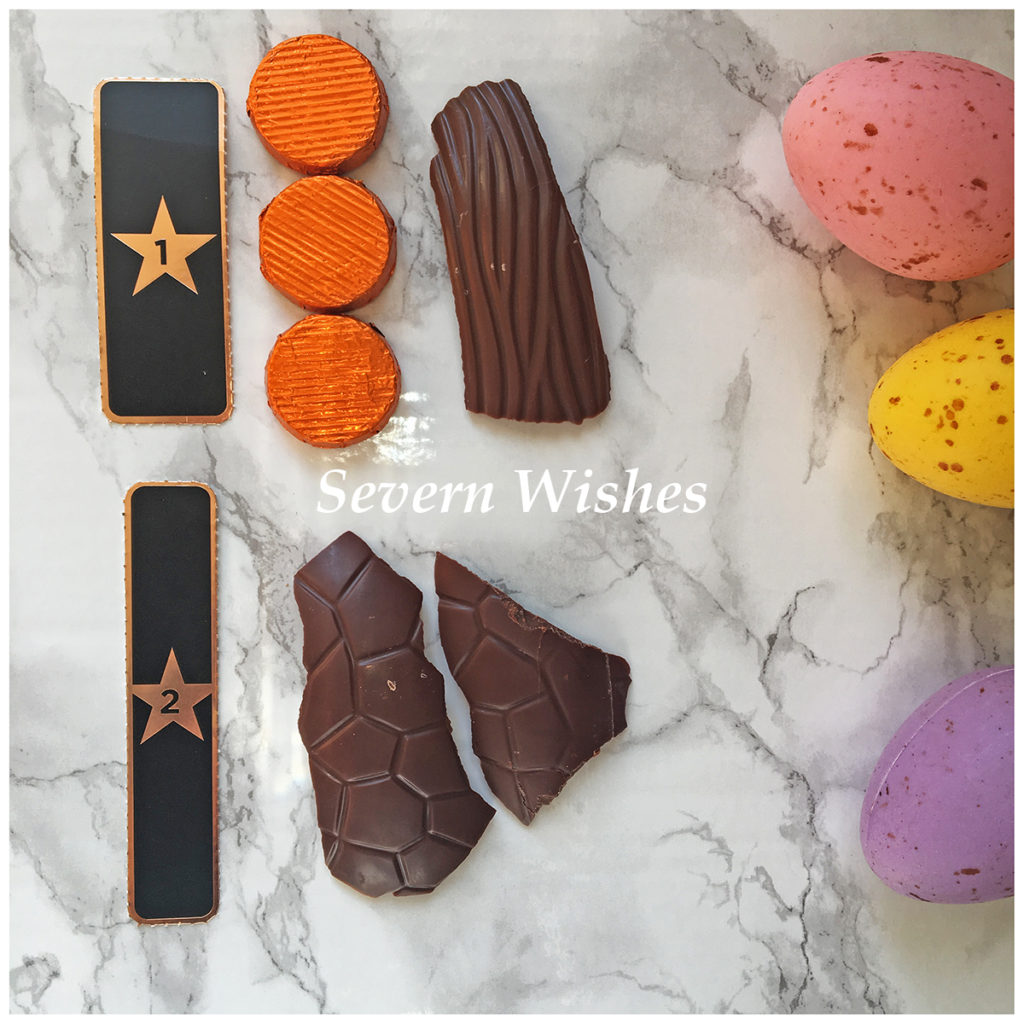
Egg Design – The Egg design has lines similar to tree bark or waves. It’s an appealing looking Egg and smells strongly of cocoa. It’s presented inside a piece of plastic (which says is recyclable on the packaging) with disks in a plastic bag at the base. The Egg size and pattern is view able through the mostly clear plastic which is good, you can see what you’re getting. You receive 6 Chocolate Orange disks in orange foil, this is one disk for every serving. The disks are round with lined tops. The foil from the disks is recyclable but the plastic bag they come in is not.
Egg Taste – The Egg tastes very nice, it is quite a strong cocoa taste but leaves a nice aftertaste of sweet chocolate. The sugar content is very high though, and after a couple of bites I had had enough. The Chocolate Orange disks are very tasty, they have a strong natural orange taste to them.
Egg Quality – The Easter Egg itself measures 3mm in thickness at the smallest sections and 6mm at the thickest sections. The chocolate orange disks are 5mm deep and taste great, a nice addition to this Easter Egg treat.
Egg Value – A very tasty Egg and a nice treat for anyone requiring a Free From Easter treat. I would say you get a lot for your money with this considering you get the Egg itself plus the Chocolate Orange disks. Because it’s so sweet you wouldn’t usually eat all of this Egg in one sitting, meaning it will last you longer too.Most of the packaging is recyclable except for the film and carton the egg comes inside.
Asda Free From Chocolate Egg
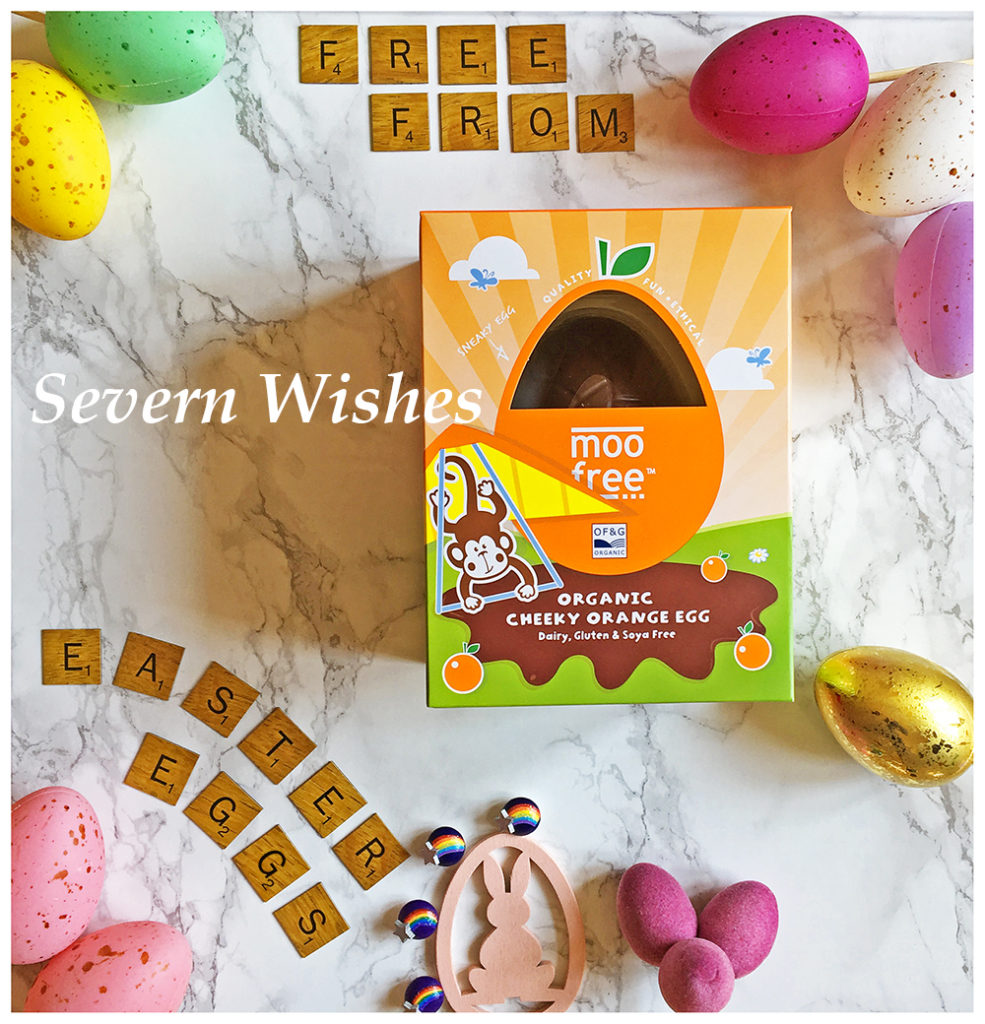
Number 2. The second egg I have is a Moo Free Easter Egg which cost me £3.00. This pack is only 110g. You can find these Eggs at most stores, I have seen them in Aldi, Asda and Tesco.
Organic Cheeky Orange Egg that is Dairy, Gluten and Soya Free. This pack contains a Chocolate Egg that is a Milk Chocolate alternative made from a combination of Cocoa, Sugar, Rice and Orange Oil. Moo Free are an ethical and family owned manufacturer based in Devon in the UK. They use high quality ingredients that have a single origin, including organic cocoa mass from plantations in the Dominican Republic.
Despite no allergens being present in the ingredients the packaging makes the customer aware that the product is Dairy, Gluten and Soya Free. It doesn’t mention Wheat, and it also states that is is made in a factory that handles Hazelnuts. This pack contains 2 servings it states, 1/2 of an egg is classed as a serving. The values per serving are as follows; Energy 1334 kJ Fat, Total 21.2g Of which Saturates 12.5g Carbohydrate 29.9g Of which Sugars 20.8g Protein 1.8g Salt 0.17g
Egg Design – The design of this Egg is nice, hexagonal shapes are all over the surface of the oval shape and all link together.Taste – The Orange taste of this Egg is very prominent and along with the sugar content makes it rather sweet, almost sickly. I couldn’t manage half of my half (serving) and stopped at a quarter. It’s meant to be a milk chocolate alternative however it’s quite a plain and strong chocolate flavour.
Egg Quality – The Moo Free Egg is only 3mm thick all the way around the oval. It has been the thinnest of all the eggs I have tried, and is also the most rich. The taste is nice but very strong in comparison to others. Moo do several eggs but I chose to try this Orange one, so perhaps the other flavours are not to overpowering.
Egg Value – This Egg is small and you don’t get much chocolate for the amount of money that you pay. Considering most other Dairy Free items are made with Soya products though, this item gives those who suffer with a Soya allergy a way of eating chocolate this Easter. I’m very happy to see a notice on the Moo Free box which says the plastic that their egg comes inside was made with recycled plastic, and could we please recycle it again. The box is also recyclable, so of course I will do that Moo Free Company! I’d be happy to because I’m big on recycling and it makes me happy to!
Moo Free Egg
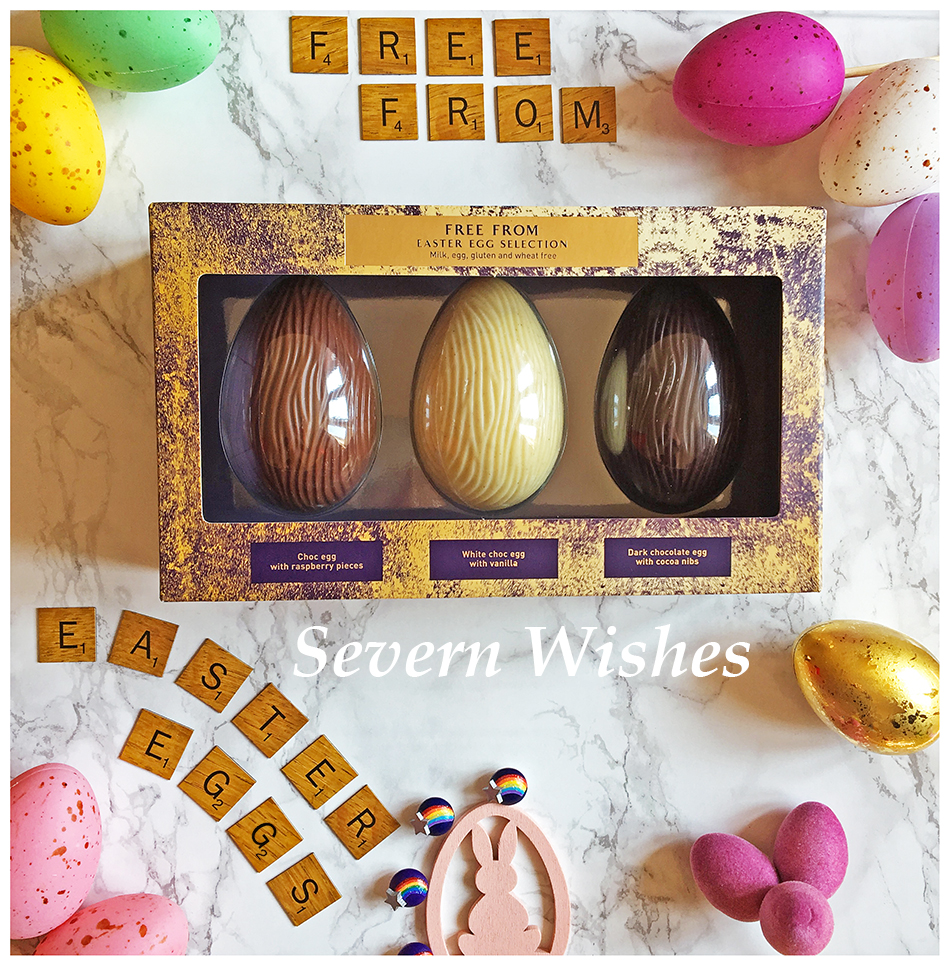
Number 3. The third egg I have is a Trio of Flavoured Chocolate Eggs. This one is a little more indulgent, I had it from Asda in their extra special range, it cost £4.50 for its tiny amount of chocolate at just 150g. LINK
There are three eggs inside this Easter Egg Selection, the first is a Chocolate Egg with Raspberry Pieces. This one tastes delicious, there are sweet and tangy raspberry pieces in every bite. The second egg is a White Chocolate Egg with vanilla, and you can see the flecks of vanilla all inside the white chocolate. The taste is surprisingly similar to white chocolate and has lots of vanilla flavouring too. Finally the third of the set is a Dark Chocolate Egg with cocoa nibs inside. This one tastes delicious because of the dark, rich chocolate flavour combined with the cocoa nibs which give boosts of taste, it’s rich and indulgent but also has a really nice after taste.
Soya is the only allergen present. This Egg should be suitable for those who have Nut allergies because Nuts are not part of the ingredients. It also states that there are No Artificial Colours, Flavours or Hydrogenated Fat.
The Pack provides 6 servings, half of each egg which would be about right considering the different tastes. 1/6 of the pack contains (1 serving) Energy kJ 583 Energy kcal 140 Fat 8.9g Of Which Saturates 5.5g Carbohydrate 14g of Which Sugars 9.9g Fibre 1.0g Protein 0.7g Salt 0.01g
Easter Egg Selection Trio
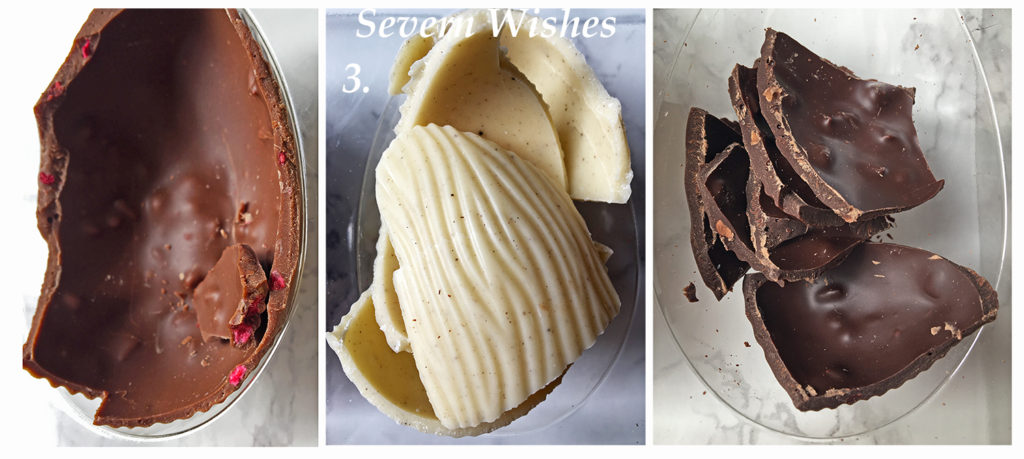
Trio Eggs Design – Each of these Egg tastes great, I would say that the Raspberry combination is my favourite, closely followed by the Dark Coca Nibs. The White is some of the nicest Free From White Chocolate that I have tried however, which gives this Egg a bonus point in taste design. The Vanilla definitely makes a big difference. Over all the set is nicely balanced in flavours, you have the fruit combo which is both Sweet and Tangy, you have the Classic flavours of the Vanilla and then you have the Rich and Indulgent Dark.
Trio Eggs Quality – The Easter Eggs were not hugely thick, however they were consistent at around 4mm. The Cocoa Mass was pretty high within this chocolate, dark chocolate has 58%.
Trio Eggs Value – Although they are the more expensive per 100g these eggs also have the better quality. Over all I would go for the taste and these have that in abundance. You don’t feel like you’re eating something that has been designed to not have Allergens in it, but instead you are enjoying a delicious chocolate treat of high quality cocoa and its adjacent flavourings to match. I have to ask myself, would I buy these again because of the taste and quality? Yes in fact I would do. Only as a treat, and Easter is that sort of one of time where I would allow it. I only wish the eggs were a bit larger, I would pay another £1 for larger ones of this quality and deliciousness!
Easter Egg Selection Trio
Of course there are plenty of other Free From Eggs out there, however I needed to avoid any that definitely contained Nuts due to my husbands allergies. And there were others that I didn’t think I would enjoy due to their flavour combinations…
I loved the flavour of the Orange Disks from Egg Number 1, and I loved Eggs Raspberry and Dark from Number 3 the Trio.
Thank you for visiting Severn Wishes today, I hope you have enjoyed this Review and that you all have a great Easter Bank Holiday!
✩ Sabrina ✩
HAPPY EASTER!!!
By continuing to use the site, you agree to the use of cookies. more information
The cookie settings on this website are set to "allow cookies" to give you the best browsing experience possible. If you continue to use this website without changing your cookie settings or you click "Accept" below then you are consenting to this.