Sabrina is a Lifestyle, Parenting and Product Review Blogger. A Writer, Photographer, Reviewer, Home Cook, Crafter & Nature Enthusiast. You will find a bit of all those categories here on Severn Wishes Blog, Welcome to Sabrina's Lifestyle Blogging & Honest Reviews.
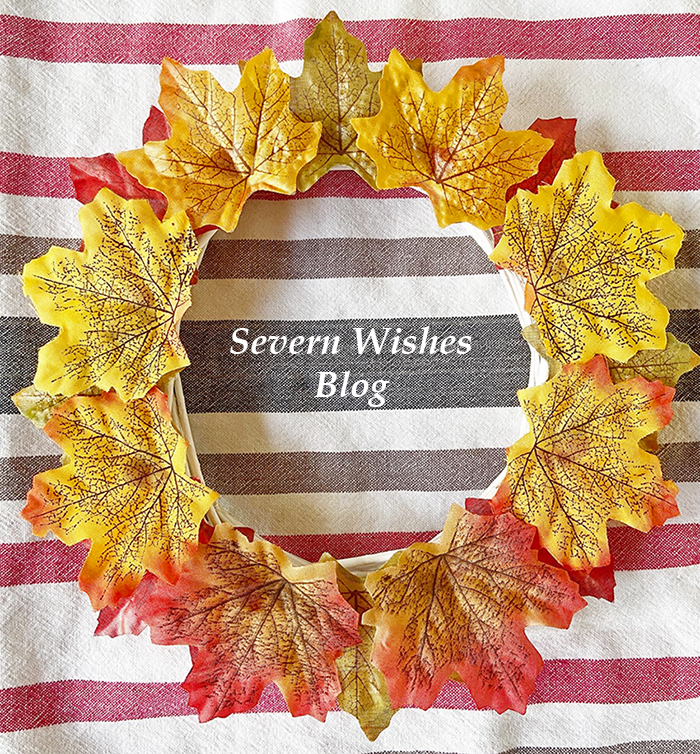
Welcome to one of my latest Craft Project posts that I am very proud of. I have been wanting to make a wreath for about four years now, and I never got around to it until this Autumn. Oops!
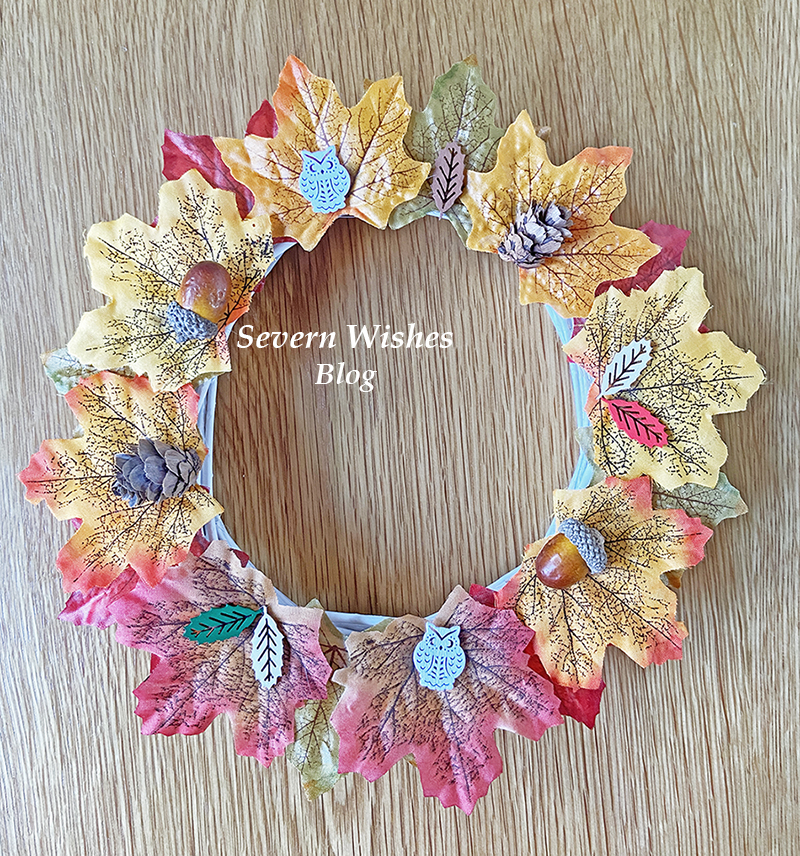
Autumn Wreaths like this can be placed indoors flat or indoors hung up. If you have a nice sheltered porch over your doorway you could even hang it outside! I chose to make an indoor wreath using false leaves, dried pine cones, acorns and wooden craft pieces.
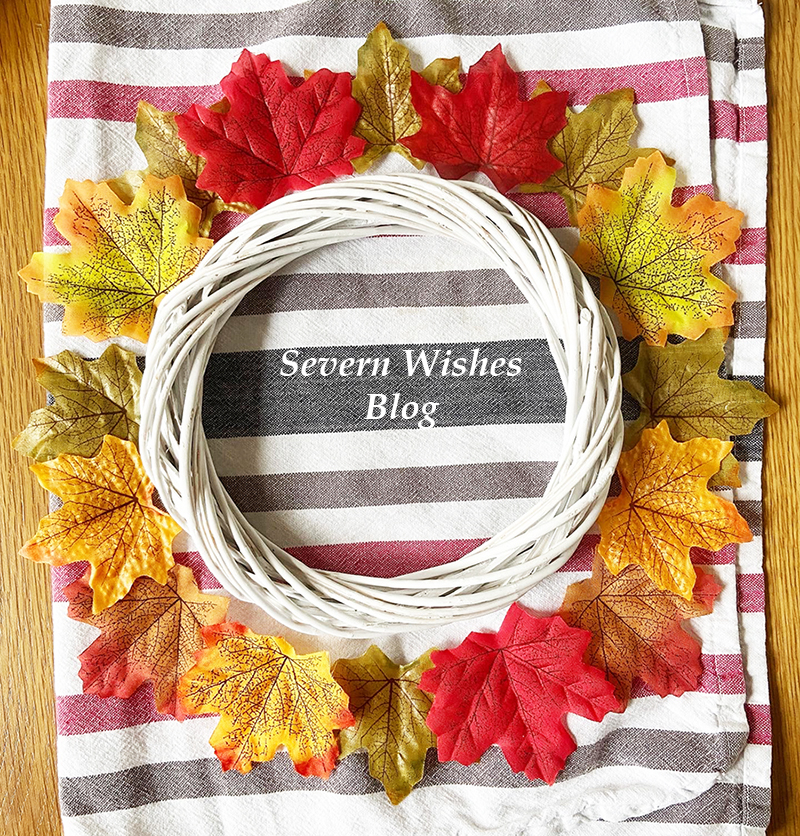
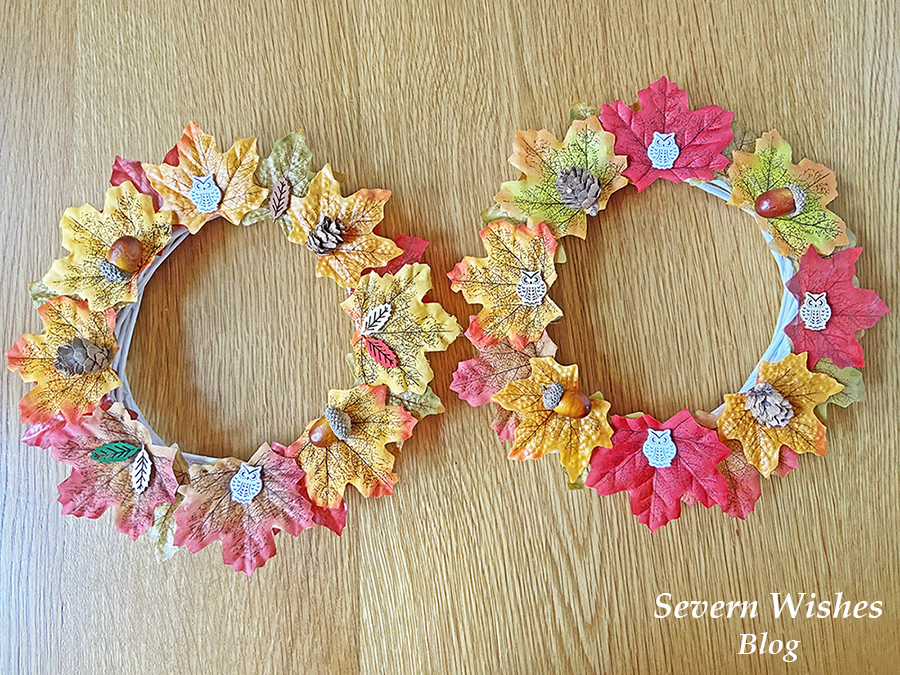
Here are all the things I have used to make my two wreath rings.
It’s a good idea to decide on your design before you start gluing anything, I place mine around the outside.
How to Make
Step 1. Prepare your design before you glue anything down.
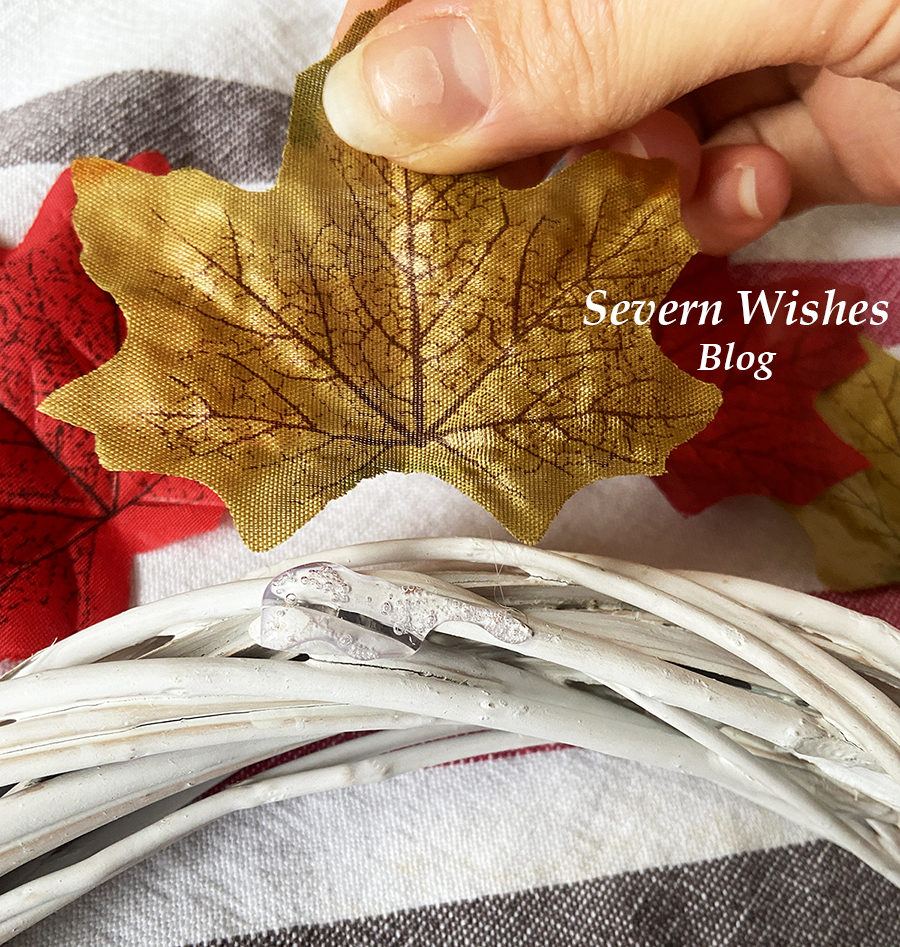
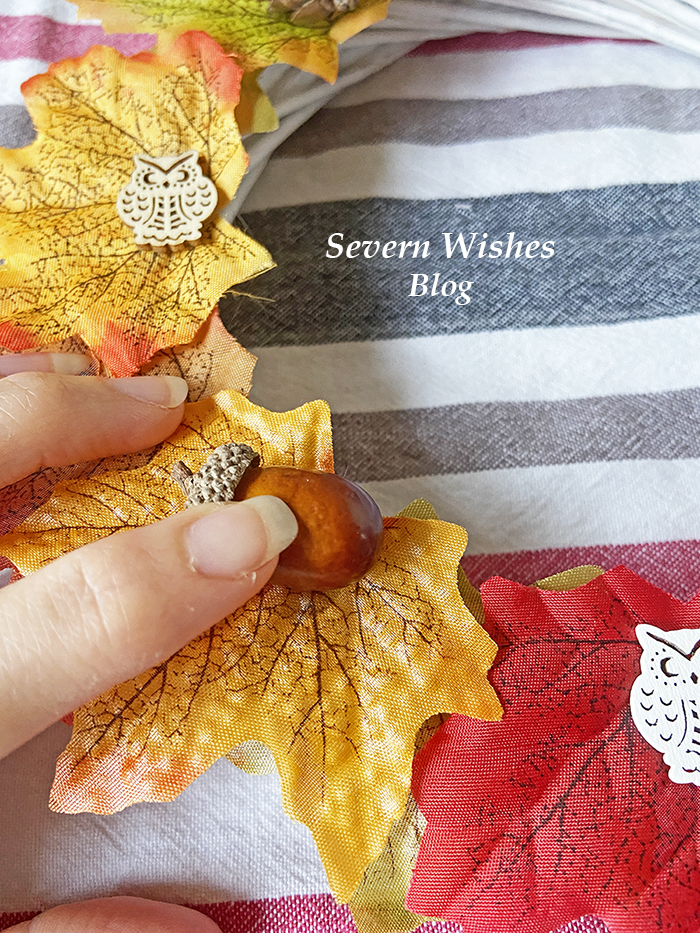
Step 2. Glue the first layer of items down using a glue gun and wait for that to dry and the glue to harden before you add the next layer. Use a blob of glue per item, just enough to stick it down because you don’t want lots of excess glue on the wreath.
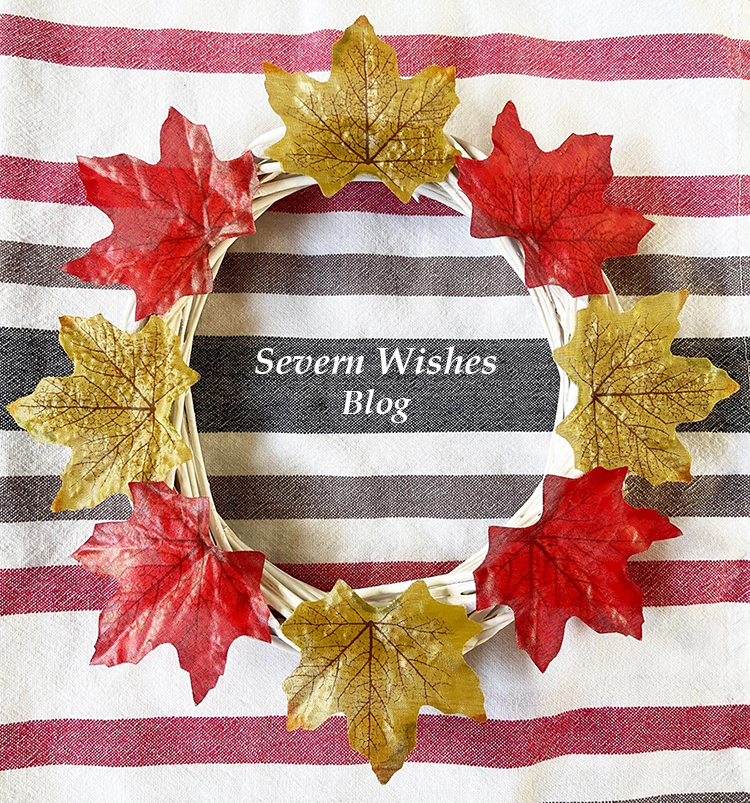
Step 3. Repeat the second layer with the glue and take care when pressing down the items when it is hot. Layer by overlapping the leaves until all the white on the front is gone. Once you’ve done the leaves let the wreath dry a few minutes and the glue harden.
Step 4. Keep adding to your design and let the layers dry in between, it only takes a few minutes to dry each time. You can put as many layers on as you would like to, and then add the three dimensional items last.
Step 5. When the design is fully dry then you are able to either lay it out or hang it up in your home. If you are hanging it up on a window you may want to repeat the design on the other side so that you can see leaves on both sides.
Take Care when Pushing the Items on the the Hot Glue
TOP TIPS! Make sure you only use a little glue, it’s hot and a little goes a long way!
TOP TIPS! Layer the leaves up until you cannot see any more of the white, overlap them slightly so as to create depth to the wreath ring.
Make sure to decide on where you want to put the items before hand so that you don’t make a mistake when gluing.
What You Need
Wreath Base – Wicker or Rattan or Wood Sticks Glue Gun and Glue Sticks Decorations or Naturally Sourced Dried Out Items (like Pinecones) or Both!
Where I Bought From
I did a Nature Foraging Walk with my son. I got the wooden pieces like owls and leaves and the artificial leaves from The Works in their craft part of the store. I got the Rattan Wreaths from eBay. I got the Glue Gun and Sticks from Amazon.
✩✩✩
Thank you for reading this crafty and make blog post today, if you have any questions for me then please comment below this post and I will happily answer them for you. If you like my wreath please let me know!
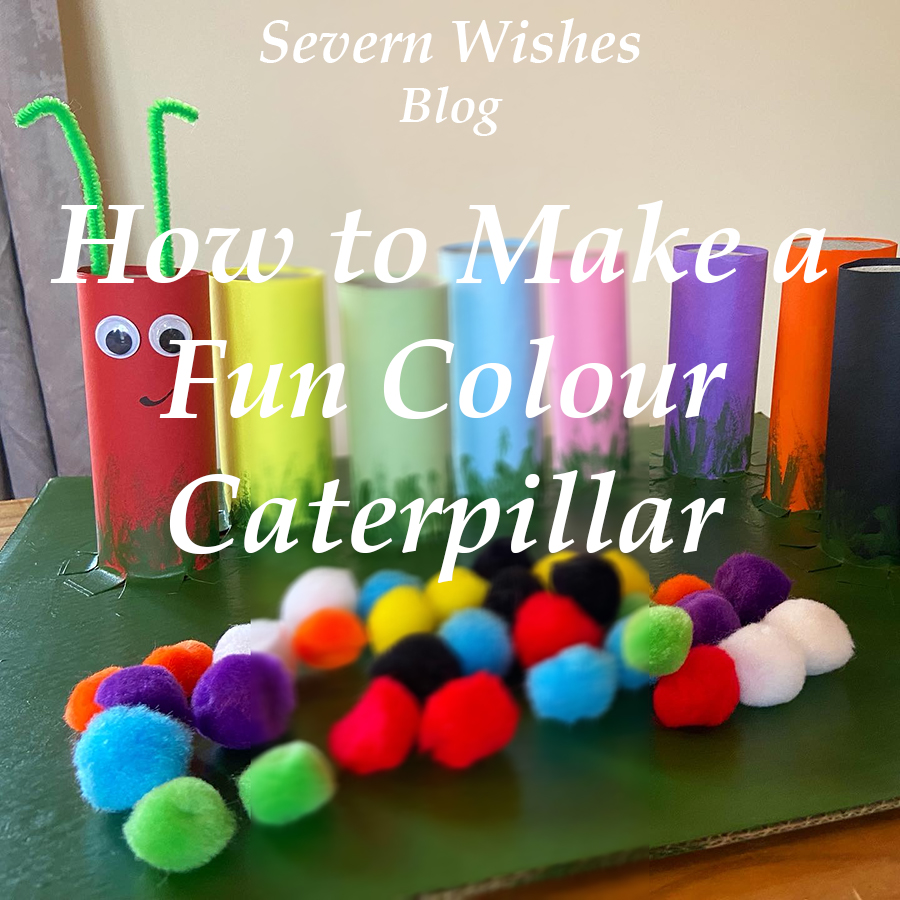
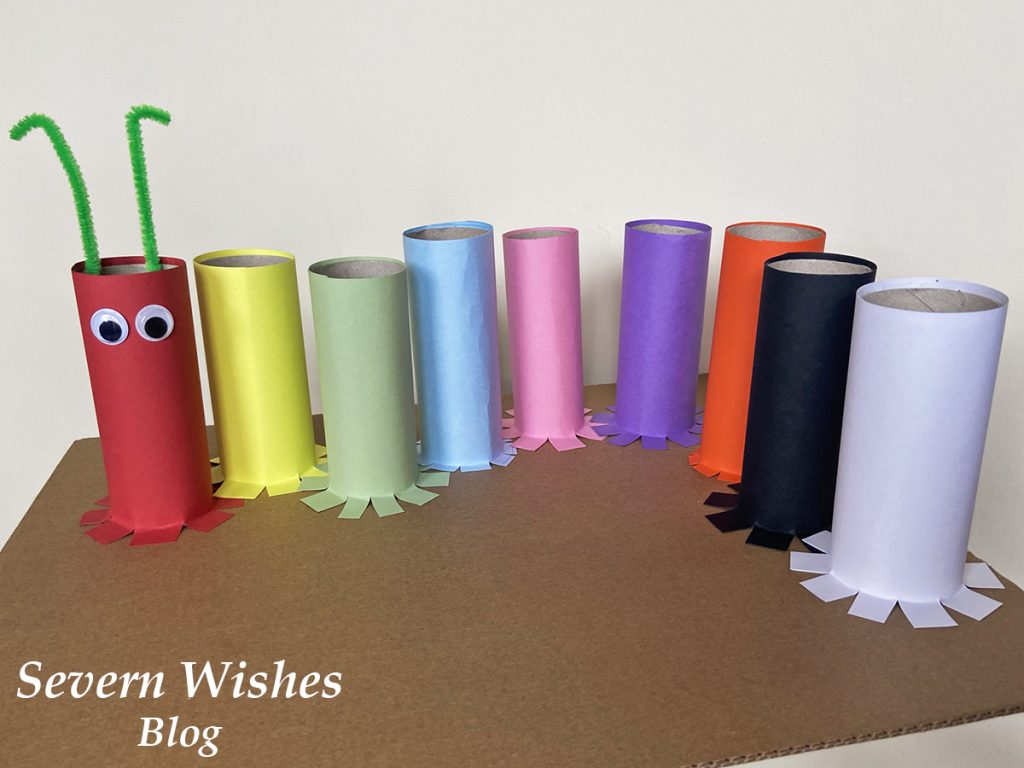
My Fun Craft Caterpillar is an easy to make craft project, that can help you to teach your toddler about colours and counting. You can make it any size you like and with only a few simple and non expensive items. Ideal for children aged two plus with good fine motor skills.
Designed for Age Group – 2 Years Plus (Supervised) Parent Difficulty to Make – 3/5 Time it takes to Make – 4 – 6 Hours Cost to Make – £10 Reasons to Make – Learning about Colours and Counting. Helps Develop Fine Motor Skills.
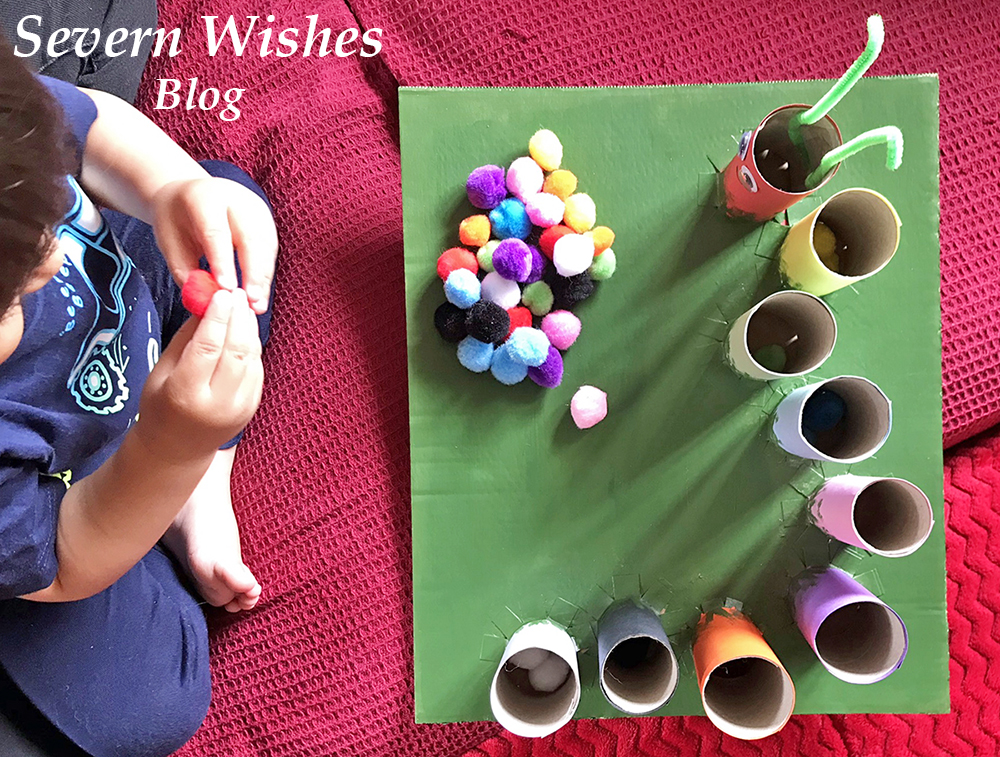
When my son began having issues with delayed speech I came up with several things to aid him in his communication. One of which was a Caterpillar friend that I made into several different items. Today I’m going to be showing you how I made my Fun Craft Colours Caterpillar!He is cute and great for helping little ones learn about colours, counting out and developing fine motor skills.
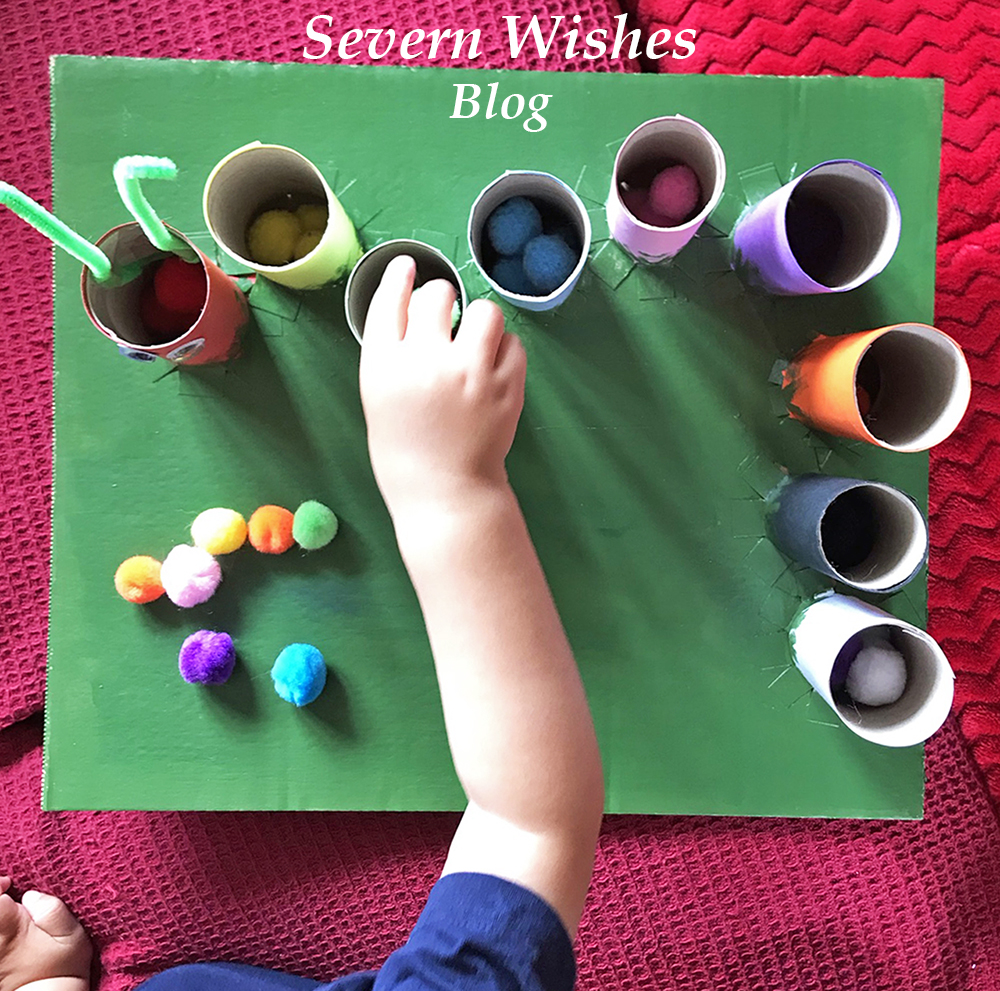
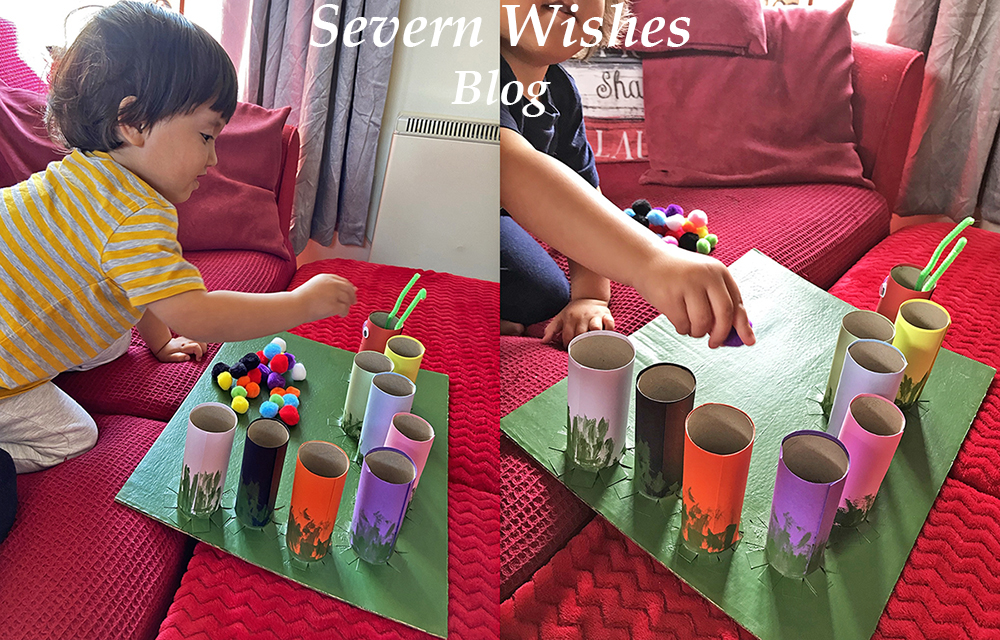
TOP TIP I wanted to help my son develop his fine motor skills as well as improve him saying different colours, picking up the Pom Poms and getting them to drop inside the correct tube does take some skills for little ones, so don’t worry if they have to learn how to do it. My son got the hang of it really quickly and was soon getting faster at doing it. One Tip is to show your little one what you want them to do, and then let them figure it out on their own a bit too. Always supervise but encourage and praise when they succeed.
What You Will Need
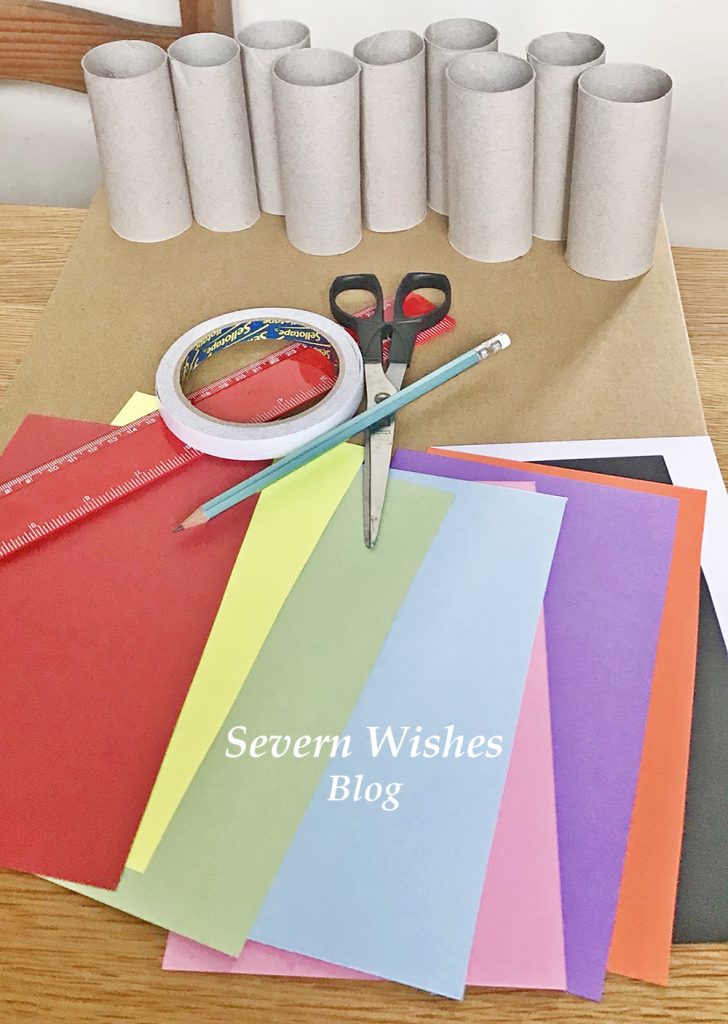
Toilet Roll Tubes – You can use toilet rolls and kitchen rolls and just trim them so they are a similar height. Order your card and Pom Poms and work out how many rolls you will need, you require one roll per colour.
A Thick Cardboard Base – Do you have a sturdy box after going shopping or have had something delivered? You need a piece of strong thick cardboard either a Square or a Rectangle for your Base that the Caterpillar will stand on.
Coloured Card – You need to try and match the coloured card with the Pom Poms you are ordering. If you want to do a simple Caterpillar just go for a pack with Red, Yellow, Green and Blue mix, sometimes you get an Orange or a Pink in those packs. I bought two packs to ensure I got black, white, purple, pink and orange for my more complex Caterpillar.
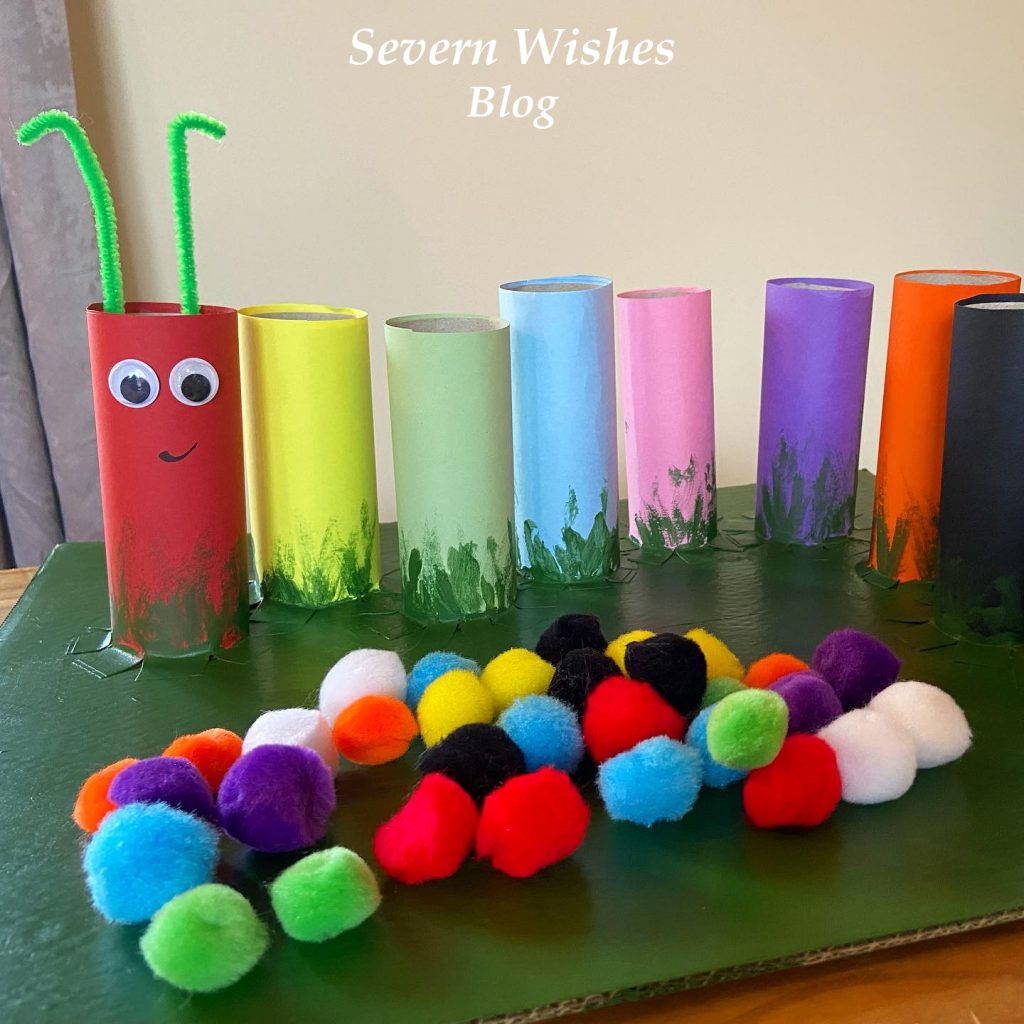
Coloured Pom Poms – A toilet roll tube is a certain width across, so make sure you only order Pom Poms that are less than this. My tubes are 4cm wide so I purchased a bag of mixed coloured 2cm Pom Poms. This means they are easy enough to tip back out after every use. Also ensure you get non toxic child friendly craft items from reputable companies.
Double Sided Tape – You need this tape for cleanly applying your Card to your Rolls, this is the most time consuming of the craft build but it’s easier and less messy than waiting for lots of paint to dry. (See my How To below).
Paint for the Base – I chose to just paint my base Green, as if the Caterpillar were on a leaf or some grass. You can be as creative as you like! You only need to paint the base, once you have fixed on all your tubes (see my How To below for more clarity).
Stationery and Craft Extras – You may want to stick on googly eyes and feelers, or draw them on, it’s totally up to you, your Caterpillar, your choice! 🙂 You will also need a Pencil and a pair of Scissors.
Where I Got My Craft Items
Coloured Card Packs – Hobbycraft Online Pom Poms – Hobbycraft Online Goggly Eyes and Pipe Cleaners – Craft Bundle from The Works Double Sided Tape – Tesco Store Green Paint and Brush – The Works
How To Make Colour Caterpillar – Sabrina’s Step by Step Guide
Step 1. Assemble all of your items as described above and ensure you have enough of what you need. Place a tube, a piece of coloured card and your desired amount of Pom Poms (I used 4 per colour) into individual piles. See what you have and how many tubes with the right colours and Pom Pom matches.
Step 2. Arrange the plain tubes on your base, and see how you would like them arranged. You need a one centimetre gap between each roll where it will be attached to the base. Bearing this in mind, arrange your tubes and mark with a pencil on the base where you would like them to go.
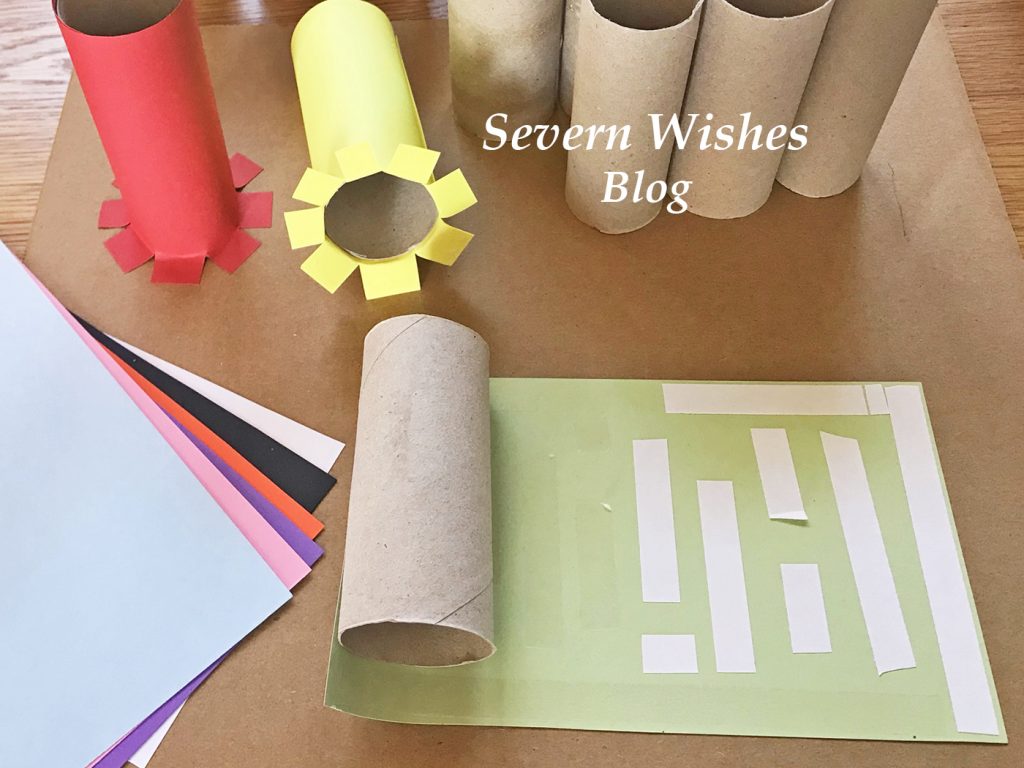
Step 3. Satisfied that you have all the pieces you need you can begin the card craft. Start by marking the pieces of coloured card for your tubes. For example mine were 15cm high, so I marked the card at 16cm with a pencil leaving the gap of one additional centimetre. Then cut all the card pieces to size ready for wrapping around the tube. TOP TIP ensure you leave enough card to wrap all the way around a tube with the extra at the bottom. You need at least a one centimetre section of card at the bottom of every tube for attaching it to the base.
SABRINA’S TOP TIPS: Don’t throw away pieces of card that you have left over from this make, I have plenty of Craft and Art ideas on my blog that you could use these bits for 🙂
Step 5. Cut strips of double sided tape, align them along the top and edges of the coloured card and down the centre, ensure there is enough at the edges. At what will be the base of the tube stack the pieces vertically, using a small gap between them, this will be cut in Step 7 to ensure an easy attachment to the cardboard base. Make sure you put tape on all of the coloured card pieces. TOP TIP Make sure to do this Step and on to Steps 6 to 7 at the same time and don’t leave the craft part way finished, otherwise the double sided tape will dry out before you can affix it to the base.
Step 6. Time to roll the card on to the tubes. Remove all of the double sided tape strips. Line up the top section of the cardboard with the edge of the tube, on a flat surface like a table, gently roll the tube along the card. The tape will stick well to the thin tube, using your thumb and first fingers you can smooth out the card as it sticks. Try keeping it in line at the top. Once you come to the end of the coloured card make sure the final line of it is secure to its tube, smooth with your fingers and hold the edge in place for a minute per tube making sure that its firmly stuck in place. Repeat this per tube, laying them down on their sides once you are finished.
Step 7. You now need to be cutting the base of each tube so that they can be attached to the base. Take the first coloured tube you want to attach to the base (I did a Rainbow so mine was Red) and using sharp scissors cut a one centimetre slice up into the card at the tube base. Rotate the tube around cutting vertical slices as you go. Then once cut all the way around, gently peel back the slices and make a base for your tube. Affix it into place on your cardboard base because they should already have the double sided tape attached. Press down firmly and hold for one minute. Repeat this action with all of the coloured tubes until they are all attached to the base. (See images above and below).
TOP TIP Painting the base last ensures the tubes stay in place after the double sided tape has helped stick them down on the base. It also neatens up any edges that may have tape sticking out or tubes that weren’t quite level.
Step 8. With all your coloured tubes attached to the base you can now consider adding anything else to your caterpillar, and also paint the base with whatever paint you choose. I added googly eyes and some pipe cleaners as my Caterpillar feelers.
Step 9. Leave your Caterpillar to dry overnight before showing it to your little one. Ensure that you only play with it supervised either by you or another adult. The Pom Poms should be stored inside something that little ones can’t get into unless you are doing the toy together. Most children wouldn’t eat them at this age but better safe than sorry. I recommend a small plastic box like the really useful ones with the clip over lid handles.
TOP TIP Your Caterpillar friend can now be used to teach colours and numbers! Ask your child to count how many body parts the Caterpillar has, how many Pom Poms fit in each tube, can they separate the colours correctly and add them to the correct tube? This craft project can be used for play and learning and will keep your child occupied for hours.
Have you enjoyed this Craft Project? I would love to know what you think! Please leave me comments on the blog section below or on social media. Please tag me if you make a Caterpillar of your own! Use the hashtag #SabrinasCraftCreations
Thank you for reading this blog post today, I hope I see you again soon!
Sometimes we are all guilty of spending too much time on technology, and now that the weather is improving we should all be putting down our TV remotes and phones and getting outside! (I know that you’re thinking about doing that now, as you read this blog post on a piece of tech, but please bare with me as I have some great activities you’ll want to be inspired by I’m sure!)
So where to begin! If you’re not naturally adventurous for the great outdoors it can seem a bit overwhelming! So how about we just start small! I have come up with a range of things to suit everyone, outdoorsy types and not so much! All you need to do is choose one of these to do each day during the school break or even at the Easter weekend and voila you have some outdoor fun, nature related or outdoor activity to enjoy!
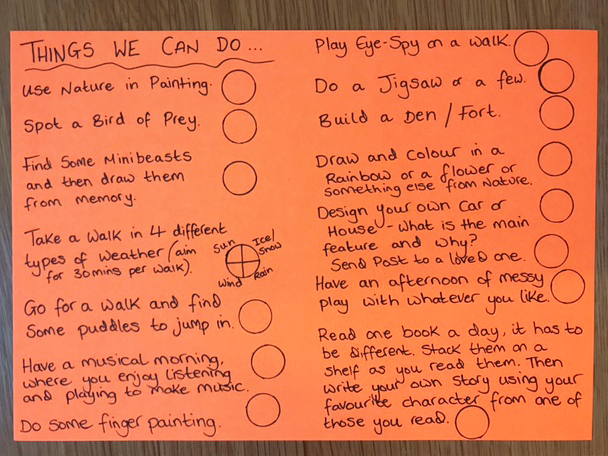
Here are my 15 “Things We Can Do” of Fun Ideas to do Indoors and Outdoors…Weather Dependent!
🥚 Use Nature in a Painting – Use sticks or leaves to paint with! 🥚Spot a Bird of Prey – Look up and see what is flying above your head! 🥚Find Some Minibeasts and Draw Them from Memory – Bugs can be colourful and interesting! 🥚Take a Walk in 4 Different Types of Weather – No matter what the weather it can be fun to take a walk!
🥚 Go For a Walk and Find Some Puddles to Jump in – Who doesn’t like jumping in a puddle! Wear wellies!
🥚 Have a Musical Morning, Listening or Playing – Music can help you relax!
🥚 Do Some Finger Painting – Draw the trunk of a tree and make the leaves with your fingers! 🥚Play Eye-Spy on a Family Walk – Eye Spy is great for a range of ages! 🥚Do a Jigsaw on a Rainy Day – Jigsaws can be a fun family activity on a rainy day or a board game!
🥚 Build a Den or Fort Together – Who doesn’t love building a den! Cushions and Throws work well!
🥚 Draw and then Colour in something you’ve seen in Nature on your Walk, a Rainbow, Tree, Flower etc
🥚 Design your own Dream Car or Dream House (for older children to imagine)
🥚 Create Post for a Loved One and Walk to a Post Box to Send it – Draw a Picture or Write a Letter
🥚 Have an Afternoon of MESS with Messy Play or Fun with Paint or Food items – Paint and Rice Crispies…
🥚 Read More! Read as a Family, decide on what your Favourite Book is and why – Books help you learn!
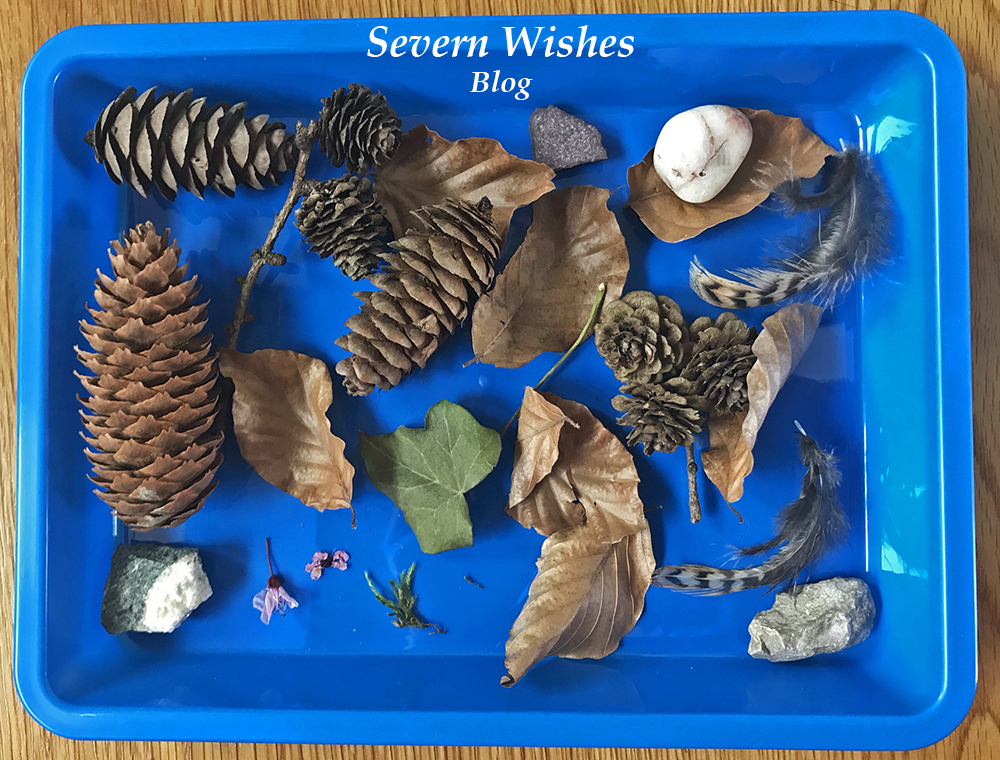
🥚 Nature Hunter Gatherers – Collect some things from in your local area to look at when you get home such as leaves and pinecones, things that have fallen from trees and bushes. Don’t deliberately destroy nature though! Fallen Leaves are great, discover what tree they come from by looking at the shape!
The image above is from when my son and I did a day of Nature Hunter Gatherers. It was a lovely warm day and we spent six hours outside having fun, games and walking. This activity is great for learning about where things come from such as pinecones and feathers. Make sure you do this on a dry day. We took a long walk through our village and picked up things that we found on the ground. Leave them somewhere cool and dry for a few days to dry out and make sure there are no creatures living in them before you handle them again!
I highly recommend getting some coloured trays like these, they were only £3 for a pack of 3 from The Works. Perfect for both Art and Craft and collecting things too!
✩✩✩
Picking Up Litter
If your children are a little older than mine you might want to pop gloves on when you go on your walk, take a plastic bag with you, and do a litter picking up hour in your local village or town. This helps the environment and the animals and birds in your area from getting injured.
🥚 Easter Ideas 🥚
You could also do Easter themed Drawings, Colouring In and Games such as an Easter Egg Hunt in your house or garden this weekend.
Check out my previous Easter blog posts for Art and Craft ideas and Baking fun… Here…
Thank you for reading this blog post today! I hope that I have inspired you to do at least one of these activities with your own family. Let me know in the comments section or on my social media if you get up to anything fun in the next few weeks!
With much of the United Kingdom still in lockdown and people unable to purchase their usual items for loved ones, I have decided to write this blog post to help people out. Mother’s Day is a special day for everyone who is classed as a Mummy, whether that is to furry children, human children, step children or children who may still reside inside us. It’s for Grandmothers, Nan’s and Great Grandparents too don’t forget, so why not make a loved one a card and let them know you’re thinking of them.
I have several ideas that should suit most people, because Mother’s Day Cards are usually floral or feminine, but you can personalise your design to fit the people in your life. If you can draw then even better! I’m not very good at drawing so I prefer to use paper and card to create pretty cards instead. This blog post is all about how I make cards using coloured card and paper.
WHAT YOU WILL NEED
Coloured Paper and Coloured Card A Pencil Items to Draw Around – to make the Circles for the Flowers Scissors Coloured Pencils or Crayons if you are Drawing Pens – Mixed Colours and Thickness Glue or Sticky Tape Ruler Coloured Tissue Paper Pipe Cleaners
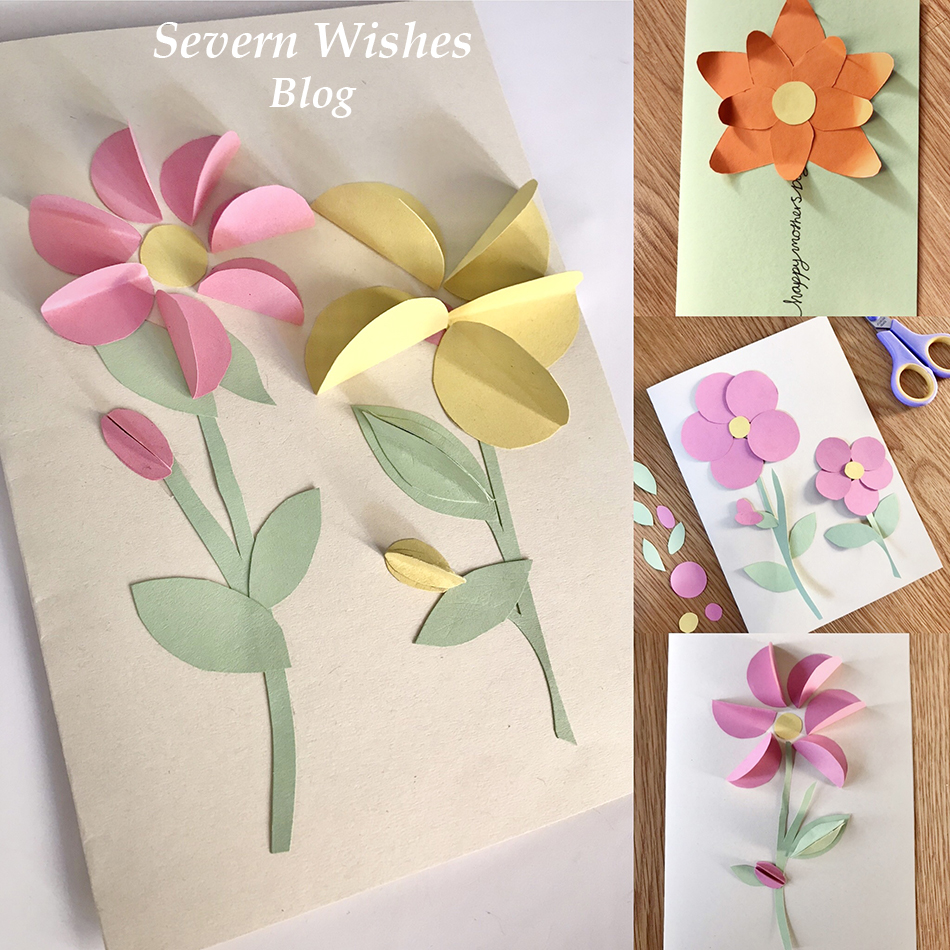
HOW TO MAKE YOUR CARD – 3D FLOWERS
Step 1. Take a piece of pale coloured card and fold it in half to get your card shape. Decide if your design is going to be a landscape or portrait style.
TOP TIP 1. When you come to make your shapes maximise the paper by doing them close to one another and along one edge. It makes it easier to cut them out but also and more importantly you’re not wasting any of the paper, and the leftovers can be used on your next awesome project!
Step 2. Draw around circular items in order to make your petals. Carefully cut them out and then fold them in half to create your three dimensional petals.
TOP TIP 2. The ideal size for the petals for an A4 Card design (an A5 when it is folded) are the size of a Nail Varnish bottle. Draw around the base of the bottle when it is stood up on the card. Another tip is to cut out one shape and use that as a guide to cut out the other petals so you get them the same size.
Step 3. Arrange your design on the Card first before gluing anything down, so as to make sure it all fits nicely.
Step 4.Glue or Stick the Card pieces down and finish decorating with any details or wording that you choose.
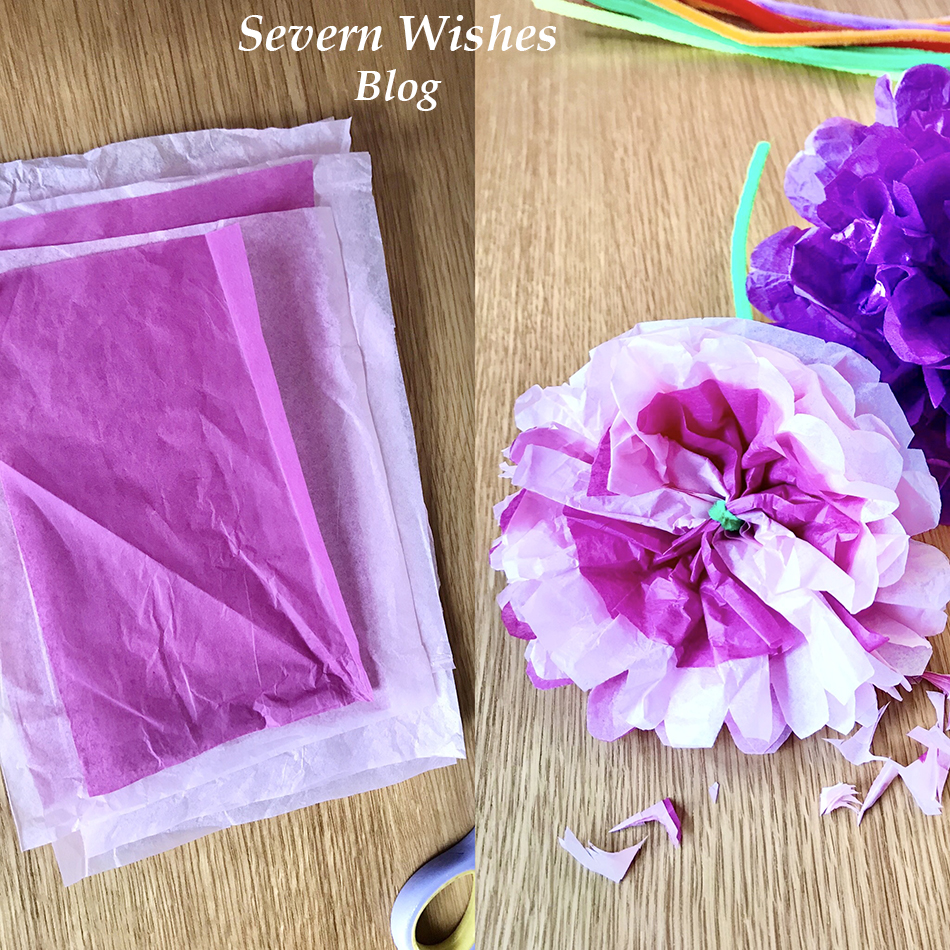
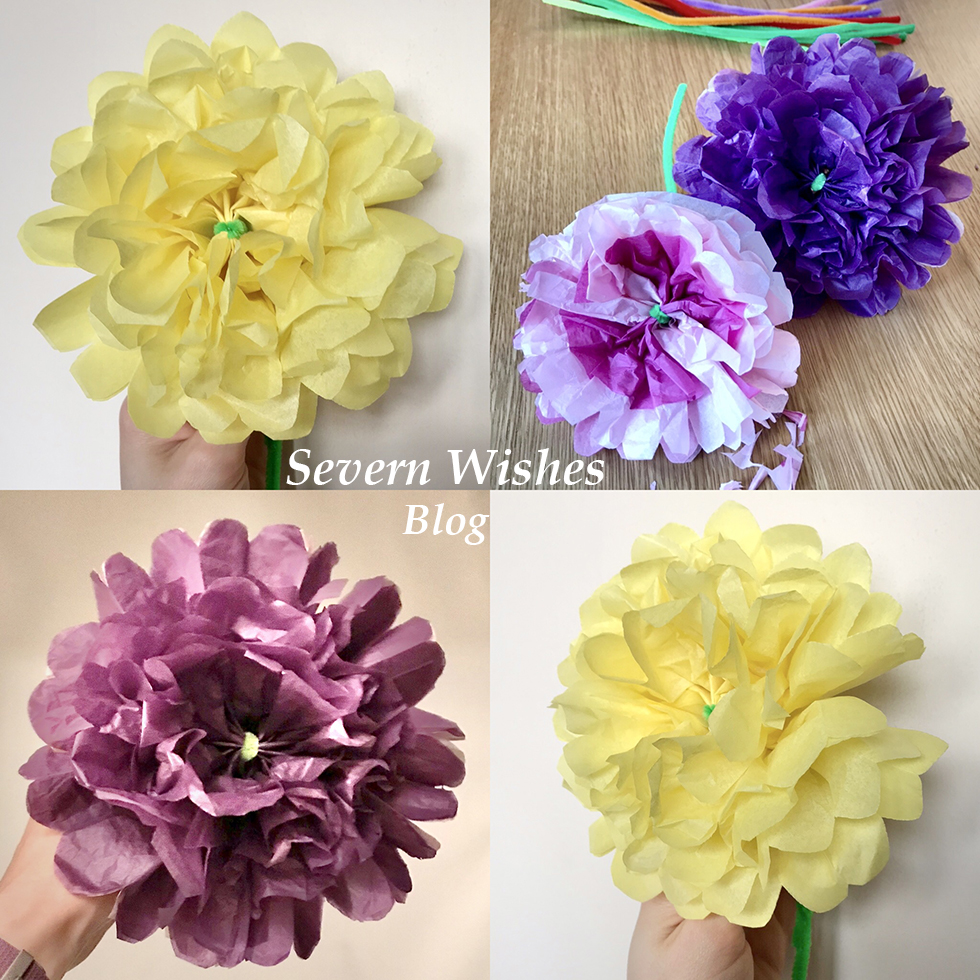
HOW TO MAKE A TISSUE PAPER FLOWER
You Will Need; A Coloured Pipe Cleaner Sheets of Coloured Tissue Paper
Step 1. Lay out your tissue paper flat, you want to cut it into equal rectangles. Once cut you stack them one on top of the other.
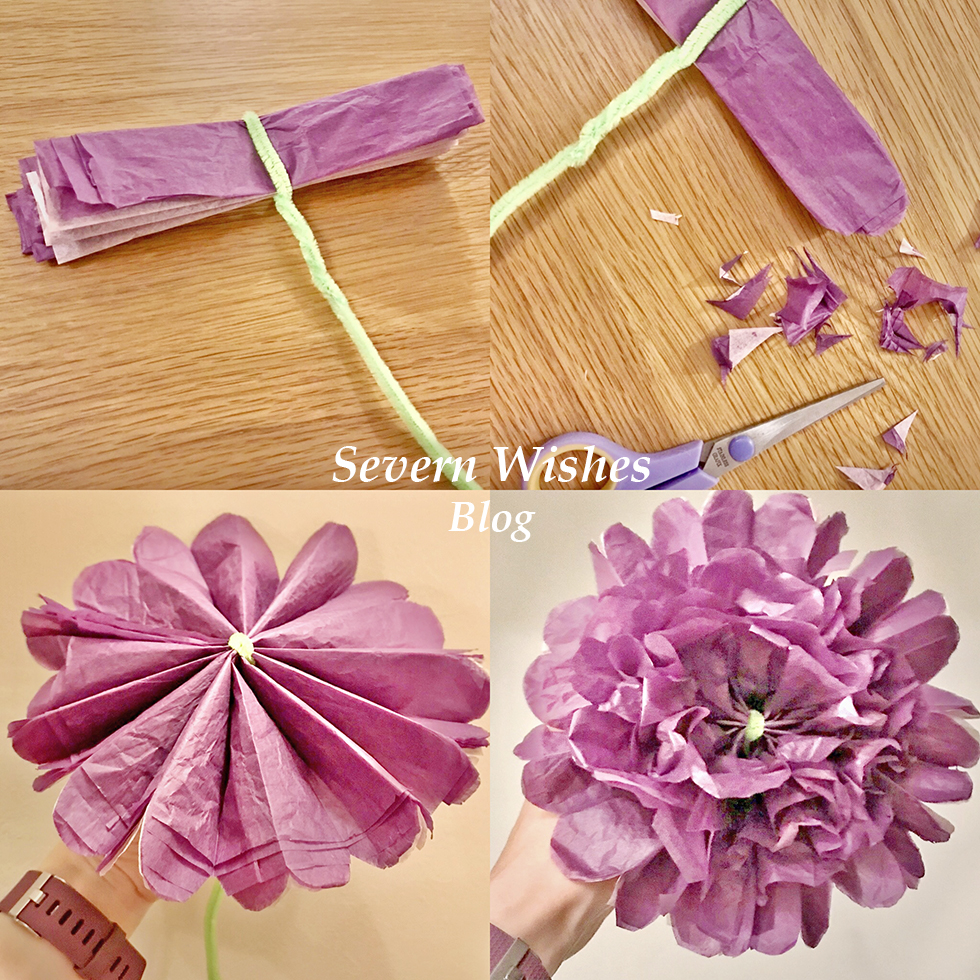
Step 2. Fold the tissue paper stack into a concertina, like a fan, until it is all folded and flatten it down. Stick the pipe cleaner in the middle, folding it over and under the stack, then wrap the remainder of it around.
Step 3. Next you need to trim the edges of the tissue paper, you can round them off or make them pointed, it depends on how you would like your flower to look like at the end. This determines the shape of the petals of your flower.
Step 4. Once the ends are trimmed lay the flower concertina across your hand with the pipe cleaner part pointing down. You want to gently and carefully tease the layers of the flower up and out. Once they are all up spread them out and make it look like the petal layers of a real flower.
(There is a video tutorial on this on my Facebook page as well).
Check out my images below!
My Tips for Opening your Flower: Open the tissue paper out gently and carefully, you should start to see a fan shape at first, and then you can raise the inner layers of the flower, just start by pulling upwards towards the middle part where the pipe cleaner is so as to make the flower look three dimensional.
Step 5. When you are finished it should look like my images below. Bend the pipe cleaner a little to make it look like a flower. Fan the petals out gently to make it three dimensional.
Paper Flower Dimensions
It depends upon how much you trim on the ends to create the petal shapes of your flower, but here are some rough dimensions of the size that your flowers will be. The larger the flower the easier it is to fluff up. Why don’t you experiment like I have below with different shaped petals and layering different colours of tissue paper too!
Rectangle Size 20cm equals a 17cm flower Rectangle Size 15cm equals a 12cm flower Rectangle Size 7.5cm equals at 7cm flower
HOW TO MAKE YOUR CARD – Happy Mother’s Day – Their Favourite Flower or Favourite Item
Step 1. Work out what your loved ones favourite thing is, then you want to write the words Happy Mother’s Day either vertical or horizontal on the folded A5 card. You incorporate those words into the item, such as the stem of the flower, or the base of an item like a slice of cake. (See my photo below for inspiration).
Step 2. To make a flower you need to cut twelve identical coloured card petals. Layer them up on the card to make the flower, don’t forget the middle bit either.
TOP TIP 3. If you want the petals to all be the same cut one and then use that one to draw around to make the additional ones.
Step 3. Other things you could do include a slice of cake with a triangle piece of card decorated with smaller shaped pieces. Or draw an outline and let smaller children colour them in.
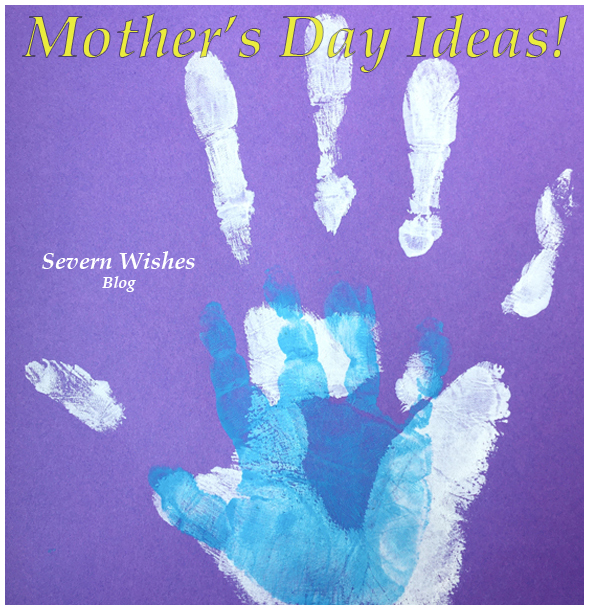
Another easy thing to do is a card of family hand prints.
Other Card Designs that are Easy to Achieve are…
Flat Flowers Three Dimensional Flowers Drawing Bouquet of Flowers Family Hand Prints Cake Slice Drawing Favourite Animal
Use a Ruler and Pen to make the stem lines and the bow, colour them in with pens and draw little flowers on the end of the stems. I did daisy like shapes, but if you can draw better then me be creative with it! Do any colour combination that you like. Add some wording around your design like “Happy Mother’s Day”.
I really hope that you have enjoyed this blog post and find it beneficial. If you do make some cards I would love to see them! Please tag me on any of my social media using the hashtag #SabrinasArtandCrafts
Thank you and I wish you all a lovely Mother’s Day.
I have always had some creative flare, but one thing I had never done before was to make my own Christmas Present Tags! I came up with lots of ideas while spending time at home.
I took the plunge this November and ordered the things I would need to design them. I already had two awesome sets of Staedtler Pens in both fine line and bold. I also had various sequins. But I needed the tags and the string. I tried my best to use natural string and cardboard that was made from recycled materials.
What you could do if you can’t get any of these brown tags, is to cut up some old Christmas Cards and make them into similar shapes like these, add things like sequins in order to sparkle them up.
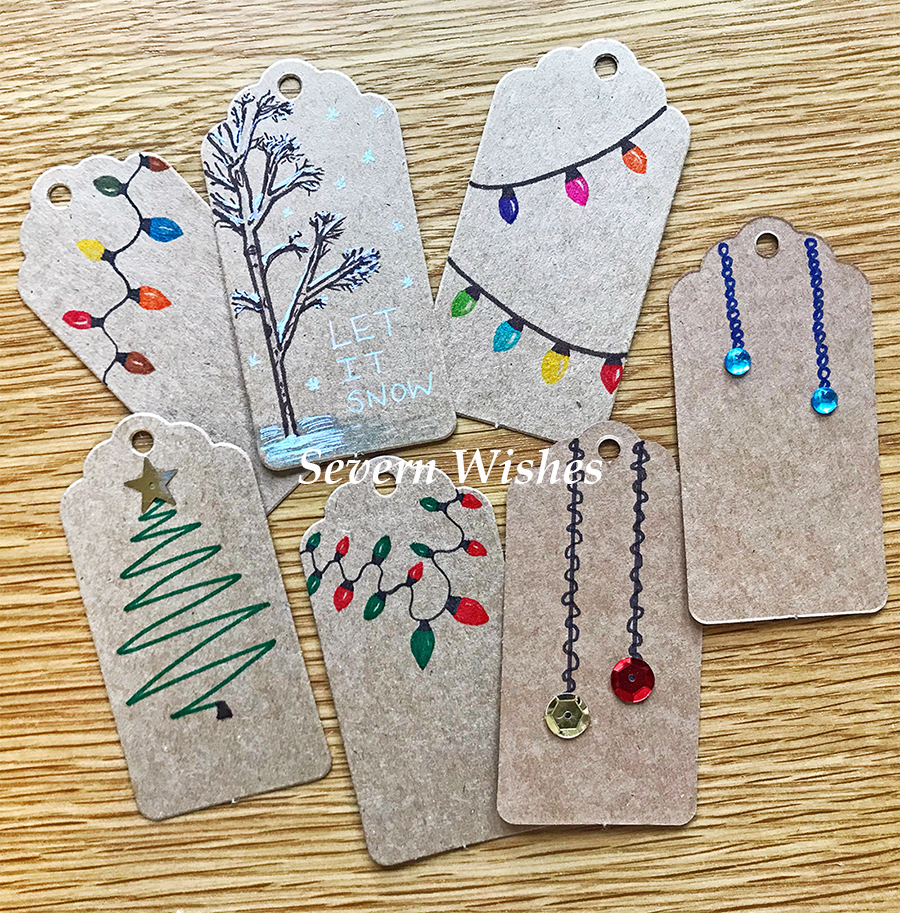
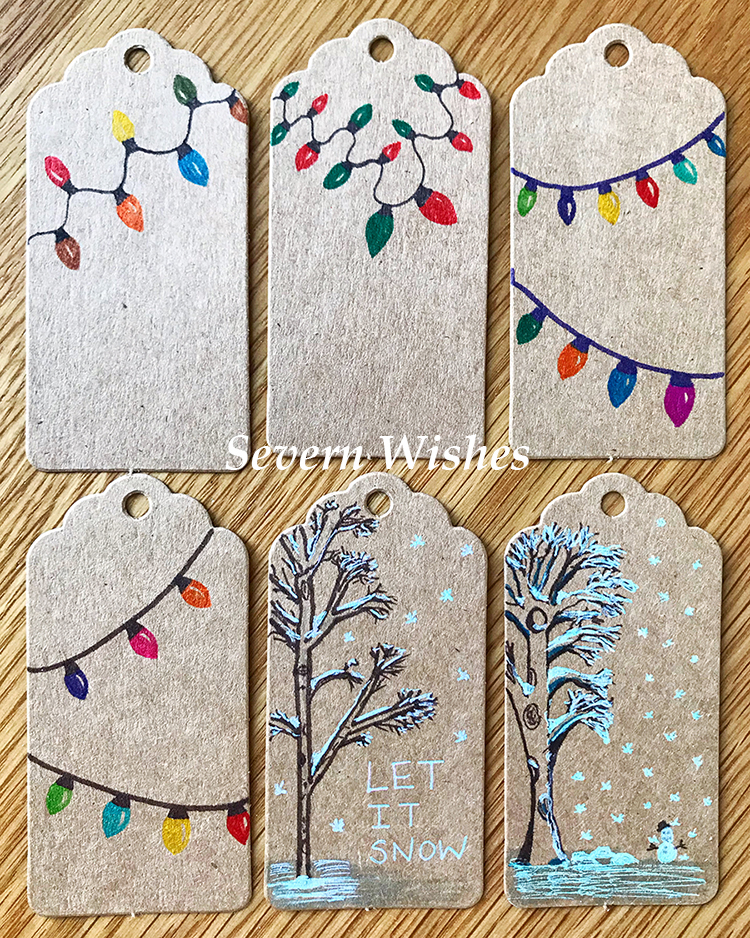
String Christmas Lights
The easiest of all my tag designs to make, you will need both thicker pens and fine pens of the same colour. The trick is to create the light shape with the finer pen and then colour it in with the same thicker style pen after. Make sure you leave the small crescent shape on one side of each light bulb so it looks three dimensional.
Begin by drawing the lines and bulb attachments with one pen, dark colours work best for this part. Then choose the pen colours you want for your bulbs. Ensure you don’t put the same shades next to one another and alternate colours like Red and Green for a Christmas look.
The size of your bulbs will depend on how many you want to do across your tag. If it’s just lights and no writing then you can fill up the space. If you plan to write “Merry Christmas” for example then perhaps do the lights top and bottom of the tag and leave the middle area blank.
Check out my images for some inspiration. Give it a go on a piece of plain paper and decide which way to do your bulbs, before doing them on to a tag.
Snow Scene with Tree
If you aren’t very good at drawing then you can still achieve something like this tag, just take your time and follow my instructions.Check out my videos on my Facebook Page too!
You need a brown pen, the finer the tip the better, and you want to start by drawing the outline of your tree. Fill in the branches afterwards, getting smaller to the ends. Next to add a 3D aspect to your tree draw circles for holes and darken undersides of larger branches and the trunk to add shadows. Use a silver, white or light blue mixture of pens now to create the snow. You could do a snow scene or just do the tree. Be creative and have fun! Look at mine below for some inspiration.
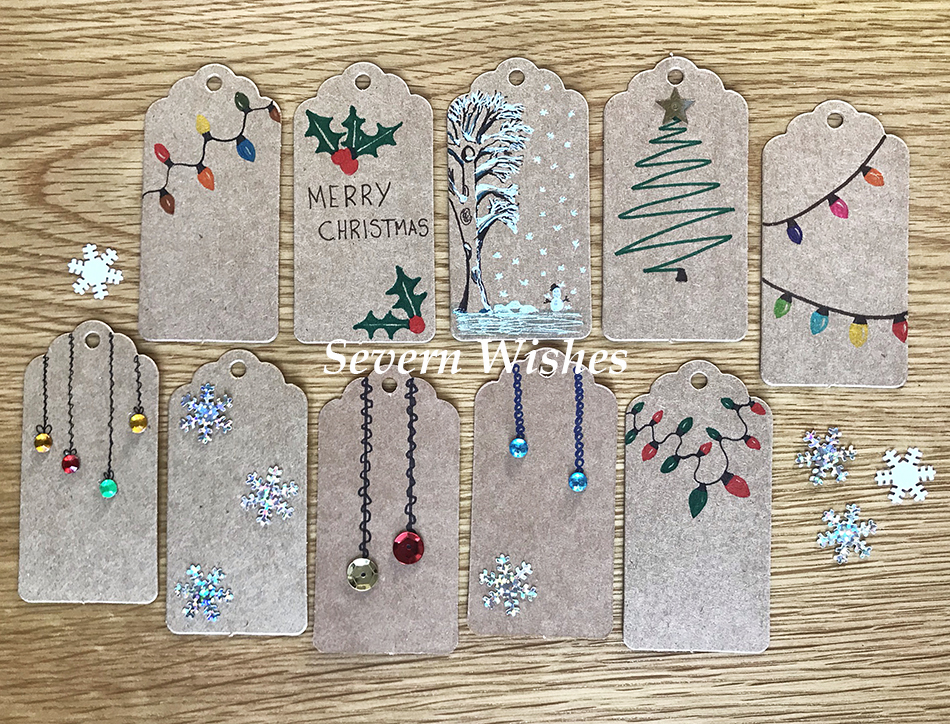
The Christmas Tree
I quite like the abstract or deconstructed Christmas Tree type of tags. Mainly because when I try to draw symmetrical and lifelike trees they never look quite right. If you’re good at drawing trees however, then putting one in the centre of a tag would look really great!
Use a nice dark green pen for your tree. Add either stick on crafty bits and pieces or draw on some festive decorations, or do a bit of both! PVA glue is best because it will dry clear! If you want to do a more 3D tag then glue dots or adhesive squares also work well too.
Me on the other hand, I prefer to do the continuous line and have a sequin star on the top, kind of a tree!
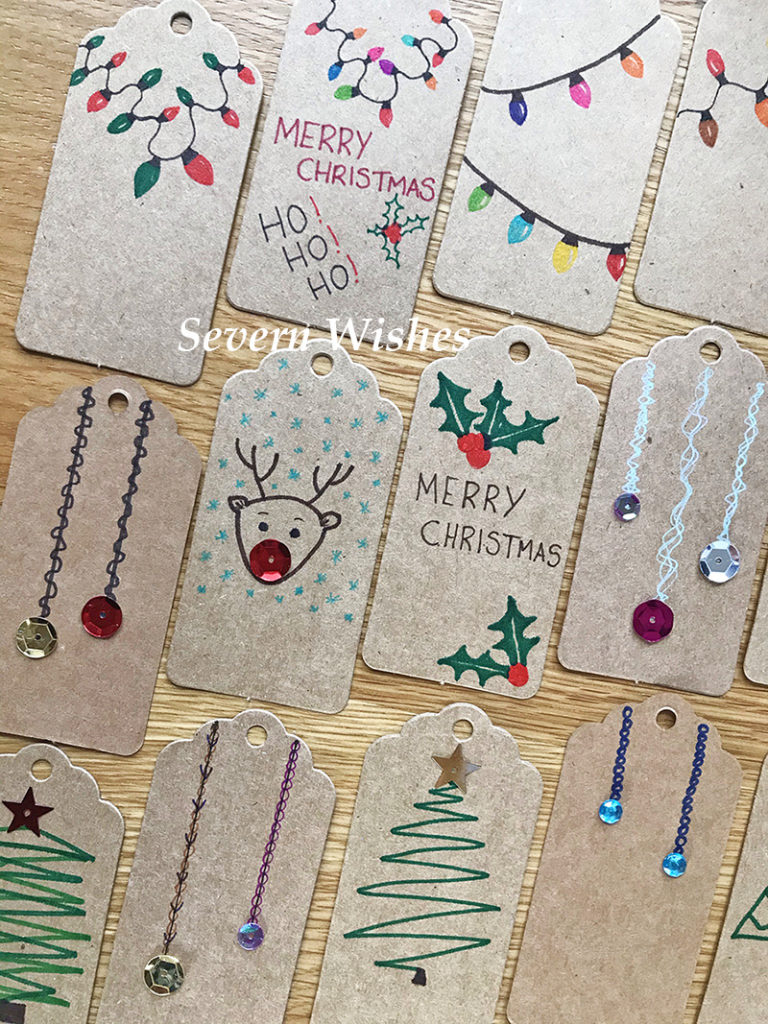
Christmas Sparkle
If you have various diamanté, sequins or sparkles you want to use on your tags then you need to come up with designs that suit them. Check out my tags below for some ideas. Hanging decorations or bauble type designs work best for rounded craft items.Think about when items hang on a tree, what they look like. Window decorations like a line of hanging stars or snowflakes are also very nice. Sequins can be used on their own or accompanying pen lines.Use your imagination and design your thoughts on a piece of plain paper first using a pencil, once happy with it, you can then transfer the ideas to a tag.
You can purchase the brown tags in most craft shops, online at places like The Works, Hobbycraft and Amazon. Try and pick ones that are already made from recyclable material.
I had previously bought my pens online from Amazon, Sequins from The Works and my Glue is also from The Works too. Other crafty items have been purchased by me over the years from various shops and also Tesco superamrket, they had a nice range of sequins this year too.
Other fun tags include, “Merry Christmas”, Holly, Baubles, Rudolph, Robin, Christmas Trees, Christmas Lights, Snowflakes, Snowmen, Santa Claus, Snowy Scenes, Penguins, Stars and things such as “Ho! Ho! Ho!” and “Let It Snow”.
Thank you for reading this post today, if you do give making Christmas tags a go then I would love to see them! Tag me on social media using the hashtag #SabrinasChristmasCrafts
Have a great Christmas!
✩ Sabrina ✩
You can see my tutorial videos on my Facebook page here…
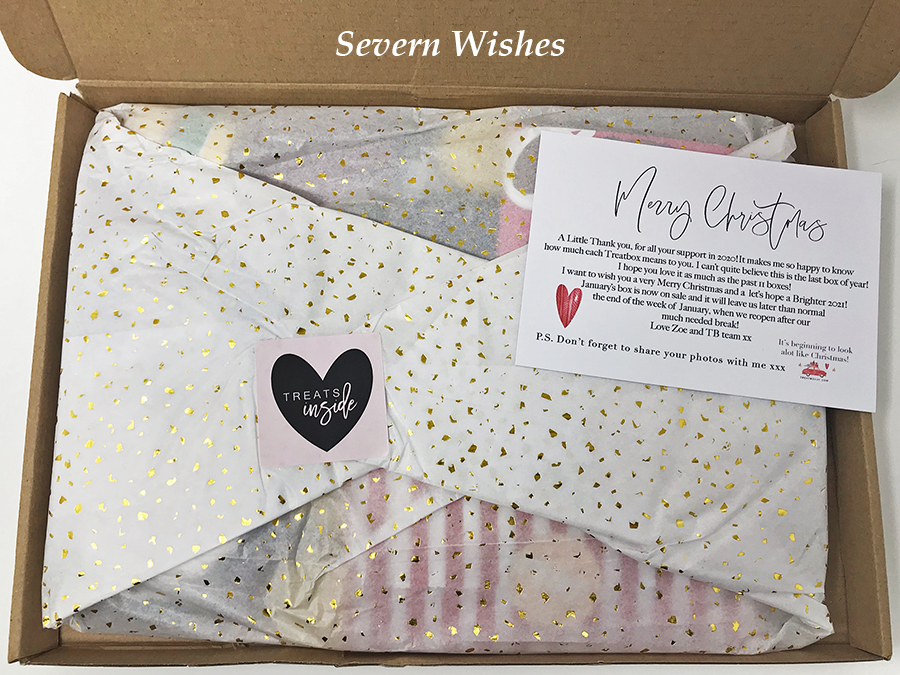
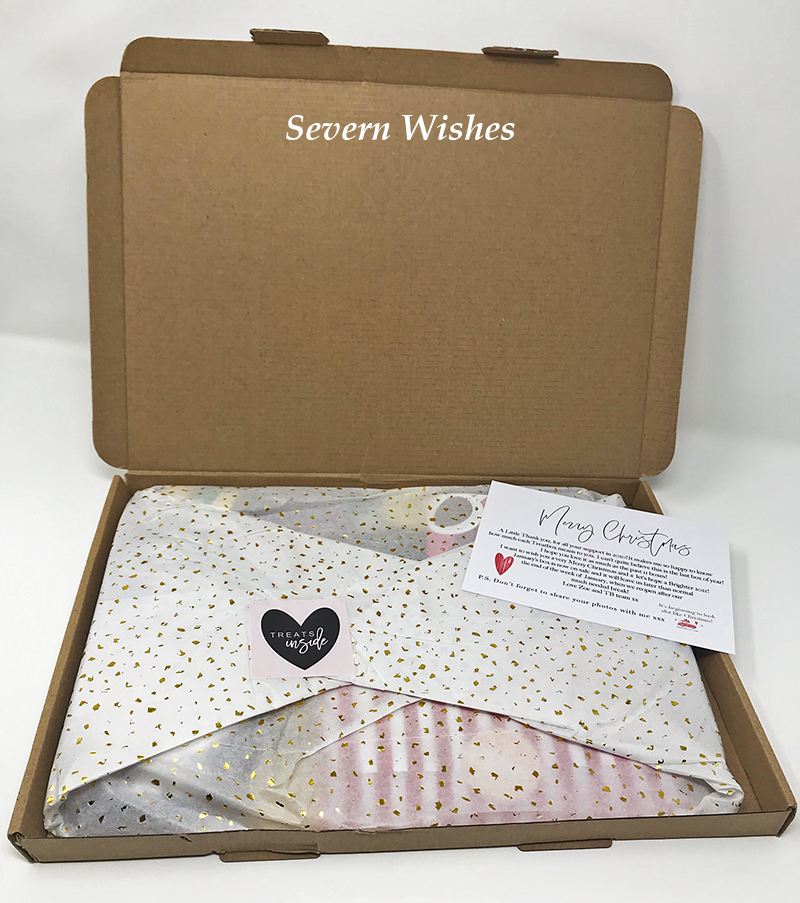
It’s that time again, but not just time to Reveal a Treatbox, oh no, but also time to Reveal the Christmas month Treatbox! Exciting stuff right? It’s usually one of my most anticipated boxes of the whole year.
This festive season the Treatbox gives us another set of treats and edible delights to enjoy. I was expecting the chocolates because I saw Zoe put something up on Instagram about tossing coins into each of the boxes before sealing them up.
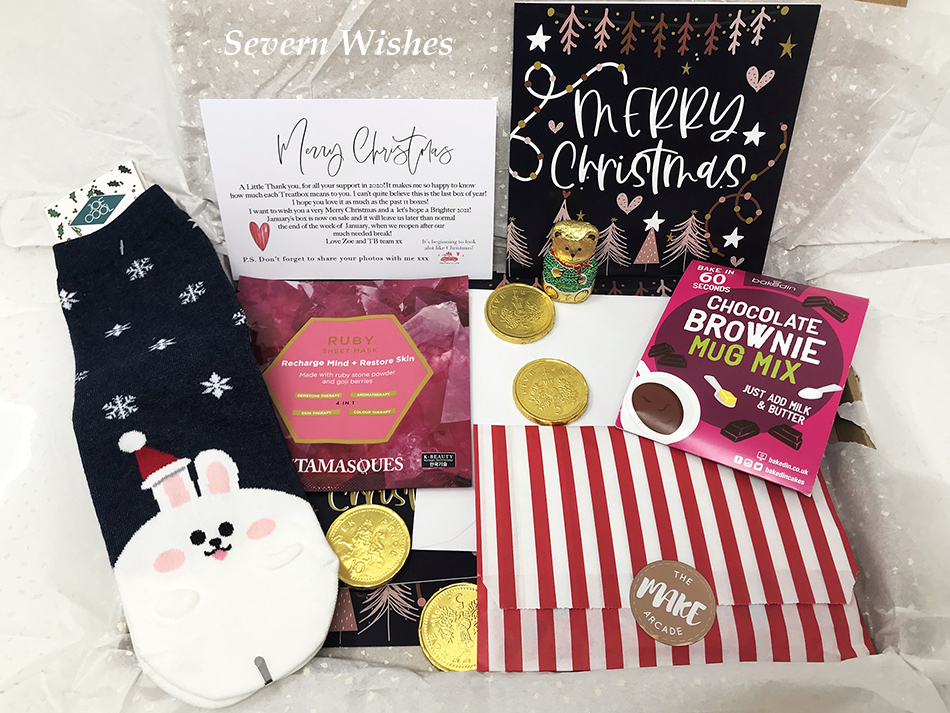
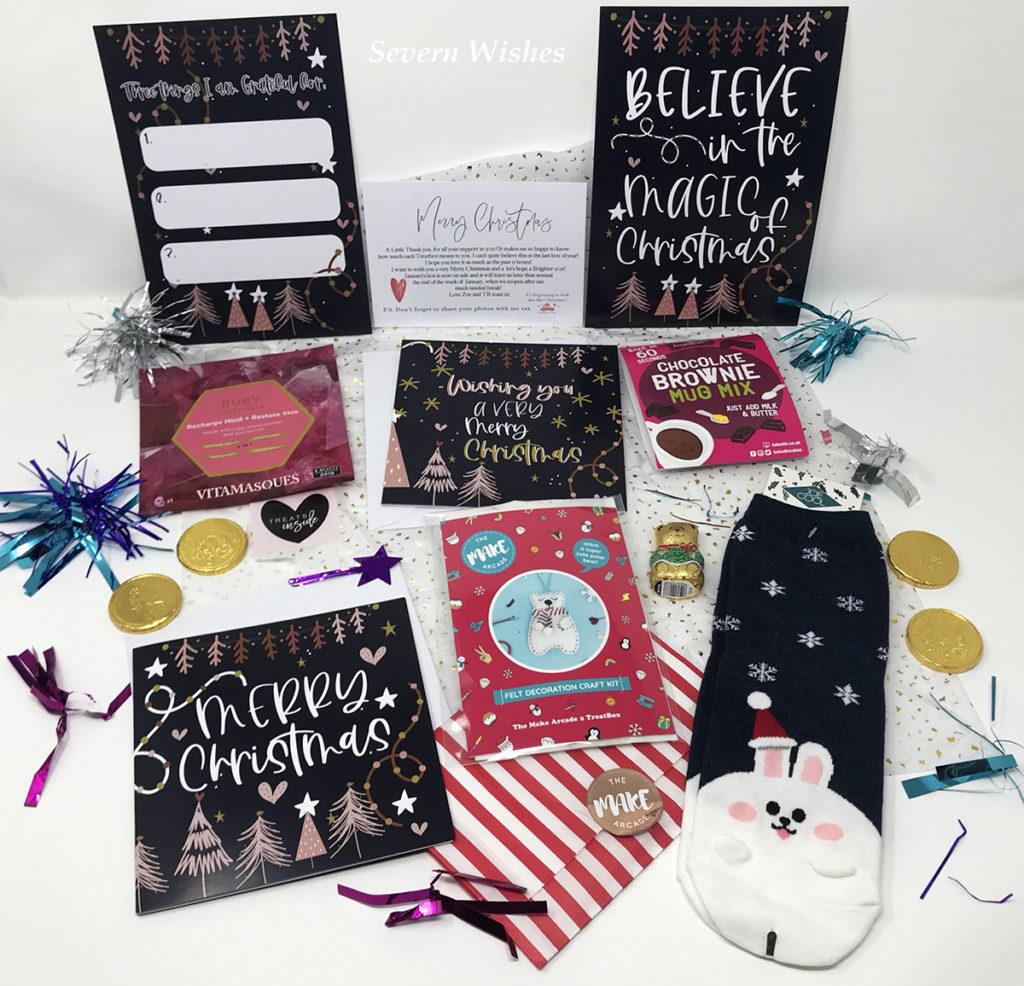
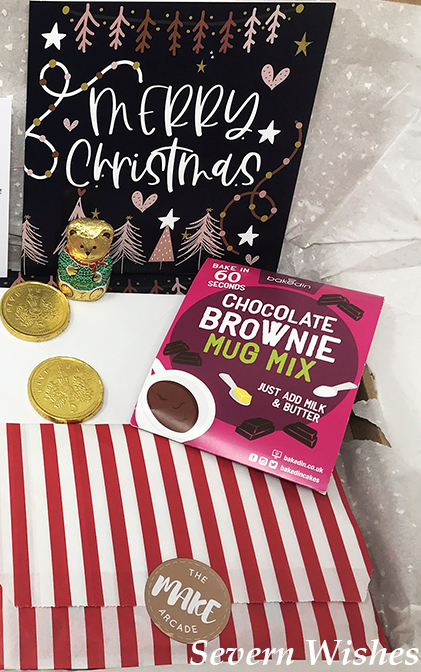
The Items I Found Inside My Box For December Were…
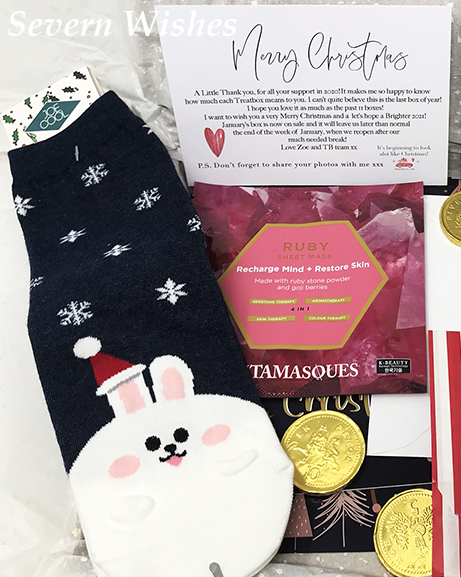
A Lindt Chocolate Teddy 4 Chocolate Coins Ruby Sheet Mask 4 in 1 Vitamasques Bakedin Chocolate Brownie Mug Mix Two Treatbox Original Christmas Cards with Envelopes A Pair of Joe Cool Christmas Socks – Christmas Bunny Two A5 print cards that read “three things I’m grateful for” and “Believe in the Magic of Christmas” “Make the Arcade” Felt Decoration Craft Kit Polar Bear
The socks are adorable! I will always be happy to receive more Joe Cool socks, I have loved every pair I’ve gotten in a Treatbox and they are such good quality. I have a little Christmas Rabbit with a hat on one ear, queue the “Aww!”.
I think the make your own Polar Bear is a particularly sweet idea and really nice to make one cold afternoon in December for you to put on to your Christmas Tree!
There are two Treatbox original Christmas Cards and two A5 Prints. I really like all of these, they are good quality and are nice enough to even frame and stick up around your home this Christmas.
We also have a Brownie in a Mug mix, Ooo! Yum! And a cute little Lindt Chocolate Bear!
And finally we have another face mask this month. I would have preferred no mask this month and seen another Christmassy related item or a Wintery item but never mind! I guess some people manage to do masks every week, I know I just don’t find the time as a single mother, ha! ha!
All in all it’s a good box of treats this month and I’m happy with it. I think if there had been a set of battery powered fairy lights included instead of the face mask, then it would’ve been up there with one of the best Christmas boxes! C’est la Vie!
Merry Christmas to Zoe and her Treatbox UK Team! Thanks for another year of boxes! I’ve been doing this for rather a Looooooooong time now! Years in fact!
Did you know you can view my previous Treatbox unboxing posts in this unique category of mine called ‘Treatbox’ it is specifically for these box reviews and reveals – Severn Wishes Treatbox.
Thank you for visiting Severn Wishes today, I hope you have enjoyed this Review of the December box! Wishing you and yours a very Merry Christmas!
Halloween is one of those holidays where people either love it or loathe it. Whether or not you like Fancy Dress and Decorating your Home, it’s an important right of passage for your little ones to experience the fun of a Halloween.
If it’s their first Halloween then I have lots of ideas that you could achieve easily at home and make some nice memories and keepsakes to show the child when they are older.
With the pandemic still affecting us all, there are many children who would love to be trick or treating and having fun and games with their friends. It’s highly likely not to happen this Halloween 2020, however that doesn’t mean you cannot do things at home.
WHAT IS IN THIS BLOG POST… HALLOWEEN 2020
Fancy Dress Photo Shoot Fun – My Tips and Tricks
Hand and Feet Print Halloween Decorations – Fun Family Keepsakes
Halloween Games with Treats to be Found (at home) – My Lockdown Halloween Trick or Treat Ideas
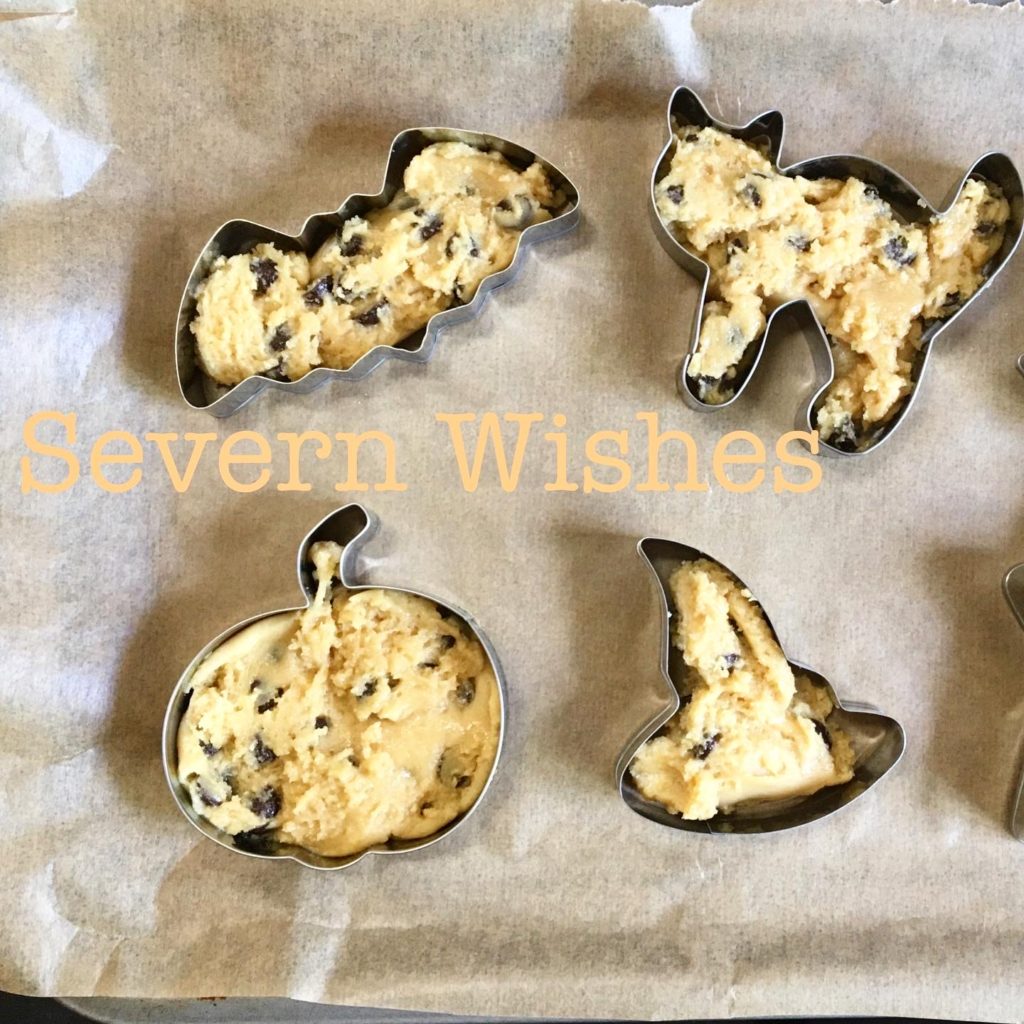
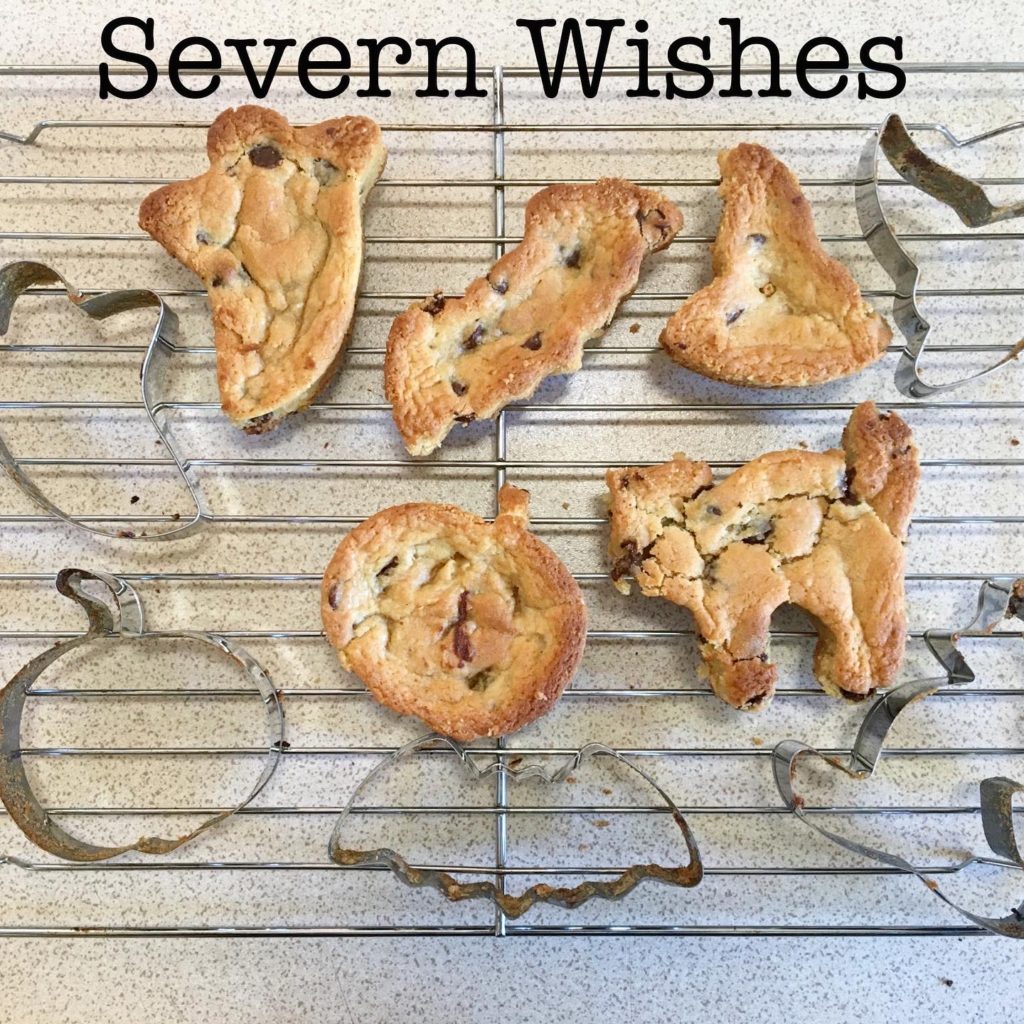
Baking with Halloween Shapes – Fun Baking Tips for the Family to do together
What Else Can You Do With Halloween Baking Cutters as Stencils!
Fancy Dress Photoshoot at Home
One way in which I always like to remember a holiday event or day is to do a photo shoot. For the last two years I have dressed my son up and surrounded him with a variety of Halloween related items. I got some good photographs doing this at home that I can treasure. If you set it up correctly you won’t need to pay anyone to take photographs for you.
You Will Need
A decent camera or a phone with a decent camera A camera which has a timer if you want to do a family portrait Natural light coming through a door or window is best for colours Fancy Dress items and any props that you would like to include
My Photography Tips
Natural Light is important to get clear and sharp imagery.
Use fairy lights to add depth to your image (supervised around the child/ren of course).
Props are important and make sure you arrange them so they can be seen, if you’re going for a theme try and stick to it.
If you want things to be inside the frame then choose your layout carefully and keep looking through the camera lens as a guide.
A sofa or chair is ideal to sit a baby on or you could even use a ball pit or a rocker with a sheet over it to block out any unwanted branding or colours.
Set up your photo shoot before you get a baby ready otherwise they may get fed up rather quickly if you ignore them to move things around.
If you can get a large pumpkin or a cushion you can sit babies inside or on top, just make sure to always have their necks supported!
If you can’t pull off a Photoshoot then why not use some Free Filters on some Photo Apps. Some of them are highly detailed. We did one to show you just how cool! And if you have older children they might be more interested in that too!
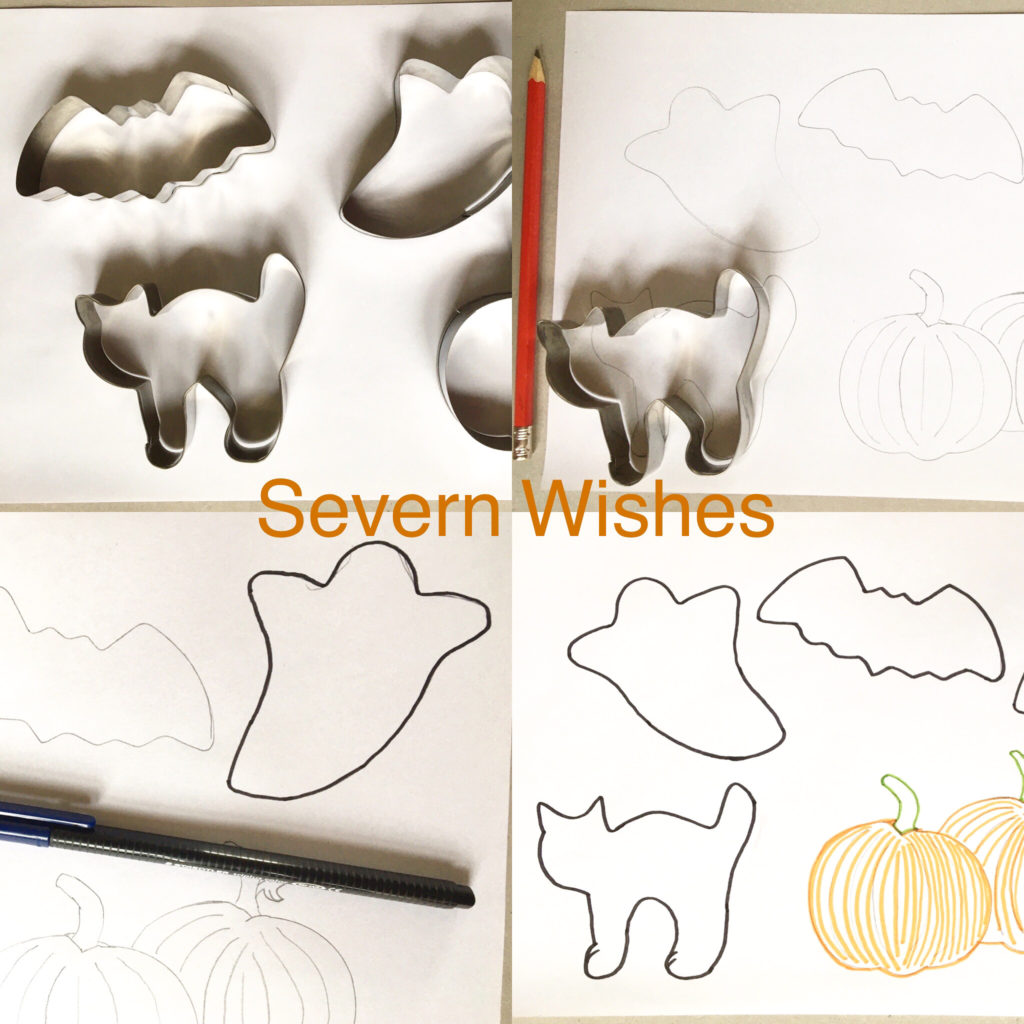
4 WAYS TO USE HALLOWEEN BAKING CUTTERS AS STENCILS
I’m not very good at drawing so using these cutters as outlines was a great idea for me! If you can draw well you won’t need to do this! Ha! Ha!
Halloween Decorations
Halloween Posters
Halloween Colouring In
Halloween Baking
I drew around the shapes and outlined them in pen, then let my child colour it in.
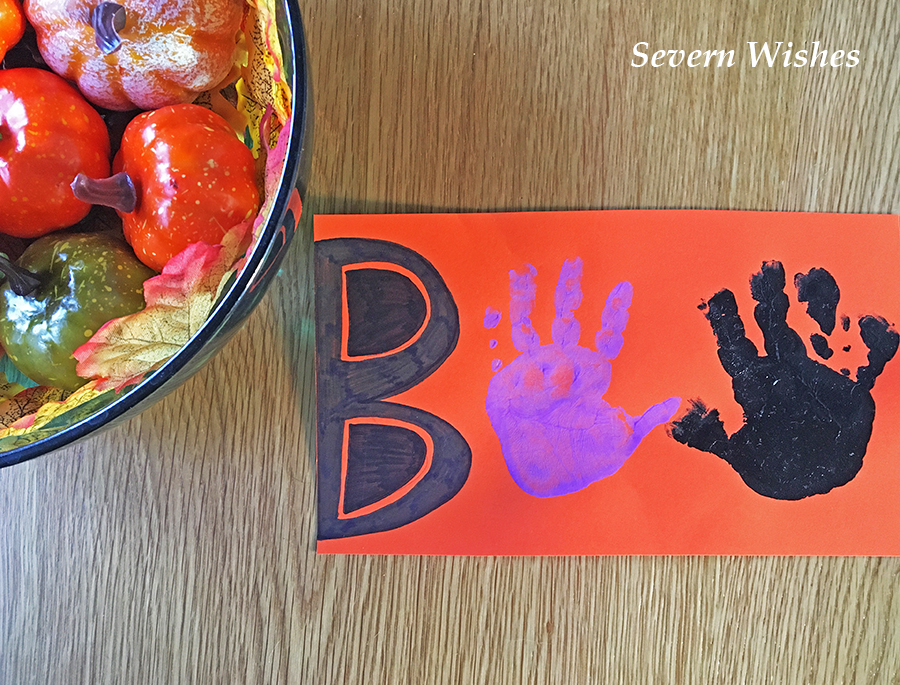
Halloween Decorations
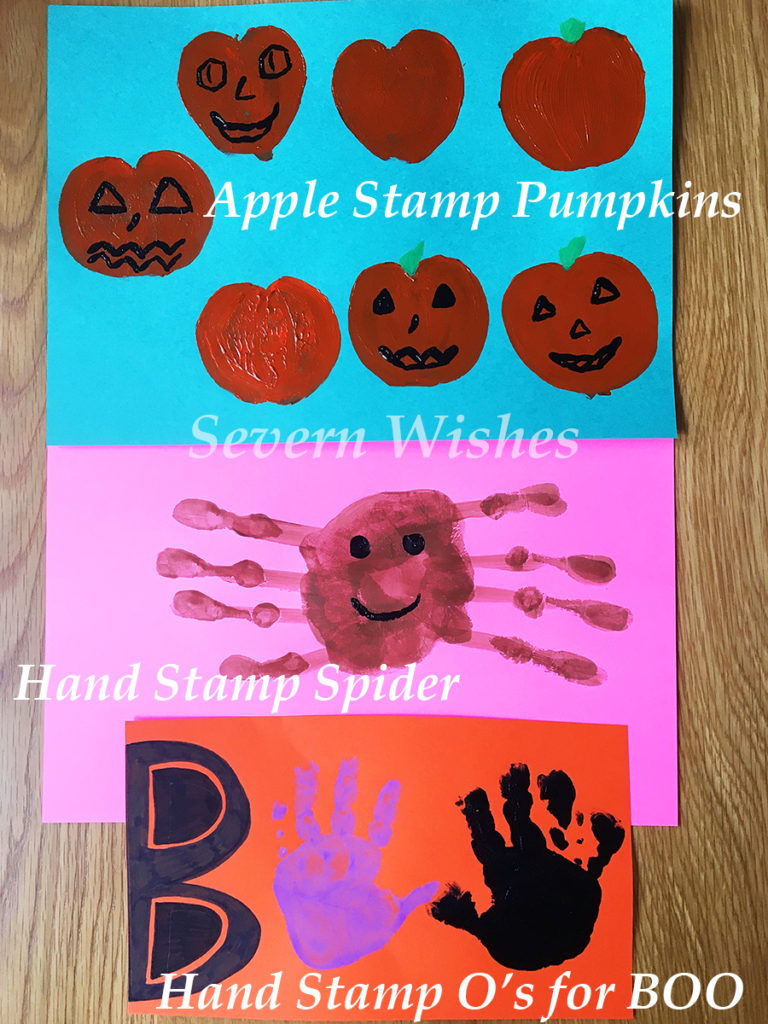
Making Halloween Decorations is easier than you think! So long as you have got some card and some paint. There are tons of ways you can make nice posters or decorations. Here is how I have made mine…
Pumpkins – Apples Halved and Dipped in Paint. Spider – Hand Prints leaving off the thumb so fingers make 8 legs. BOO – B and two hands for the O’s. Ghost – Foot Print (upside down)
I’m planning to cut out the Pumpkins once they are fully dry and hang them up against my window.
You can make a Halloween poster for your window or you can cut the items out and hang them up with string.
Trick or Treat at home won’t be the same, but it can still be fun! Check out my ideas below!
1. Make Every Room A Different Theme with a Different Sweet to Find. You can tailor them to meet the needs of your family, no choke-able sweets for little ones etc. If you don’t do Sweets you could use Numbered Fruit like Apples which result in a Toy prize if they find them all.
2. Make It A Halloween Treasure Hunt with the Treasure being Sweets! Write little clues on paper for the kids to follow. Create traps and fun obstacles for them to overcome, riddles and rhyming works well too! “Where you Sleep, Often Deep, Beneath the Covers is what you Seek!” things like that, E.G Under their bed covers is a Sweet or another Clue.
3. Use A Dice And Clues to Make a Halloween Game of your Own! Using how many rooms you have and how many children, you can send each child off to a room where they have to either complete a task or seek and find the next clue, which once put together with their siblings answers, will reveal their bounty of Treats! E.G Two Siblings, they each find a clue on paper, one reads KITC and the other HEN and when put together they go to the KITCHEN for the next clue etc.
HALLOWEEN BAKING
I have done some step by step baking videos on my Halloween cookie baking and these are available to watch on my Facebook page, I will drop you the link here Severn Wishes on Facebook.
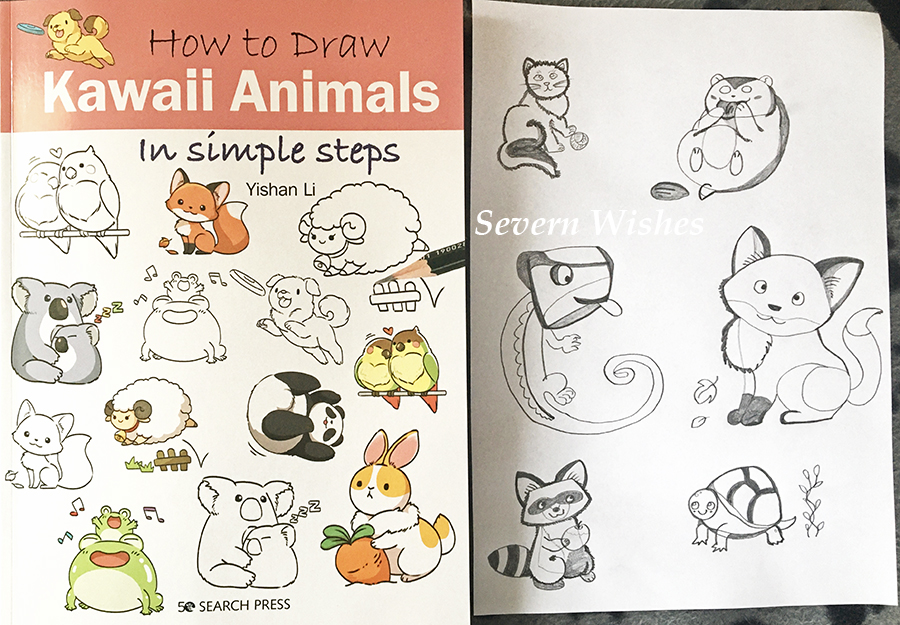
I have been supplied this book for the purpose of a review. I have not paid for this product, it was a competition win in order to keep but review it. Thank you to Search Press Art for giving me this opportunity to review this great book.
My First Attempts
A great book for beginners! It certainly is just that. I was impressed by the simplicity of the book but with excellent results. This book would make an ideal Birthday or Christmas gift for people of all ages, providing they liked drawing or were a fan of animals.
Here are some of my attempts at drawing, my Racoon isn’t half bad!
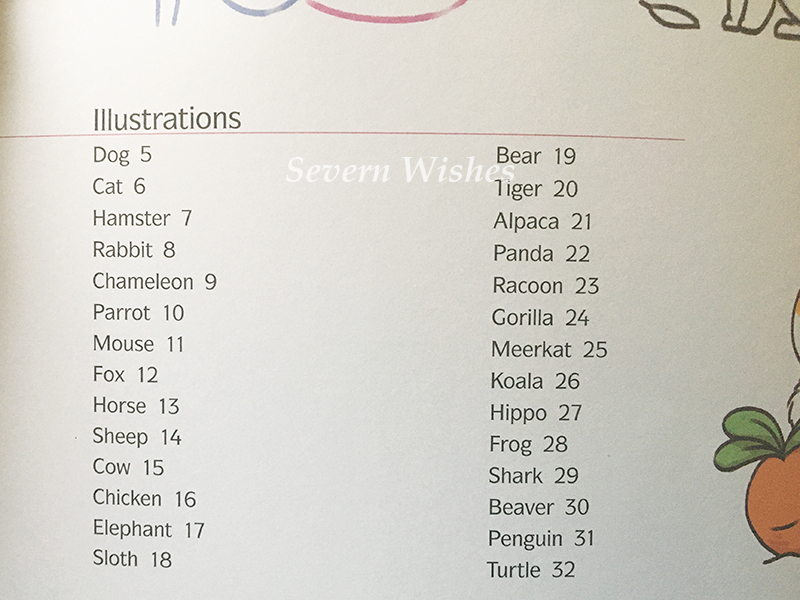
Product: Book on Drawing Book Title: How To Draw Kawaii Animals in Simple Steps By Yishan Li Publisher: Search Press Pages: 28 Animals across the pages, each drawn with 8 steps
Awesome Pages Included in this Book
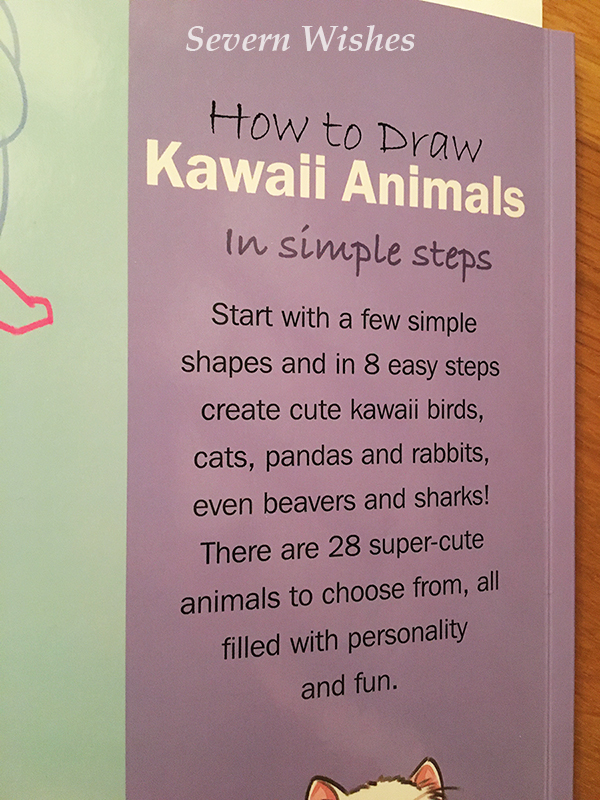
Back Cover
I am someone who really and honestly cannot draw! I mean everyone can draw in some capacity but I draw most things badly, so I jumped at the chance to use these simple steps to improve my drawing abilities.
The book is so easy to follow, with 8 simple steps to the general shape of the animals. And then you are free to add your own details. They give you inspiration with one coloured in and completely detailed animal per page, so you can attempt a similar end result.
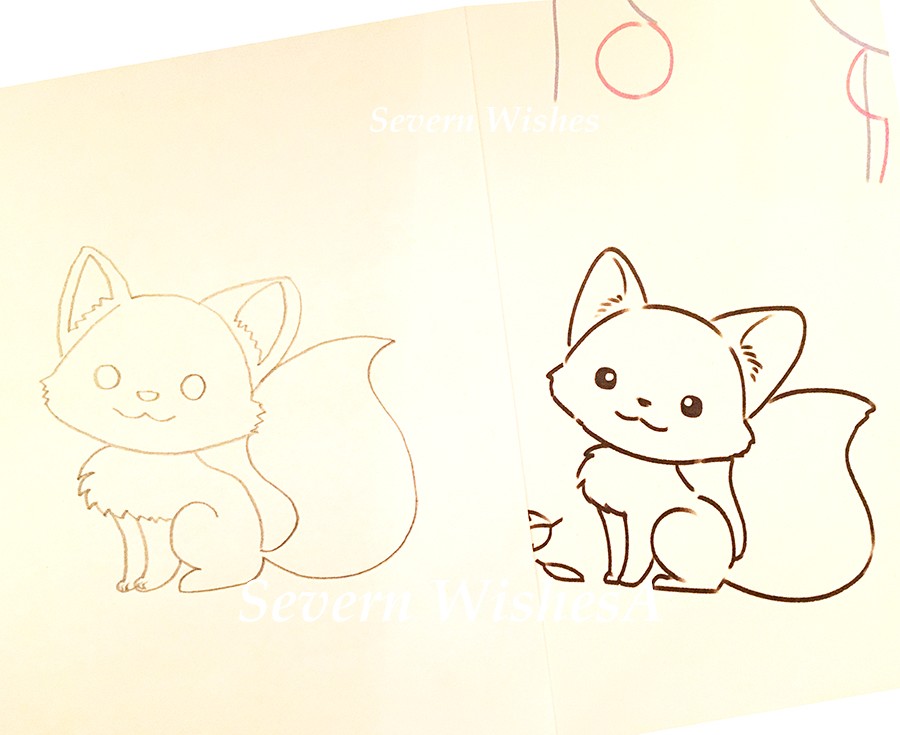
The steps are easy, you need a pencil, and I would recommend a rubber, so that you can erase any lines that you don’t need when you complete the finer details. Some lines are there to build shape but not needed at the end.
There are all sorts of animals, fish and birds in this book, something for everyone’s tastes.
(Left) My Fox (2nd Attempt) Side by Side with the Book version and original (Right).
I would and have given this Book a 5 Star Review. It has something for everyone, with a variety of animals, easy steps to follow and it also gives people the freedom to add their own details, as well as getting great results.
Thank you reading this review today. You can find this book on Amazon by typing the title into their search bar.
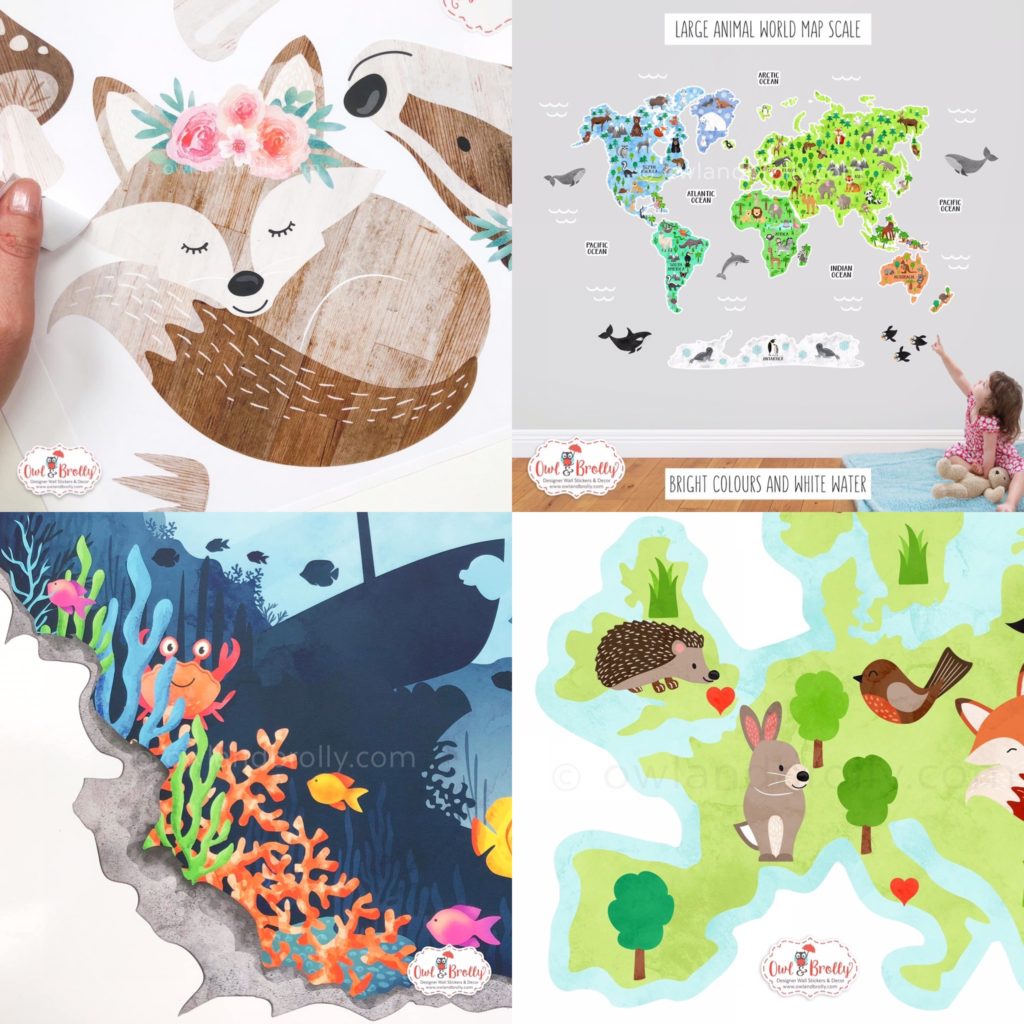
Owl and Brolly Stickers are Unique, Colourful and Imaginative
Hello Severn Wishes followers. Today I have the pleasure of bringing a special review to you all. Owl and Brolly is a company who specialise in Wall Stickers, mainly for children’s bedrooms and play rooms. I have known Sue at Owl and Brolly for several years now, we bonded through an Endometriosis group and found we had mutual things in common. When I found out she was an incredible artist and saw her beautiful work, I wanted to shout about her talent.
Sue knew that I had just moved house into a rental property, and I couldn’t take the chance of ruining the paintwork in my son’s bedroom. So the plan was to do some tester stickers, an hour, twenty four hours and finally seven days. And luckily for me there was nothing wrong with the paint and I tried the stickers on several walls just to make certain. I can guarantee that it is a good idea to do the Tester Sticker when you may not know the condition of the walls in your home.
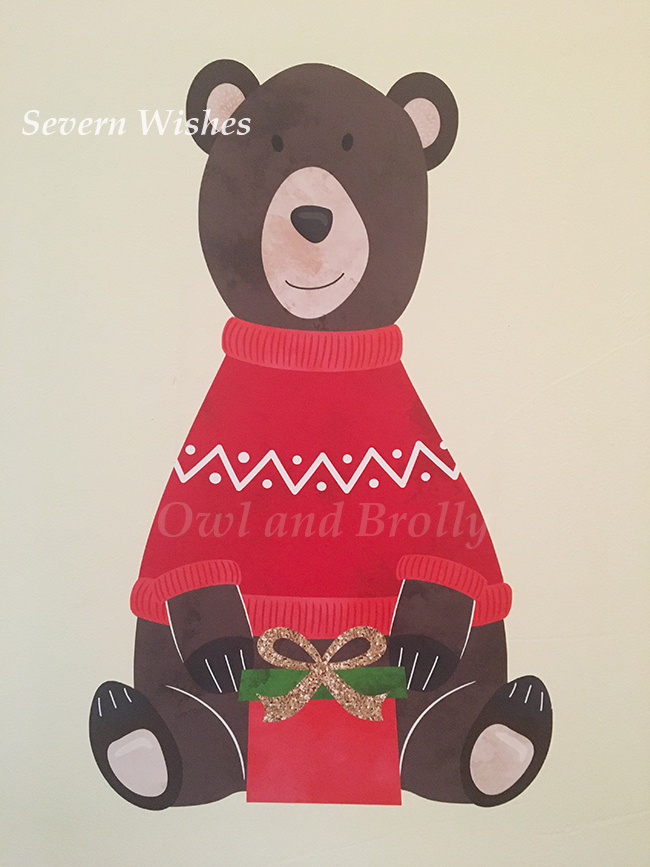
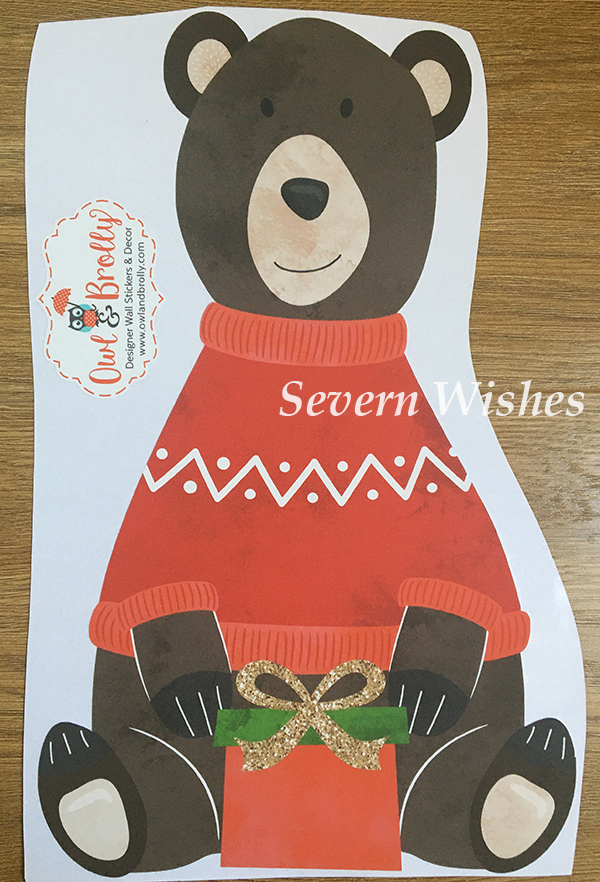
Delightful Christmas Bear
This lovely Bear is for my son’s bedroom, he hasn’t given him a name just yet, ha, ha! But the quality of this sticker just amazed me. Not just the printing of the sticker itself but the design. Owl and Brolly stickers are all drawn and designed by hand. What a talented woman behind such a wonderful creative business.
What I love about the Owl and Brolly range is the creativity and the infinite imagination that stems from items like these stickers. Any child would be lucky to have some of them on their walls.
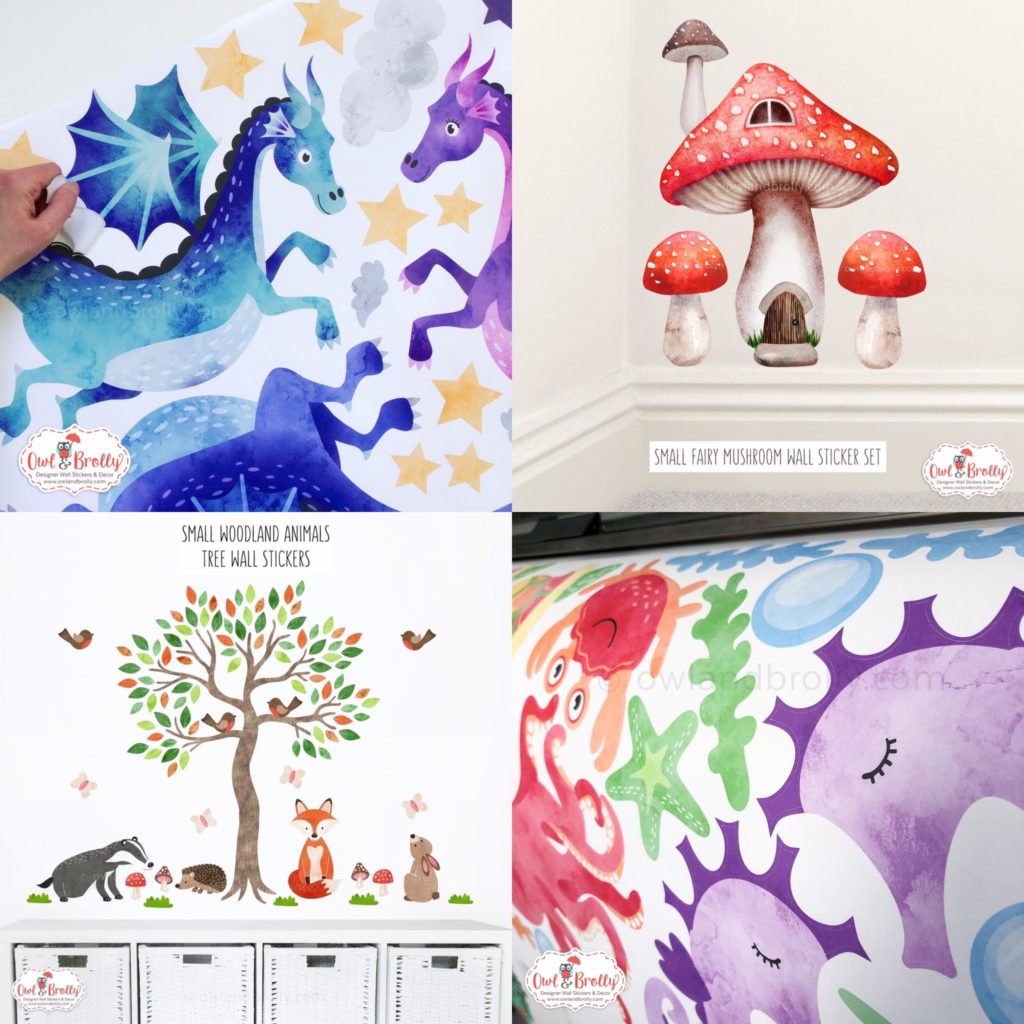
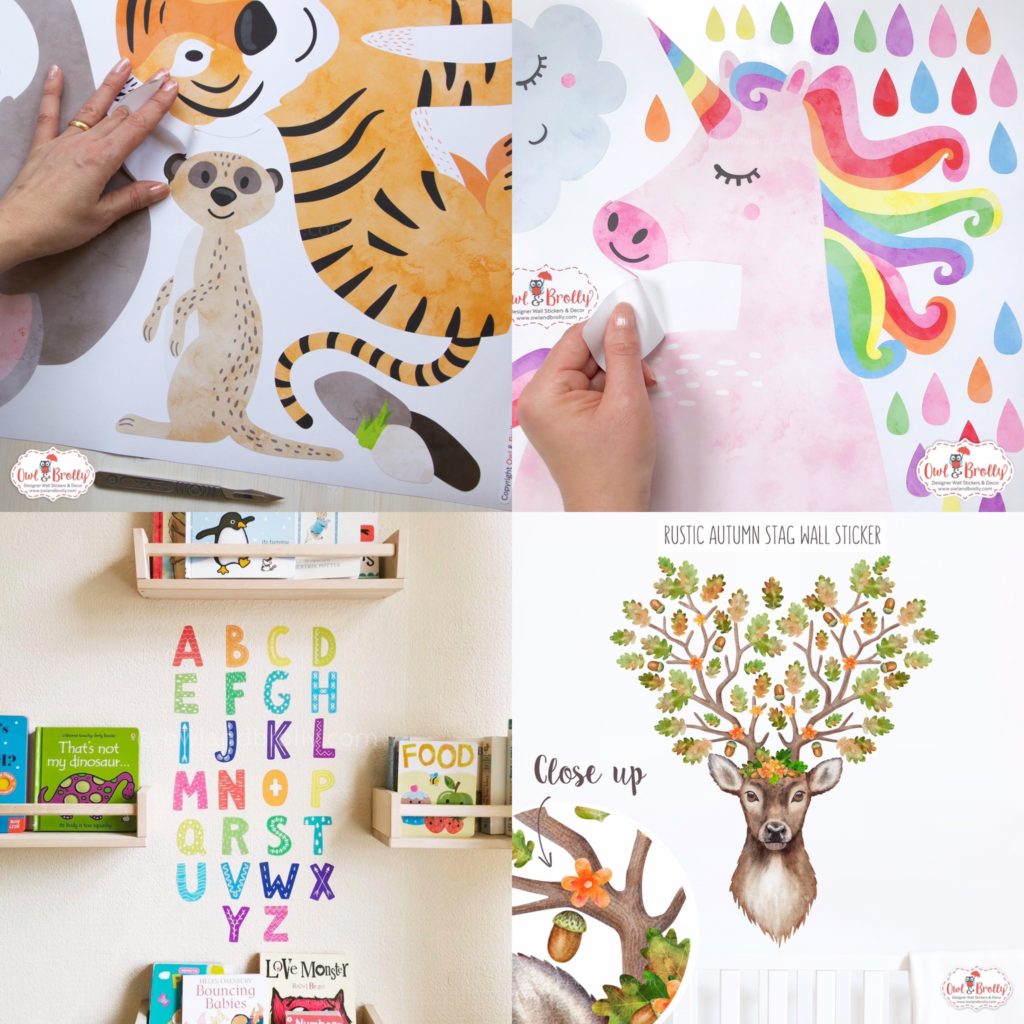
Here are some examples of the beautiful Wall Stickers Owl and Brolly currently offers. I will be providing links to social media and the website itself at the end of this article. Check out these incredible works of art!
I will now give you some background about the company and how it all came about. As a small British Business they are always looking for support from fellow UK citizens who appreciate all the talented people in this country, and especially now during the pandemic, it’s a great idea to think about purchasing locally for Christmas this year. Perhaps my blog post will inspire you to buy from Owl and Brolly.
Sue studied a HND in Natural History Illustration specialising in watercolour, she enjoyed a creative career until Endometriosis forced her to change her way of working. In order to move with the times she made the decision to become more of a digital based artist than making art with traditional paintings. Her drawings are incredibly detailed and she has a unique style.
It was after helping a start-up company with their designing that Sue went on to illustrate her own range of wall stickers for nursery walls and kids rooms. She began combining her own special watercolour techniques and using some digital media to create the sticker designs. It was a decision that brought out her artistic skills and she is doing what she loves every single day. It was at this time that she started her company, and Owl and Brolly was born.
The stickers are all printed on a high quality removable and reusable fabric wall sticker, rather than a single use PVC vinyl. This allows them to be used more than once and are easily removed (gently) and then repositioned. Sue has a passion for wanting to create illustrations that will help to inspire children’s imaginations. Her beautiful watercolour designs are not only highly detailed but they look unique. They are printed to such a high quality that they look good on any wall space and have already made so many children (and their parents) happy with the designs.
The Stickers are thin but excellent quality, printed onto removable and reusable fabric.
Please visit Sue over on Owl and Brolly to see all of the wonderful things that she has to offer. There are so many beautiful stickers on the website I couldn’t possibly show you all of them on here. You’ll have to pop over to the page or website and become even more inspired.
I highly recommend the customer service, the quality of the items and the overall finish of the products available. Sue will also work on special designs if you have something in mind, just send her a message on her social media and see if her commission’s books are currently open. She is working hard every day to accommodate people’s orders despite the pandemic and she is a very talented woman who deserves so much success.
You can find Owl and Brolly across these links below:
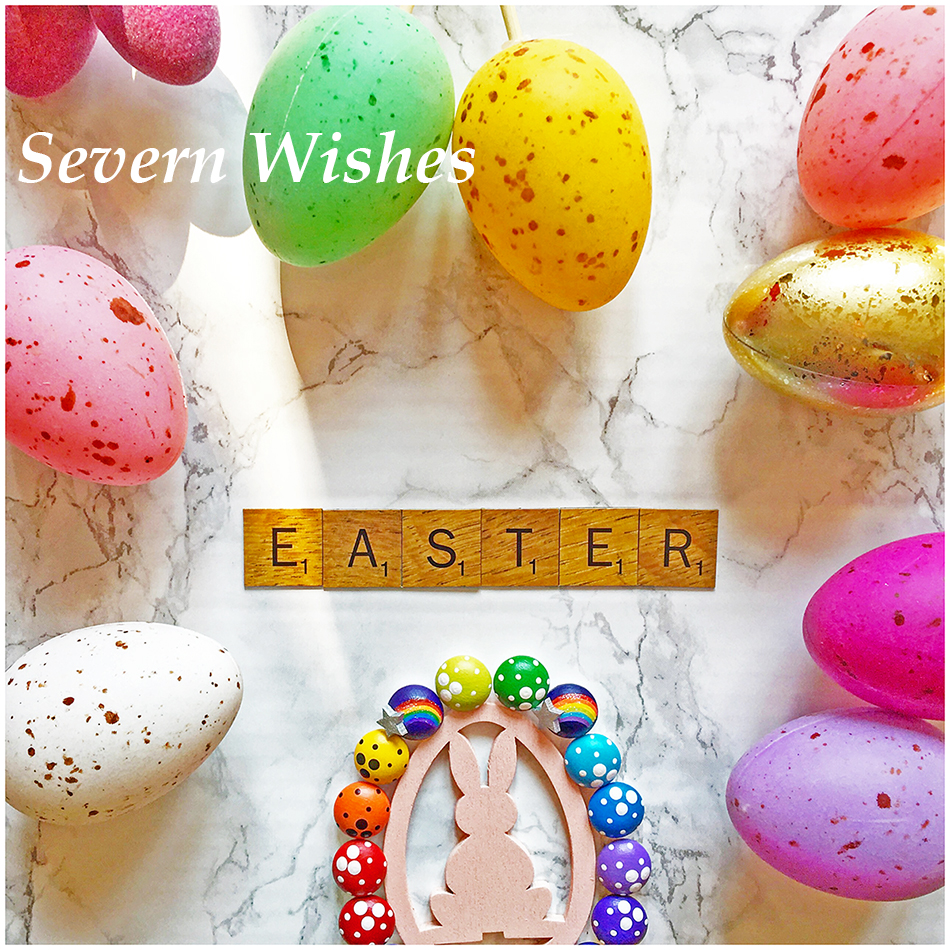
Fun to Make ~ Easter Art and Crafts ~ with Sabrina of Severn Wishes
I have wanted to do this blog post for the last three years, and I have always been too busy to complete it! Mainly because it is a mixture of writing the blog, creating and making the craft items, and then taking the step by step images, processing all of those and then putting the entire lot together in one blog post. It is both time consuming and a lengthy in process too. So what changed this year? Well for one thing, I was more determined to do some more craft this year, but isolation has also made me re-evaluate what’s important, and that is to make happy memories with my son. No matter what is going on outside our home, he doesn’t understand, and it is my job to keep things as normal as possible, so extra fun, extra learning and extra memories are all on the table at the present time. I’m so glad you could join me to hopefully make some memories of your own!
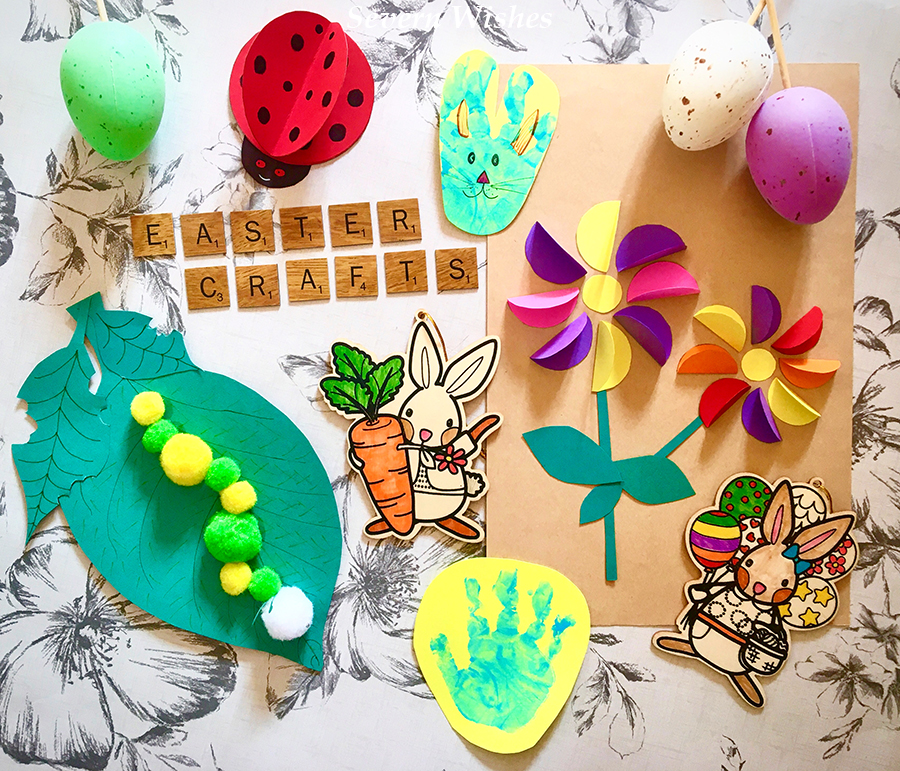
So without any further ado, let’s get our crafty fingers at the ready! Depending upon which Crafty Project you wish to undertake you will need a variety of items. My idea is this, pick an item from the four below, and then match the “You Will Need” items with what you already have at home. Providing you have all the necessary bits and bobs then feel free to scroll down to that Project and then get cracking with my Step by Step guides! Happy Crafting!
1. 3D Friendly Ladybird 2. Wiggly Caterpillar 3. 3D Paper Flower (Can be Framed or Made into an Easter Card) 4. Hand Print Easter Bunny Rabbit 5. Other Craft Ideas
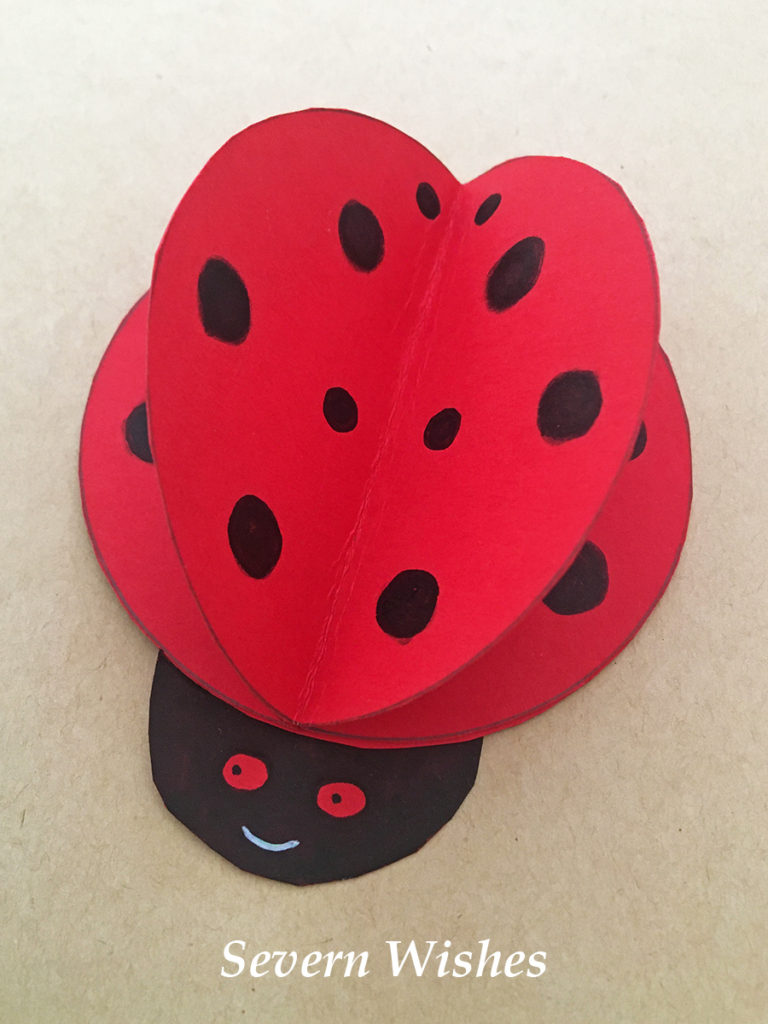
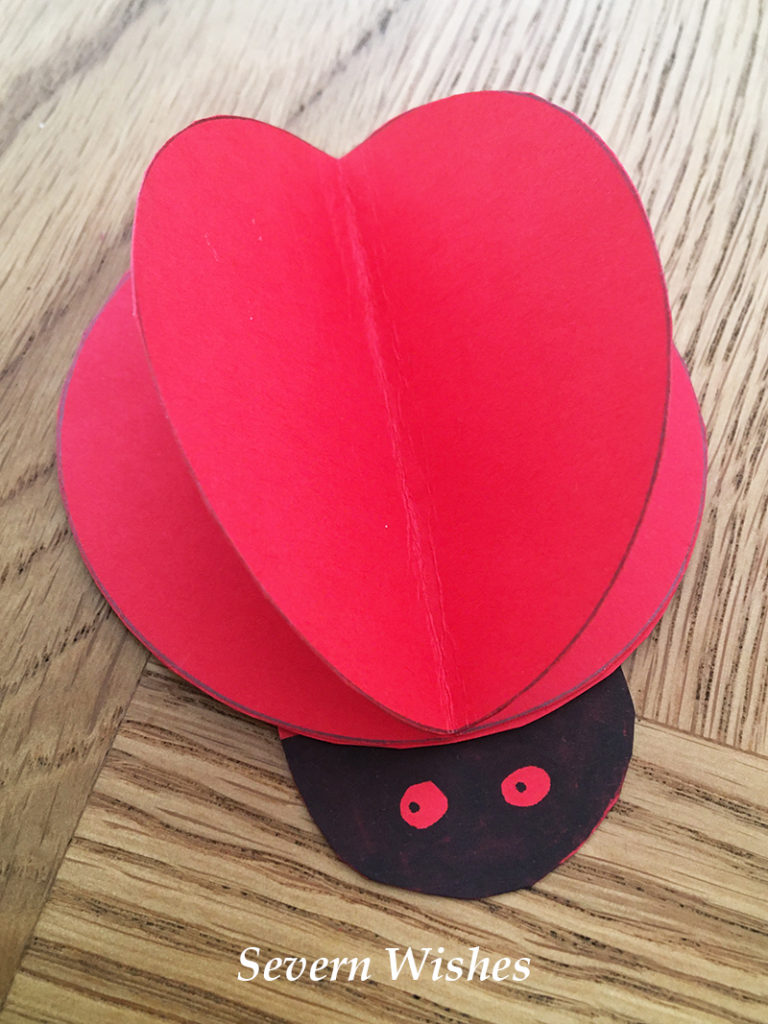
1. 3D Friendly Ladybird
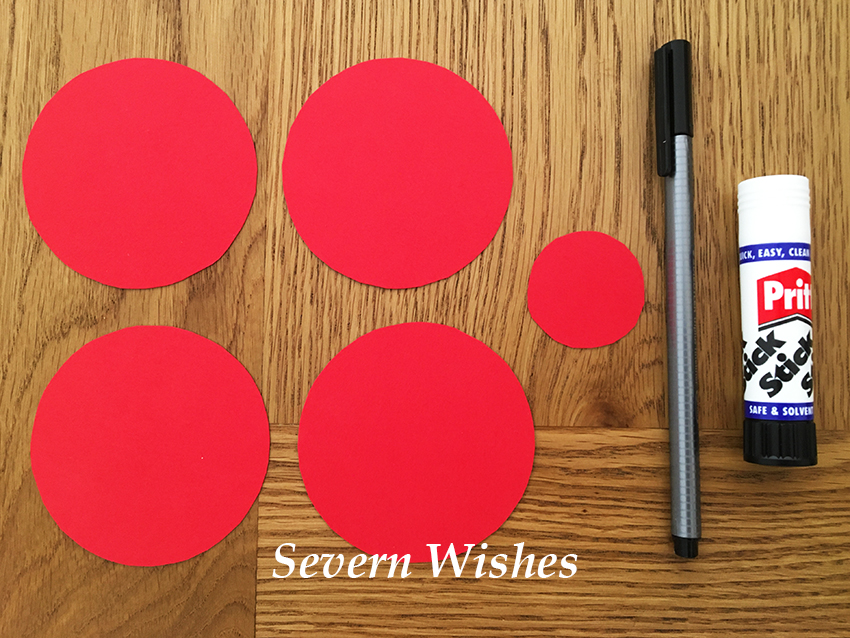
You Will Need Pritt Stick or Glue Coloured Paper and / or Card Circular Objects to Draw Around (This will determine the size of your Ladybird) Pencil Scissors Black Pen Googly Eyes (if you have some but not essential)
This is the easiest of my crafts today, and will take around twenty minutes to make. You can make it any size, any colour that you like. Why not make one for each member of the family? I am going to make several of them to put around my son’s bedroom. He loves Gaston from Ben and Holly’s Little Kingdom, so my son is the inspiration behind this particular craft project.
Step 1. Choose the Size of your Ladybird. Choose your colour. Draw around a Circular object so that you have 4 Circles the same size, and then you will need a smaller circle for the head, judge this depending upon the size of the body. Cut out these 5 circles and then you’re ready to begin.
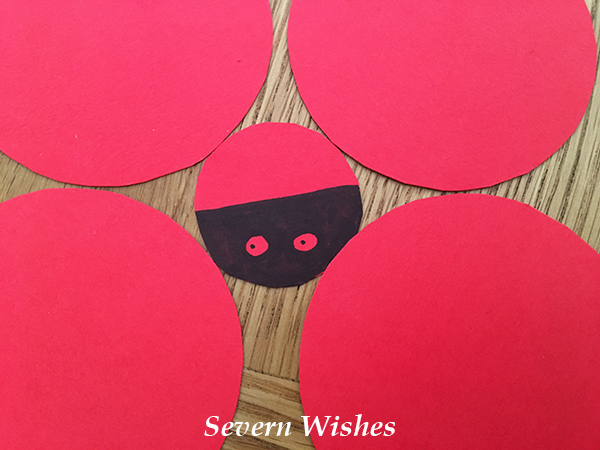
Step 2. On the small circle draw a line across the centre, you want to colour the half of this circle in with black pen. Don’t forget to draw eyes on it too like mine, if you don’t have any fun stick on eyes to hand! Then pop this face to one side you won’t need it now until Step 6.
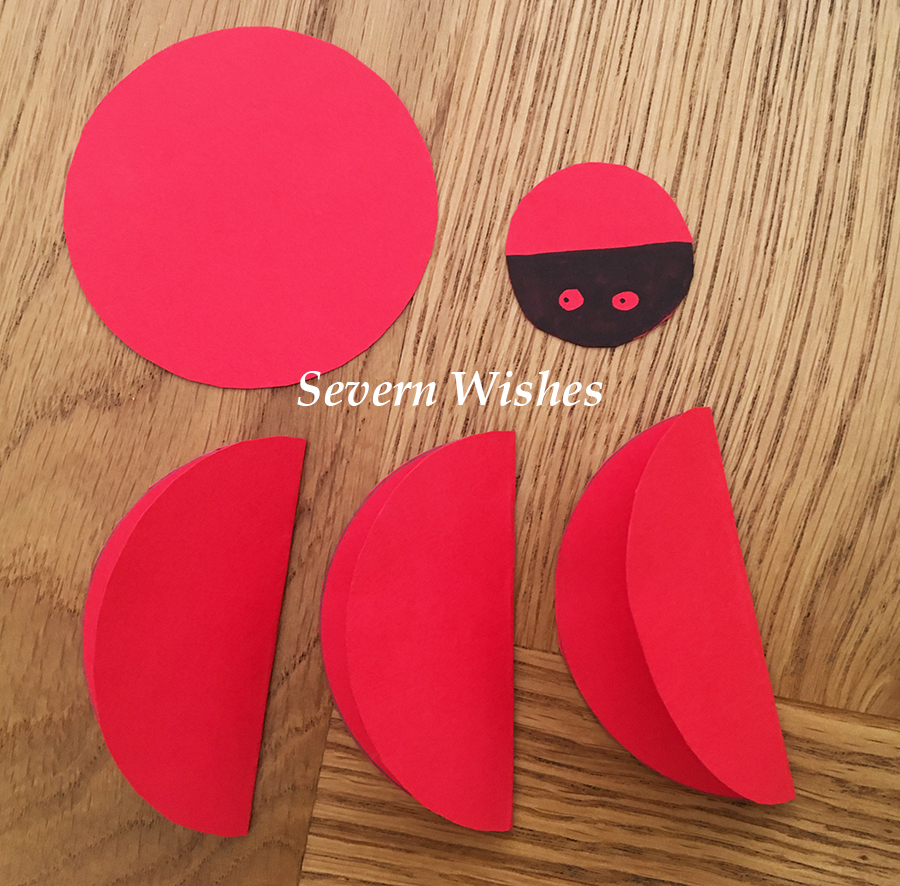
Step 3. Take 3 out of the 4 Large Circles and fold them in half across their centre. Gently crease them with your fingers, take a look at my image below to see how they should look.
Step 4. Take the flat circle and cover it lightly in glue or pritt stick, I always prefer a glue stick when messing with card, less mess! Then take two of your folded circles, stick glue on their side that faces flat, place them back to back and glue them down on to the flat circle so that they make a V shape.
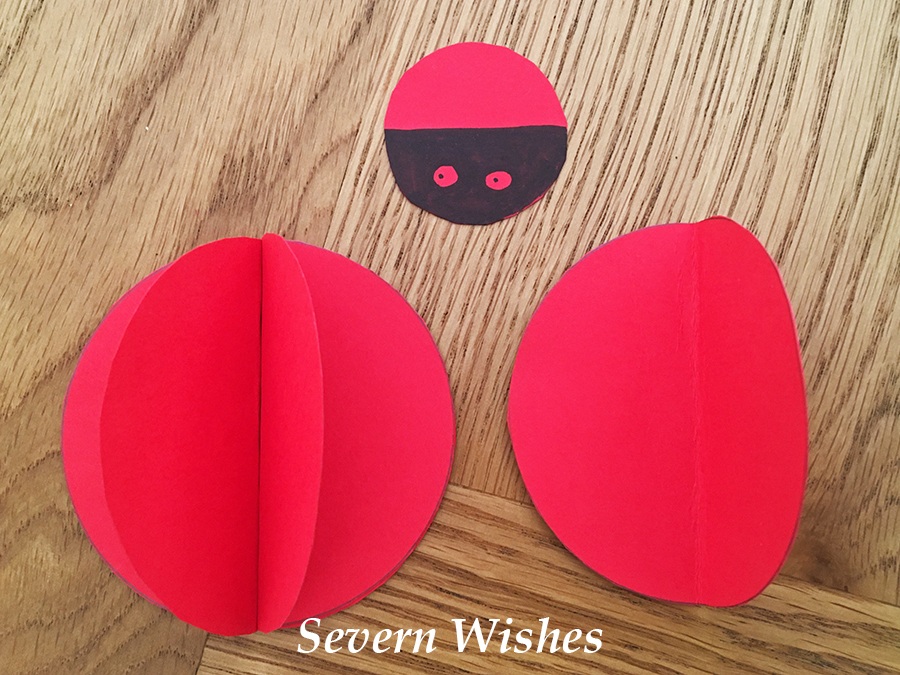
Step 5. Take the remaining Circle that is folded in half and cover it in glue before pressing it down into the centre of your Ladybird body, covering the two below neatly. You now have a finished insect body.
Step 6. You can now glue the head on by placing the glue on to the half you didn’t colour in, make sure you line it up with the V of the Ladybird to make it look right. See my image below.
Step 7. Push down all the flat surfaces of the Ladybird and leave for an hour or two for the glue to dry. Then using a Pen or Marker, draw on however many Spots you would like.
Step 8. Repeat steps for making other colours or other sizes if you have Card or Paper left over. If you need a base for your Ladybird to sit on, why not make him a cardboard leaf! (You need leaves for another of my crafts anyway!) 😉
CRAFT FINISHED
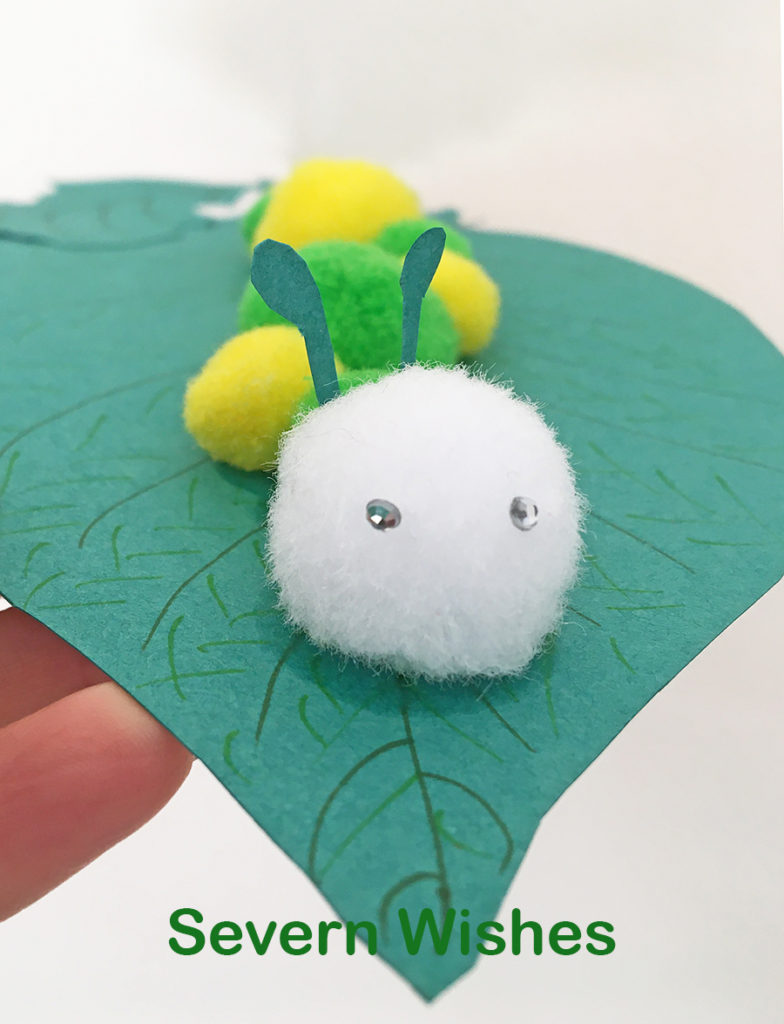
2. Wiggly Caterpillar (munching on a leaf)
You Will Need Pritt Stick and PVA Glue Green Paper or Card (Card is better) A Mixture of Green and Black Pens Poms Poms! All Colours Welcome! Googly Eyes or Stick on Sequins Scissors A Pencil A Piece of Cardboard (Cereal box is good!)
This is a fun craft to do with young children. They can make their Caterpillar whatever colour they want. All you need is some Pom Poms! You can follow my Steps or watch my video below!
Step 1. Draw and Cut Out a Leaf Shape (this is your main leaf) from your Cardboard. Then draw around this cut out piece of cardboard on to your green paper or card and Pritt Stick together.
Step 2. Draw your Leaf design on with Green pens. Set to one side.
Step 3. Decide what Pom Poms you want to use and arrange them!
Step 4. Make some antenna and extra leaves and stick your eyes on to a Pom Pom ready to assemble your bug!
Step 5. Using PVA glue stick your Caterpillar together, don’t forget the extra leaves, arrange however you wish, then leave to dry in a warm flat place.
Step 6. Add any additional things to your bug once it has dried.
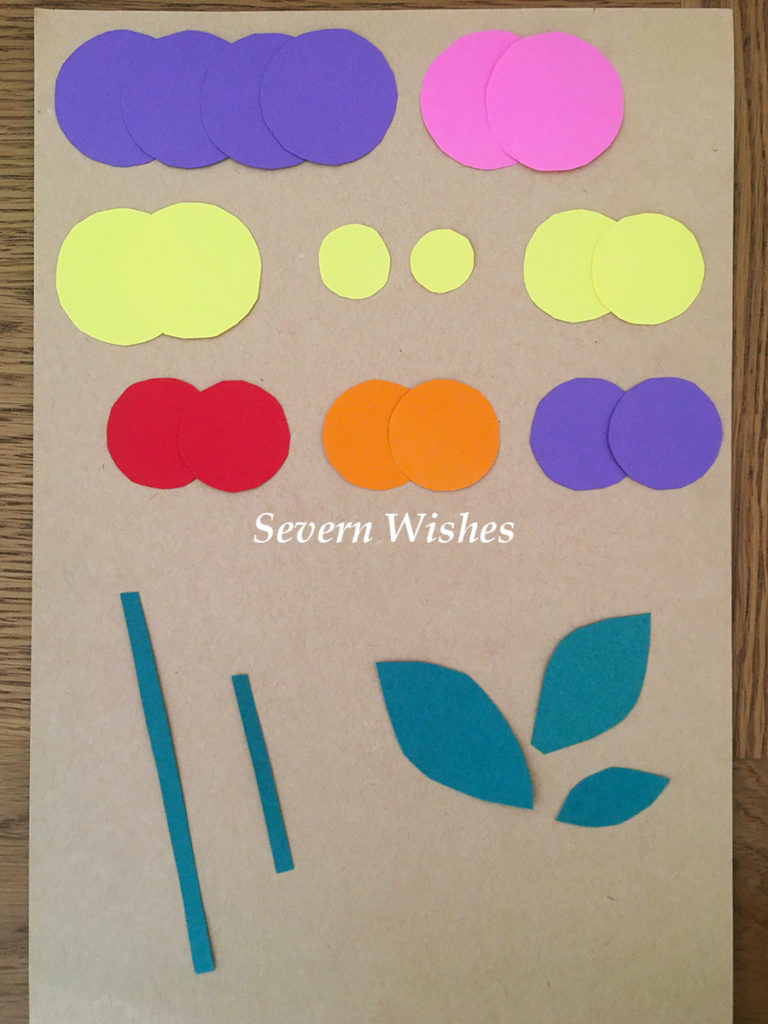
3. 3D Paper Flower (Can be Framed or Made into an Easter Card)
You Will Need Pritt Stick or Glue Different Coloured Cards or Papers A Piece of Card for Sticking to Scissors Pencil A Circular Object to Draw Around (it’s diameter will be half the width of the flower so choose wisely)
This idea is simple but looks so pretty when complete. It makes a great card.
Step 1. Take a piece of plain card, this will be your base. Draw a Stem or Cut Green Card or Paper and create one. Make sure you leave plenty of room to stick the flower part. Cut out leaves and small circles of yellow paper to create the centre of the flowers. Be as creative as you like.
Step 2. Making the petals next, you need to cut circles of different colours, you will end up with 8 Petals in total per flower. I did two different sized circles to end up with two sized flowers.
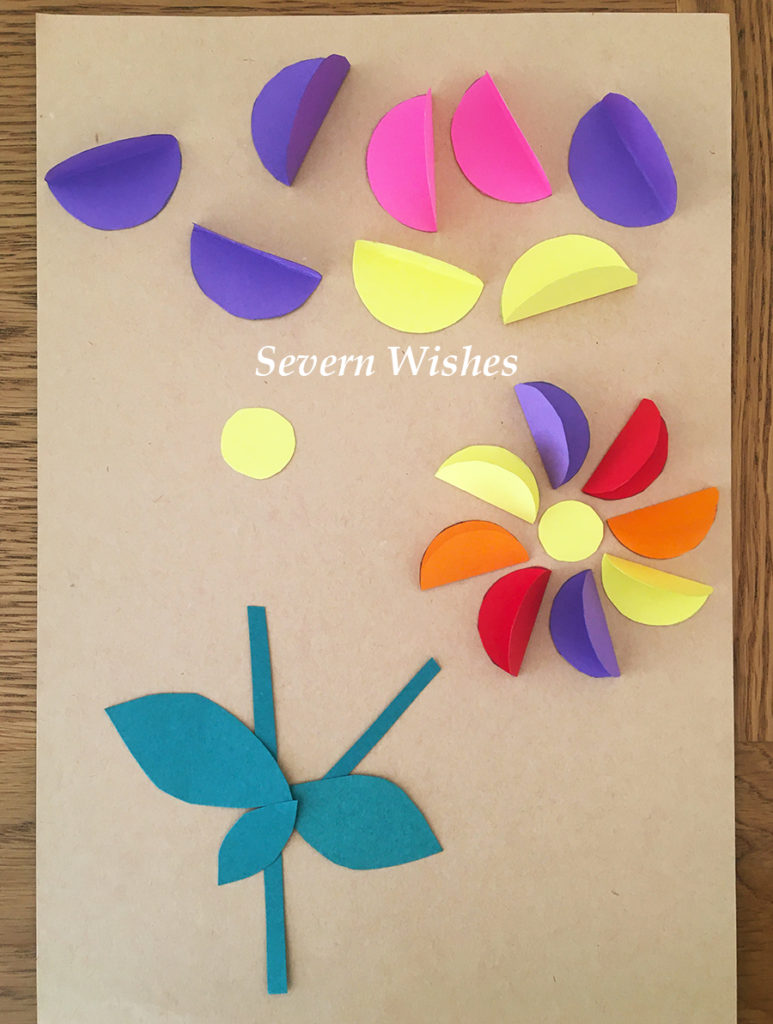
Step 3. Fold all of the petals in half so you end up with 16 halves with flat sides that stick up. This is how the petals will look 3D.
Step 4. Using Pritt Stick, stick the sides of the petals down so that they rotate around the centre of the flowers. You want them all to face the same way when you stick them around the yellow centre.
Step 5. Turn the flowers into a card if you like, or make other smaller flowers too using smaller circles, and make a pretty Easter meadow scene picture. Draw or Stick Easter Eggs and Rabbits and other Easter items along the edge like an Easter scene.
4. Hand Print Easter Bunny Rabbit
You Will Need Paper or Card Pencil Hands!!! Pens for the Details Scissors Paint
Paint works well for this one so you don’t have to colour in, unless you prefer to colour of course. It depends how much you’re painting, if you plan to do my hand prints picture (below) then you could do extra on different paper and make them into cute Rabbits!
Step 1. Draw around your hand and / or children’s hands. Or you can do a Hand Print on to Paper using Paint! MAKE SURE YOU LEAVE OUT THE THUMB! You want the shape to resemble a Rabbit head with two of each fingers being the ears! Keep two fingers together!
Step 2. Once dry you can cut the Rabbit shape out.
Step 3. Draw on Nose, Mouth and Eyes!
Step 4. Add any extras like whiskers, inner ears and freckles! Cut it out and hang it up or stick to a handmade card if you like.
FINISHED
Not the best hand print but you get the idea! My son was a bit reluctant to help out yesterday, ha ha!
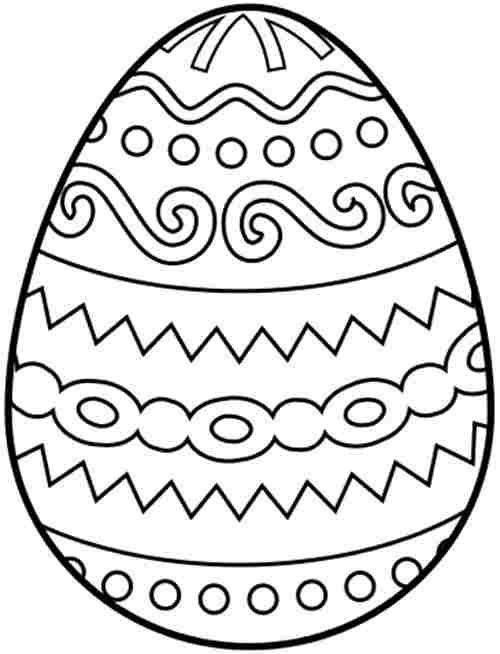
5. Other Craft Ideas If you want to just Print some Easter Egg patterns and do some Colouring in with younger children then here are a few that I really like that you can save and print 🙂
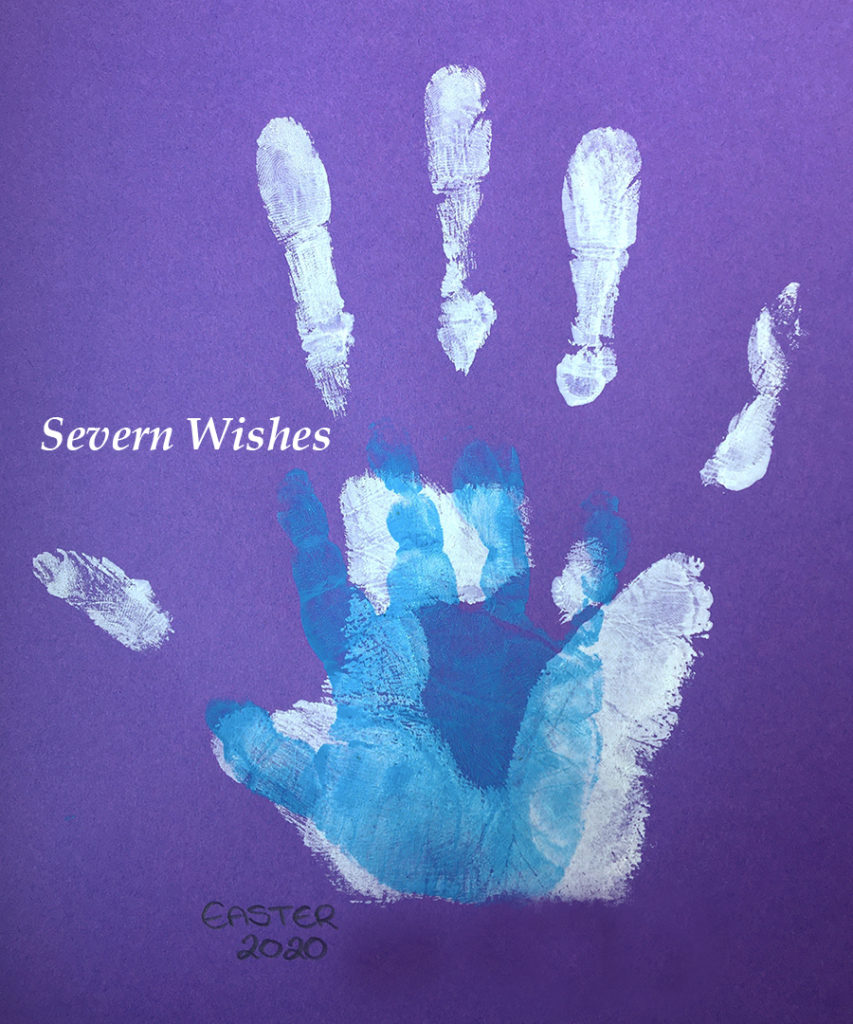
Alternatively you could do some Painting of Hands and do some Prints!
Layer the Prints of your Hands to make a nice picture.
Thanks so much for joining me for this blog post. I hope that you’ve had fun, maybe even a laugh at my crafty items. If you made something please share it with me on social media, tag me or my page! I would love to see them! What was your favourite? Would you like to see more Art and Craft? Leave me a comment. Have a wonderful fun and safe Easter!
Best wishes from me!
Sabrina
By continuing to use the site, you agree to the use of cookies. more information
The cookie settings on this website are set to "allow cookies" to give you the best browsing experience possible. If you continue to use this website without changing your cookie settings or you click "Accept" below then you are consenting to this.