How to Make Pretty Mother’s Day Cards For Your Loved Ones and How to Create Beautiful Paper Flowers

With much of the United Kingdom still in lockdown and people unable to purchase their usual items for loved ones, I have decided to write this blog post to help people out. Mother’s Day is a special day for everyone who is classed as a Mummy, whether that is to furry children, human children, step children or children who may still reside inside us. It’s for Grandmothers, Nan’s and Great Grandparents too don’t forget, so why not make a loved one a card and let them know you’re thinking of them.

I have several ideas that should suit most people, because Mother’s Day Cards are usually floral or feminine, but you can personalise your design to fit the people in your life. If you can draw then even better! I’m not very good at drawing so I prefer to use paper and card to create pretty cards instead. This blog post is all about how I make cards using coloured card and paper.

WHAT YOU WILL NEED

Coloured Paper and Coloured Card
A Pencil
Items to Draw Around – to make the Circles for the Flowers
Scissors
Coloured Pencils or Crayons if you are Drawing
Pens – Mixed Colours and Thickness
Glue or Sticky Tape
Ruler
Coloured Tissue Paper
Pipe Cleaners

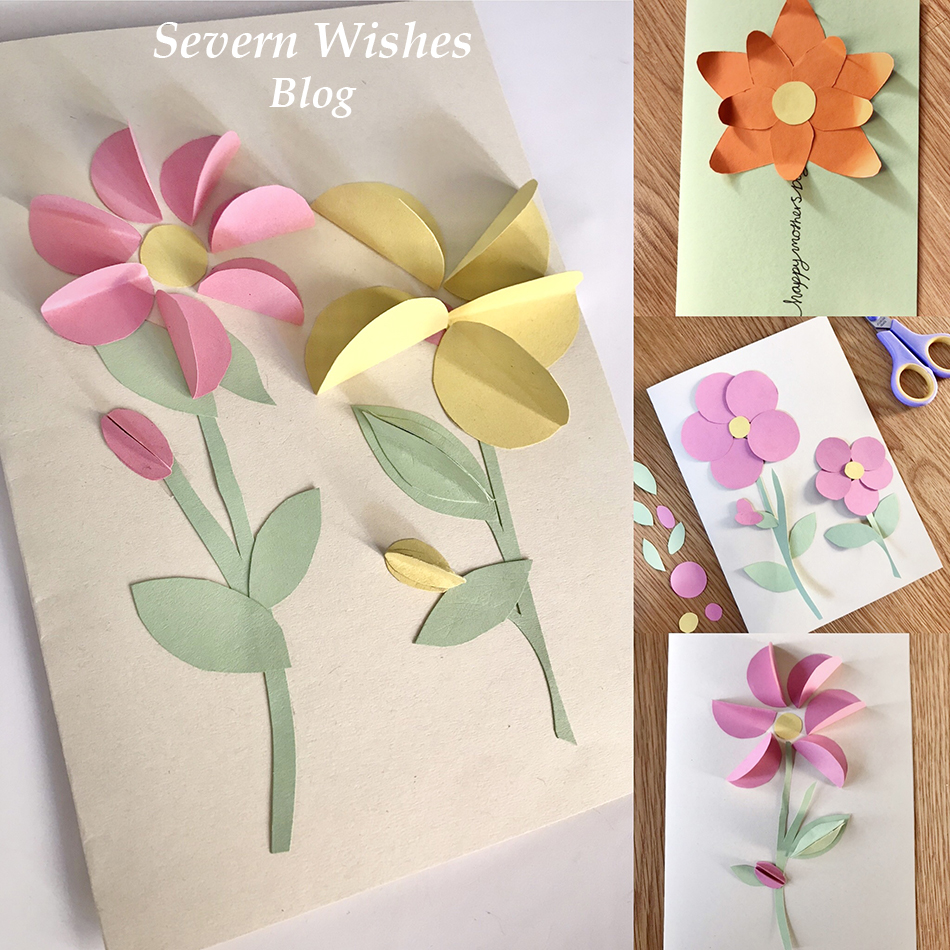
HOW TO MAKE YOUR CARD – 3D FLOWERS

Step 1. Take a piece of pale coloured card and fold it in half to get your card shape. Decide if your design is going to be a landscape or portrait style.


TOP TIP 1. When you come to make your shapes maximise the paper by doing them close to one another and along one edge. It makes it easier to cut them out but also and more importantly you’re not wasting any of the paper, and the leftovers can be used on your next awesome project!

Step 2. Draw around circular items in order to make your petals. Carefully cut them out and then fold them in half to create your three dimensional petals.


TOP TIP 2. The ideal size for the petals for an A4 Card design (an A5 when it is folded) are the size of a Nail Varnish bottle. Draw around the base of the bottle when it is stood up on the card. Another tip is to cut out one shape and use that as a guide to cut out the other petals so you get them the same size.

Step 3. Arrange your design on the Card first before gluing anything down, so as to make sure it all fits nicely.


Step 4. Glue or Stick the Card pieces down and finish decorating with any details or wording that you choose.

HOW TO MAKE A TISSUE PAPER FLOWER

You Will Need;
A Coloured Pipe Cleaner
Sheets of Coloured Tissue Paper

Step 1.
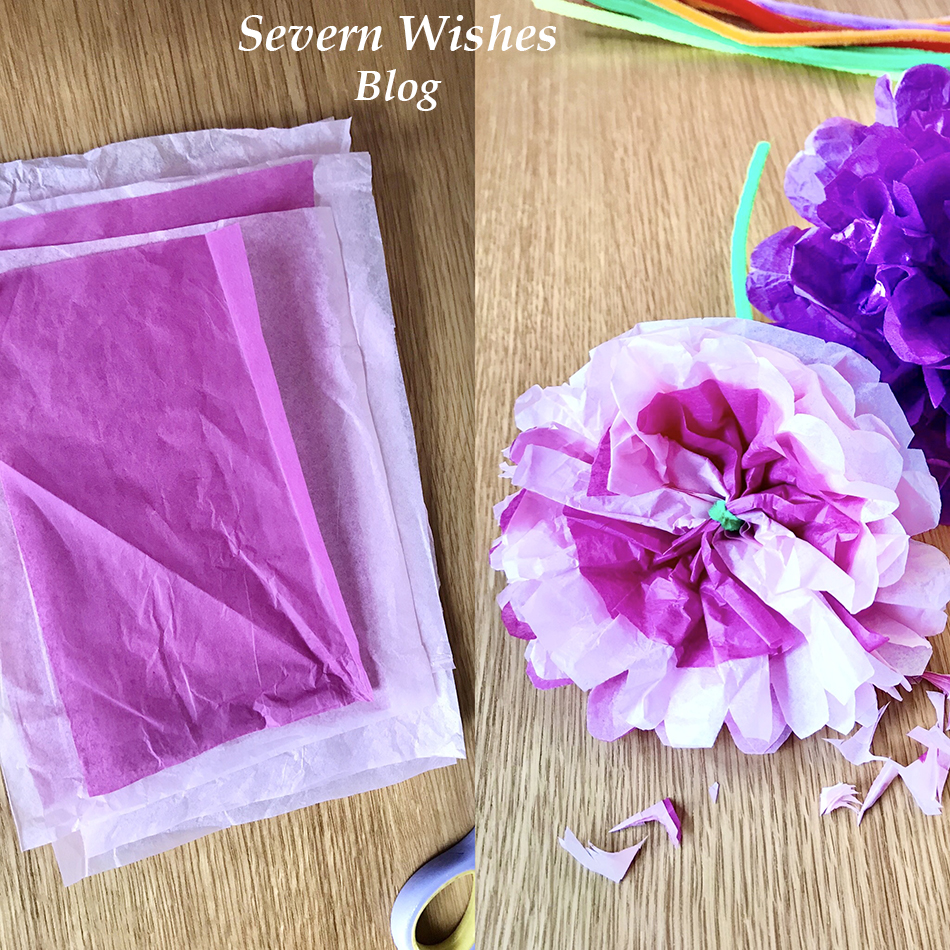
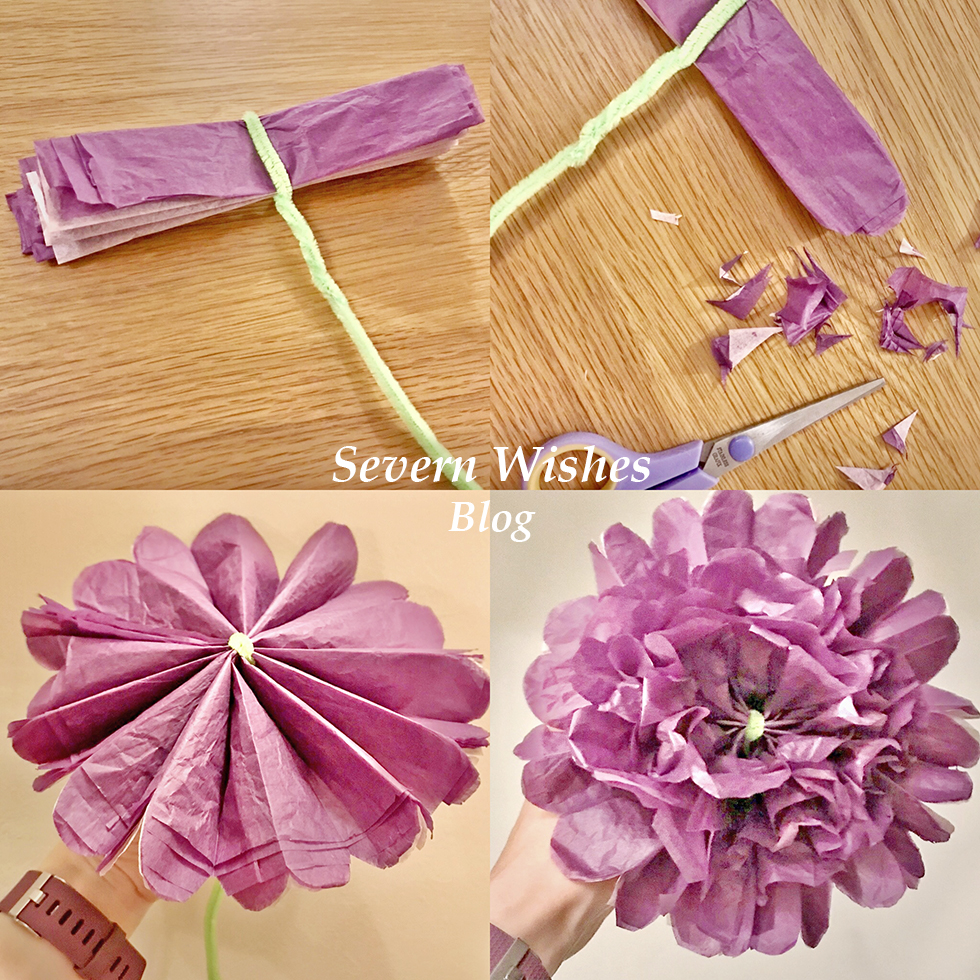
Lay out your tissue paper flat, you want to cut it into equal rectangles. Once cut you stack them one on top of the other.

Step 2. Fold the tissue paper stack into a concertina, like a fan, until it is all folded and flatten it down. Stick the pipe cleaner in the middle, folding it over and under the stack, then wrap the remainder of it around.

Step 3. Next you need to trim the edges of the tissue paper, you can round them off or make them pointed, it depends on how you would like your flower to look like at the end. This determines the shape of the petals of your flower.

Step 4. Once the ends are trimmed lay the flower concertina across your hand with the pipe cleaner part pointing down. You want to gently and carefully tease the layers of the flower up and out. Once they are all up spread them out and make it look like the petal layers of a real flower.

(There is a video tutorial on this on my Facebook page as well).

Check out my images below!

My Tips for Opening your Flower: Open the tissue paper out gently and carefully, you should start to see a fan shape at first, and then you can raise the inner layers of the flower, just start by pulling upwards towards the middle part where the pipe cleaner is so as to make the flower look three dimensional.

Step 5. When you are finished it should look like my images below. Bend the pipe cleaner a little to make it look like a flower. Fan the petals out gently to make it three dimensional.
Paper Flower Dimensions

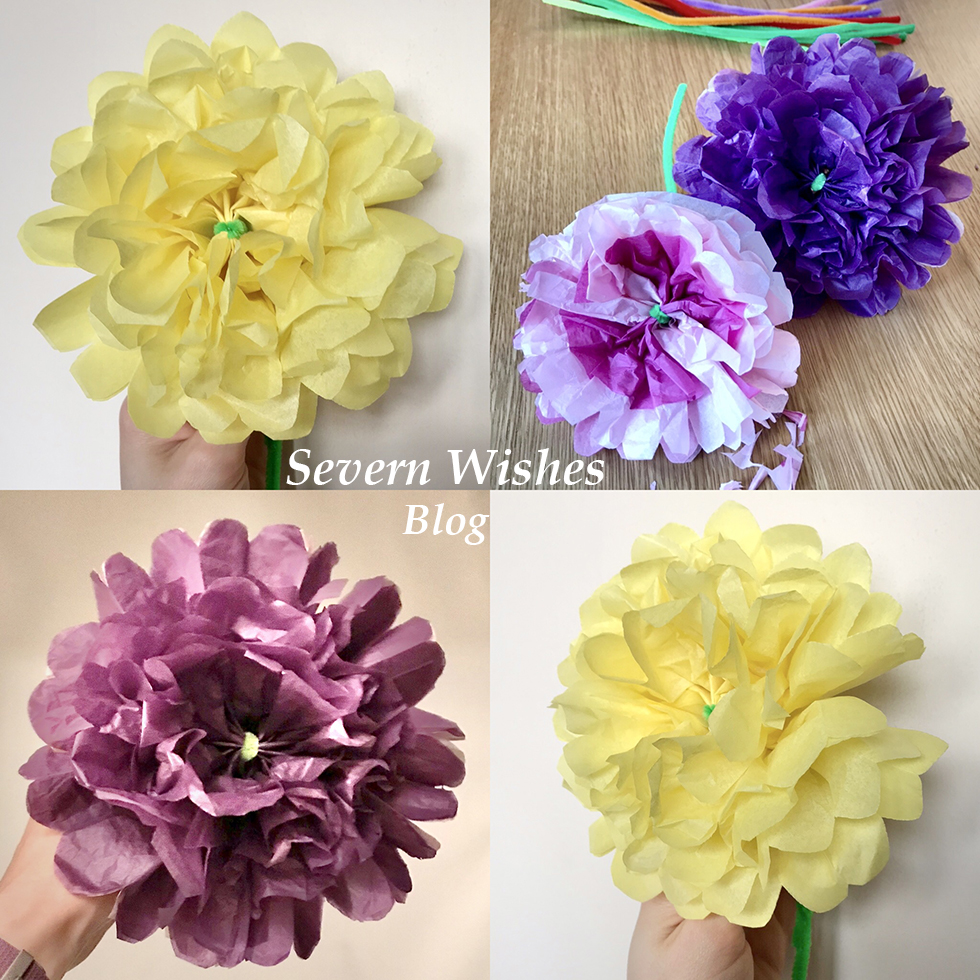
It depends upon how much you trim on the ends to create the petal shapes of your flower, but here are some rough dimensions of the size that your flowers will be. The larger the flower the easier it is to fluff up. Why don’t you experiment like I have below with different shaped petals and layering different colours of tissue paper too!

Rectangle Size 20cm equals a 17cm flower
Rectangle Size 15cm equals a 12cm flower
Rectangle Size 7.5cm equals at 7cm flower
HOW TO MAKE YOUR CARD – Happy Mother’s Day – Their Favourite Flower or Favourite Item

Step 1.
Work out what your loved ones favourite thing is, then you want to write the words Happy Mother’s Day either vertical or horizontal on the folded A5 card. You incorporate those words into the item, such as the stem of the flower, or the base of an item like a slice of cake. (See my photo below for inspiration).

Step 2. To make a flower you need to cut twelve identical coloured card petals. Layer them up on the card to make the flower, don’t forget the middle bit either.

TOP TIP 3. If you want the petals to all be the same cut one and then use that one to draw around to make the additional ones.

Step 3. Other things you could do include a slice of cake with a triangle piece of card decorated with smaller shaped pieces. Or draw an outline and let smaller children colour them in.
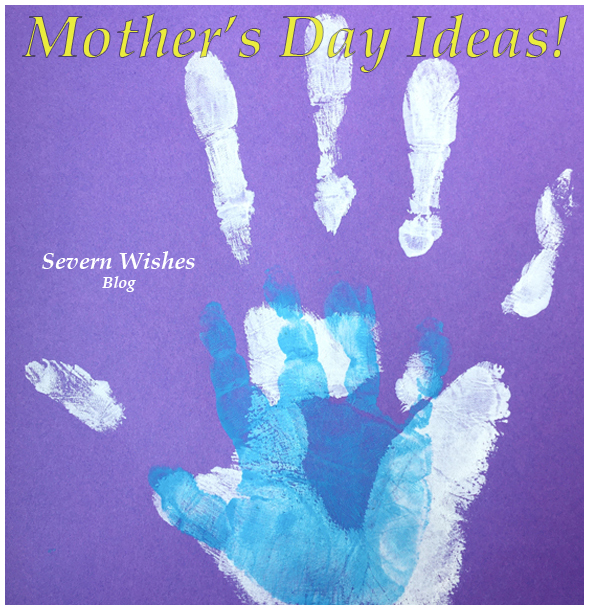
Another easy thing to do is a card of family hand prints.

Other Card Designs that are Easy to Achieve are…

Flat Flowers
Three Dimensional Flowers
Drawing Bouquet of Flowers
Family Hand Prints
Cake Slice Drawing
Favourite Animal

Use a Ruler and Pen to make the stem lines and the bow, colour them in with pens and draw little flowers on the end of the stems. I did daisy like shapes, but if you can draw better then me be creative with it! Do any colour combination that you like. Add some wording around your design like “Happy Mother’s Day”.

I really hope that you have enjoyed this blog post and find it beneficial. If you do make some cards I would love to see them! Please tag me on any of my social media using the hashtag #SabrinasArtandCrafts

Thank you and I wish you all a lovely Mother’s Day.

✩ Sabrina ✩

February 2021 Treatbox Reveal and Review

Welcome to the February 2021 Reveal and Review of Treatbox.

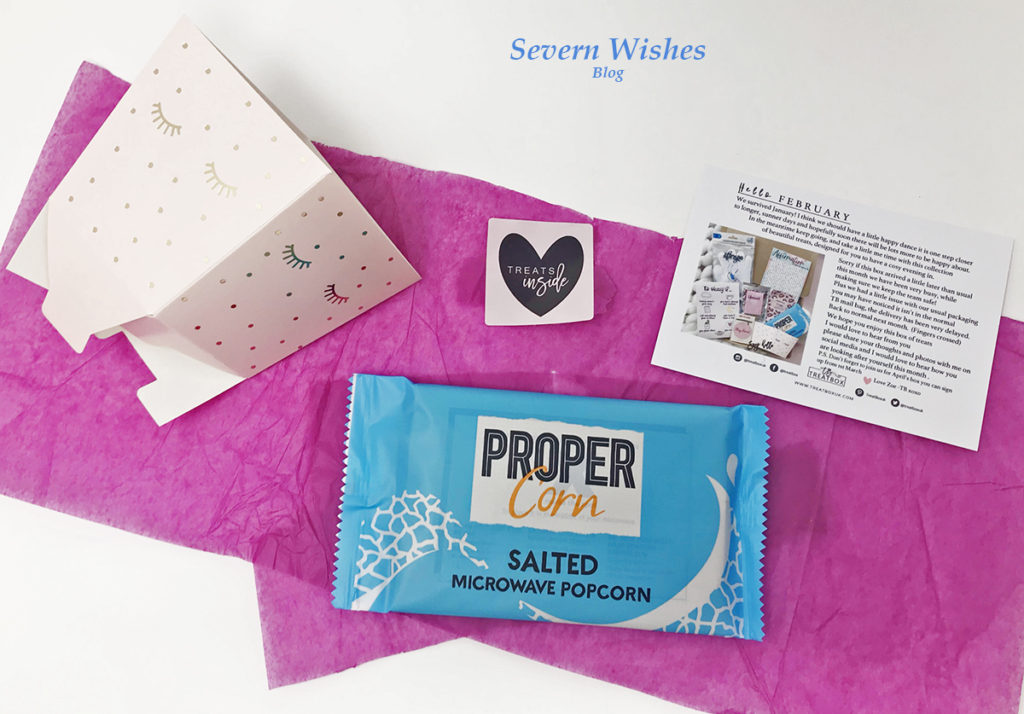
Here I am, photographing and reviewing the items within my 59th Box. My box of Treats arrived a little late this time around so I’m sorry for bringing this to you a little later into the month than I would have liked! Hopefully the March box won’t be too late and I would love it to arrive on my birthday!

What is inside the February Box?

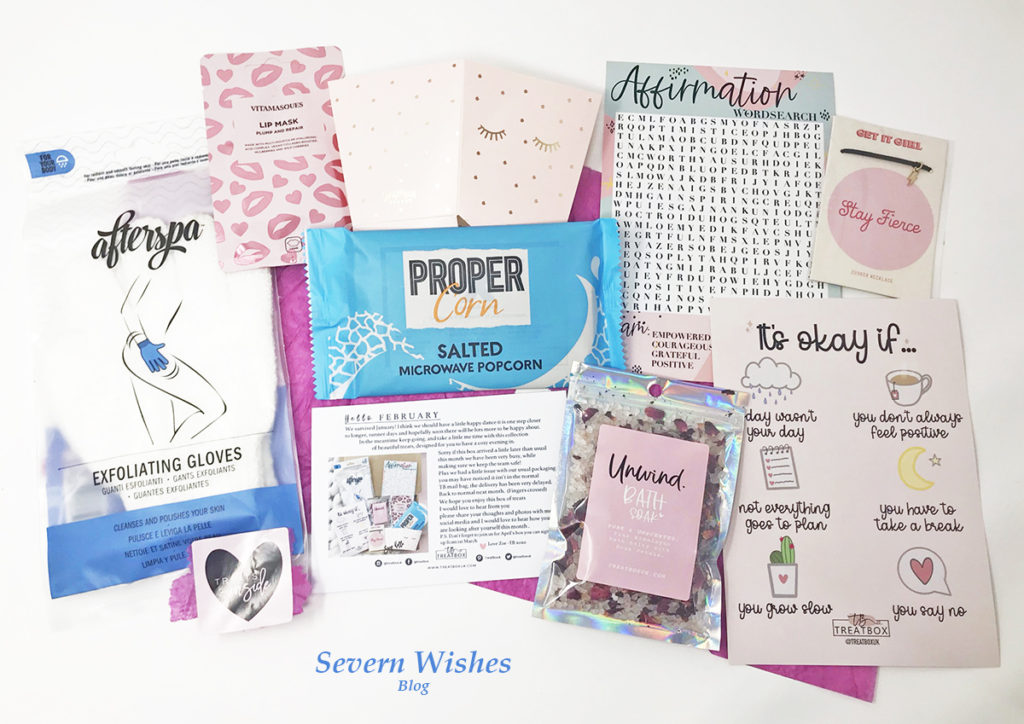
A “Ginger Ray” Pop Up Box to put Popcorn or Treats inside on Movie Night at home

Propercorn – A bag of Microwavable Popcorn

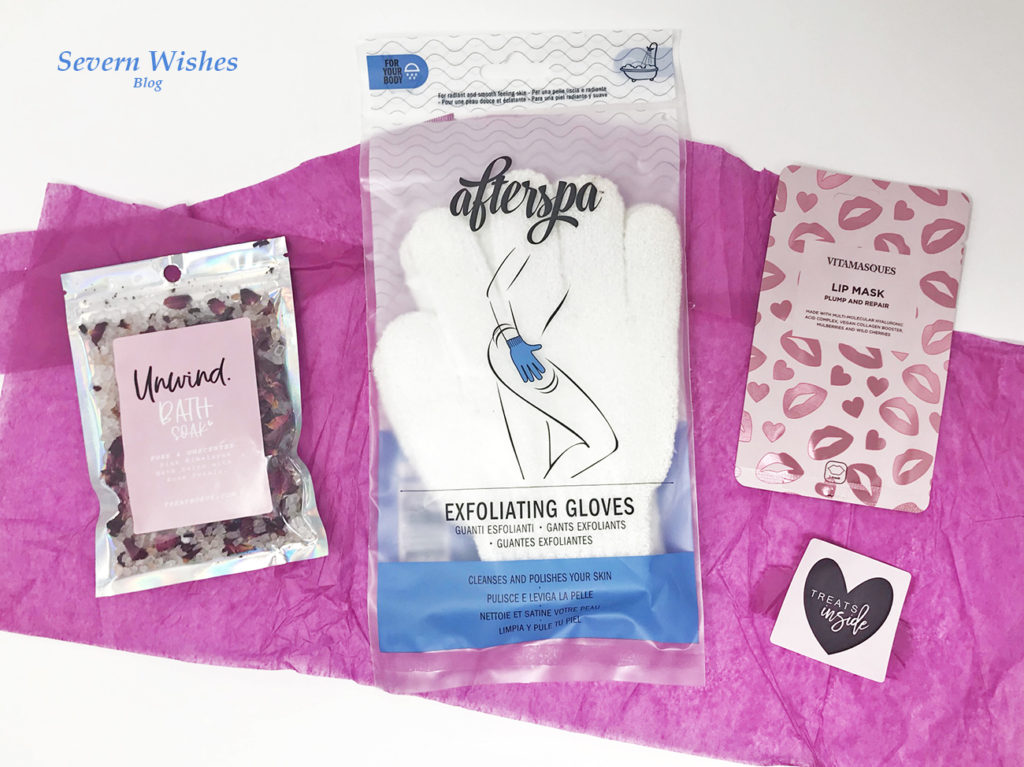
AfterSpa Exfoliating Gloves

Treatbox Print “it’s okay if…”

Treatbox “Affirmation Word Search” A5 activity sheet

Unwind Bath Soak

Vitamasques Lip Mask

Get It Girl – Choker Necklace – Stay Fierce – Lightning Bolt on a Leather Cord

My Opinions on the Box

I love that this box was all about relaxation and taking time for myself. I am saving the bath soak and gloves for this upcoming weekend when I will be dyeing my hair and having a relaxing bath.

The word search and print were both lovely and nice reminders that I don’t have to have my stuff together every day and it’s okay to take a mental health day or a self care Saturday!

I am really looking forward to box number 60 in March because it’s also my birthday! So it’s like an extra little treat to myself!

Did you know that you can view all of my previous Treatbox unboxing posts in this unique category of mine called ‘Treatbox’ it is specifically for these box reviews and reveals – Severn Wishes Treatbox.

Thank you for reading this Review and Reveal of the February Treatbox, I hope you pop back here again soon for the next one.

✩ Sabrina ✩

Argos Tester Review of the Chad Valley Bright Stars Pop Up Play Tunnel

I am fortunate to be an Argos Tester, this means that I often get items sent to me for the purpose of an online review. I test products and take photographs of them before submitting my findings and thoughts to Argos. For February I was offered Children’s Toys. I was excited at the thought of testing something that my young son would be a huge part of, and his opinions would matter during the reviewing process.

#ArgosTester #ArgosTesters #ArgosTestersCommunity

I have written this article about a product that I have been supplied for free, in order to test and then review it. This is my experience with said product and my honest review about the product which is listed below. I have already submitted my product review to the Argos Website when this post has been published.

My Honest Opinion on the Product

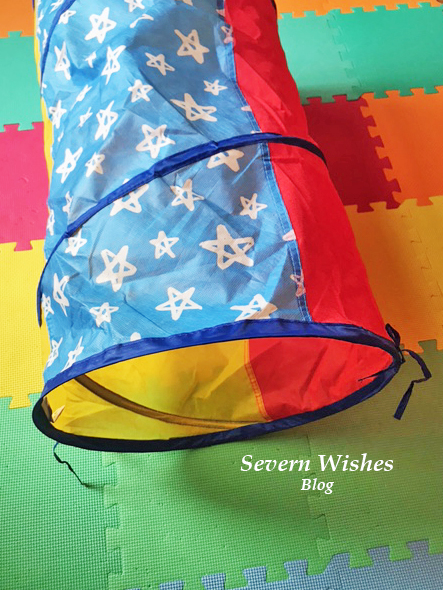
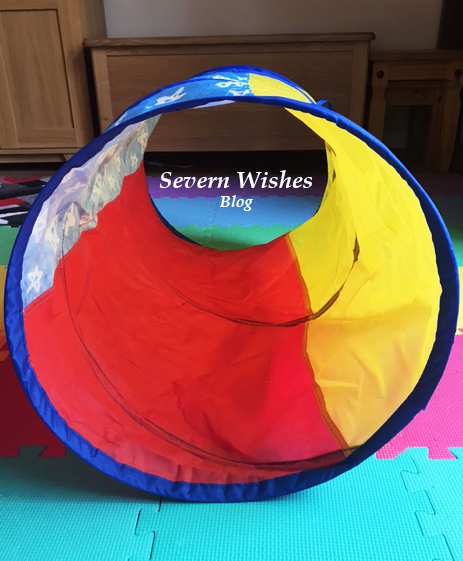
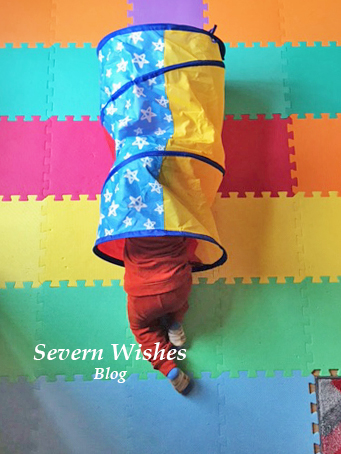
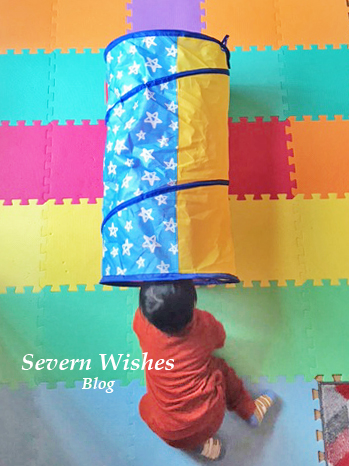
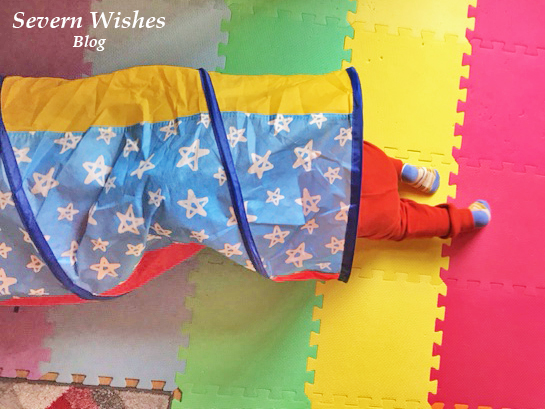
I have been rather happy with the overall look and quality of this product. The Pop Up Tunnel is something that doesn’t only entertain my toddler, but we can add learning into play and he also gets exercise indoors on poor weather days. It is bright and inviting and my son wanted to play with it immediately after I had set it up for him. I look forward to setting it up outside in the summer too on some outdoor play mats. I think it’s an excellent product for the price it is available at, and most children would have the imagination to be able to use it effectively. Because it folds away neatly it even fits into our large toy chest so it takes up no additional room. This product is ideal for any parents who may have a toddler or young child with lots of energy like mine. The best features are the ideal length (it is not too long to overtake your floor but long enough for a toddler to crawl through and have lots of fun), its bright colours and fun stars pattern, the genius tabs at either end so it can be securely fastened and put away for another day, and finally the imagination factor of it!

✩✩✩

Sabrina’s Top Tips for Using this Tunnel for Learning during Play

Once your child is used to the tunnel and is having fun with it, then there are several ways you can use it to increase learning while your child is playing. Words such as “Through” for them crawling through the tunnel is a good one, as well as “In”, “Out” and “Under”. You can also name the various Colours such as “Red”, “Yellow” and “Blue” and the “Stars” on the pattern too. See if your toddler can indicate which is which and say them back.

✩✩✩

Usage of the Product

The tunnel is made from material that is not waterproof, and is only wipe clean, so it is best used indoors and on a soft surface such as carpet, a rug or play mats. Keep food and drink away from it in my opinion. It will move around and slip easily on a wooden floor so perhaps look at where is safest in your home to set it up. Always supervise your child or children when using toys. The tunnel can be used outdoors in dry weather but I would suggest it was still set up on play mats still to avoid the material getting torn by anything sharp or pointed.

Product Name: Chad Valley Bright Stars Pop Up Play Tunnel

Product Details: A Red, Yellow and Blue Tunnel with White Stars. Ideal for children aged 2 years and over. Pop Up means it has minimal assembly required and also folds away neatly using the tabs at either end to secure and store reasonably flat. It is advisable to supervise children at all times while using this toy tunnel and to keep any sharp toys or furniture away from the material to prolong use. It can be used indoors or outdoors, but should only really be used on a flat and soft surface indoors, ideally set up on play mats or carpet. Due to the nature of the material it should be stored appropriately. Play Mats that can be set up outdoors is also a good idea when planning to use this outside because this tunnel is not waterproof.

Product Dimensions: H42cm W80cm D42cm

Product Description: Ideal for bringing children into a world of imagination. This tunnel can be anything they want it to be, and you can also use it with other items such as when children want to build a den for example. A tunnel to a secret dinosaur world, a secret passageway out into the world of spies… this can be whatever your child can dream up.

Argos Website Link: Chad Valley Bright Stars Pop Up Play Tunnel

Argos Website Price: £8.00 (Correct as of 14th February 2021)

My Argos Tester Review Submission

My son was over the moon with this bright & fun tunnel he loves anything with stars on. It took no time to set up & easily packed away again, tabs either end secure it together almost flat so storage is no issue when not in use. A lovely item filled with possibilities with a bit of imagination, good for learning, teaching & great exercise on days we can’t get out of the house.

If you are interested in finding out more about this product then please click the link above in my Product Details section to go to the Argos website.

Thank you for reading this review, have a lovely day.

✩ Sabrina ✩

Introducing Children to Nature with Fun and Games

There are many ways to introduce toddlers and young children to nature. No matter where you live there will always be something to see. So here are my top tips on how you can start showing off the nature where you live, to your children. It’s never too early to start learning!

And I am sure that David Attenborough would agree with me when I say that “You’re never too young or too old to learn about the world around you”.

By making things fun children are more likely to learn and remember the information you are portraying. You can still stay safe at home but enjoy nature around where you live by keeping to social distancing guidelines.

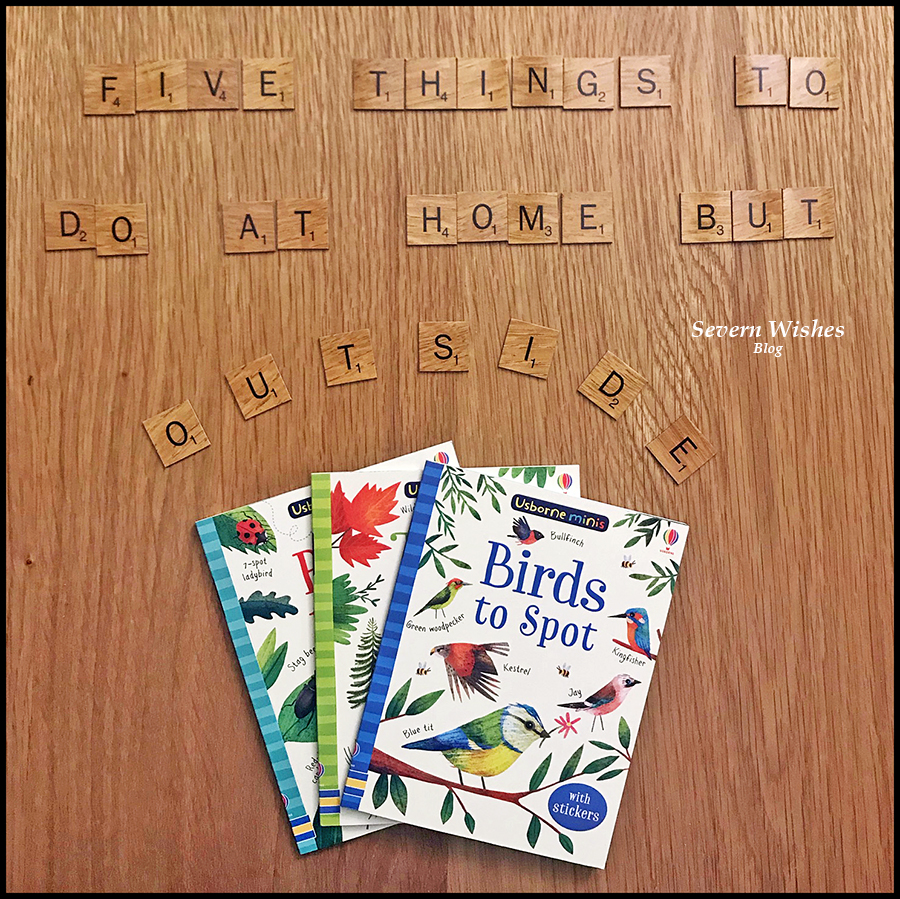
Here are my Top 5 things to do at Home but Outside! Be it in your Garden or if you don’t have one you could just go on a Walk around your village or town or park. It may be lockdown but that doesn’t stop you walking socially distanced from other families.

Children are more likely to learn and listen if you turn things into fun and a game. So why not make your own games up, or take a look at my ideas below.

1. Bird Spotting
2. Bug Finding
3. Pick a Creature – Try To Find It
4. What Is That I See? What Is Around My Home
5. Eye Spy Lockdown Edition

1. Bird Spotting is easy enough to do, take a notepad and pen with you and write everyone’s names at the top. Make columns down the page and write down every different sort of bird that you spot. The person who spots the most species of birds is the winner!

2. Bug Finding is great fun in a small space, depending on how old your children are you could just spot basic bugs and say things like “Beetle” or “Spider” or you can go into what type of bug you are looking at such as “Stag Beetle” etc. You could even ask little ones to draw what they saw on the walk from their memory when you get back home.

3. Pick a Creature is a great game to play with children who already know what certain animals are. Take a walk and get everyone to pick something, one person might count Crows, the other Cats, another Pigeons, but whatever it is they have to keep score of their creature until you get home.

4. What is that I see? Use your knowledge of things around where you live and discuss things with your children like the seasons, if there are evergreen trees, what colour the flowers are you can find, any buildings and their purpose etc.

5. Eye Spy Lockdown Edition is literally eye spy but your children are only allowed to pick one type of thing during your walk. You could say just birds, or just objects, whatever is best for your children’s age.

Books I Recommend

I recently invested in several books for my son who is two and a half. He is interested in matching things up lately so I thought books with pictures of things to spot when we go out for a walk are ideal. I also have a number of nature books I have collected over my lifetime, anything with large pictures and easy to see nature depicting scenes are engaging for most children.

“Usborne Minis” are Great little books ideal to carry with you on a walk, and they have a range so you could pick which is most relevant to you and where you live, for example Birds, Trees or Bugs. There are always National Trust books and also RSPB for birds. Another great book I own is the DK Pocket Nature Wildlife of Britain book, it’s a few years old now but has excellent photography and information about British wildlife.

Of course you can always use a search engine on your phone to find out what you’ve seen, but the joy of these sorts of books is being able to mark things off when you have spotted them. The Usborne Mini book set have stickers for you to place on a grid inside the book in order to tick them off. This is great because you also have to identify the sticker as well as the creature or tree for example. Simple but it’s still learning at its best.

Thank you for reading this post today, I hope I have inspired you to get out and about in your area with your children (or just your other half). I have many more lockdown friendly ideas coming up over the next few weeks, so please check back another time if you enjoyed this post.

Have a lovely week!

✩ Sabrina ✩

Argos Tester Review of the Russel Hobbs 25400 Colour Control Steam Iron

I am fortunate to be an Argos Tester, this means that I often get items sent to me for the purpose of a review. For November I was offered technology related items. I was excited at the prospect of testing something that would be so useful to me with my writing.

#ArgosTester #ArgosTesters #ArgosTestersCommunity

I have written this about a product that I have been supplied for free, in order to test and then review it. This is my experience with said product and my honest review about the product listed below. I have already submitted my product review to the Argos Website when this post has been published.

My Argos Tester Review

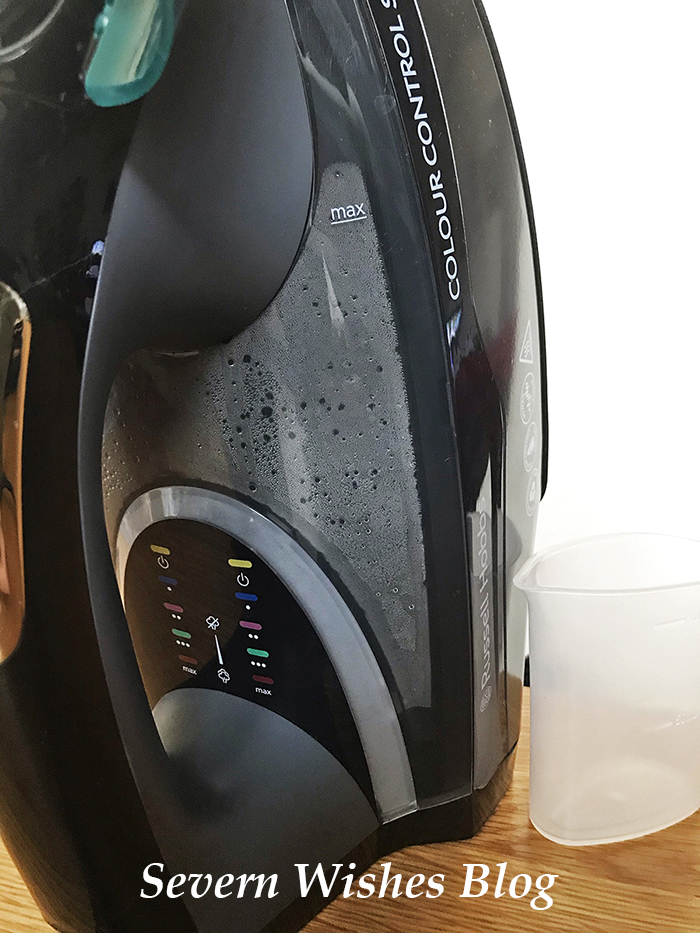
The functions on this iron are useful & time saving. It heated up really quickly & the colour changing variations aid your choice in setting. The ability to steam iron or dry iron is useful, as well as a handy self-cleaning feature. When using the iron I found it comfortable to hold despite it being fairly heavy, & it was sturdy when stood on its heel. The colour settings help take the guess work out of how hot it needs to be.

Product Details: A 30 Second Heat Up Time, Metal Plate Iron with Ceramic Coating. 3100 Watts of Power and a longer than usual Power Cord.
Product Name: Russel Hobbs 25400 Colour Control Steam Iron
Product Price: £54.99
Product Link: Argos Website Russel Hobbs Irons
Product Information from Argos:

  • Steam output: 50g/min.
  • Shot of steam: 180g/min.
  • Non-stick ceramic soleplate with button groove.
  • Capacity of water tank: 380ml.
  • Water spray button.
  • Anti-drip system to protect your clothes from water spillages.
  • Anti-scale for hassle free maintenance.
  • Self-clean function to prolong the life of your iron.
  • Variable steam function allows you to adjust the humidity, direction and power of the steam flow.
  • Vertical steam function allows you to use the iron to steam creases from hanging garments or curtains with ease.
  • Features a steam tip for easier removal of creases from difficult to reach areas.
  • Auto shut-off feature automatically turns off your iron when not in use or when knocked over.

My Honest Opinion on the Product

I have been very impressed by this Steam Iron. Having not used one or owned one before I wasn’t sure how much it would differ from a regular iron.  And wow have irons come on leaps and bounds since I last had a new one! With an Auto Shut-Off function, multiple light variations to aid use and the choice of steam or dry ironing, this appliance literally has it all. It is quite heavy but then it needs to be.

If you are interested in this product or similar irons then please check out the link above to go to the Argos website.

Thank you for reading this review, I hope you have found it useful.

✩ Sabrina ✩

A Week of Positive Things – Sabrina’s Tips for having a more Positive 7 Days at Home

A Week of Positive Things

Sabrina’s Top Tips for having a more Positive 7 Days

Everyone seems to be feeling a bit low lately, it’s bound to be the Winter Blues mixed in with everything to do with the Pandemic. There are so many people who have found themselves working from home again, and many young people who are studying at home again too. With all this time stuck at home there are lots of anxious feelings and negativity, so I’m here with some suggestions to try and put a positive spin back into your home environment!

So here is my solution to tackle the blues, try to take half an hour out of your day as a family unit, every afternoon for the next week, after work is over and after the schooling is done for the day. Pick one of these ideas of mine to do together, a different one every day in any order you like.

I guarantee they will have you feeling more positive by the end of day 7! You can do them in any order you like! Or do one of them twice if it’s a hit! If you play along please comment on this post or on my socials at the end of the week and tell me which activity your family preferred and whether these activities did in fact work for you and increase your family’s positive attitudes.

  1. Go for a Walk (Weather Dependent) and play a game as you go! Ideal for parents with younger children who are still enthralled by the nature of “eye spy”. But the fresh air and endorphins combined should make all of you feel better too. Older children may want to go for a jog or a bike ride if that’s more your thing, so long as it’s half an hour outdoors with your family, all together.

  2. Watch a Funny TV Show or Cartoon. Laugher really can help you to feel better, even for a brief moment, so why not stick on a tv show or a favourite cartoon that never failed to make you laugh and giggle together. Tom and Jerry is a good one!

  3. Bake or Make Something Delicious! I have a ton of recipes on my blog and some don’t even take that long to do. So why not make some chocolate crispy cakes or even some rocky road, something simple and even something that doesn’t require baking to save you time! Then you’ll have a tasty treat for a few afternoons to come! See what you’ve got in the cupboard! Here is my baking section HERE.

  4. Get Creative. You can do one of two things with this creative activity depending upon the age of the people in your household. Either, do a rotating draw-off where by you each start with a piece of A4 paper and one coloured pen (all varying colours) and you keep rotating the papers every minute, do this until 4 minutes is up. Everyone should’ve drawn on each of the pieces of paper. No talking! See what you’ve come up with! Share them with me on social media! #SabrinasCreativeCrafts
    OR
    You can play the Sentences Game. The idea is to make up a creative story, it should be funny, and you once again rotate the papers. This time you want long strips and not A4. Cut a vertical A4 in half twice or get your strips. Once the first minute is up and the first sentence has been written, you all fold over the section and pass it on. When the time is up you each open up the papers to find a story.

    For example;
    There once was a man who couldn’t find his shoes.
    I think I want some KFC he thought.
    He headed off in the direction of the sunset.
    In the end his dog ran away and joined the circus.

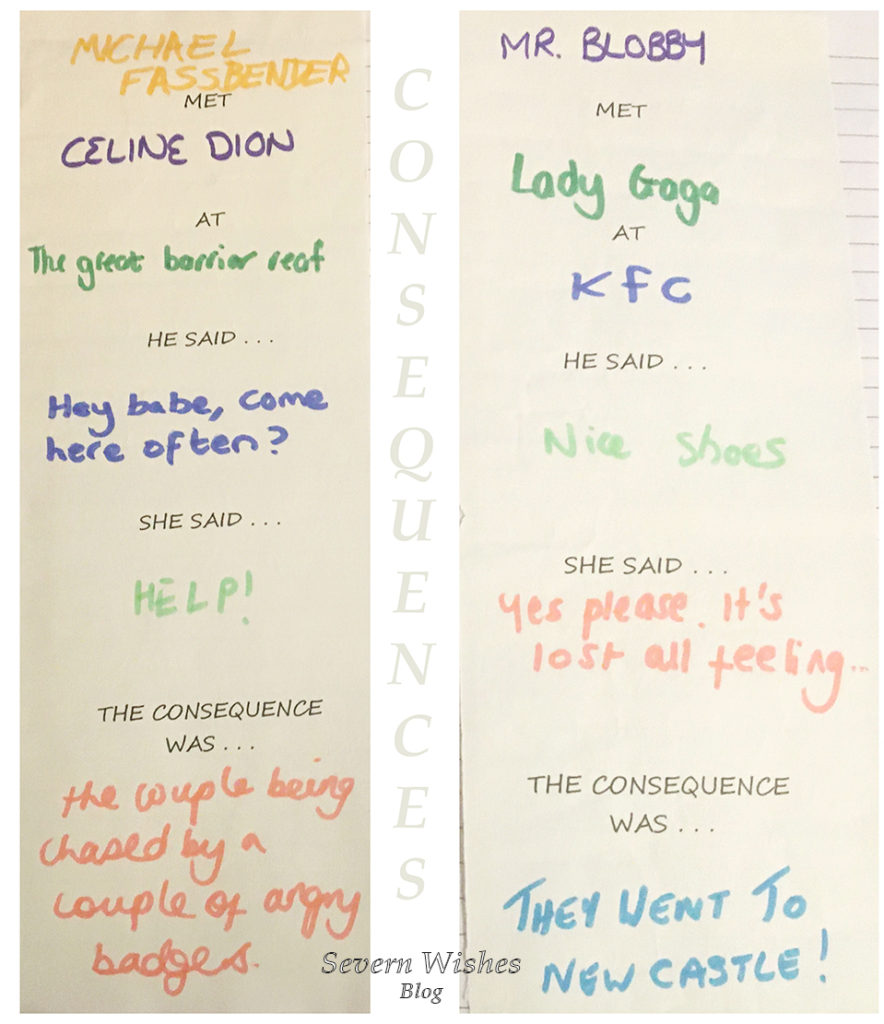
    If you have teenagers then you could play the game another way, this is called CONSEQUENCES, you start by writing on each of the papers the following things, add extra if you have a large family so that everyone will get a go at each section when the papers are passed on. They usually go like this…
    ___
    Met
    ___
    At
    ___
    They said ___
    What happened next was ___ OR The Consequence was ___

    Then unroll it after everyone has had their turn and the sections are completed, then take turns in reading them out. See my photo below this list for an idea of what it would look like when you finished! Warning my examples may cause laughter!

  5. Photos! Another fun thing that would brighten your spirits is to look back at any photo albums that you have or digital slideshows. You could even play a game while you look through them. Every time that your mum is seen with sunglasses on she gets a point, each time someone hasn’t got their hat on when they should you lose a point! First person to spot the water in the photos gets a point. Etc etc! Make up some rules before you start and say that the first person to 10 points gets out of doing the washing up tonight! Or the winner chooses what’s for dinner the next night! Involve one another in every day things.

  6. Write a List of Goals and Aspirations for 2021 – but only write the do-able ones! For example, I want to bake a cake for mums birthday. OR I would like to walk a mile on the next weekend that is dry and sunny. When you achieve something, even if it’s a little thing, you feel so much better about having accomplished it. Setting some realistic goals now for the year might seem silly when we don’t know what’s around the corner, however even if the goals are just for the people in your bubble, it’s still doable. Put them up on your fridge or board and tick yours off when you have completed it.

  7. Make a Meal Together. No matter how old you all are there is something fun about making dinner together. May I suggest something that everyone can get stuck into such as Fajitas, Curry, Sausages and Mash or Lasagne (dietary requirements permitting). I have tons of recipes on my blog if you need inspiring! But making and preparing food together before you eat it can be a real bonding experience, and it can also be important for teaching younger children where foods come from or that by mixing this with that you achieve this outcome. Food is something that has been so important during the first lockdowns so I thought I would continue on with that and try and get you back into your kitchen to make something you love together. Check out my Recipes HERE.
Why Not Try And Make My Delicious Cookies? Click the link in section 3 for the recipe!
The Consequences Game – Imaginative Fun for the older children in your family.

I really hope that you’ve enjoyed this blog post and that you would like to participate in my week of positivity. If you do participate in any of them or attempt to get those in your bubble to do so, then please let me know how you got on! I can’t wait to see if you make anything as well 🙂 tag me online! And thanks for joining me!

✩ Sabrina ✩
Severn Sabrina Instagram
Severn Wishes Blog Facebook
Sabrina of Severn Wishes on Twitter

January 2021 Treatbox Reveal and Review

Welcome to January! It’s 2021 and the start of a brand new year!
Thank you for joining me!

A bit of background before I begin this Reveal! I was in two minds on whether or not to maintain my subscription to Treatbox this year, but with my birthday being in March I figured I would give it three more boxes. If the standard of items didn’t improve by April I would then consider cancelling. This Reveal of January 2021 is my 58th Box!!! How mad is that?!

But! I have been subscribed for years now and I love the box coming through my door each month. But sometimes I have found items to be verging on use by dates or products being repeated and I just don’t see how that is worth the money. If I were happy with the majority of items every month it would be different. So we shall see what the next couple of months bring! It has been a nice surprise to receive during lockdown and a positive pick me up, so I am just hopeful that the boxes get better! I used to love the themed boxes like they were during the first year or so…

So what delights were in the January Treatbox?

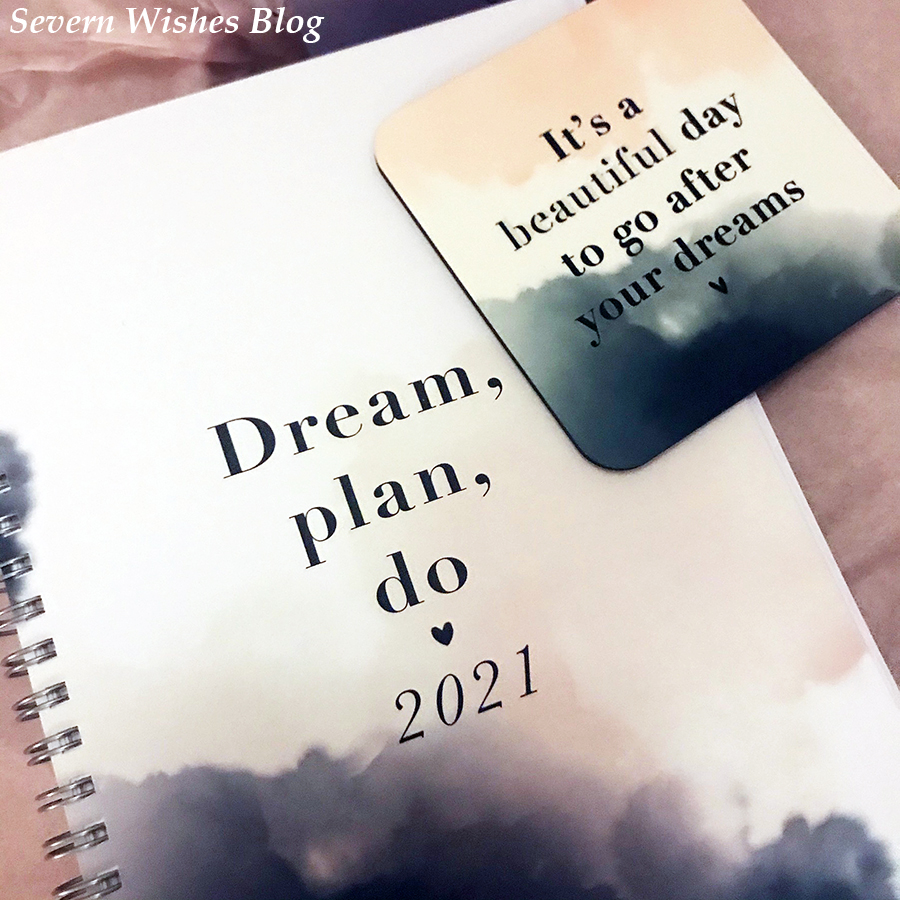
Dream, Plan, Do. 2021 Diary

Square Treatbox Original Print “I am loved. I am enough. I am strong.”

Coaster “It’s a beautiful day to go after your dreams”.

Happiness Bingo Card – Cross Them Off As You Go Through January

Whittard Salted Caramel Hot Chocolate Sachets 2 x 20g

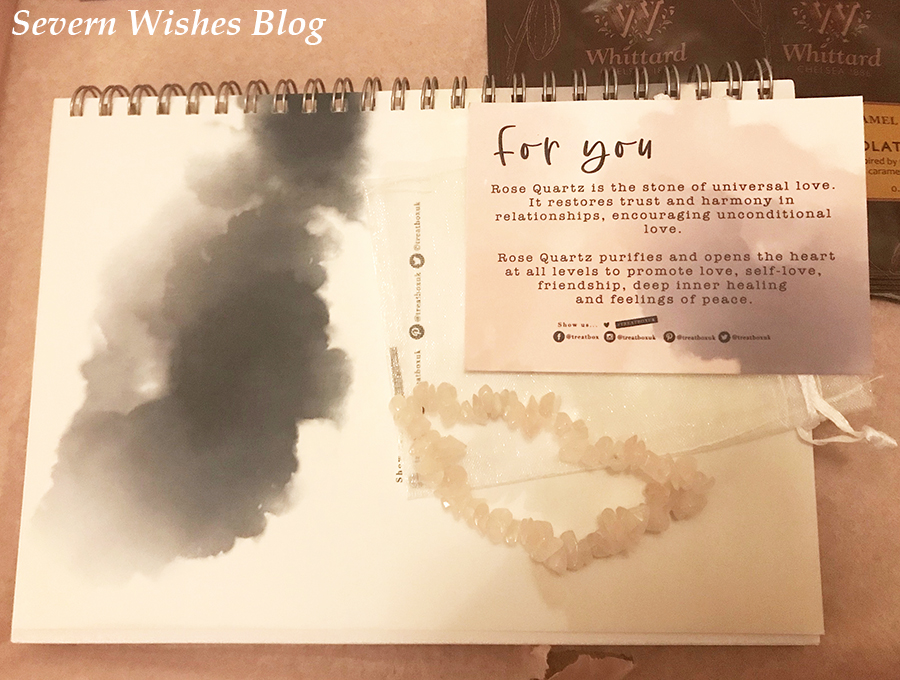
Rose Quartz elasticated Bracelet

“You’re Doing Amazing” Biscuit


Did you know that you can view all of my previous Treatbox unboxing posts in this unique category of mine called ‘Treatbox’ it is specifically for these box reviews and reveals – Severn Wishes Treatbox.

My Honest Opinion on the January Box

I really loved the quality of the diary and I look forward to using it throughout the year. The coaster is also very useful and also a beautiful design. Two lovely objects to enjoy in 2021. The bracelet was also something entirely new and unexpected and is a really nice item too.

The hot chocolate sachets are something that has been included in a box recently in the Autumn (October Box), and the use by dates on mine are less than a month use by February 2021. So they will need drinking fairly soon to be enjoyed at their best.

I have yet to enjoy the biscuit but plan to do that with a cup of tea this weekend actually! I shall pop up a photo on my socials and let you know what I think!

The Happiness Bingo is a nice idea for everyone to tick off during the month. The square print is beautiful and something I would consider framing in the future.

Thank you for visiting Severn Wishes today, I hope you have enjoyed this Review of the January box! Wishing you a Happy New Year!

✩ Sabrina ✩

Argos Tester Review of the JLAB Talk Pro USB Microphone and it is an Awesome bit of Tech

I am very fortunate to be an Argos Tester, this means that I often get items sent to me for the purpose of a review. For November I was offered technology related items. I was excited at the prospect of testing something that would be so useful to me with my writing.

#ArgosTester #ArgosTesters #ArgosTestersCommunity

This post has been written by myself about a product that I have been supplied for free, in order to test and then review it. This is my experience with said product and my honest review about the product that is listed below. I have already submitted my product review to the Argos Website when this post has been published.

Argos Tester Review

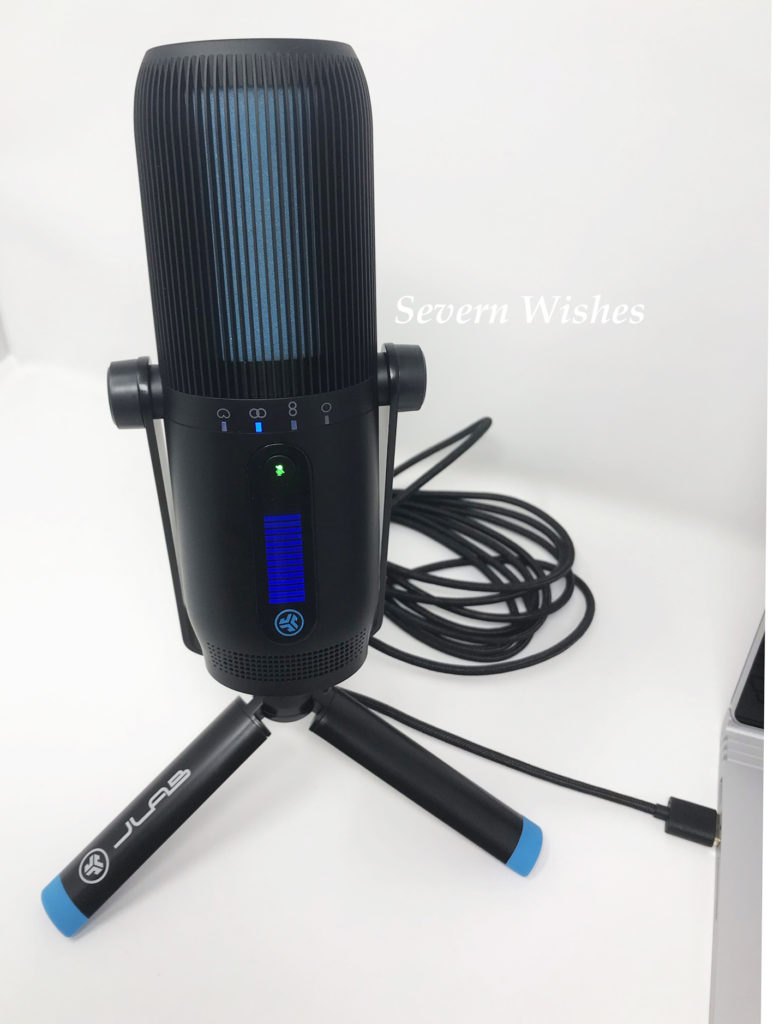
The Talk Pro is a professional piece of tech that is simple to set up & easy to use. It looks so stylish with the black & blue design & has varying modes for different types of sound streaming & recording. I have used this microphone with a speaking voice, singing voice & a narration type of use. The microphone sound on playback was clear & of excellent quality. Overall I am hugely impressed  by this tech & I will be retiring my four year old current mic in favour of using this one, the quality surpasses anything I already owned.

PRODUCT DETAILS

Product Name: JLab TALK PRO USB Microphone

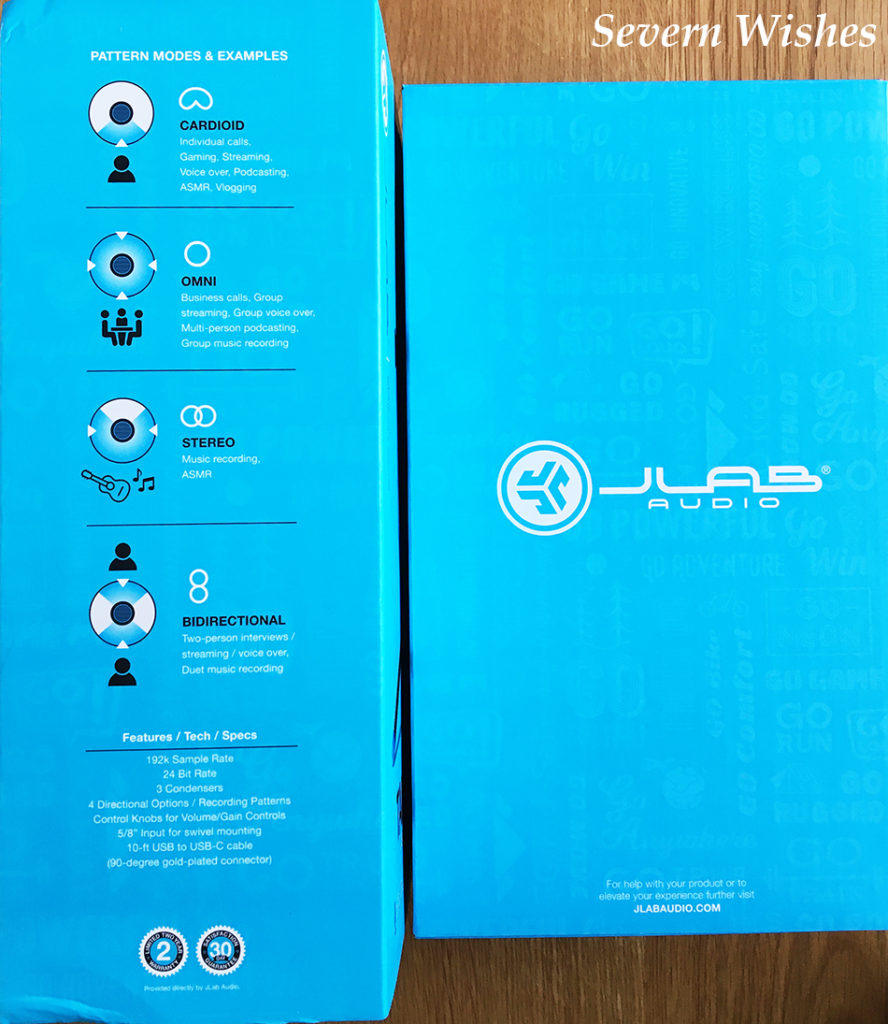
Product Information: The Ultimate Professional Microphone. This piece of tech has 4 Different Pattern Modes and 3 Condensers that suit all types of microphone usage. This is ideal for Streaming, Gaming, Narration, Singing, Meetings, Duets, Dual Voice Synchronisation, Recording Music and / or the Voice. With Volume and Gain controls and easy to use buttons and levels, it is simple to set up and use. With a 3m long cable, and a USB connection this Mic can be set up quickly for a wide range of reasons.

Product Price: £149.99 (RRP)

Product Link to Argos Website: JLab Talk Pto USB Microphone

My Honest Opinion and Thoughts on the Talk Pro

The JLAB Talk Pro Microphone is both professional looking and clear sounding. I have tested this thoroughly with Narration over video, simple voice recording, singing into the microphone and more. As a blogger and gamer a piece of equipment like this is essential for good video editing. I’m very lucky to have gotten the opportunity to have this particular product.

What I really like about the Talk Pro is how sturdy it is. Inside the box you receive a base for the microphone, this is not only strong but easy to attach and assemble to the microphone itself. You gently pull the legs of the base away from one another until you can stand it up on a flat surface. It looks very professional once it’s all set up.

I like that the colour scheme of Black and Blue compliments the design of the microphone, such as the Blue lights indicating volume and which mode you are using, in correlation to the Blue accents on the physical piece of equipment, such as the base tripod. An aesthetically pleasing piece of tech.

The sound quality during both streaming and recording whilst using this device is hugely impressive. I have a four year old mic from another brand which has served me well for my blogging years so far with creating video narration and things. I have now discovered however, after rigorous testing on my part, that the quality of sound from the Talk Pro is on a totally other level. Not only is there clarity but it picks up everything in a quality that, even when being recorded, is maintained throughout the piece, be it speaking or singing.

Overall this piece of technology is simple to start using for anyone who needs a clear way of getting their voice heard and recorded. Great for multiple uses such as work as well as hobbies. I am very satisfied with the product and highly recommend it for anyone who relies on a good microphone quality on a regular basis.

Thank you for reading this review, I hope you have enjoyed it. You can purchase this product or read more about it by looking online from Argos, I have left the link in the product description above. If you have any questions about it please leave me a comment below and I will do my best to answer them.

✩ Sabrina ✩

Sabrina’s How To Make Your Own Unique Gift Tags This Festive Season

I have always had some creative flare, but one thing I had never done before was to make my own Christmas Present Tags! I came up with lots of ideas while spending time at home.

I took the plunge this November and ordered the things I would need to design them. I already had two awesome sets of Staedtler Pens in both fine line and bold. I also had various sequins. But I needed the tags and the string. I tried my best to use natural string and cardboard that was made from recycled materials.

What you could do if you can’t get any of these brown tags, is to cut up some old Christmas Cards and make them into similar shapes like these, add things like sequins in order to sparkle them up.

String Christmas Lights

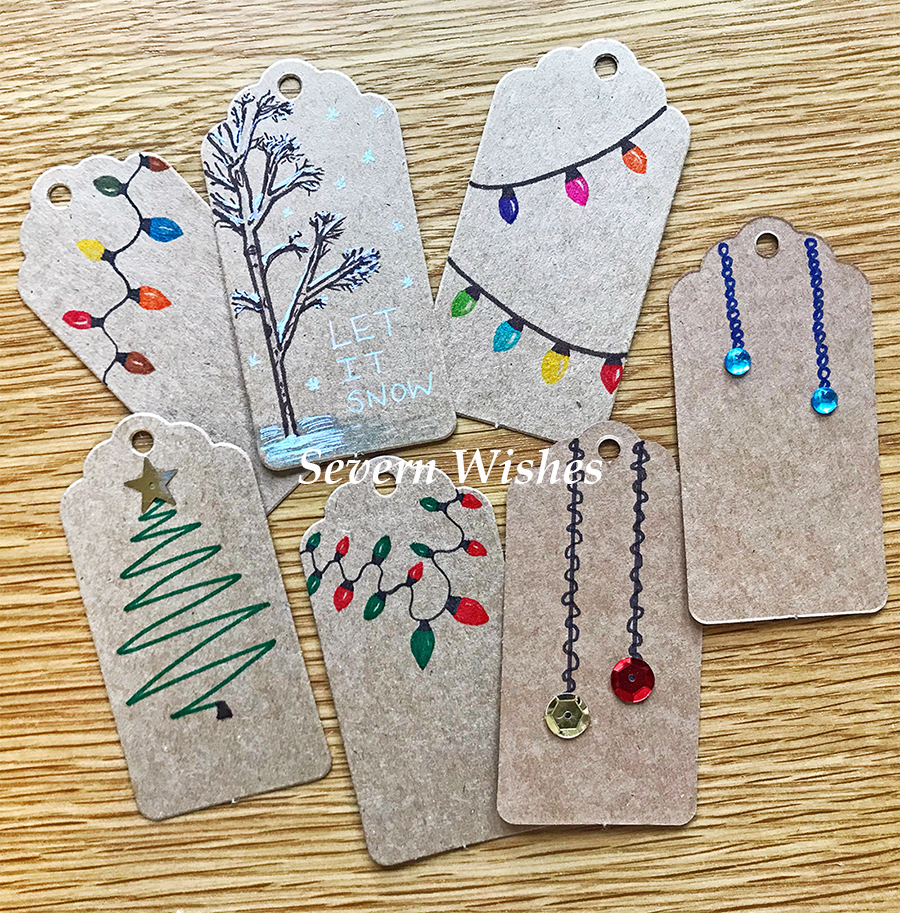
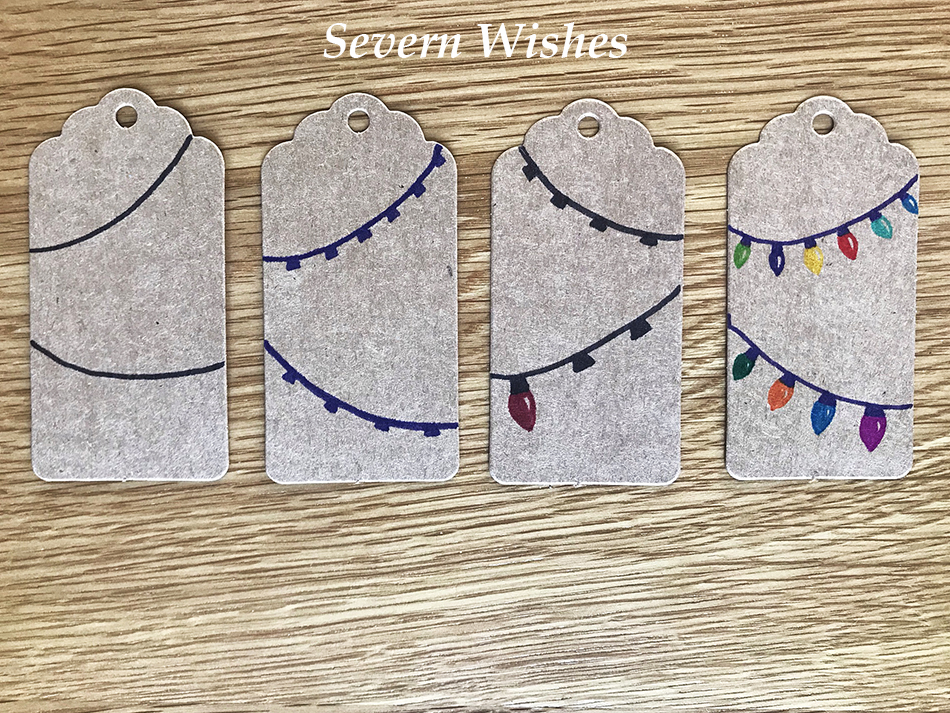
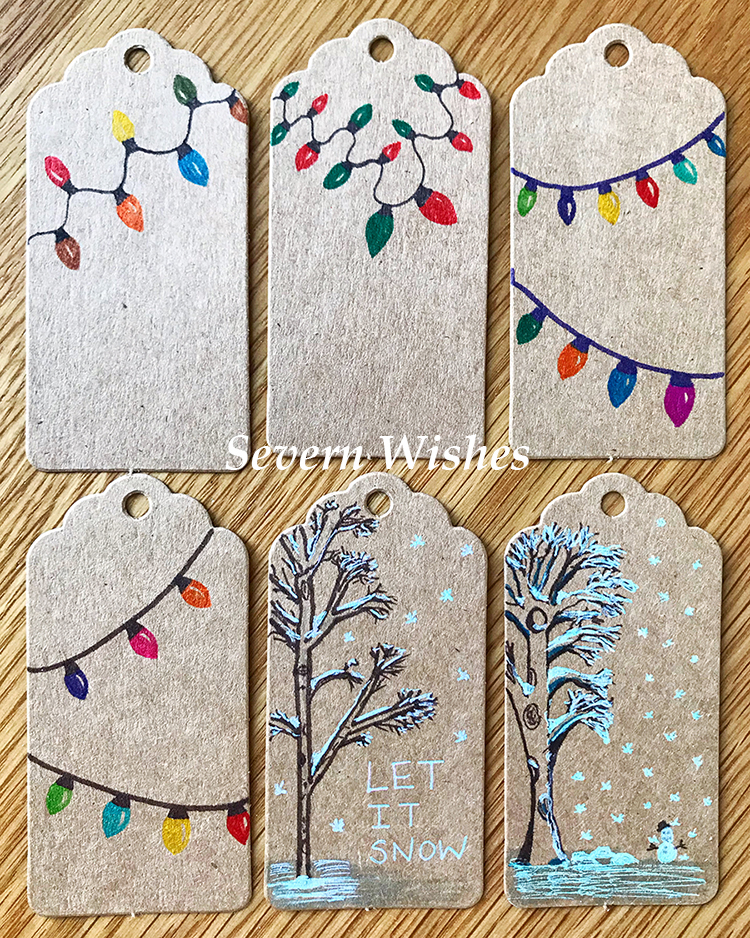
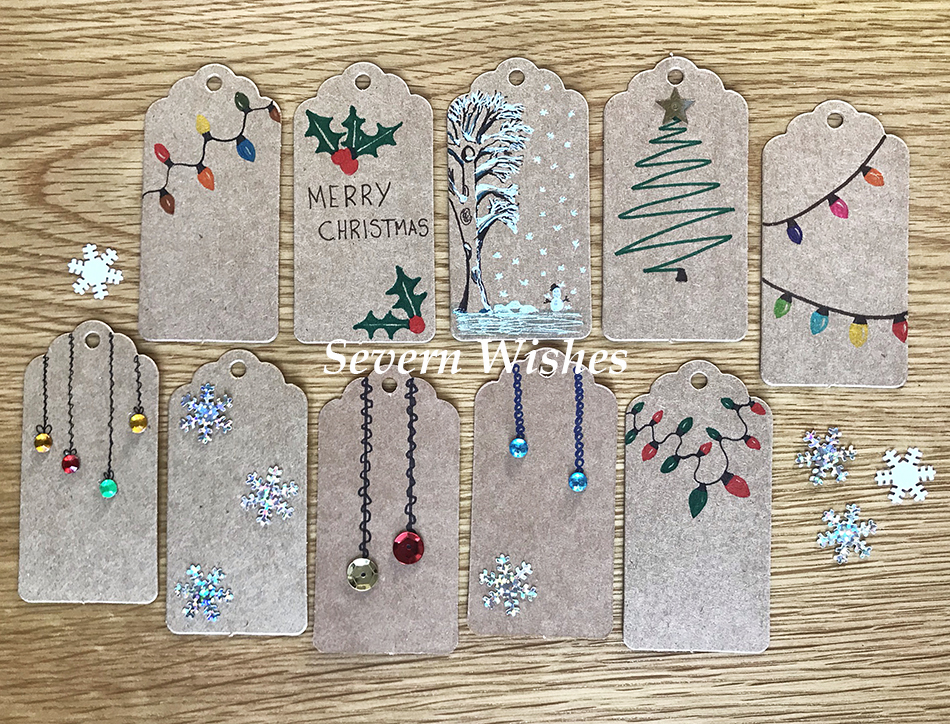
The easiest of all my tag designs to make, you will need both thicker pens and fine pens of the same colour. The trick is to create the light shape with the finer pen and then colour it in with the same thicker style pen after. Make sure you leave the small crescent shape on one side of each light bulb so it looks three dimensional.

Begin by drawing the lines and bulb attachments with one pen, dark colours work best for this part. Then choose the pen colours you want for your bulbs. Ensure you don’t put the same shades next to one another and alternate colours like Red and Green for a Christmas look.

The size of your bulbs will depend on how many you want to do across your tag. If it’s just lights and no writing then you can fill up the space. If you plan to write “Merry Christmas” for example then perhaps do the lights top and bottom of the tag and leave the middle area blank.

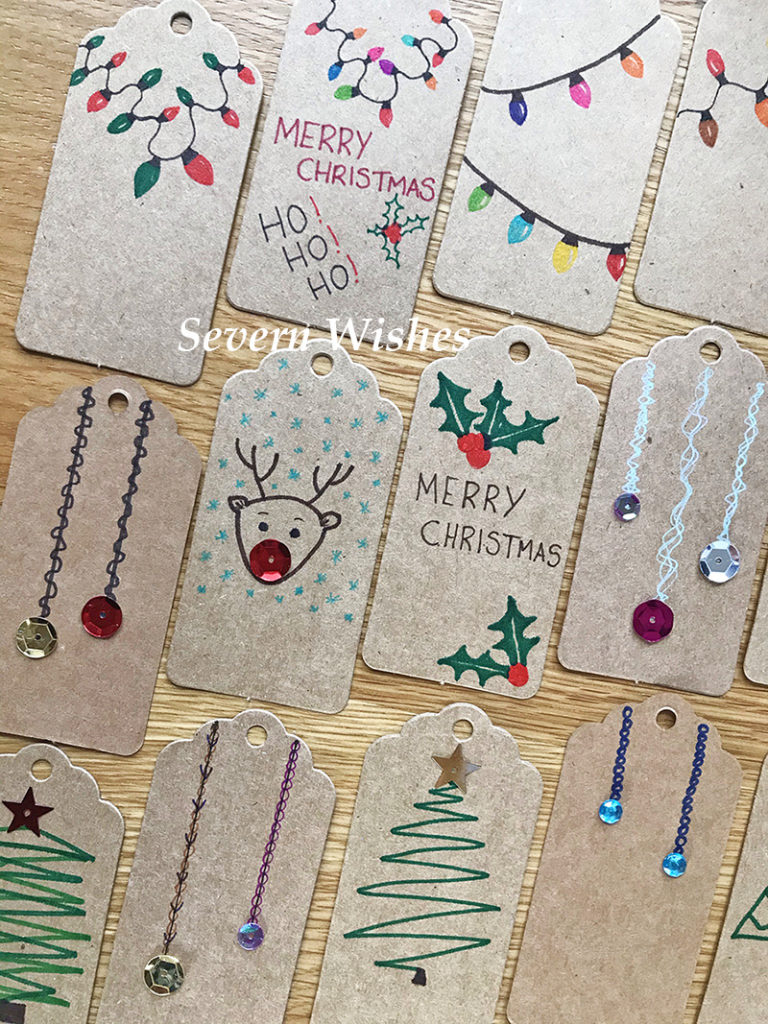
Check out my images for some inspiration. Give it a go on a piece of plain paper and decide which way to do your bulbs, before doing them on to a tag.

Snow Scene with Tree

If you aren’t very good at drawing then you can still achieve something like this tag, just take your time and follow my instructions.
Check out my videos on my Facebook Page too!

You need a brown pen, the finer the tip the better, and you want to start by drawing the outline of your tree. Fill in the branches afterwards, getting smaller to the ends. Next to add a 3D aspect to your tree draw circles for holes and darken undersides of larger branches and the trunk to add shadows. Use a silver, white or light blue mixture of pens now to create the snow. You could do a snow scene or just do the tree. Be creative and have fun! Look at mine below for some inspiration.

The Christmas Tree

I quite like the abstract or deconstructed Christmas Tree type of tags. Mainly because when I try to draw symmetrical and lifelike trees they never look quite right. If you’re good at drawing trees however, then putting one in the centre of a tag would look really great!


Use a nice dark green pen for your tree. Add either stick on crafty bits and pieces or draw on some festive decorations, or do a bit of both! PVA glue is best because it will dry clear! If you want to do a more 3D tag then glue dots or adhesive squares also work well too.

Me on the other hand, I prefer to do the continuous line and have a sequin star on the top, kind of a tree!

Christmas Sparkle

If you have various diamanté, sequins or sparkles you want to use on your tags then you need to come up with designs that suit them. Check out my tags below for some ideas. Hanging decorations or bauble type designs work best for rounded craft items.
Think about when items hang on a tree, what they look like. Window decorations like a line of hanging stars or snowflakes are also very nice.

Sequins can be used on their own or accompanying pen lines.
Use your imagination and design your thoughts on a piece of plain paper first using a pencil, once happy with it, you can then transfer the ideas to a tag.

You can purchase the brown tags in most craft shops, online at places like The Works, Hobbycraft and Amazon. Try and pick ones that are already made from recyclable material.

I had previously bought my pens online from Amazon, Sequins from The Works and my Glue is also from The Works too. Other crafty items have been purchased by me over the years from various shops and also Tesco superamrket, they had a nice range of sequins this year too.

Other fun tags include, “Merry Christmas”, Holly, Baubles, Rudolph, Robin, Christmas Trees, Christmas Lights, Snowflakes, Snowmen, Santa Claus, Snowy Scenes, Penguins, Stars and things such as “Ho! Ho! Ho!” and “Let It Snow”.

Thank you for reading this post today, if you do give making Christmas tags a go then I would love to see them! Tag me on social media using the hashtag #SabrinasChristmasCrafts

Have a great Christmas!

✩ Sabrina ✩
You can see my tutorial videos on my Facebook page here…

Sabrina’s Dairy Free No Bake Cheesecake Recipe

Dairy Free Coconut and Vanilla Cheesecake with Dark Chocolate Shavings
Method Step No.4

Sabrina’s Dairy Free Cheesecake Recipe

Ingredients


120g of Dairy Free Spread
250g of Biscuits (I use Plain Digestives and Oreos)
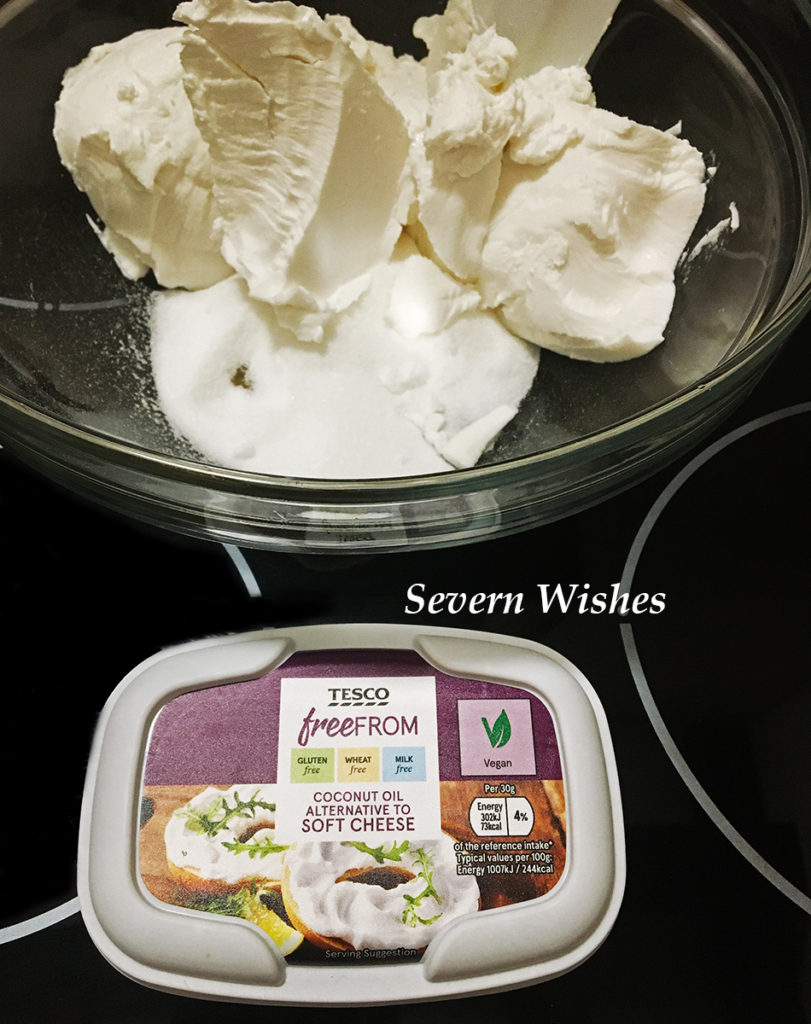
240g Free From Tesco Soft Cheese (2 tubs at 170g each)
100g Caster Sugar
1 Teaspoon of Vanilla
100ml of Double Vegan Cream

Method

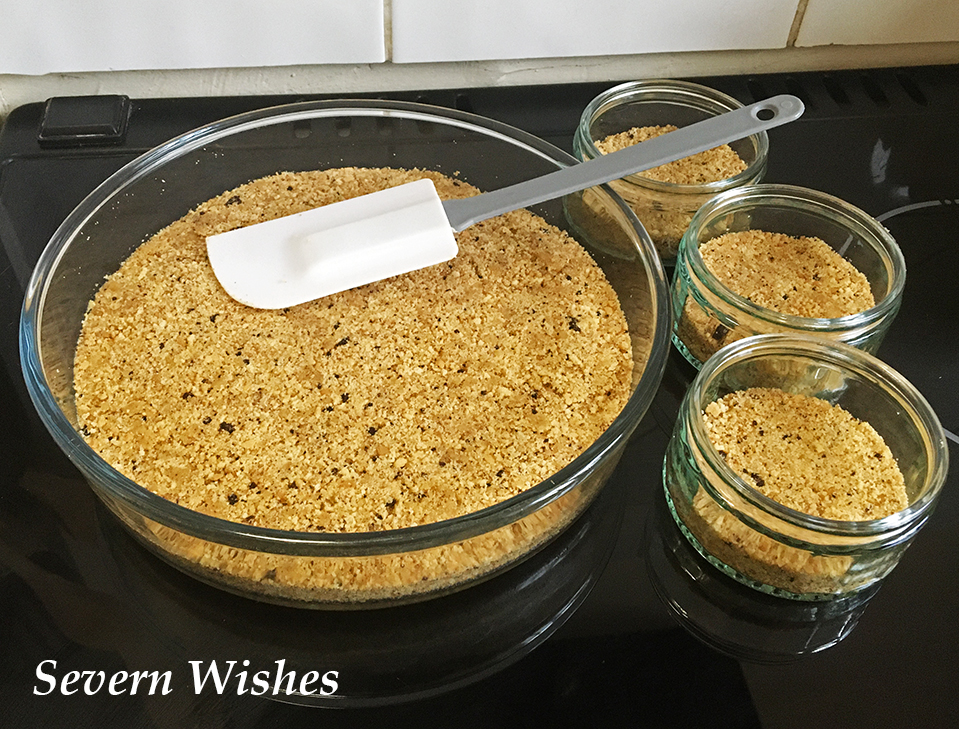
1. Crush your biscuits, whatever way you like! Food Bag and a Rolling Pin! Food Processor, you want them fine with not many chunks.

2. Melt your dairy free spread in a saucepan on a low heat, once liquid pour in your biscuits just a quarter at a time, keep stirring with a wooden spoon until all the melted spread and biscuit crumbs are combined.

3. Pour this into a cake tin or glass dish, round is best, and press down firmly. You want to refrigerate this base for at least four hours before adding the topping.

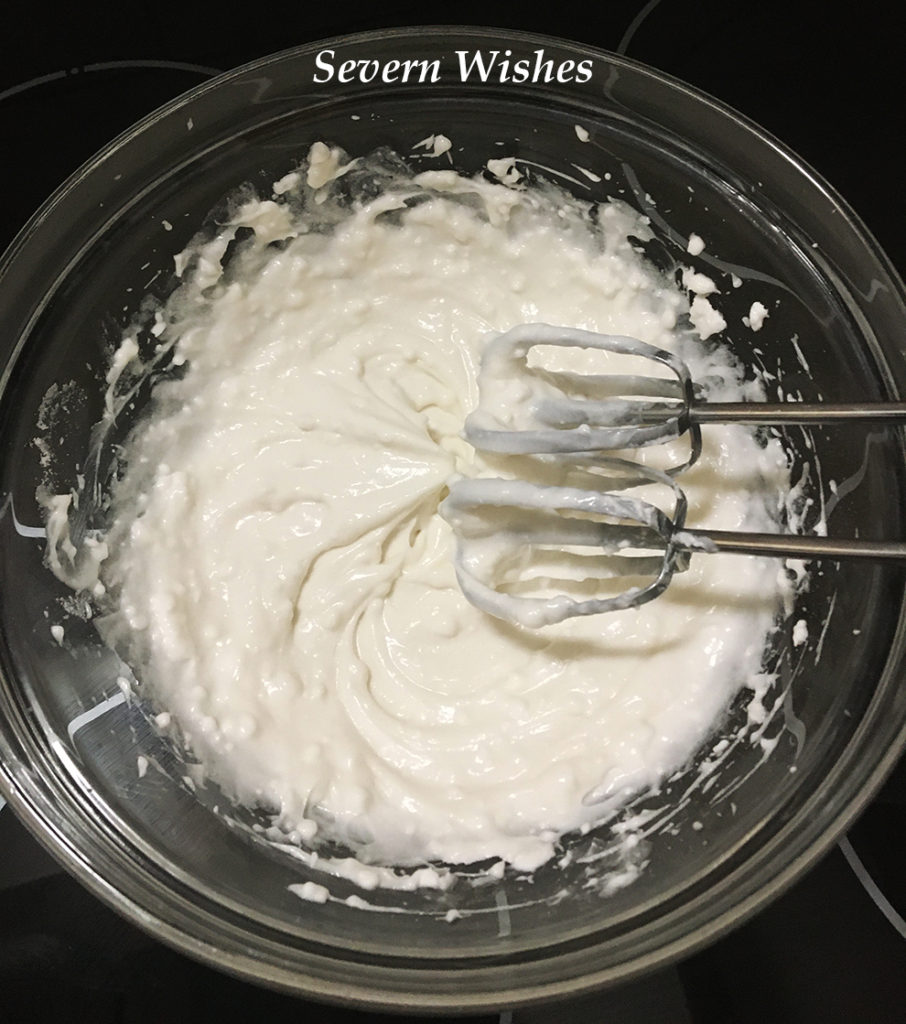
4. For the cheesecake topping you need to take a large bowl and using a wooden spoon, you beat the soft cheese and the sugar together. Mix until smooth, add the vanilla or any other flavouring you would like at this point. You may want to use a food mixer or hand mixer for the next part to make it easier.

5. Whip up the double vegan cream until it forms peaks, it should be smooth, then using the wooden spoon gently combine it with the cheesecake topping in the large bowl. The mixture should be folded together and stirred gently. Try not to over whip the mixture.

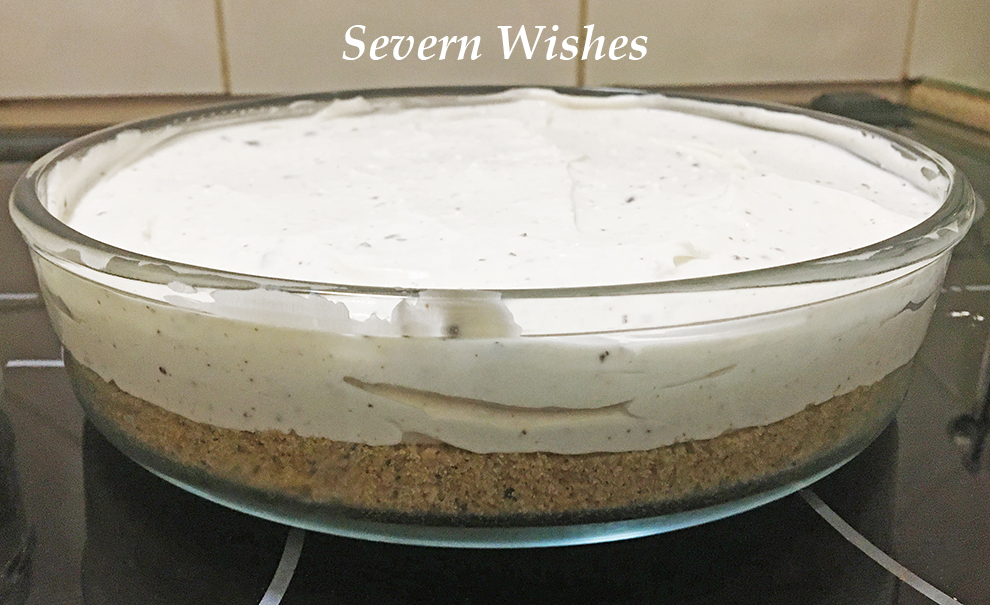
6. Once the base is chilled you can spoon this cheesecake on top, use a spatula to level it out. If you want to add anything like fruit or chocolate, you are better leaving that until serving or at least the next day so that the cheesecake is totally set.

7. Remove from the fridge about twenty minutes before serving. This cheesecake will last up to 5 days in a fridge. Make sure that you cover it fully before leaving it in the fridge when it’s finished.

Method Step No.3
Method Step No.5
Method Step No.6

If you need any help with this recipe then feel free to leave me a comment and ask me anything. If you make a cheesecake you can tag me on my social media and let me know how it turned out! I would love to see your creations! Because the cheese alternative is coconut based, you should try and pair your flavourings with the coconut for a tasty combination.

I did Vanilla and Dark Chocolate shavings in mine. I would be tempted to do either Lemon or Mango.

✩ Sabrina ✩