Sabrina’s How To Make Paper Flowers for all Occasions

Hello and Welcome! If you’re a regular visitor to Severn Wishes Blog then you’ll know that I love to do lots of Art and Craft! If you’re new here then hi, and after this blog post please check out the remainder of my fun Crafts in the section here.

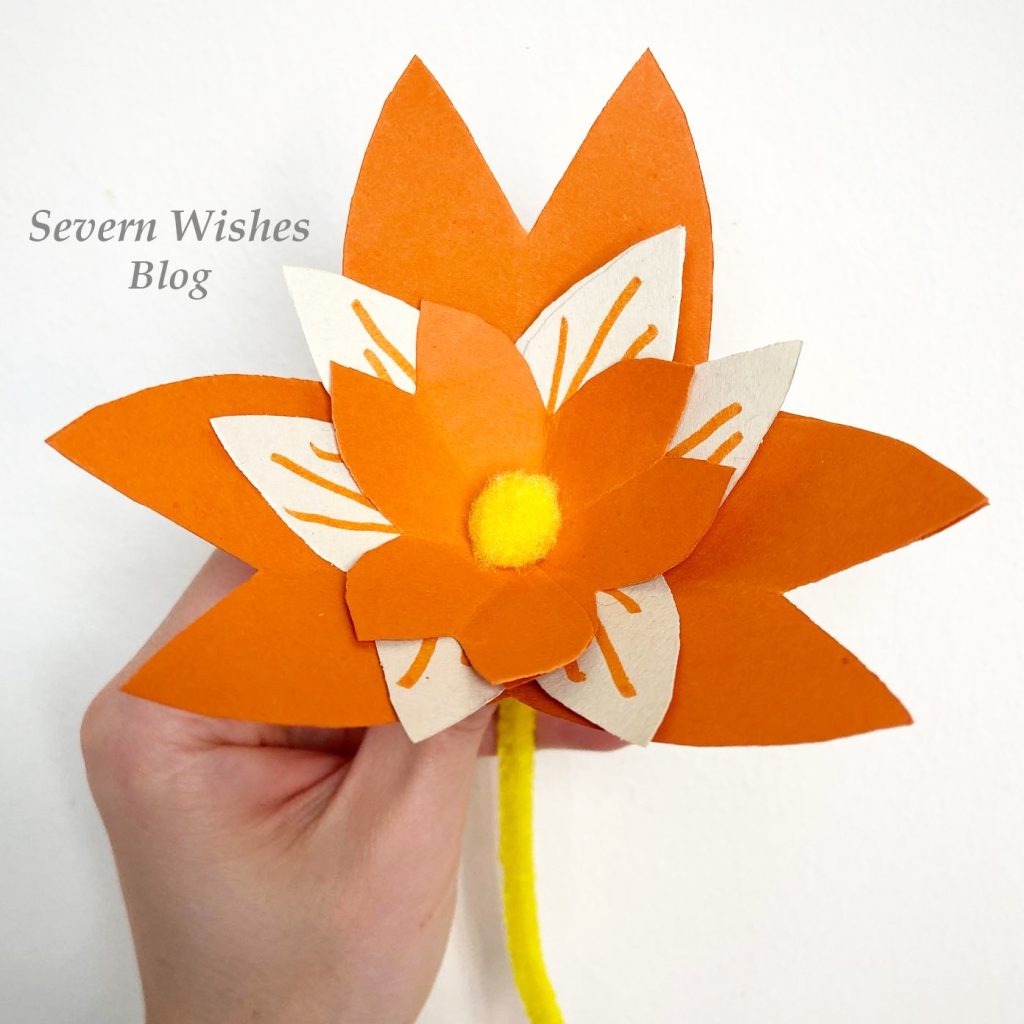
Paper Flowers are a wonderful alternative to buying fresh ones, the beauty of these homemade gifts is that they won’t wilt and have to one day be thrown away, these can be treasured by the loved one receiving them, forever! Give a single flower or make a bouquet it’s up to you!
What Do I Need?

A Ruler (30cm)
A Pen or Pencil
Pipe Cleaners various Colours
Thin Coloured Card or Thick Coloured Paper
Pens for Decorating the Petals (optional)
Fluffy Craft Balls (Flower Centres)
Scissors
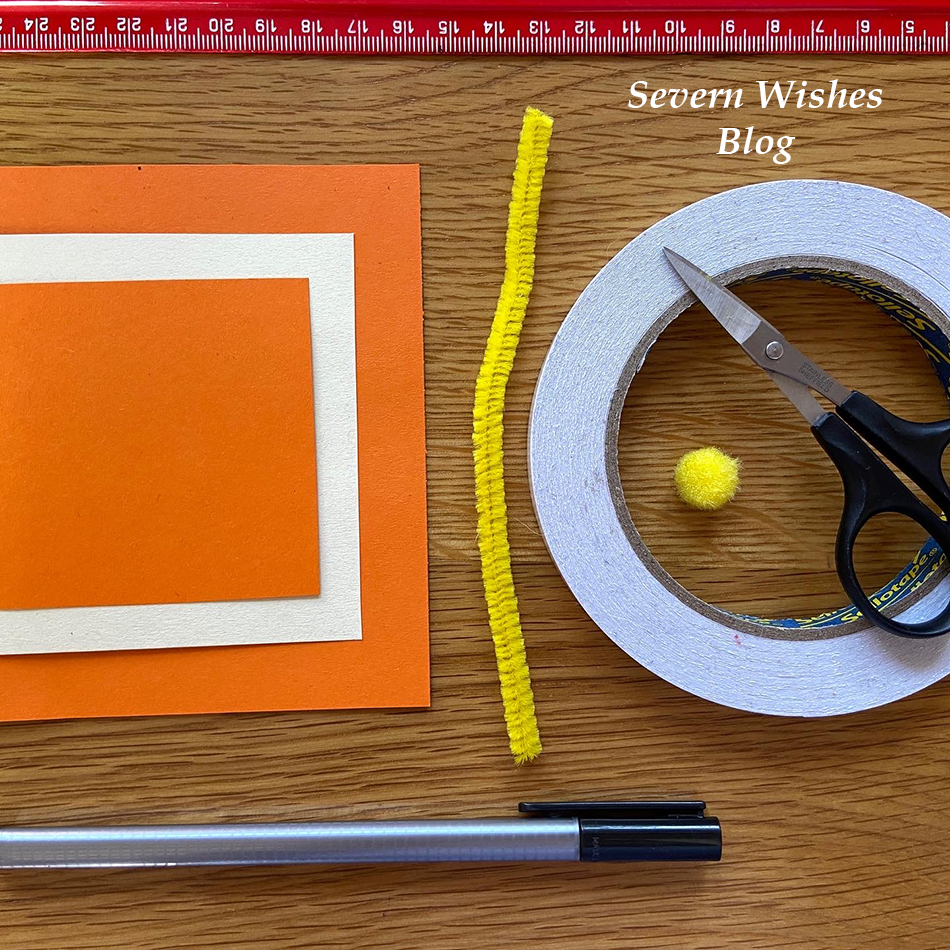
My Step by Step Visual Guide is really easy to follow, but I also uploaded videos to my social media if you would prefer to follow that! Carry on reading for my step by step and photographic guide.
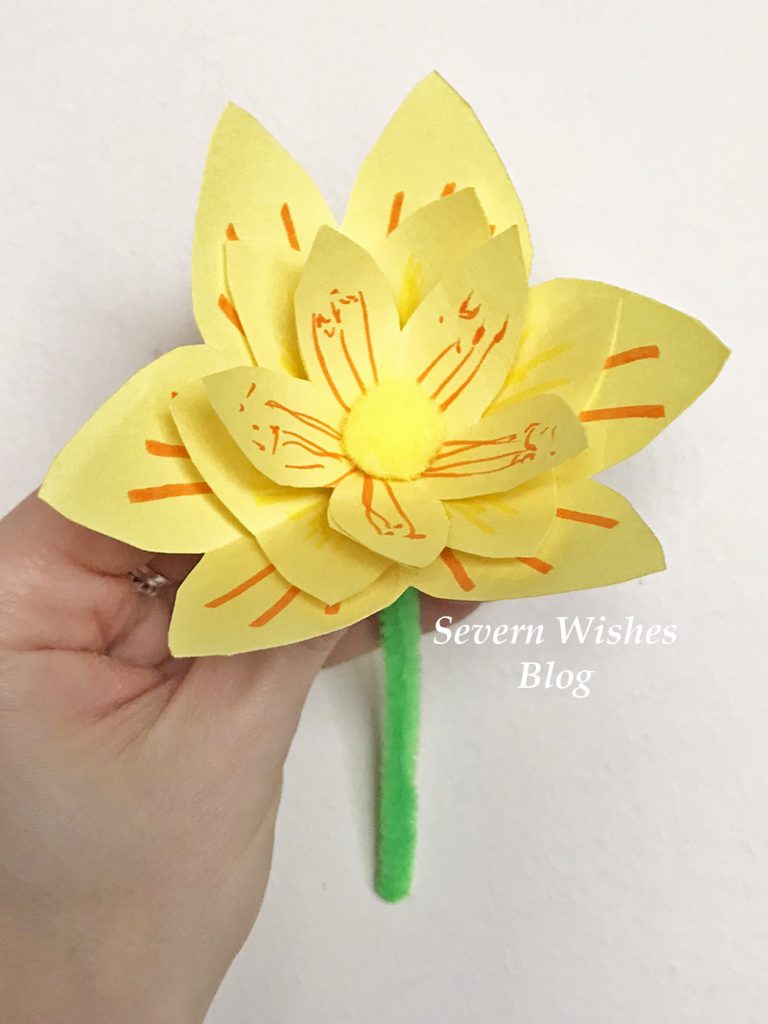

SABRINA’S STEP BY STEP GUIDE

1. Cut Squares from your chosen Coloured Card. For example I made my Orange Flower with a 7cm, a 8cm and a 10cm Square. Three Squares is an ideal amount of layers but you can do just two or even more layers if you wish. Assemble these squares on a flat surface ready for the individual folding process. (See my images below for additional guidance).

2. Fold each square you have in half to form a rectangle, do this by folding the bottom line up to the top line and line up the crease and push flat. Repeat for every piece you have.

3. Next, you fold each rectangle back into a square shape by folding it from the left to right and flatten and crease down flat once again.
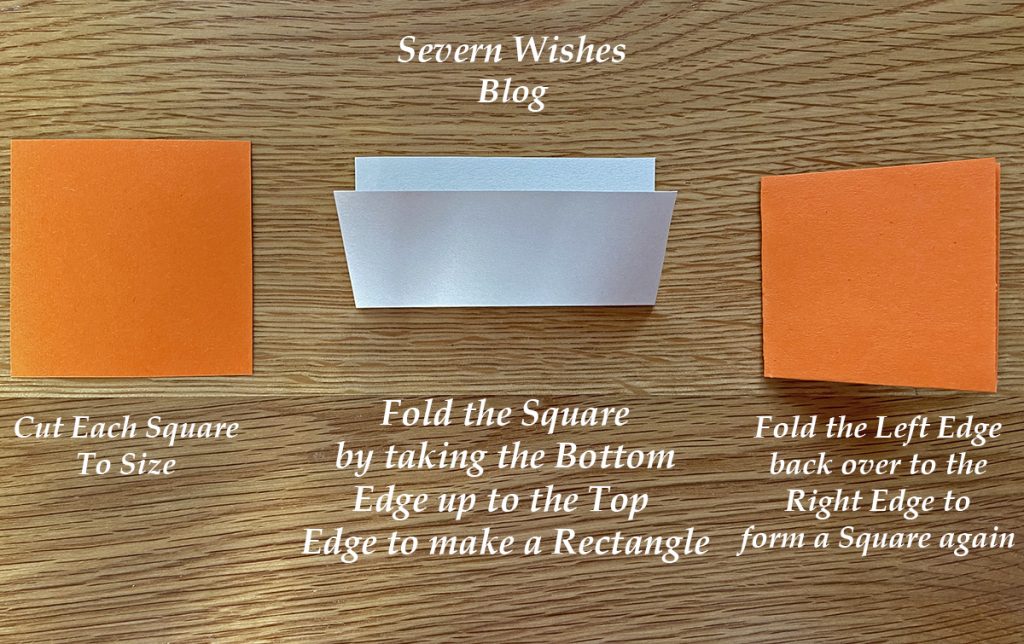
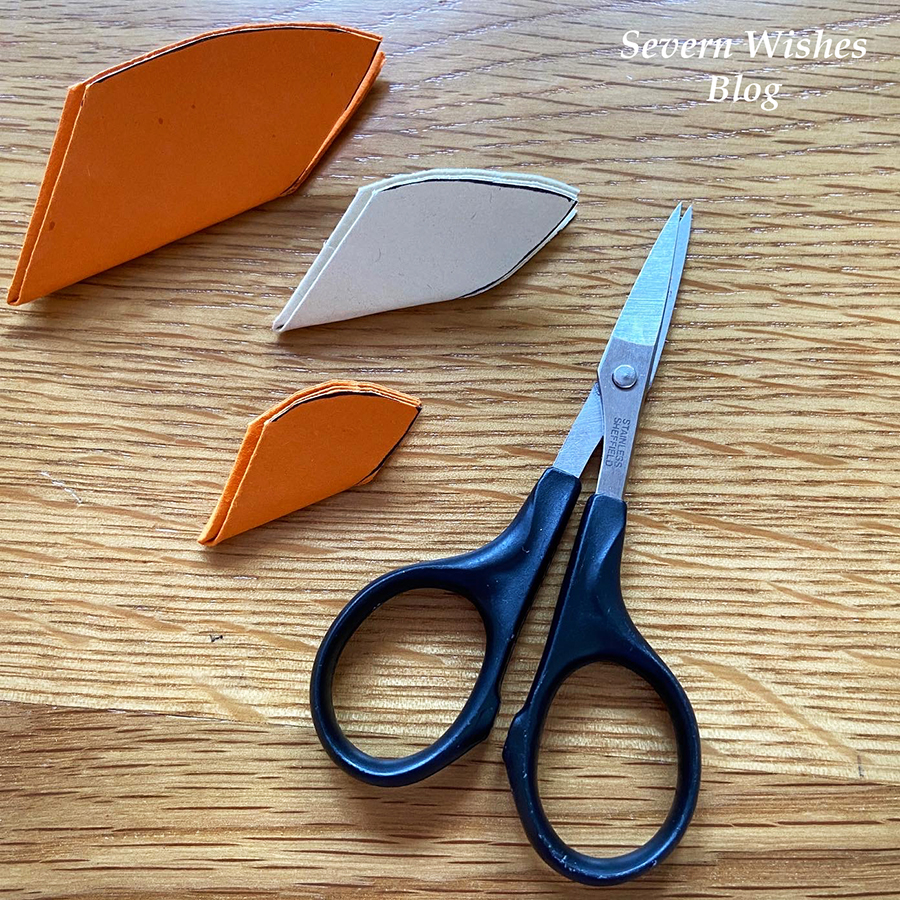
4. Finally you will have all your layers into folded squares, and these now need to be made into Triangles. But to do this correctly for the next steps you must not rotate them at all during the folding process. Make sure that you fold the bottom right corner of your squares up to the top left, flatten and crease.
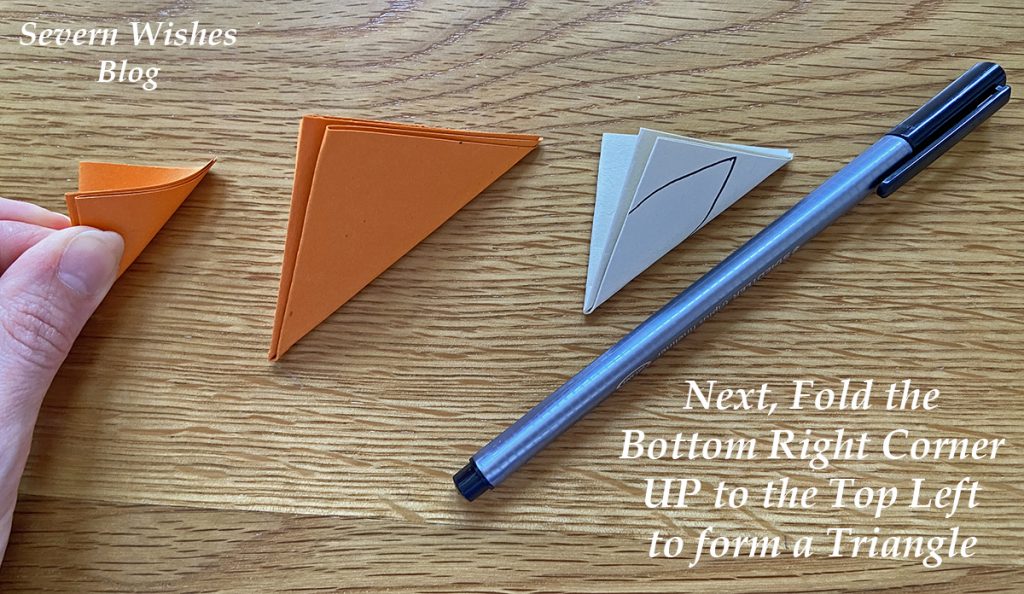
5. Next you need to draw a petal shape on every flattened triangle, make sure not to rotate it from when you folded it when you draw on it, otherwise it won’t cut intact during step 6.

6. Now you need to carefully cut out your shapes, gently follow the line and then discard these cut offs for the recycling because you don’t need them.

7. Time for the moment of truth, open out the flowers gently and slowly so as not to tear them. Lay them out flat and make sure they are an entire piece.
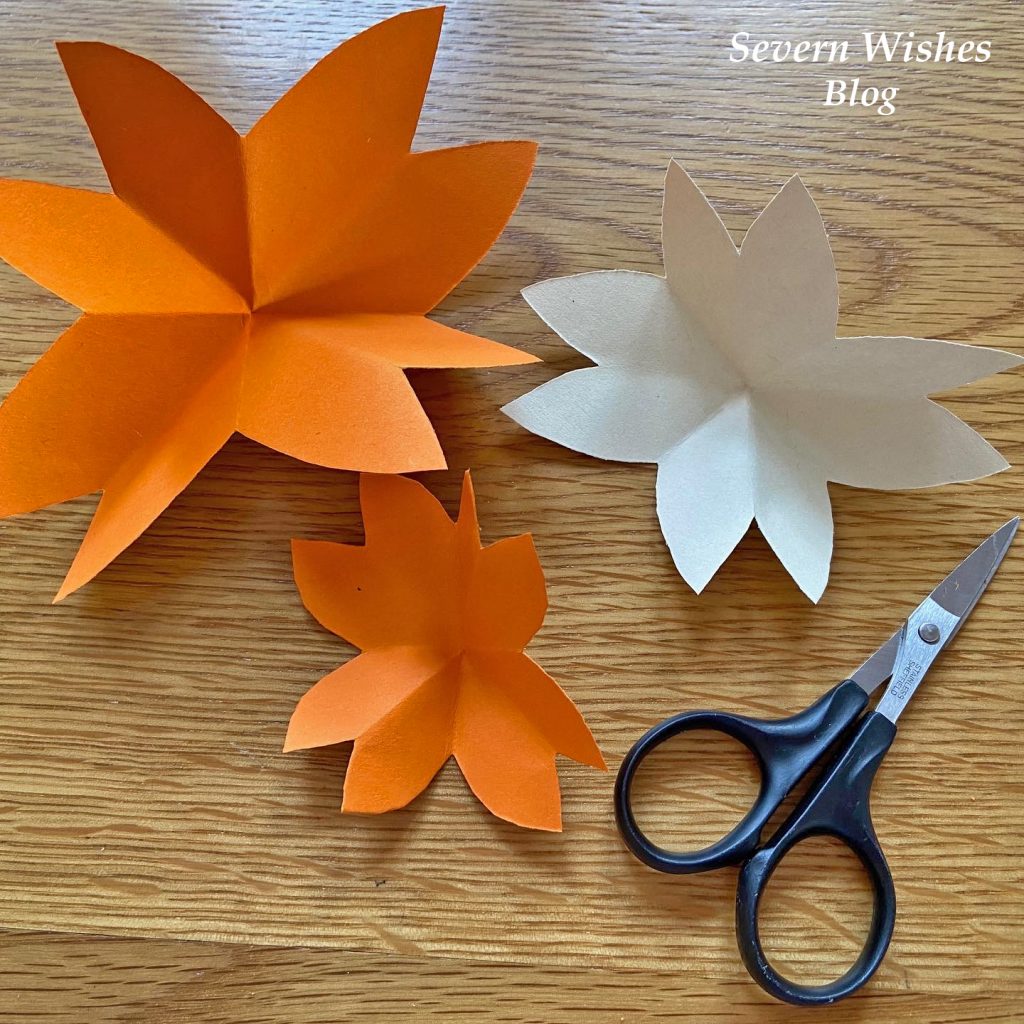
8. With the crease lines facing at each compass point you need to mark the petals that are in the South East corner of each flower. (See my images below if you are uncertain).

9. Carefully cut these petals away from the flower, be sure to only follow the crease lines of the folds when you cut and don’t be tempted to cut it too low in the centre, just enough for the spare petal to gently come free. You don’t need these now and these spare pieces can all be recycled at the end of your crafting session.

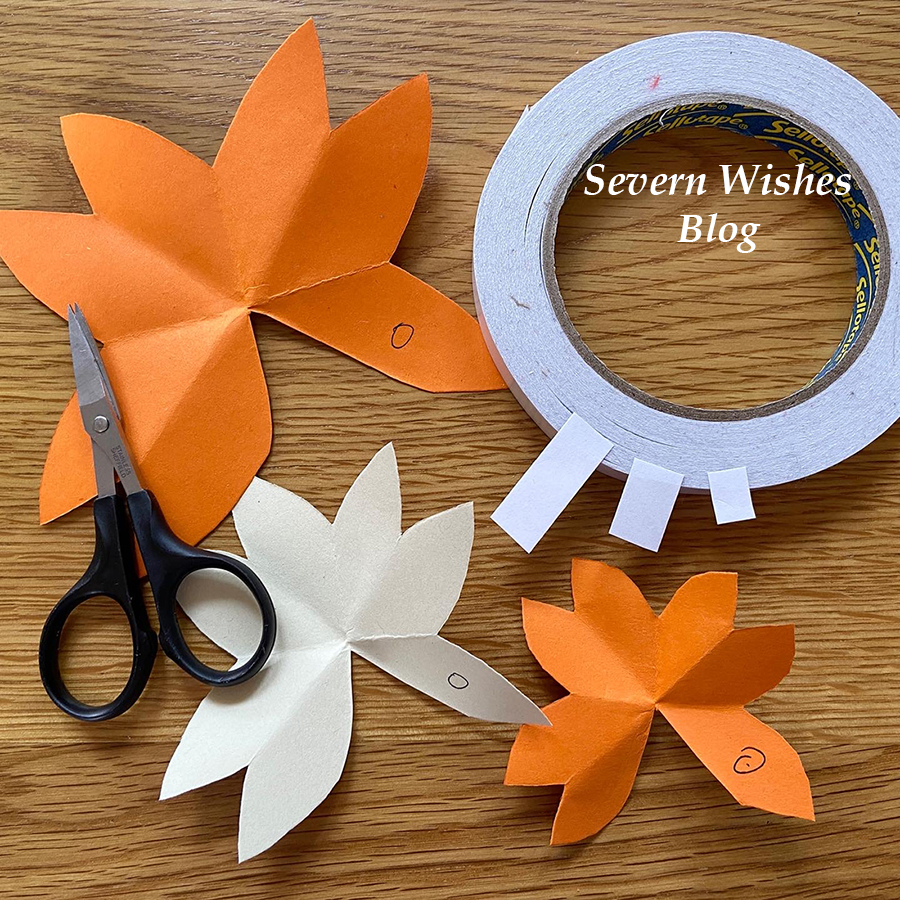
10. Next step is to mark the petal on the right of the one you just cut away, on each of your flower layers, and then stick a piece of double sided tape or a blob of glue on to that mark.
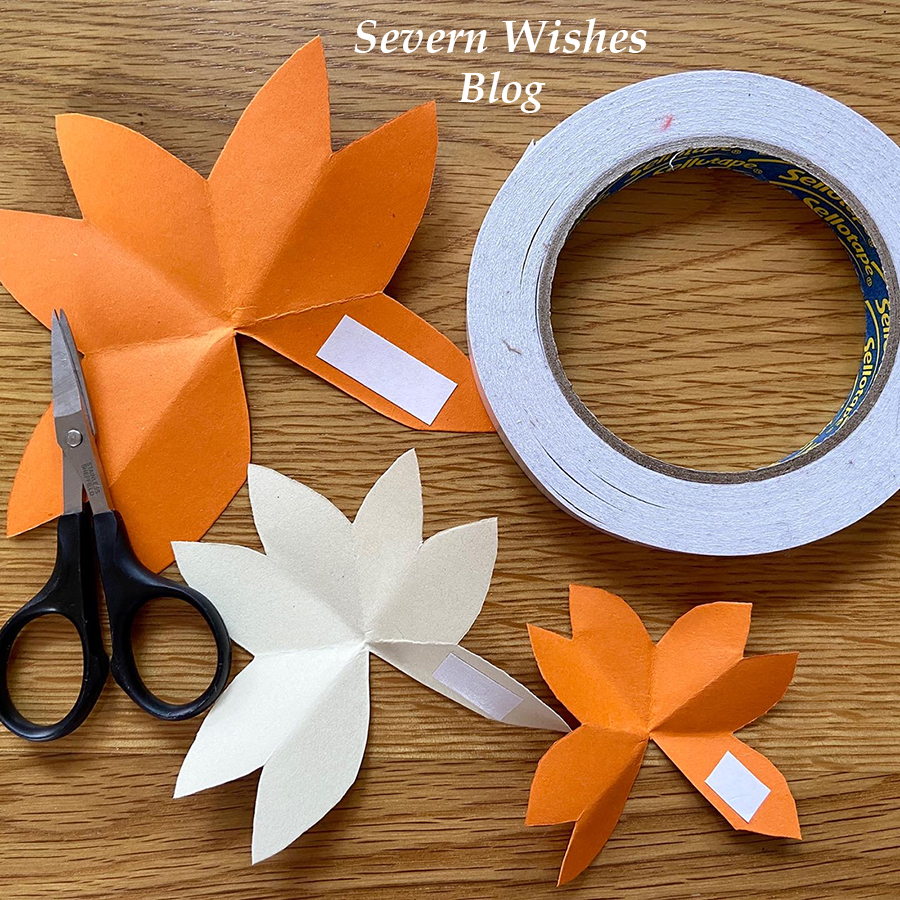
11. Doing each layer one at a time now, gently place the flower into your hand, and with the other hand carefully fold the petal on the left side over the petal on the right side. The creases and folds we made at the start should allow you to do this easily, if not gently fold the creases again and try again, the flower should (with some gentle persuasion) create a 3D flower with the shape similar to a cone. Push down on the glued part and make sure that you have aligned the petals and that it is stuck down. Repeat this for all flowers and layers that you want to make.
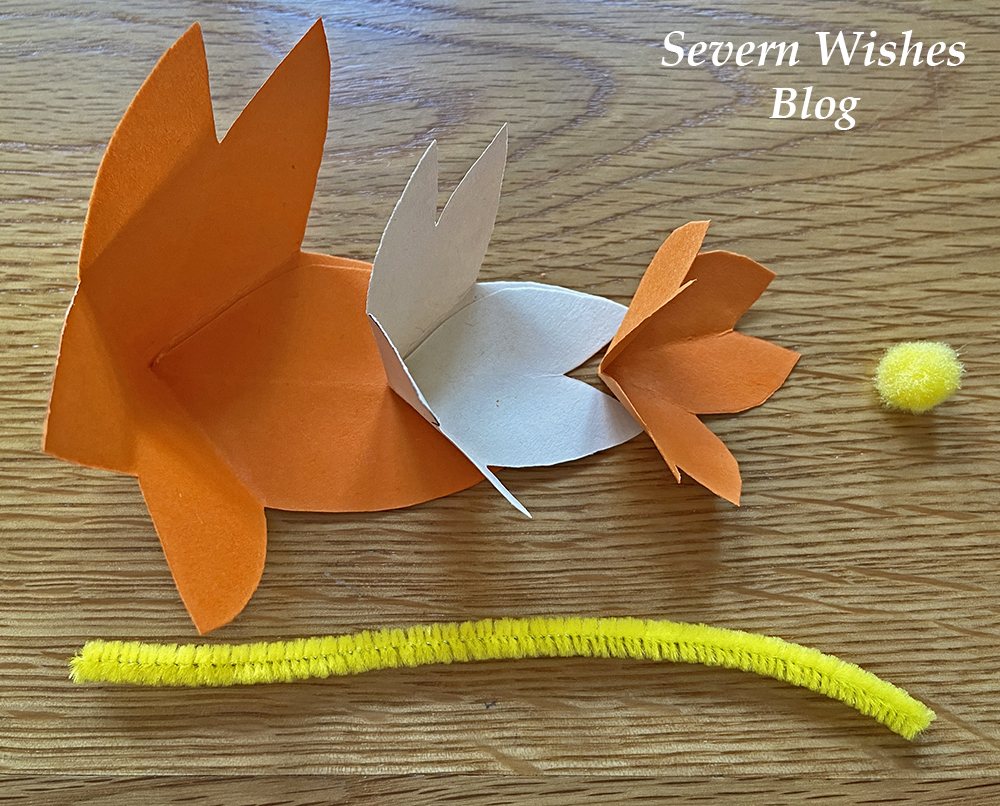
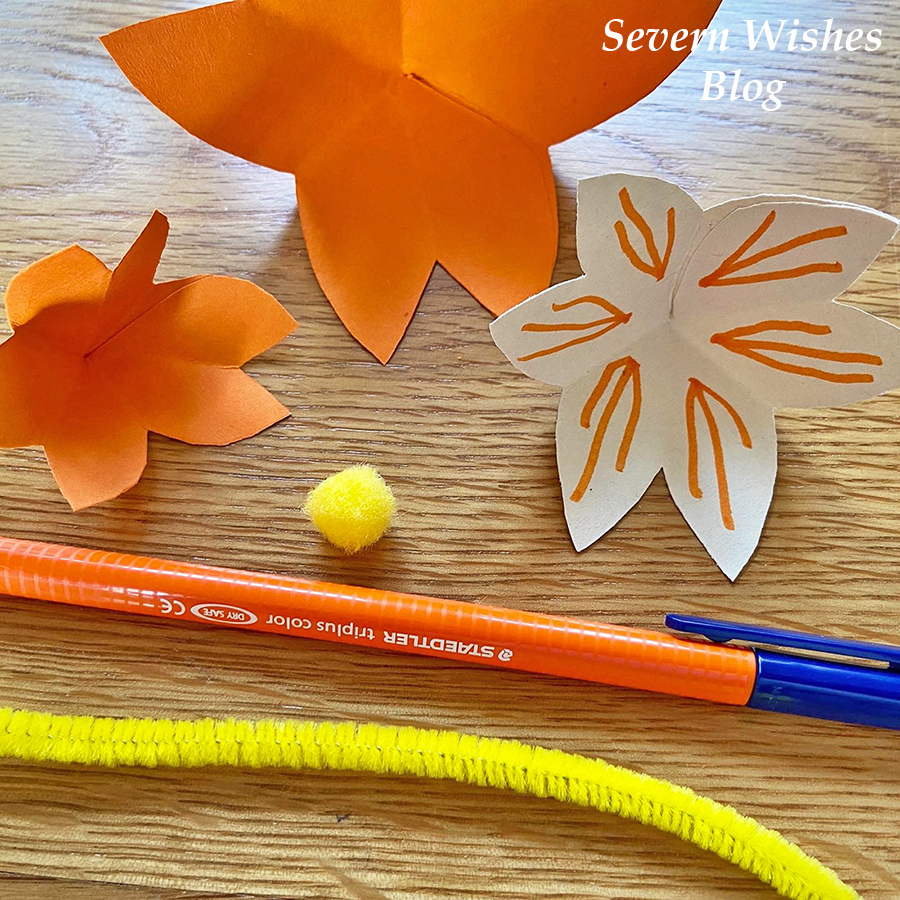
12. Carefully lay out each of the Flower layers now that they are 3D. You now need to decorate them if you want to with lines or dots before we assemble them. If making them with small children you may want them to decorate at Step 10, before you make them 3D.

13. During this step you want to use the end of the Pipe Cleaner you have chosen to gently pierce through the middle of the Flower layers, take one at a time, and force the pin end of the Pipe Cleaner directly through the centre where the creases and folds meet. Once all of the layers are pierced you can now arrange them in order of size.
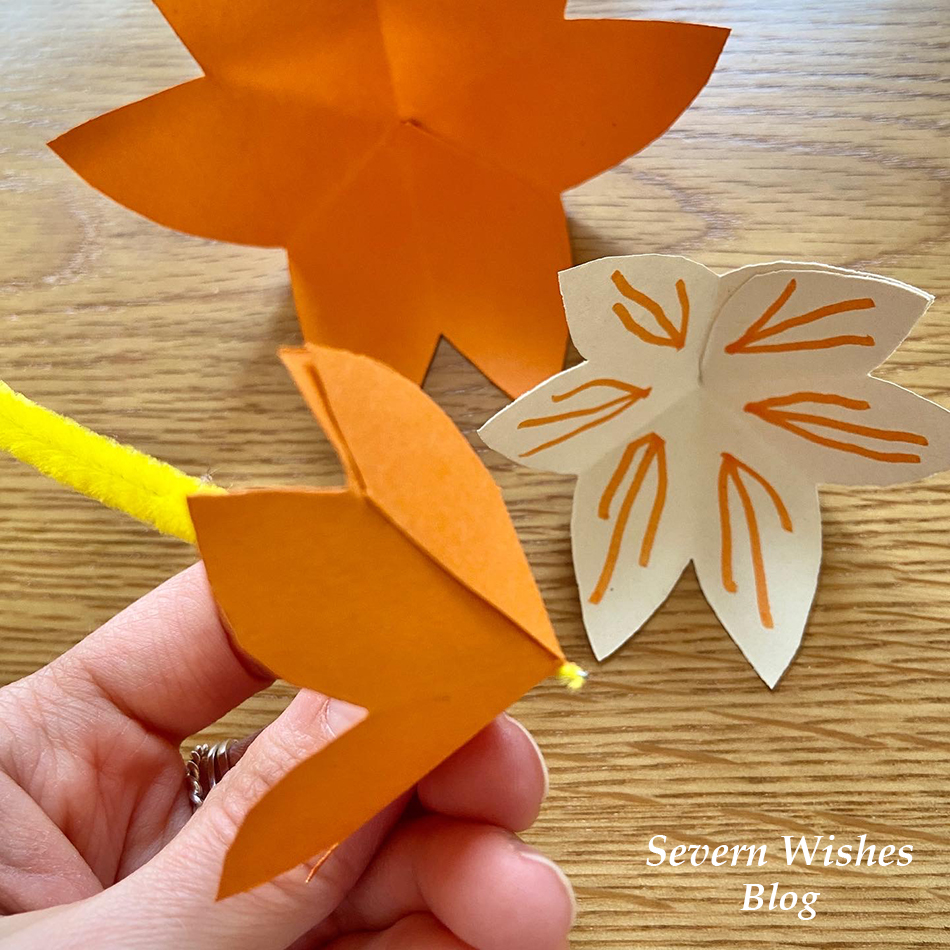
14. Assemble your finished Paper Flower by sliding the layers on to the Pipe Cleaner, you do want to leave about a 4mm bit of the pipe cleaner poking out so that you can push on a coloured fluffy craft ball (if you have one) and this neatens the whole look of the flower plus it covers the pointed end of the pipe cleaner.

15. Adjust the Petals by rotating the layers slowly on the pipe cleaner stem until you are satisfied with the flowers final look. I hope you are happy with your flower! You can play around and add other things too if you like! Be creative and I cannot wait to see yours! Tag me! #SabrinasHowToMake

✩✩

Thank you for reading this Craft related blog post today, I always love doing my “Sabrina’s How To Make’s”! And if you have any questions for me then please comment below on this post and I will happily answer them for you. If you make some flowers please tag me on social media using the hashtag #SabrinasHowToMake and I really look forward to seeing them!

✩ Sabrina 

April 2022 Treatbox UK Reveal and Review

Hello! It’s Treatbox Day! And it’s time for the April 2022 Treatbox Reveal and Review.

View my Unboxing Video over on my Facebook or my Instagram.


Hello April!

It’s been quite a nice start to the month, some sunshine with occasional snow showers – the usual weird mix for Spring! But the Blossom is out and that is my favourite!
I was very much looking forward to Revealing this box due to the success of March 2022, I was not disappointed! Let’s unbox this one now!

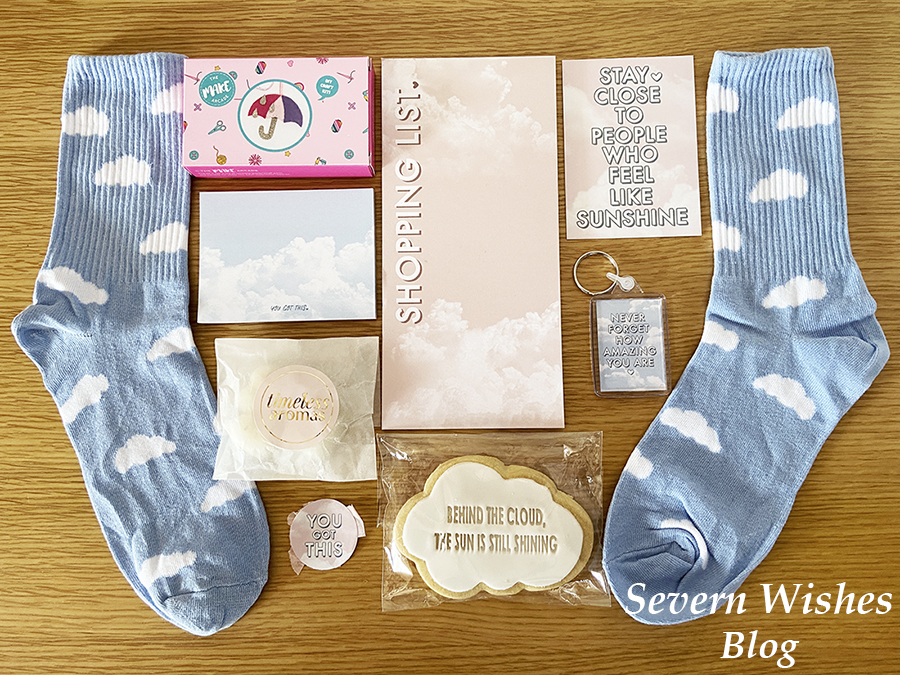
What’s Inside the April 2022 box from Treatbox UK?

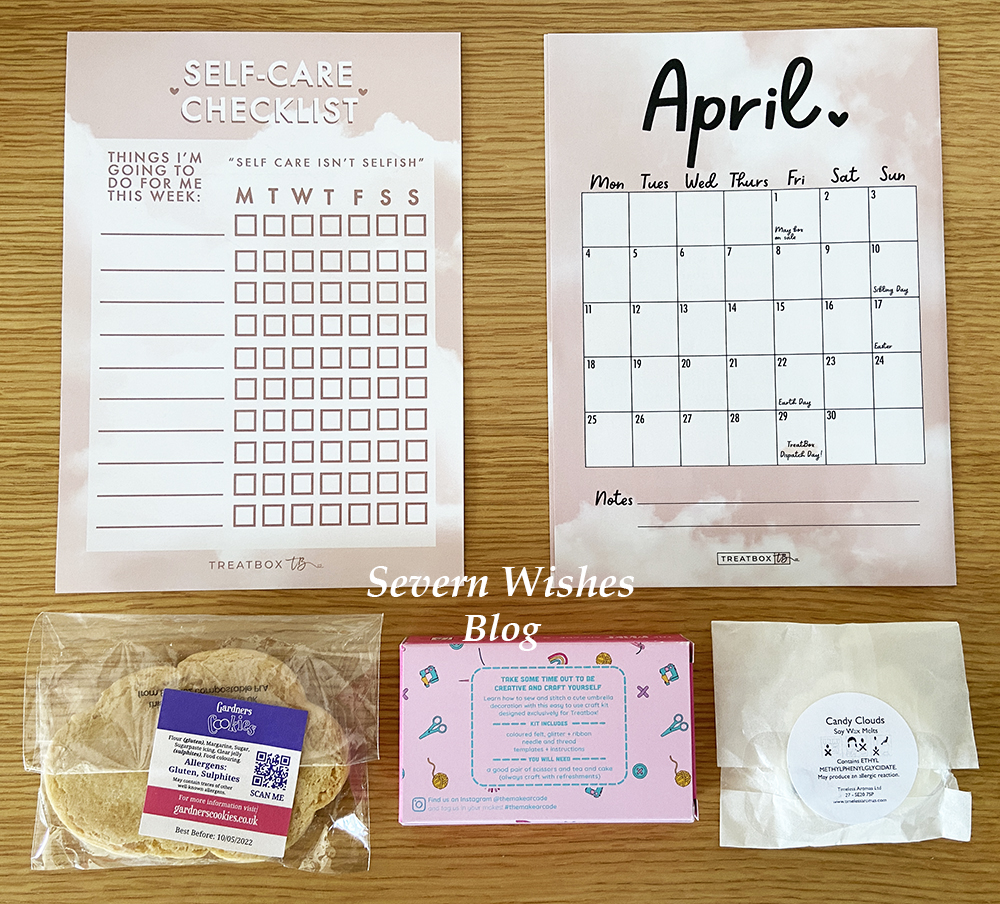
April Calendar Print
Light Blue Ribbed Cloud Design Socks
Gardners Cookies (Egg & Dairy Free) Iced Biscuit “Behind the Cloud. the Sun still shines”
Treatbox Original Sticky Notes – Cloud Design “You Got This”
Treatbox Original Shopping List Notepad – Dusky Pink Cloud Design
Treatbox & The Make Arcade Collab – Umbrella Glitter Shower Make Your Own Craft Kit
Treatbox Original Positive Affirmation Card “Stay Close to People Who Feel Like Sunshine”
Treatbox Original Keyring (Cloud Design) “Never Forget How Amazing You Are”
Treatbox Original Self Care Daily Checklist (2 + Months Worth)
Timeless Aromas Heart Shape Wax Melts in Candy Cloud Scent

My Honest Opinion on this month’s Contents.

There were several really nice and unique Treatbox original items in this April box, which I will most definitely be using! The shopping list comes in particularly handy for someone like myself, and the sticky notes are again a great piece of stationery that can be used all around the home. It was also nice to have an array of different items, an edible one, a wearable one, a make-able thing and plenty of positive affirming ones too.

I love the socks! I love socks in general but I love the quality of these socks that we receive from Treatbox, they wash and wear really well. Love the clouds design!
Again the keyring and the small card are positive reinforcement because I am sure we could all do with some with everything that is going on for us all both personally and on a global scale.

Love the idea of the self care checklist, though I’m not sure if I will get to tick off a square every single day – though I will certainly try! Self Care is not Selfish yet as a single parent some days I do struggle to find that balance. But I am trying to do better for myself.

Overall a lovely box, some really useful items, I look forward to a cup of tea with my biscuit and I will sit down and attempt the Craft Kit before the end of the month! And I promise I will put the finished piece on my social media for you all to see it! (Hides face in hands) Sewing is not my forte folks but I am very craft orientated so I shall give it my best shot!

The April 2022 Treatbox was filled with a positive and self care importance vibe, and with the calming clouds design I definitely feel as though it’s starting April off in the right way.
Now let’s hope it stays that way!


Thank you so much for joining me for this April 2022 Treatbox UK Unboxing, Reveal and Review. I really hope that you have enjoyed reading this blog post. I will be uploading various photography during the month from the products featured this month so don’t forget to follow all my socials and keep in touch for all the latest from Severn Wishes Blog!

Have a wonderful April!

✩ Sabrina ✩
March 2022 Treatbox UK Reveal and Review


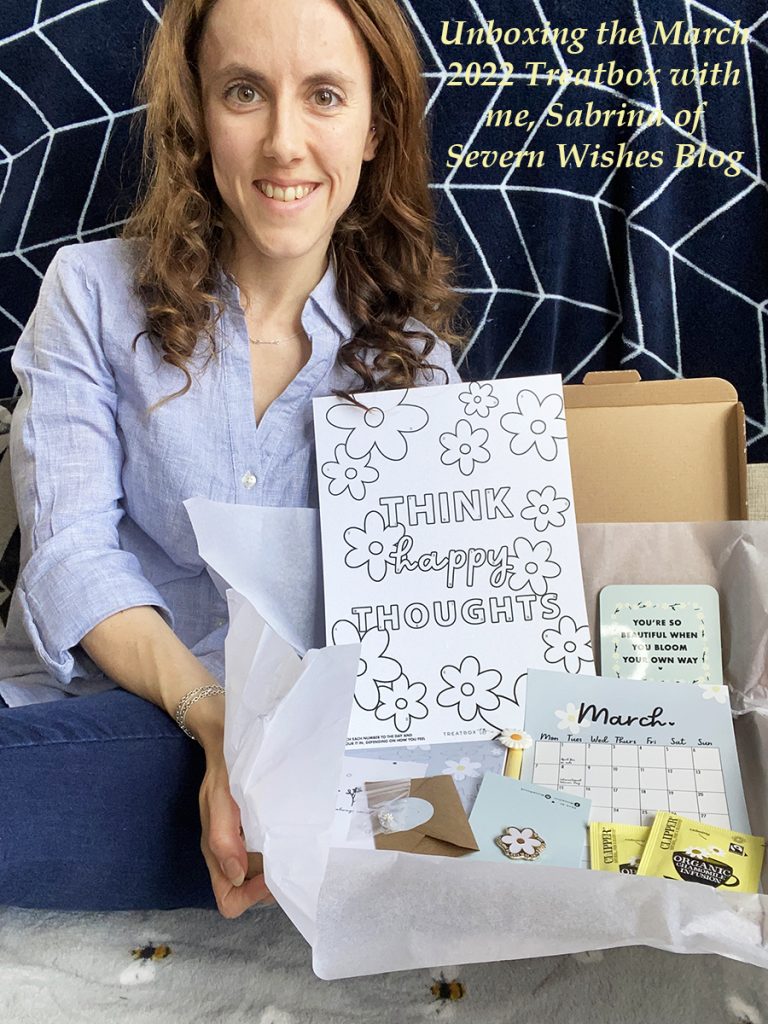
Hello! It’s time for the March 2022 Treatbox UK unboxing, Reveal and Review!


March is my Birthday month, and it is of course when we welcome Spring and everything about new life! I was excited when I opened the box and the theme inside was “Daisy” as in the flowers! I wonder what treats await me…


I decided to video record my unboxing for this Treatbox, it has been years since I did one but I felt like the time was right to bring the video aspect back! You can see it on my Facebook page or my Instagram account if you would prefer to watch the video. If not please keep reading as I unbox this amazing March box from TreatboxUK.


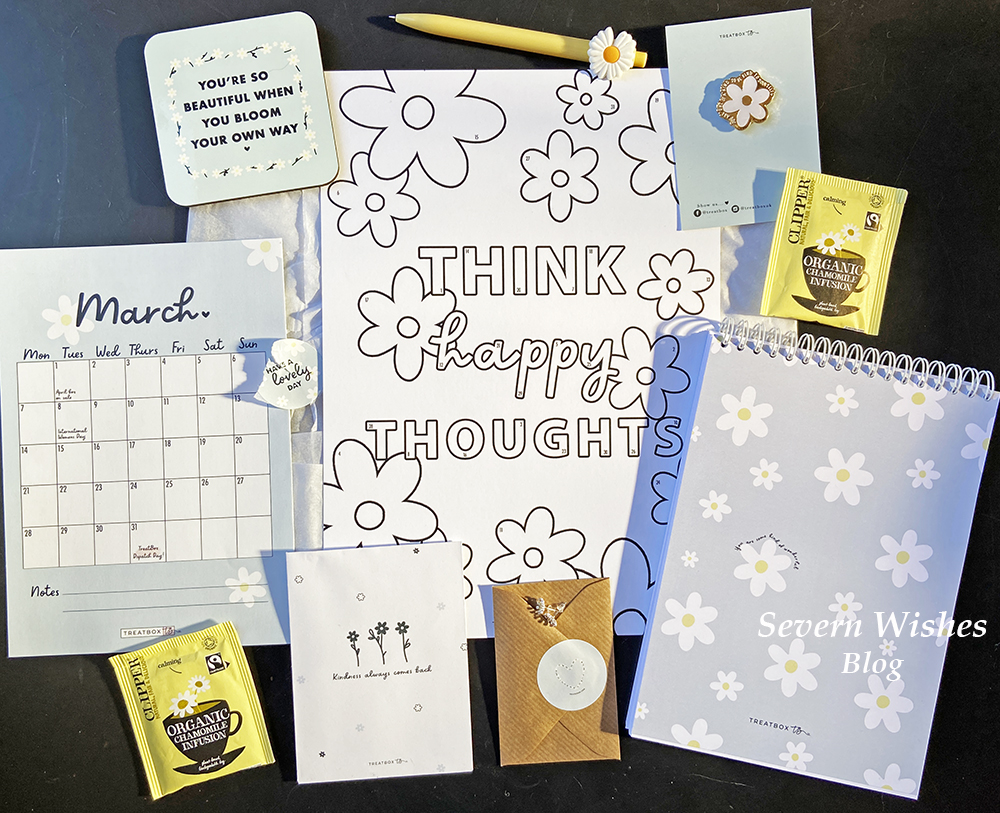
What is Inside the March 2022 Box?

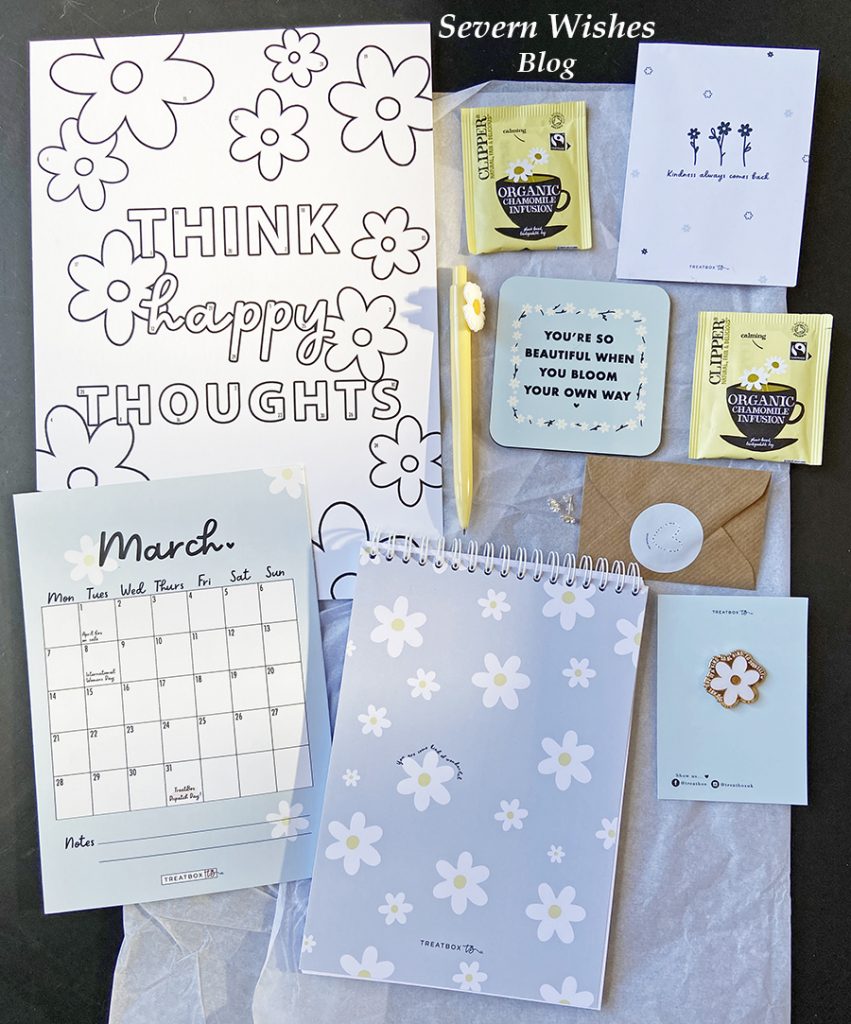
Treatbox UK March 2022 Calendar Print
Daily Mood Colouring Page
Treatbox Original Notepad with Daisy’s
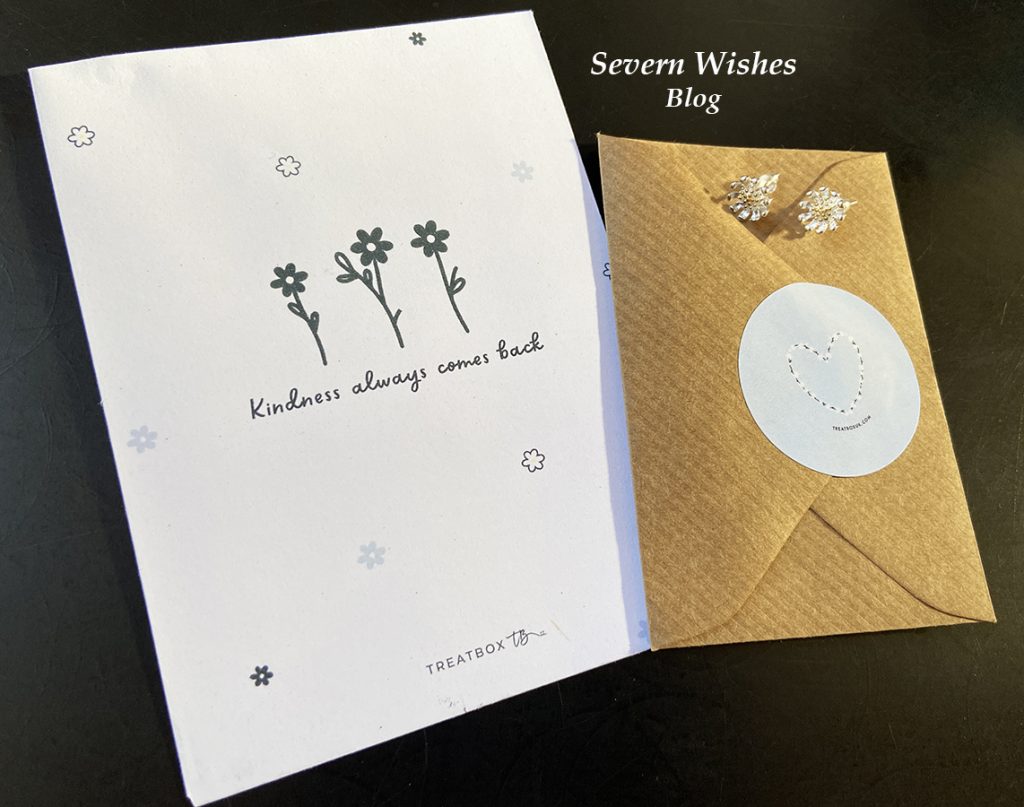
Oxeye Daisy Seeds for us to Plant
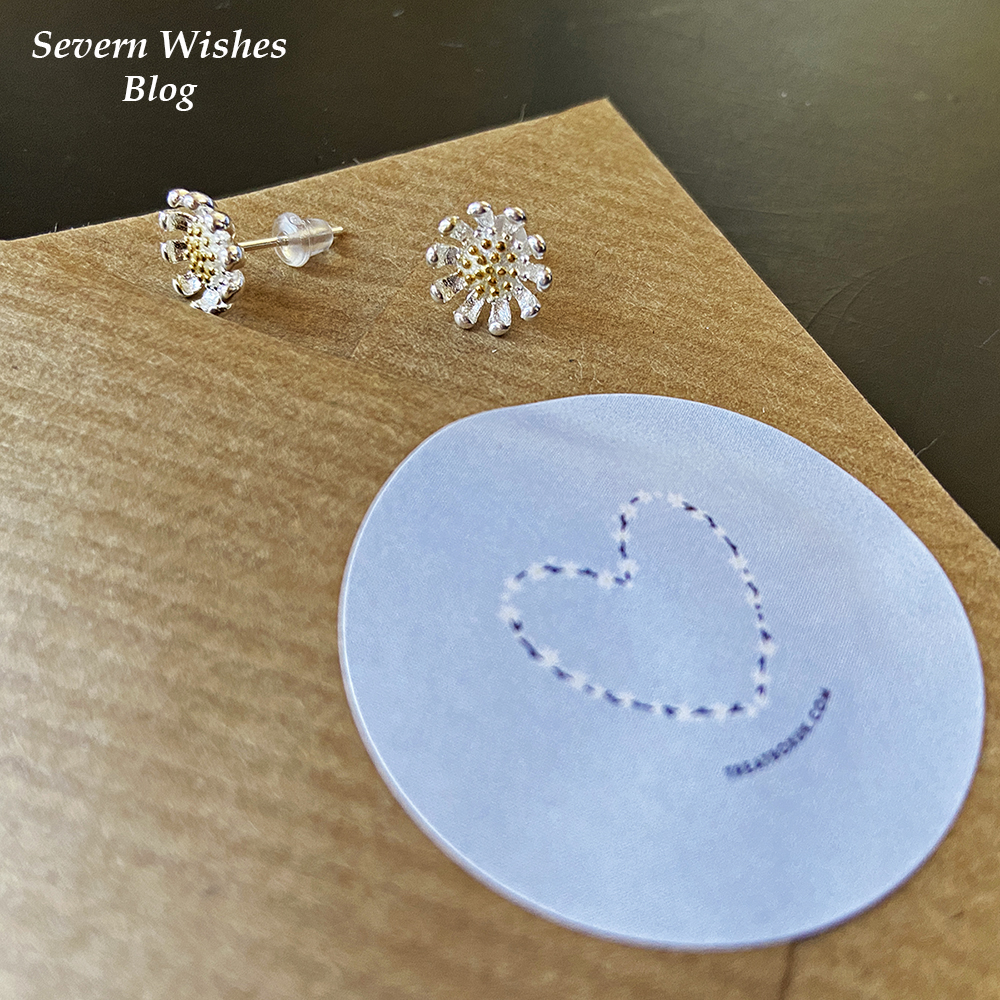
Silver Plated Daisy Earrings
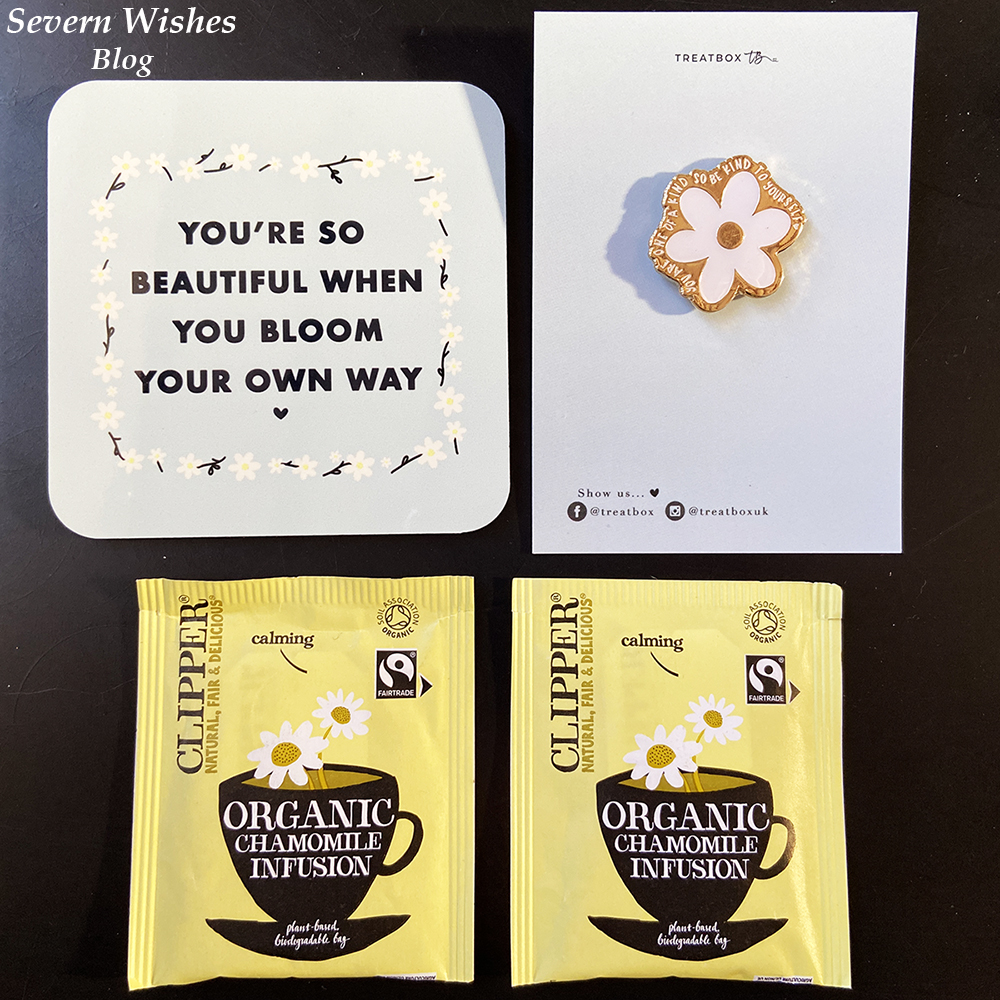
Clipper Chamomile Tea x 2 Bags
Daisy Pin Badge “You are one of a kind so be Kind to yourself”
Daisy Chain Coaster “You’re so beautiful when you bloom your own way”
Yellow Daisy Pen


What is my Honest Opinion on this Box?

I LOVED IT!


Okay so I have had A LOT of Treat boxes over the years, and this March 2022 box is right up there with some of the greats. I loved the Daisy theme, and I loved how the theme was apparent across everything in the box, from the bought items through to the Treatbox Originals.

I loved every item, but if I had to pick three favourites they would be… The Earrings, The Daisy Pin Badge and the Coaster. But closely followed by the Notepad and the Colouring sheet. I think these unique colouring pages are an excellent calming aspect of the boxes and I would love to keep seeing them included in the Treat boxes to come.

Overall a wonderful box that has left me with very high expectations for April! (Oops!)

I loved that we had items to do and to use and to make, rather than them all just be items to sit around gathering dust. PLUS I thought that no face / eye masks this month was a great thing too! It’s wonderful to have new things that we have not seen in Treatbox yet. I now have so many coasters that are all so unique I am just going to start collecting Coasters now, it’s my new thing 😀


A TOP TOP TOP BOX!
Thanks Zoe and the Team for creating this extra special box this month!

Thank you for reading this Unboxing Reveal today, I hope you have enjoyed it.

Please pop by in early April to see the next Reveal and Review of Treatbox UK! OR Check out my social media for the unboxing video which will be going live once I receive the box!

Have a lovely month of March and I hope to see you back again soon.

✩ Sabrina ✩
5 Healthy Choices Everyone Can Get Behind This New Year

Hello everyone, I hope this latest blog piece finds you all well.

Today I am discussing the 5 healthy choices that I do all the time, that are easy enough so that anyone can get behind them! You’ll feel better if you accomplish even one of these this new year, because they are not only good for your body but also your mind, let us all have a healthy year ahead.

  1. Drink More Water

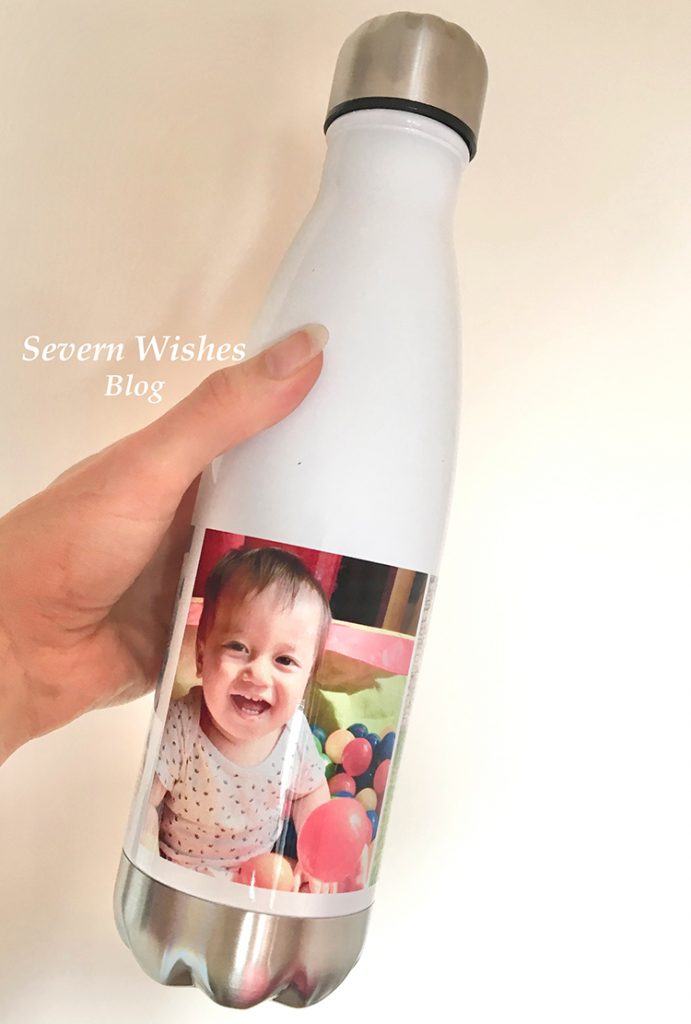
    I cannot stress enough how so many people don’t drink enough water every day. Women and Men need at least two litres of water a day to aid blood pressure and digestion and to help cell renewal in the skin. I personally aim for 2.5 litres a day and use my reusable water bottles. You will also find that by drinking more water your organs and joints will be cushioned and hydrated. Water contains minerals too, such as Calcium, Magnesium, Chloride and Sodium to name but a few. Water is essential for good kidney and bladder health and helps them by removing toxins that have built up. If these aren’t enough reasons for drinking more water then how about this, by drinking a glass of water when you first wake up it stabilises your blood pressure and kick starts your digestive system, meaning when you start your day your breakfast is ready to be harvested for all its nutrients. To top it off your brain can also respond with regular and consistent water in take, including by improving your mood and memory. So why not try and drink more water this year, once you get into the habit of it and you feel the improvements for yourself your body will ask you for more. That is why a reusable water bottle is great, I carry one everywhere I go.

2. Swap to some Dairy Free food items

You may not believe me now, but making a few swaps to things such as Dairy Free Butter (which is delicious by the way) can help with things such as cholesterol and get you to eat less salt too. You can still bake and cook with Dairy Free Butter and because it’s so tasty you wouldn’t know the difference. I would never go back now to a dairy based butter or spread. I love the Vitalite spread! Perfect in Mashed Potatoes and fab for baking too!

One reason to go dairy free is the choice you have, wow what a range! Plant based or nut based milks are healthier options for you and most alternative milks are fortified with vitamins and minerals too. You may also find that some have lower calories and are better for your body because they are hydrating.
Some people (like my family) use alternatives due to allergies and medical conditions. However you can still make the change to a healthier alternative for both your body and the climate.
Most people find they have more energy and are less bloated and have less digestive issues by swapping from dairy to the alternatives out there, finding one that you like might be hard because there is a massive choice. However my Doctor recommended unsweetened Soya Milk in small amounts or Oat Milk because they are both filled with Vitamins and Minerals necessary to maintain a healthy body such as Calcium.

Dairy Free Cheeses are getting better every year! When I first went Dairy Free there were two choices on the shelf in the chilled isle, now there is a whole fridge dedicated to various types and varieties of dairy free cheese, be it grated, hard, soft or even something in between them all! The only way you can know is to try it for yourself one day. I do recommend the Violife range though!

3. Taking a 15 to 30 Minute Break for Fresh Air Every Day

Fresh Air is so important and a lot of us don’t get enough of it, so if you make one new year resolution this year make sure it’s to get more of it. Even if the weather is bad, standing in your garden under an umbrella still counts. You could walk and that would be even better because it would be light exercise too!

Fresh Air is vital for blood pressure and heart rate by providing clean oxygen for your body, it also aids digestion by increasing oxygen flow through your organs. Fresh Air also improves your mood and can make your happier. Oxygen is vital for good brain health and mood so the more fresh oxygen you can get every day the more you’ll feel the benefit of it.

Breathing in fresh air can also help to reduce the risk of getting air born illnesses and infections by clearing the sinuses. People are more likely to lose weight and stay fit by going for a daily walk and getting both their heart rate up a little and by breathing in plenty of fresh air. Even if you live in the city search on local maps for parks and green spaces. You never know what you might see on your walk either, make it fun for children and play a game like eye spy or pick a letter every day and each person has to spot five things beginning with that letter.

As the weather improves into Spring this will be a much easier one to do every day.

Find Somewhere Local, Green and Full of Nature and Enjoy

4. Do Something You Love for Half an Hour a Day – For Your Mental Health

Most of us prioritise lots of things above our mental health, including housework and other chores, when we should be either resting or doing something for ourselves. Try to make a list of what needs to be done that day and what can be put off until tomorrow. It’s important to get through your every day necessities at home without feeling guilty about wanting to do something for you. And when you’re a parent you get even less time to yourself so it’s very important to take that half an hour, just to fit it in somewhere if you can. I usually have my half an hour before bed, gaming, reading, writing, catching up on a television program I have recorded…

Choose Happy and Healthy

5. Eat a Rainbow of Coloured Foods Every Week

This may sound like a simple one, but I have read many studies that suggest eating a variety of fruit and vegetables over the course of a week, and not just the same four or five every day, gives our bodies the varied vitamins and minerals that it needs to stay healthy. So why not try adding a different lunch and a different evening meal to your routine this week, start to experiment more and try that piece of fruit that you always see in the supermarket but never buy! The more colour the better. Check out my recipes on my blog for some inspiration to start with!

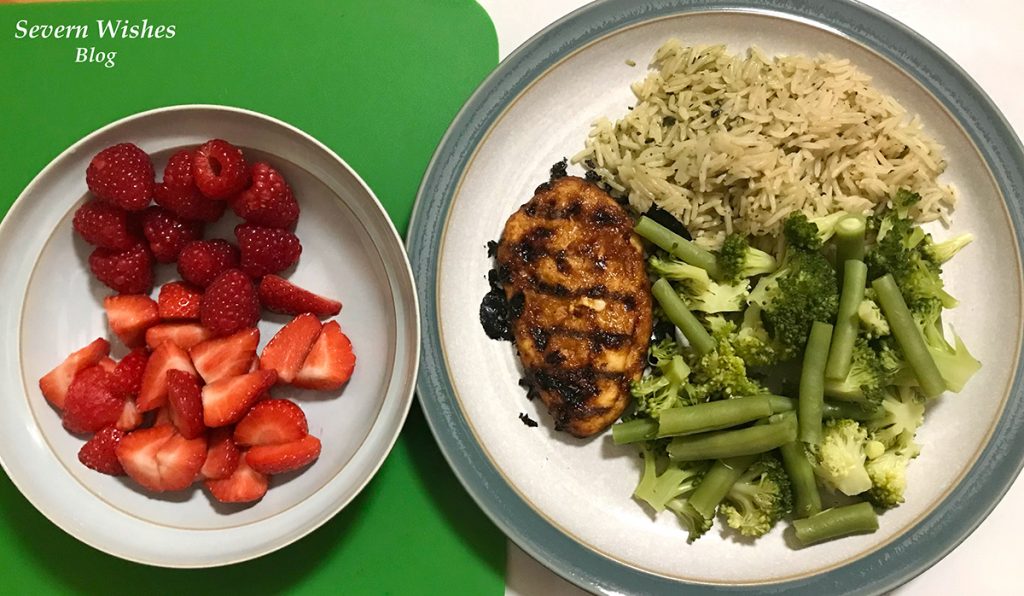
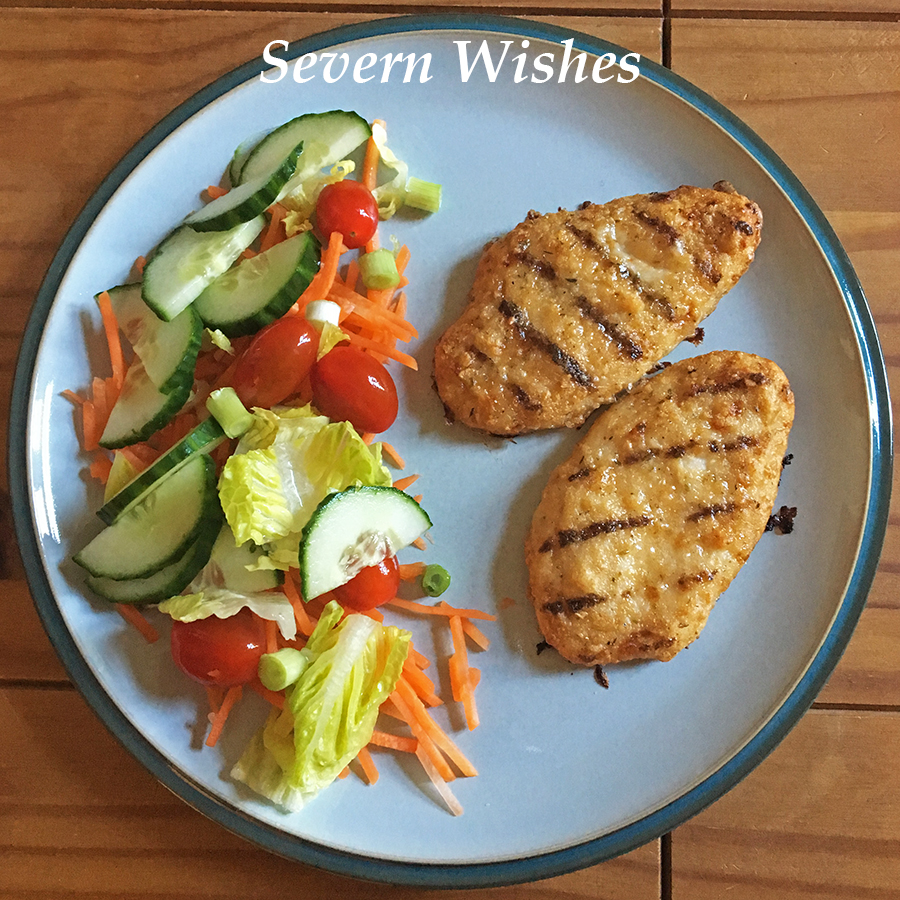
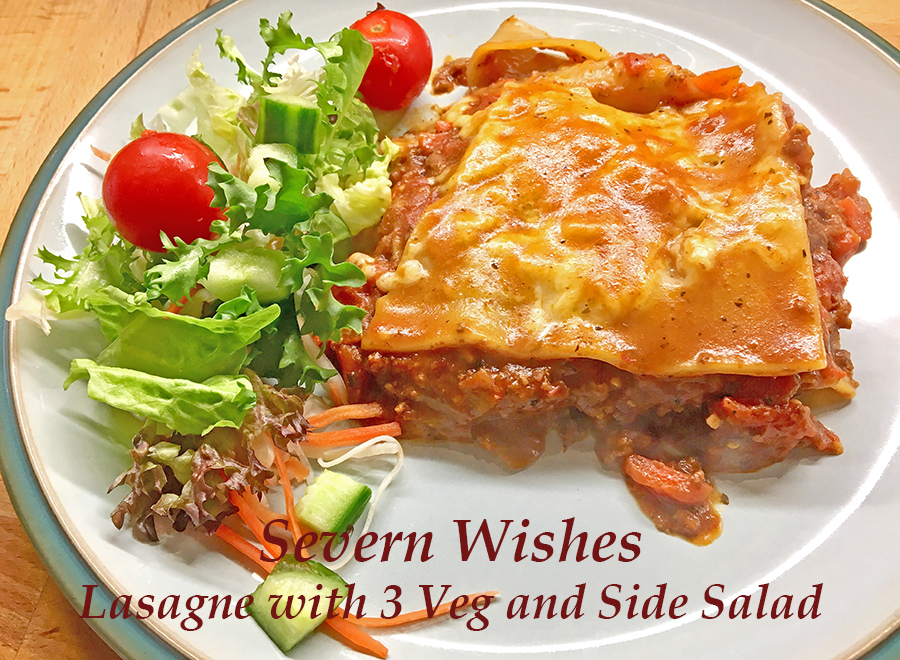
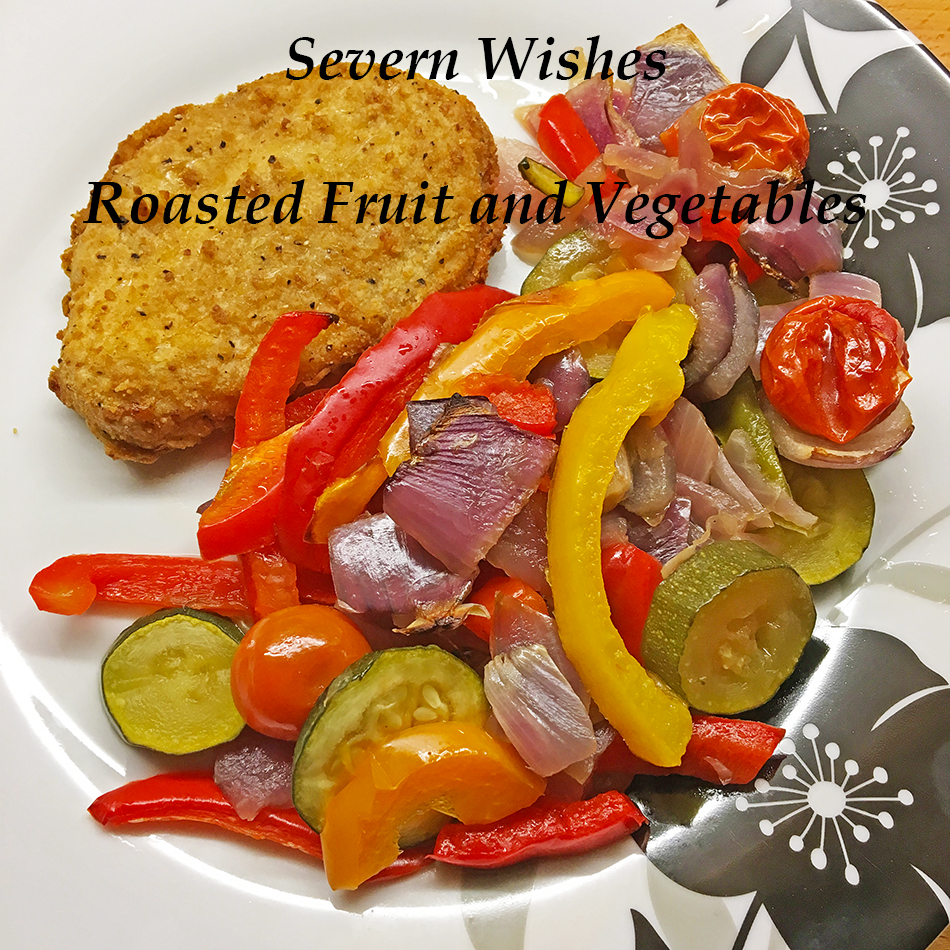
You can get your five or more a day through fruit juice, fruit pieces that are fresh, frozen or tinned, frozen veggies or fresh ones, they all count towards your total. My photograph below shows a typical dinner for myself, and I usually get one of my five during the cooking of my evening meal, I regularly eat a whole raw Carrot while I cook!

If you find that you’re struggling to get your 5 fruit and veg a day (for whatever reason) and feel like you’re lacking something in your diet, perhaps consider taking a multivitamin to give your body a boost, even if just through the winter. Most people lack Vitamin C and D during the colder months.

Eating More Colour Is Better For Your Health

Thank you for reading this blog post today and I do hope that you enjoyed it. If you do take me up on any of my healthy suggestions do comment and let me know how you’re getting on.

Have a wonderful last few days of January! Best wishes!


✩ Sabrina ✩

How I Made a Fun Craft Caterpillar to Teach my Child about Colours

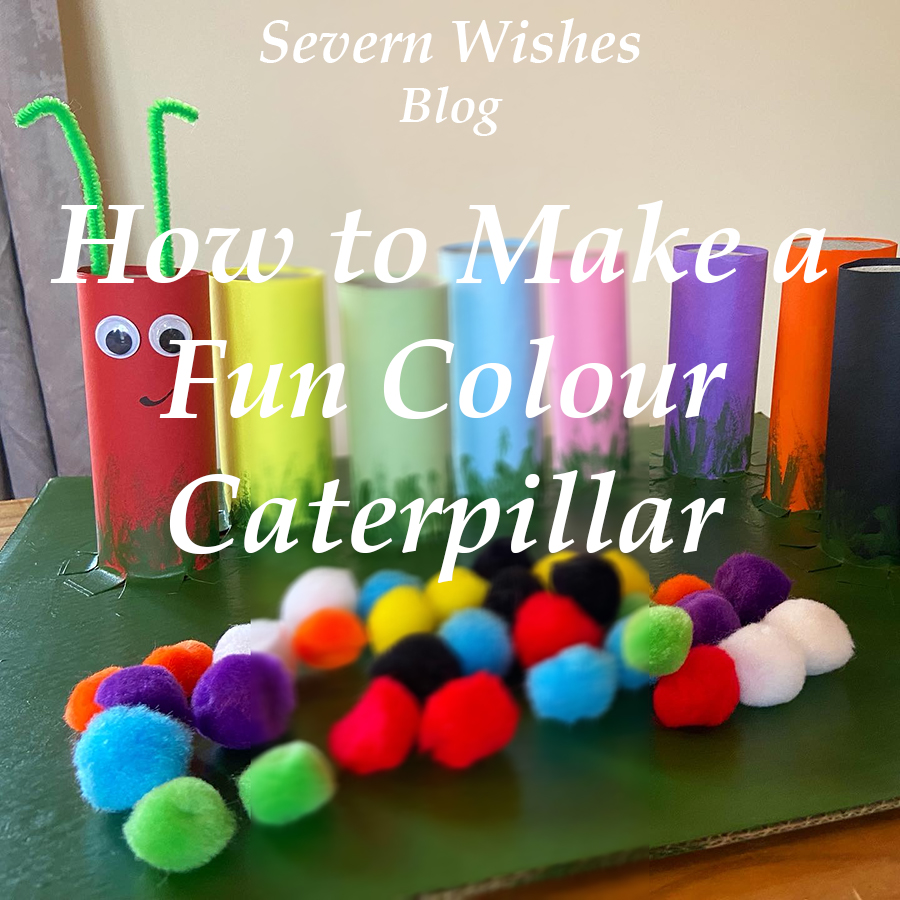
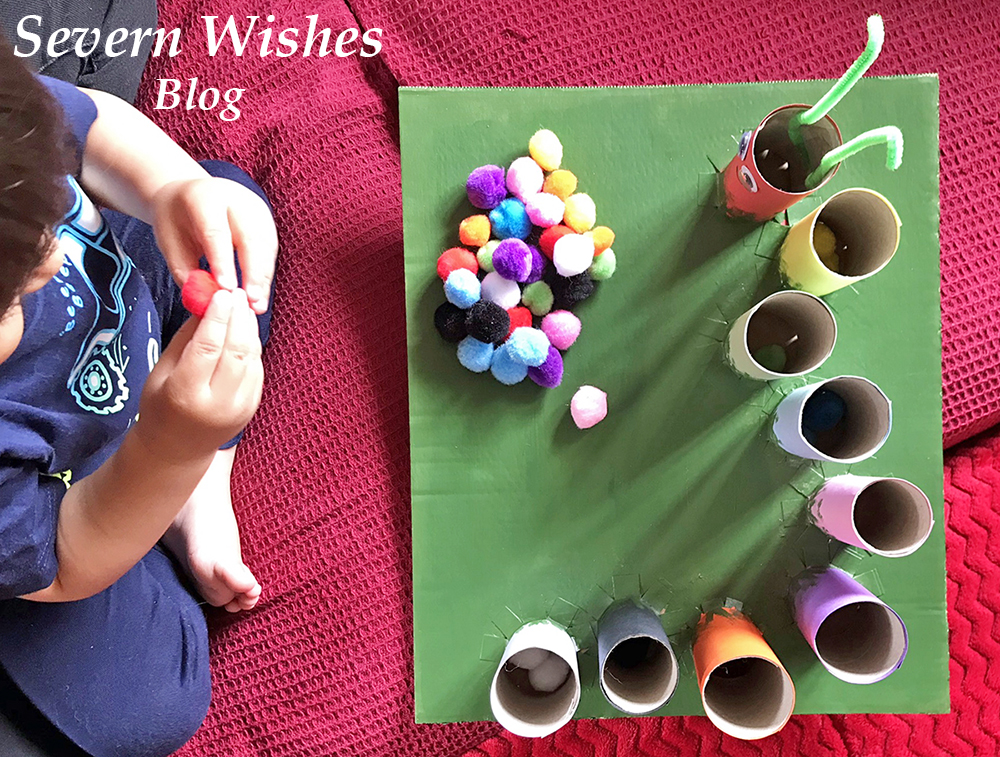
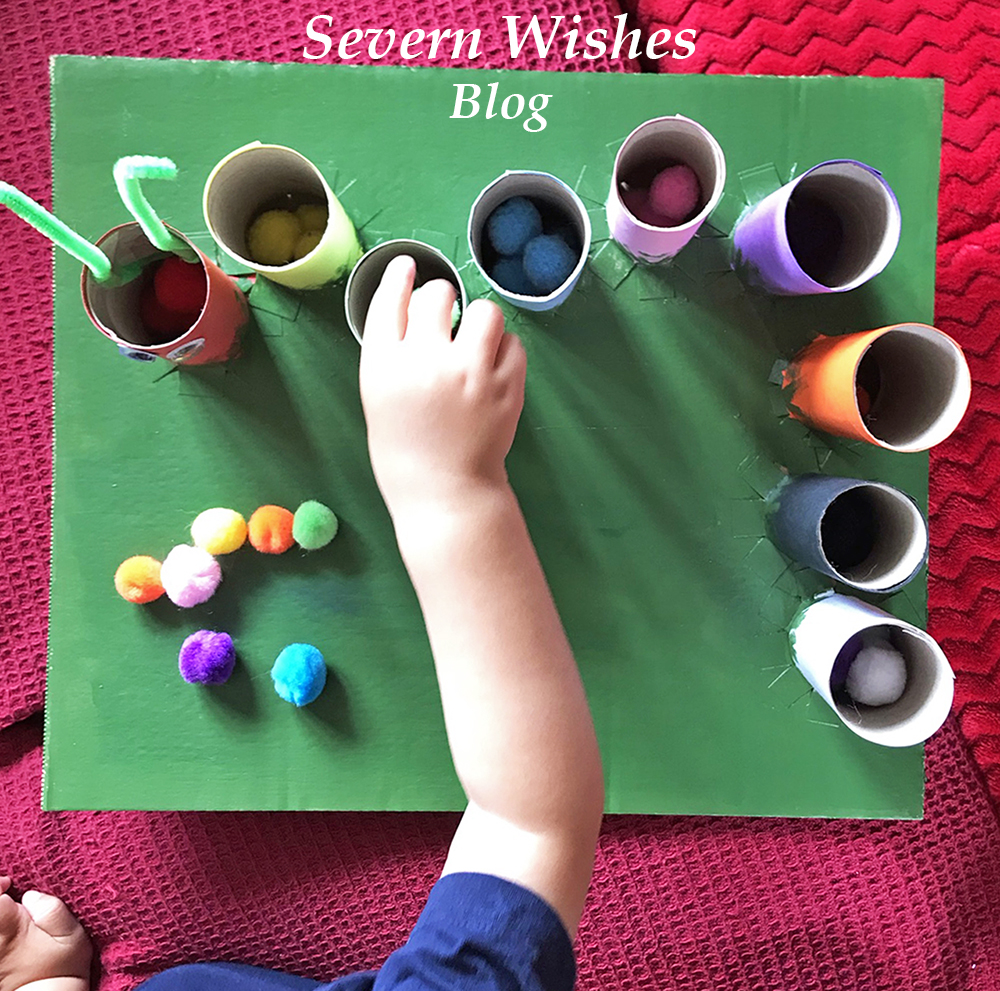
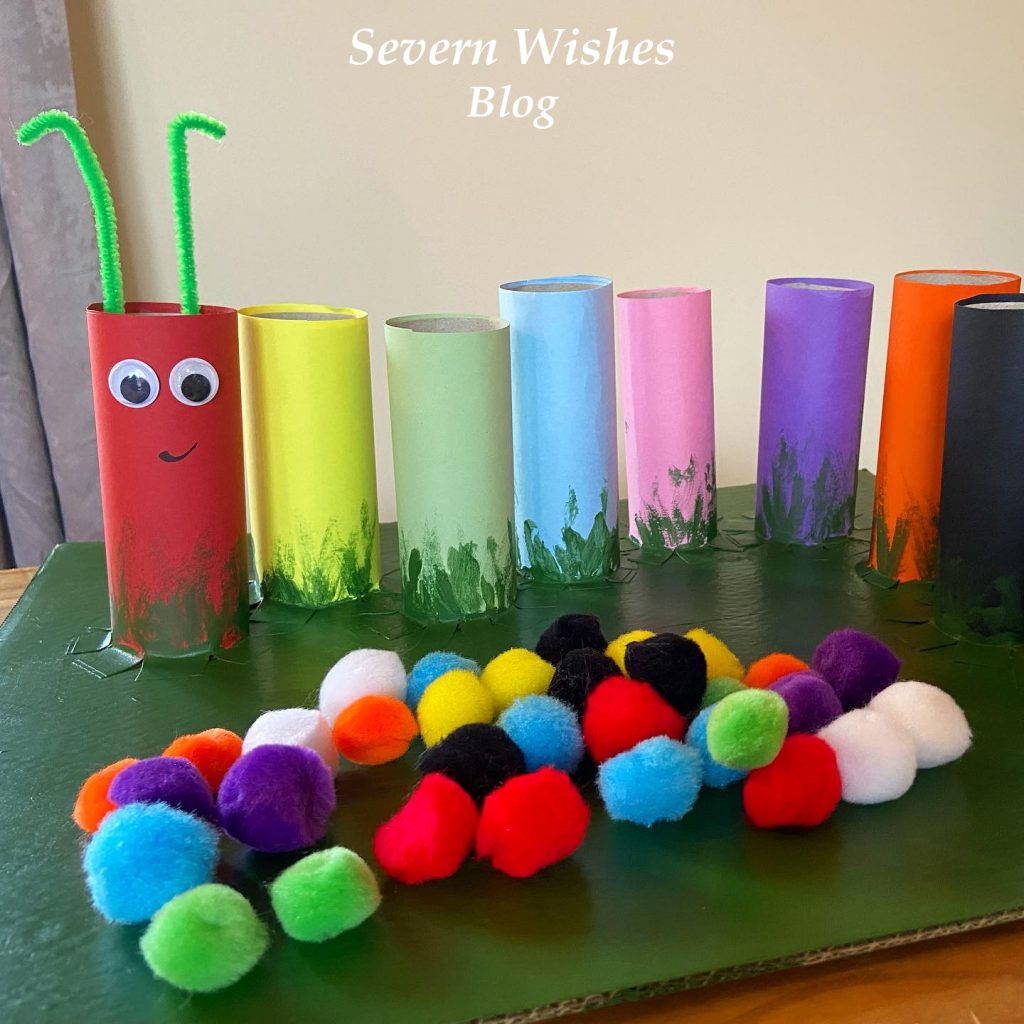
My Fun Craft Caterpillar is an easy to make craft project, that can help you to teach your toddler about colours and counting. You can make it any size you like and with only a few simple and non expensive items. Ideal for children aged two plus with good fine motor skills.

Designed for Age Group – 2 Years Plus (Supervised)
Parent Difficulty to Make – 3/5
Time it takes to Make – 4 – 6 Hours
Cost to Make – £10
Reasons to Make – Learning about Colours and Counting
. Helps Develop Fine Motor Skills.

When my son began having issues with delayed speech I came up with several things to aid him in his communication. One of which was a Caterpillar friend that I made into several different items. Today I’m going to be showing you how I made my Fun Craft Colours Caterpillar! He is cute and great for helping little ones learn about colours, counting out and developing fine motor skills.

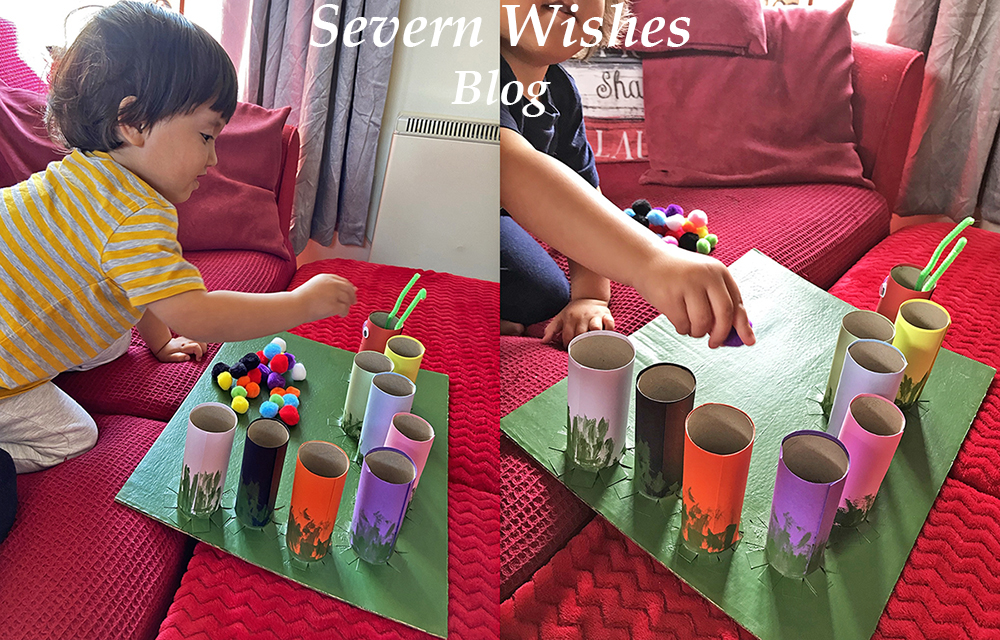
TOP TIP I wanted to help my son develop his fine motor skills as well as improve him saying different colours, picking up the Pom Poms and getting them to drop inside the correct tube does take some skills for little ones, so don’t worry if they have to learn how to do it. My son got the hang of it really quickly and was soon getting faster at doing it. One Tip is to show your little one what you want them to do, and then let them figure it out on their own a bit too. Always supervise but encourage and praise when they succeed.

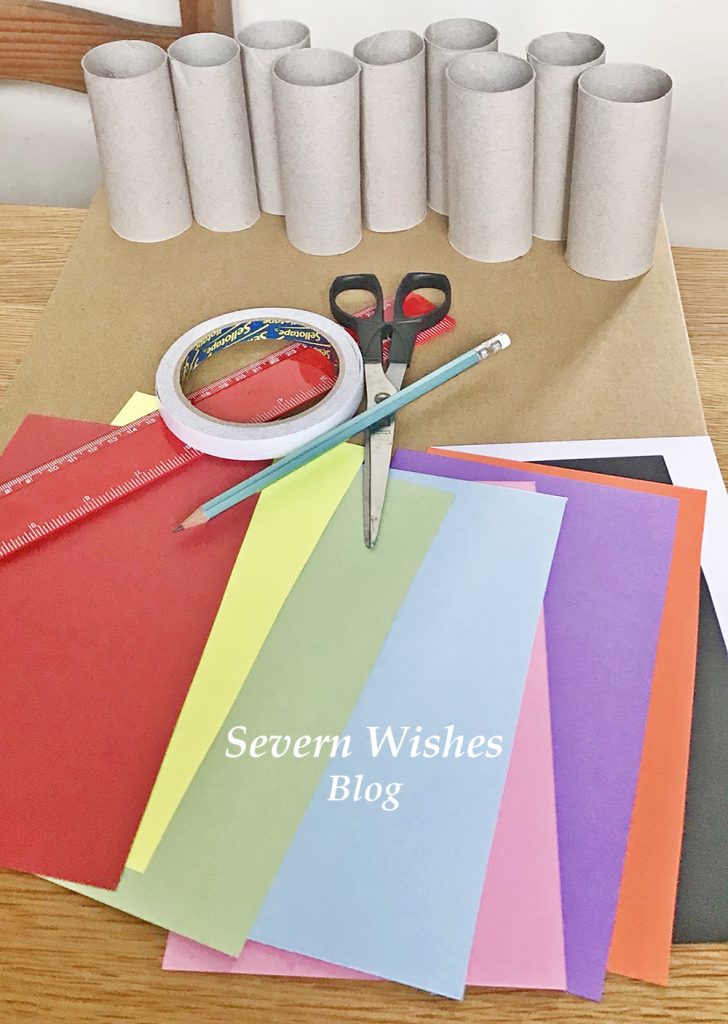
What You Will Need

Toilet Roll Tubes – You can use toilet rolls and kitchen rolls and just trim them so they are a similar height. Order your card and Pom Poms and work out how many rolls you will need, you require one roll per colour.

A Thick Cardboard Base – Do you have a sturdy box after going shopping or have had something delivered? You need a piece of strong thick cardboard either a Square or a Rectangle for your Base that the Caterpillar will stand on.

Coloured Card – You need to try and match the coloured card with the Pom Poms you are ordering. If you want to do a simple Caterpillar just go for a pack with Red, Yellow, Green and Blue mix, sometimes you get an Orange or a Pink in those packs. I bought two packs to ensure I got black, white, purple, pink and orange for my more complex Caterpillar.

Coloured Pom Poms – A toilet roll tube is a certain width across, so make sure you only order Pom Poms that are less than this. My tubes are 4cm wide so I purchased a bag of mixed coloured 2cm Pom Poms. This means they are easy enough to tip back out after every use. Also ensure you get non toxic child friendly craft items from reputable companies.

Double Sided Tape – You need this tape for cleanly applying your Card to your Rolls, this is the most time consuming of the craft build but it’s easier and less messy than waiting for lots of paint to dry. (See my How To below).

Paint for the Base – I chose to just paint my base Green, as if the Caterpillar were on a leaf or some grass. You can be as creative as you like! You only need to paint the base, once you have fixed on all your tubes (see my How To below for more clarity).

Stationery and Craft Extras – You may want to stick on googly eyes and feelers, or draw them on, it’s totally up to you, your Caterpillar, your choice! 🙂 You will also need a Pencil and a pair of Scissors.

Where I Got My Craft Items

Coloured Card Packs – Hobbycraft Online
Pom Poms – Hobbycraft Online
Goggly Eyes and Pipe Cleaners – Craft Bundle from The Works
Double Sided Tape – Tesco Store
Green Paint and Brush – The Works

How To Make Colour Caterpillar – Sabrina’s Step by Step Guide

Step 1. Assemble all of your items as described above and ensure you have enough of what you need. Place a tube, a piece of coloured card and your desired amount of Pom Poms (I used 4 per colour) into individual piles. See what you have and how many tubes with the right colours and Pom Pom matches.

Step 2. Arrange the plain tubes on your base, and see how you would like them arranged. You need a one centimetre gap between each roll where it will be attached to the base. Bearing this in mind, arrange your tubes and mark with a pencil on the base where you would like them to go.

Step 3. Satisfied that you have all the pieces you need you can begin the card craft. Start by marking the pieces of coloured card for your tubes. For example mine were 15cm high, so I marked the card at 16cm with a pencil leaving the gap of one additional centimetre. Then cut all the card pieces to size ready for wrapping around the tube.
TOP TIP ensure you leave enough card to wrap all the way around a tube with the extra at the bottom. You need at least a one centimetre section of card at the bottom of every tube for attaching it to the base.

SABRINA’S TOP TIPS: Don’t throw away pieces of card that you have left over from this make, I have plenty of Craft and Art ideas on my blog that you could use these bits for 🙂

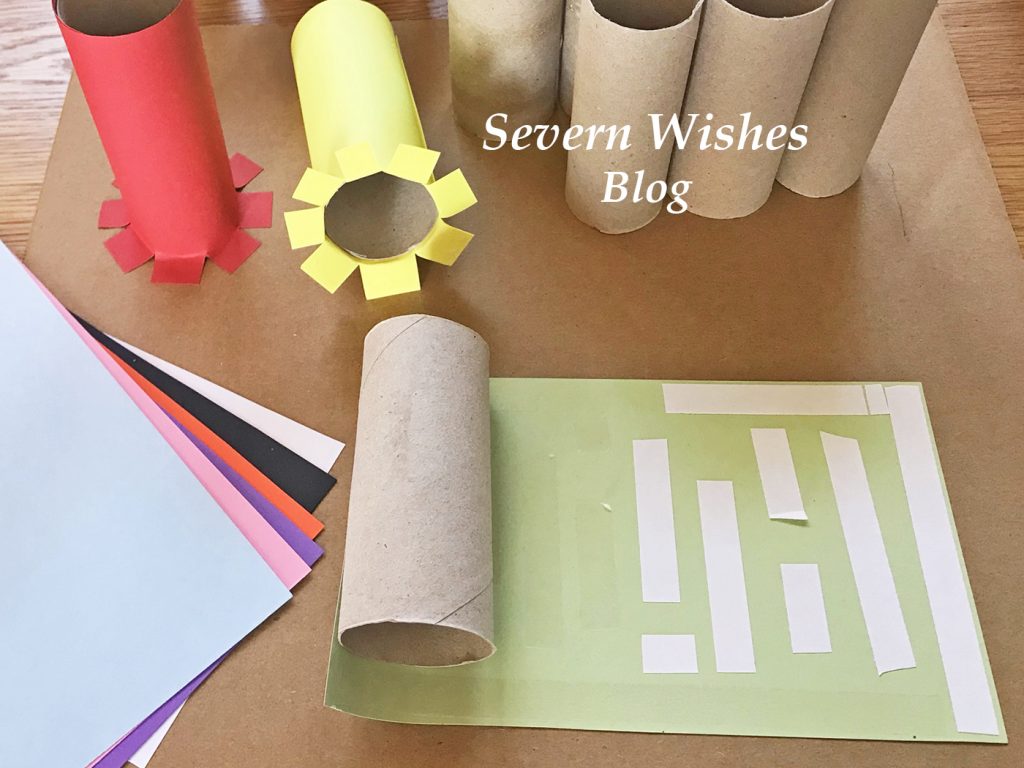
Step 5. Cut strips of double sided tape, align them along the top and edges of the coloured card and down the centre, ensure there is enough at the edges. At what will be the base of the tube stack the pieces vertically, using a small gap between them, this will be cut in Step 7 to ensure an easy attachment to the cardboard base. Make sure you put tape on all of the coloured card pieces. TOP TIP Make sure to do this Step and on to Steps 6 to 7 at the same time and don’t leave the craft part way finished, otherwise the double sided tape will dry out before you can affix it to the base.

Step 6. Time to roll the card on to the tubes. Remove all of the double sided tape strips. Line up the top section of the cardboard with the edge of the tube, on a flat surface like a table, gently roll the tube along the card. The tape will stick well to the thin tube, using your thumb and first fingers you can smooth out the card as it sticks. Try keeping it in line at the top. Once you come to the end of the coloured card make sure the final line of it is secure to its tube, smooth with your fingers and hold the edge in place for a minute per tube making sure that its firmly stuck in place. Repeat this per tube, laying them down on their sides once you are finished.

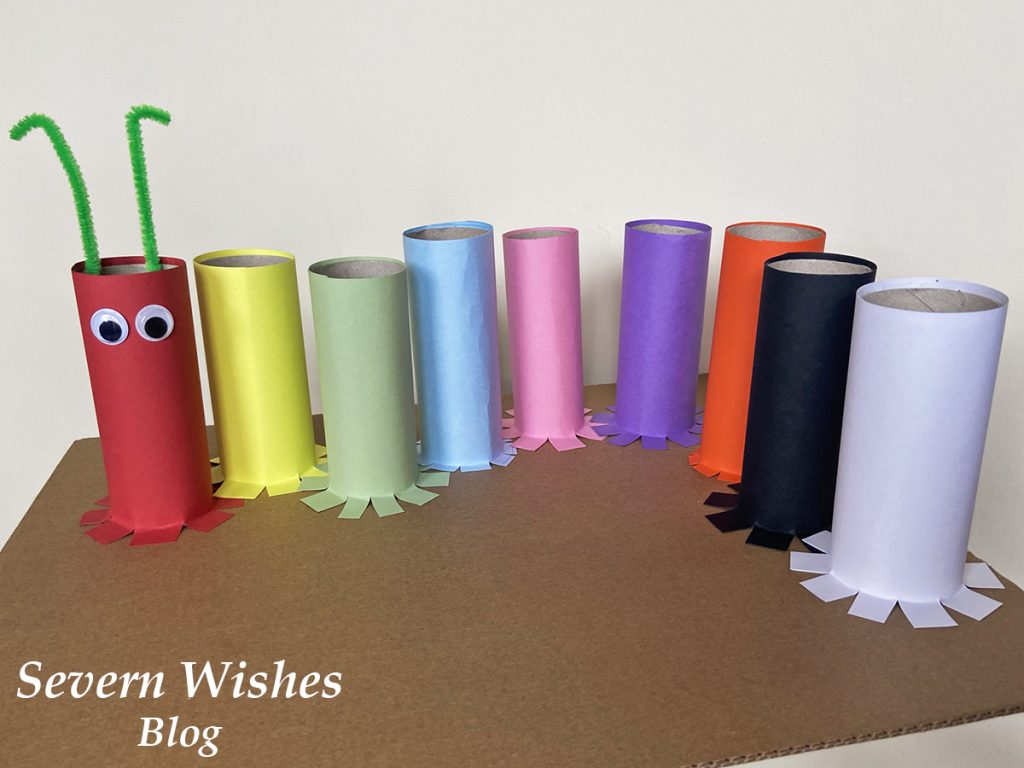
Step 7. You now need to be cutting the base of each tube so that they can be attached to the base. Take the first coloured tube you want to attach to the base (I did a Rainbow so mine was Red) and using sharp scissors cut a one centimetre slice up into the card at the tube base. Rotate the tube around cutting vertical slices as you go. Then once cut all the way around, gently peel back the slices and make a base for your tube. Affix it into place on your cardboard base because they should already have the double sided tape attached. Press down firmly and hold for one minute. Repeat this action with all of the coloured tubes until they are all attached to the base. (See images above and below).

TOP TIP Painting the base last ensures the tubes stay in place after the double sided tape has helped stick them down on the base. It also neatens up any edges that may have tape sticking out or tubes that weren’t quite level.

Step 8. With all your coloured tubes attached to the base you can now consider adding anything else to your caterpillar, and also paint the base with whatever paint you choose. I added googly eyes and some pipe cleaners as my Caterpillar feelers.

Step 9. Leave your Caterpillar to dry overnight before showing it to your little one. Ensure that you only play with it supervised either by you or another adult. The Pom Poms should be stored inside something that little ones can’t get into unless you are doing the toy together. Most children wouldn’t eat them at this age but better safe than sorry. I recommend a small plastic box like the really useful ones with the clip over lid handles.

TOP TIP Your Caterpillar friend can now be used to teach colours and numbers! Ask your child to count how many body parts the Caterpillar has, how many Pom Poms fit in each tube, can they separate the colours correctly and add them to the correct tube? This craft project can be used for play and learning and will keep your child occupied for hours.


Have you enjoyed this Craft Project? I would love to know what you think!
Please leave me comments on the blog section below or on social media.
Please tag me if you make a Caterpillar of your own!
Use the hashtag #SabrinasCraftCreations

Thank you for reading this blog post today, I hope I see you again soon!

Best Wishes for a happy week ahead!

✩ Sabrina ✩
March 2021 Treatbox Reveal and Review


Welcome to the March 2021 Treatbox UK unboxing Reveal and my Review of the contents inside the box. This box month always coincides with my birthday, so it’s like an extra little present to myself! And funnily enough it felt even more like my birthday when I opened it thanks to two items inside…


… a blank Happy Birthday card and a key ring! (I have collected Keyrings since I was a child)!

Happy Birthday to me! And here is what else was inside this great box!


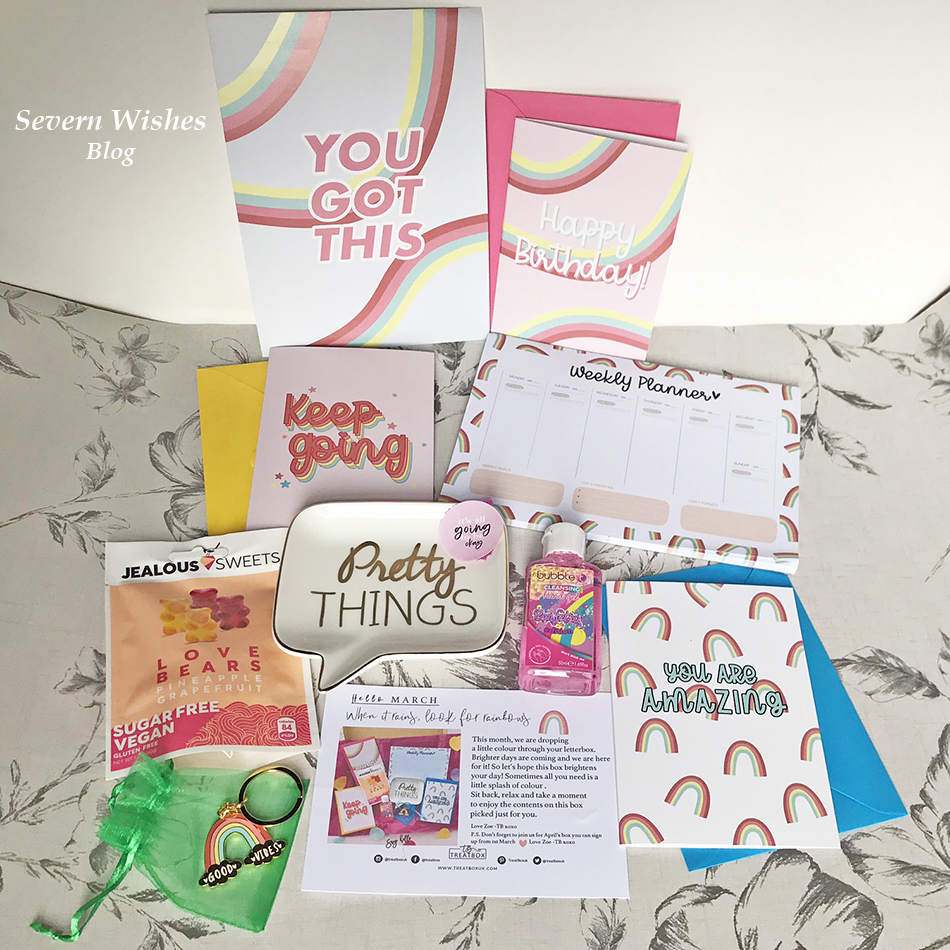
What Was In The March 2021 Box?

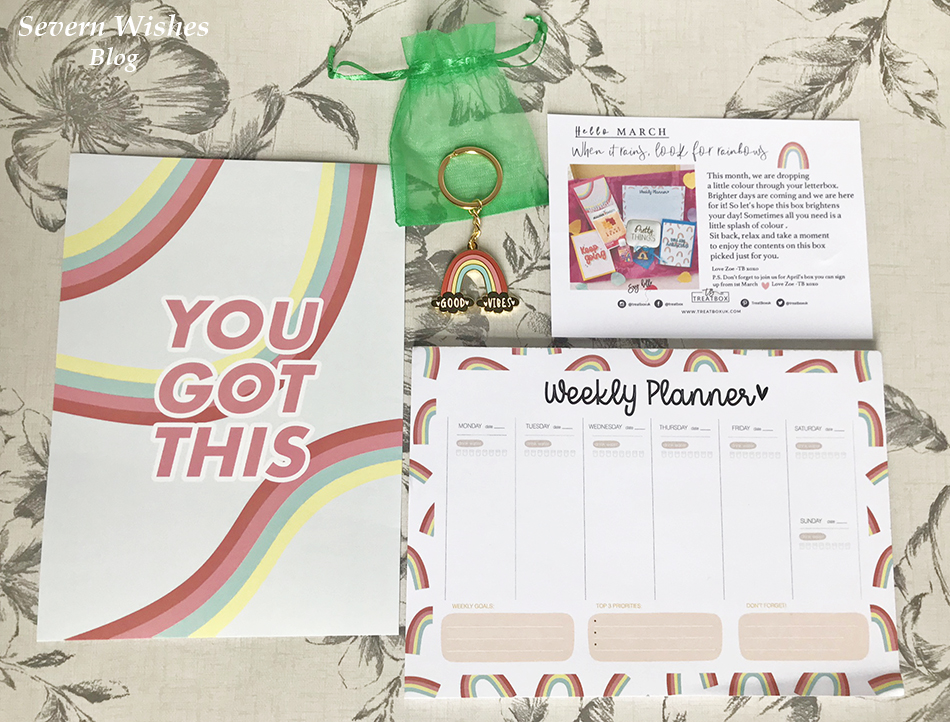
Treatbox A5 Print “You Got This”
Treatbox Cards x 3 “Happy Birthday”, “Keep Going” & “You Are Amazing”

Treatbox Rainbow Design Weekly Planner Pad
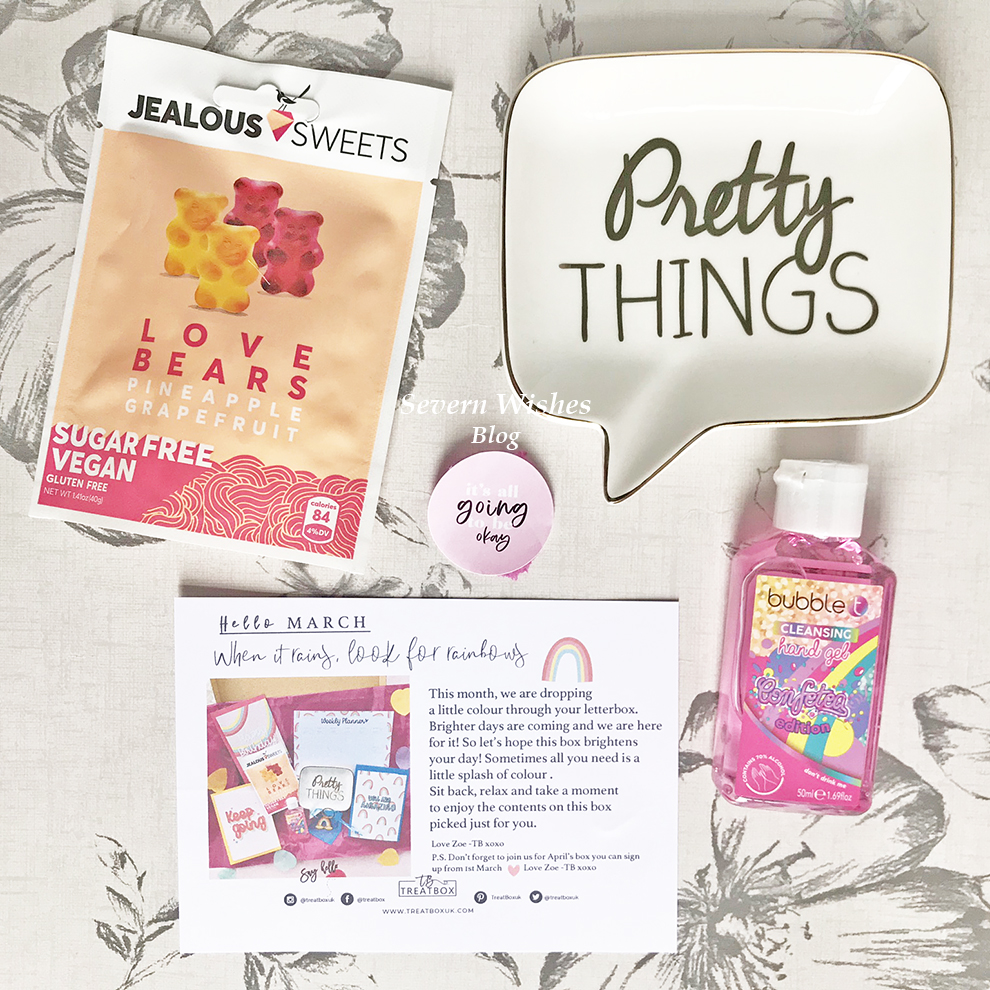
“Pretty Things” Keepsake Dish
Bubble t Cleansing Hand Sanitiser “Confetea Edition” 50ml
Jealous Sweets Love Bears Sugar Free Vegan Sweets 40g
“Good Vibes” Rainbow Key Ring


9 items in total.


My Opinion of the March Box Contents


What I really liked inside this box was… all of it! 😀 From the Rainbow theme to the positive vibes! I thought the Keepsake Dish is of excellent quality, and the key ring is lovely too. Sanitiser is something that we all need a lot of at the moment and it is great to have a pretty pink one that smells amazing, that is a bonus! What fun!

The A5 print and the cards are positive orientated and I love that we can pass the positive vibes on to other people from our joy in receiving the Treatbox UK March box! I cannot wait to try those Vegan Sweets and I saw they have a long use by date so no rush in nibbling them all up! Yay!

But my favourite item by far has to be the Weekly Planner! I love how much design Zoe and the team have managed to incorporate into it! Drinking Water, Days of the Week, Goals, Priorities and Don’t Forgets! It is now so much faster to plan my week than my old planner where I had to use a ruler to section parts of the day out for my To Do’s and Goals! Now I just pop them all on this one page! I LOVE IT!


Thanks so much for an awesome item! I would love to see another one with a different border in a few months time, because I will be using this weekly from now on 😉 A great box I am very happy!


Did you know that you can view all of my previous Treatbox unboxing posts in this unique category of mine called ‘Treatbox’ it is specifically for these box reviews and reveals – Severn Wishes Treatbox.

March 2021 was box number 60 for me!!!


Thank you for reading this Review and Reveal for the March Treatbox! If you liked it why not check out my other reviews too! Have a wonderful day!

✩ Sabrina ✩
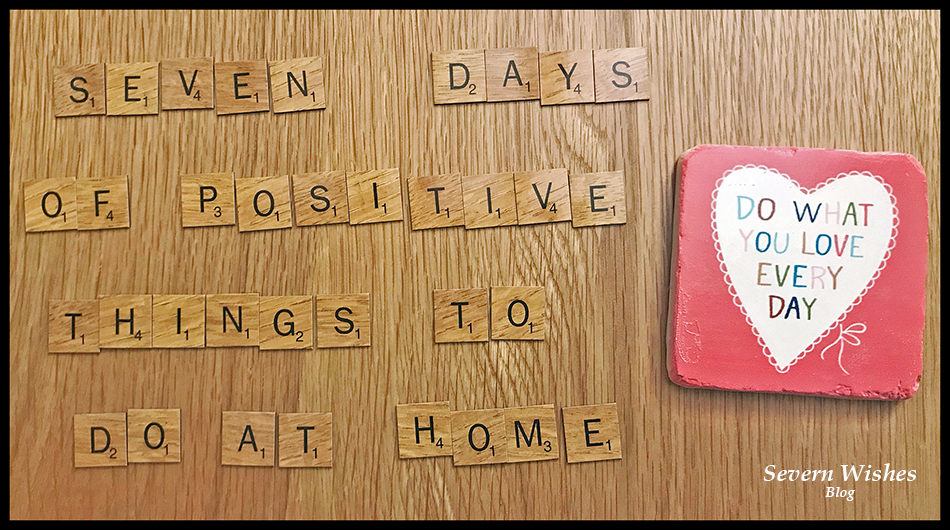
A Week of Positive Things – Sabrina’s Tips for having a more Positive 7 Days at Home

A Week of Positive Things

Sabrina’s Top Tips for having a more Positive 7 Days

Everyone seems to be feeling a bit low lately, it’s bound to be the Winter Blues mixed in with everything to do with the Pandemic. There are so many people who have found themselves working from home again, and many young people who are studying at home again too. With all this time stuck at home there are lots of anxious feelings and negativity, so I’m here with some suggestions to try and put a positive spin back into your home environment!

So here is my solution to tackle the blues, try to take half an hour out of your day as a family unit, every afternoon for the next week, after work is over and after the schooling is done for the day. Pick one of these ideas of mine to do together, a different one every day in any order you like.

I guarantee they will have you feeling more positive by the end of day 7! You can do them in any order you like! Or do one of them twice if it’s a hit! If you play along please comment on this post or on my socials at the end of the week and tell me which activity your family preferred and whether these activities did in fact work for you and increase your family’s positive attitudes.

  1. Go for a Walk (Weather Dependent) and play a game as you go! Ideal for parents with younger children who are still enthralled by the nature of “eye spy”. But the fresh air and endorphins combined should make all of you feel better too. Older children may want to go for a jog or a bike ride if that’s more your thing, so long as it’s half an hour outdoors with your family, all together.

  2. Watch a Funny TV Show or Cartoon. Laugher really can help you to feel better, even for a brief moment, so why not stick on a tv show or a favourite cartoon that never failed to make you laugh and giggle together. Tom and Jerry is a good one!

  3. Bake or Make Something Delicious! I have a ton of recipes on my blog and some don’t even take that long to do. So why not make some chocolate crispy cakes or even some rocky road, something simple and even something that doesn’t require baking to save you time! Then you’ll have a tasty treat for a few afternoons to come! See what you’ve got in the cupboard! Here is my baking section HERE.

  4. Get Creative. You can do one of two things with this creative activity depending upon the age of the people in your household. Either, do a rotating draw-off where by you each start with a piece of A4 paper and one coloured pen (all varying colours) and you keep rotating the papers every minute, do this until 4 minutes is up. Everyone should’ve drawn on each of the pieces of paper. No talking! See what you’ve come up with! Share them with me on social media! #SabrinasCreativeCrafts
    OR
    You can play the Sentences Game. The idea is to make up a creative story, it should be funny, and you once again rotate the papers. This time you want long strips and not A4. Cut a vertical A4 in half twice or get your strips. Once the first minute is up and the first sentence has been written, you all fold over the section and pass it on. When the time is up you each open up the papers to find a story.

    For example;
    There once was a man who couldn’t find his shoes.
    I think I want some KFC he thought.
    He headed off in the direction of the sunset.
    In the end his dog ran away and joined the circus.

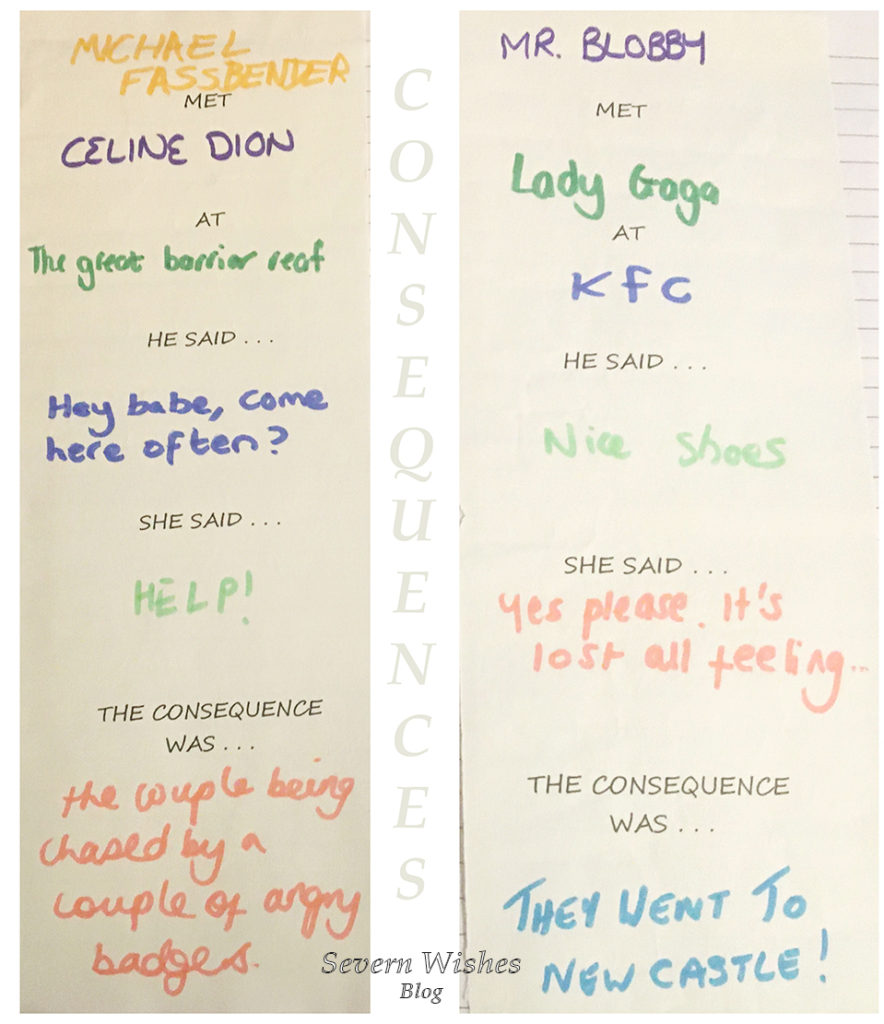
    If you have teenagers then you could play the game another way, this is called CONSEQUENCES, you start by writing on each of the papers the following things, add extra if you have a large family so that everyone will get a go at each section when the papers are passed on. They usually go like this…
    ___
    Met
    ___
    At
    ___
    They said ___
    What happened next was ___ OR The Consequence was ___

    Then unroll it after everyone has had their turn and the sections are completed, then take turns in reading them out. See my photo below this list for an idea of what it would look like when you finished! Warning my examples may cause laughter!

  5. Photos! Another fun thing that would brighten your spirits is to look back at any photo albums that you have or digital slideshows. You could even play a game while you look through them. Every time that your mum is seen with sunglasses on she gets a point, each time someone hasn’t got their hat on when they should you lose a point! First person to spot the water in the photos gets a point. Etc etc! Make up some rules before you start and say that the first person to 10 points gets out of doing the washing up tonight! Or the winner chooses what’s for dinner the next night! Involve one another in every day things.

  6. Write a List of Goals and Aspirations for 2021 – but only write the do-able ones! For example, I want to bake a cake for mums birthday. OR I would like to walk a mile on the next weekend that is dry and sunny. When you achieve something, even if it’s a little thing, you feel so much better about having accomplished it. Setting some realistic goals now for the year might seem silly when we don’t know what’s around the corner, however even if the goals are just for the people in your bubble, it’s still doable. Put them up on your fridge or board and tick yours off when you have completed it.

  7. Make a Meal Together. No matter how old you all are there is something fun about making dinner together. May I suggest something that everyone can get stuck into such as Fajitas, Curry, Sausages and Mash or Lasagne (dietary requirements permitting). I have tons of recipes on my blog if you need inspiring! But making and preparing food together before you eat it can be a real bonding experience, and it can also be important for teaching younger children where foods come from or that by mixing this with that you achieve this outcome. Food is something that has been so important during the first lockdowns so I thought I would continue on with that and try and get you back into your kitchen to make something you love together. Check out my Recipes HERE.
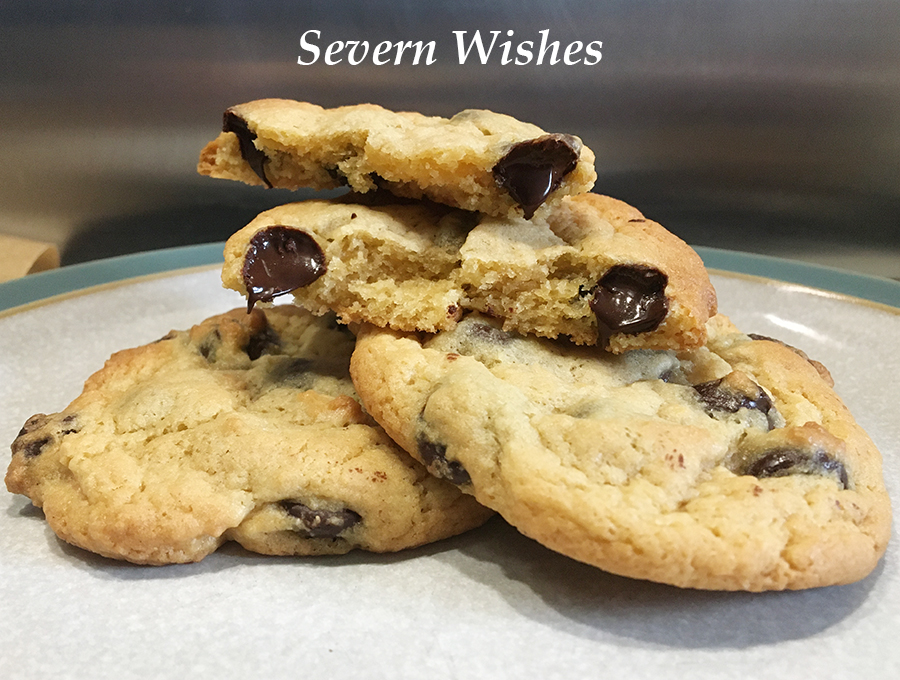
Why Not Try And Make My Delicious Cookies? Click the link in section 3 for the recipe!
The Consequences Game – Imaginative Fun for the older children in your family.

I really hope that you’ve enjoyed this blog post and that you would like to participate in my week of positivity. If you do participate in any of them or attempt to get those in your bubble to do so, then please let me know how you got on! I can’t wait to see if you make anything as well 🙂 tag me online! And thanks for joining me!

✩ Sabrina ✩

Severn Sabrina Instagram
Severn Wishes Blog Facebook
Sabrina of Severn Wishes on Twitter

How To Eat A Rainbow In A Week and Ways to Help your Children Eat Healthy too

So many people are looking for healthier choices in the wake of this awful pandemic. The fitter and healthier we are, hopefully the stronger we will all be if and when we need to be. So in this post I will be giving you all some ideas on how to eat a Rainbow worth of healthy foods in a week. I once read a study that said its about variety over quantity, so now I try and mix it up each week.

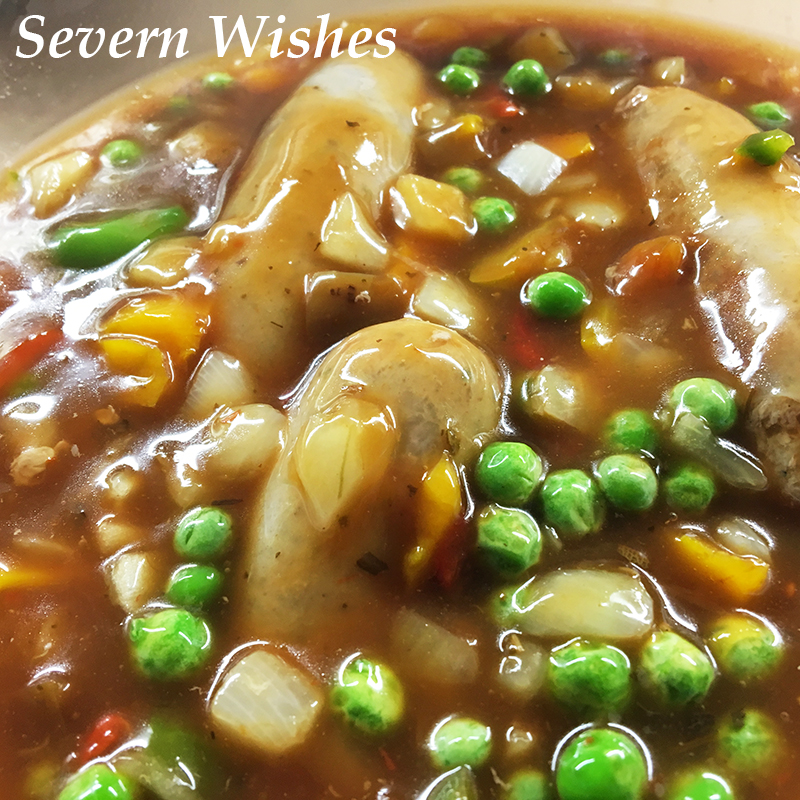
TOP TIP: An easy way to get veg into children is to add tiny cut up amounts into casseroles or anything which has a sauce or gravy to disguise any strong tastes. I like the bags of tiny frozen veg you can buy, just tip a mugs amount into every meal you make.

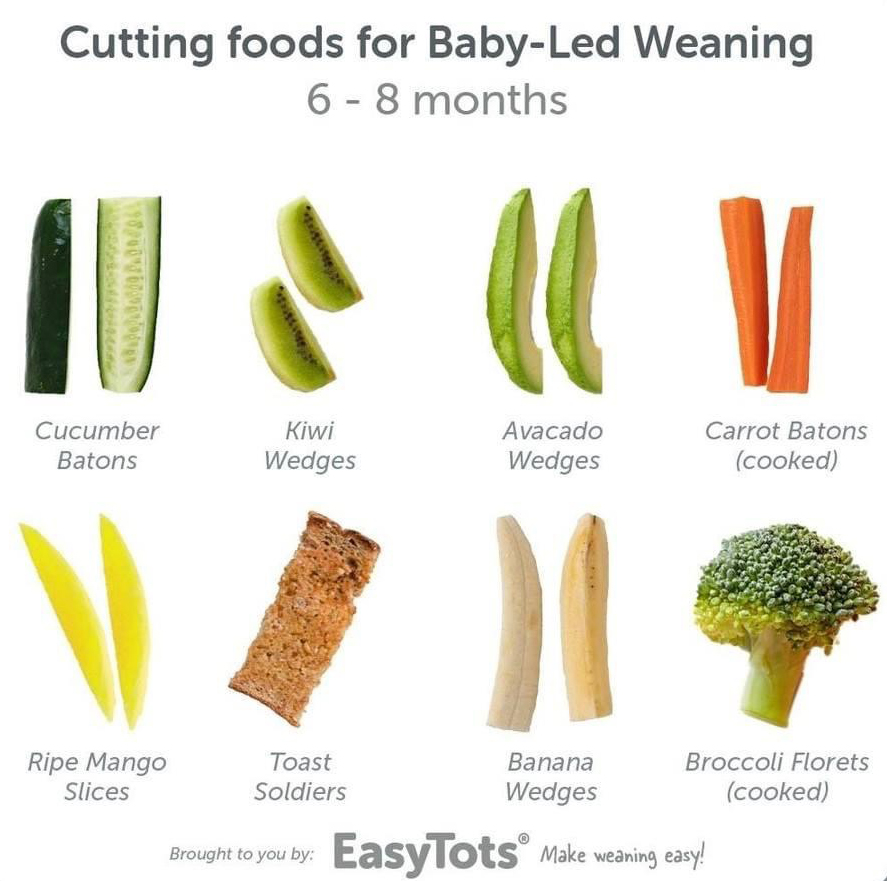
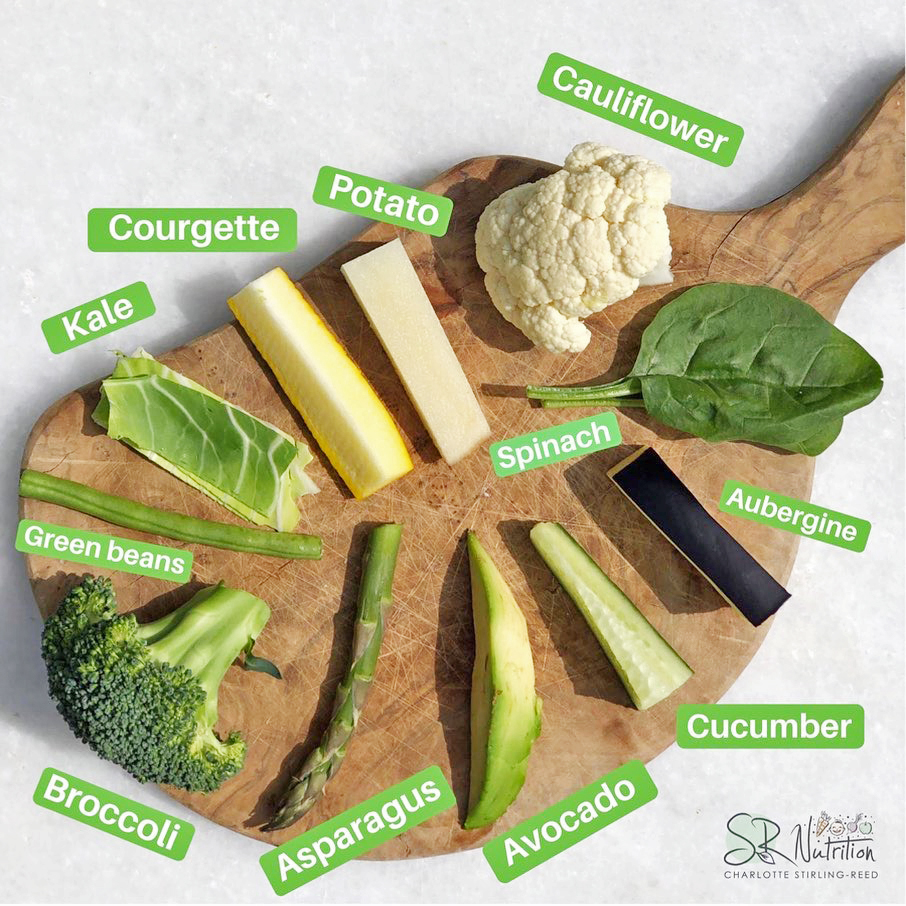
TOP TIP: If you are doing any baby led weaning, here are some ways that you can cut up fruit and vegetables to make it easier for children to pick up and eat.

Here are some inspirational colours of Fruit and Vegetables that you could use for your week enjoying an Edible Rainbow of Food.

RED

Strawberries
Raspberries
Tomatoes
Apple

Chilli
Pepper

Cherries
Cranberry
Grapefruit

Pomegranate
Red Currants
Red Onions
Water Melon

ORANGE

Oranges
Carrots

Apricot
Pepper
Peach
Squash
Nectarine

Pumpkin
Papaya

YELLOW

Mango
Lemon
Pepper
Sweetcorn
Pineapple

GREEN

Lettuce and Leaves
Avocado
Spinach
Kale
Kiwi
Apples
Lime
Leeks
Pears
Chilli
Pepper
Cucumber
Courgette
Spring Onions

Honeydew Melon

BLUE

Blueberries
Acai Berries

PURPLE

Blackberries
Black Currants
Red Cabbage
Aubergine
Carrot

Grapes
Plums


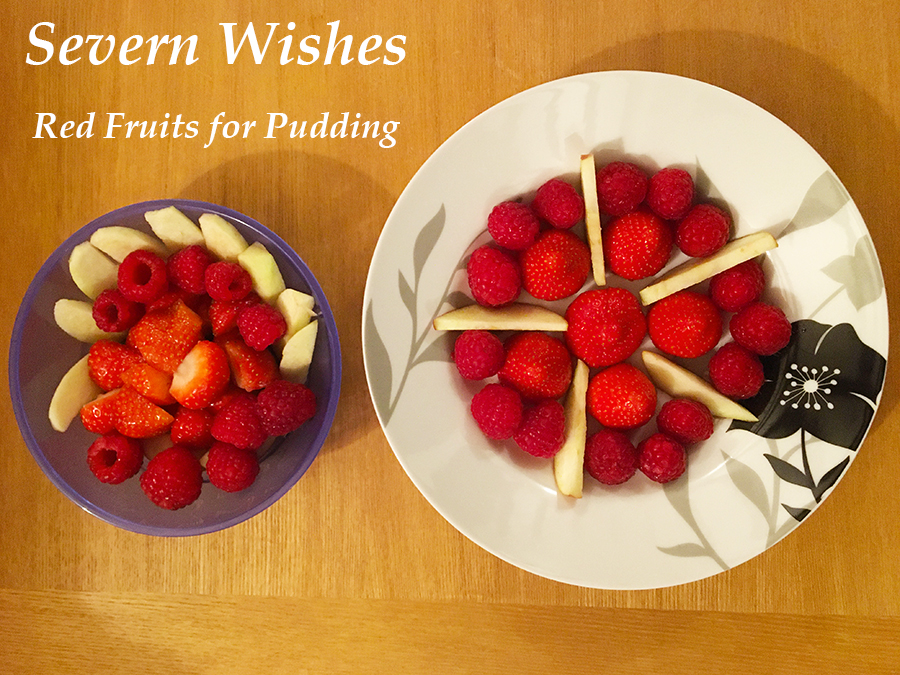
I love nothing more than to eat a big bowl of berries with some Vegan yoghurt on top for my pudding.

I started my son on fruit and vegetables when he was really young, a large variety at his weaning stage. Because it’s really important that children eat healthily to get the necessary vitamins and minerals they need for their growth and development. And if you start them young, the more likely it is that they continue to eat that variety as they grow up.

Here are some examples and TOP TIPS that I use to get my toddler to eat his fruit.

Toddler Size! Cut up into ideal sizes and shapes to minimise choking hazards and also to inspire them to pick them up themselves. My son prefers to eat some things independently.

Make It Fun! Whether you sing a song about a Rainbow, or the Birds Eye Vegetables Advert, make food fun! Kids think things are funny and that will bring a positive energy to the scenario. I remember giving my son a piece of Mango for the first time, he must have dropped it about ten times before getting it to his mouth. He thought the slipperiness of it was hilarious! Then realised how great it tasted and there was no stopping him.

My Son has some Fave Fruit Combos!

Bowl of Mixed Berries
Mango Chunks and Melon Chunks
Apple Slices and Shapes

My Son’s Bowl of Fruit Versus My Bowl of Fruit


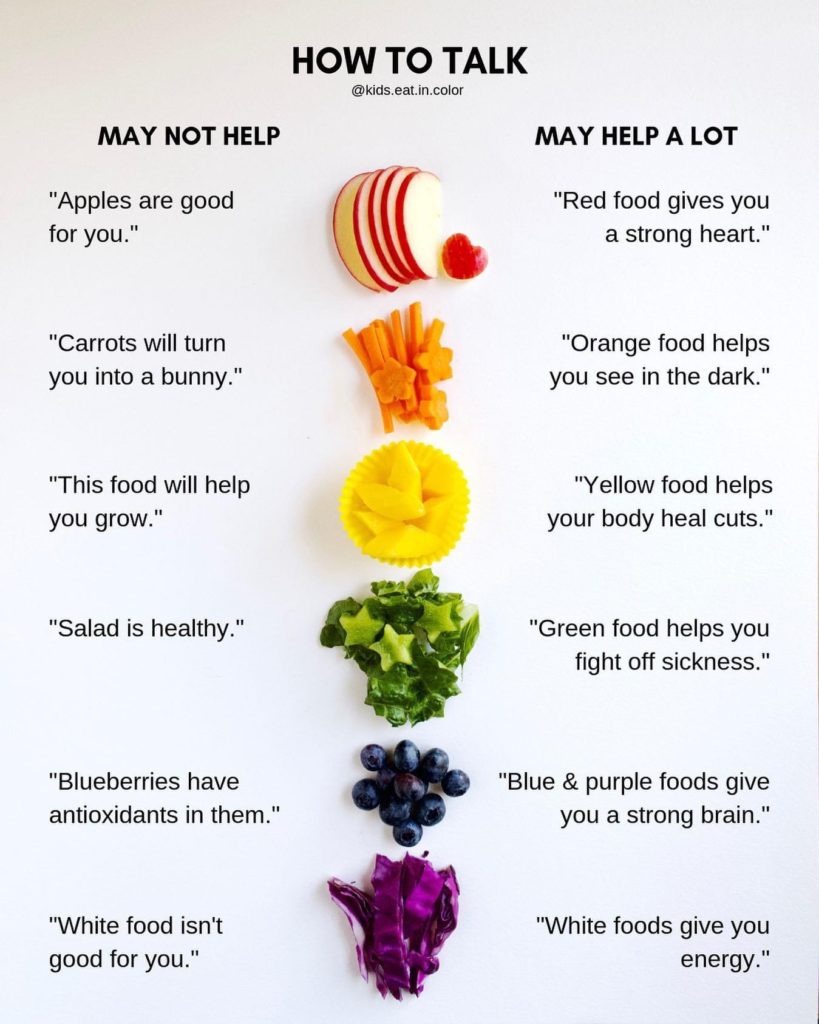
Some children need encouragement when it comes to eating their fruit and vegetables, check out these awesome phrases in the diagram below to get you started. You should always stick to the facts, fun and inspiring things to tell your children and young adults. Do not use language that will confuse, stick to what actually happens when they eat their greens.

Eating A Rainbow In A Week

Monday

Strawberry Yoghurt with Apple Slices
Glass of Cranberry Juice
Fajitas with Red Pepper Slices and Tomato Salsa
Bowl of Strawberries and Raspberries

Tuesday

Peach and Passionfruit Yoghurt with Peach or Orange Slices
Glass of Orange Juice
Carrot and Coriander Soup
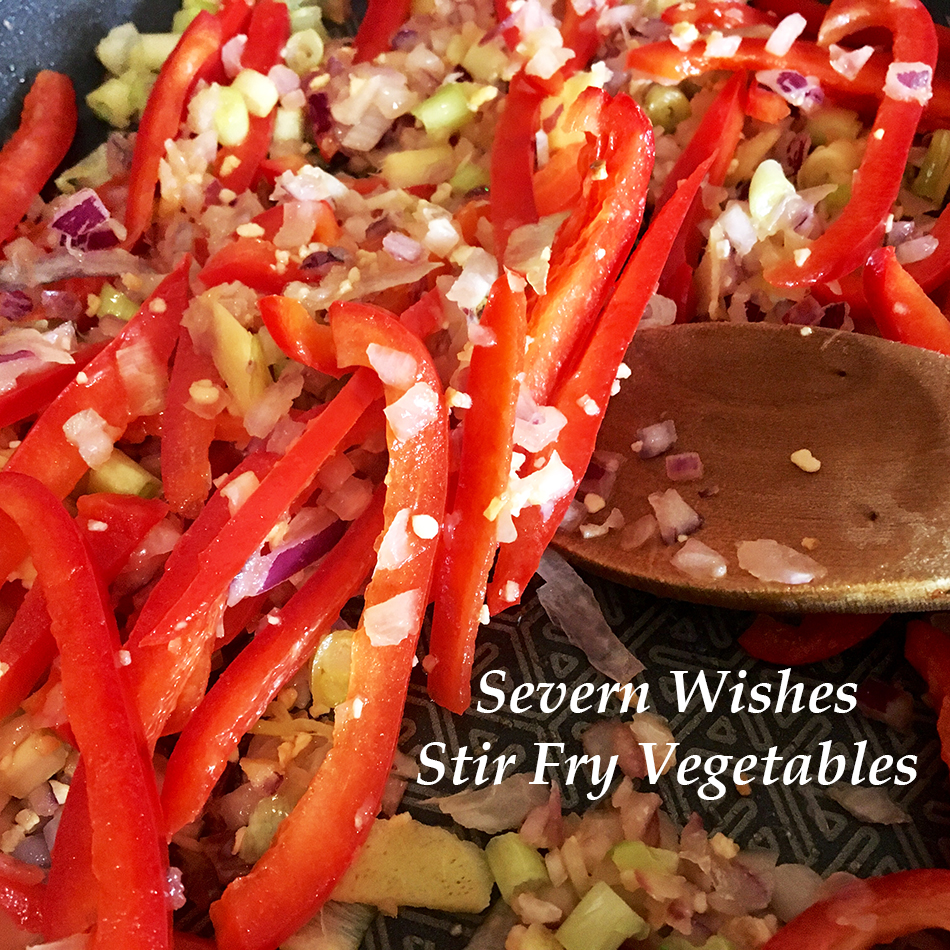
Stir Fry with Carrots and a (Orange) Pepper

Wednesday

Chicken Breast with Sweet Potato Mash and Sweetcorn
Mango Chunks

Thursday

Kiwi Fruit cut up into some Plain Yoghurt
A Pear and an Apple
Salad with tasty leaves, crispy lettuce, spring onion and cucumber slices
Beef Stir Fry with Green Pepper, Green Chilli, Leeks and Spinach


Friday

Blueberries in Plain or Vanilla Yoghurt

Saturday

Blackberry Yoghurt with added Blackberries

Blackcurrant Cheesecake

Sunday

Mix it up! Choose some of your favourites from the week, try something new, make up your own recipe or go with other colours of food such as Pink, White or Black! Plenty of unusual fruit and veg out there!

Thank you for reading this post today, I hope you have gotten some fun ideas of things to try with your children and your weekly fruit and veg.

✩ Sabrina ✩
Owl and Brolly Wall Stickers Let Imagination Run Free with their Incredible Quality, Unique Style and Beautiful Watercolour Designs

Owl and Brolly Stickers are Unique, Colourful and Imaginative

Hello Severn Wishes followers. Today I have the pleasure of bringing a special review to you all. Owl and Brolly is a company who specialise in Wall Stickers, mainly for children’s bedrooms and play rooms. I have known Sue at Owl and Brolly for several years now, we bonded through an Endometriosis group and found we had mutual things in common. When I found out she was an incredible artist and saw her beautiful work, I wanted to shout about her talent.


Sue knew that I had just moved house into a rental property, and I couldn’t take the chance of ruining the paintwork in my son’s bedroom. So the plan was to do some tester stickers, an hour, twenty four hours and finally seven days. And luckily for me there was nothing wrong with the paint and I tried the stickers on several walls just to make certain. I can guarantee that it is a good idea to do the Tester Sticker when you may not know the condition of the walls in your home.

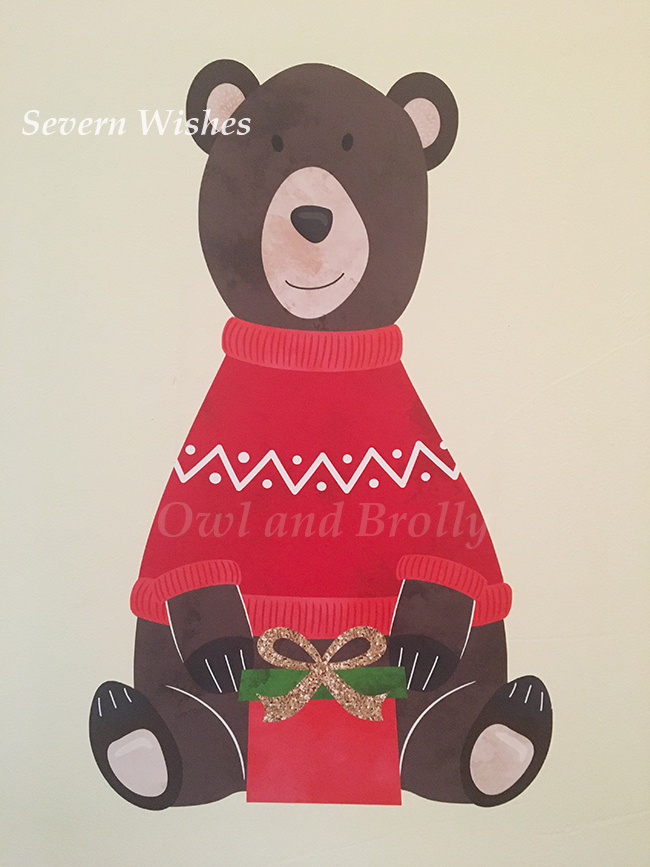
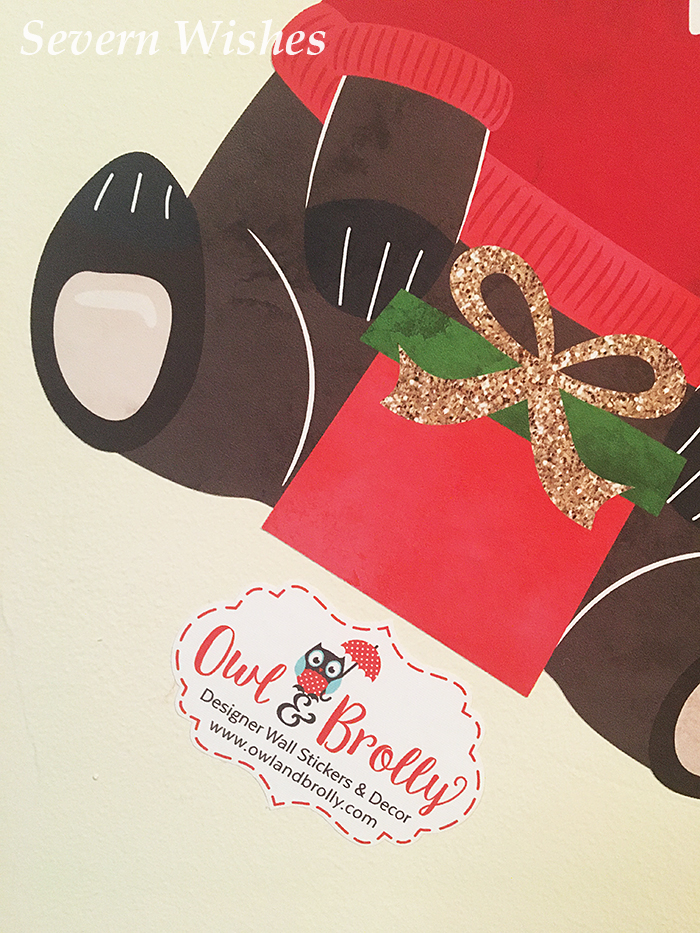
Delightful Christmas Bear

This lovely Bear is for my son’s bedroom, he hasn’t given him a name just yet, ha, ha! But the quality of this sticker just amazed me. Not just the printing of the sticker itself but the design. Owl and Brolly stickers are all drawn and designed by hand. What a talented woman behind such a wonderful creative business.

What I love about the Owl and Brolly range is the creativity and the infinite imagination that stems from items like these stickers. Any child would be lucky to have some of them on their walls.

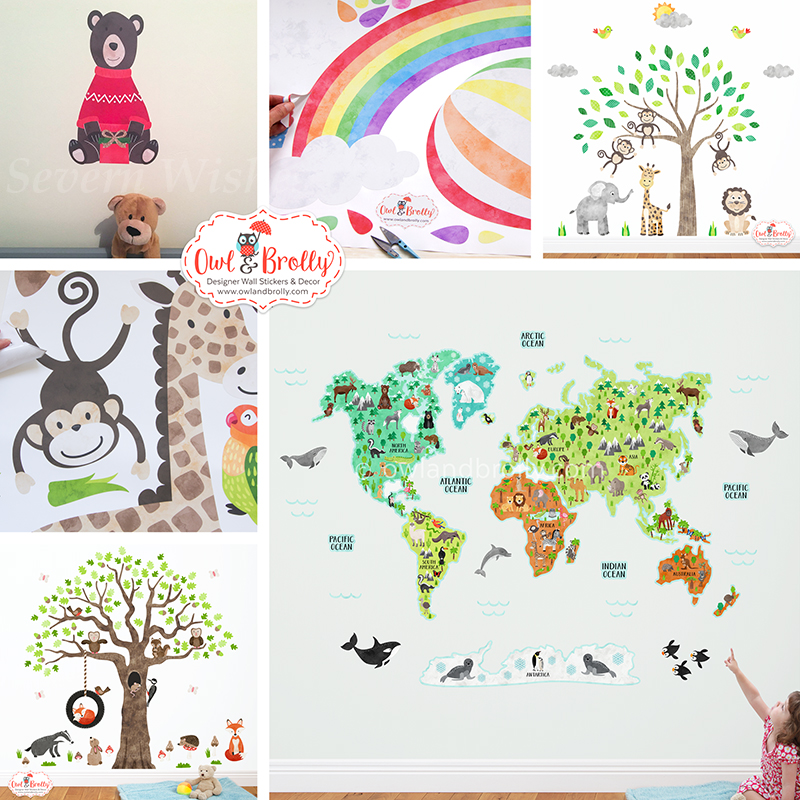
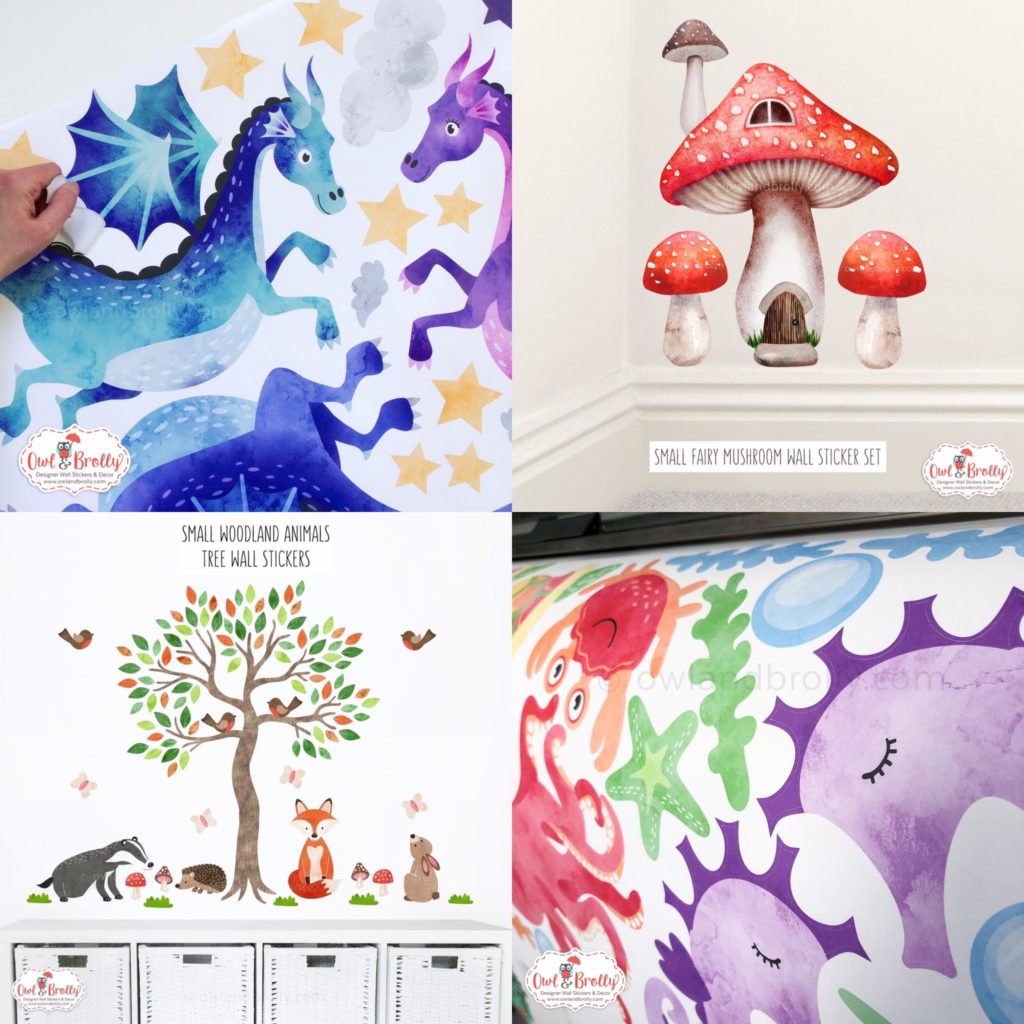
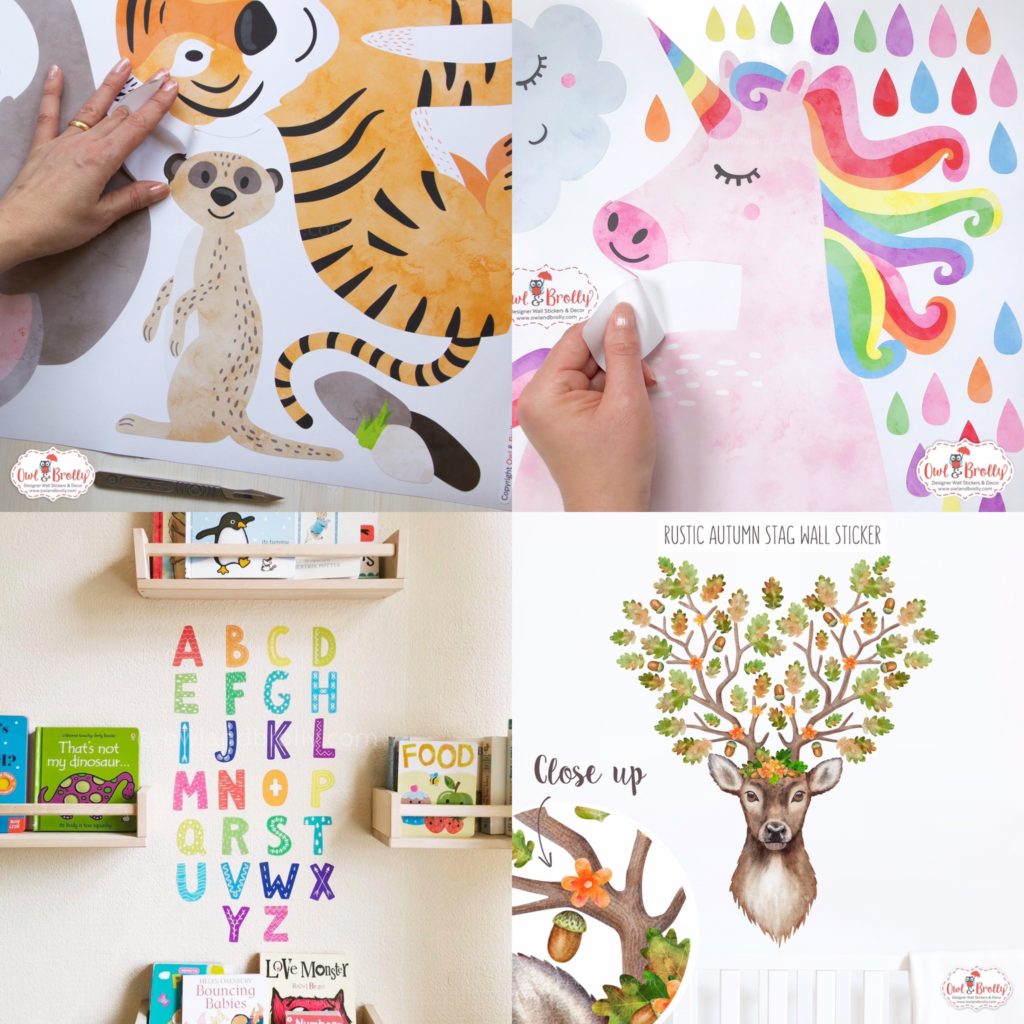
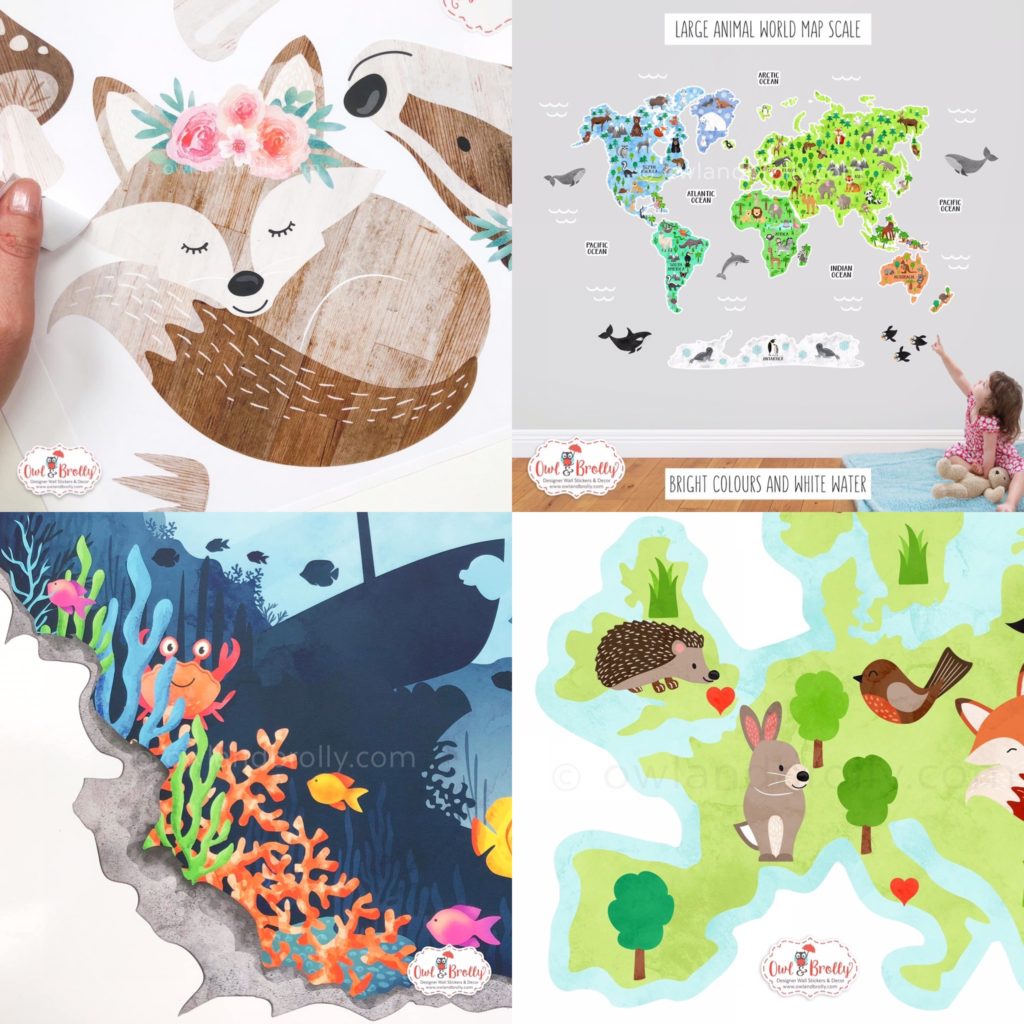
Here are some examples of the beautiful Wall Stickers Owl and Brolly currently offers. I will be providing links to social media and the website itself at the end of this article. Check out these incredible works of art!

I will now give you some background about the company and how it all came about. As a small British Business they are always looking for support from fellow UK citizens who appreciate all the talented people in this country, and especially now during the pandemic, it’s a great idea to think about purchasing locally for Christmas this year. Perhaps my blog post will inspire you to buy from Owl and Brolly.

Sue studied a HND in Natural History Illustration specialising in watercolour, she enjoyed a creative career until Endometriosis forced her to change her way of working. In order to move with the times she made the decision to become more of a digital based artist than making art with traditional paintings. Her drawings are incredibly detailed and she has a unique style.

It was after helping a start-up company with their designing that Sue went on to illustrate her own range of wall stickers for nursery walls and kids rooms. She began combining her own special watercolour techniques and using some digital media to create the sticker designs. It was a decision that brought out her artistic skills and she is doing what she loves every single day. It was at this time that she started her company, and Owl and Brolly was born.

The stickers are all printed on a high quality removable and reusable fabric wall sticker, rather than a single use PVC vinyl. This allows them to be used more than once and are easily removed (gently) and then repositioned. Sue has a passion for wanting to create illustrations that will help to inspire children’s imaginations. Her beautiful watercolour designs are not only highly detailed but they look unique. They are printed to such a high quality that they look good on any wall space and have already made so many children (and their parents) happy with the designs.

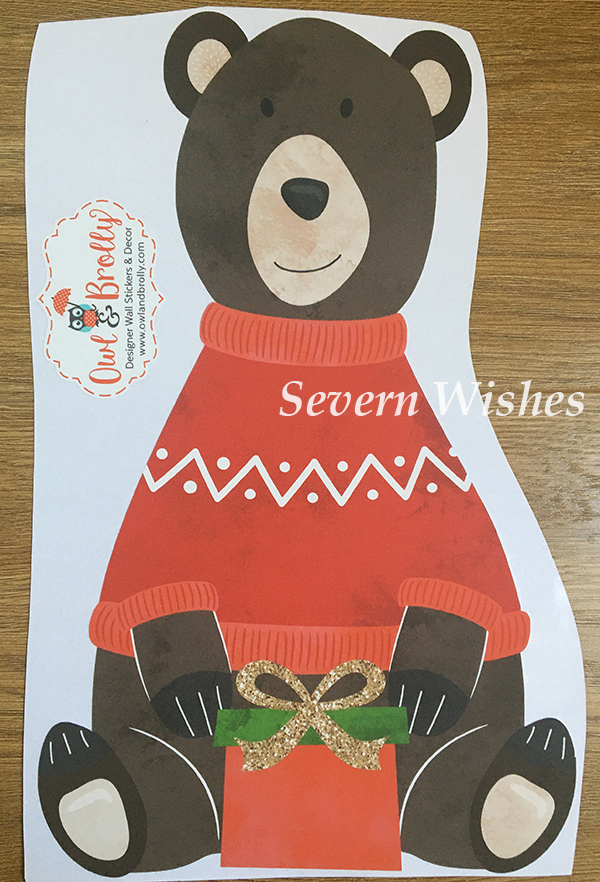
The Stickers are thin but excellent quality, printed onto removable and reusable fabric.


Please visit Sue over on Owl and Brolly to see all of the wonderful things that she has to offer. There are so many beautiful stickers on the website I couldn’t possibly show you all of them on here. You’ll have to pop over to the page or website and become even more inspired.

I highly recommend the customer service, the quality of the items and the overall finish of the products available. Sue will also work on special designs if you have something in mind, just send her a message on her social media and see if her commission’s books are currently open. She is working hard every day to accommodate people’s orders despite the pandemic and she is a very talented woman who deserves so much success.

You can find Owl and Brolly across these links below:

Owl and Brolly WEBSITE
Owl and Brolly FACEBOOK
Owl and Brolly INSTAGRAM


Thank you again to Sue for giving me the opportunity to review her wonderful products, I have thoroughly enjoyed this collaboration.

And thank you for visiting Severn Wishes today, I hope you have enjoyed this product review, thanks for reading.


✩ Sabrina ✩
Trollbeads Together Apart Rainbow Bead Review

I was lucky to have won a Trollbeads bracelet back in 2016 it came just as it was, a gorgeous and intricate twisted bracelet with unique clover lock and spacer bead. I bought a single bead for it which was a clear one, very iridescent in the light. In 2018 I was gifted an Orchid Flower bead by my Father and Step Mother which I also added to it. I love my bracelet, it is so well made with quality throughout its design.

When I had an email a couple of weeks ago from Trollbeads saying they were releasing a special bead, and it would feature Rainbow and money would be going to charity too, I knew I wanted one to add to my bracelet.

Rainbows mean a lot to me and my family, my son is a Rainbow Baby. It has become a symbol of hope during this pandemic and is now more important than ever to so many people.

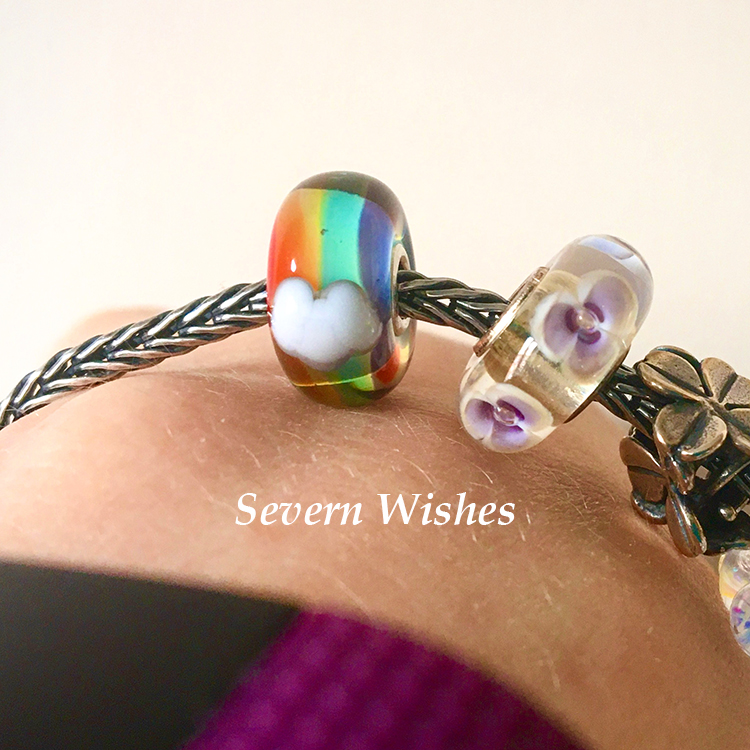
Here is the beautiful Together Apart bead on my clover bracelet.

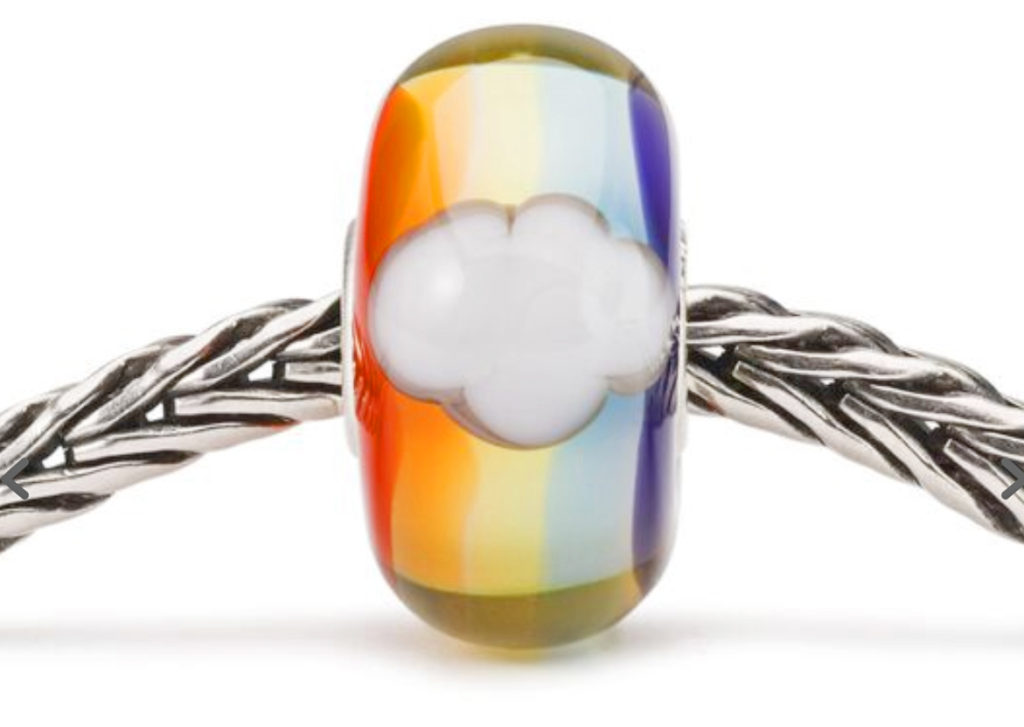
The bead features a Rainbow colours design with clouds attached to the centre sphere and outer smoothness of the bead. It is beautiful and unique looking. I’m so glad I managed to get one because they are limited edition, and the first batch sold out within a couple of hours of their launch.

It is a beautiful bead, very well made and such stunning bright colours. As you can see on my photograph above mine is extra unique as it has a single bubble in the centre too. I am happy I purchased one, it really brightens up my bracelet and I love to wear it alongside my other two beads.

Overall I am very happy I bought this bead, and I am happy I have donated to charity while having something to enjoy for my lifetime. Trollbeads UK are excellent in both quality and service, I highly recommend them. Because their glass beads are so unique you get something extra special in my opinion, they are not mass produced like some other jewellery and bead companies. And these Limited Edition ones are usually even more amazing.

So back to the charity donation part, Trollbeads are giving £4 from every bead sold, so technically the bead costs you just £36 when you minus your donation. The £4 will be donated to the Charity “NHS CHARITIES TOGETHER”. They are supporting NHS staff, the volunteers and the patients who have been impacted by COVID-19 all across the United Kingdom. If you buy a bead and accompanying bracelet for £120 they are donating £12 from that to the charity.

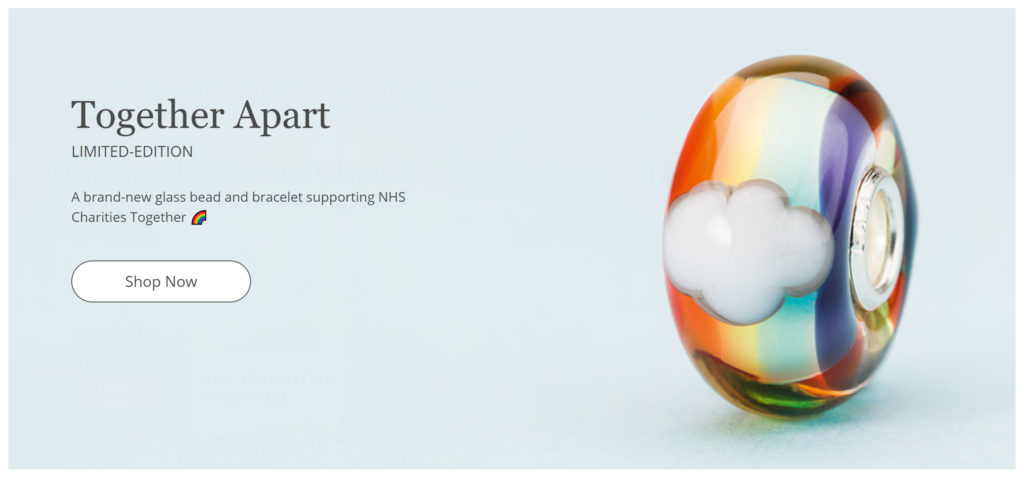
Click the website banner below to head on over to the Trollbeads website if you’d like to purchase one for yourself. (If they have any left! Keep an eye on their website and social media for updates as I think they were making some more).

From The Trollbeads Website – Description of the Together Apart Bead

Together Apart Bead £40

  • Weight: 1.95 g
  • Main Material: Glass

We will get through this together. 

The bead has two rainbows and two clouds.

This is a Limited Edition release. Limited Editions are rare or unique beads which are only released in very small quantities.

Each glass bead is handmade from red-hot glass over an open flame and no two glass beads are ever completely alike. This goes for size, colouration & pattern. Your bead is absolutely unique and will have slight variations from the bead pictured.

Trollbeads Website

Thank you for reading this Review today, I hope you have enjoyed reading it. Have a lovely week.

✩ Sabrina ✩