How I Helped My Child Fall in Love with Numbers

I am a huge believer in passing on knowledge to people when it might be useful to them, and for many years I had considered being a teacher. However my life took a different direction once I went off to university. It didn’t stop me from coming up with things that others may find handy though, it was just one of many reasons I decided to start my blog all those years ago.

After I became a parent I found I was coming up with lots of hacks and tips for my son that other parents might also find useful. This particular blog post today is all about NUMBERS! My son learnt his numbers 1 to 10 very quickly thanks to my tips and tricks, by the time he started preschool at 3 he could count to 31. He is now 4 and thanks to my encouragement he can count to a whopping 500!

The fab thing about my tips is that you may already have some of these items laying around in your home that you can use, and if not you can make your own cards like I have also done. Check out online second hand and local shops if you don’t have anything, as well as asking friends who may have slightly older children if they could have a clear out for you. Let me tell you about how I introduced and taught my son about numbers.
Child Clocks or Numbered Blocks

Your baby may already have toys with numbers on, things for age 6 month plus normally have various things on them, you may find a mix of nature and numerical combinations or well known characters with basic shapes and or numbers too. Toys and playmats also sometimes have numbers, those talking toys certainly will, but teaching your little one how to recognise a number visually is important.

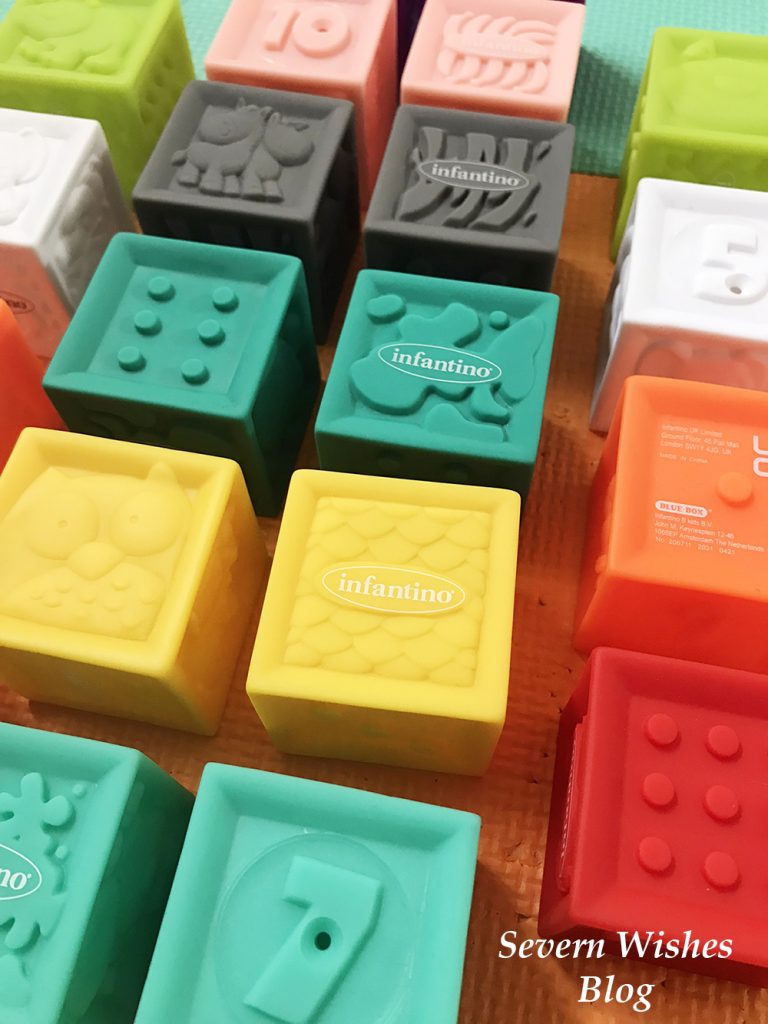
You can easily get wooden toys that contain clocks on them or boards with numbers that can be removed and set out in a numerical order. These toys are great for learning the starter numbers (1-10) but also for starting with basic mathematics too. I bought my son a board of numbers and he has a wooden clock as well gifted by a relative. The blocks in my image above were bought online and are of the brand Infantino, these BPA free plastic cubes have an array of animals and numerical variations on them such as dots and actual written numbers. They were some of the first numbers my son saw as a baby.

My son would like to count things around him, so say I gave him 4 smiley faces for his tea I would ask how many I had given him, soon he started counting everything. 2 swings at the park, 7 birds on the fence, 5 sheep in the field. And so on, and lots of praise and encouragement when they get something right is also essential. Make learning a fun thing to do and participate in.

You can also begin time telling by showing them a phone or a watch and asking them to find the time. If they have a child’s clock they can match that time. A children’s clock may just have turn-able clock hands or some have the digits that are also removeable too. For example it might be 10.30am so you ask them what that would look like on their clock and see if they select the numbers appropriately. Making it fun means that it is more likely to sink in to their mind. If they have breakfast at 7.30am every day, you could ask them what the time is on the kitchen clock if you have a steady routine, or if bedtime is 7pm too.

The Home Calendar Block

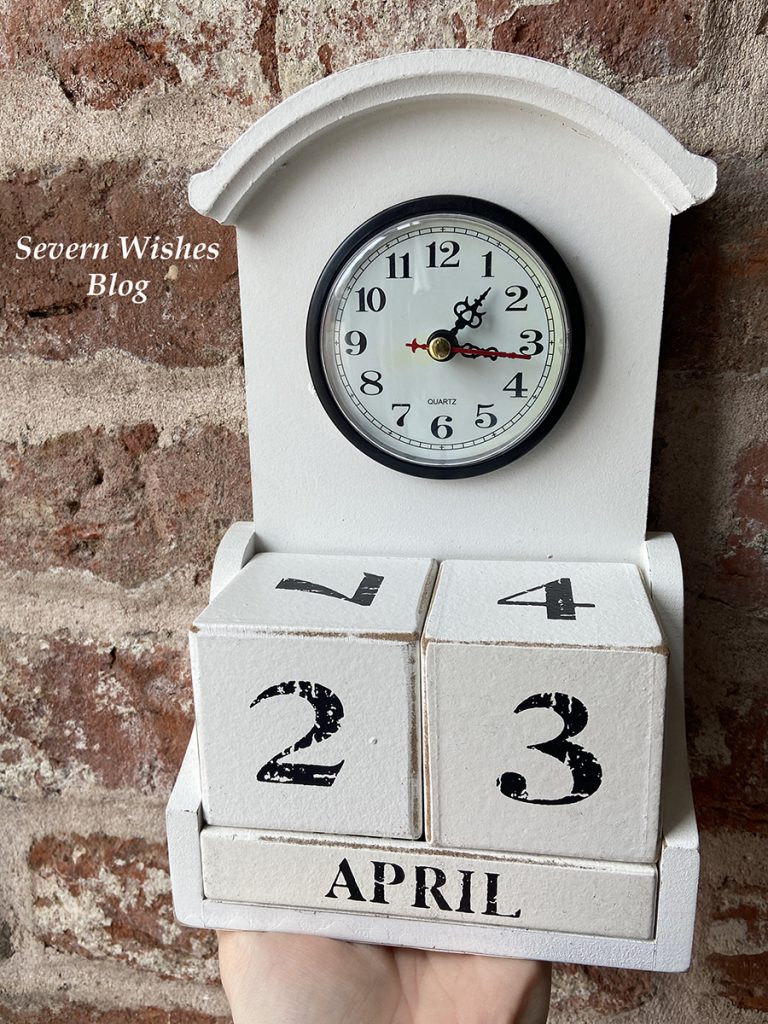
My calendar block is also a clock! Many of us will have a Calendar block at home, these blocks rotate daily and allow children to understand the passing of days into months. When my son was two I introduced him to my block set, and every single morning before breakfast we would rotate the blocks. I started by giving him one and me the other, I would say something like “Today is the 17th so we need a 1 and a 7, I have the 7, can you find me a 1 please?” And his interest developed from there. Soon I could ask him to find any of the numbers from One to Thirty One and he could place them on the block correctly. For the past two years we have done this every day and he has learnt to count up to 31 just by doing the calendar. My son also asked me why the months were different numbers, why it didn’t go up to Thirty Two and such, it sparked an interest which lead to me making his flashcards up to 50 numbers.
Flashcards – Bought or Homemade

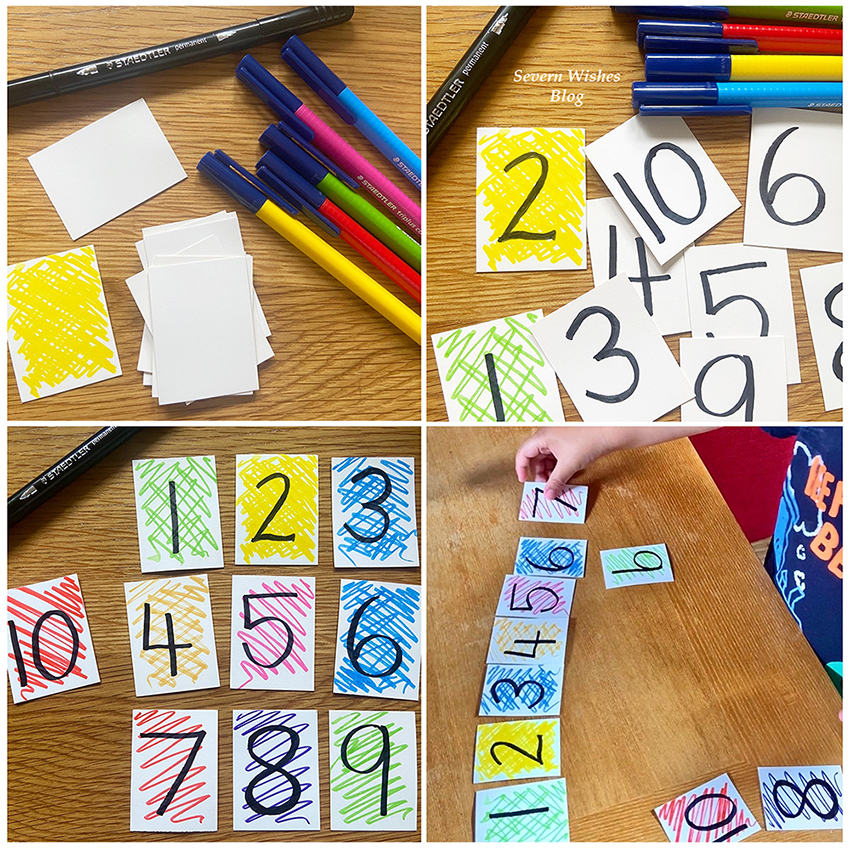
Flashcards are great, you can buy them from most online toy retailers, or if are creative and have pens, like me you could make them. My son has 50 of these homemade numbers now, and thanks to some games he can count up to 500. He does number work at school, and even got an award recently for how good he was with counting numbers. Making it colourful and fun is inviting the child to participate. Always encourage but never force your child to learn, do it on their own terms when you are at home. Plus if it is fun they will be more likely to want to repeat the exercise. My son is currently doing writing practice for his letters and numbers and coming on great thanks to wipeable board books which I highly recommend because they are reusable.

Originally I only made ten numbers but my son was soon asking for more, and the more he enjoyed counting them and laying them out in their order, the more I wanted to continue making and encouraging that growth in learning.

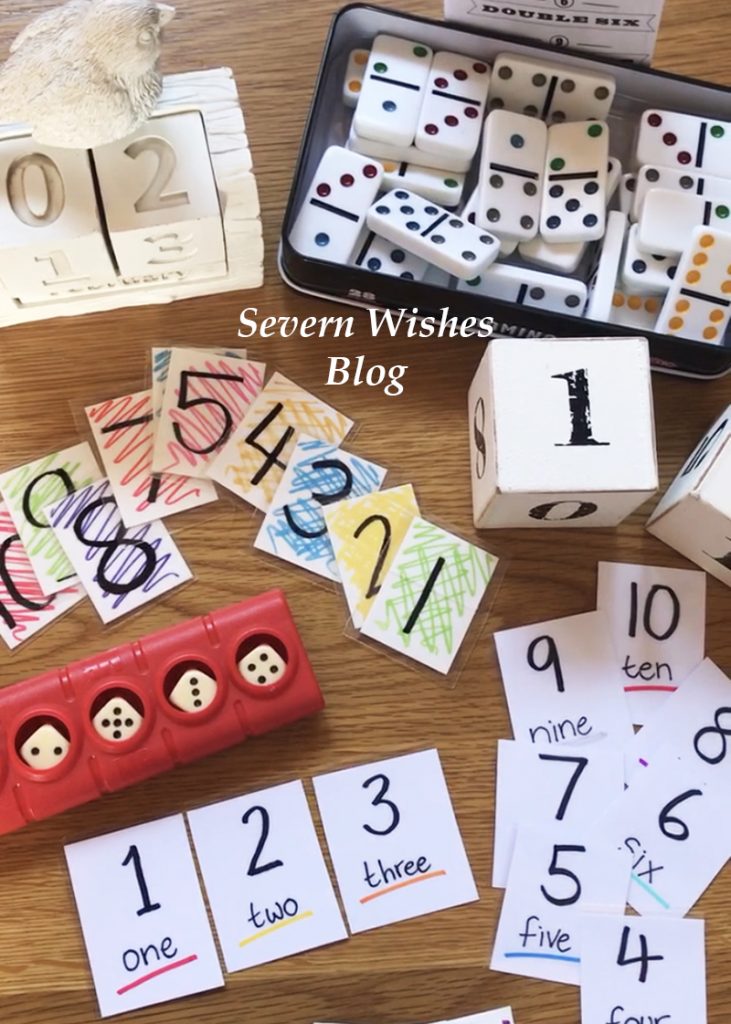
When my son turned 3 I also made a set of flashcards that had the number and the written word such as One and 1 on them, this was so my son learnt the word associated with the number in preparation for reading and writing them.
Other Fun Number Related Activities

Playing Dominoes is another fun learning activity which requires the counting of numbers, and games like Yahtzee, Playing Cards or Rummikub are also fun to start with children of a going to school age.

However you keep using numbers in your child’s life, know this, you are helping them learn through play.

✩✩✩

Thank you for reading this parenting related blog post today. I have tons of parenting tips and hacks across my blog and social media. I even do a Monday Mum Hack on Instagram.

Search #SevernSabrina and #SabrinasMondayMumHacks

Hope to see you here again soon.

✩ Sabrina ✩

Great Apps and Websites for those who are Expecting or are New Parents

We live in an age where so much is readily accessible to us, but there can be so much information out there that it can often be overwhelming, especially for first time parents. With so many websites, forums and blogs that can sometimes be opinionated and not necessarily filled with the facts. Every person knows where they would prefer to get their information from, some of us like books and others like the world wide web!

Sometimes you can have a baby that is completely different to any before it or any you have known, and you may need additional help or advice. During these times you should always turn to a Midwife, Doctor or Paediatrician if you have concerns of any kind.

There were things I wished I had known more about before I had my son, and that was despite me reading both books and websites for hours at night when I had terribly painful SPD. I found lots of the websites and apps that I have listed below extremely useful at one point or another during the last four years. So I thought a blog post might help other expectant parents to see what information is available to them.

As a parenting blogger I often get asked about my personal opinion of which apps and websites have helped me since I became a mother. So in order to achieve this post I have gone back over four years of my browsing and researching and screenshot history, to bring you an alphabetical list of all the things that I have found the most useful. I have only included websites and apps that I used more than once and found them beneficial long term.

A Aptaclub Pregnancy and Birth
B Bounty App
B Baby Centre Apps and Email Newsletter and Website
B Baby Names App
B Baby and Child (British Red Cross First Aid)

D Duo ABC
E Ella’s Kitchen
E Emma’s Diary
F Free Prints (Photos and FP Cards)

G Get Creative (CBeebies)
G Go Explore (CBeebies)
K Kicks Count Website

N NHS Website
O Online 4 Baby Website

P Pokémon Smile (Teaching Toddler Teeth Brushing)
P PooGoesHomeToPooland (Teaching How To Use The Toilet)

S Storytime (CBeebies)
S Snapfish (Photo Printing)

Y Your Baby Club Website and Social Media

Let me now elaborate on a few of these now and the reasons why I found them so useful. Some of them are of course self explanatory, but others are really handy for tips and tricks. Some offer you freebies and others offer key medical advice or milestone information.

Bounty App
The app gives you information on the progress of your baby whilst in the womb, and then after the birth it gives you key advice on milestones and growth. An app that I found generally fascinating to look at every week as my pregnancy progressed. Now that my son is older he is still on the app as a 48 month old! And the app offers me developmental advice and articles to read. The articles can be read at any time of your pregnancy and usually the app updates what is relevant to you at the time you need it. There are also useful check lists on it too.
I score this app a 5.

Baby and Child (British Red Cross First Aid)
First Aid is such an important part of human life, however most people go through their entire pregnancy without knowing how to do life saving procedures on babies or young children such as, choking, allergic reactions and dealing with illness. The Baby and Child App gives advice as well as videos that people can watch at their leisure for a variety of situations. Just some of what they cover include; Asthma, Bleeding, Burns, Choking, Epileptic Seizure, Fever, Head Injury, Meningitis, Vomiting etc.
This app is one that I believe every single person should have on their phone, just in case.
I score this app a 5.

Duo ABC
I found this app while researching after my son had to start Speech and Language therapy. Due to the support being so sporadic due to the pandemic I did my own research, started my own lessons with my child at home, and created my own flash cards. But this app came up on a results search, and despite it being American my son found aspects of it to be beneficial. Writing the letters on the phone screen with his finger, sounding out letters and recognising upper and lowercase letters all helped on our journey. I did just 20 minutes with him a day for 3 months, alongside my other teaching and he soon knew his alphabet and could say all but 5 of the letters properly. If anyone is struggling with their child and they seem distanced from paper methods, try this app, just ten minutes a day with you, you may just see a difference as I did.
I score this app 4.

Ella’s Kitchen
Once your little one reaches the 6 month milestone and you consider starting to wean them alongside their daily milk amount, you may want some advice. Ella’s Kitchen App provide you with advice, recipes and you can sign up for a free pack with a journey poster, stickers and some vouchers for their snacks. It was fun when my son was little, but when he developed lots of food allergies I made my own recipes up.
I score this app 4.

Emma’s Diary
Emma’s Diary is a fun app where you can create all sorts of fun things to keep throughout your pregnancy, it also offers some information and it gives away bags of goodies at certain points of your pregnancy. It’s worth signing up to this as soon as you find out you’re pregnant to take advantage of all the items on offer.
I score this app 4.

Free Prints (Photos and FP Cards)
Free Prints have two useful apps, the first one is Photo’s and you get some free prints every month just pay the postage. And the second one is Cards where you get one free card a month like a postcard, just pay postage. Upgrade to proper cards for pennies and they offer lots of other fun affordable products throughout the year. The more you order the more deals you’ll get.
I score these apps 4.

Get Creative (CBeebies) and Go Explore (CBeebies)
Apps that I don’t know what I would have done without! When I became a single parent even taking a shower was tricky. Sitting my son on the bathroom floor safely on a bean bag when he was a toddler, my phone playing CBeebies programs and videos off the app were a godsend! Now he is older he is using the various parts of the app to learn all sorts of things like shape sorting, mathematics, role play like shopping and problem solving. The Creative app allows freedom in Art and expression using some of the CBeebies favourite characters, and the Go Explore is more about learning and fun, again with the usual friendly faces. Love these apps! In moderation of course.
I score these apps 5.

Kicks Count Website
Kicks Count is something that is really important, and all pregnant women should visit the website and learn about the importance of kick counting and the work this group do. It’s worth following them on social media too.
I score this 5.

NHS Website
When you have questions in the small hours of the morning the NHS website can have useful information or point you in the direction of help if you need it.
I score this 5.

Online 4 Baby Website
An excellent website for affordable baby items such as changing mats and muslin cloths. Worth a look when they have a sale on for certain!
I score this website 4.

Pokémon Smile (Teaching Toddler Teeth Brushing)
Whether you like Pokémon or loathe it, if you have a child that refuses to brush their teeth you will try literally ANYTHING to make that time of the day and night less stressful. For us it was this app that allowed my son to turn a corner! There is an icon of the mouth that follows them while they brush and indicates where to go next so they don’t miss any teeth.
I score this app 5.

PooGoesHomeToPooland (Teaching How To Use The Toilet)
Another app that is a little annoying but if it helps your child to understand that poo goes down the toilet and not on the floor then so be it! My son watched it every day for about a month and then got bored of it, but it certainly helped him realise that
I score this app 3.

Storytime (CBeebies)
Another CBeebies app and this one is all about books and stories. The app can read to your child or they can try and read themselves. The stories are often interactive as well, lots of fun.
I score this app 5.

Snapfish (Photo Printing)
Free photo’s every month just pay the postage, a great way to keep family up to date with how little one changes and you can make an album of their first year for less than £20.
I score this app 4.

Your Baby Club Website and Social Media
As a Blogger Writer for Your Baby Club I often provide them with useful articles surrounding parenting. These first hand experiences from parents go alongside their informative articles on the websites and on their social media platforms too.
I score this 5.

Thank you for reading this blog post today, I do hope that you have found it useful. Please pass the link to my website on to family or friends who are expecting so that you can share these excellent websites and apps with them. Hopefully they will be just as happy with them as you were today! (I hope).

Keep on visiting Severn Wishes Blog for Parenting related blogging, Product Reviews and general Lifestyle Posts! Thank you! Have a lovely day!


✩ Sabrina ✩

Talking About All the Different Ways that We Use a Tuff Tray at Home

Hello Severn Wishes Blog Fans! Today I am bringing you a Lifestyle / Parenting / Hacks / Product Review article I have written all about something I have now owned for well over a year!
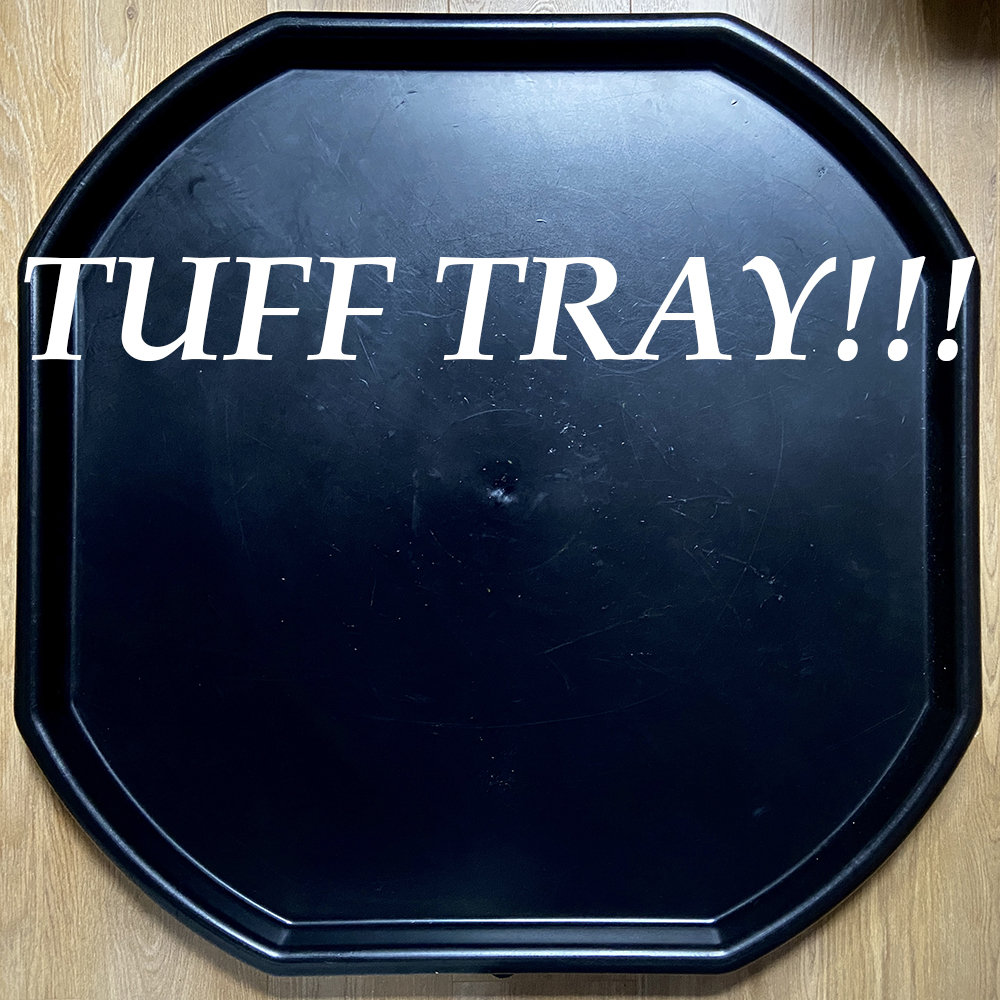
And that item is… The TUFF TRAY!

These fantastic trays are usually found in a school setting, especially with younger children like those in a preschool or nursery setting, but due to their versatility they have been becoming more and more popular with mums who are able to do a lot with their children at home.

As soon as I heard about them I knew it would be a great investment for the future. I ordered mine in black but they do come in a variety of colours. I preferred the black due to it not getting stained or if we made any scuff marks with toys they wouldn’t be showing up as easily. Overall I’m really happy with the quality of the tray for what I paid for it. So far it has withstood a toddler doing all sorts on it and in it!
I chose to purchase without the stand so it was then just suitable for laying down on the floor.

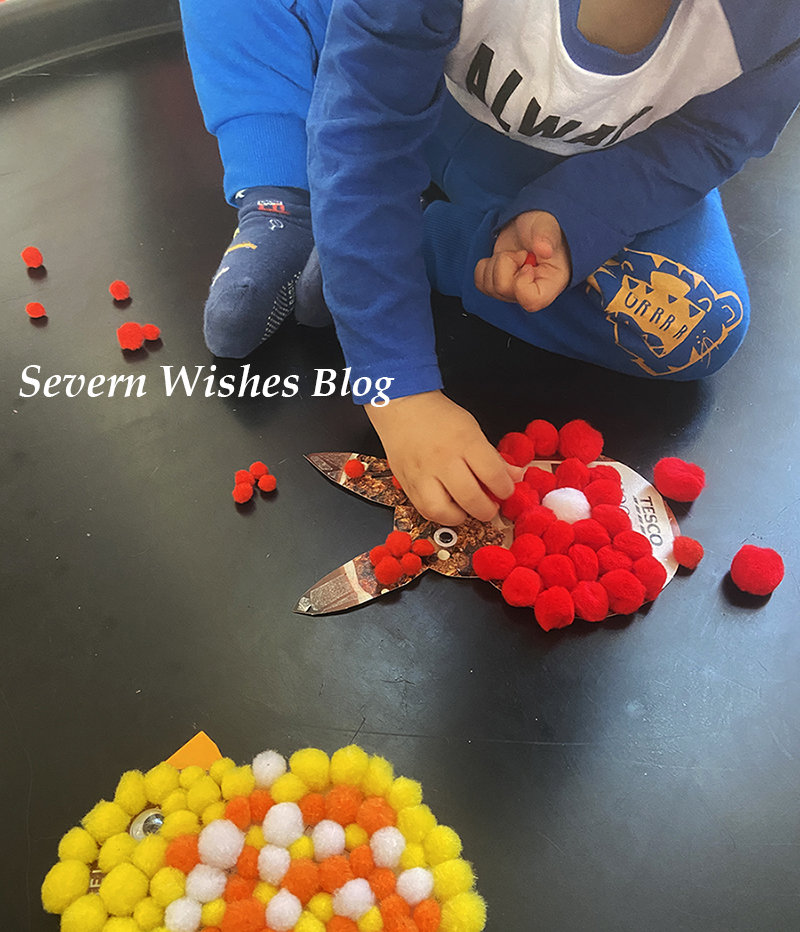
Be it Sensory, Messy Play or just toys on a flat surface, the Tuff Tray is ideal for lots of reasons when you have little ones growing up. Here are just some of the many ways that we have used our tray this past year or so! Both in visual form and I made a little list too!

  • 1. Ideal for Craft to keep the craft pieces and mess contained in the tray borders.
  • 2. Great for when you want to do some Messy Play and use paint so it doesn’t get on the floor.
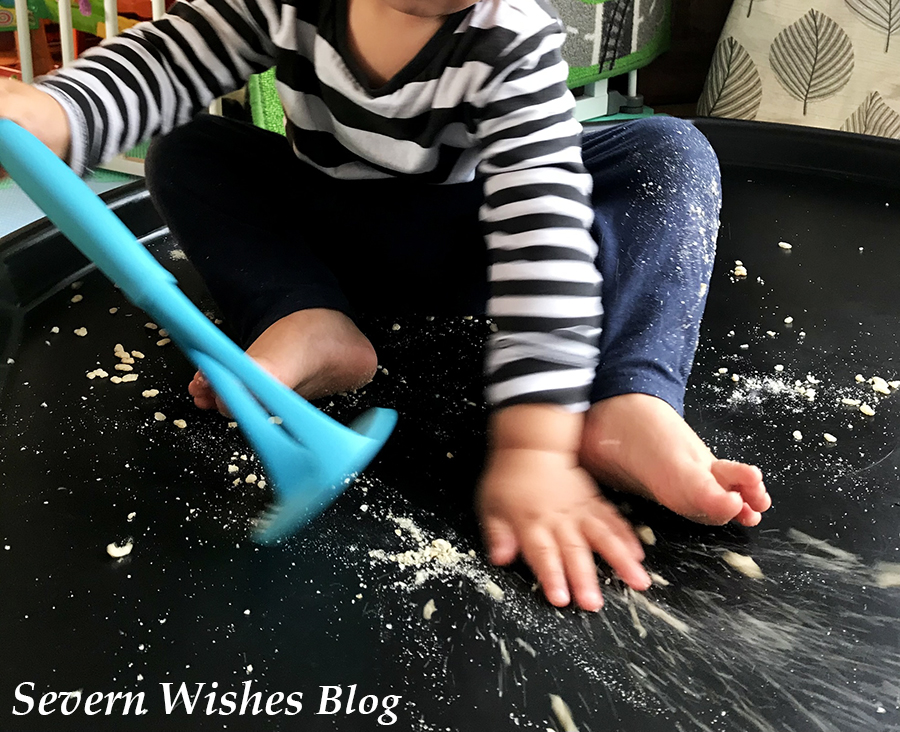
  • 3. Doing some experimenting with foods in toddlerhood? Keep those rice crispies, rice grains and other food stuffs within easy clean up-able reach. You can wipe clean anything off it.
  • 4. Using Glitter today? This tray is ideal to wipe clean after your picture making as the bits will all be contained within the tray walls. Sit your children outside of it and let the mess be inside (mostly).
  • 5. Potty Training? Stick the Potty in the centre of the tray on the floor, and it will be easy to clean spillages off the plastic rather than off your floor!
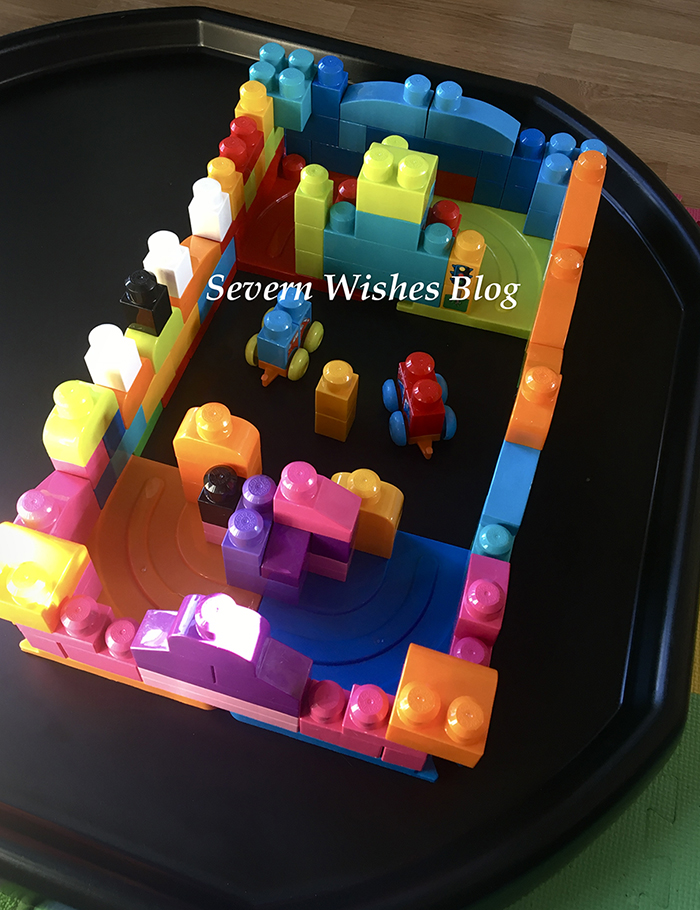
  • 6. Building Lego or Duplo or Blocks? It can be annoying for little ones if pieces are rolling away or falling over all the while! But on the tuff tray they won’t get far at all! It also means it is a flat surface for the building to become easier on little hands.
  • 7. Doing a Jigsaw? Be it an adult one or a children’s one? Do it on your Tuff Tray and you’ll be able to move it at a moments notice off the floor and then continue it later.
  • 8. Want to do some baking with the kids but you want to do it at their level? It is much safer to do it on the floor where nobody is balancing and this tray doubles as a big flat surface, just clean it with sterilising spray and let it air dry before you start any food preparation.
  • 9. Sensory Play can involve all sorts of things like craft or food stuffs, having it all contained within the Tuff Tray makes life easier for you and if you planned to do it for a few sessions over a week you could even leave it on the tray and just move the whole tray instead of packing everything up.
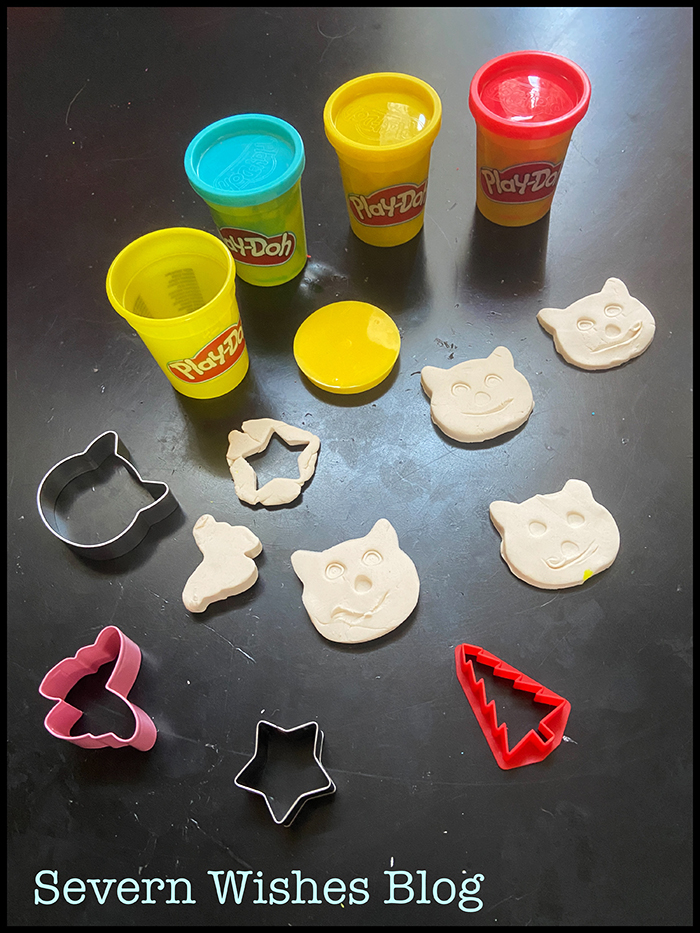
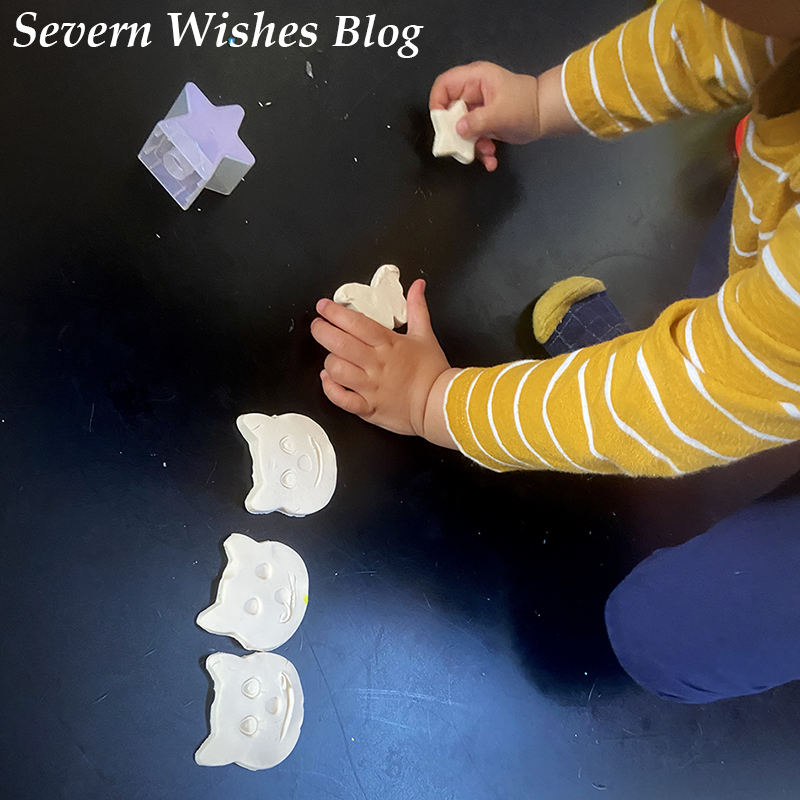
  • 10. Play-Doh can get messy and easily sticks to hard surfaces like tables or floors, but by using a Tuff Tray base for all of the items they are contained within its sides. If you choose to get a stand with your tray you can even have the tray at a suitable height for your little ones. Or you can do what I do and maintain it on a flat floor, whichever is easier for you.
  • 11. A Tuff Tray can be used outside for a water table or a sand table due to its sides being all the way around with no holes within its surface.
  • 12. Design a World – Use your Tuff Tray and things like chalks or washable paint to create a world, a map or a world for your children to put their toys in to and play. I have drawn a road on mine for my sons toy cars before now and also used elements like sand made of ground cereal to make a beach.


So overall the Tuff Tray doubles up as another useful hard surface within your home and is ideal for playing, learning and food preparing. Young children can safely sit within its boundary or outside of it leaning in in order to play. There are no sharp edges on the Tray and the hard plastic is coated so its easy to wipe clean after every use.
I purchased the standard (medium) size but it is also available in small or extra large depending on the supplier you’re purchasing it from. They are also available in many colours.
Prices range from £11 to £70 and all Tray prices do depend upon the colour, and the size and whether you wish to buy a stand with your Tuff Tray purchase.
They can be used inside or outside but I would recommend you keep them out of direct sunlight and harsh weather conditions and keep them inside a garage or shed when not in use in order to maintain the sturdiness of the plastic.

What do we use our Tuff Tray for the most?

Craft and Messy Play and Sensory Play mainly.

Thank you for reading this blog post today, I hope I have inspired you and if I have then I would love to hear what you and your family use your Tuff Tray for!

Enjoy the rest of your February!

✩ Sabrina ✩

The Transition of moving my son from a Cot to a Toddler Bed, my Tips and First Hand Experiences plus Reviews of the Purchases I made.

If you’re reading my blog today you might be in the same boat that I was last summer, which is wondering if it were time to make the move for your little one. The transition to a toddler bed is not one to be taken lightly, it is a huge step for our little person, and they deserve lots of time, patience and assistance from us (as their parent/s) to help them feel safe and secure in their new upgraded space.

Hopefully this article that I have combined with my review of the toddler bed that I bought, can help you to make informed decisions on what is best for you and your child/ren. Is it time? Only you will know by the actions and dependence your child currently has.

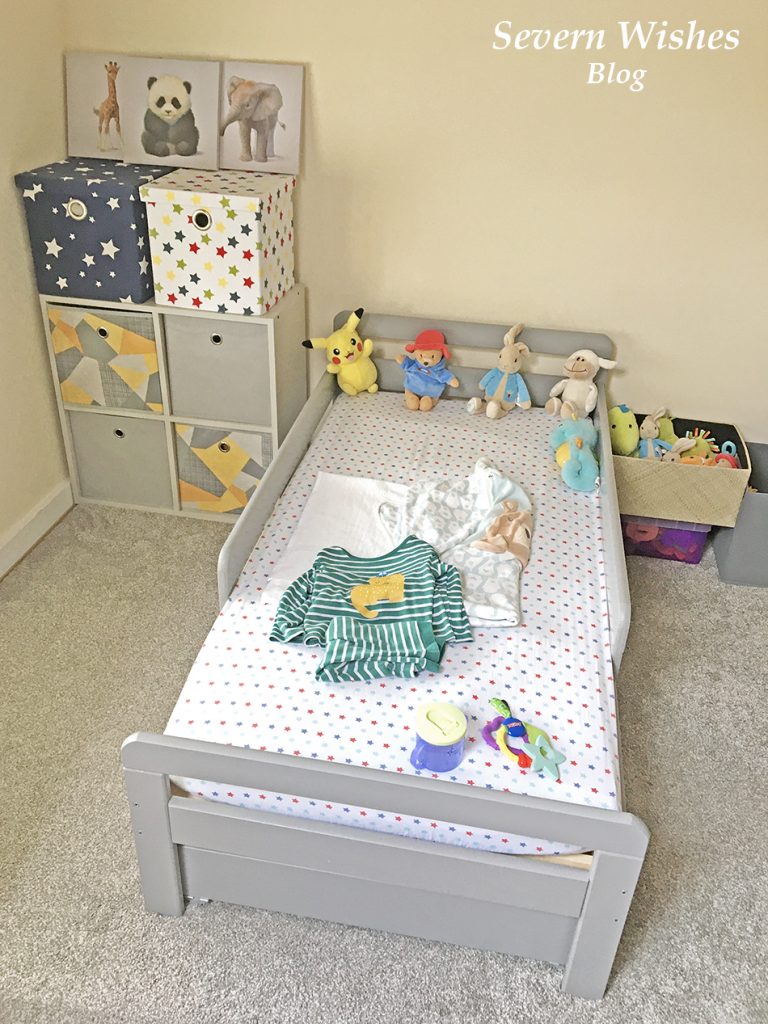
When the bed was finally in place…

When my son turned two I wanted him to start using a toddler bed and there were several reasons why I thought this needed to happen now. The first reason was that it was difficult to lower him inside his cot when he had fallen asleep in my arms, and he was now tall enough to consider trying to climb over. I didn’t want that to happen, so I purchased his first toddler bed after measuring up the space that I had in his bedroom.

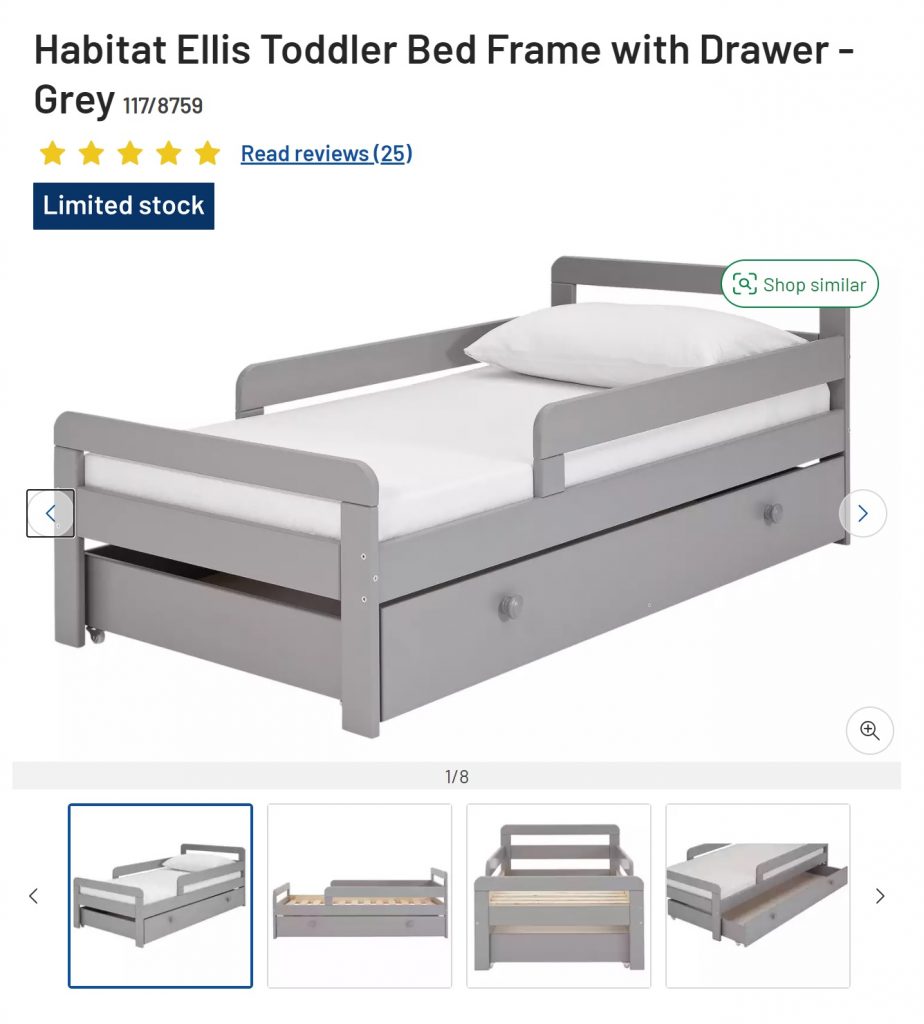
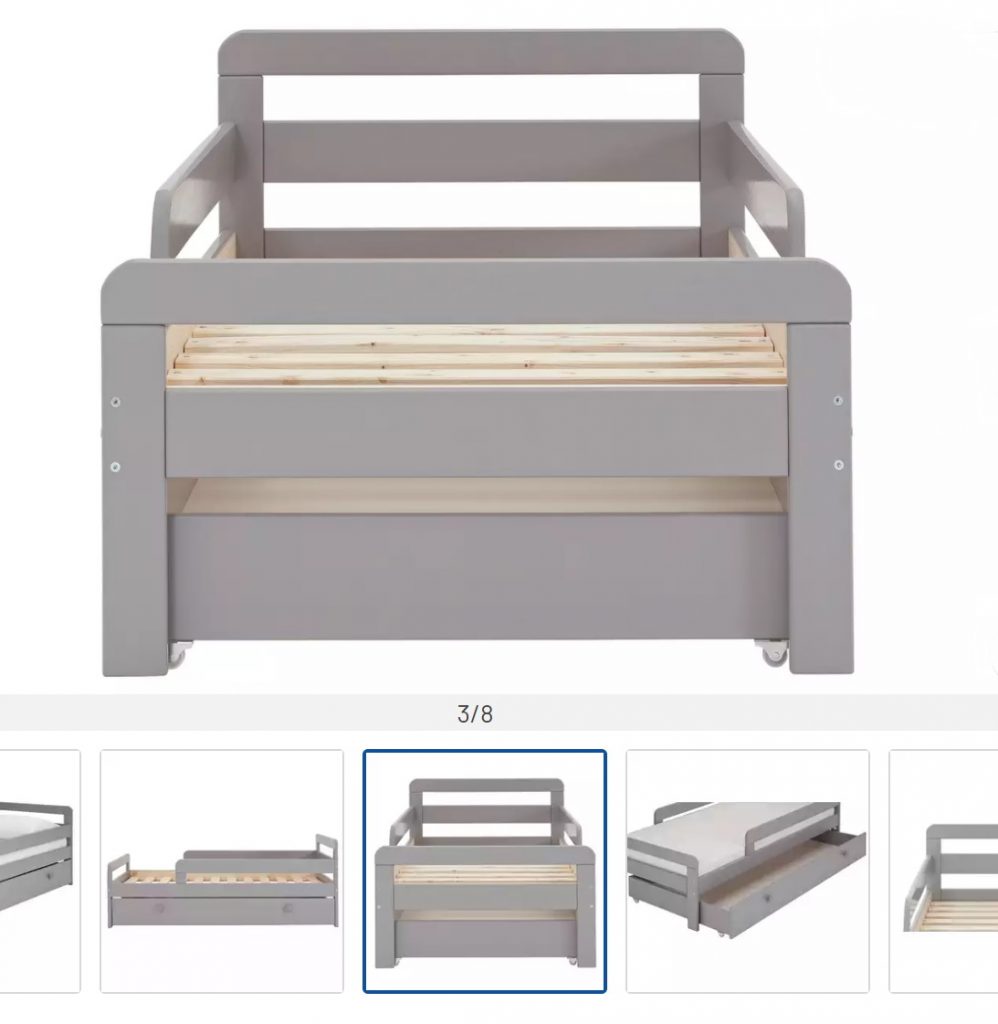
I bought the Argos “Ellis Toddler Bed” in Grey, to match my sons furniture, and then bought a mattress online. I had chosen this bed for three reasons, the first being its height from the floor, the second was that it came with a drawer for under bed storage, and the final reason was because of the three quarter sides.

My son moves frequently in his sleep and I knew that it would be quite a while before he could sleep safely without any sides to his bed. This bed was a great size for the price and I would hope it to last him two years at least due to the length. The handy draw keeps tidy all of the towels and bedding I use for my sons room and it is easy enough to slide in and out on its rolling caster wheels.

Bed Frame size L144, W75, H57cm.
Required Mattress size L140, W70cm.
Clearance between floor and underside of bed 19.5cm.
Drawer size H18.5, W139, D73.5cm.

There are now limited stock on this bed but it does also come in different colours. Here is what I would give it on my review scores having used it now for a whole year.


Quality of Paintwork 4✩
Quality of Manufacturing 4✩
Quality of Finished Product 5✩
Correct Specifications 5✩
Product Design 5✩


Overall this product is excellent quality and although it was difficult to put together, overall we have been very happy with it. A fantastic size for toddlers and small children and my son hasn’t fallen out of it due to the great design with those side bars. Although he is average height for his age (at 3) he still has plenty of room left to grow into this bed.

The Transition from a Cot to a Bed – My Tips and Tricks

The biggest thing about change for toddlers is that it can be unnerving to them. They get anxious and have to get used to something over time, so don’t worry if this alteration in routine and sleeping area takes a few weeks for them to get used to. The best thing that you can do for the first few nights is to keep the routine the same, but just place them in the new bed. If you have a routine that ends with them being placed into bed keep doing that.
Then on the second week add one new thing now that the child is older such as, can they now get into bed themselves because they are old enough to do so? It will make them feel bigger if they do it themselves and gives them confidence, but only when they are willing to get into bed on their own.
Don’t forget to use positive reinforcement when they are on the bed or in the bed so that the praise gives them positive ideals of being in the furniture.
Saying things as “What a lovely new bed you have!” and “Now that you are two/three you can sleep in this special big kids bed” and remember to let them know that this is a good thing, a positive step and not one away from you. Definitely praise little one when they get into bed without you having to prompt them too!

Getting the child to stay in bed is another matter though. Don’t worry if they frequently get out of bed or even tumble out of bed half asleep for the first few weeks, wondering where you are (especially if you have had them sleeping in your room up until this point). And the beauty of the toddler bed is its distance to the floor. They usually are only between 15 and 20cm from the floor.
Make sure to implement rules in their new bedroom, such as no toys after bed time. The child is not too young at this age to be putting their own toys back into a box or tub or basket, so why not start them off if you haven’t already done so (good practice for preschool).
I have found that it’s also a good idea to introduce a clock or show the time to a child at this age, and tell them that at “7 o’clock” (or whatever your bedtime is) their toys are put away and your bedtime routine begins.
Personally we are in the room for 7.30pm but it can take up to an hour to settle my three year old, some nights a story or two is enough and other nights I’m still reading at the hour mark. But it’s just imperative that you keep the routine the same, even if the time differs slightly, it’s still the act of doing things in the order that they are used to, and the act of then getting them into their own bed.


Talk About Their Safe Space

I tell my son every single night that he is “safe in his bed” and he is “safe at home with mummy” and this has reinforced him to stay in his bed. For the first few weeks if he woke in the night he would come and find me because he wasn’t sure on things. Now he’s more than happy to climb into his bed and choose the stories he wants at bedtime. He knows that I’m never far away now, but his bedroom is a safe place for him to be. He doesn’t always come and find me now that he is older either. He often wakes (and I hear him) but he presses his singing toy and lays back down or he will have a sip of water from his bottle and then turn over and go back to sleep.
Again positive reinforcement is key when organising their safe space. When little one wakes up they want to recognise where they are and that it is home or safe, favourite toys or items around the room will help.

If you find your little one is struggling initially with the bed transition then you could choose to sleep on the floor in their room for a few nights. Whenever they wake up in the night make sure they know that you aren’t far away and they are safe. It is totally normal for most children to find their new surroundings daunting, but remember to just keep praising and comforting, they will soon get there. All children are different and it could take a few weeks of patience to achieve the end goal, but everyone should sleep better once that is over with.


Ensure Comfort

Make sure that they are comfortable on a firm but soft mattress and that the room is an optimum temperature. I still use our Gro-Egg from when he was a baby to tell me the room temp! My son had sleeping bags until he was two and a half, he was happy to sleep in them until he got older then he kept trying to take them off. I gave him his own thin pillow at three years of age, and I now put him in Pyjamas and a blanket over him. I have bought a toddler duvet this summer ready for the colder winter months, now that he is old enough to be able to push it away from his own face.


Keep Stories Gentle at Bedtime

I have found that stories that talk about bedtime or going to sleep are best at bedtime, other books can just excite little ones too much. My son has an absolute favourite book about a bear and a baby bear and he’s on his way to going to sleep, and we read it every night. I can now recite it from memory while he falls asleep in my arms (that is how many hundreds of times I have read it). But it’s such a lovely and gentle book that talks about how much mummy bear loves little bear and she is never far away no matter what he is getting up to. Consider what you are doing during your bedtime routine and make sure that there is nothing that is causing your little one to become more awake as opposed to be falling asleep. The best books we have found come from The Works.

My sons favourite book that I highly recommend, we found it at The Works.

Thank you so much for reading this blog post that I have written today, I do hope that you have found it informative and if my lifestyle experience with my son can help you in some way then I am more than happy to share it.

✩ Sabrina ✩
How I Made a Fun Craft Caterpillar to Teach my Child about Colours

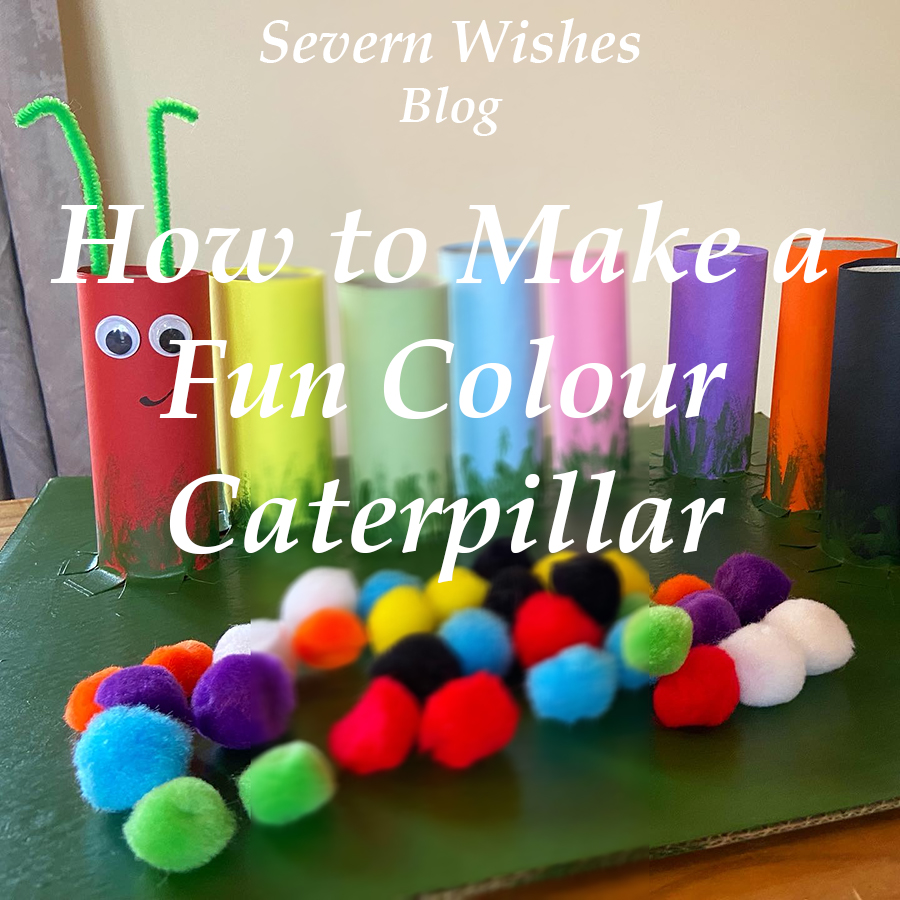
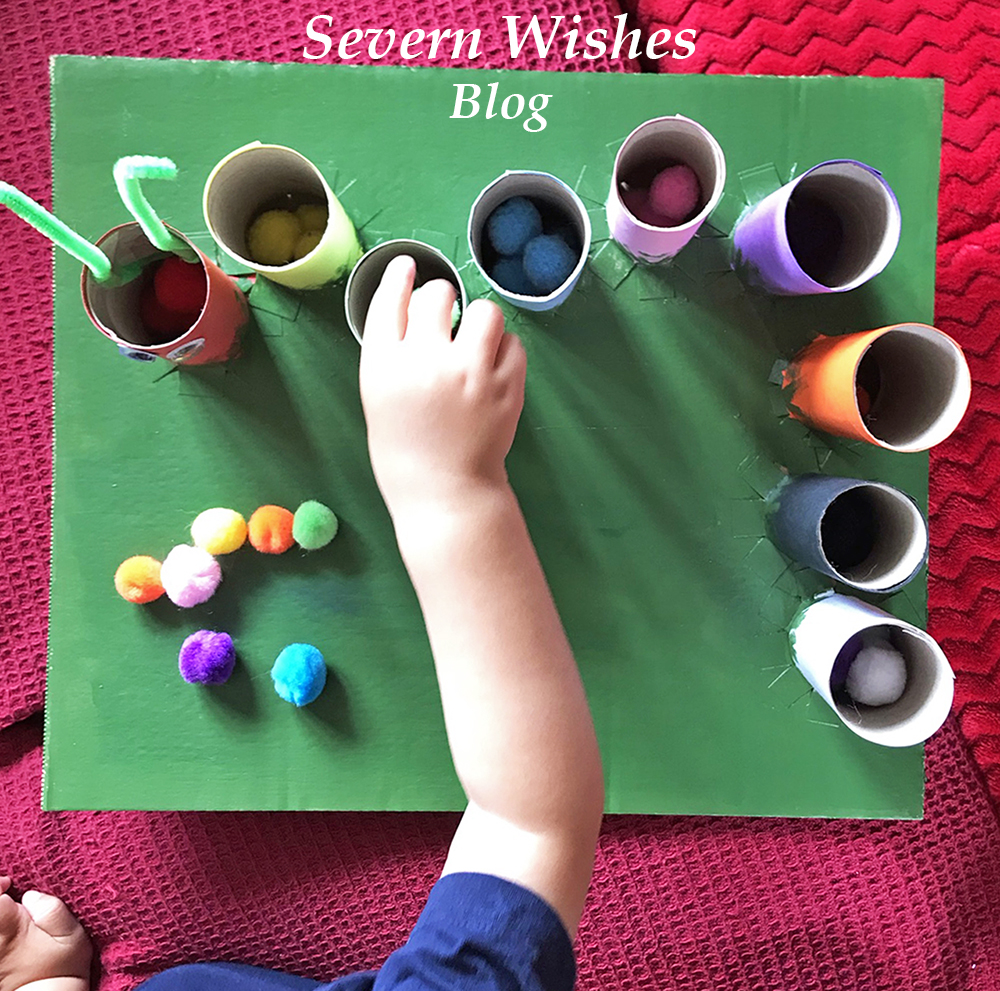
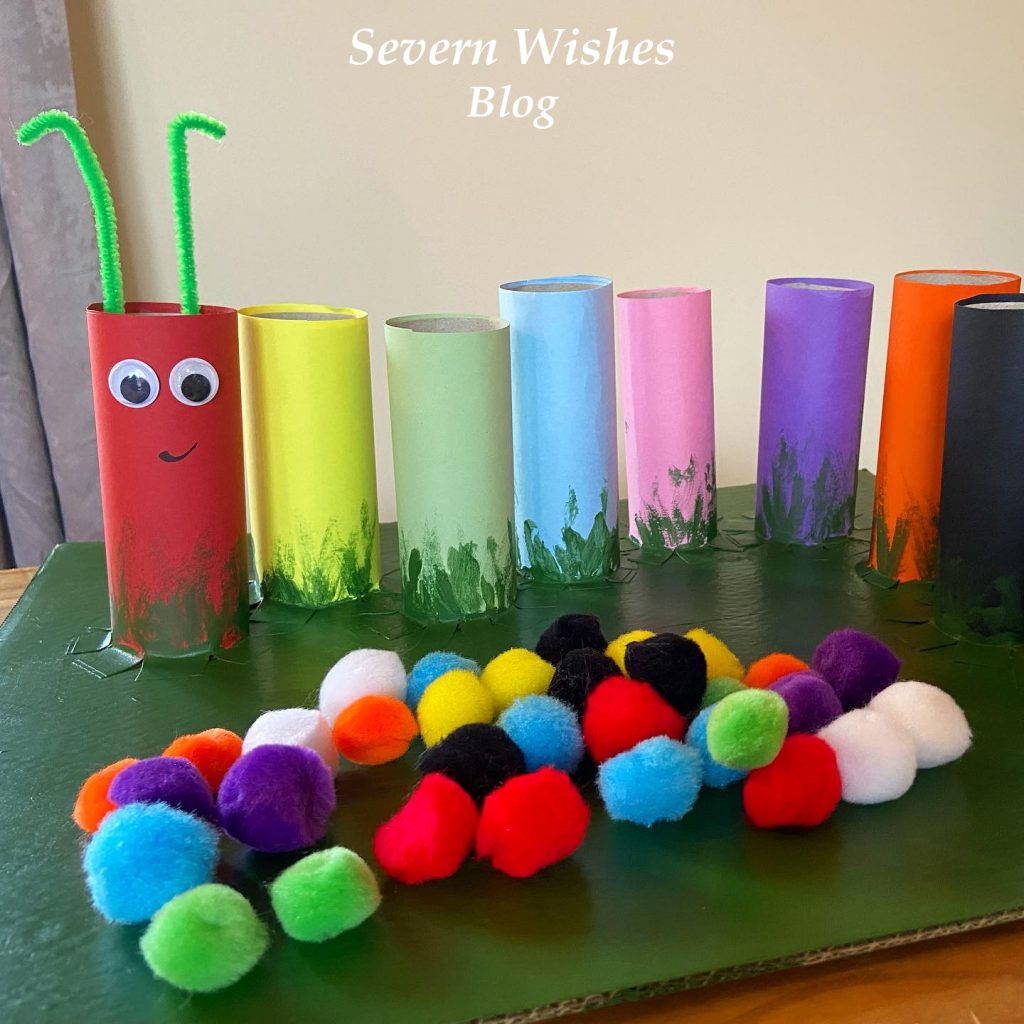
My Fun Craft Caterpillar is an easy to make craft project, that can help you to teach your toddler about colours and counting. You can make it any size you like and with only a few simple and non expensive items. Ideal for children aged two plus with good fine motor skills.

Designed for Age Group – 2 Years Plus (Supervised)
Parent Difficulty to Make – 3/5
Time it takes to Make – 4 – 6 Hours
Cost to Make – £10
Reasons to Make – Learning about Colours and Counting
. Helps Develop Fine Motor Skills.

When my son began having issues with delayed speech I came up with several things to aid him in his communication. One of which was a Caterpillar friend that I made into several different items. Today I’m going to be showing you how I made my Fun Craft Colours Caterpillar! He is cute and great for helping little ones learn about colours, counting out and developing fine motor skills.

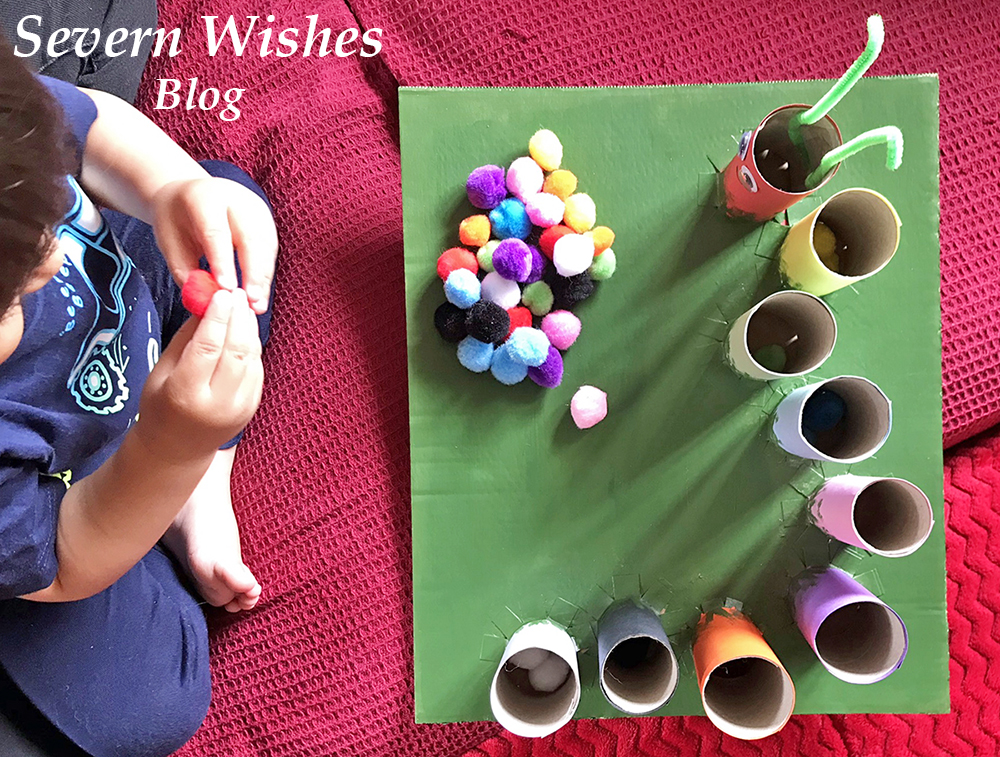
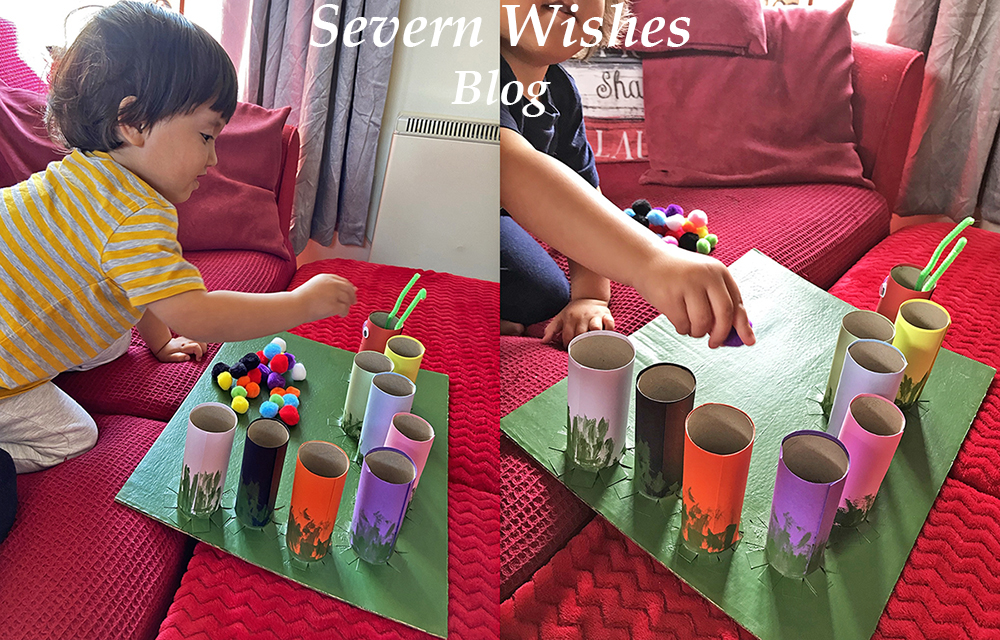
TOP TIP I wanted to help my son develop his fine motor skills as well as improve him saying different colours, picking up the Pom Poms and getting them to drop inside the correct tube does take some skills for little ones, so don’t worry if they have to learn how to do it. My son got the hang of it really quickly and was soon getting faster at doing it. One Tip is to show your little one what you want them to do, and then let them figure it out on their own a bit too. Always supervise but encourage and praise when they succeed.

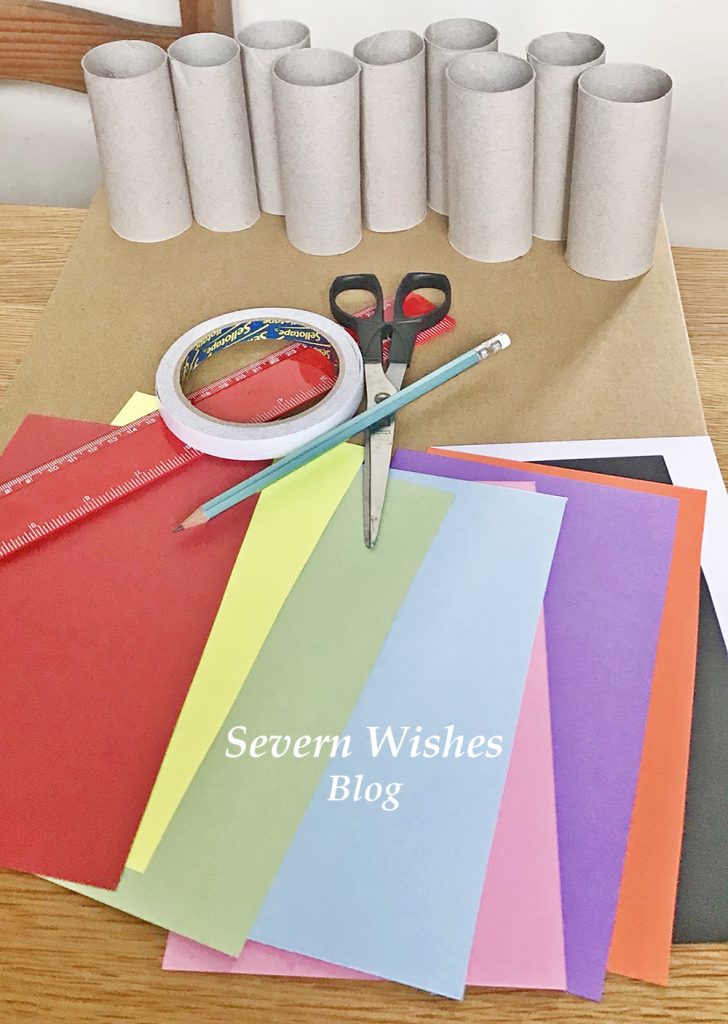
What You Will Need

Toilet Roll Tubes – You can use toilet rolls and kitchen rolls and just trim them so they are a similar height. Order your card and Pom Poms and work out how many rolls you will need, you require one roll per colour.

A Thick Cardboard Base – Do you have a sturdy box after going shopping or have had something delivered? You need a piece of strong thick cardboard either a Square or a Rectangle for your Base that the Caterpillar will stand on.

Coloured Card – You need to try and match the coloured card with the Pom Poms you are ordering. If you want to do a simple Caterpillar just go for a pack with Red, Yellow, Green and Blue mix, sometimes you get an Orange or a Pink in those packs. I bought two packs to ensure I got black, white, purple, pink and orange for my more complex Caterpillar.

Coloured Pom Poms – A toilet roll tube is a certain width across, so make sure you only order Pom Poms that are less than this. My tubes are 4cm wide so I purchased a bag of mixed coloured 2cm Pom Poms. This means they are easy enough to tip back out after every use. Also ensure you get non toxic child friendly craft items from reputable companies.

Double Sided Tape – You need this tape for cleanly applying your Card to your Rolls, this is the most time consuming of the craft build but it’s easier and less messy than waiting for lots of paint to dry. (See my How To below).

Paint for the Base – I chose to just paint my base Green, as if the Caterpillar were on a leaf or some grass. You can be as creative as you like! You only need to paint the base, once you have fixed on all your tubes (see my How To below for more clarity).

Stationery and Craft Extras – You may want to stick on googly eyes and feelers, or draw them on, it’s totally up to you, your Caterpillar, your choice! 🙂 You will also need a Pencil and a pair of Scissors.

Where I Got My Craft Items

Coloured Card Packs – Hobbycraft Online
Pom Poms – Hobbycraft Online
Goggly Eyes and Pipe Cleaners – Craft Bundle from The Works
Double Sided Tape – Tesco Store
Green Paint and Brush – The Works

How To Make Colour Caterpillar – Sabrina’s Step by Step Guide

Step 1. Assemble all of your items as described above and ensure you have enough of what you need. Place a tube, a piece of coloured card and your desired amount of Pom Poms (I used 4 per colour) into individual piles. See what you have and how many tubes with the right colours and Pom Pom matches.

Step 2. Arrange the plain tubes on your base, and see how you would like them arranged. You need a one centimetre gap between each roll where it will be attached to the base. Bearing this in mind, arrange your tubes and mark with a pencil on the base where you would like them to go.

Step 3. Satisfied that you have all the pieces you need you can begin the card craft. Start by marking the pieces of coloured card for your tubes. For example mine were 15cm high, so I marked the card at 16cm with a pencil leaving the gap of one additional centimetre. Then cut all the card pieces to size ready for wrapping around the tube.
TOP TIP ensure you leave enough card to wrap all the way around a tube with the extra at the bottom. You need at least a one centimetre section of card at the bottom of every tube for attaching it to the base.

SABRINA’S TOP TIPS: Don’t throw away pieces of card that you have left over from this make, I have plenty of Craft and Art ideas on my blog that you could use these bits for 🙂

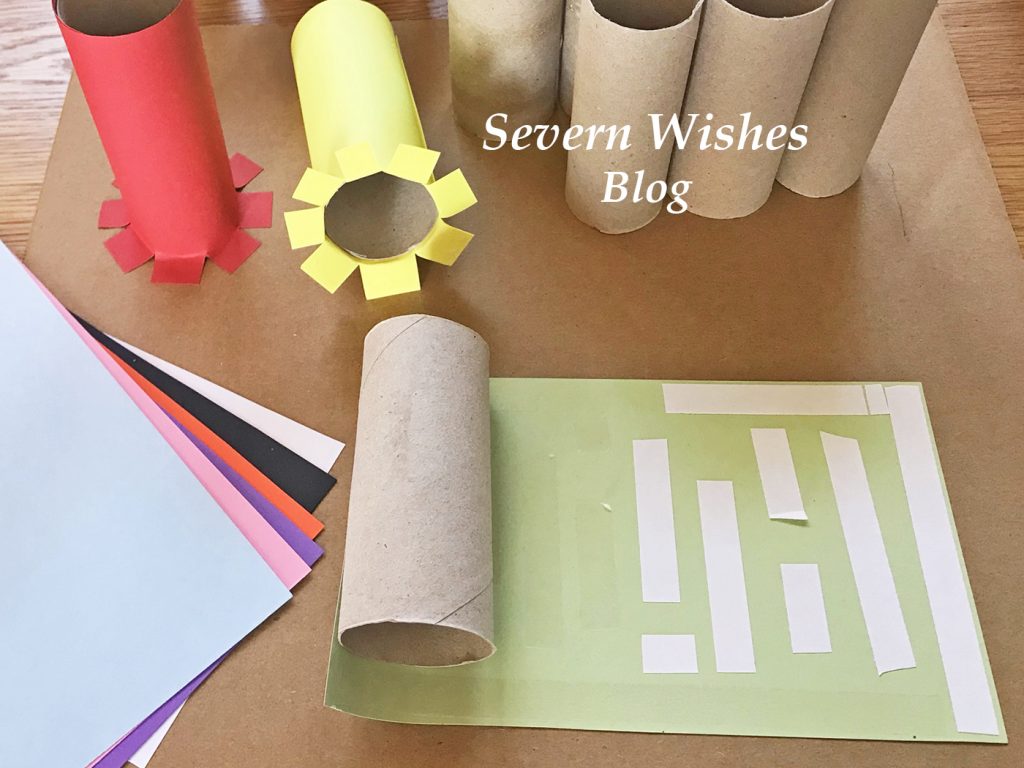
Step 5. Cut strips of double sided tape, align them along the top and edges of the coloured card and down the centre, ensure there is enough at the edges. At what will be the base of the tube stack the pieces vertically, using a small gap between them, this will be cut in Step 7 to ensure an easy attachment to the cardboard base. Make sure you put tape on all of the coloured card pieces. TOP TIP Make sure to do this Step and on to Steps 6 to 7 at the same time and don’t leave the craft part way finished, otherwise the double sided tape will dry out before you can affix it to the base.

Step 6. Time to roll the card on to the tubes. Remove all of the double sided tape strips. Line up the top section of the cardboard with the edge of the tube, on a flat surface like a table, gently roll the tube along the card. The tape will stick well to the thin tube, using your thumb and first fingers you can smooth out the card as it sticks. Try keeping it in line at the top. Once you come to the end of the coloured card make sure the final line of it is secure to its tube, smooth with your fingers and hold the edge in place for a minute per tube making sure that its firmly stuck in place. Repeat this per tube, laying them down on their sides once you are finished.

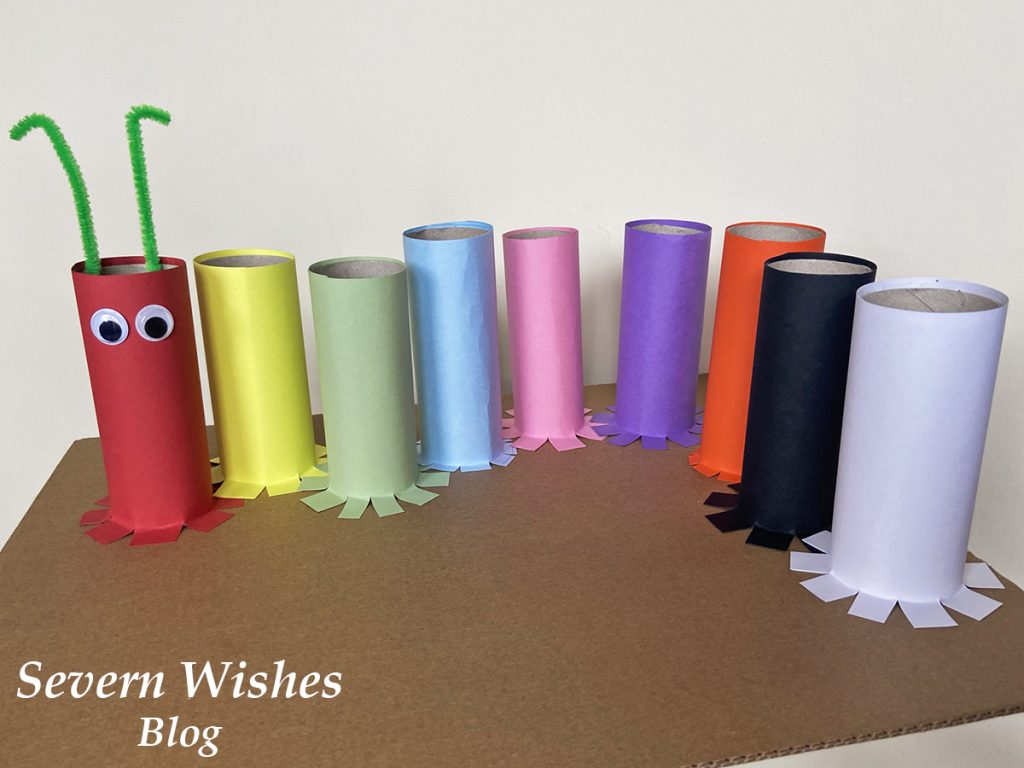
Step 7. You now need to be cutting the base of each tube so that they can be attached to the base. Take the first coloured tube you want to attach to the base (I did a Rainbow so mine was Red) and using sharp scissors cut a one centimetre slice up into the card at the tube base. Rotate the tube around cutting vertical slices as you go. Then once cut all the way around, gently peel back the slices and make a base for your tube. Affix it into place on your cardboard base because they should already have the double sided tape attached. Press down firmly and hold for one minute. Repeat this action with all of the coloured tubes until they are all attached to the base. (See images above and below).

TOP TIP Painting the base last ensures the tubes stay in place after the double sided tape has helped stick them down on the base. It also neatens up any edges that may have tape sticking out or tubes that weren’t quite level.

Step 8. With all your coloured tubes attached to the base you can now consider adding anything else to your caterpillar, and also paint the base with whatever paint you choose. I added googly eyes and some pipe cleaners as my Caterpillar feelers.

Step 9. Leave your Caterpillar to dry overnight before showing it to your little one. Ensure that you only play with it supervised either by you or another adult. The Pom Poms should be stored inside something that little ones can’t get into unless you are doing the toy together. Most children wouldn’t eat them at this age but better safe than sorry. I recommend a small plastic box like the really useful ones with the clip over lid handles.

TOP TIP Your Caterpillar friend can now be used to teach colours and numbers! Ask your child to count how many body parts the Caterpillar has, how many Pom Poms fit in each tube, can they separate the colours correctly and add them to the correct tube? This craft project can be used for play and learning and will keep your child occupied for hours.


Have you enjoyed this Craft Project? I would love to know what you think!
Please leave me comments on the blog section below or on social media.
Please tag me if you make a Caterpillar of your own!
Use the hashtag #SabrinasCraftCreations

Thank you for reading this blog post today, I hope I see you again soon!

Best Wishes for a happy week ahead!

✩ Sabrina ✩

Argos Tester Review of the Playmobil 6765 1.2.3 Floating Take Along Noah’s Ark Set

I am very fortunate to be an Argos Tester, this means that I often get items sent to me for the purpose of an online review. I test products and take photographs of them before submitting my findings and thoughts to Argos. For April I was offered one of a selection of Children’s Toy Sets. I love testing something that my young son would be allowed to partake in, his reactions and opinions would matter to me during the reviewing process.

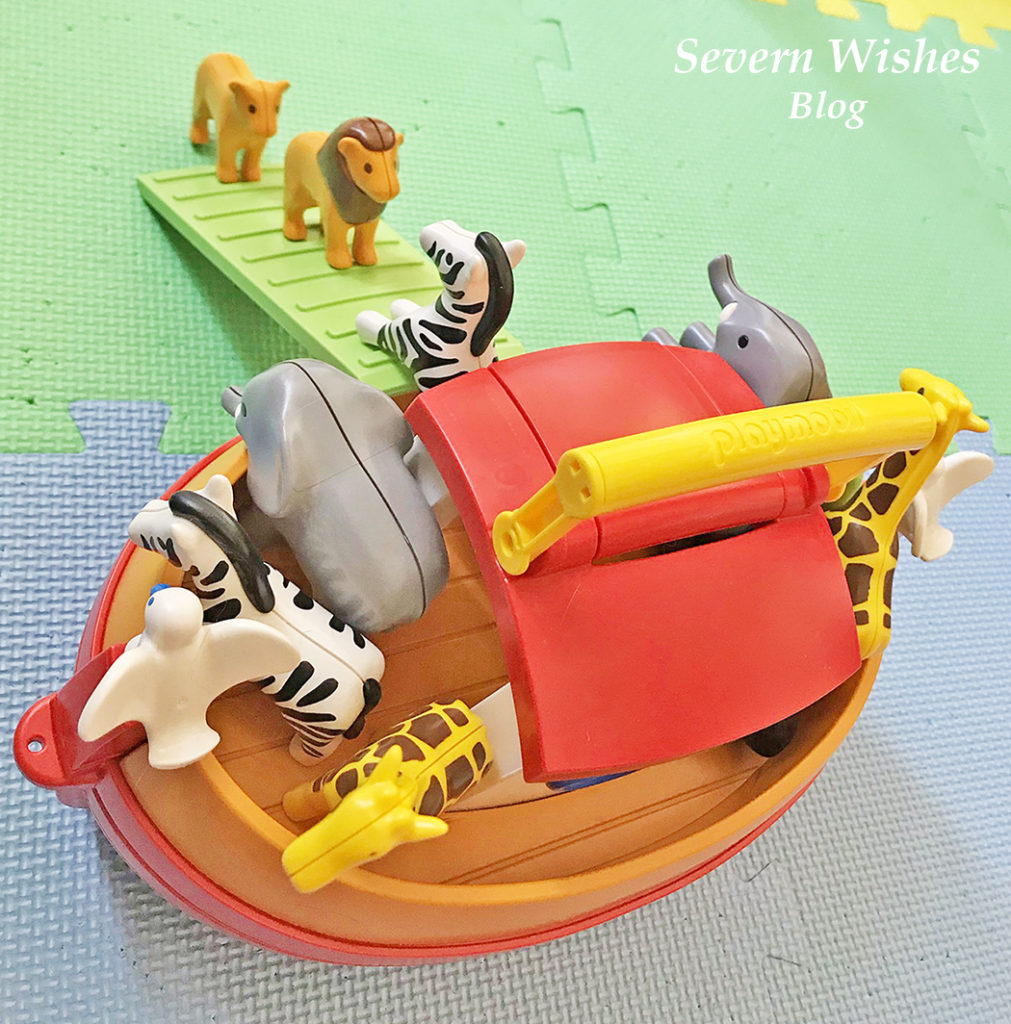
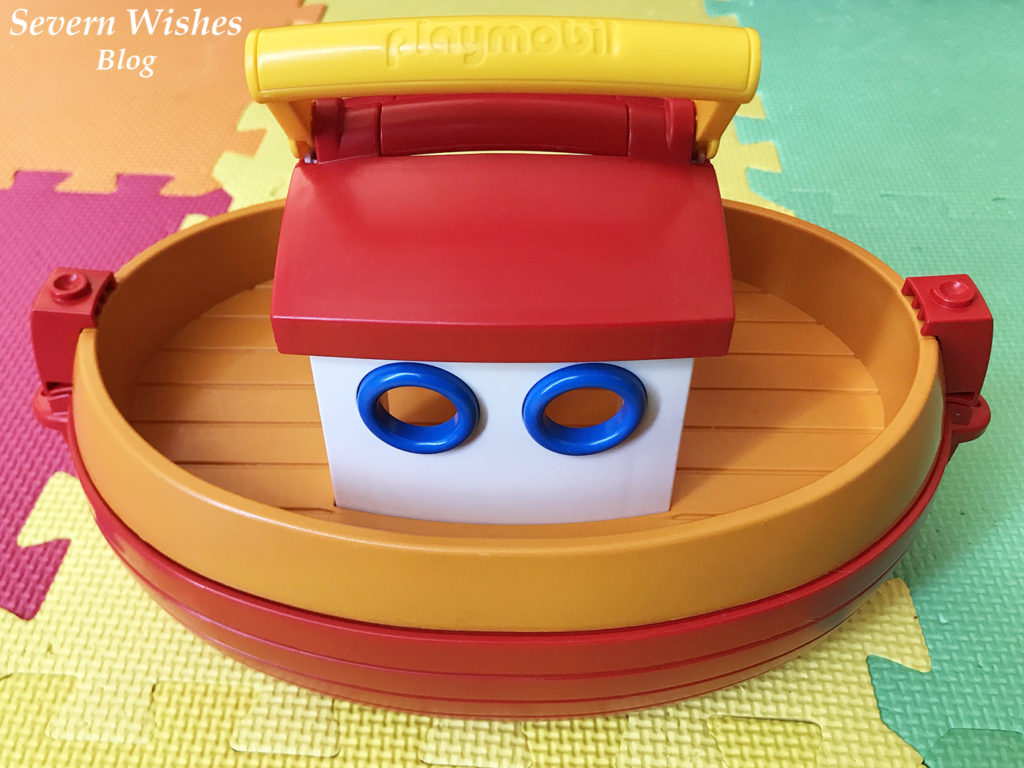
The item I am reviewing today is the Playmobil 6765 1.2.3 Floating Take Along Noah’s Ark Set.


#ArgosTester #ArgosTesters #ArgosTestersCommunity

I have written this article about a product that I have been supplied for free, in order to test and then review it. This is my experience with said product and my honest review about the product which is listed below. I have already submitted my product review to the Argos Website when this post has been published on my blog.

Product Details

Product Name: Playmobil 6765 1.2.3 Floating Take Along Noah’s Ark Set

Product Details: A Red and Orange Boat / Ark with Animals and People for Imaginative Play. For Ages 18 months plus.

Product Dimensions: H20cm W30cm D12.5cm

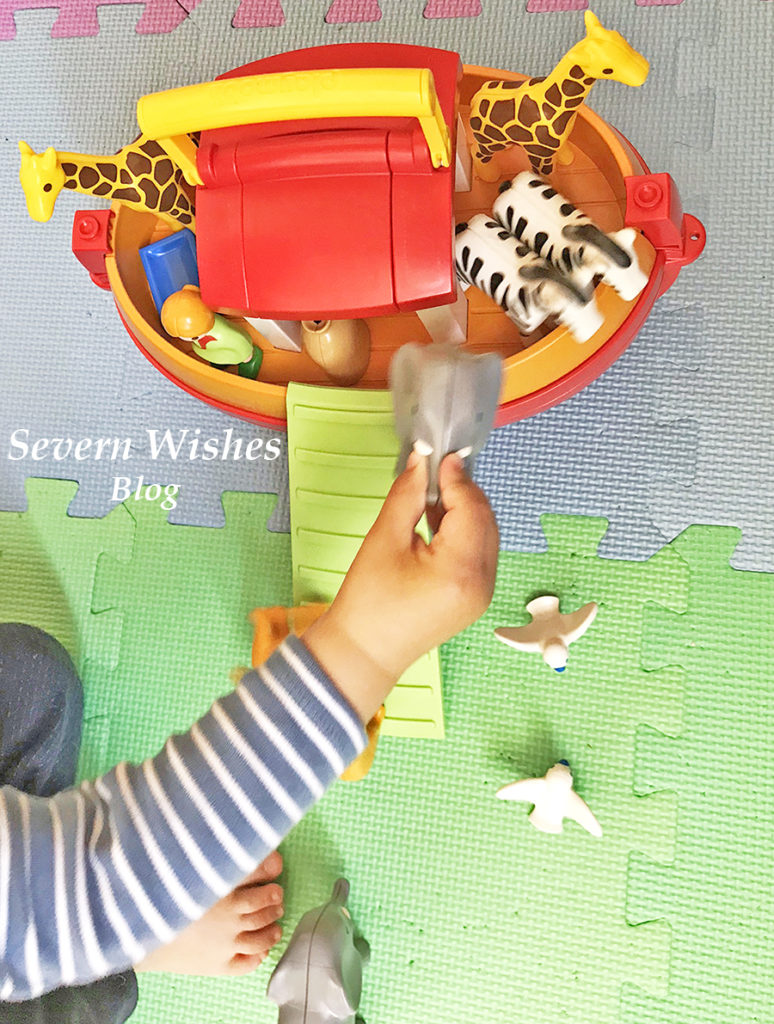
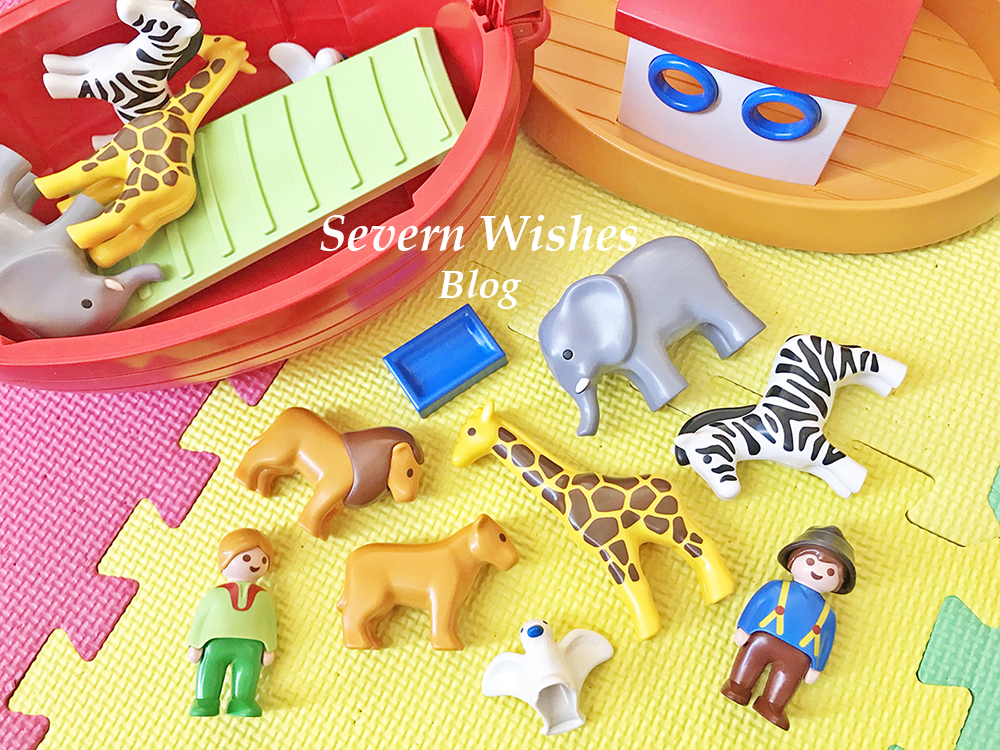
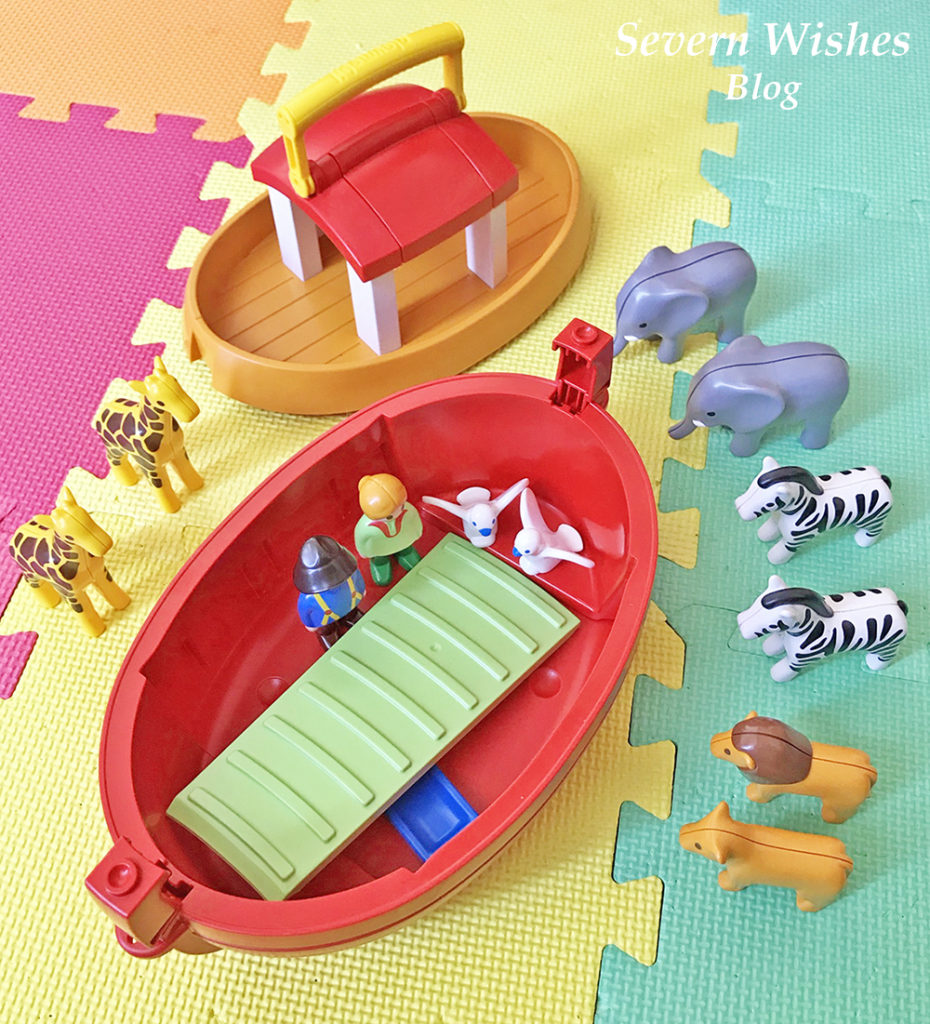
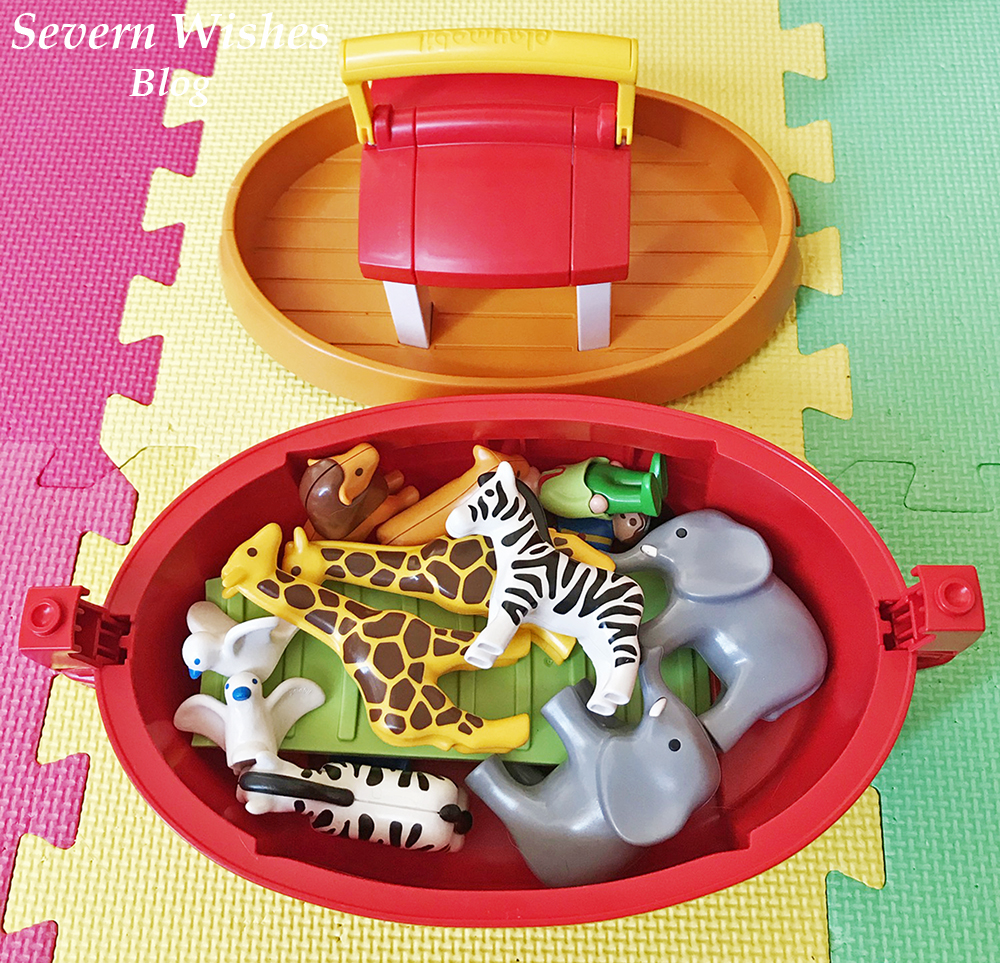
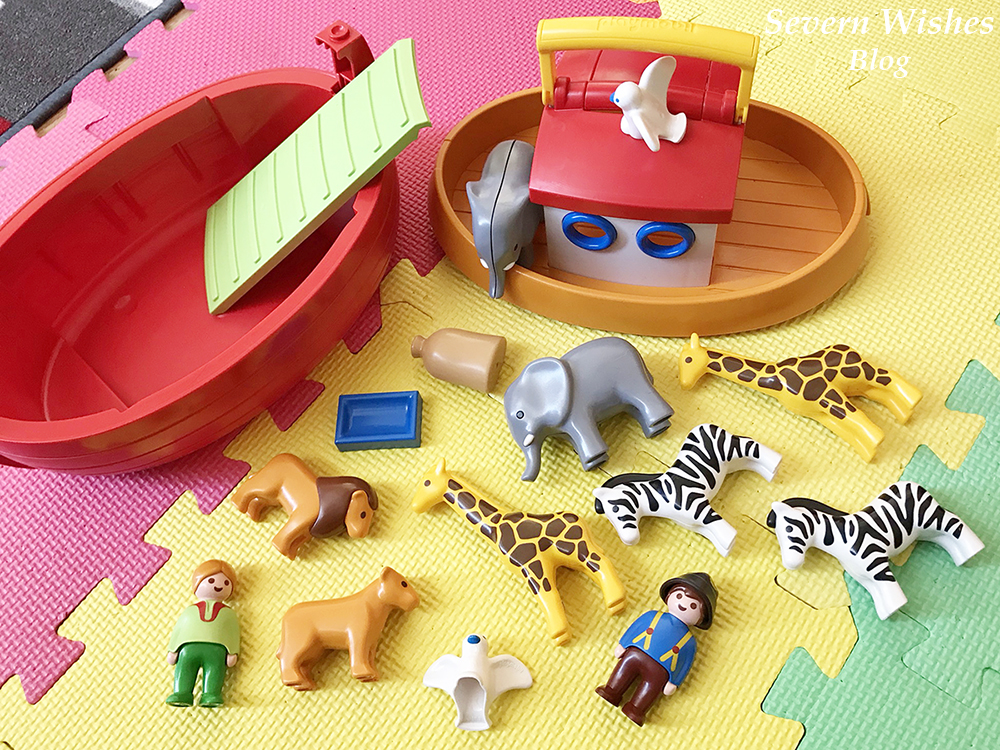
Product Description: A fantastic set for young children to learn about animals. The set includes four sets of paired animals and two birds, two people, a food bag and water trough and a ramp. The Ark itself features a top piece and a bottom half, all of the pieces fit inside it for convenient storage. The top half features a carry handle easy enough for young children to use. The Ark can be used in the bath or in a paddling pool, it does float on water but it is advised not to use it in water that has had things added to it like soap, and not to use the Ark in direct sunlight for prolonged periods of time, as this will affect the condition and colour of the toys. Two clips, one at either end of the boat, hold the two pieces in place, they are quite tight so it is advised to supervise your child when they want to play with this toy.

Argos Website Link: Playmobil 6765 1.2.3 Floating Take Along Noah’s Ark Set

Argos Website Price: £30.00 (Price Correct as of 24th April 2021).

My Son and his Reactions

I got my son to help me with this review, his reaction to the toy allowed me to give a more detailed review. He instantly loved the animals, they were a nice size for him to hold and he was happy that they came in pairs too. He is a little too young to understand the “Two by Two” Scenario but he liked how he could place the pairs together on his play mats and then move them on to the boat. With my help we managed to get all of them on to the top deck with clever positioning! He loved to pick it up by the carry handle and it got easily transported around our home.
My son couldn’t open the locks at either end of the boat, they were stiff, but I wonder if over time and with use they will get a little easier to open. Until then I ask him if he wants the boat open or closed dependent on how he is planning to play. Overall it has been a big hit and is a beautiful and colourful set for young children to learn about animals and have imaginative play time.

My Argos Tester Review Submission

Very impressed by the overall quality of the Playmobil set. Animals are accurate in both colour & pattern & great for small hands. The Ark has nice features such as the handle for carrying, the ramp to re-enact the “two by two” scenario & the fact that all the pieces fit neatly inside for storing away when not in use. My son loves animals & really loved how he could stand these up and they wouldn’t easily fall over. A fab set that has captured imagination & also teaches children about animals.

My Overall Honest Opinion

There is a strong carry handle on the top of the Ark for children or adults to carry the set. This is a great idea in order to transport the set around the home or to a grandparents house for example. The clips on either end are strong so as the pieces don’t fall out of the Ark during transportation. But they are a bit stiff, too much for children to open up, maybe they get easier with frequent use. The accurate colourful pieces and bright vibrant boat make for fun imaginative play for children.

Having studied the pieces in detail they are beautifully made, smooth with no sharp edges or danger of any small parts. A great set for young children and great up to around the age of 5 or 6. The animals could still be used after that age however, just in other imaginative play. A fantastic set overall with lots of nice attention to details such as the lines on the Ark deck and simple decorations on the animals.

There is only one issue I have with the animals, and that is they all have a hole in one leg which would allow water inside if you were to use the set in water. I am always concerned about mould growing inside toys that are used to get wet. Therefore we will not be using this set in the bath, and instead using blue play mats to pretend that it the water.

If you are interested in finding out more about this product then please click the link above in my Product Details section to go to the Argos website.

Thank you for reading this review, have a lovely day.


✩ Sabrina ✩
Fun Ways to Spend Quality Time with your Children both Indoors and Outdoors this Easter

Sometimes we are all guilty of spending too much time on technology, and now that the weather is improving we should all be putting down our TV remotes and phones and getting outside! (I know that you’re thinking about doing that now, as you read this blog post on a piece of tech, but please bare with me as I have some great activities you’ll want to be inspired by I’m sure!)

So where to begin! If you’re not naturally adventurous for the great outdoors it can seem a bit overwhelming! So how about we just start small! I have come up with a range of things to suit everyone, outdoorsy types and not so much! All you need to do is choose one of these to do each day during the school break or even at the Easter weekend and voila you have some outdoor fun, nature related or outdoor activity to enjoy!

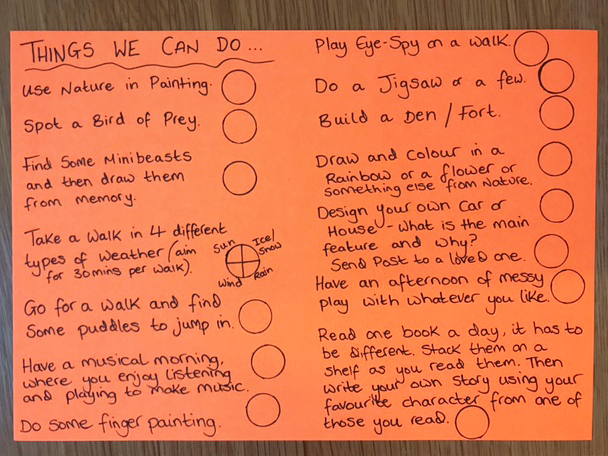
Here are my 15 “Things We Can Do” of Fun Ideas to do Indoors and Outdoors… Weather Dependent!

🥚 Use Nature in a Painting – Use sticks or leaves to paint with!

🥚
Spot a Bird of Prey – Look up and see what is flying above your head!

🥚
Find Some Minibeasts and Draw Them from Memory – Bugs can be colourful and interesting!

🥚
Take a Walk in 4 Different Types of Weather – No matter what the weather it can be fun to take a walk!

🥚 Go For a Walk and Find Some Puddles to Jump in – Who doesn’t like jumping in a puddle! Wear wellies!

🥚 Have a Musical Morning, Listening or Playing – Music can help you relax!

🥚 Do Some Finger Painting – Draw the trunk of a tree and make the leaves with your fingers!

🥚
Play Eye-Spy on a Family Walk – Eye Spy is great for a range of ages!

🥚
Do a Jigsaw on a Rainy Day – Jigsaws can be a fun family activity on a rainy day or a board game!

🥚 Build a Den or Fort Together – Who doesn’t love building a den! Cushions and Throws work well!

🥚 Draw and then Colour in something you’ve seen in Nature on your Walk, a Rainbow, Tree, Flower etc

🥚 Design your own Dream Car or Dream House (for older children to imagine)

🥚 Create Post for a Loved One and Walk to a Post Box to Send it – Draw a Picture or Write a Letter

🥚 Have an Afternoon of MESS with Messy Play or Fun with Paint or Food items – Paint and Rice Crispies…

🥚 Read More! Read as a Family, decide on what your Favourite Book is and why Books help you learn!

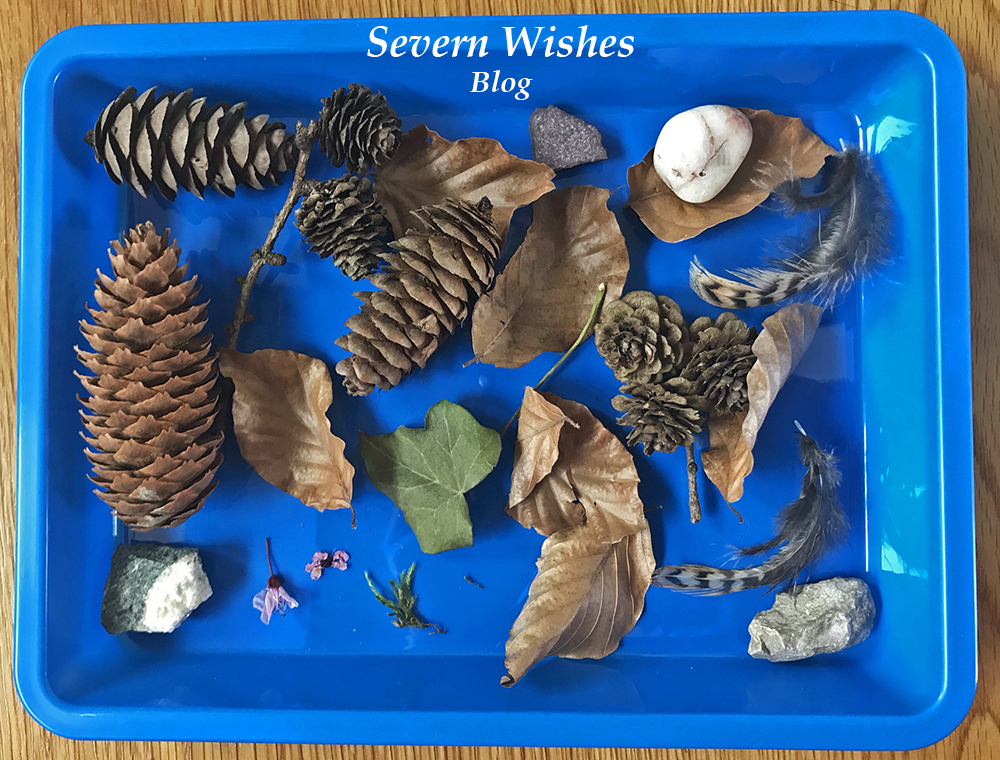
🥚 Nature Hunter GatherersCollect some things from in your local area to look at when you get home such as leaves and pinecones, things that have fallen from trees and bushes. Don’t deliberately destroy nature though! Fallen Leaves are great, discover what tree they come from by looking at the shape!

The image above is from when my son and I did a day of Nature Hunter Gatherers. It was a lovely warm day and we spent six hours outside having fun, games and walking. This activity is great for learning about where things come from such as pinecones and feathers. Make sure you do this on a dry day. We took a long walk through our village and picked up things that we found on the ground. Leave them somewhere cool and dry for a few days to dry out and make sure there are no creatures living in them before you handle them again!

I highly recommend getting some coloured trays like these, they were only £3 for a pack of 3 from

The Works. Perfect for both Art and Craft and collecting things too!

✩✩✩

Picking Up Litter

If your children are a little older than mine you might want to pop gloves on when you go on your walk, take a plastic bag with you, and do a litter picking up hour in your local village or town. This helps the environment and the animals and birds in your area from getting injured.

🥚 Easter Ideas 🥚

You could also do Easter themed Drawings, Colouring In and Games such as an Easter Egg Hunt in your house or garden this weekend.


Check out my previous Easter blog posts for Art and Craft ideas and Baking fun… Here

Thank you for reading this blog post today! I hope that I have inspired you to do at least one of these activities with your own family. Let me know in the comments section or on my social media if you get up to anything fun in the next few weeks!

✩ Sabrina ✩
Argos Tester Review of the Chad Valley Bright Stars Pop Up Play Tunnel

I am fortunate to be an Argos Tester, this means that I often get items sent to me for the purpose of an online review. I test products and take photographs of them before submitting my findings and thoughts to Argos. For February I was offered Children’s Toys. I was excited at the thought of testing something that my young son would be a huge part of, and his opinions would matter during the reviewing process.

#ArgosTester #ArgosTesters #ArgosTestersCommunity

I have written this article about a product that I have been supplied for free, in order to test and then review it. This is my experience with said product and my honest review about the product which is listed below. I have already submitted my product review to the Argos Website when this post has been published.

My Honest Opinion on the Product

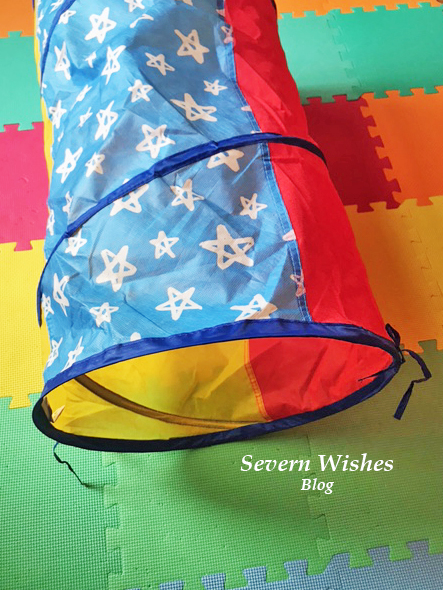
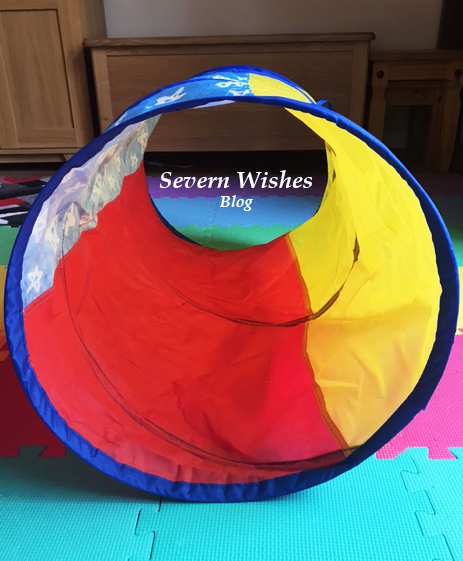
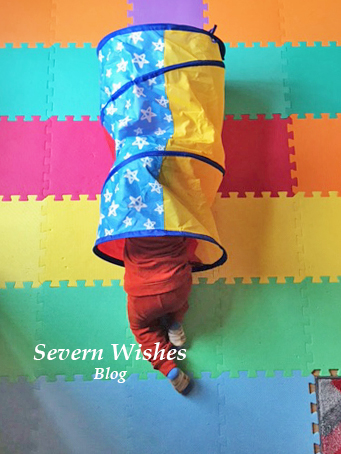
I have been rather happy with the overall look and quality of this product. The Pop Up Tunnel is something that doesn’t only entertain my toddler, but we can add learning into play and he also gets exercise indoors on poor weather days. It is bright and inviting and my son wanted to play with it immediately after I had set it up for him. I look forward to setting it up outside in the summer too on some outdoor play mats. I think it’s an excellent product for the price it is available at, and most children would have the imagination to be able to use it effectively. Because it folds away neatly it even fits into our large toy chest so it takes up no additional room. This product is ideal for any parents who may have a toddler or young child with lots of energy like mine. The best features are the ideal length (it is not too long to overtake your floor but long enough for a toddler to crawl through and have lots of fun), its bright colours and fun stars pattern, the genius tabs at either end so it can be securely fastened and put away for another day, and finally the imagination factor of it!

✩✩✩

Sabrina’s Top Tips for Using this Tunnel for Learning during Play

Once your child is used to the tunnel and is having fun with it, then there are several ways you can use it to increase learning while your child is playing. Words such as “Through” for them crawling through the tunnel is a good one, as well as “In”, “Out” and “Under”. You can also name the various Colours such as “Red”, “Yellow” and “Blue” and the “Stars” on the pattern too. See if your toddler can indicate which is which and say them back.

✩✩✩

Usage of the Product

The tunnel is made from material that is not waterproof, and is only wipe clean, so it is best used indoors and on a soft surface such as carpet, a rug or play mats. Keep food and drink away from it in my opinion. It will move around and slip easily on a wooden floor so perhaps look at where is safest in your home to set it up. Always supervise your child or children when using toys. The tunnel can be used outdoors in dry weather but I would suggest it was still set up on play mats still to avoid the material getting torn by anything sharp or pointed.

Product Name: Chad Valley Bright Stars Pop Up Play Tunnel

Product Details: A Red, Yellow and Blue Tunnel with White Stars. Ideal for children aged 2 years and over. Pop Up means it has minimal assembly required and also folds away neatly using the tabs at either end to secure and store reasonably flat. It is advisable to supervise children at all times while using this toy tunnel and to keep any sharp toys or furniture away from the material to prolong use. It can be used indoors or outdoors, but should only really be used on a flat and soft surface indoors, ideally set up on play mats or carpet. Due to the nature of the material it should be stored appropriately. Play Mats that can be set up outdoors is also a good idea when planning to use this outside because this tunnel is not waterproof.

Product Dimensions: H42cm W80cm D42cm

Product Description: Ideal for bringing children into a world of imagination. This tunnel can be anything they want it to be, and you can also use it with other items such as when children want to build a den for example. A tunnel to a secret dinosaur world, a secret passageway out into the world of spies… this can be whatever your child can dream up.

Argos Website Link: Chad Valley Bright Stars Pop Up Play Tunnel

Argos Website Price: £8.00 (Correct as of 14th February 2021)

My Argos Tester Review Submission

My son was over the moon with this bright & fun tunnel he loves anything with stars on. It took no time to set up & easily packed away again, tabs either end secure it together almost flat so storage is no issue when not in use. A lovely item filled with possibilities with a bit of imagination, good for learning, teaching & great exercise on days we can’t get out of the house.

If you are interested in finding out more about this product then please click the link above in my Product Details section to go to the Argos website.

Thank you for reading this review, have a lovely day.

✩ Sabrina ✩