Sabrina’s Easter Craft Ideas 2022

Happy Easter! I hope you’re having a wonderful long weekend!

If you’ve already been out and about and are now looking for something to do within your home to keep the children entertained, then why not check out all my craft pieces below, show your children and they might want to give them a go! They are all really easy and just need a few minutes of your time as the adult to deal with some scissor cutting and poking holes, and then they can begin! You won’t need any fancy craft equipment for any of these either, just gather the following items on my list below and you’re good to go!

If you were wondering what it cost me to make all of the craft items I have done in recent posts it was about £15. That includes all of the double sided tape, various packs of white and coloured card, good quality colouring pens, craft balls and pipe cleaners among other things. But I have lots of them left over from these purchases too for use in future craft projects. I actually have more crafty items in the works and I’m still using up the same items and haven’t needed to buy any additional ones.

Sabrina’s TOP TIP: Making up a Craft box is a great idea, it will keep everything neat and tidy. Throw in left over pieces of card, toilet rolls and crafting left overs. I recommend a Really Useful Box or a similar one which has a tight fitting lid. These are also really strong and stackable for easy storing away.

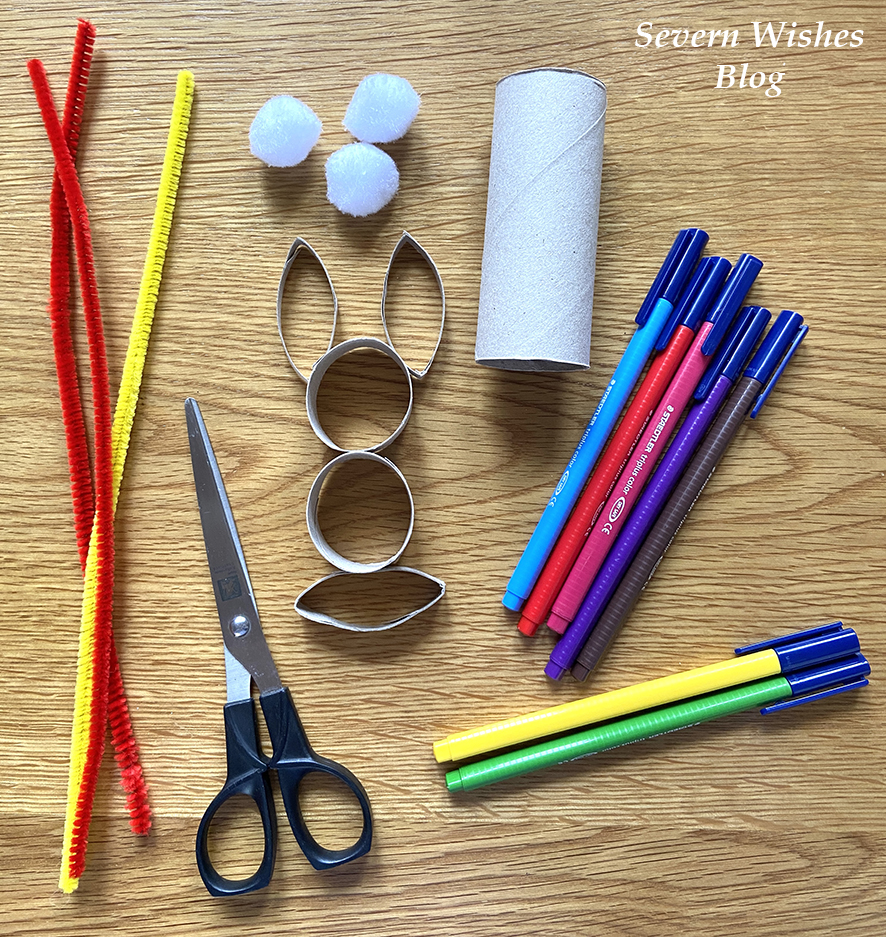
✩✩✩ What Will We Need for all these Projects ✩✩✩

Toilet Rolls
Cereal Box Cards
Pens to Decorate
Scissors
A Pen or Pencil
A Ruler
Pipe Cleaners
Fluffy Craft Balls
Coloured Card
Googly Eyes
Double Sided Tape
Pritt Stick or PVA used sparingly

✩✩✩

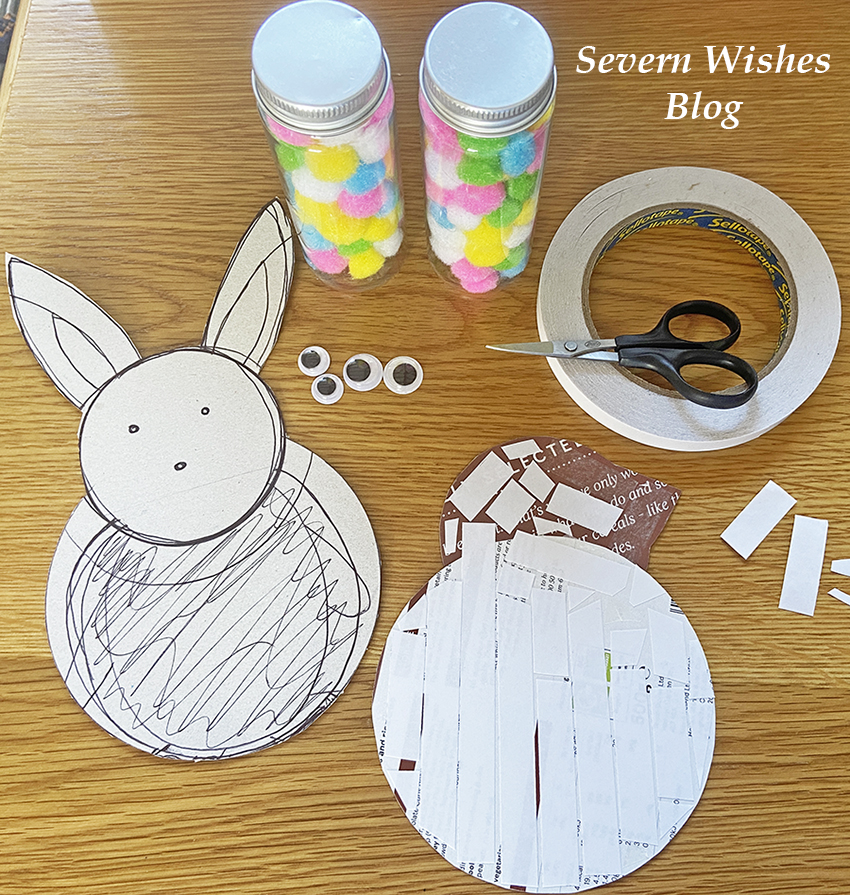
How to Make Sabrina’s Fluffy Craft Easter Animals

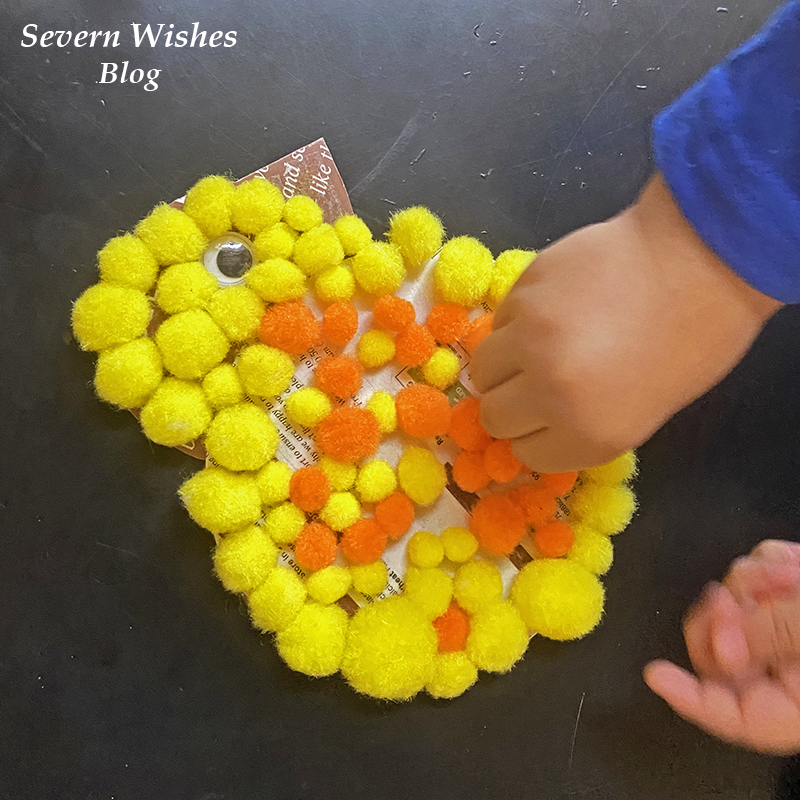
These cute and fluffy animals were made using cereal box card, double sided tape and a bag of craft balls! In all it cost me about £2! And we have a ton of balls left over which we can use as flower middles and things like that – I use them in other projects too. This one is easy for little children, you do the templates and then add the glue on and then they can go to town with all the sticking!

Step 1. Draw on a cereal box, inside on the flat side piece, whatever shape you like, a Rabbit, a Chick, an Easter Egg, whatever you like or your children want.
Step 2. Cut out your templates, make them as big or as small as you like.
Step 3. Use PVA or Pritt Stick or Doubled Sided Tape to coat your template with glue.
Step 4. Provide a clean and flat surface for your little ones to sit and stick the fluffy craft balls to their card template.
Step 5. Add googly eyes or card beaks or any other items you want to finish them off.
Step 6. Let them dry overnight, place a piece of kitchen roll or newspaper on a flat surface, add the template, add another layer of tissue or newspaper, and then place a heavy book on top overnight to flatten them down and help the balls to stick.
Step 7. Next day you can display them around your home.
✩✩✩
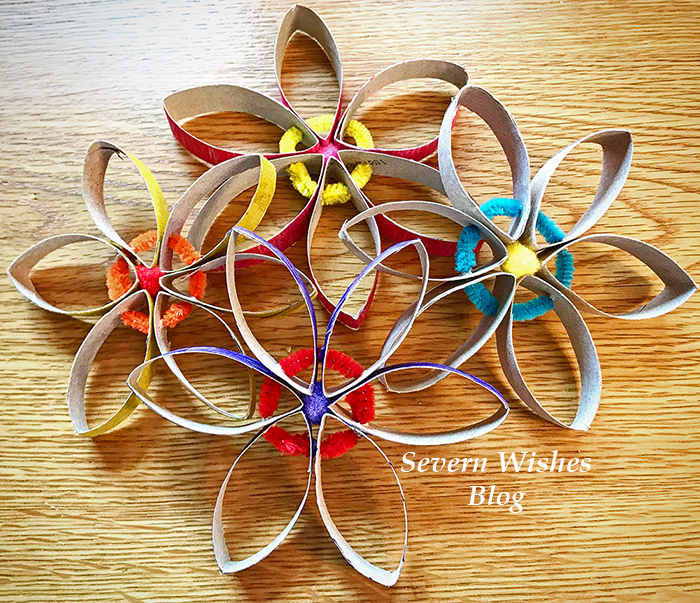
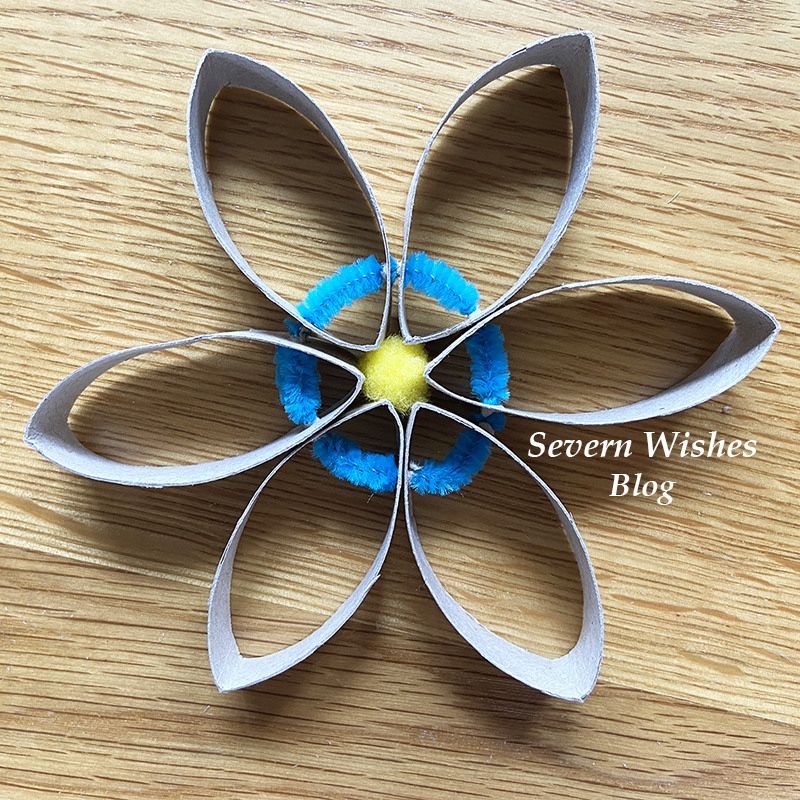
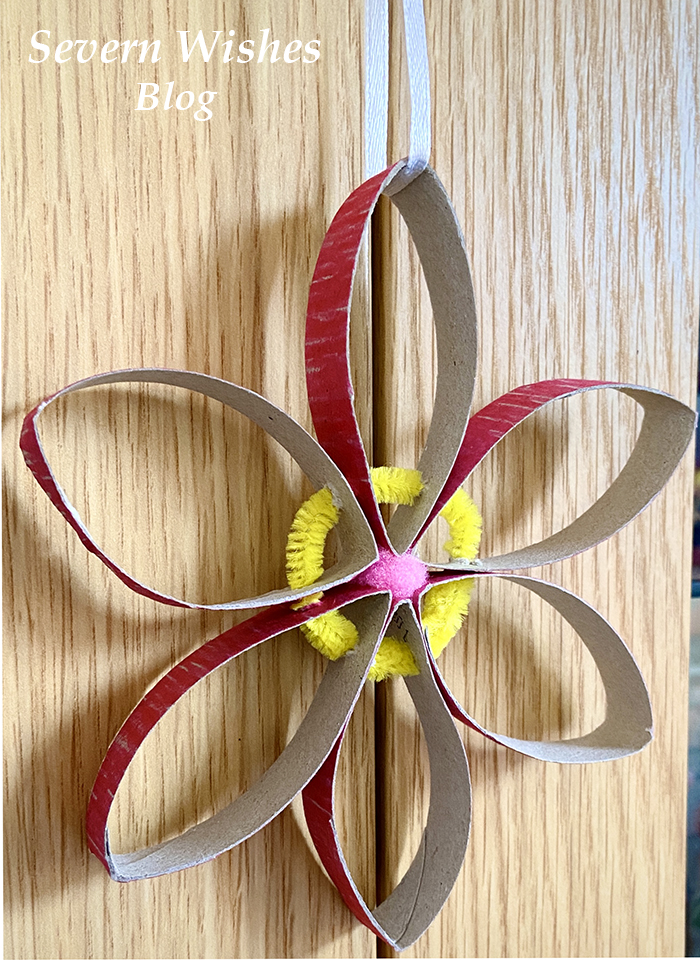
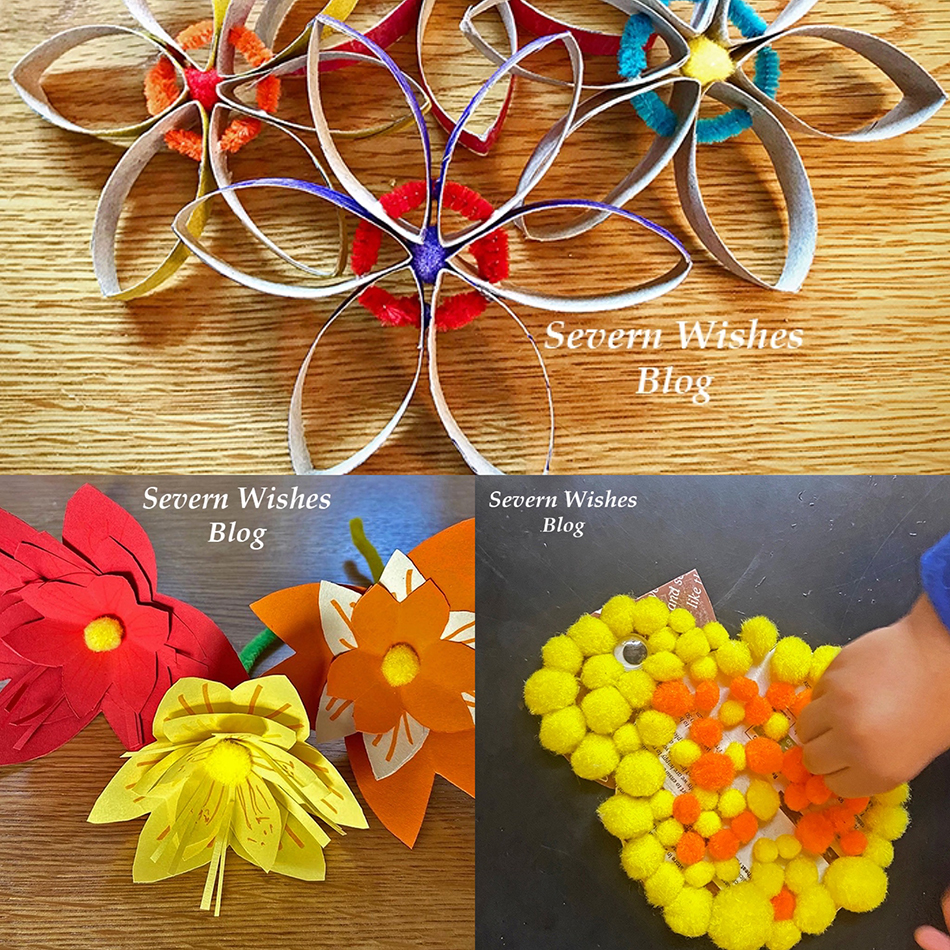
How to Make Sabrina’s Toilet Roll Flowers

My easy toilet roll flowers are so simple to do! They only take about ten minutes to make once your toilet roll is decorated and dry. You could make a load of these, if you have a kitchen roll tube you may even get 3 flowers worth of petals from one tube! I would like to try and make a Rainbow of these!

Step 1. Let the Children decorate their toilet rolls and let them dry.
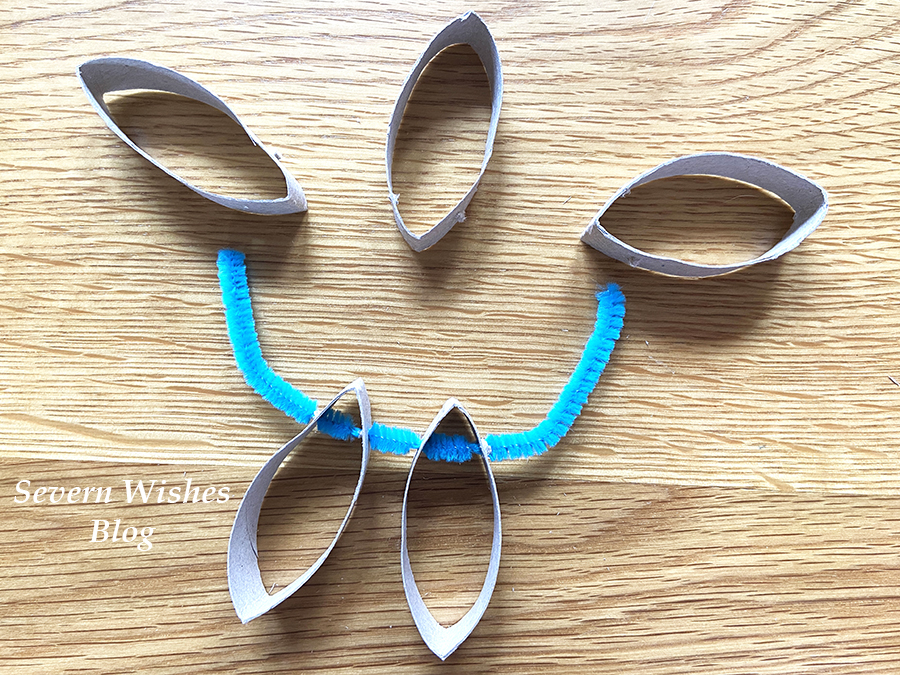
Step 2. An adult then cuts the toilet rolls into equal width pieces to make the petals.
Step 3. An adult also then uses the pointy end of their open scissors to poke holes that are 1cm up from the end and through both sides of each petal. (See my photo).
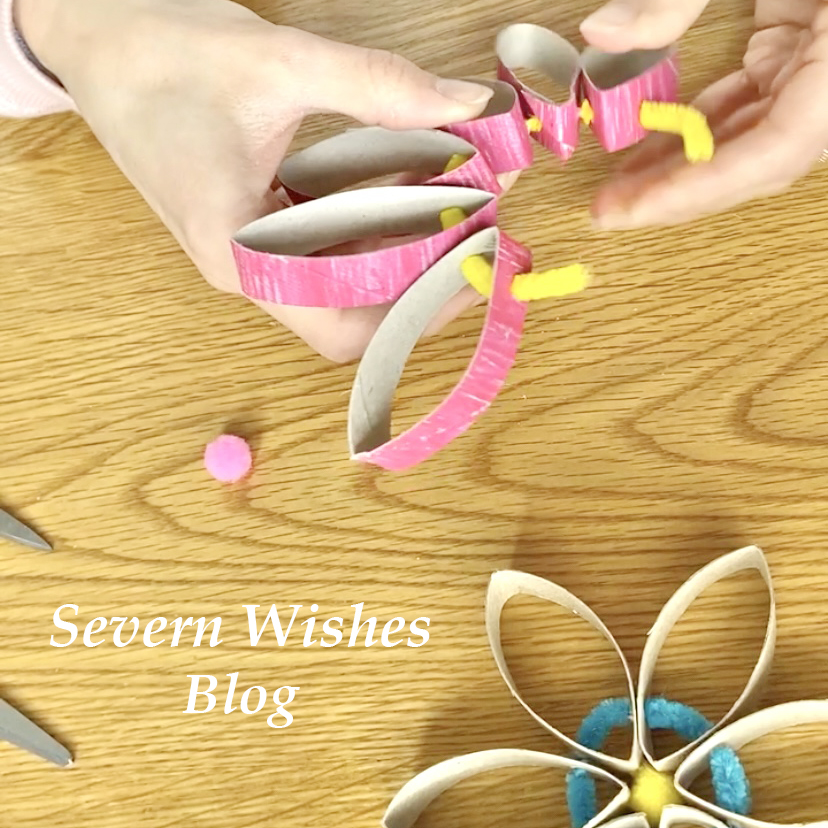
Step 4. The petals can now be opened out and gently threaded on to a pipe cleaner through the holes made with the scissors. Push them on until they hit the middle of the pipe and keep adding round.
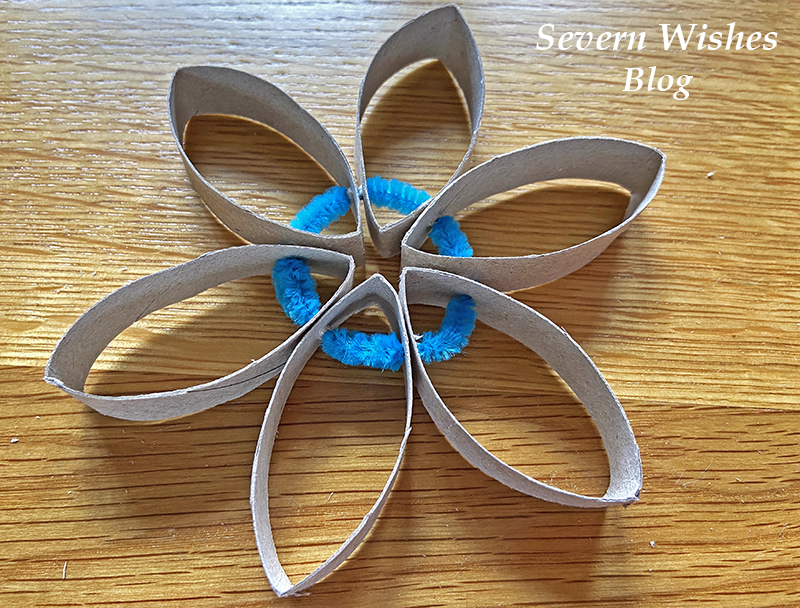
Step 5. Curve the Pipe Cleaner round as you go, after each petal, and then after the final one is added you push the ends of the pipe back through the final petal holes to neaten it up. Line it up spaced between the petals while it is flat on a table and then push a fluffy craft ball into the middle.
Step 6. Hang your flowers up around your home on ribbon or string for a nice decoration.
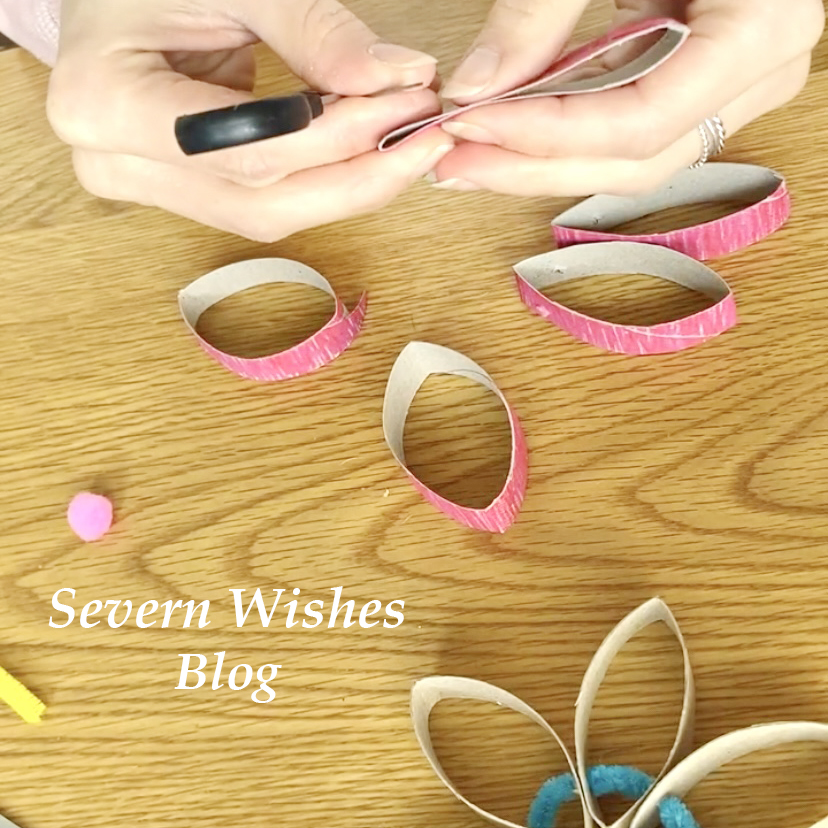
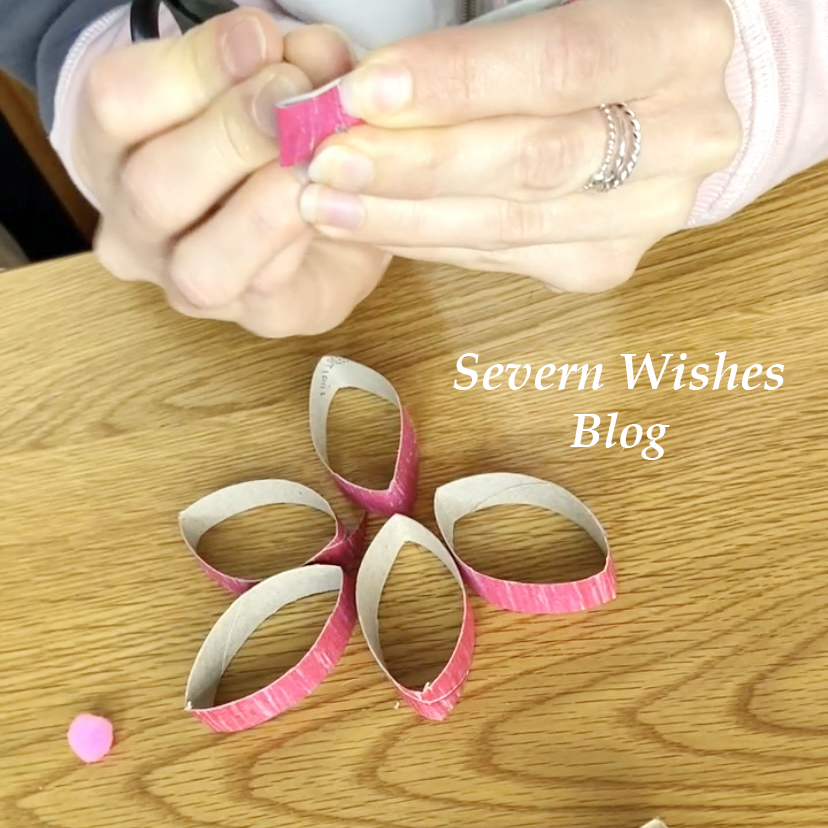
Step 3 – 1 cm in from the petal end
Step 3 – making holes through the petals
Step 4.
Step 4 to 5.
Step 5.
Step 6.

✩✩✩

Step 2 – Cut the Decorated Roll into 5 Pieces

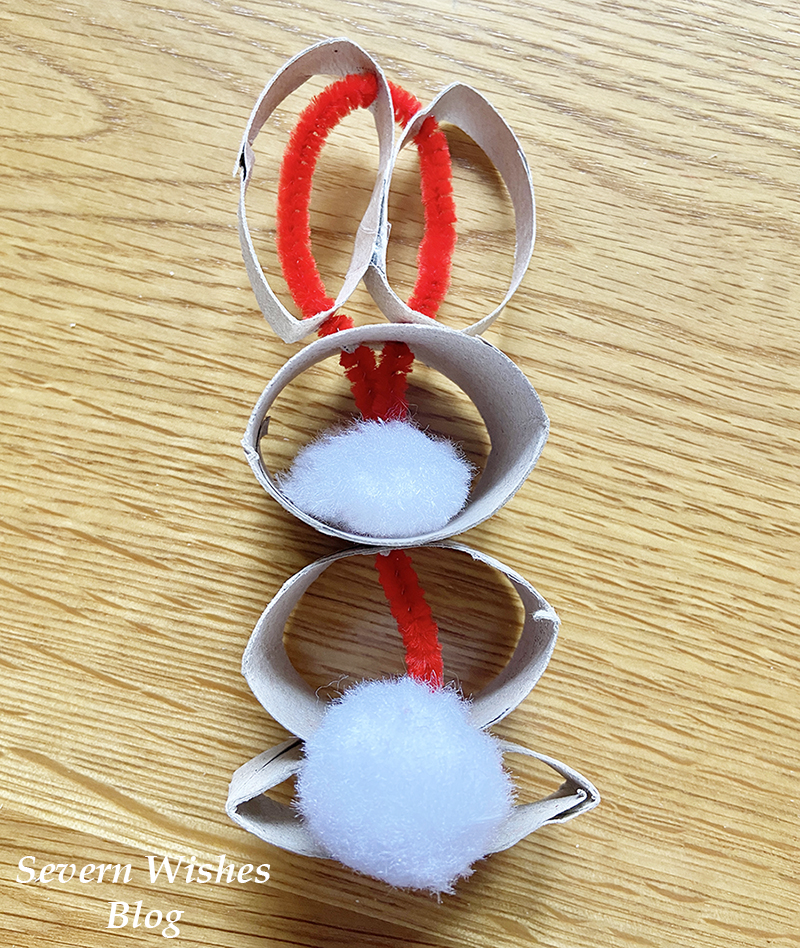
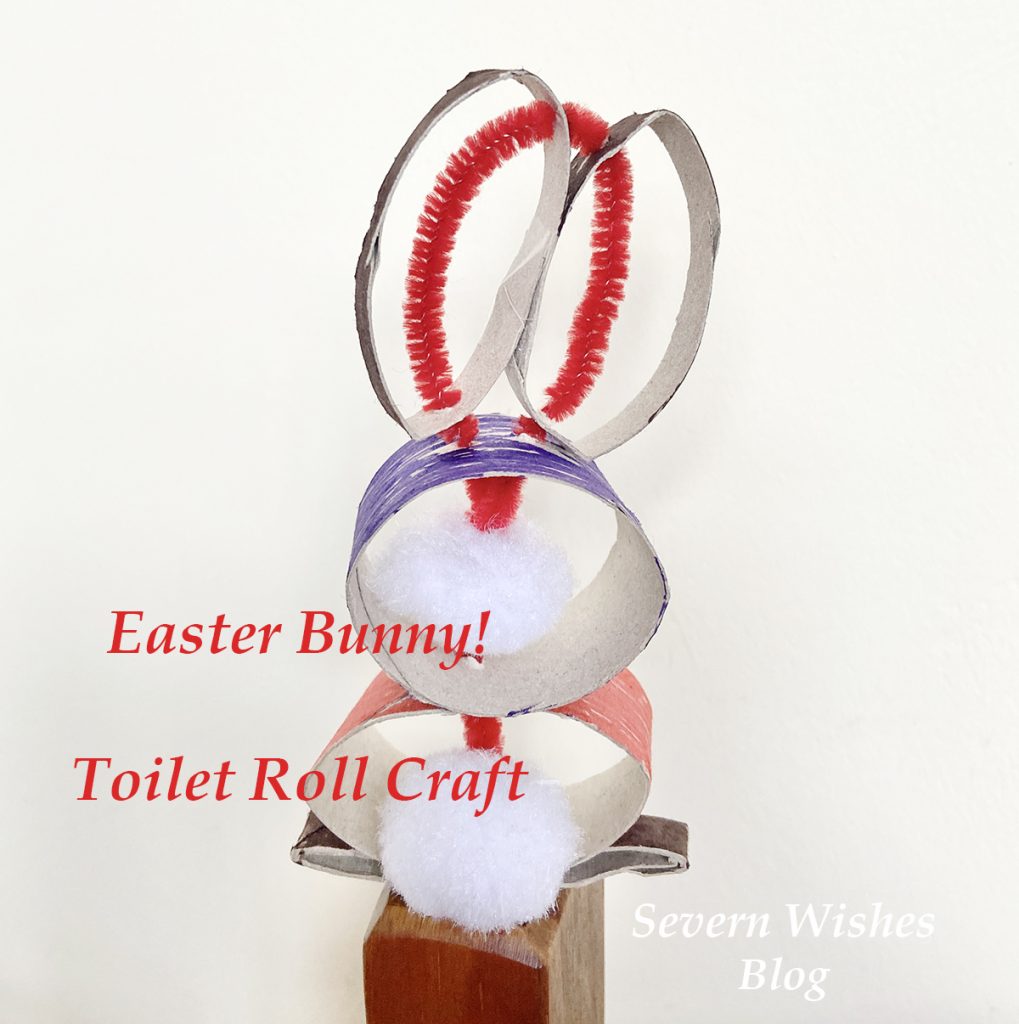
How to Make Sabrina’s Toilet Roll Easter Bunny

My cute toilet roll bunny’s are great for the Easter break! And they should stand up all by themselves! They are a little trickier than the flowers, but lots of fun still! They all start with a decorated toilet roll anyway so make sure you just save them up and get little ones to colour them in.

Step 1. Children decorate toilet rolls and let them dry.
Step 2. An adult cuts the toilet rolls into 5 pieces, a base, two ears, a middle and a head. (See Photo).
Step 3. An adult uses the pointy end of scissors to poke holes in the pieces, each one is specific. So…
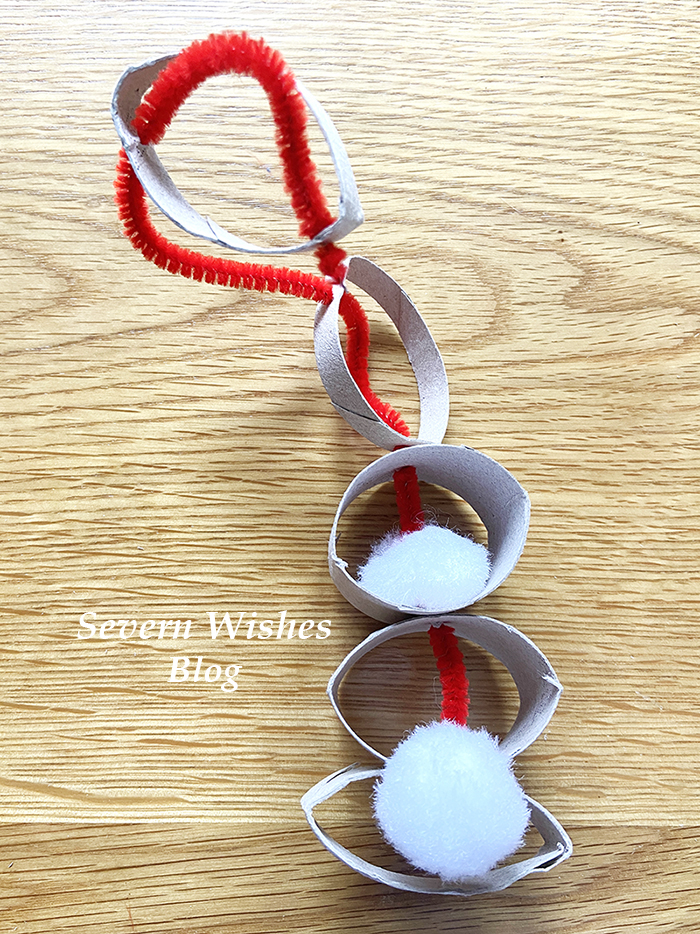
Base is one hole, central on one side. Middle piece is two holes, one top one bottom just push the card flat together and the scissor end straight through. The Head piece needs one hole in the base at the centre, and off centre at the top it needs two holes. Each ear needs two holes, both on the same side at either end before the point. (See My Photo).
Step 4. Using a Pipe Cleaner push it on to the base and bend the end, attach the fluffy tail.
Step 5. Add the Middle to the pipe cleaner, push it down until it is flush and flat against the base.
Step 6. Take the Head piece, thread it on through the single hole, make it flush on the Middle piece of roll and then push another fluffy ball down the pipe cleaner until it sits in the middle of the roll.
Step 7. Push the pipe cleaner up through one of the holes in the top, and curve the pipe cleaner round, make sure the bunny parts are all flush and together for the body.
Step 8. Add each ear by pushing the pipe cleaner up through one side with the holes on, in through the bottom hole and out of the top hole, bend the pipe cleaner round and then through the top hole of the final ear and down through the bottom hole.
Step 9. The final step is to push the rest of the pipe cleaner down through the second hole on the bunny head, if you have more than 1cm of pipe left cut it off, then push the last 1cm into the fluffy ball within the roll bunny head, this neatens it up and gets the pointy end of the pipe cleaner hidden away.
Step 10. Adjust your bunny feet base and middle parts so that the bunny is aligned and he should stand up all by himself!
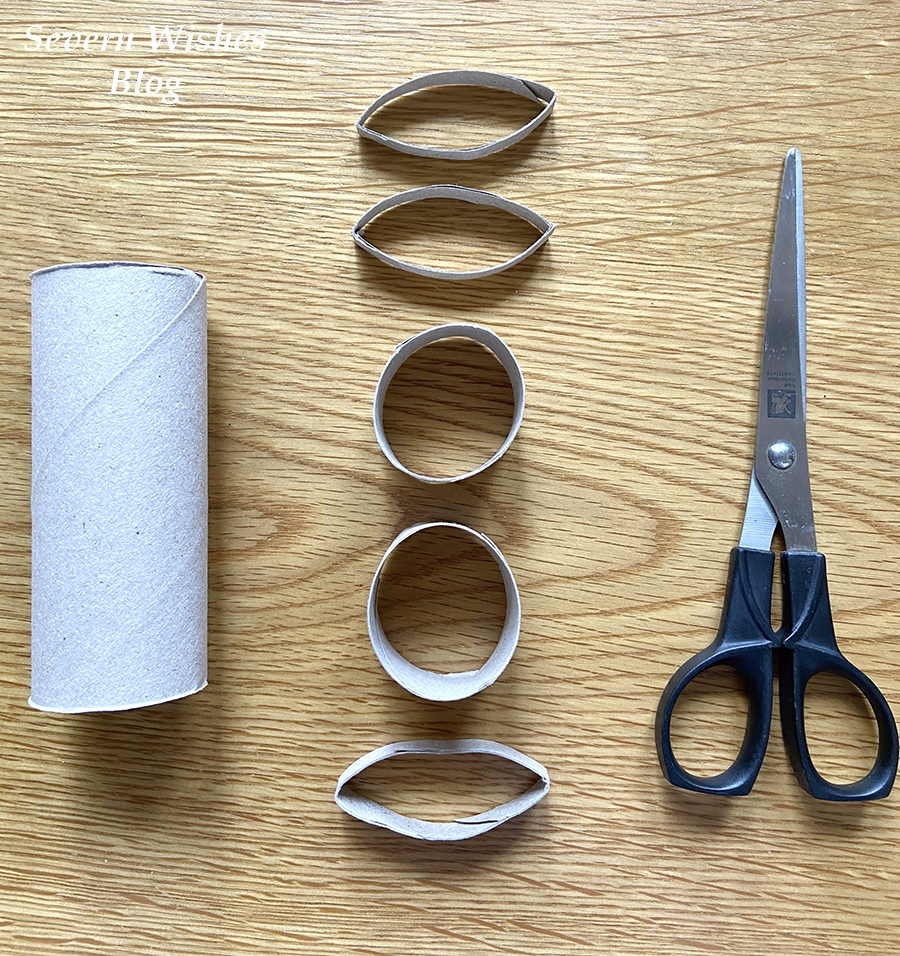
Step 3 – use my guide to make the necessary holes
Step 4 – Base and Tail
Step 7 and Step 8 – Threading the Ears

My bunny making video tutorial can be found on my Facebook page if you get stuck which is right here

✩✩✩
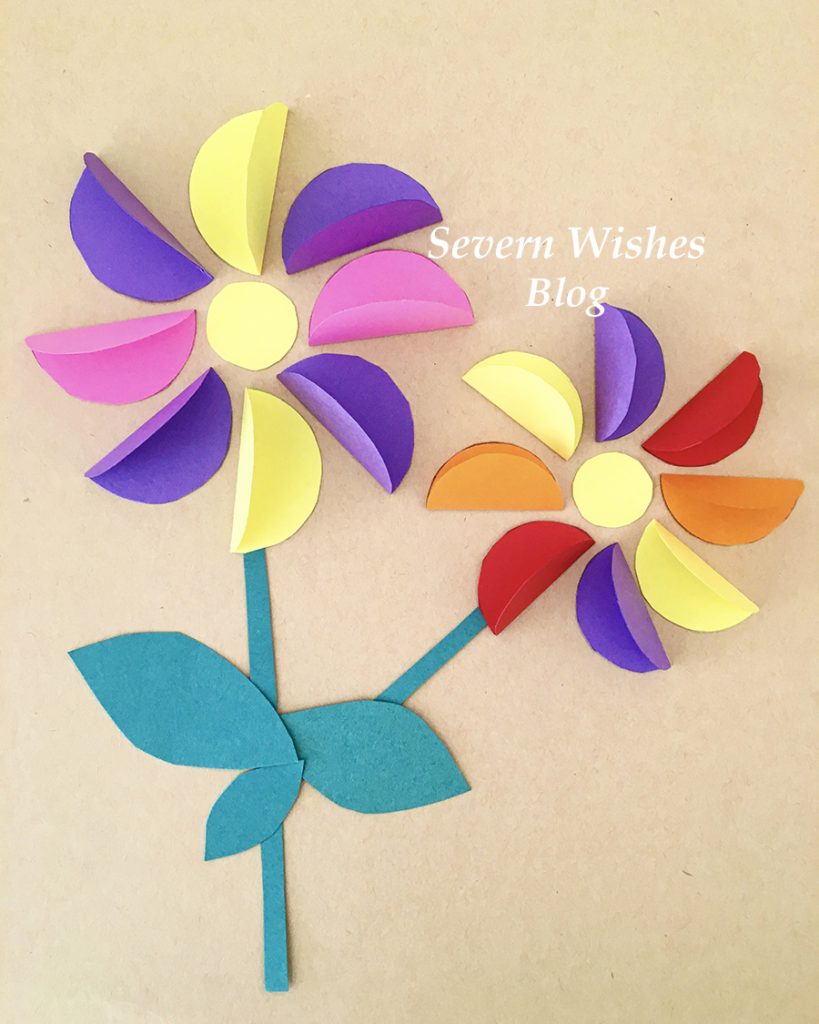
How to Make Sabrina’s Circle Petal Flower Card

This one is nice and easy and once all the cutting out is done, children can stick them down however they like to design their own flowers.

Step 1. Fold a Piece of Card in half for your card base.
Step 2. Draw around a circular object many many times on some different pieces of coloured card.
Step 3. Cut out these circles carefully and assemble flat.
Step 4. Every circle needs to be folded in half.
Step 5. Assemble your Flower by arranging the petals with one side sticking up to make it 3D.
Step 6. Cut out a small circle in a bright colour for the centre of each flower.
Step 7. Once happy with the design either pritt stick or double sided tape each petal down to the card.
Step 8. Make leaves or stems from card, or use pens to decorate your card.

✩✩

Thank you for reading this (long) Craft related blog post today, I always showing you my latest “Sabrina’s How To Make’s”! And if you have any questions for me about how to do something you’ve seen on my blog then please comment below on this post and I will happily answer them for you. I hope that you have seen something you would like to try and make yourself!

If you do make any of my craft items please tag me on social media using the hashtag #SabrinasHowToMake I really look forward to seeing them!

✩ Sabrina 

Check out my previous How to Make Craft posts for these beautiful 3D paper flowers!

Free From Easter Eggs Taste Testing and Comparing

Welcome to today’s post as I discuss Free From Easter Eggs with a Taste Testing and Ingredients Comparison.

This Easter time I might be on a Dairy Free diet, but that hasn’t stopped me hunting for treats! I wanted to share my findings with you all, my opinion, product information, photo’s and all! Here is my Review of several Free From Chocolate Easter Eggs.

So I’m trying a few chocolate eggs that are known as free from, I require dairy free but a lot of these eggs come as free from several allergens. Wheat or Gluten or Dairy, most of these go together. I will be outlining Allergens and Ingredients with each egg below.

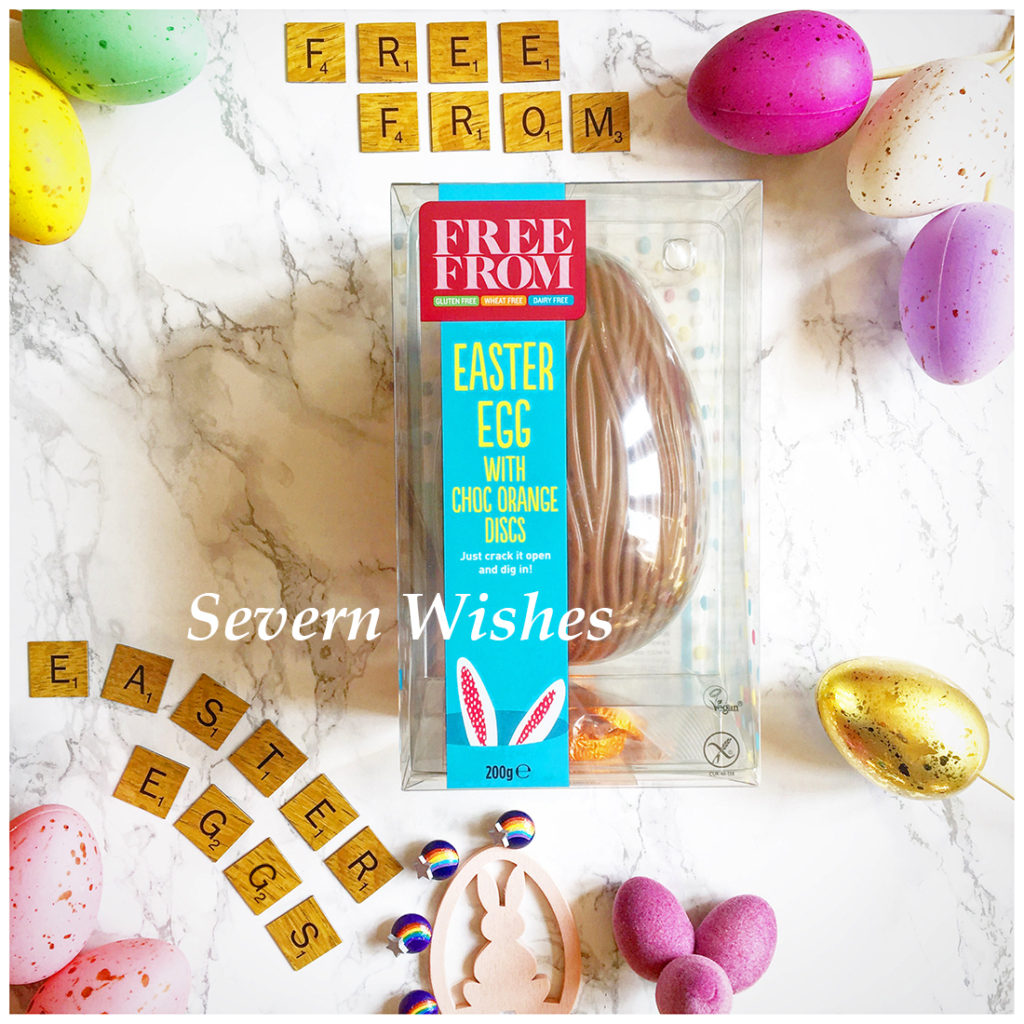
Number 1. The first egg I have is an Asda Free From Easter Egg with Chocolate Orange Flavour Disks.
The pack is available for £4.00 for it’s 200g.
LINK

This Egg is Vegan, Gluten Free, Wheat Free and Dairy Free. The Asda Chocolate also has No Artificial Flavours, Colours or Hydrogenated Fats.

Ingredients and Allergens
Sugar, Cocoa Butter, Cocoa Mass, Rice Syrup, Inulin, Coconut Oil, Rice Flour, Flavourings, Emulsifier (Soya Lecithins).
Soya is the only allergen present. This Egg should be suitable for those who have Nut allergies because Nuts are not part of the ingredients.
The Pack provides 6 servings. 1/6 of the pack (1 serving)
Energy kJ 778,
Energy kcal 186,
Fat 12g,
Of Which Saturates 7.1g,
Carbohydrate 19g,
of Which Sugars 12g
Fibre 0.9g
Protein 0.8g
Salt 0.02g.

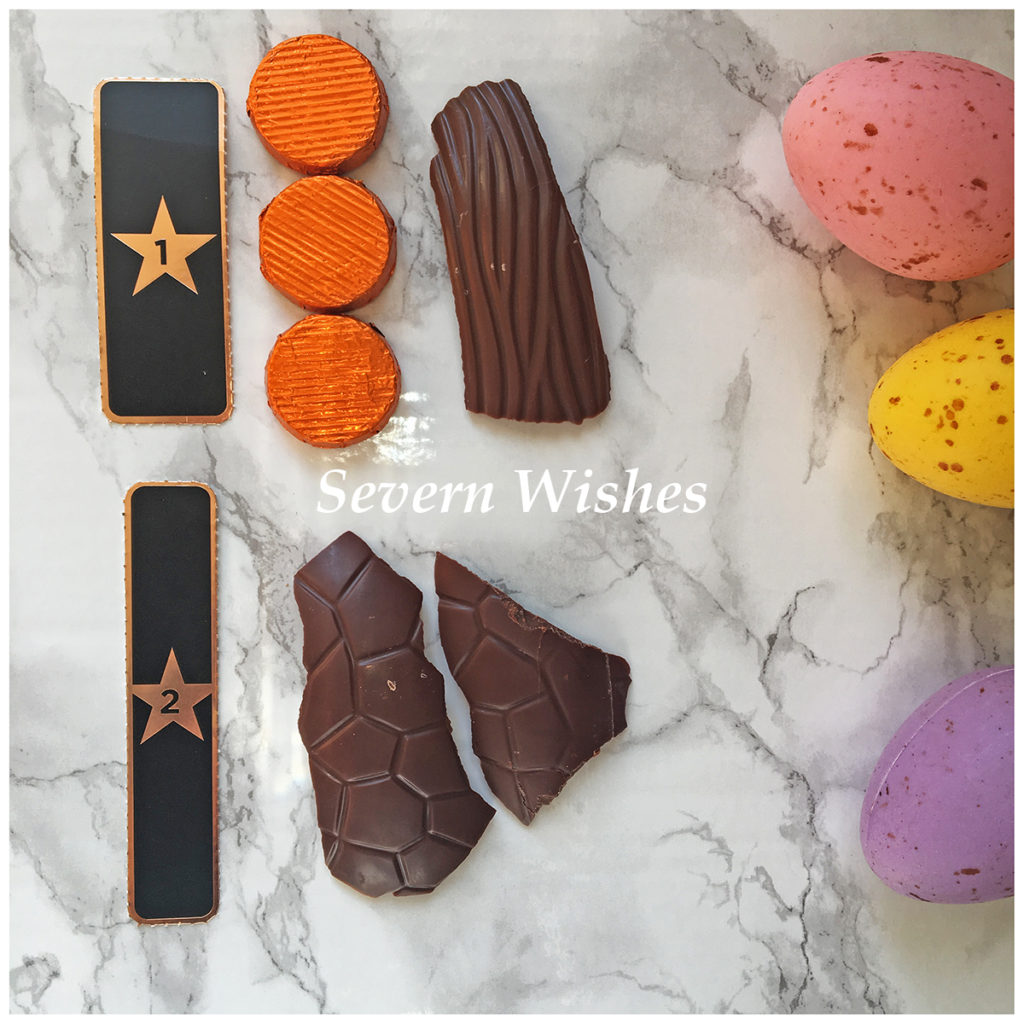
Egg Design – The Egg design has lines similar to tree bark or waves. It’s an appealing looking Egg and smells strongly of cocoa. It’s presented inside a piece of plastic (which says is recyclable on the packaging) with disks in a plastic bag at the base. The Egg size and pattern is view able through the mostly clear plastic which is good, you can see what you’re getting. You receive 6 Chocolate Orange disks in orange foil, this is one disk for every serving. The disks are round with lined tops. The foil from the disks is recyclable but the plastic bag they come in is not.

Egg Taste – The Egg tastes very nice, it is quite a strong cocoa taste but leaves a nice aftertaste of sweet chocolate. The sugar content is very high though, and after a couple of bites I had had enough. The Chocolate Orange disks are very tasty, they have a strong natural orange taste to them.

Egg Quality – The Easter Egg itself measures 3mm in thickness at the smallest sections and 6mm at the thickest sections. The chocolate orange disks are 5mm deep and taste great, a nice addition to this Easter Egg treat.

Egg Value – A very tasty Egg and a nice treat for anyone requiring a Free From Easter treat. I would say you get a lot for your money with this considering you get the Egg itself plus the Chocolate Orange disks. Because it’s so sweet you wouldn’t usually eat all of this Egg in one sitting, meaning it will last you longer too.Most of the packaging is recyclable except for the film and carton the egg comes inside.

Asda Free From Chocolate Egg

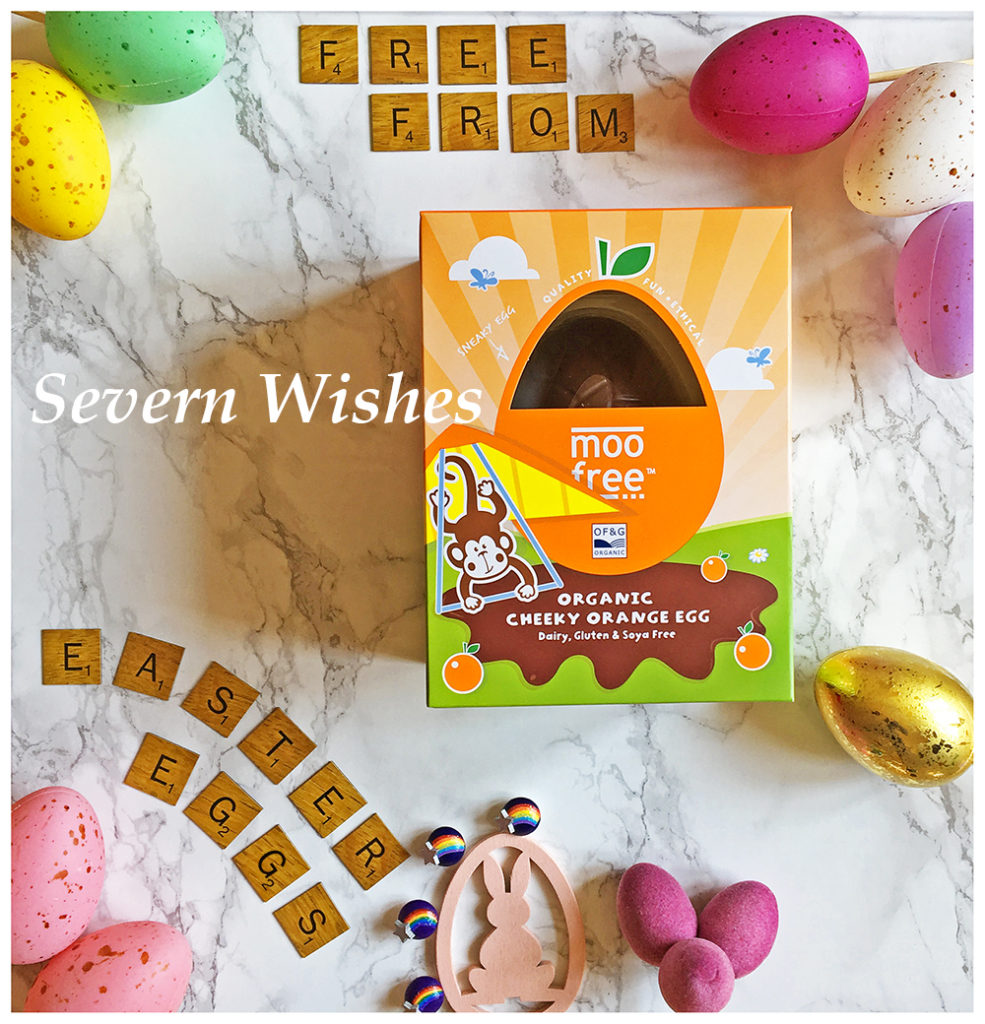
Number 2. The second egg I have is a Moo Free Easter Egg which cost me £3.00. This pack is only 110g. You can find these Eggs at most stores, I have seen them in Aldi, Asda and Tesco.

Organic Cheeky Orange Egg that is Dairy, Gluten and Soya Free. This pack contains a Chocolate Egg that is a Milk Chocolate alternative made from a combination of Cocoa, Sugar, Rice and Orange Oil. Moo Free are an ethical and family owned manufacturer based in Devon in the UK. They use high quality ingredients that have a single origin, including organic cocoa mass from plantations in the Dominican Republic.

Ingredients
Organic Cocoa (44%),
Organic Raw Cane Sugar (34%),
Organic Rice Powder (20%),
Organic Orange Oil (2%),
Organic Sunflower Lecithin,
Natural Flavouring.

Despite no allergens being present in the ingredients the packaging makes the customer aware that the product is Dairy, Gluten and Soya Free. It doesn’t mention Wheat, and it also states that is is made in a factory that handles Hazelnuts.
This pack contains 2 servings it states, 1/2 of an egg is classed as a serving.
The values per serving are as follows;
Energy 1334 kJ
Fat, Total 21.2g
Of which Saturates 12.5g
Carbohydrate 29.9g
Of which Sugars 20.8g
Protein 1.8g
Salt 0.17g

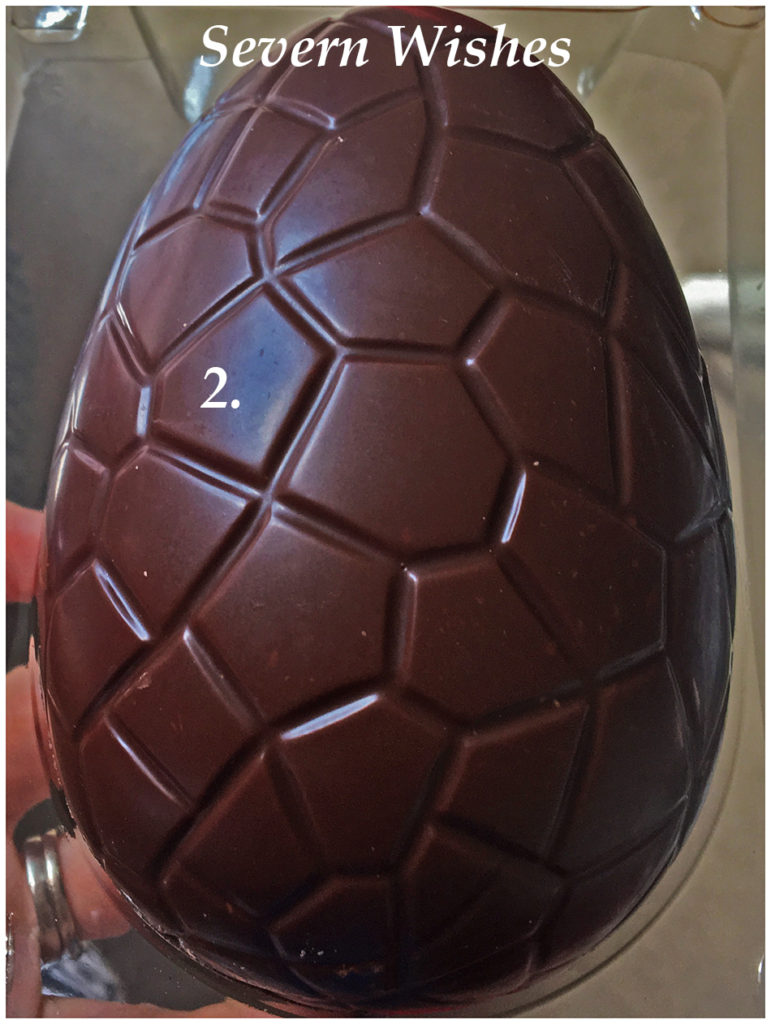
Egg Design – The design of this Egg is nice, hexagonal shapes are all over the surface of the oval shape and all link together.Taste – The Orange taste of this Egg is very prominent and along with the sugar content makes it rather sweet, almost sickly. I couldn’t manage half of my half (serving) and stopped at a quarter. It’s meant to be a milk chocolate alternative however it’s quite a plain and strong chocolate flavour.

Egg Quality – The Moo Free Egg is only 3mm thick all the way around the oval. It has been the thinnest of all the eggs I have tried, and is also the most rich. The taste is nice but very strong in comparison to others. Moo do several eggs but I chose to try this Orange one, so perhaps the other flavours are not to overpowering.

Egg Value – This Egg is small and you don’t get much chocolate for the amount of money that you pay. Considering most other Dairy Free items are made with Soya products though, this item gives those who suffer with a Soya allergy a way of eating chocolate this Easter. I’m very happy to see a notice on the Moo Free box which says the plastic that their egg comes inside was made with recycled plastic, and could we please recycle it again. The box is also recyclable, so of course I will do that Moo Free Company! I’d be happy to because I’m big on recycling and it makes me happy to!

Moo Free Egg

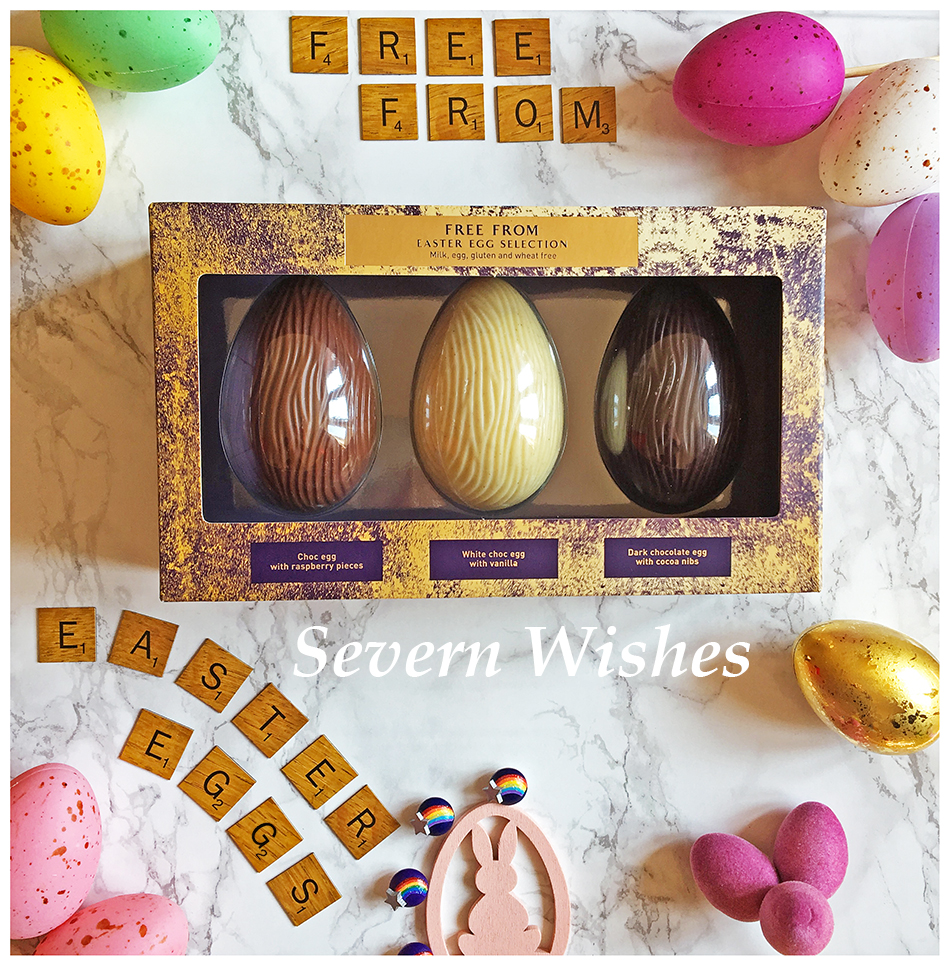
Number 3. The third egg I have is a Trio of Flavoured Chocolate Eggs. This one is a little more indulgent, I had it from Asda in their extra special range, it cost £4.50 for its tiny amount of chocolate at just 150g.
LINK

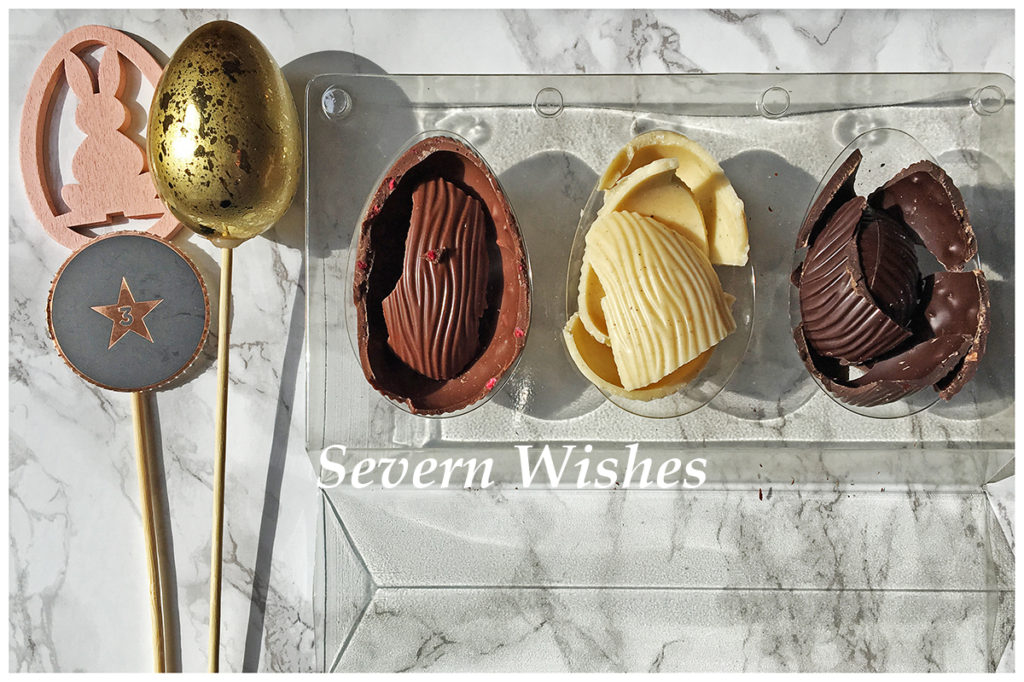
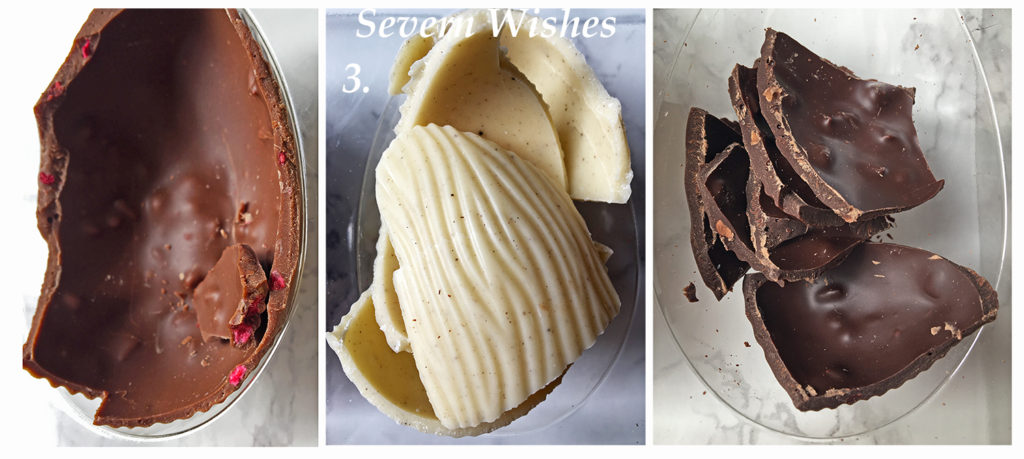
There are three eggs inside this Easter Egg Selection, the first is a Chocolate Egg with Raspberry Pieces. This one tastes delicious, there are sweet and tangy raspberry pieces in every bite. The second egg is a White Chocolate Egg with vanilla, and you can see the flecks of vanilla all inside the white chocolate. The taste is surprisingly similar to white chocolate and has lots of vanilla flavouring too. Finally the third of the set is a Dark Chocolate Egg with cocoa nibs inside. This one tastes delicious because of the dark, rich chocolate flavour combined with the cocoa nibs which give boosts of taste, it’s rich and indulgent but also has a really nice after taste.

Ingredients and Allergens
Dark Chocolate (32%), Sugar, Cocoa Butter, Cocoa Mass, Inulin, Maltodextrin, Maize Flour, Coconut Oil, Rice Syrup, Rice Flour, Flavourings, Cocoa Nibs, Freeze Dried Raspberry Pieces, Vanilla Powder, Coconut Oil, Emulsifier (Soya Lecithins).

Soya is the only allergen present. This Egg should be suitable for those who have Nut allergies because Nuts are not part of the ingredients. It also states that there are No Artificial Colours, Flavours or Hydrogenated Fat.

The Pack provides 6 servings, half of each egg which would be about right considering the different tastes.
1/6 of the pack contains (1 serving)
Energy kJ 583
Energy kcal 140
Fat 8.9g
Of Which Saturates 5.5g
Carbohydrate 14g
of Which Sugars 9.9g
Fibre 1.0g
Protein 0.7g
Salt 0.01g

Easter Egg Selection Trio

Trio Eggs Design – Each of these Egg tastes great, I would say that the Raspberry combination is my favourite, closely followed by the Dark Coca Nibs. The White is some of the nicest Free From White Chocolate that I have tried however, which gives this Egg a bonus point in taste design. The Vanilla definitely makes a big difference. Over all the set is nicely balanced in flavours, you have the fruit combo which is both Sweet and Tangy, you have the Classic flavours of the Vanilla and then you have the Rich and Indulgent Dark.

Trio Eggs Quality – The Easter Eggs were not hugely thick, however they were consistent at around 4mm. The Cocoa Mass was pretty high within this chocolate, dark chocolate has 58%.

Trio Eggs Value – Although they are the more expensive per 100g these eggs also have the better quality. Over all I would go for the taste and these have that in abundance. You don’t feel like you’re eating something that has been designed to not have Allergens in it, but instead you are enjoying a delicious chocolate treat of high quality cocoa and its adjacent flavourings to match.
I have to ask myself, would I buy these again because of the taste and quality? Yes in fact I would do. Only as a treat, and Easter is that sort of one of time where I would allow it. I only wish the eggs were a bit larger, I would pay another £1 for larger ones of this quality and deliciousness!

Easter Egg Selection Trio

Of course there are plenty of other Free From Eggs out there, however I needed to avoid any that definitely contained Nuts due to my husbands allergies. And there were others that I didn’t think I would enjoy due to their flavour combinations…

I loved the flavour of the Orange Disks from Egg Number 1, and I loved Eggs Raspberry and Dark from Number 3 the Trio.

Thank you for visiting Severn Wishes today, I hope you have enjoyed this Review and that you all have a great Easter Bank Holiday!

✩ Sabrina ✩

HAPPY EASTER!!!

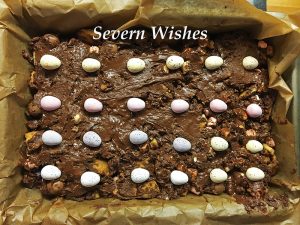
Sabrina’s Delicious and Delectable Easter Rocky Road

Sabrina’s Delicious and Delectable Easter Rocky Road!

☆ Welcome to a post about Sabrina’s Recipes! ☆

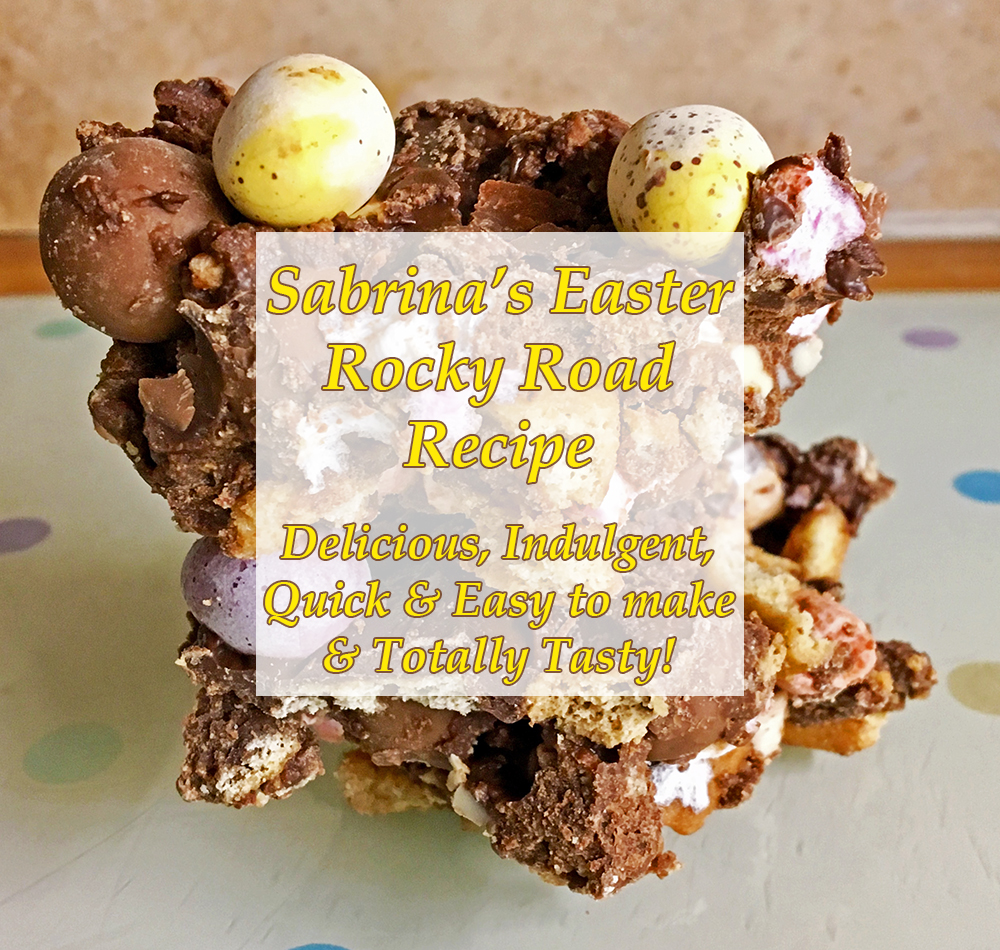
So with Easter only being a day or so away, I had wanted to share one of my favourite recipes with you all. This is rather indulgent and it is quite a sweet treat, but if you like this sort of thing, this will be right up your treat tasting alley!

My Easter Rocky Road is a Nut Free delicious treat for the whole family, it takes only minutes to prepare and a couple of hours to set and that is all! And you can add other options in to it in order to make it go further, and to allow your family to get some fruit into their diet too.


You can tailor this recipe to suit yourselves, like I said above this is a Nut Free Recipe due to the allergies in my family. However feel free to substitute items and adapt this recipe in any way that you need to. Just keep the same measurement. For example, if you want a Vegetarian Recipe and are fine with Nuts, you can remove the 50 grams of Mini Marshmallows and replace those with 50 grams of Chopped Nuts.

This recipe will make approximately 24 squares of Rocky Road. You can determine the depth of yours by choosing a baking tin or glass dish that suits you. When making for children, make sure that you supervise when eating due to the mixture of textures. Also make sure you cut this dessert into small portions due to the high sugar content. The serving is designed as one square of Easter Rocky Road at a time. Once it has set and been cut, place the pieces into a cake tin or baking tin with a lid, keep it closed between servings and the cake will last up to 7 days.

☆ What You Will Need ☆

A Baking Tray / A Glass Dish (Approximately 1.5 inches Deep)
Baking Parchment Cut To The Size Of Your Tray
A Large Bowl For Mixing
A Saucepan and A Glass Bowl for Melting The Ingredients Listed Below
Water for Boiling in the Saucepan
Two Wooden Spoons
A Spatula

☆ Sabrina’s Easter Rocky Road – Ingredients ☆

Mini Marshmallows 50 grams
Maltesers 50-75 grams
White Chocolate Chips 25-40 grams
Digestive Biscuits OR Ginger Biscuits 150-200 grams
Milk Chocolate (for melting) 250 grams
Dark Chocolate (for melting) 120 grams
Butter (for melting) 140 grams
Golden Syrup (for melting) 4 tablespoons


Mini Eggs – 2 bags – 1 to be used inside the Rocky Road (these need to be cut up into quarters) and then you need to leave 1 bag with some whole or halved to push in to the mixture at the last minute before putting it in the fridge for setting.

You can also add any of the following things that go brilliantly with this recipe – Cherries / Cranberries / Nuts / Raisins etc… You will need 50 grams of your chosen one/s and make sure you increase the depth of your tray by half an inch / 2 cm if you decide to include more than one of these.

☆ Sabrina’s Easter Rocky Road – Method ☆

☆ Crush the Biscuits into mixed sized pieces and add to a large bowl.

☆ Melt the Milk and Dark Choc with the Syrup and Butter until Smooth.

☆ Set 150ml of the melted chocolate mixture to one side in a jug to cool a little.

☆ Add your chosen Rocky Road Ingredients into the Bowl with the Biscuit bits and Mix up thoroughly.


Once you’re happy with the distribution, add the melted chocolate mixture from the saucepan / glass bowl. Mix it up completely coating all the ingredients.

☆ Transfer to the baking / glass tray with the parchment already lined inside it and smooth it out as flat as possible, push down gently using a wooden spoon.


☆ Pour the remaining melted choc (from the jug) over the mixture and smooth it over the top with a spoon or spatula, you need to try and coat most of the mix.

☆ Add your chosen decorations of Mini Eggs OR even Malteser Bunnies!

☆ Put the whole tray in the fridge to set for a couple of hours, then gently remove the paper from the baking tray and cut the Rocky Road into nice squares ready for serving.


☆ Remember to put the pieces into a seal-able tin or tub to make sure it stays fresh. Once set and cut just store it at room temperature for the best results. And Enjoy!


Thank you very much for joining me for this food related blog post today. I hope you have enjoyed it and I hope you find my instructions easy enough to follow yourself.

If you end up making my recipe then please leave me a comment, I would love to know what you think about it and also do tell me how it turns out!

Wishing all of you a great Easter!

✩ Sabrina ✩