Sabrina is a Lifestyle, Parenting and Product Review Blogger. A Writer, Photographer, Reviewer, Home Cook, Crafter & Nature Enthusiast. You will find a bit of all those categories here on Severn Wishes Blog, Welcome to Sabrina's Lifestyle Blogging & Honest Reviews.
Welcome to the March 2021 Treatbox UK unboxing Reveal and my Review of the contents inside the box. This box month always coincides with my birthday, so it’s like an extra little present to myself! And funnily enough it felt even more like my birthday when I opened it thanks to two items inside…
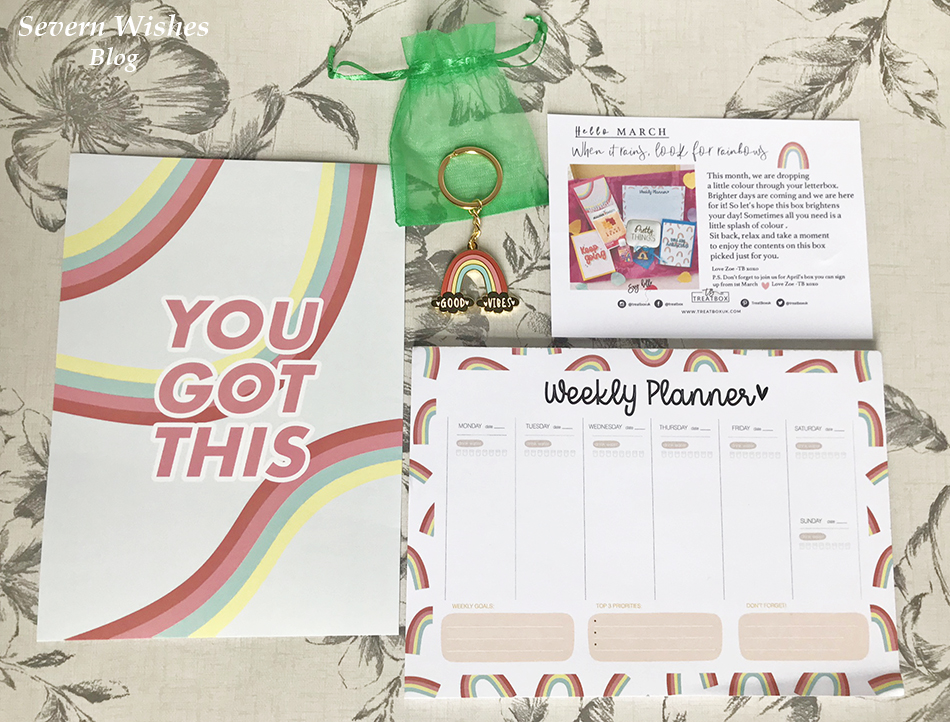
… a blank Happy Birthday card and a key ring! (I have collected Keyrings since I was a child)!
Happy Birthday to me! And here is what else was inside this great box!
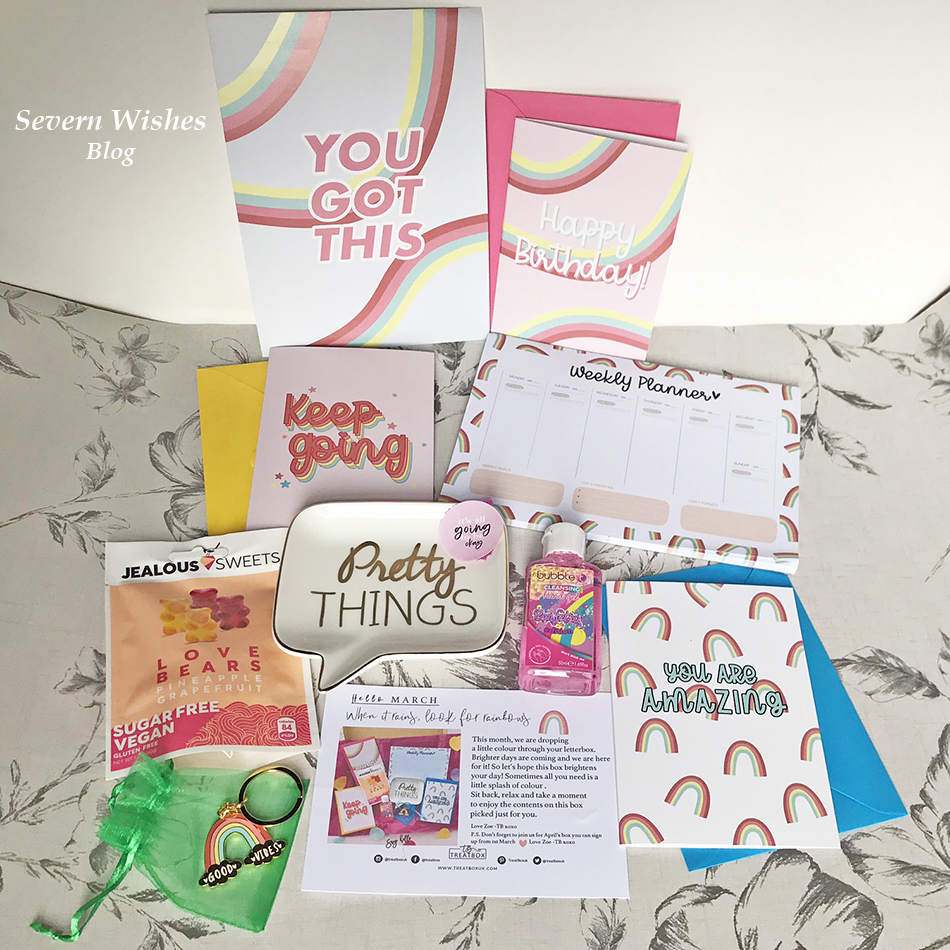
✩What Was In The March 2021 Box?✩
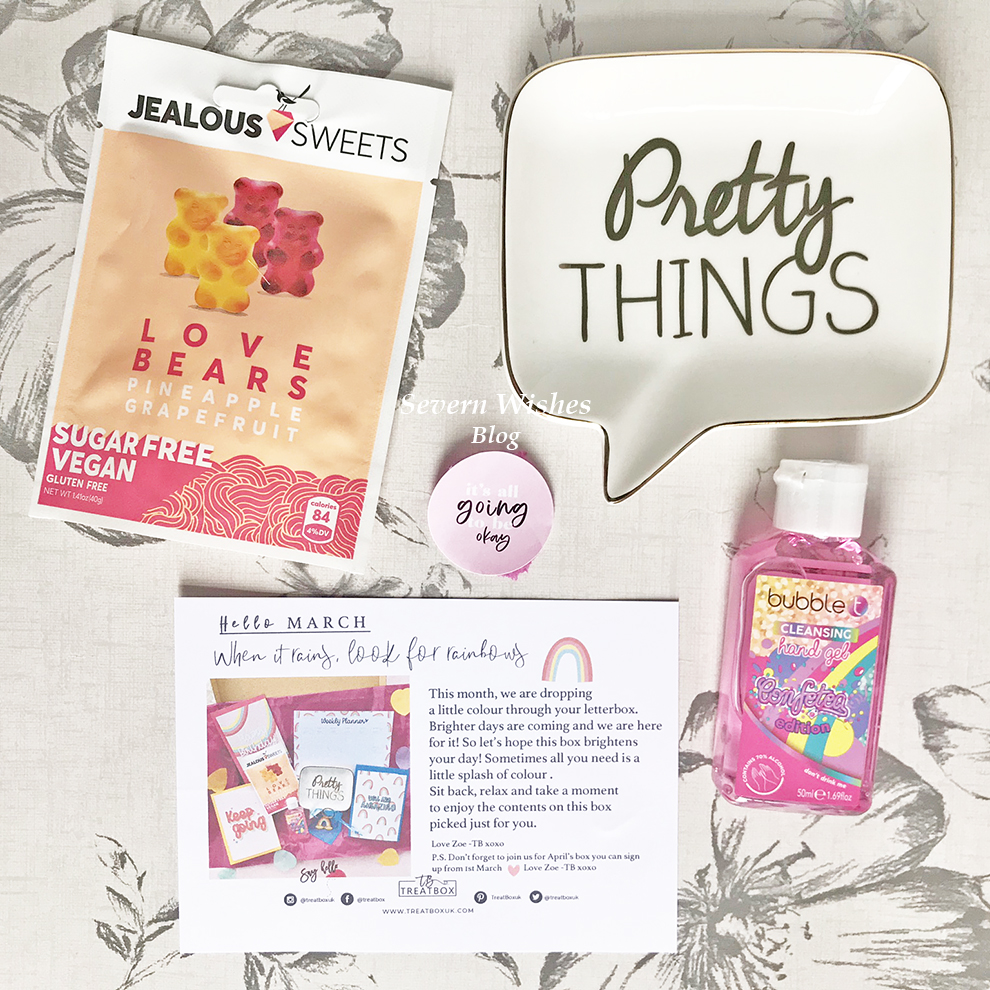
Treatbox A5 Print “You Got This” Treatbox Cards x 3 “Happy Birthday”, “Keep Going” & “You Are Amazing” Treatbox Rainbow Design Weekly Planner Pad “Pretty Things” Keepsake Dish Bubble t Cleansing Hand Sanitiser “Confetea Edition” 50ml Jealous Sweets Love Bears Sugar Free Vegan Sweets 40g “Good Vibes” Rainbow Key Ring
9 items in total.
✩My Opinion of the March Box Contents ✩
What I really liked inside this box was… all of it! 😀 From the Rainbow theme to the positive vibes! I thought the Keepsake Dish is of excellent quality, and the key ring is lovely too. Sanitiser is something that we all need a lot of at the moment and it is great to have a pretty pink one that smells amazing, that is a bonus! What fun!
The A5 print and the cards are positive orientated and I love that we can pass the positive vibes on to other people from our joy in receiving the Treatbox UK March box! I cannot wait to try those Vegan Sweets and I saw they have a long use by date so no rush in nibbling them all up! Yay!
But my favourite item by far has to be the Weekly Planner! I love how much design Zoe and the team have managed to incorporate into it! Drinking Water, Days of the Week, Goals, Priorities and Don’t Forgets! It is now so much faster to plan my week than my old planner where I had to use a ruler to section parts of the day out for my To Do’s and Goals! Now I just pop them all on this one page! I LOVE IT!
Thanks so much for an awesome item! I would love to see another one with a different border in a few months time, because I will be using this weekly from now on 😉A great box I am very happy!
Did you know that you can view all of my previous Treatbox unboxing posts in this unique category of mine called ‘Treatbox’ it is specifically for these box reviews and reveals – Severn Wishes Treatbox.
March 2021 was box number 60 for me!!!
Thank you for reading this Review and Reveal for the March Treatbox! If you liked it why not check out my other reviews too!Have a wonderful day!
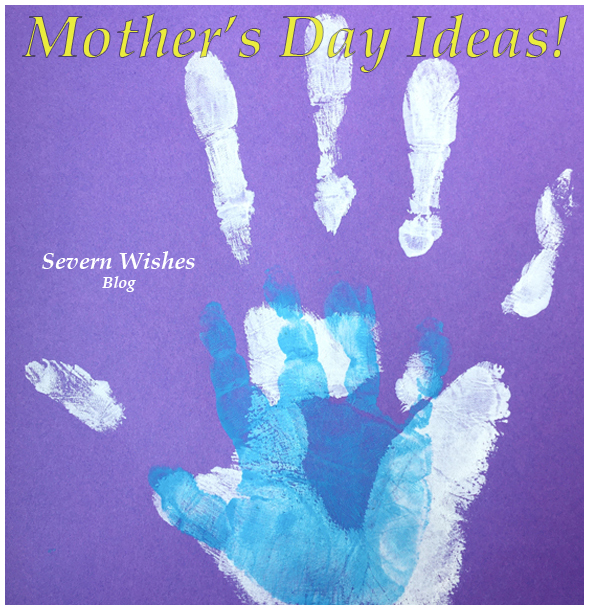
With much of the United Kingdom still in lockdown and people unable to purchase their usual items for loved ones, I have decided to write this blog post to help people out. Mother’s Day is a special day for everyone who is classed as a Mummy, whether that is to furry children, human children, step children or children who may still reside inside us. It’s for Grandmothers, Nan’s and Great Grandparents too don’t forget, so why not make a loved one a card and let them know you’re thinking of them.
I have several ideas that should suit most people, because Mother’s Day Cards are usually floral or feminine, but you can personalise your design to fit the people in your life. If you can draw then even better! I’m not very good at drawing so I prefer to use paper and card to create pretty cards instead. This blog post is all about how I make cards using coloured card and paper.
WHAT YOU WILL NEED
Coloured Paper and Coloured Card A Pencil Items to Draw Around – to make the Circles for the Flowers Scissors Coloured Pencils or Crayons if you are Drawing Pens – Mixed Colours and Thickness Glue or Sticky Tape Ruler Coloured Tissue Paper Pipe Cleaners
HOW TO MAKE YOUR CARD – 3D FLOWERS
Step 1. Take a piece of pale coloured card and fold it in half to get your card shape. Decide if your design is going to be a landscape or portrait style.
TOP TIP 1. When you come to make your shapes maximise the paper by doing them close to one another and along one edge. It makes it easier to cut them out but also and more importantly you’re not wasting any of the paper, and the leftovers can be used on your next awesome project!
Step 2. Draw around circular items in order to make your petals. Carefully cut them out and then fold them in half to create your three dimensional petals.
TOP TIP 2. The ideal size for the petals for an A4 Card design (an A5 when it is folded) are the size of a Nail Varnish bottle. Draw around the base of the bottle when it is stood up on the card. Another tip is to cut out one shape and use that as a guide to cut out the other petals so you get them the same size.
Step 3. Arrange your design on the Card first before gluing anything down, so as to make sure it all fits nicely.
Step 4.Glue or Stick the Card pieces down and finish decorating with any details or wording that you choose.
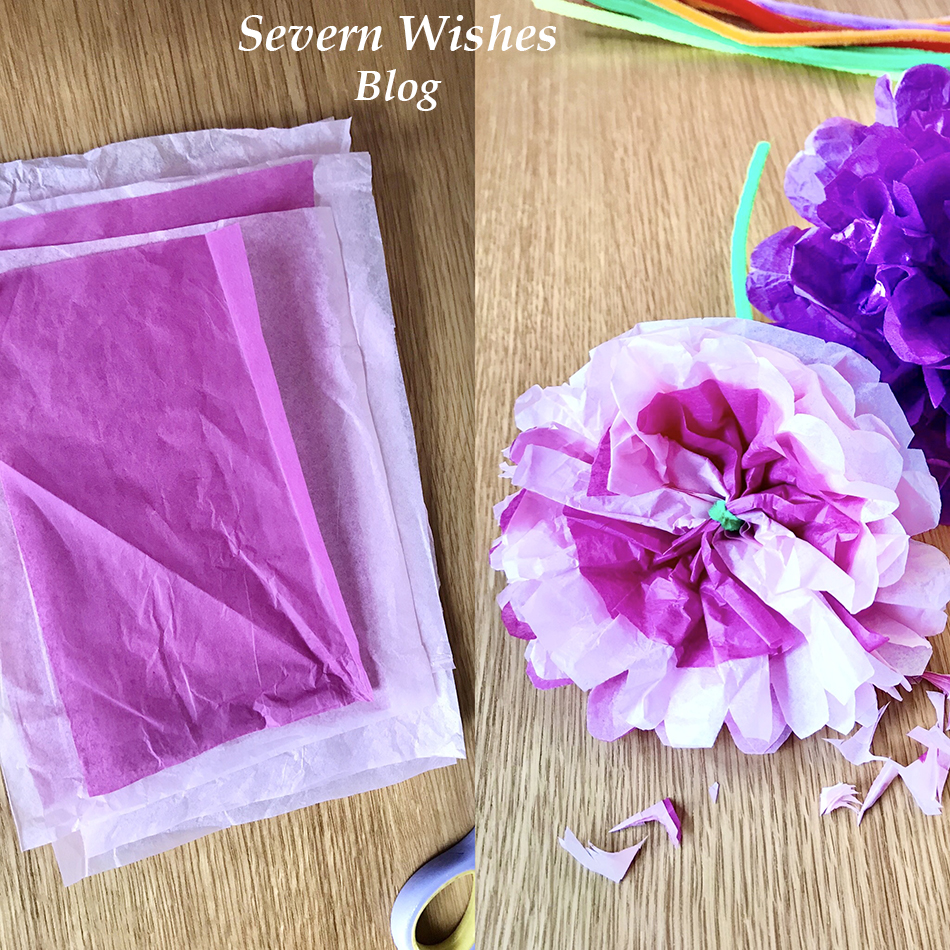
HOW TO MAKE A TISSUE PAPER FLOWER
You Will Need; A Coloured Pipe Cleaner Sheets of Coloured Tissue Paper
Step 1. Lay out your tissue paper flat, you want to cut it into equal rectangles. Once cut you stack them one on top of the other.
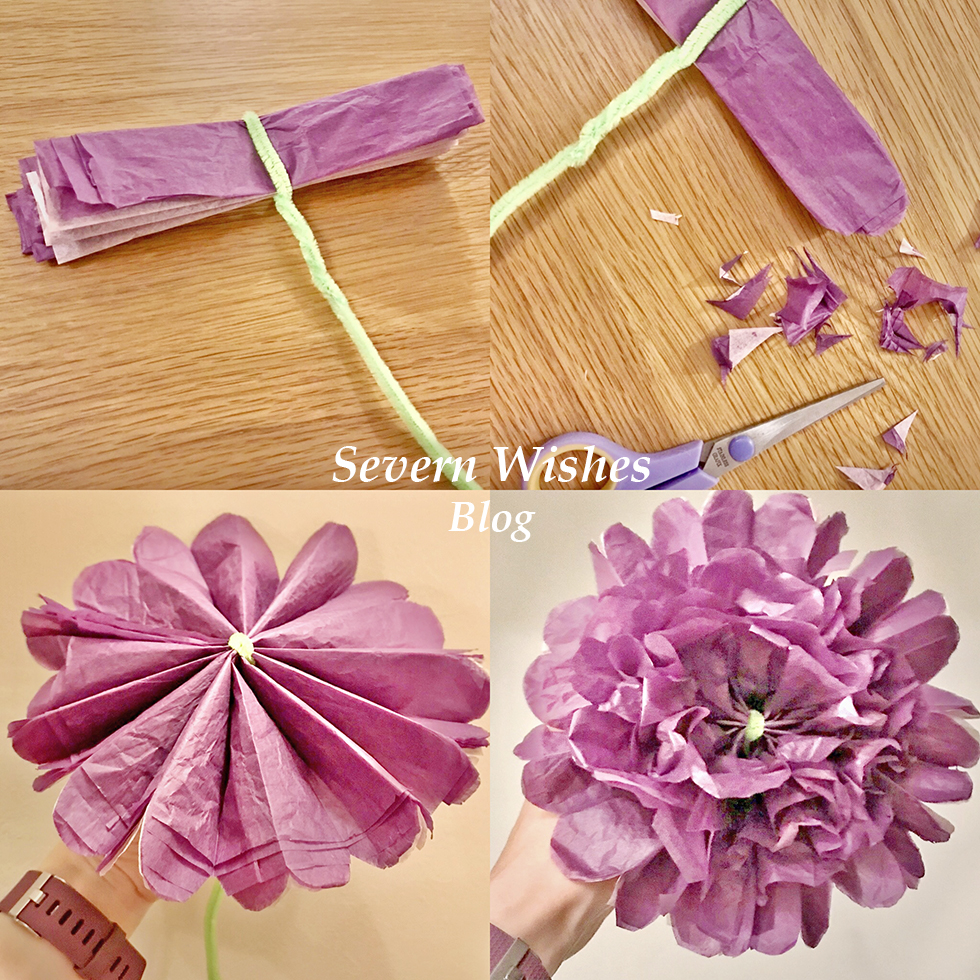
Step 2. Fold the tissue paper stack into a concertina, like a fan, until it is all folded and flatten it down. Stick the pipe cleaner in the middle, folding it over and under the stack, then wrap the remainder of it around.
Step 3. Next you need to trim the edges of the tissue paper, you can round them off or make them pointed, it depends on how you would like your flower to look like at the end. This determines the shape of the petals of your flower.
Step 4. Once the ends are trimmed lay the flower concertina across your hand with the pipe cleaner part pointing down. You want to gently and carefully tease the layers of the flower up and out. Once they are all up spread them out and make it look like the petal layers of a real flower.
(There is a video tutorial on this on my Facebook page as well).
Check out my images below!
My Tips for Opening your Flower: Open the tissue paper out gently and carefully, you should start to see a fan shape at first, and then you can raise the inner layers of the flower, just start by pulling upwards towards the middle part where the pipe cleaner is so as to make the flower look three dimensional.
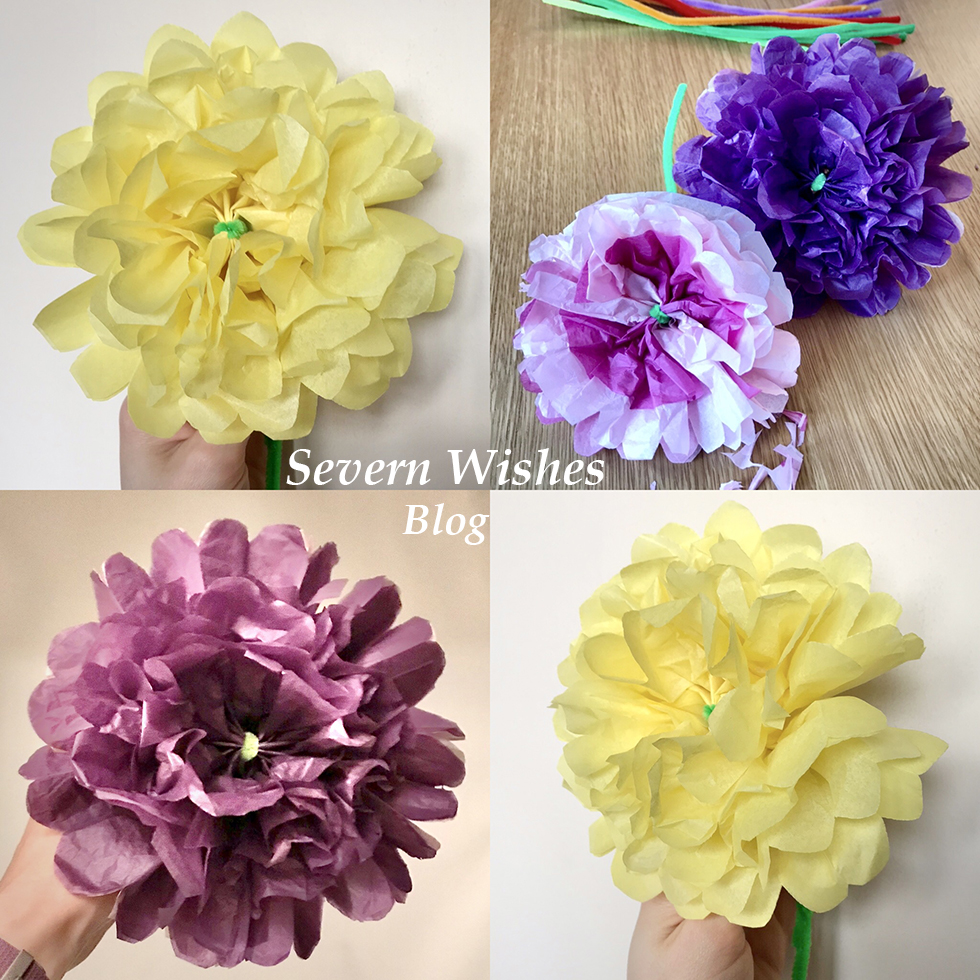
Step 5. When you are finished it should look like my images below. Bend the pipe cleaner a little to make it look like a flower. Fan the petals out gently to make it three dimensional.
Paper Flower Dimensions
It depends upon how much you trim on the ends to create the petal shapes of your flower, but here are some rough dimensions of the size that your flowers will be. The larger the flower the easier it is to fluff up. Why don’t you experiment like I have below with different shaped petals and layering different colours of tissue paper too!
Rectangle Size 20cm equals a 17cm flower Rectangle Size 15cm equals a 12cm flower Rectangle Size 7.5cm equals at 7cm flower
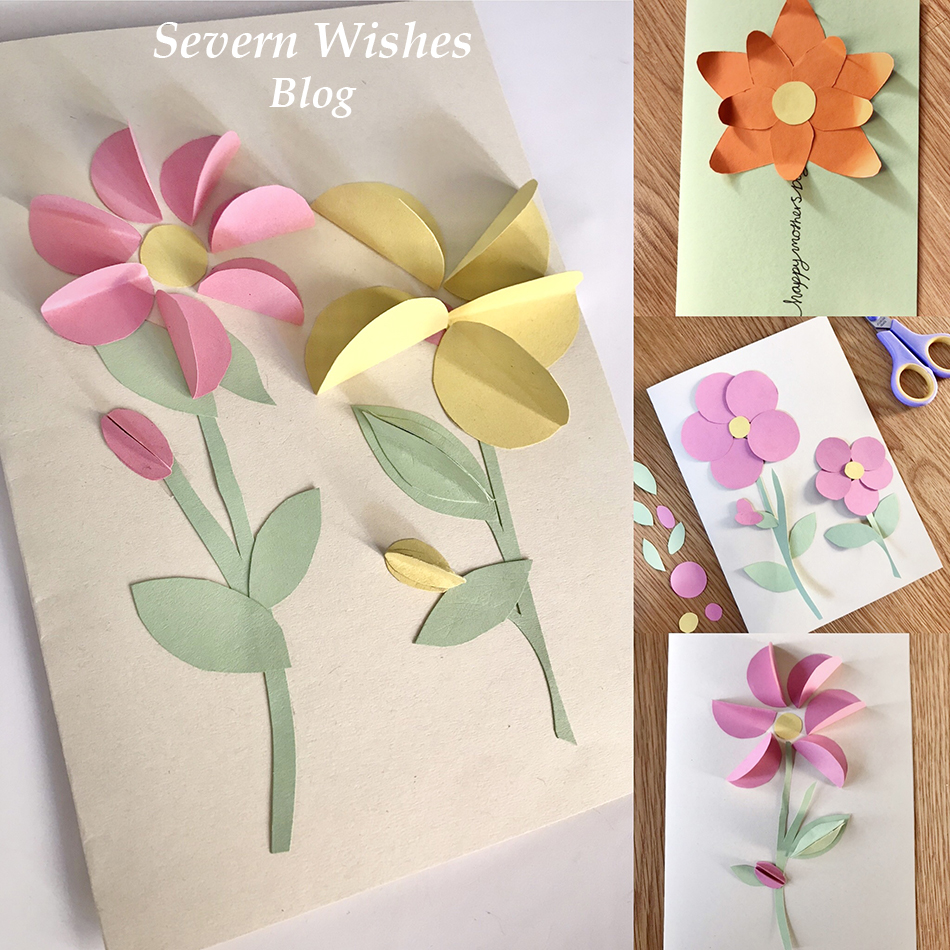
HOW TO MAKE YOUR CARD – Happy Mother’s Day – Their Favourite Flower or Favourite Item
Step 1. Work out what your loved ones favourite thing is, then you want to write the words Happy Mother’s Day either vertical or horizontal on the folded A5 card. You incorporate those words into the item, such as the stem of the flower, or the base of an item like a slice of cake. (See my photo below for inspiration).
Step 2. To make a flower you need to cut twelve identical coloured card petals. Layer them up on the card to make the flower, don’t forget the middle bit either.
TOP TIP 3. If you want the petals to all be the same cut one and then use that one to draw around to make the additional ones.
Step 3. Other things you could do include a slice of cake with a triangle piece of card decorated with smaller shaped pieces. Or draw an outline and let smaller children colour them in.
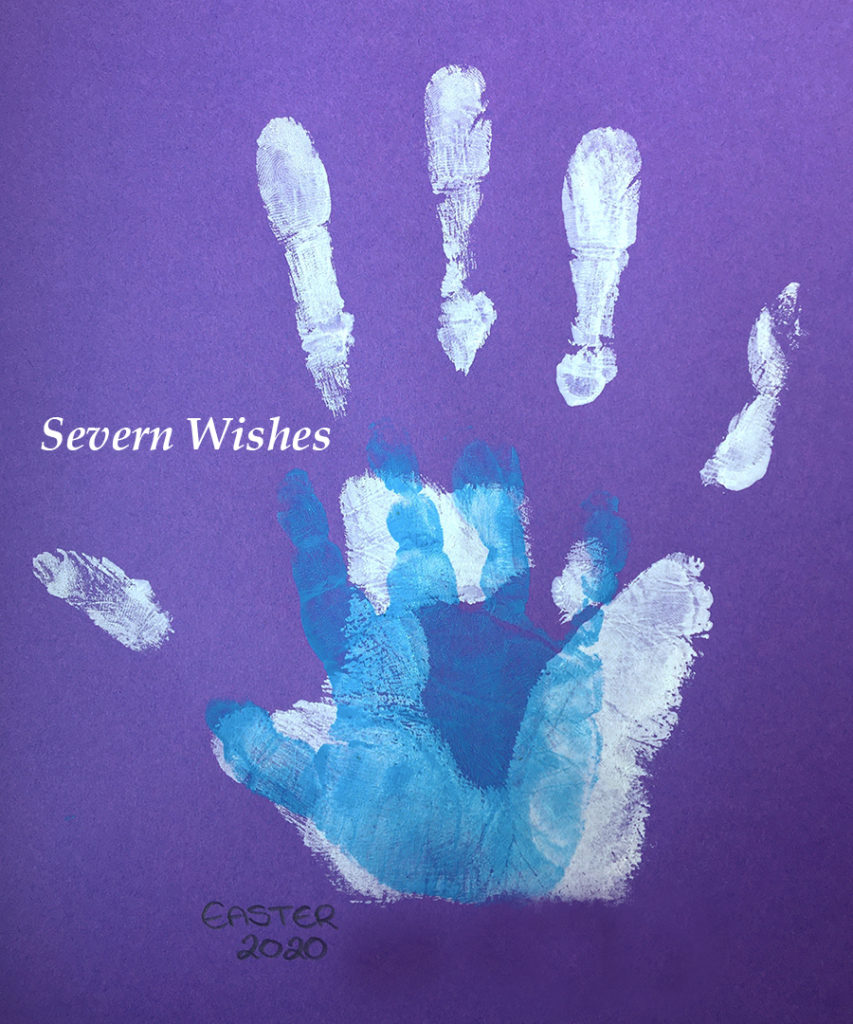
Another easy thing to do is a card of family hand prints.
Other Card Designs that are Easy to Achieve are…
Flat Flowers Three Dimensional Flowers Drawing Bouquet of Flowers Family Hand Prints Cake Slice Drawing Favourite Animal
Use a Ruler and Pen to make the stem lines and the bow, colour them in with pens and draw little flowers on the end of the stems. I did daisy like shapes, but if you can draw better then me be creative with it! Do any colour combination that you like. Add some wording around your design like “Happy Mother’s Day”.
I really hope that you have enjoyed this blog post and find it beneficial. If you do make some cards I would love to see them! Please tag me on any of my social media using the hashtag #SabrinasArtandCrafts
Thank you and I wish you all a lovely Mother’s Day.
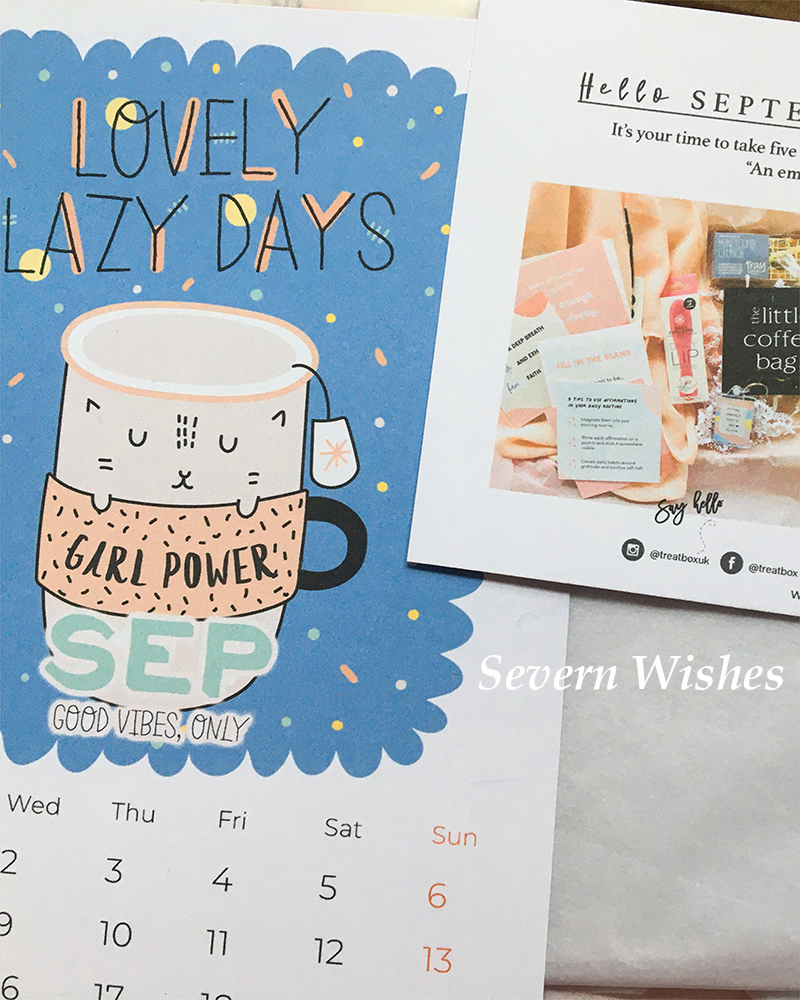
Welcome one and all to the September Treatbox Reveal and Review!
My apologies for this post being so late in the month, there was a mix up with my box so I have only justreceived it! But what a fabulous box of treats it is!
Read on to find out exactly what!With pictures too!
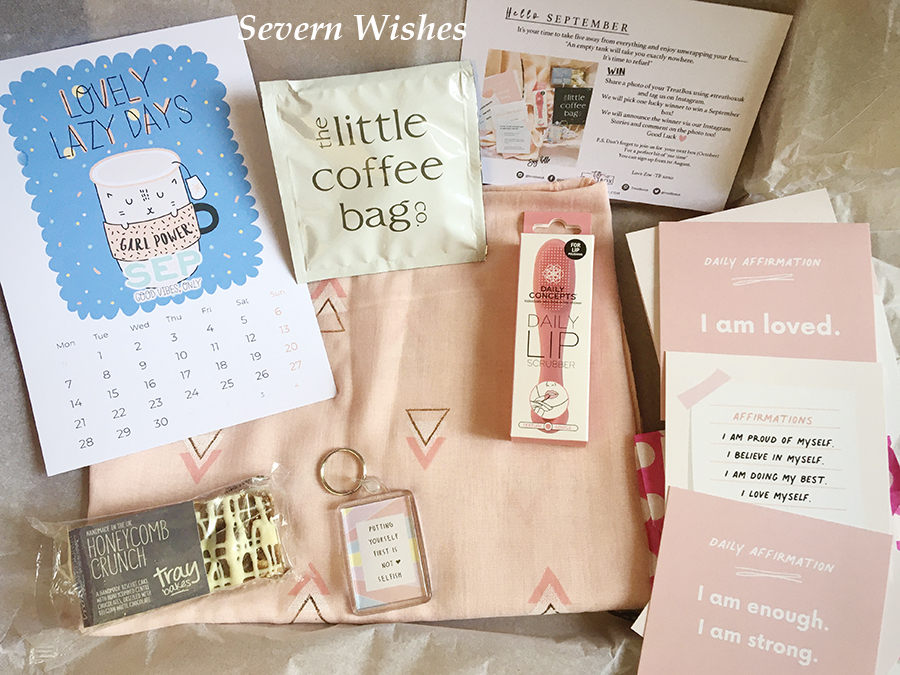
SO WHAT IS INSIDE THE SEPTEMBER BOX?
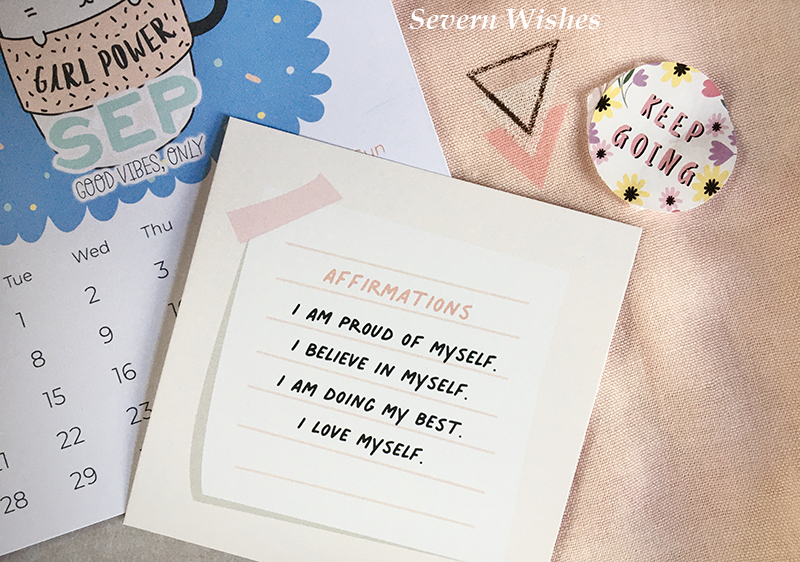
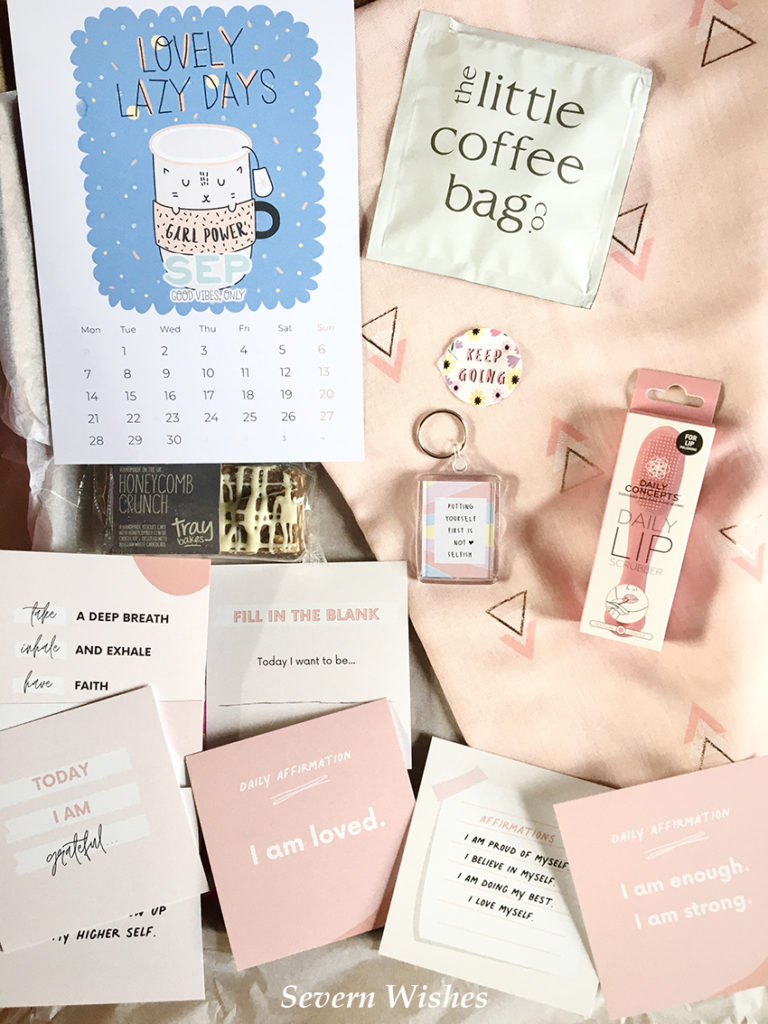
An awesome and very cute Calendar Print (Yay!)
A beautiful Scarf, blush Pink with patterns of Hearts or Chevrons (Picked at Random) (It’s so soft!)
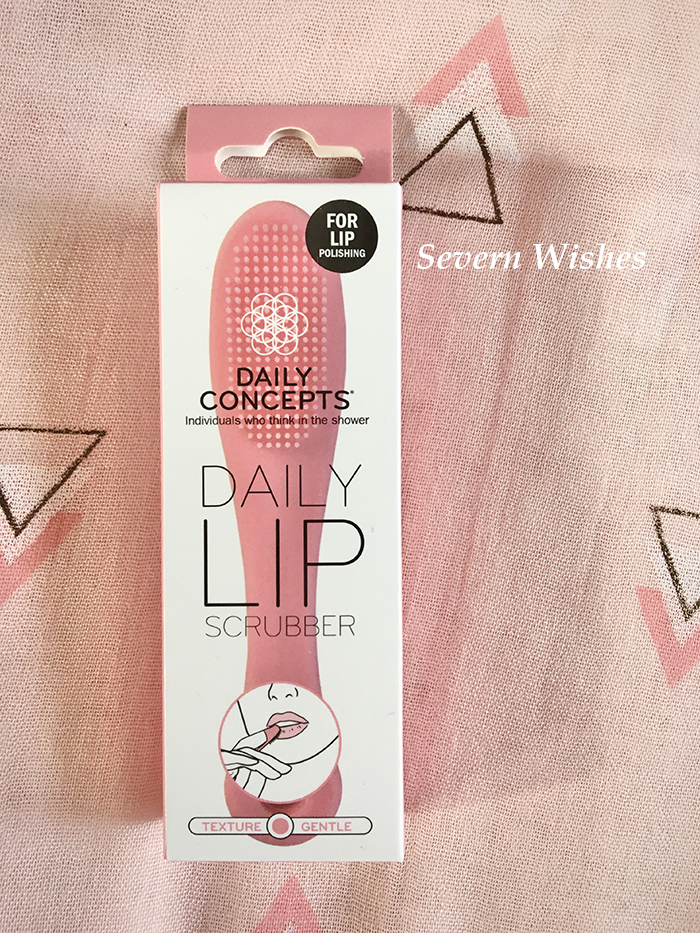
Daily Concepts Daily Lip Scrubber
Tray Bakes Honeycomb Crunch Bar (Mmm!)
the Little Coffee Bag Co. Black or White Coffee Bag
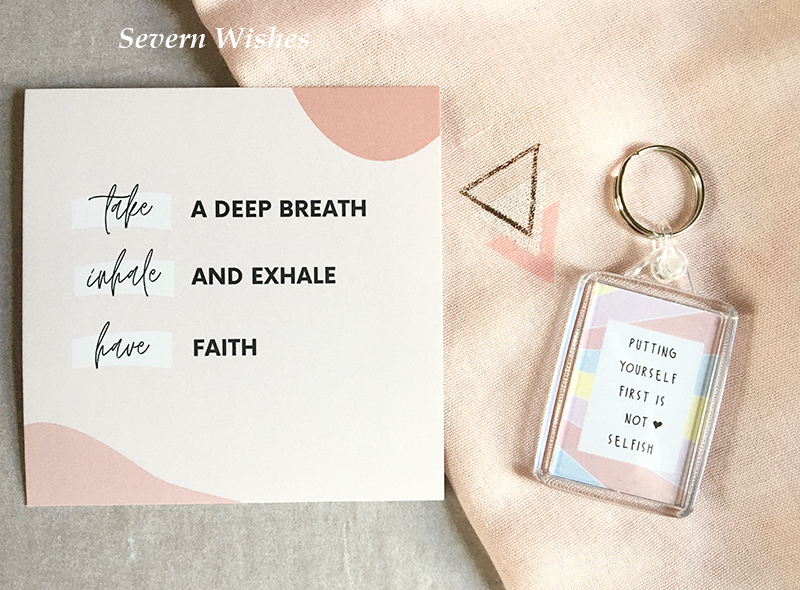
Treatbox Unique Key Ring with Inspirational Quotes
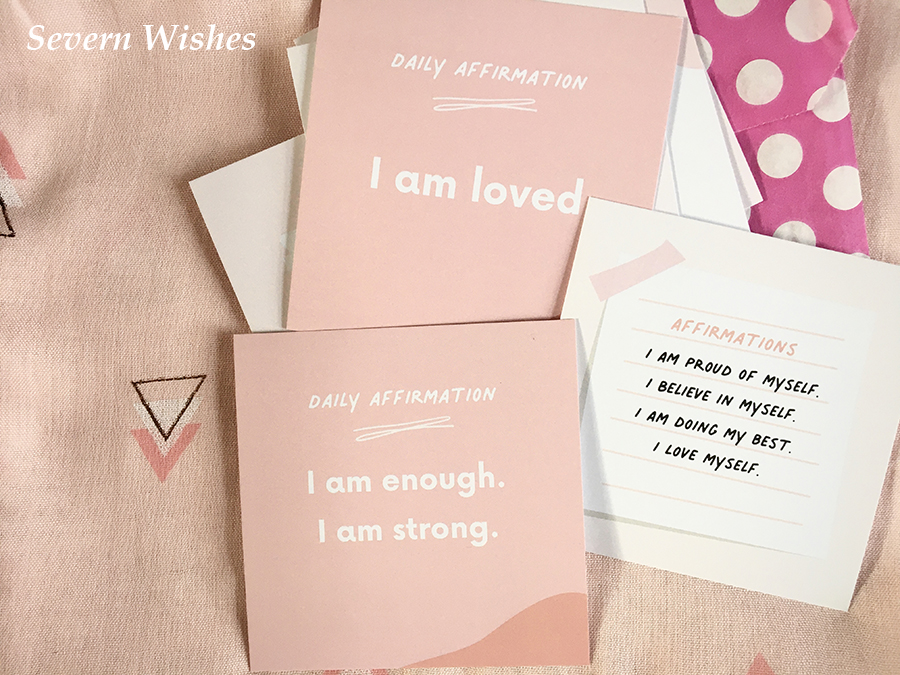
Paper Bag of Treatbox Special Daily Affirmation Cards
What Do I Love Most In This Box?
I cannot express how happy I was to see the Calendar Print! I love it too being a Cat related image! It has gone straight on to my Fridge. I do hope this will be a regular occurrence again! If so, then fab! I adore the scarf it is both pretty and soft, and the pattern is versatile enough to go with anything in my wardrobe.
The Lip Scrubber is really useful and a very handy product considering we are now entering into Autumn and Winter. A good idea to have in your bathroom in case of dry lips!
I haven’t eaten the Treat Bar yet, but it sounds delicious! And I have gifted the Coffee Bag to my Mother who adores her Coffee, I am not fond of it in all honesty. I’m sure she will enjoy it!
The Affirmation Cards are wonderful! Just when you need a pick me up they are right there. Wonderful quaint designs and they say all the right things. I have popped two of them on my fridge along with my calendar, because as someone who is currently working through a low self esteem, it’s really nice to have reminders such as, “I am enough” and “I am strong” etc.
I love the pink theme this month, to be honest the whole box is well thought out. I am also ecstatic because there isn’t a face or eye mask in sight! Hurrah! *Dances* I really hope this is a good move and a turning point, because if it is then I am happy to continue my subscription. I want (as I’m sure many of you do) a Treat to eat or drink, something to cherish or wear, something to do and enjoy and something to inspire. The calendar print I would love to see return, as I would also love to see A5 prints perhaps. I have a few of the A4 ones from the last 3 years of boxes framed around my home and I still adore them.
I am very much looking forward to my October box now, I hope it is full of inspiring things and perhaps an Autumnal theme…
If you want to read any of my reviews on previous boxes then please click the category Treatbox.
Thank you for visiting Severn Wishes today, I hope you have enjoyed the Review of this September Treatbox. I hope to see you here again soon for another one of my Reviews.
In these uncertain times it’s nice to have a box of joy arrive on my doorstep, I very much love how Treatbox does that.
✩ Sabrina ✩
Check out my previous Treatbox unboxing posts in this unique category of mine called ‘Treatbox’ it is specifically for these box reviews and reveals – Severn Wishes Treatbox.
Fun to Make ~ Easter Art and Crafts ~ with Sabrina of Severn Wishes
I have wanted to do this blog post for the last three years, and I have always been too busy to complete it! Mainly because it is a mixture of writing the blog, creating and making the craft items, and then taking the step by step images, processing all of those and then putting the entire lot together in one blog post. It is both time consuming and a lengthy in process too. So what changed this year? Well for one thing, I was more determined to do some more craft this year, but isolation has also made me re-evaluate what’s important, and that is to make happy memories with my son. No matter what is going on outside our home, he doesn’t understand, and it is my job to keep things as normal as possible, so extra fun, extra learning and extra memories are all on the table at the present time. I’m so glad you could join me to hopefully make some memories of your own!
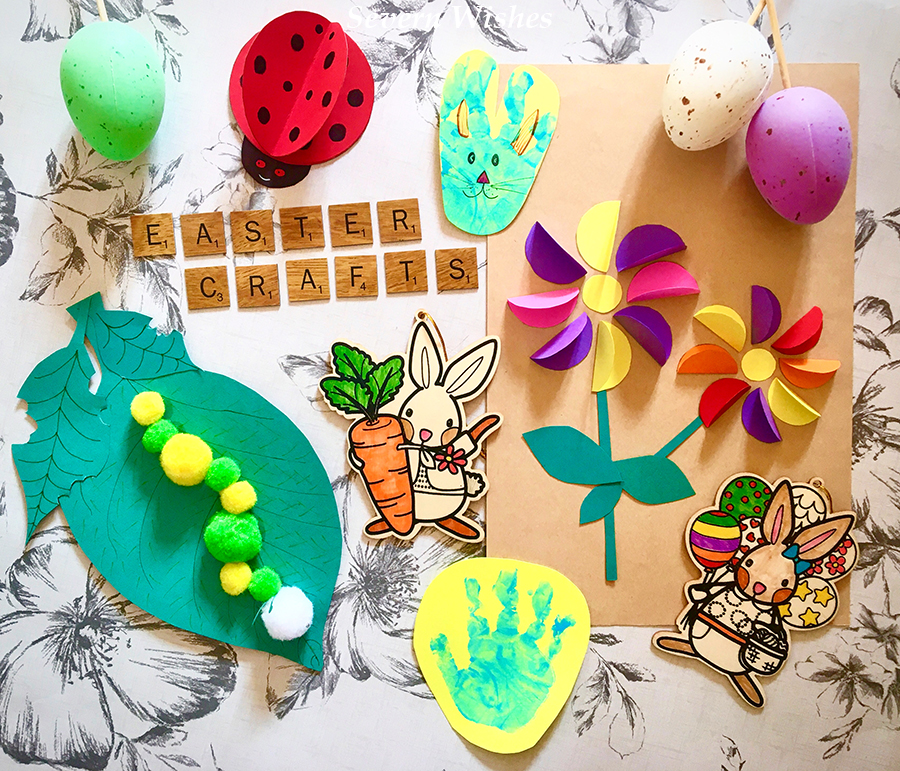
So without any further ado, let’s get our crafty fingers at the ready! Depending upon which Crafty Project you wish to undertake you will need a variety of items. My idea is this, pick an item from the four below, and then match the “You Will Need” items with what you already have at home. Providing you have all the necessary bits and bobs then feel free to scroll down to that Project and then get cracking with my Step by Step guides! Happy Crafting!
1. 3D Friendly Ladybird 2. Wiggly Caterpillar 3. 3D Paper Flower (Can be Framed or Made into an Easter Card) 4. Hand Print Easter Bunny Rabbit 5. Other Craft Ideas
1. 3D Friendly Ladybird
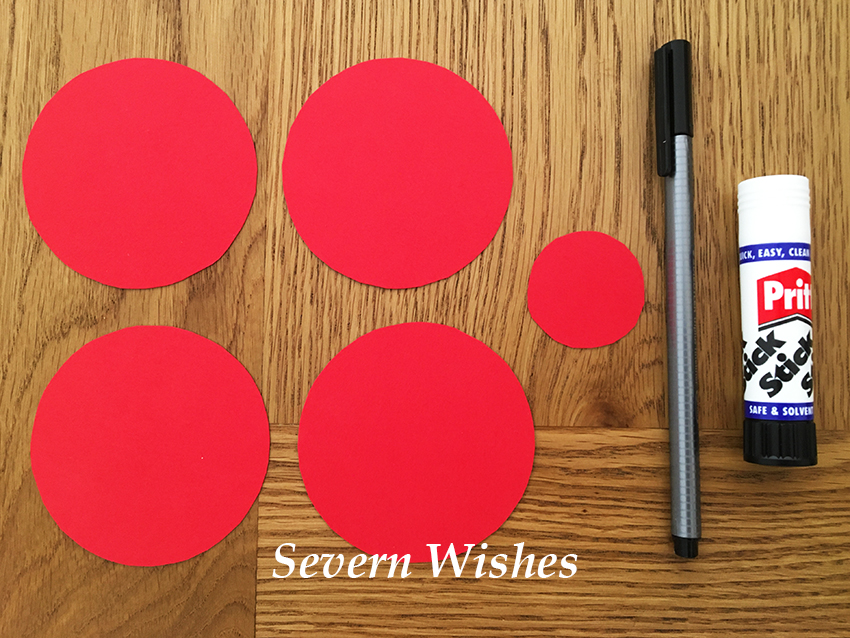
You Will Need Pritt Stick or Glue Coloured Paper and / or Card Circular Objects to Draw Around (This will determine the size of your Ladybird) Pencil Scissors Black Pen Googly Eyes (if you have some but not essential)
This is the easiest of my crafts today, and will take around twenty minutes to make. You can make it any size, any colour that you like. Why not make one for each member of the family? I am going to make several of them to put around my son’s bedroom. He loves Gaston from Ben and Holly’s Little Kingdom, so my son is the inspiration behind this particular craft project.
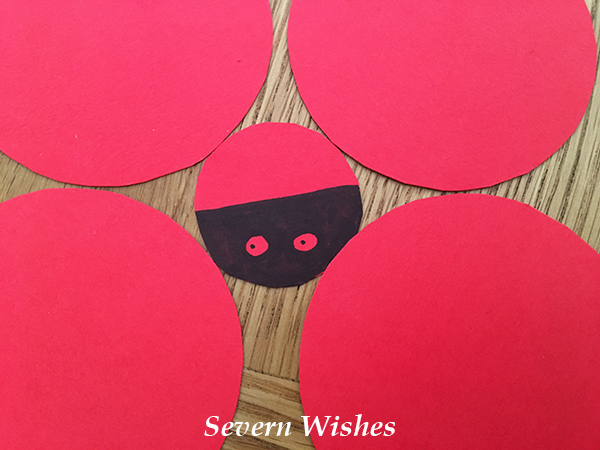
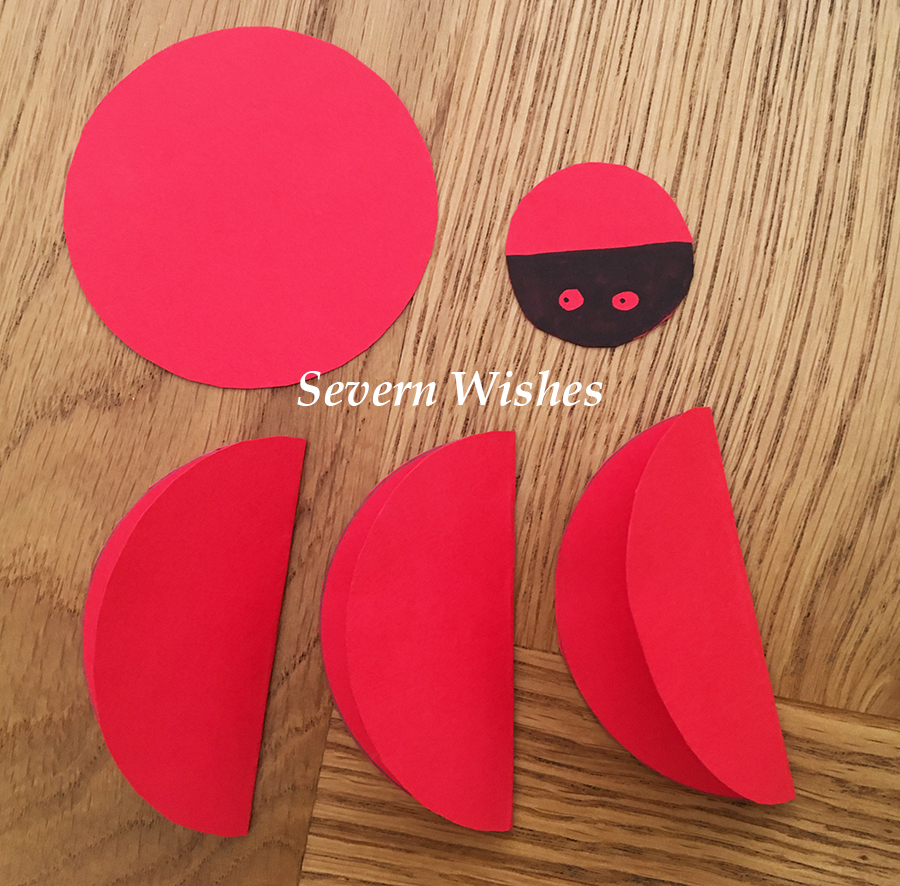
Step 1. Choose the Size of your Ladybird. Choose your colour. Draw around a Circular object so that you have 4 Circles the same size, and then you will need a smaller circle for the head, judge this depending upon the size of the body. Cut out these 5 circles and then you’re ready to begin.
Step 2. On the small circle draw a line across the centre, you want to colour the half of this circle in with black pen. Don’t forget to draw eyes on it too like mine, if you don’t have any fun stick on eyes to hand! Then pop this face to one side you won’t need it now until Step 6.
Step 3. Take 3 out of the 4 Large Circles and fold them in half across their centre. Gently crease them with your fingers, take a look at my image below to see how they should look.
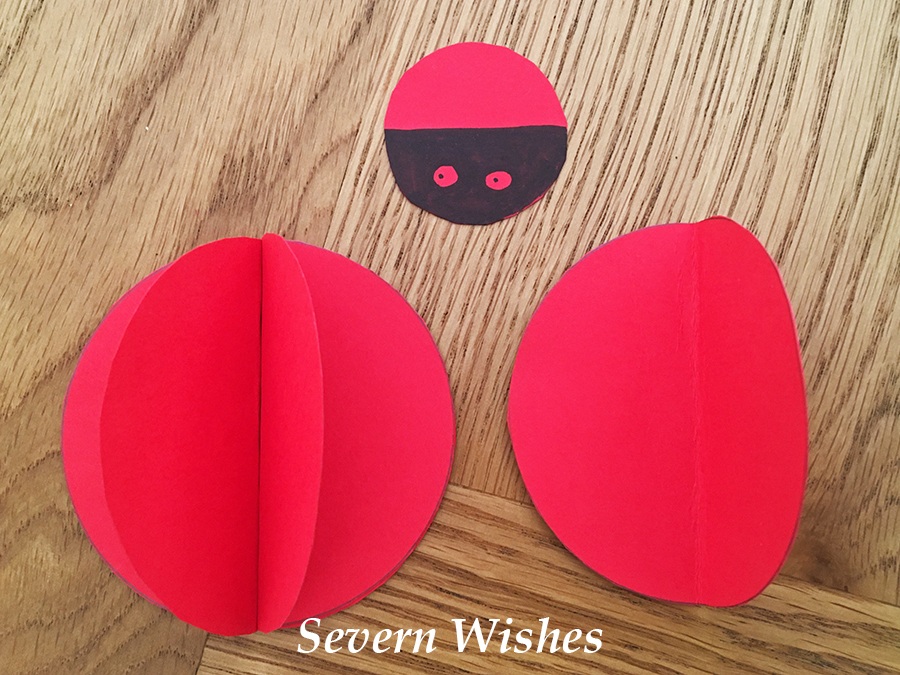
Step 4. Take the flat circle and cover it lightly in glue or pritt stick, I always prefer a glue stick when messing with card, less mess! Then take two of your folded circles, stick glue on their side that faces flat, place them back to back and glue them down on to the flat circle so that they make a V shape.
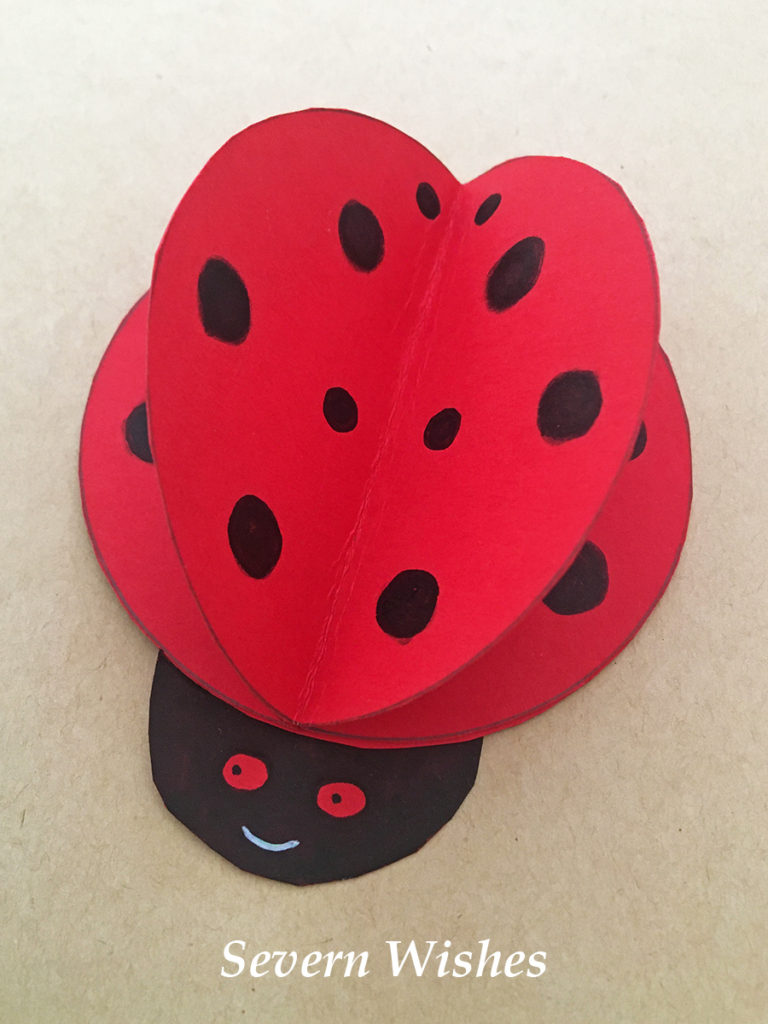
Step 5. Take the remaining Circle that is folded in half and cover it in glue before pressing it down into the centre of your Ladybird body, covering the two below neatly. You now have a finished insect body.
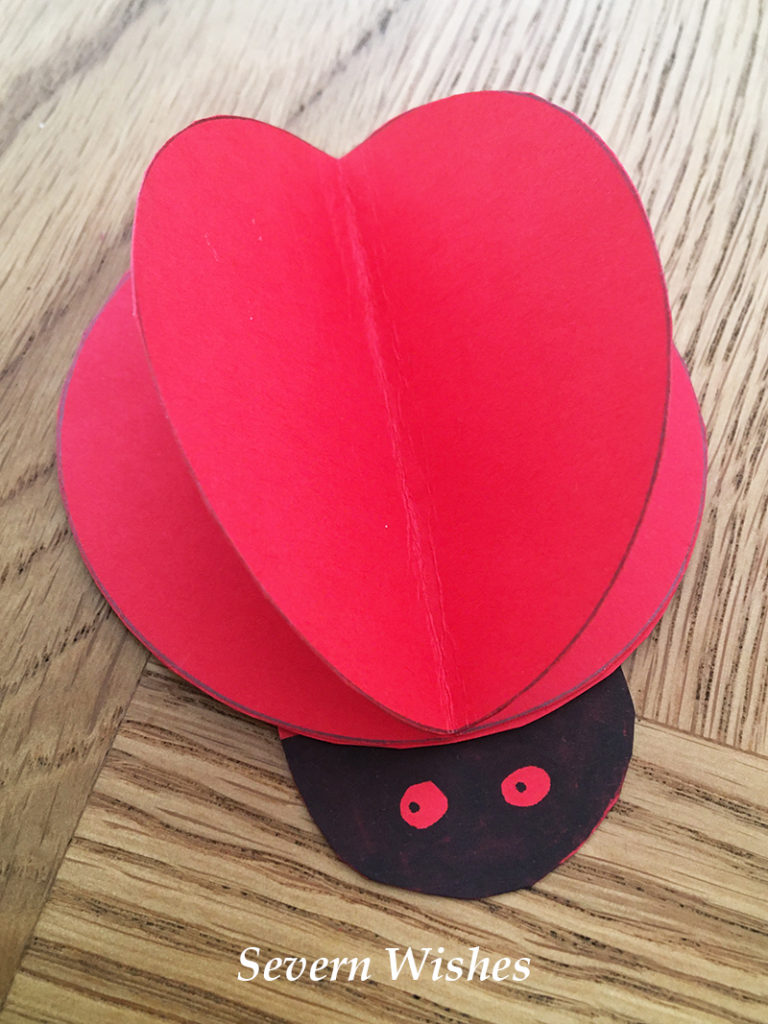
Step 6. You can now glue the head on by placing the glue on to the half you didn’t colour in, make sure you line it up with the V of the Ladybird to make it look right. See my image below.
Step 7. Push down all the flat surfaces of the Ladybird and leave for an hour or two for the glue to dry. Then using a Pen or Marker, draw on however many Spots you would like.
Step 8. Repeat steps for making other colours or other sizes if you have Card or Paper left over. If you need a base for your Ladybird to sit on, why not make him a cardboard leaf! (You need leaves for another of my crafts anyway!) 😉
CRAFT FINISHED
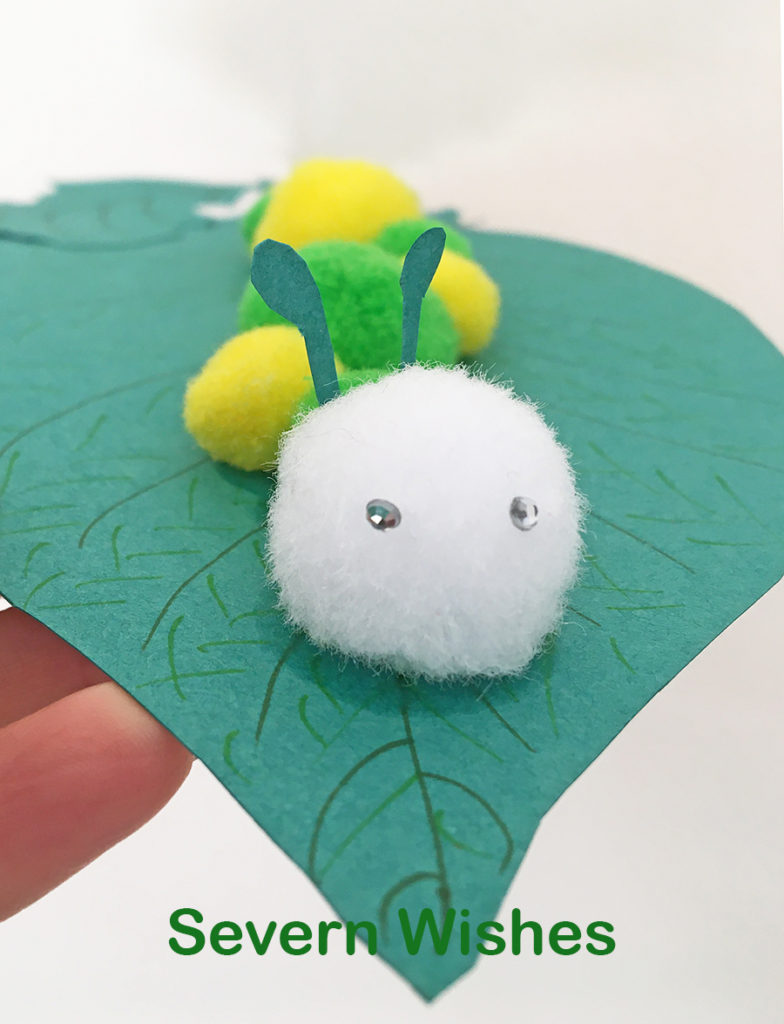
2. Wiggly Caterpillar (munching on a leaf)
You Will Need Pritt Stick and PVA Glue Green Paper or Card (Card is better) A Mixture of Green and Black Pens Poms Poms! All Colours Welcome! Googly Eyes or Stick on Sequins Scissors A Pencil A Piece of Cardboard (Cereal box is good!)
This is a fun craft to do with young children. They can make their Caterpillar whatever colour they want. All you need is some Pom Poms! You can follow my Steps or watch my video below!
Step 1. Draw and Cut Out a Leaf Shape (this is your main leaf) from your Cardboard. Then draw around this cut out piece of cardboard on to your green paper or card and Pritt Stick together.
Step 2. Draw your Leaf design on with Green pens. Set to one side.
Step 3. Decide what Pom Poms you want to use and arrange them!
Step 4. Make some antenna and extra leaves and stick your eyes on to a Pom Pom ready to assemble your bug!
Step 5. Using PVA glue stick your Caterpillar together, don’t forget the extra leaves, arrange however you wish, then leave to dry in a warm flat place.
Step 6. Add any additional things to your bug once it has dried.
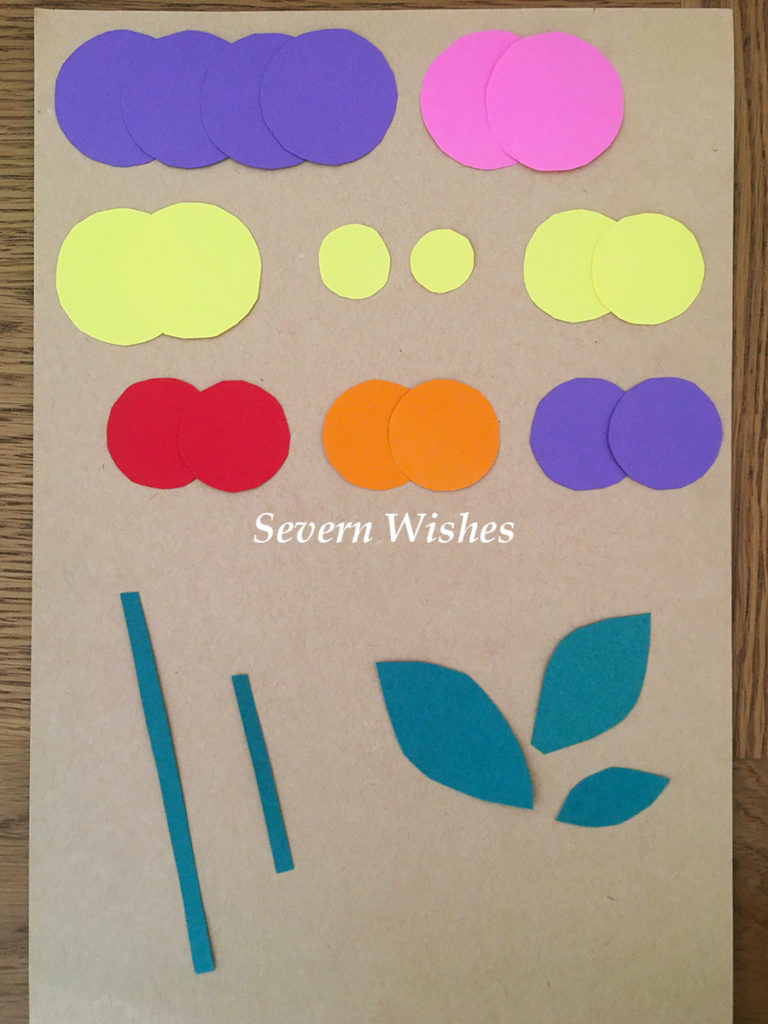
3. 3D Paper Flower (Can be Framed or Made into an Easter Card)
You Will Need Pritt Stick or Glue Different Coloured Cards or Papers A Piece of Card for Sticking to Scissors Pencil A Circular Object to Draw Around (it’s diameter will be half the width of the flower so choose wisely)
This idea is simple but looks so pretty when complete. It makes a great card.
Step 1. Take a piece of plain card, this will be your base. Draw a Stem or Cut Green Card or Paper and create one. Make sure you leave plenty of room to stick the flower part. Cut out leaves and small circles of yellow paper to create the centre of the flowers. Be as creative as you like.
Step 2. Making the petals next, you need to cut circles of different colours, you will end up with 8 Petals in total per flower. I did two different sized circles to end up with two sized flowers.
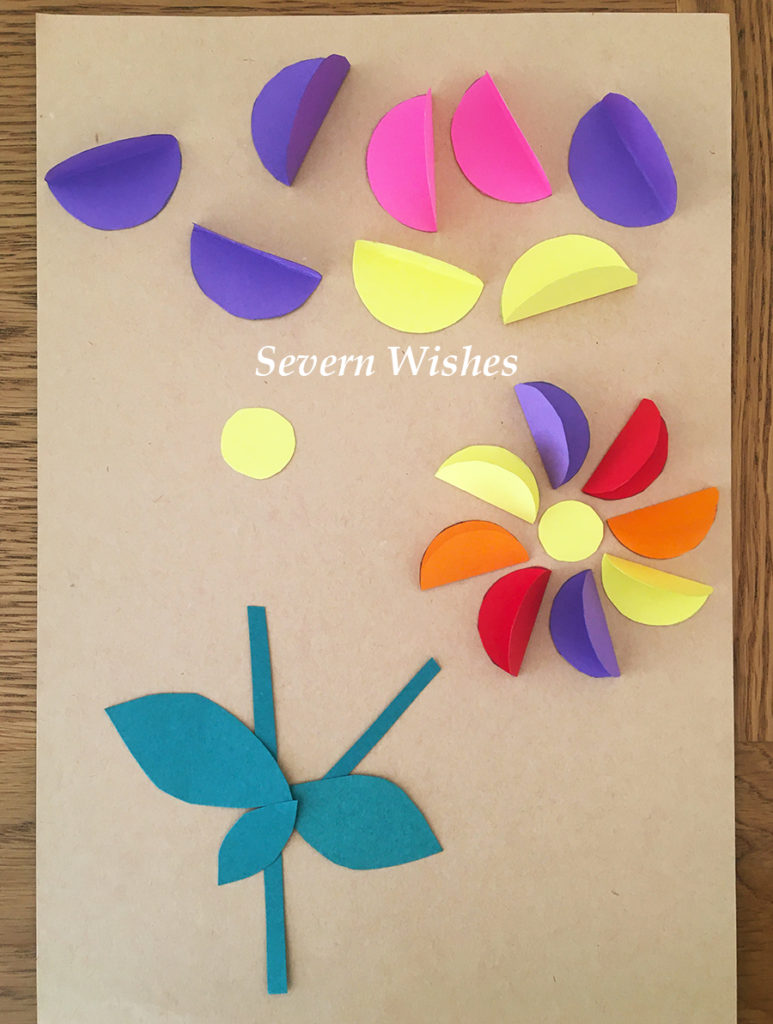
Step 3. Fold all of the petals in half so you end up with 16 halves with flat sides that stick up. This is how the petals will look 3D.
Step 4. Using Pritt Stick, stick the sides of the petals down so that they rotate around the centre of the flowers. You want them all to face the same way when you stick them around the yellow centre.
Step 5. Turn the flowers into a card if you like, or make other smaller flowers too using smaller circles, and make a pretty Easter meadow scene picture. Draw or Stick Easter Eggs and Rabbits and other Easter items along the edge like an Easter scene.
4. Hand Print Easter Bunny Rabbit
You Will Need Paper or Card Pencil Hands!!! Pens for the Details Scissors Paint
Paint works well for this one so you don’t have to colour in, unless you prefer to colour of course. It depends how much you’re painting, if you plan to do my hand prints picture (below) then you could do extra on different paper and make them into cute Rabbits!
Step 1. Draw around your hand and / or children’s hands. Or you can do a Hand Print on to Paper using Paint! MAKE SURE YOU LEAVE OUT THE THUMB! You want the shape to resemble a Rabbit head with two of each fingers being the ears! Keep two fingers together!
Step 2. Once dry you can cut the Rabbit shape out.
Step 3. Draw on Nose, Mouth and Eyes!
Step 4. Add any extras like whiskers, inner ears and freckles! Cut it out and hang it up or stick to a handmade card if you like.
FINISHED
Not the best hand print but you get the idea! My son was a bit reluctant to help out yesterday, ha ha!
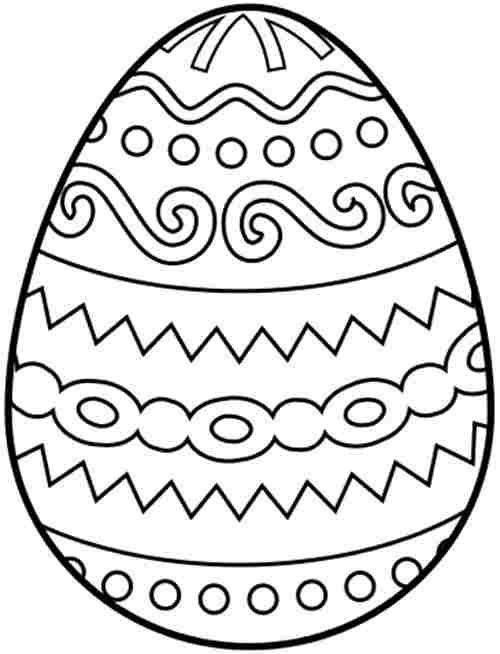
5. Other Craft Ideas If you want to just Print some Easter Egg patterns and do some Colouring in with younger children then here are a few that I really like that you can save and print 🙂
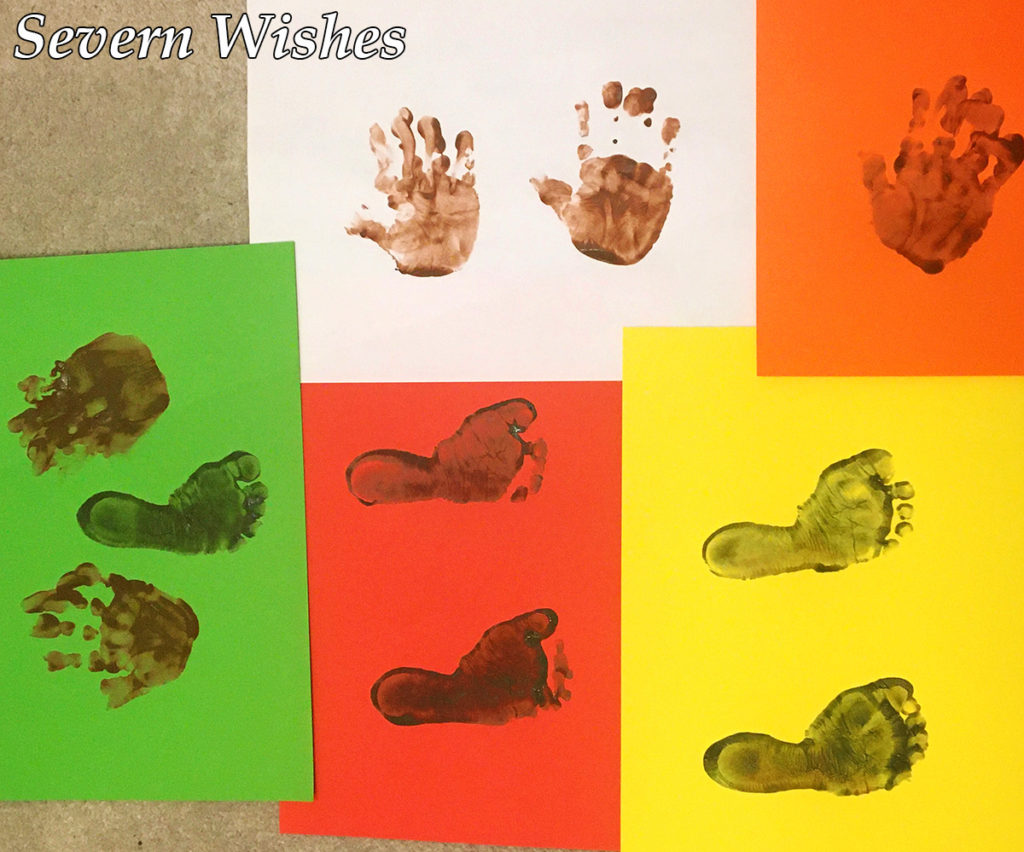
Alternatively you could do some Painting of Hands and do some Prints!
Layer the Prints of your Hands to make a nice picture.
Thanks so much for joining me for this blog post. I hope that you’ve had fun, maybe even a laugh at my crafty items. If you made something please share it with me on social media, tag me or my page! I would love to see them! What was your favourite? Would you like to see more Art and Craft? Leave me a comment. Have a wonderful fun and safe Easter!
Hello Treatbox Fans! It’s time for the February 2020 Treatbox Reveal and Review!
Greeted by baby pink paper and a sticker that reads “Awesome People’s Club” the February treatbox smells nice as I open it up…
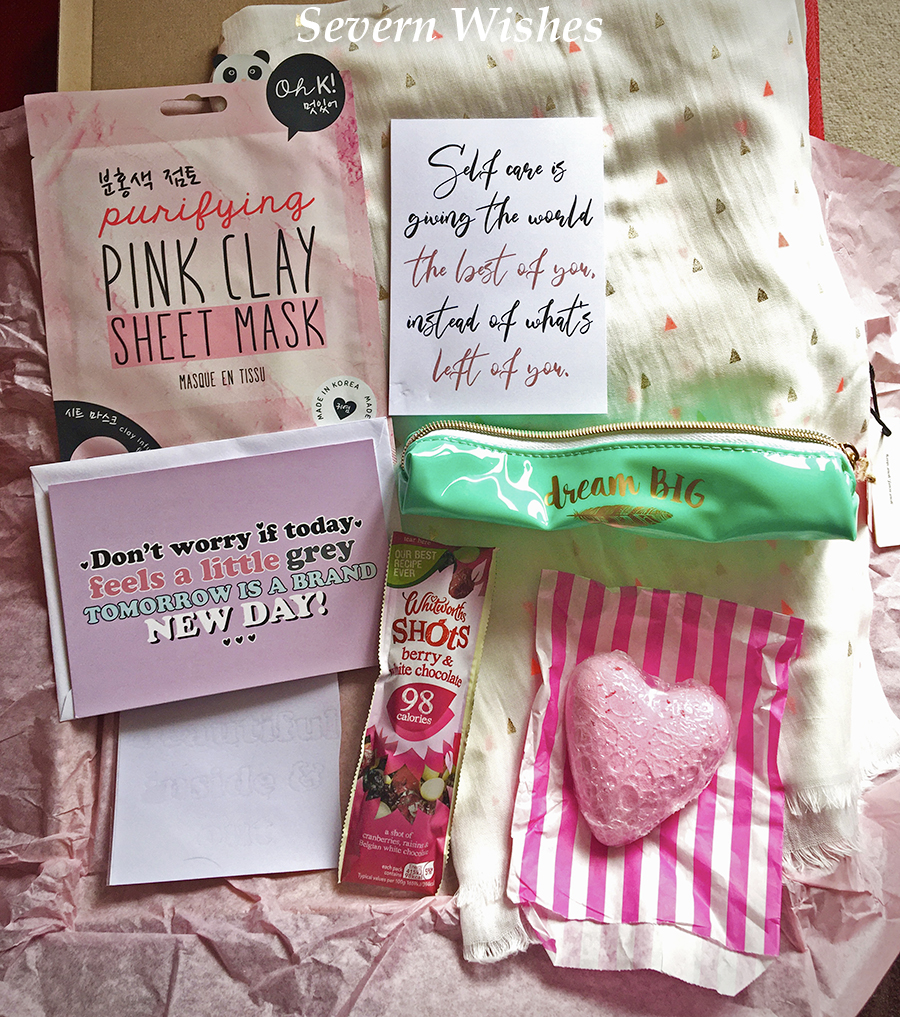
The first thing I notice is the scarf, wow it’s beautiful! It has instantly become my favourite item inside this month’s box. I look forward to wearing it.
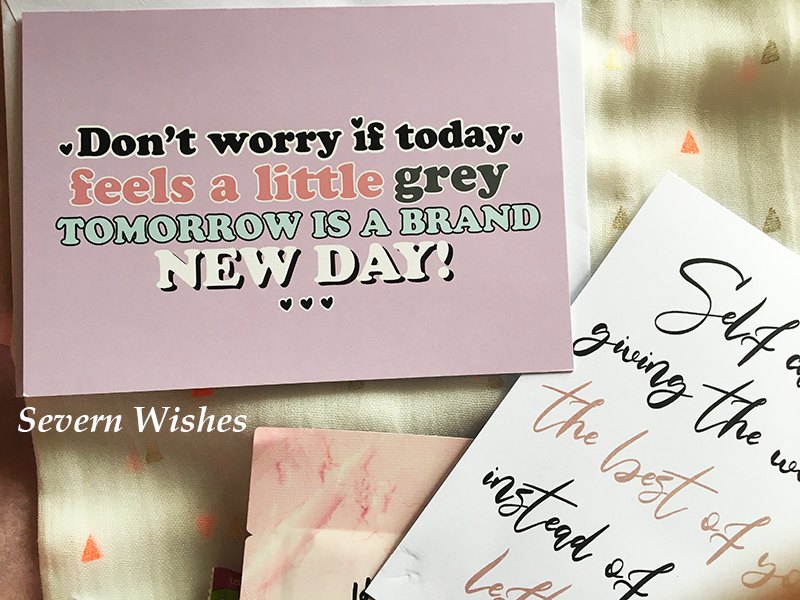
White Scarf with Triangular Pattern Details “Dream Big” Long Cosmetics Bag / Pencil Case “Don’t Worry if Today Feels a Little Grey” Treatbox Card Self Care Print A5 Korean Beauty Mask – Purifying Pink Clay Sheet Mask Whitworth’s Shots – Berry and White Chocolate – Healthy Snack Pink Heart Bath Bomb A Sticker – I think! Will Update! “Beautiful Inside and Out”
My Honest Opinion
Here we are everyone, it’s February! I was looking forward to this box, as it could have literally been anything and the themes aren’t a thing anymore. Knowing it would be self care and making time for yourself is always good, but it’s also different for every person.
I’m very pleased with most of its contents. I especially like the scarf, the case and the shots.The quotes and the quality in these three items are right up my street. The card is also nice and has a good quote to remind us all that grey days do eventually pass. The bath bomb is a nice touch but I honestly don’t have much time to relax in the bath these days! HA!
We do have yet another Korean Beauty, which I would like to see something else inside the next box, perhaps still beauty but not a mask, maybe a lip balm, a stick on tattoo or even something like jewellery perhaps… the final item I think might be a sticker of some sort, but without the useful calendar and explanation page I can’t tell you what it is! I shall find out from Zoe and update my blog accordingly!
Finally the quote on the A5 print this month hit home to me, we often find ourselves so busy to do self care, I know I do. Some days I do feel I am just giving what is left, and I want the people directly in my life to have the best parts of me.
Overall I have really liked the February box, there have been some nice items and a good improvement on the products inside too.
Are you thinking of ordering a TreatBox for yourself or for a gift for someone? Then you can find Treatbox subscriptions and build your own box at their website
Check out my previous Treatbox unboxing posts in this unique category of mine called ‘Treatbox’ it is specifically for these box reviews and reveals – Severn Wishes Treatbox.
Don’t forget you can follow my social media such as Instagram for more Treatbox photos and updates throughout the month including me using items!@SevernSabrina
Thank you for visiting Severn Wishes, have a great February!
Hello everyone, today I’ve gone all arts and crafts on you!Most children break up from school today and I’m sure a lot of you are trying to come up with ways you can entertain everyone without it being Christmas movie after Christmas movie. Hands up if I’m right!
So what about some crafting! You can choose whichever one of these that you already have the necessary items for!Pick one or do them all over the festive season! They make great tree decorations or cards, and perfect gifts for family members too!
Top Tip: Pop your little ones name and the year in the corner of the decoration if you’re keeping it, make one every year and compare the sizes!
It’s amazing what you can make out of a few bits of card, a pack of mixed pens and some washable paints! Why not give one of these awesome craft ideas a go with your little ones this Festive Season!
I always love the idea of doing cards! You can combine any of the below ideas and then simply cut out your finished design and stick it on to a piece of card.
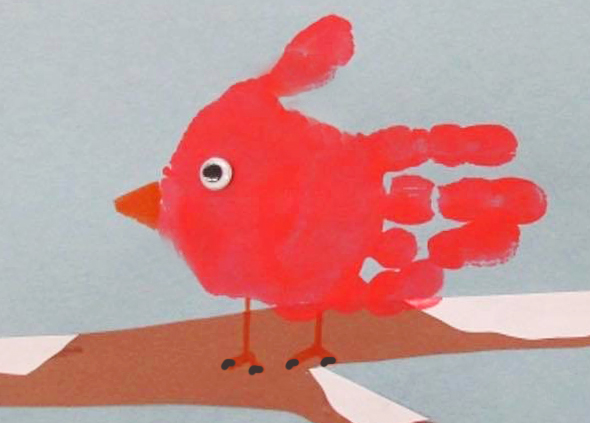
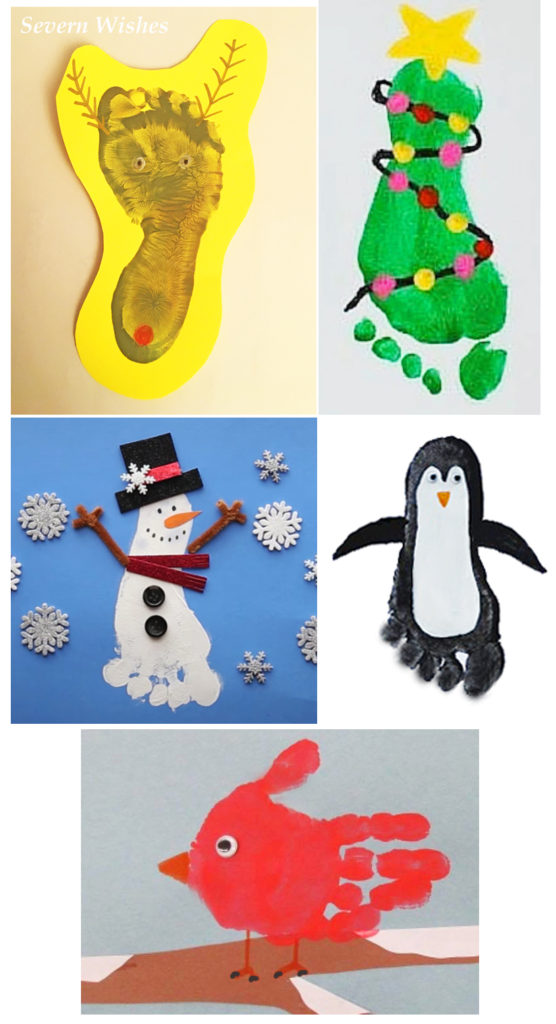
Reindeer Foot Print Penguin Foot Print Snowman Foot Print Christmas Tree Foot Print Reindeer Hand Print Robin Hand Print
What Will You Need:
A Sensible but Fun Adult 😉 with Baby Wipes at the ready! Coloured Paper and Card Pack of Mixed Coloured Pens, Glitter Pens are also cool too Double Sided Tape or Pritt Stick or Glue
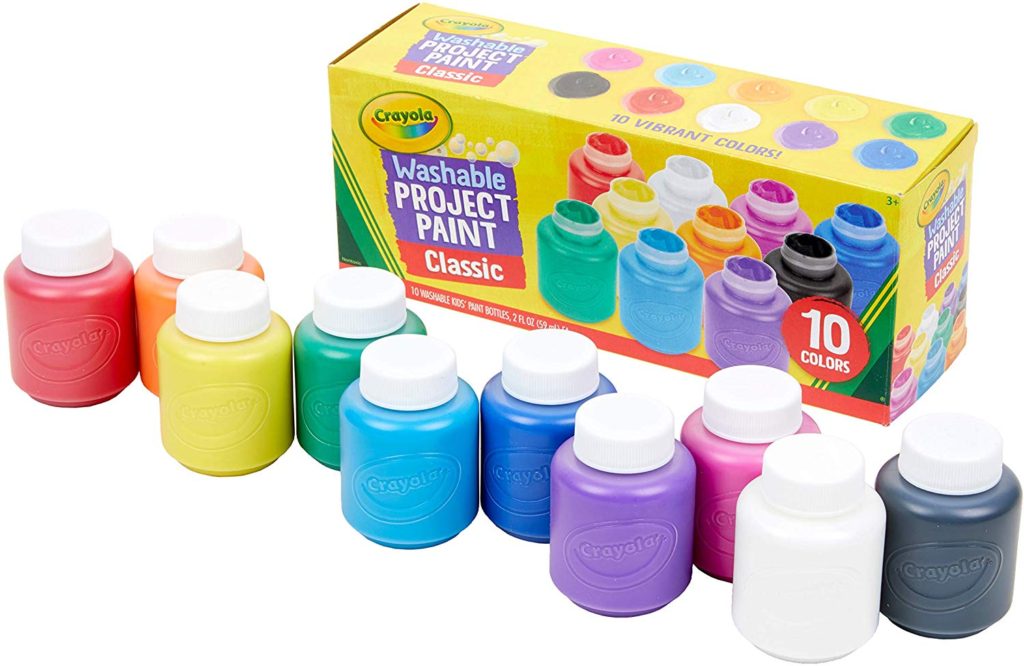
Washable Paints in mixed colours – I like the Crayola ones A few different sized paint brushes or a sponge for skin application. Scissors (one reason you need an adult) Stickers if you want to add those or some googly eyes for your print animals
You may need a ruler, a hole punch and string or ribbon if you plan on making anything into a hanging decoration.
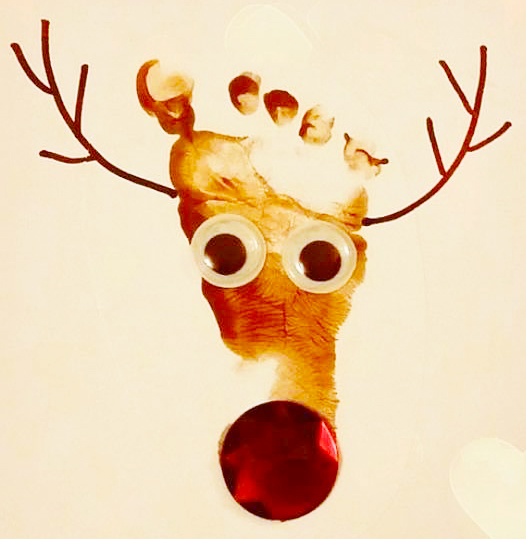
Use Washable Paints and some Card to make your very own Tree Decorations or Christmas Cards. It’s easy to do Hand Print Robins, Wreath or Reindeer! Or Footprint Trees, Snowmen, or Penguins!
How To Make It…
Paint your child’s Hand or Foot and carefully press it down on to your chosen card or paper. Let it dry overnight somewhere warm. Flatten the design for the next few hours once it’s dry. Next you need to decide which Christmas theme to go for! Paint, Draw or Stick on your favourite bits to make your design real! Get an adult to do any cutting parts that are needed to make it into a decoration or card.
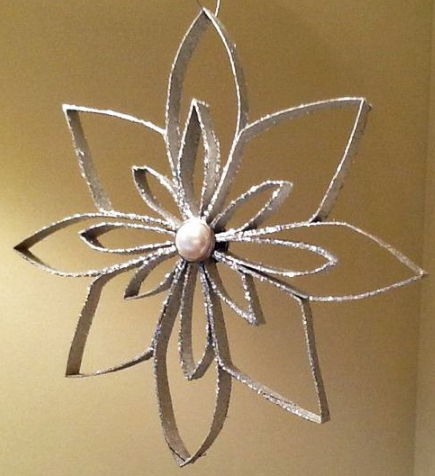
Toilet Roll Snowflakes are great to do too! You need two toilet rolls per snowflake, glue, scissors, paint and glitter! Tip One: Paint the Toilet Roll and Glitter it up first and then let it dry before cutting, at least overnight! Tip Two: Cut all the pieces the same width and arrange it before gluing! Tip Three: Tie some Ribbon or String to the top and hang in your home!
Thank you for visiting Severn Wishes today, I hope you enjoyed this Arts and Crafts post. Hopefully I will to see you here again soon. Have a great Festive Season!
✩ Sabrina ✩
Reindeer Child Foot Print
By continuing to use the site, you agree to the use of cookies. more information
The cookie settings on this website are set to "allow cookies" to give you the best browsing experience possible. If you continue to use this website without changing your cookie settings or you click "Accept" below then you are consenting to this.