How to make Birthday Bags on a Budget

How to make Birthday Bags on a Budget – it can be done!

My son recently had his birthday and a part of me was disheartened by the fact that I couldn’t afford to throw him a birthday party, one where his friends could come. We had family things going on all week but nothing with his school friends.

After talking to him about it one afternoon a week before his birthday, I asked him if he would like to do anything for his birthday on the day besides attend school, He said that he would like to share his favourite things with his school friends. I thought it was a lovely idea so we chatted about what sort of items he would include. After a lengthy conversation I decided we could do some birthday bags, and I hunted around for the best bargains. I was on a strict budget to I checked where things were on offer and started making a list.

So how do you make up a birthday bag?

You need either a birthday bag or a party bag, there are many varieties available online. You can get them usually with a handle so they are perfect for little hands to hold.
I also chose to buy the plastic cones because I didn’t want Oreos to break up and/or go stale in the bags. This worked perfectly to break things up into sections, the Edibles and the Toys.

How do you stick to your Budget and get the best value?

✩ Sabrina’s Top Tips ✩

There are several ways to stick to budget and also find the best deals, here are my tips.
1. Decide your budget and make a list of what you need to buy.
2. How many are you buying for? Sometimes it’s cheaper to buy 50 bags than 20, bare this in mind.
3. Watch out for “lowest price in 30 days” and other useful slogans on offers.
4. Compare supermarkets online before you go out to do the shopping.
5. Use supermarket offers if you have a discount card with them.
6. Visit budget stores and compare the items you have seen online.
7. Always read the online reviews and filter by most recent as well.
8. Bulk Buy – Depending on whether you can reuse an item in the future for something else or even sell the remainder of the items on, bulk buying can be beneficial. (For us the Oreo’s were cheaper to bulk buy and so were the party bags). My son will happily eat any leftover biscuits let me tell you.
9. Work out the maximum you would like to spend, divide that by how many you are buying for, let’s say it’s 20 children. So divide your budget by 20, and you will understand how much it will cost to do a bag per child. Once you’ve made some essential purchases work out what is remaining of your budget and only spend what you have left. It might be that you have to buy a massive bag of sweets and divide them by hand into little sweet bags like I did with the Oreo biscuits.

Think smarter with your money and not buying things simply for convenience.

Why did we choose the items?


Picking for a mixture of genders is always tricky, but I don’t know a child who doesn’t love stickers and sweets / chocolate biscuits. Oreo is the choice because my son has food allergies but luckily he can eat original Oreo. The cars were because they were pull-back and super cool but also a car is gender neutral in my eyes, same goes for the bouncy balls. I asked all the parents (or my son told me) what peoples favourite colours were, and then labelled the bags and added the toys in accordingly. If I had someone who loved Red they got a red tie on their biscuit cone and they got a red car and a red ball. I would’ve loved to have included bubbles too but they would have sent me over budget. You could swap the bouncy balls for bubbles if your child would prefer those.

What did we include in the final bags?

20 Pull Back Cars cost £7
35 Bouncy Balls cost £7
Stickers cost £2.00 (50 sheets)
Oreo Biscuits cost £4
22 Haribo Sweets (Individual Packets) cost £3
100 Sweet Plastic Cones cost £3
40 Happy Birthday Bags cost £4

I divided the stickers between the children’s bags and kept the rest for my own reward charts at home, meaning each sheet only cost me 4 pence. Bargain!

Total Spent: £30.00
Total of Children: 16
Cost per Child: £1.79

I don’t think this was too bad, 16 happy children for less than £30 (as we had leftovers) and it was much cheaper than throwing a birthday party. My son got to share his favourite items with his friends too!

We have also got left over bouncy balls, birthday bags, cone bags, 6 sweet bags and 4 cars. The leftover pieces we can use whenever we like or give away at other occasions.

At the end of the day you can’t put a price on a child’s happiness and my son was over the moon to help me give out these little bags of joy to all of his friends at school, so that they could all celebrate his happy birthday together.

Thank you for reading this blog post today, I hope you have found it interesting and perhaps got a few useful tips in case you ever decide to do bags for your child’s birthday or a birthday party.

I hope I see you here again soon!

 Sabrina 

Sabrina’s How to Make an Autumn Wreath

Welcome to one of my latest Craft Project posts that I am very proud of.
I have been wanting to make a wreath for about four years now,
and I never got around to it until this Autumn. Oops!

Autumn Wreaths like this can be placed indoors flat or indoors hung up.
If you have a nice sheltered porch over your doorway you could even hang it outside!
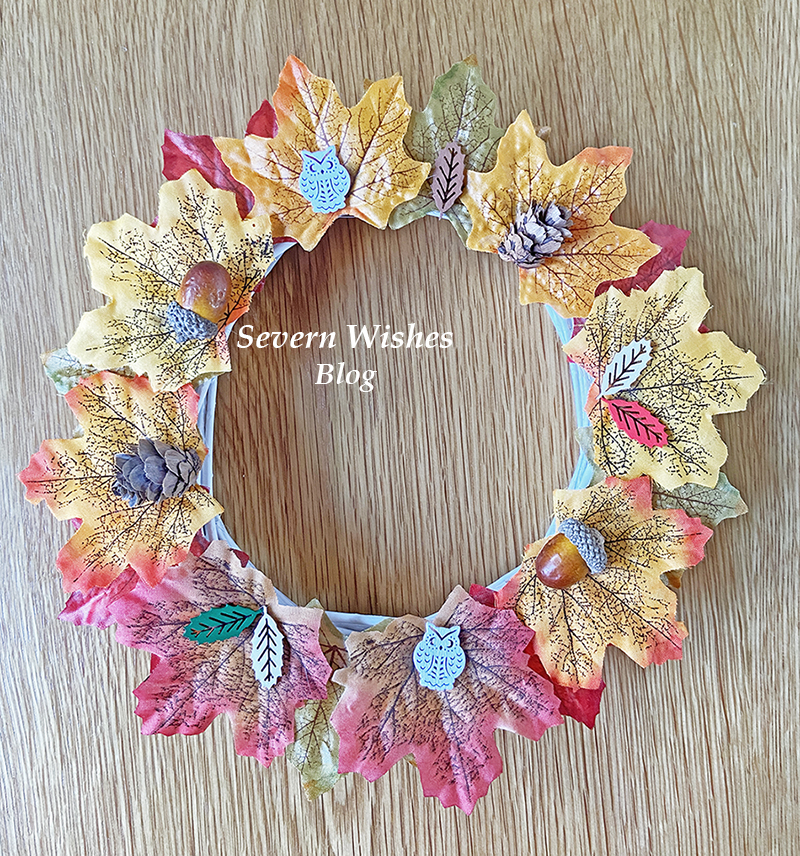
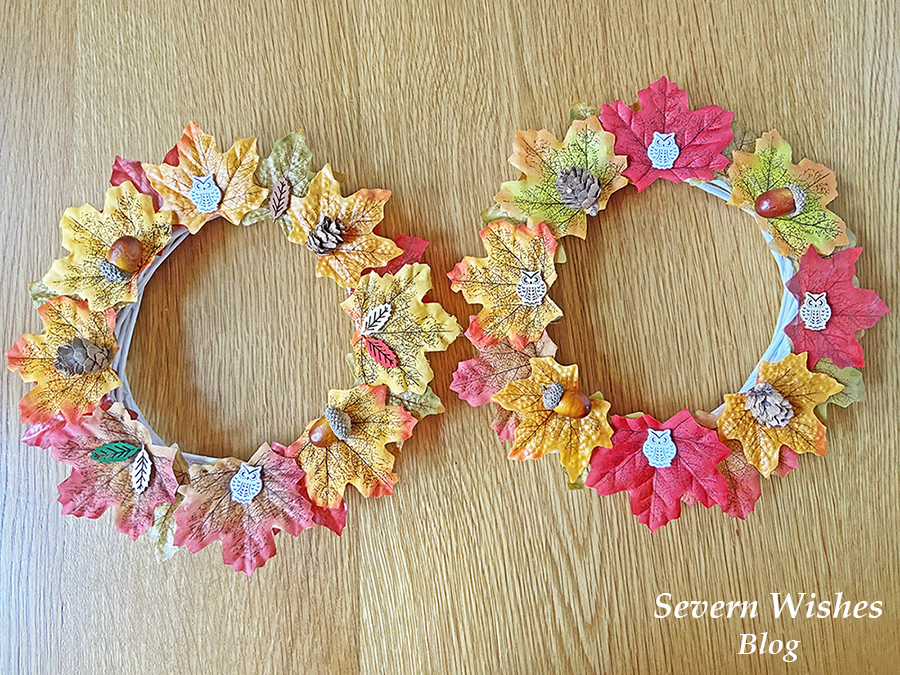
I chose to make an indoor wreath using false leaves, dried pine cones, acorns and wooden craft pieces.

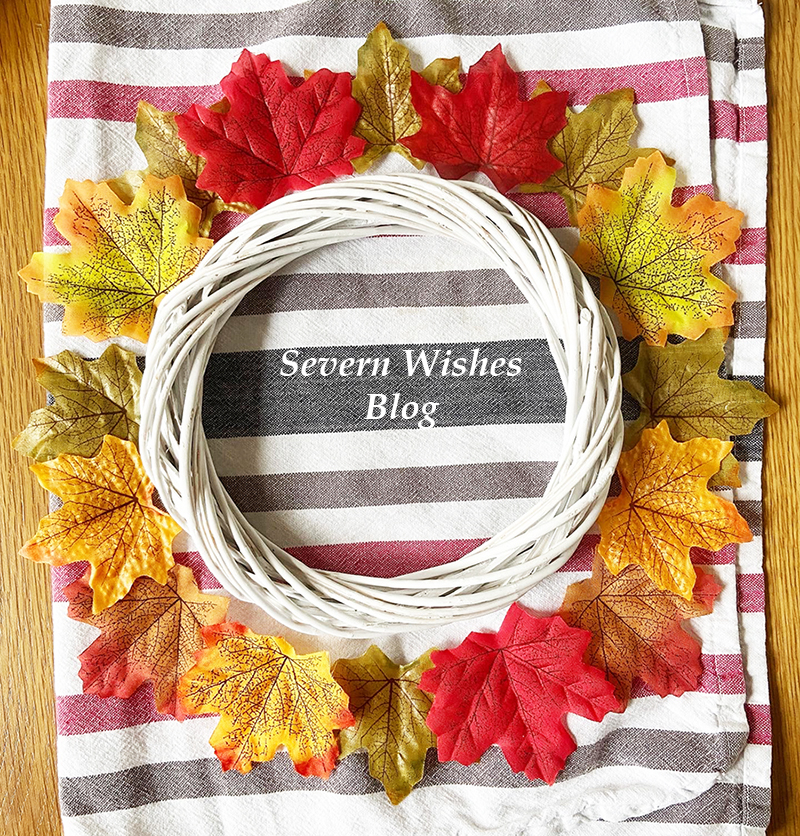
Here are all the things I have used to make my two wreath rings.
It’s a good idea to decide on your design before you start gluing anything, I place mine around the outside.

How to Make

Step 1. Prepare your design before you glue anything down.

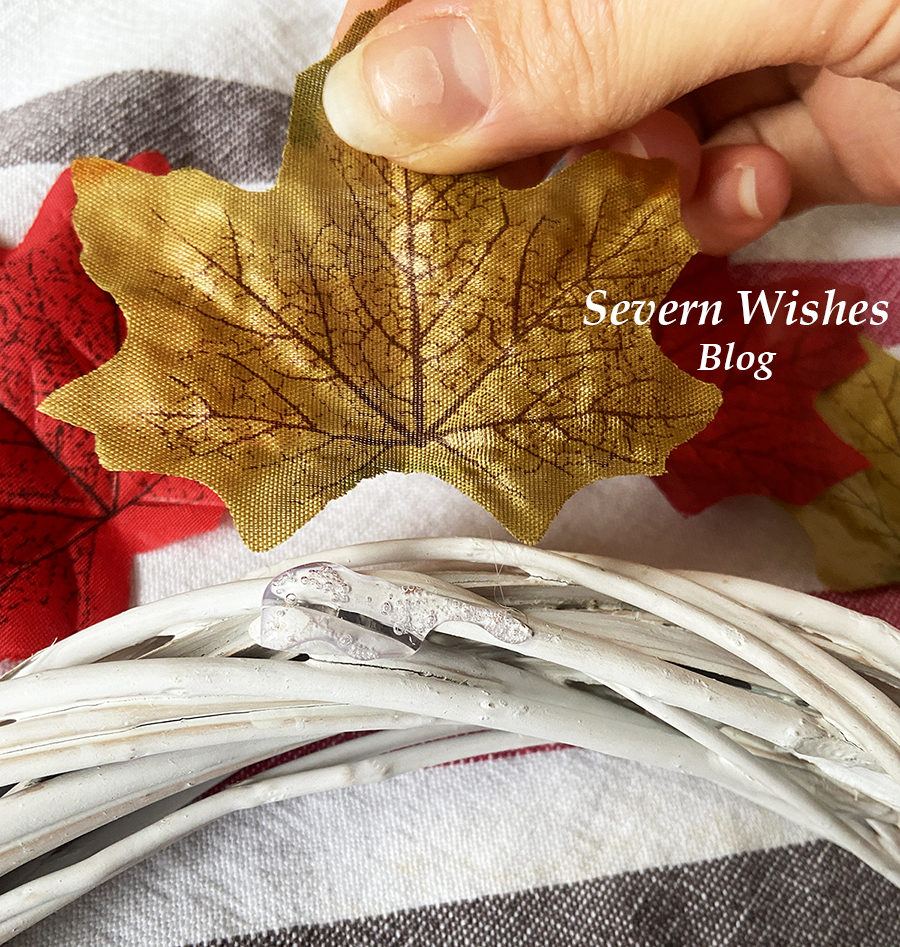
Step 2. Glue the first layer of items down using a glue gun and wait for that to dry and the glue to harden before you add the next layer. Use a blob of glue per item, just enough to stick it down because you don’t want lots of excess glue on the wreath.

Step 3. Repeat the second layer with the glue and take care when pressing down the items when it is hot. Layer by overlapping the leaves until all the white on the front is gone. Once you’ve done the leaves let the wreath dry a few minutes and the glue harden.

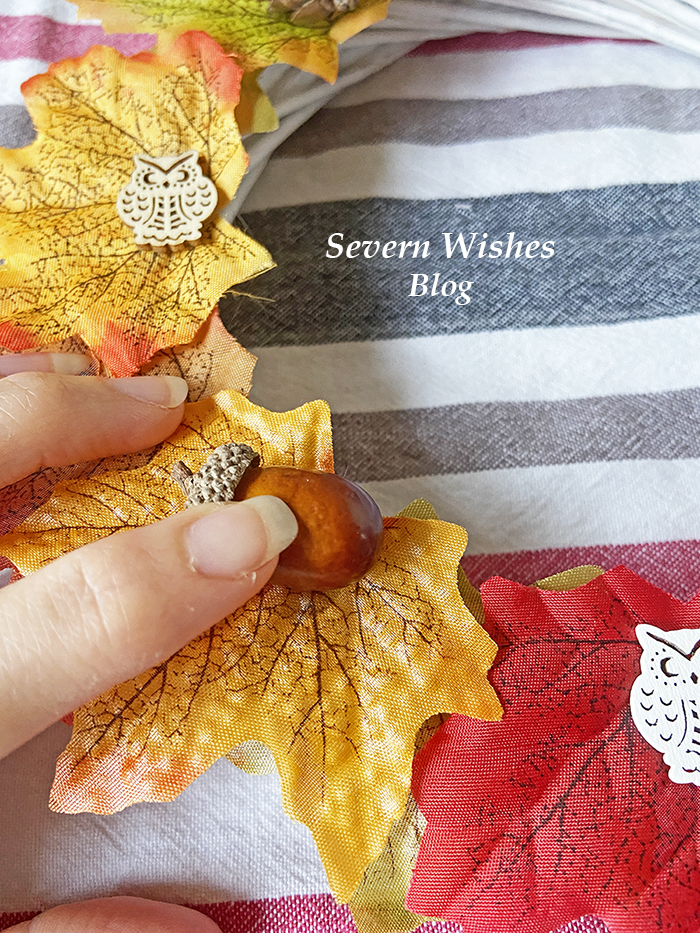
Step 4. Keep adding to your design and let the layers dry in between, it only takes a few minutes to dry each time. You can put as many layers on as you would like to, and then add the three dimensional items last.

Step 5. When the design is fully dry then you are able to either lay it out or hang it up in your home. If you are hanging it up on a window you may want to repeat the design on the other side so that you can see leaves on both sides.

Take Care when Pushing the Items on the the Hot Glue

TOP TIPS! Make sure you only use a little glue, it’s hot and a little goes a long way!

TOP TIPS! Layer the leaves up until you cannot see any more of the white,
overlap them slightly so as to create depth to the wreath ring.

Make sure to decide on where you want to put the items before hand so that you don’t make a mistake when gluing.

What You Need

Wreath Base – Wicker or Rattan or Wood Sticks
Glue Gun and Glue Sticks
Decorations or Naturally Sourced Dried Out Items (like Pinecones) or Both!

Where I Bought From

I did a Nature Foraging Walk with my son.
I got the wooden pieces like owls and leaves and the artificial leaves from The Works in their craft part of the store.
I got the Rattan Wreaths from eBay.
I got the Glue Gun and Sticks from Amazon.

✩✩

Thank you for reading this crafty and make blog post today, if you have any questions for me then please comment below this post and I will happily answer them for you. If you like my wreath please let me know!

✩ Sabrina 

A Week of Positive Things – Sabrina’s Tips for having a more Positive 7 Days at Home

A Week of Positive Things

Sabrina’s Top Tips for having a more Positive 7 Days

Everyone seems to be feeling a bit low lately, it’s bound to be the Winter Blues mixed in with everything to do with the Pandemic. There are so many people who have found themselves working from home again, and many young people who are studying at home again too. With all this time stuck at home there are lots of anxious feelings and negativity, so I’m here with some suggestions to try and put a positive spin back into your home environment!

So here is my solution to tackle the blues, try to take half an hour out of your day as a family unit, every afternoon for the next week, after work is over and after the schooling is done for the day. Pick one of these ideas of mine to do together, a different one every day in any order you like.

I guarantee they will have you feeling more positive by the end of day 7! You can do them in any order you like! Or do one of them twice if it’s a hit! If you play along please comment on this post or on my socials at the end of the week and tell me which activity your family preferred and whether these activities did in fact work for you and increase your family’s positive attitudes.

  1. Go for a Walk (Weather Dependent) and play a game as you go! Ideal for parents with younger children who are still enthralled by the nature of “eye spy”. But the fresh air and endorphins combined should make all of you feel better too. Older children may want to go for a jog or a bike ride if that’s more your thing, so long as it’s half an hour outdoors with your family, all together.

  2. Watch a Funny TV Show or Cartoon. Laugher really can help you to feel better, even for a brief moment, so why not stick on a tv show or a favourite cartoon that never failed to make you laugh and giggle together. Tom and Jerry is a good one!

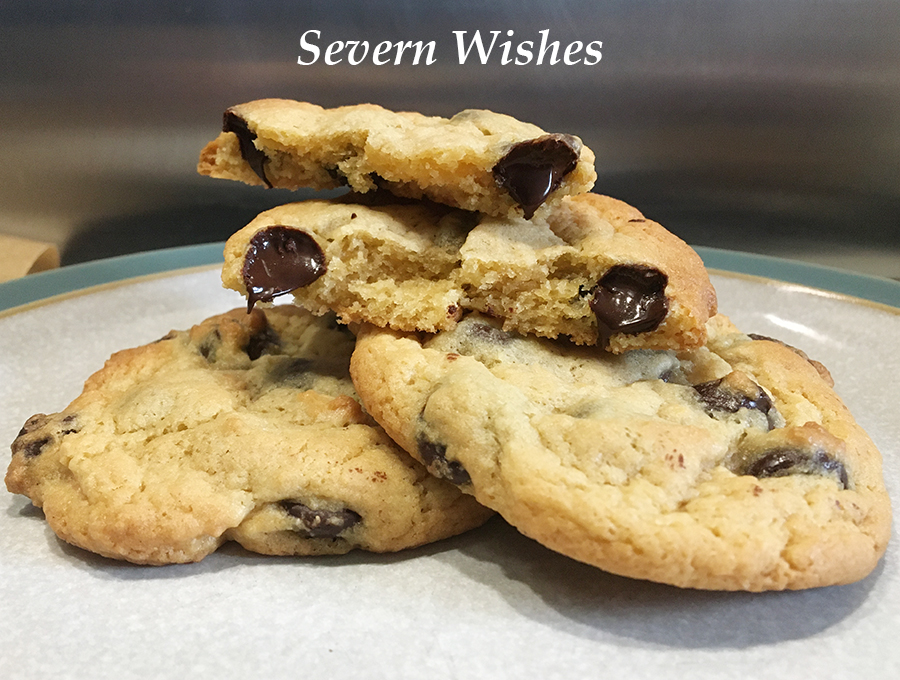
  3. Bake or Make Something Delicious! I have a ton of recipes on my blog and some don’t even take that long to do. So why not make some chocolate crispy cakes or even some rocky road, something simple and even something that doesn’t require baking to save you time! Then you’ll have a tasty treat for a few afternoons to come! See what you’ve got in the cupboard! Here is my baking section HERE.

  4. Get Creative. You can do one of two things with this creative activity depending upon the age of the people in your household. Either, do a rotating draw-off where by you each start with a piece of A4 paper and one coloured pen (all varying colours) and you keep rotating the papers every minute, do this until 4 minutes is up. Everyone should’ve drawn on each of the pieces of paper. No talking! See what you’ve come up with! Share them with me on social media! #SabrinasCreativeCrafts
    OR
    You can play the Sentences Game. The idea is to make up a creative story, it should be funny, and you once again rotate the papers. This time you want long strips and not A4. Cut a vertical A4 in half twice or get your strips. Once the first minute is up and the first sentence has been written, you all fold over the section and pass it on. When the time is up you each open up the papers to find a story.

    For example;
    There once was a man who couldn’t find his shoes.
    I think I want some KFC he thought.
    He headed off in the direction of the sunset.
    In the end his dog ran away and joined the circus.

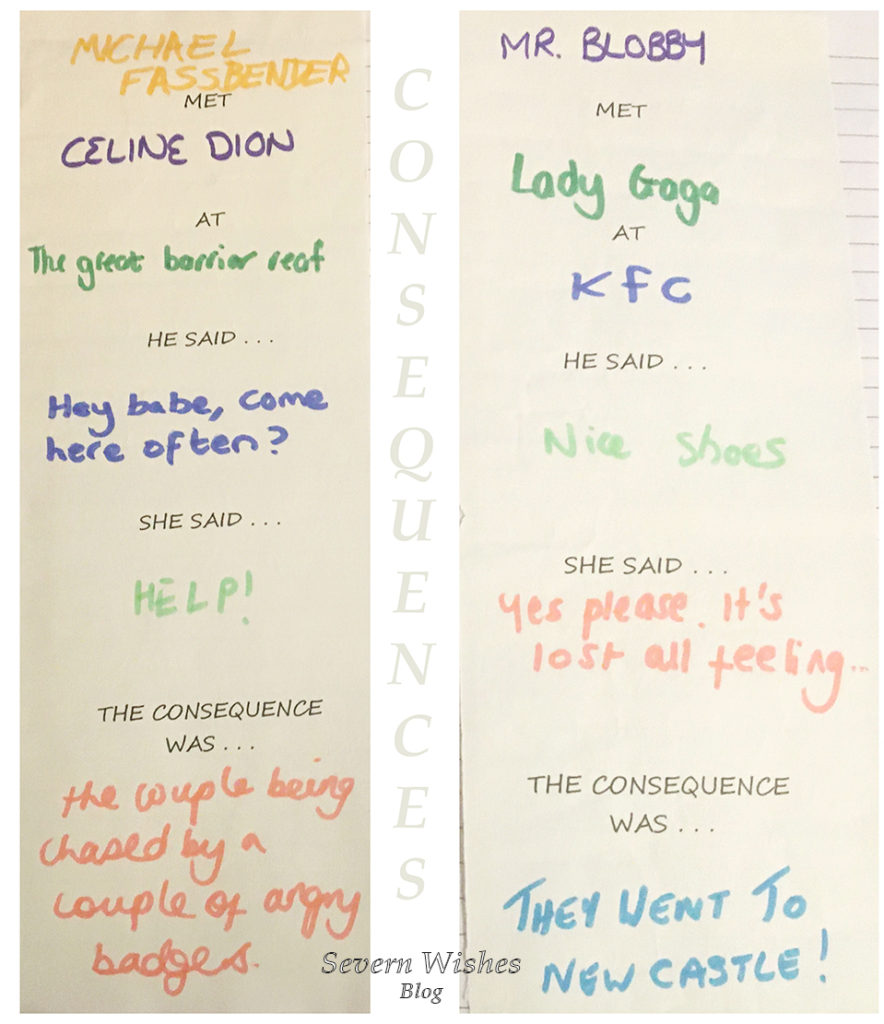
    If you have teenagers then you could play the game another way, this is called CONSEQUENCES, you start by writing on each of the papers the following things, add extra if you have a large family so that everyone will get a go at each section when the papers are passed on. They usually go like this…
    ___
    Met
    ___
    At
    ___
    They said ___
    What happened next was ___ OR The Consequence was ___

    Then unroll it after everyone has had their turn and the sections are completed, then take turns in reading them out. See my photo below this list for an idea of what it would look like when you finished! Warning my examples may cause laughter!

  5. Photos! Another fun thing that would brighten your spirits is to look back at any photo albums that you have or digital slideshows. You could even play a game while you look through them. Every time that your mum is seen with sunglasses on she gets a point, each time someone hasn’t got their hat on when they should you lose a point! First person to spot the water in the photos gets a point. Etc etc! Make up some rules before you start and say that the first person to 10 points gets out of doing the washing up tonight! Or the winner chooses what’s for dinner the next night! Involve one another in every day things.

  6. Write a List of Goals and Aspirations for 2021 – but only write the do-able ones! For example, I want to bake a cake for mums birthday. OR I would like to walk a mile on the next weekend that is dry and sunny. When you achieve something, even if it’s a little thing, you feel so much better about having accomplished it. Setting some realistic goals now for the year might seem silly when we don’t know what’s around the corner, however even if the goals are just for the people in your bubble, it’s still doable. Put them up on your fridge or board and tick yours off when you have completed it.

  7. Make a Meal Together. No matter how old you all are there is something fun about making dinner together. May I suggest something that everyone can get stuck into such as Fajitas, Curry, Sausages and Mash or Lasagne (dietary requirements permitting). I have tons of recipes on my blog if you need inspiring! But making and preparing food together before you eat it can be a real bonding experience, and it can also be important for teaching younger children where foods come from or that by mixing this with that you achieve this outcome. Food is something that has been so important during the first lockdowns so I thought I would continue on with that and try and get you back into your kitchen to make something you love together. Check out my Recipes HERE.
Why Not Try And Make My Delicious Cookies? Click the link in section 3 for the recipe!
The Consequences Game – Imaginative Fun for the older children in your family.

I really hope that you’ve enjoyed this blog post and that you would like to participate in my week of positivity. If you do participate in any of them or attempt to get those in your bubble to do so, then please let me know how you got on! I can’t wait to see if you make anything as well 🙂 tag me online! And thanks for joining me!

✩ Sabrina ✩

Severn Sabrina Instagram
Severn Wishes Blog Facebook
Sabrina of Severn Wishes on Twitter