Argos Testers Product Review BaByliss Turbo Smooth Hair Dryer with Diffuser

Hello! I’m Sabrina! I am an Argos Tester, this means that I often get items sent to me for the purpose of an online review. I thoroughly test the products and take photographs of them before submitting my findings and honest thoughts over to Argos. Sometimes I even do a video, and these are shown on my social media channels. This latest campaign was to test out a brand new hair dryer.

#ArgosTester #ArgosTesters #ArgosTestersCommunity

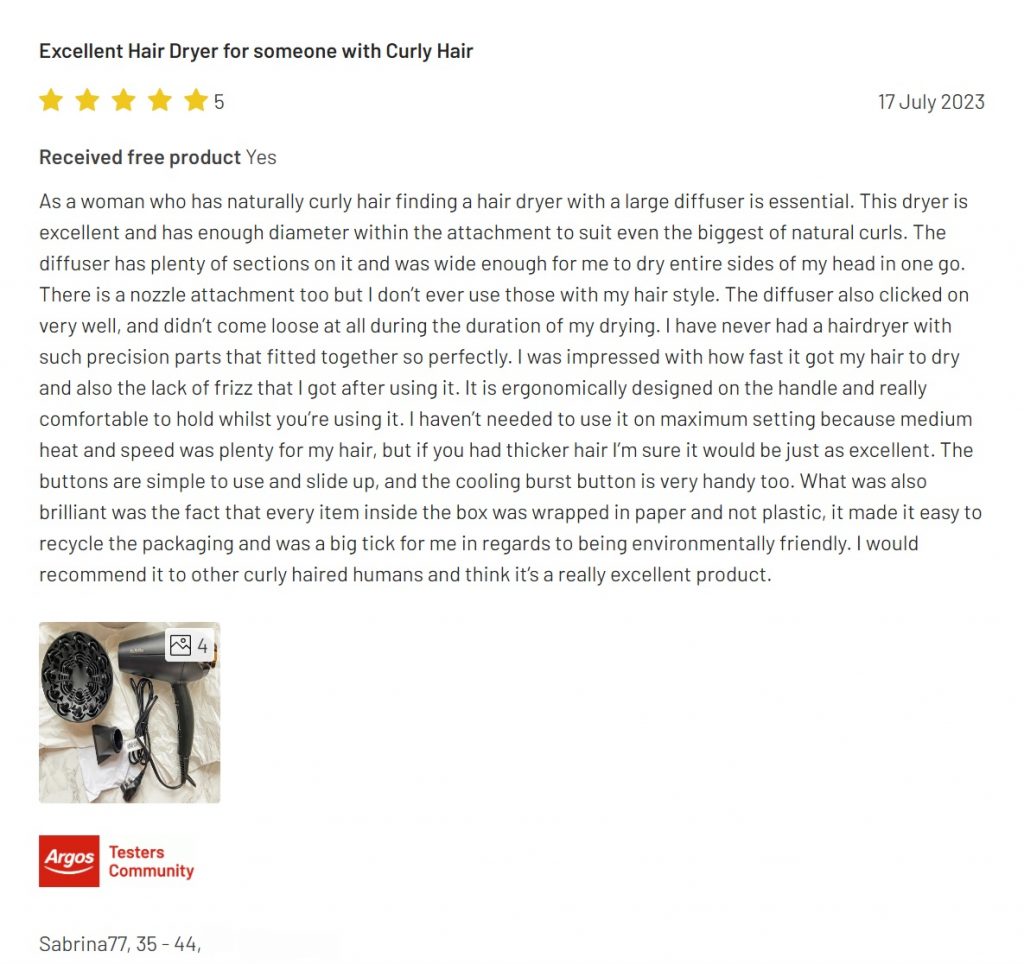
I have written this article about a product that I have been supplied for free, in order to test and then review it. This is my experience with said product and it is my honest review about the product listed below. I have already submitted my review to the Argos Website, and it has been accepted on to live public view when this blog post has been publishedPlease see my review on this screengrab below from the Argos website. All words and photography within this article are my own.

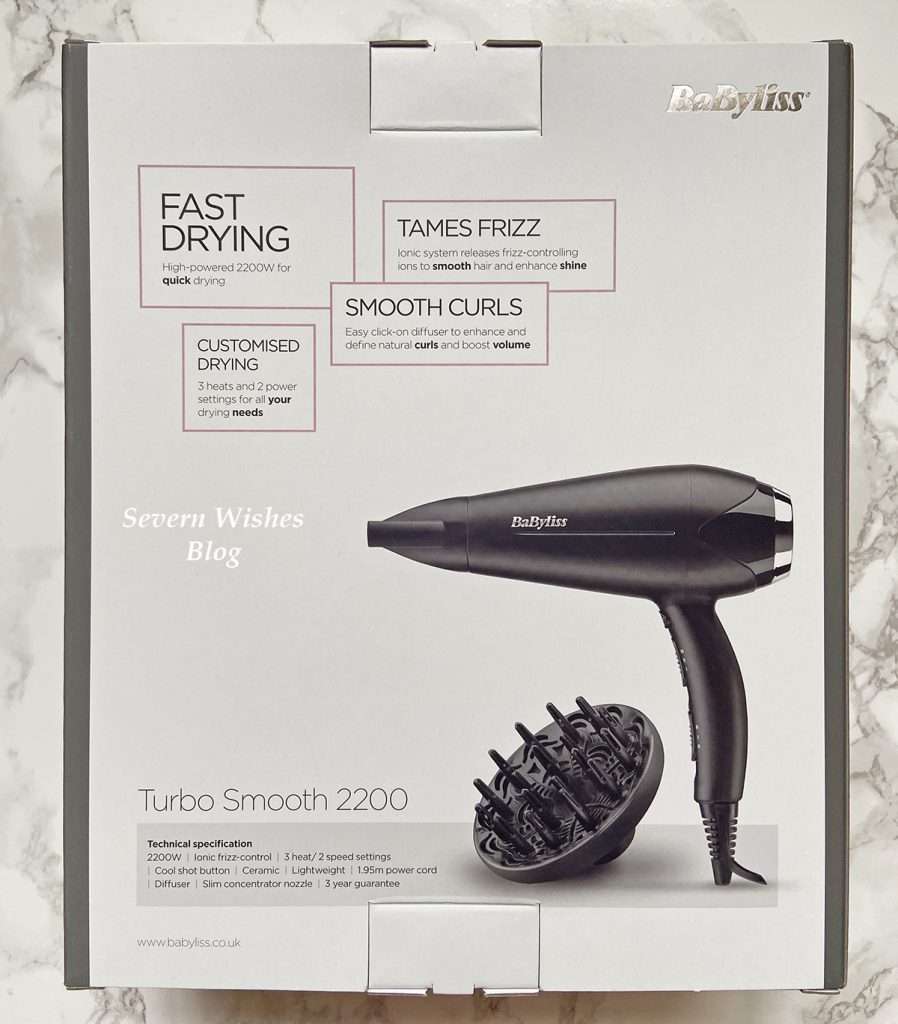
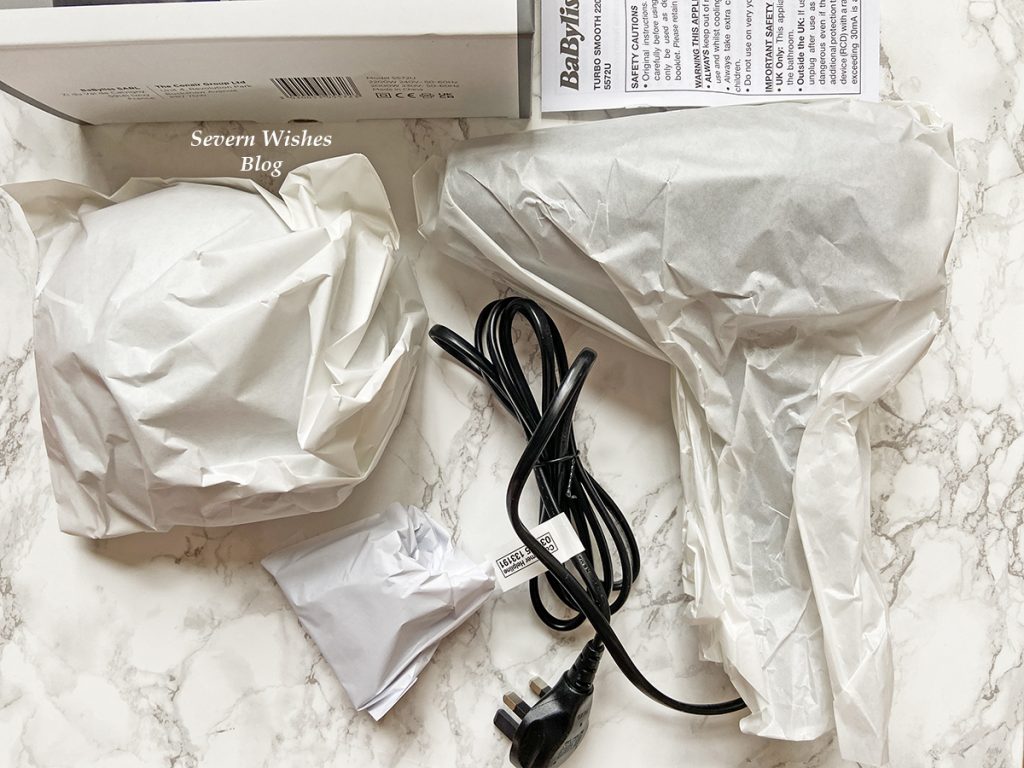
Packaging

Product Details

Name: BaByliss Turbo Smooth 5572U Hair Dryer with Diffuser
Colour: Black
RRP: £32.00
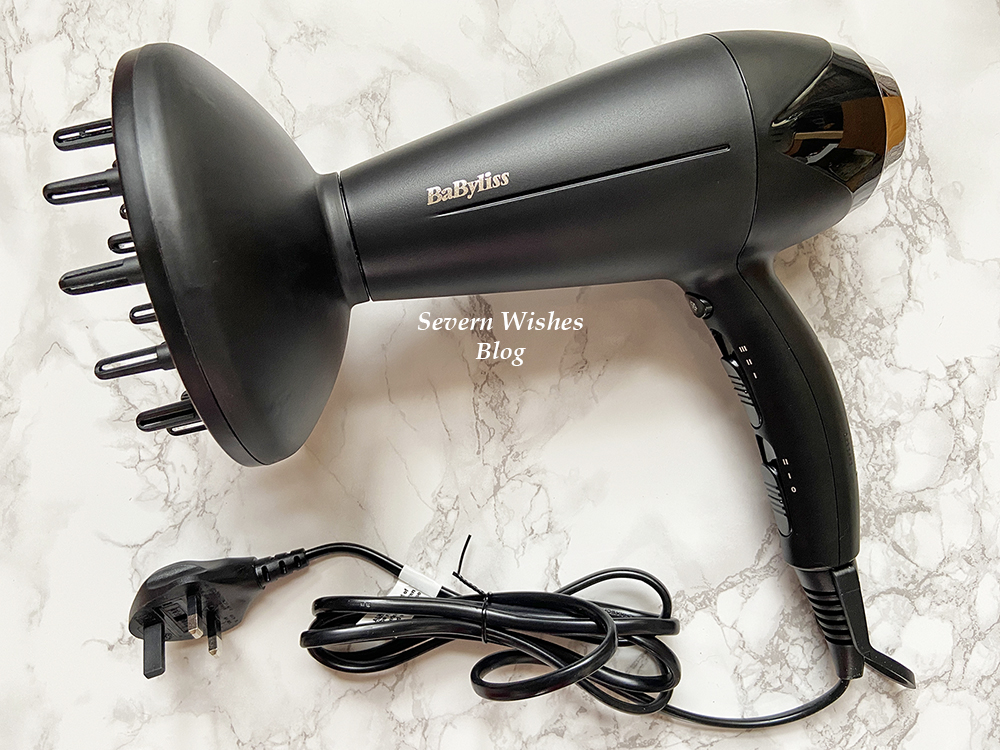
Product Details: High Powered Hair Dryer with 2200W for Fast Drying Capability. Customised Drying with 3 Heat Settings and 2 Speeds. Large Click on Diffuser and Slim Concentrator Nozzle included. 1.95m Power Cord. Ionic Frizz Control, Ceramic and Ergonomic Design. Weight 0.6 kg.
Argos Website: LINK

My Honest Opinion

Overall I would like to rate the 5 stars.

Quality 5✩
Features 5✩
Design 5✩
Attachments 5✩

My Honest Opinion of the Product

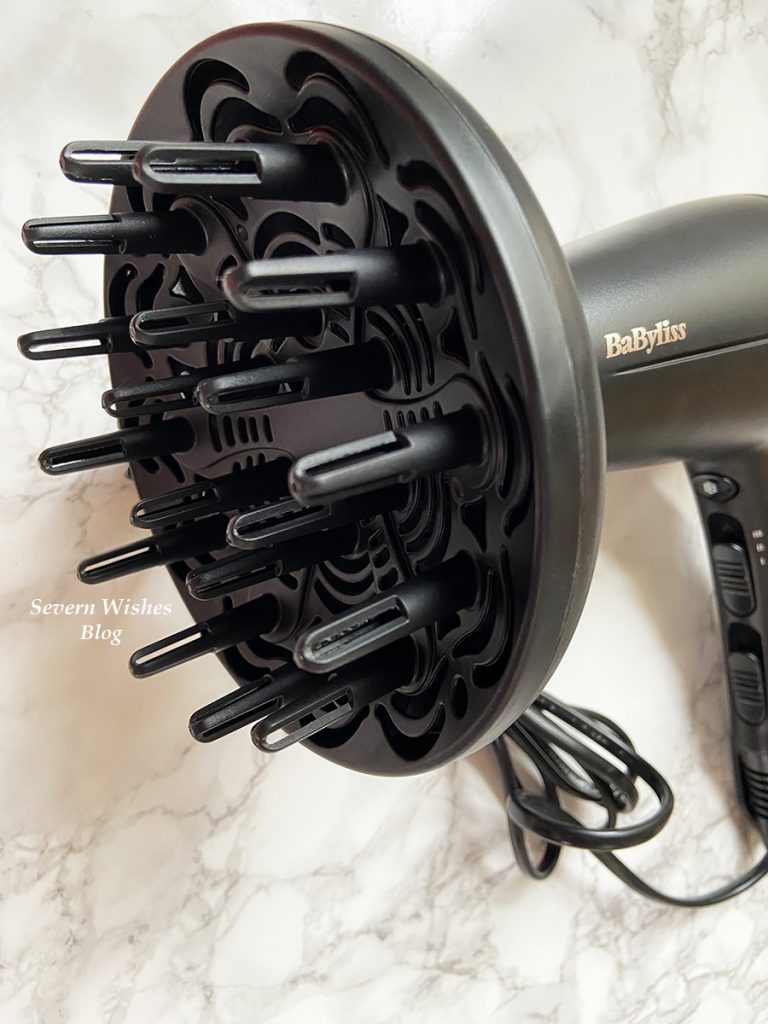
As a woman who has naturally curly hair finding a hair dryer with a large diffuser is essential. This dryer is excellent and has enough diameter within the attachment to suit even the biggest of natural curls. The diffuser has plenty of sections on it and was wide enough for me to dry entire sides of my head in one go. There is a nozzle attachment too but I don’t ever use those with my hair style. The diffuser also clicked on very well, and didn’t come loose at all during the duration of my drying. I have never had a hairdryer with such precision parts that fitted together so perfectly.

I was impressed with how fast it got my hair to dry and also the lack of frizz that I got after using it. It is ergonomically designed on the handle and really comfortable to hold whilst you’re using it. I haven’t needed to use it on maximum setting because medium heat and speed was plenty for my hair, but if you had thicker hair I’m sure it would be just as excellent. The buttons are simple to use and slide up, and the cooling burst button is very handy too.


What was also brilliant was the fact that every item inside the box was wrapped in paper and not plastic, it made it easy to recycle the packaging and was a big tick for me in regards to being environmentally friendly. I would recommend it to other curly haired humans and think it’s a really excellent product.

Thank you for reading this product review today, I hope you have enjoyed it.

If you have any questions about this set hair dryer then please leave me a comment below or on any of my social media posts and I will do my best to answer them with the knowledge that I have gained from reviewing this product. For anything else please refer to the Argos website which you can find on the link I posted above in Product Details.

Thank you for visiting my blog, have a great day.

✩ Sabrina ✩

Argos Testers Review of LEGO City Set 60317 Police Chase at the Bank

Today I am lucky enough to be showcasing a brand new LEGO City set which is out this week!
I have reviewed this product during the start of January and already provided my finished article to Argos, it was supplied to me through Argos Testers. 2022 now marks my sixth year as part of the program and I am very grateful.

I am an Argos Tester, this means that I often get items sent to me for the purpose of an online review. I test products and take photographs of them before submitting my findings and thoughts to Argos. The final campaign of 2021 was LEGO! I was very excited at the thought of testing something that I love, I enjoy making LEGO at home already on a regular basis.

#ArgosTester #ArgosTesters #ArgosTestersCommunity

I have written this article about a product that I have been supplied for free, in order to test and then review it. This is my experience with said product and my honest review about the product which is listed below. I have already submitted my product review to the Argos Website, and it has been accepted when this post has been published.

My Argos Tester Review

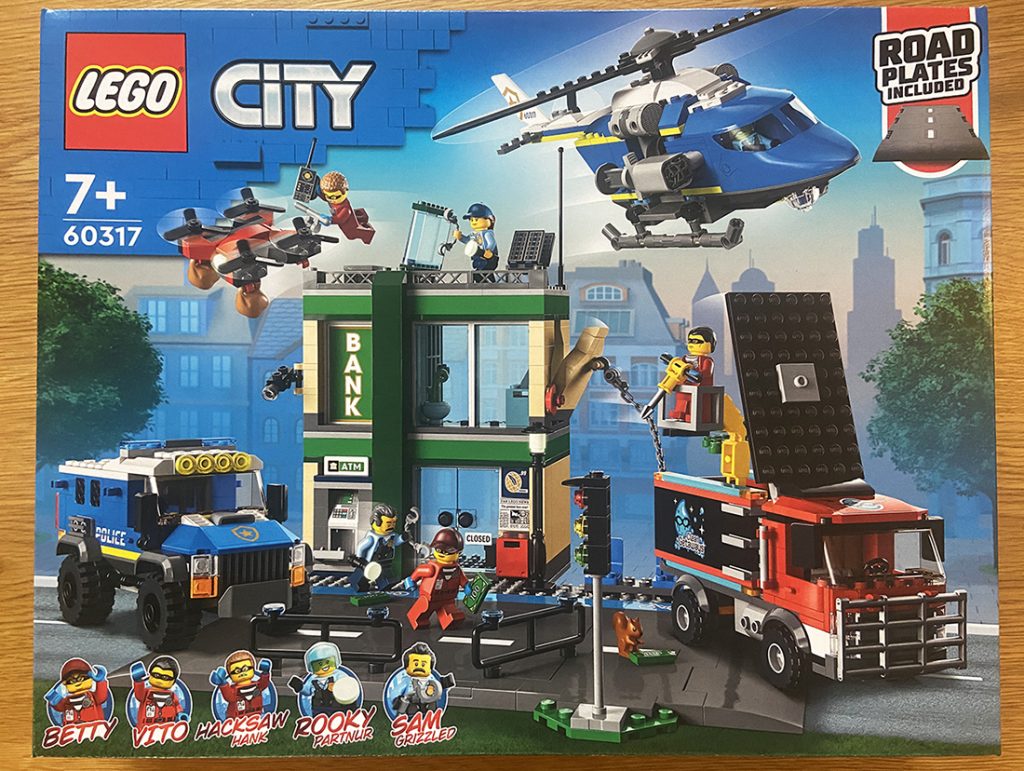
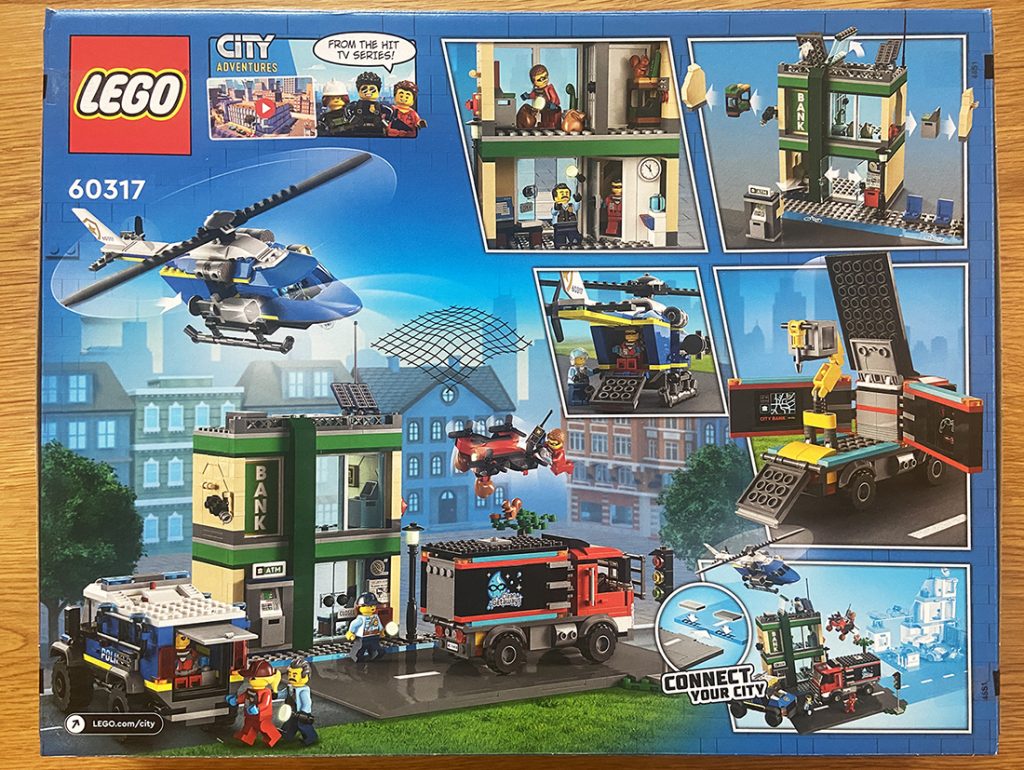
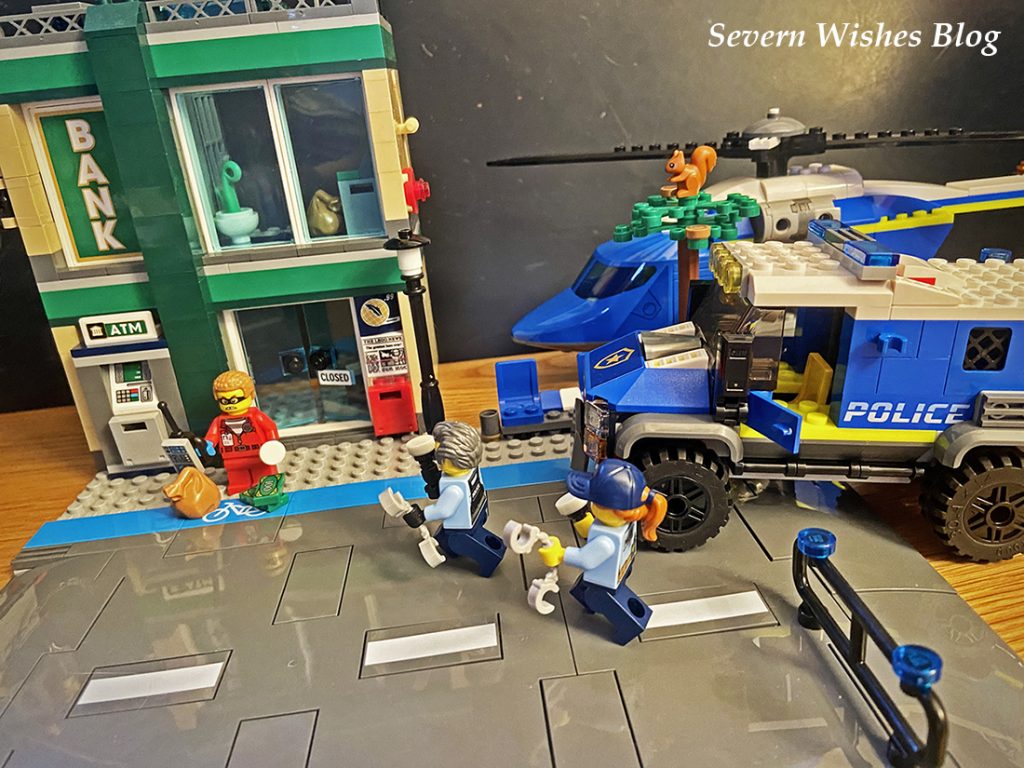
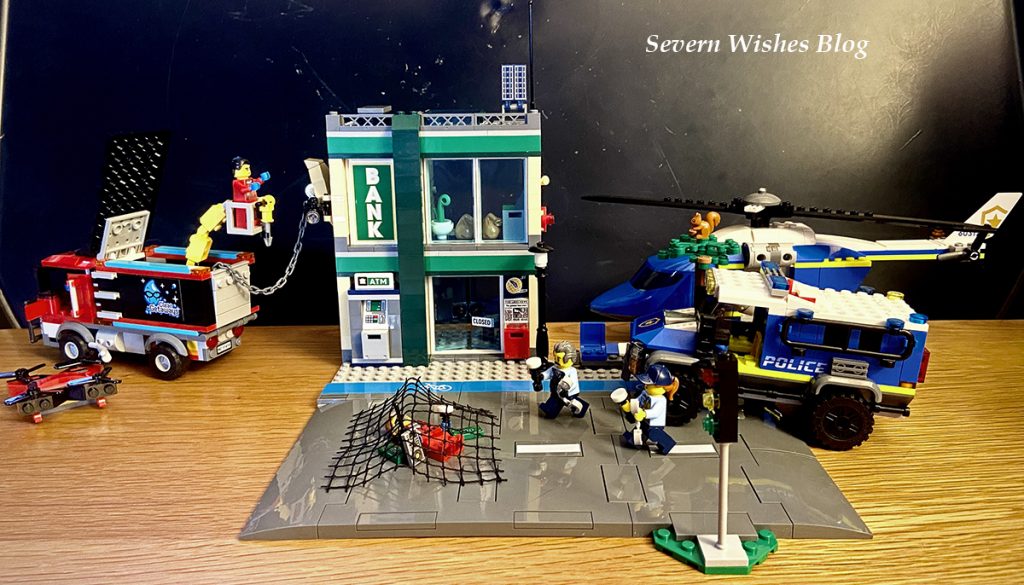
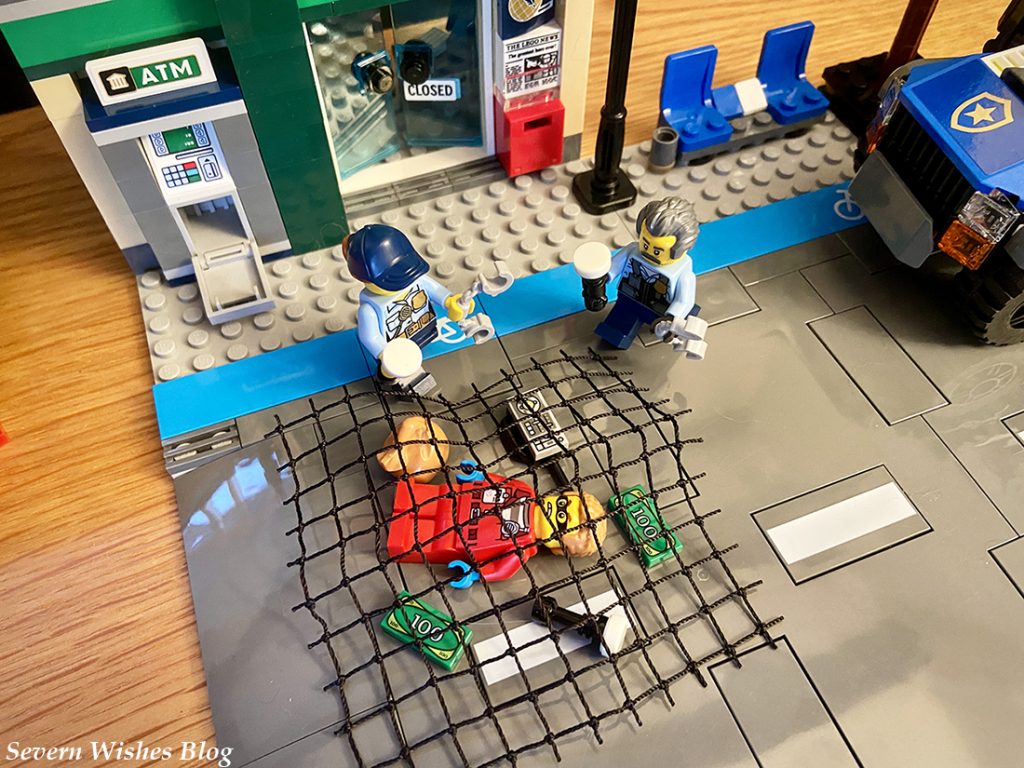
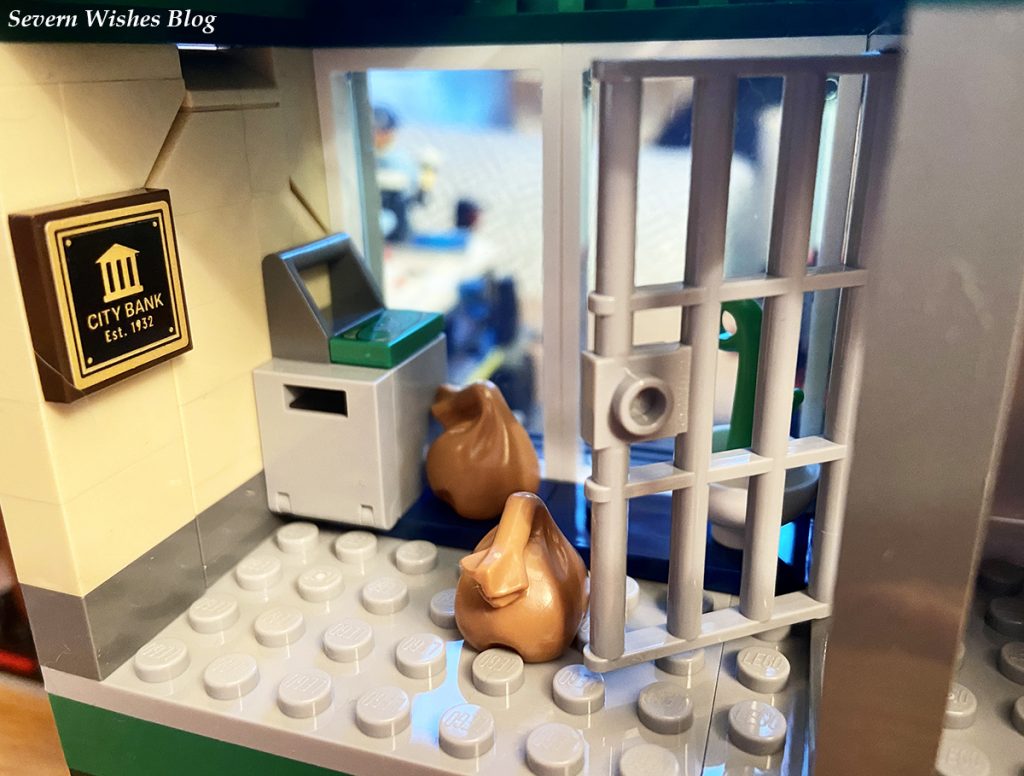
A set filled with fun & imagination, helicopter, police vehicle & the “clean getaways” Robbers / Heist assault vehicle. Not to mention a Bank full of awesome details & nifty moveable pieces. Endless possibilities for imaginative Police vs Robbers scenarios. Combine with other Lego City products, road pieces are included. Loved building this, took around 8 hours, so many amazing details & quirky unique LEGO aspects. Well designed vehicles & building with many opportunities for playing individually or with others. My favourite piece is the Helicopter that even allows you to fire a net out of the side! Wow! The details on the outfits of the characters are excellent with the Police Officers having vests with zip pockets & badges visible. Great accessories for all LEGO Mini Figures. All vehicles have wheels or rotatable blades. Everything is sturdy & the instructions are easy to follow (as always with LEGO). A wonderful set for anyone collecting the LEGO City or anyone who enjoys this type of scenario with Police catching the bad guys.
Great for children aged 7 and over due to its small parts, also great set for adults who enjoy LEGO scenarios too!

Product Name: LEGO City Police Chase at the Bank Set with Trucks (Set Number 60317)
Product Price: £90.00
Product Link: Argos Website LEGO City Police Chase at the Bank
Product Information from Argos: 915 Pieces. 7 Years and Over. Road Pieces Included. 5 Mini Figures Included. Set builds are a Police Truck, Police Helicopter, Two Floor Bank Building, Heist Vehicle and Drone.

Thank you for reading this review, I hope you have enjoyed it. You can purchase this product or read more about it by looking online from Argos, I have left the link in the product description above.

If you have any questions about this LEGO City set then please leave me a comment below and I will do my best to answer them best I can with the knowledge I have gained from reviewing this product. Thank you.

✩ Sabrina ✩

HALLOWEEN 2020 – How to Make Memories for a First Halloween and create Fun for a Halloween at home during this difficult year

Halloween is one of those holidays where people either love it or loathe it. Whether or not you like Fancy Dress and Decorating your Home, it’s an important right of passage for your little ones to experience the fun of a Halloween.

If it’s their first Halloween then I have lots of ideas that you could achieve easily at home and make some nice memories and keepsakes to show the child when they are older.

With the pandemic still affecting us all, there are many children who would love to be trick or treating and having fun and games with their friends. It’s highly likely not to happen this Halloween 2020, however that doesn’t mean you cannot do things at home.

WHAT IS IN THIS BLOG POST… HALLOWEEN 2020

  • Fancy Dress Photo Shoot Fun – My Tips and Tricks
  • Hand and Feet Print Halloween Decorations – Fun Family Keepsakes
  • Halloween Games with Treats to be Found (at home) – My Lockdown Halloween Trick or Treat Ideas
  • Baking with Halloween Shapes – Fun Baking Tips for the Family to do together
  • What Else Can You Do With Halloween Baking Cutters as Stencils!

Fancy Dress Photoshoot at Home

One way in which I always like to remember a holiday event or day is to do a photo shoot. For the last two years I have dressed my son up and surrounded him with a variety of Halloween related items. I got some good photographs doing this at home that I can treasure. If you set it up correctly you won’t need to pay anyone to take photographs for you.

You Will Need

A decent camera or a phone with a decent camera
A camera which has a timer if you want to do a family portrait
Natural light coming through a door or window is best for colours
Fancy Dress items and any props that you would like to include

  • My Photography Tips
  • Natural Light is important to get clear and sharp imagery.
  • Use fairy lights to add depth to your image (supervised around the child/ren of course).
  • Props are important and make sure you arrange them so they can be seen, if you’re going for a theme try and stick to it.
  • If you want things to be inside the frame then choose your layout carefully and keep looking through the camera lens as a guide.
  • A sofa or chair is ideal to sit a baby on or you could even use a ball pit or a rocker with a sheet over it to block out any unwanted branding or colours.
  • Set up your photo shoot before you get a baby ready otherwise they may get fed up rather quickly if you ignore them to move things around.
  • If you can get a large pumpkin or a cushion you can sit babies inside or on top, just make sure to always have their necks supported!

If you can’t pull off a Photoshoot then why not use some Free Filters on some Photo Apps. Some of them are highly detailed. We did one to show you just how cool! And if you have older children they might be more interested in that too!

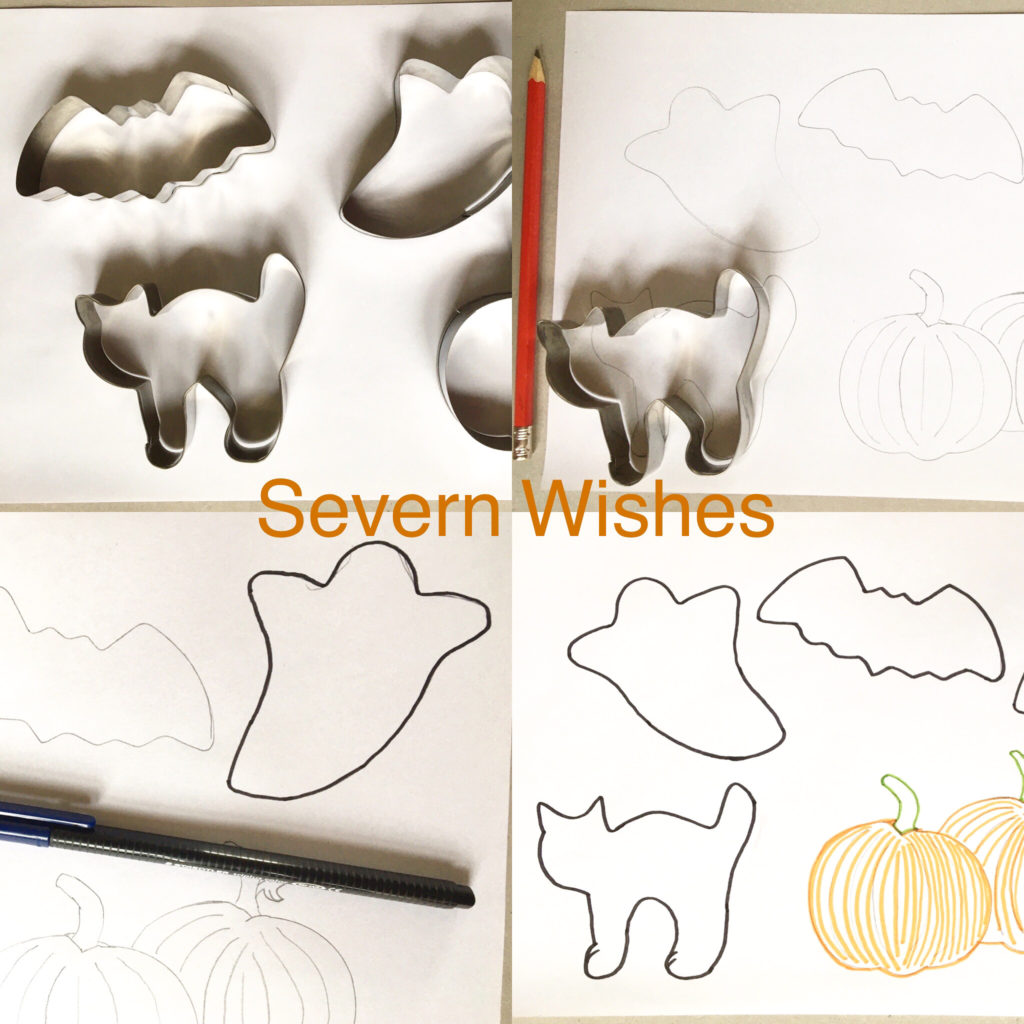
4 WAYS TO USE HALLOWEEN BAKING CUTTERS AS STENCILS

I’m not very good at drawing so using these cutters as outlines was a great idea for me! If you can draw well you won’t need to do this! Ha! Ha!


Halloween Decorations

Halloween Posters

Halloween Colouring In


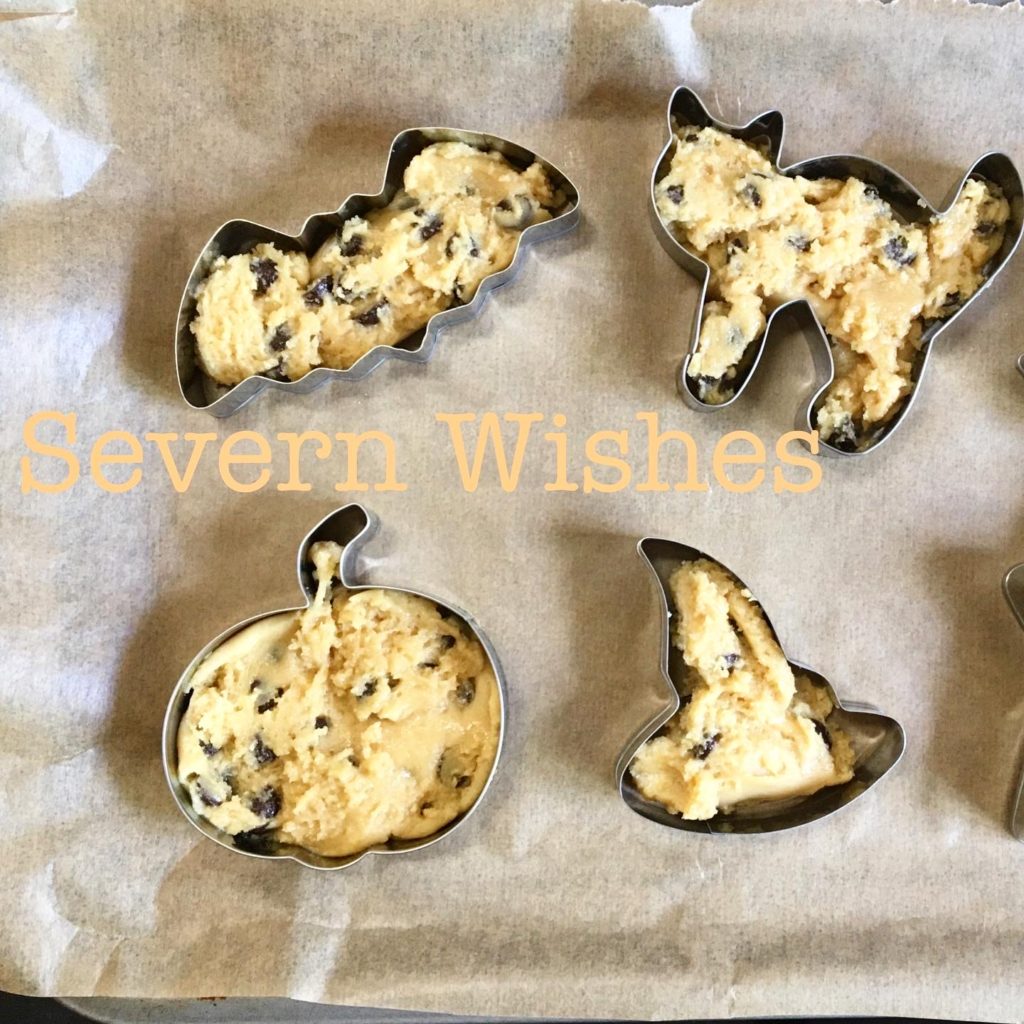
Halloween Baking

I drew around the shapes and outlined them in pen, then let my child colour it in.

Halloween Decorations

Making Halloween Decorations is easier than you think! So long as you have got some card and some paint. There are tons of ways you can make nice posters or decorations. Here is how I have made mine…

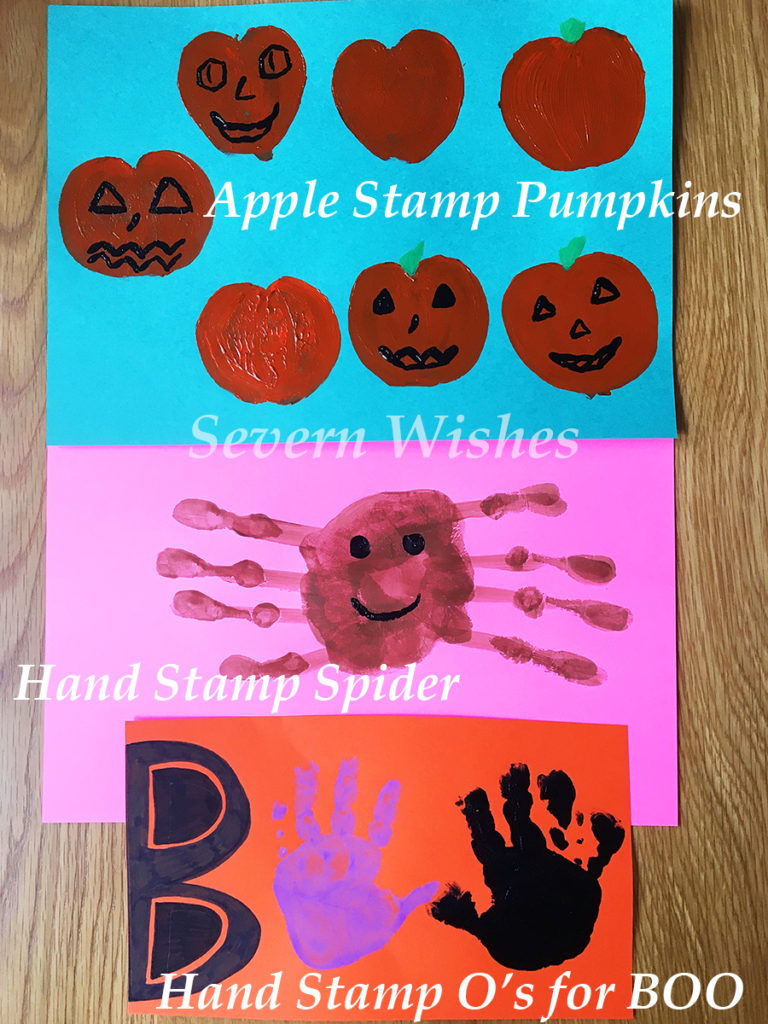
Pumpkins – Apples Halved and Dipped in Paint.
Spider – Hand Prints leaving off the thumb so fingers make 8 legs.
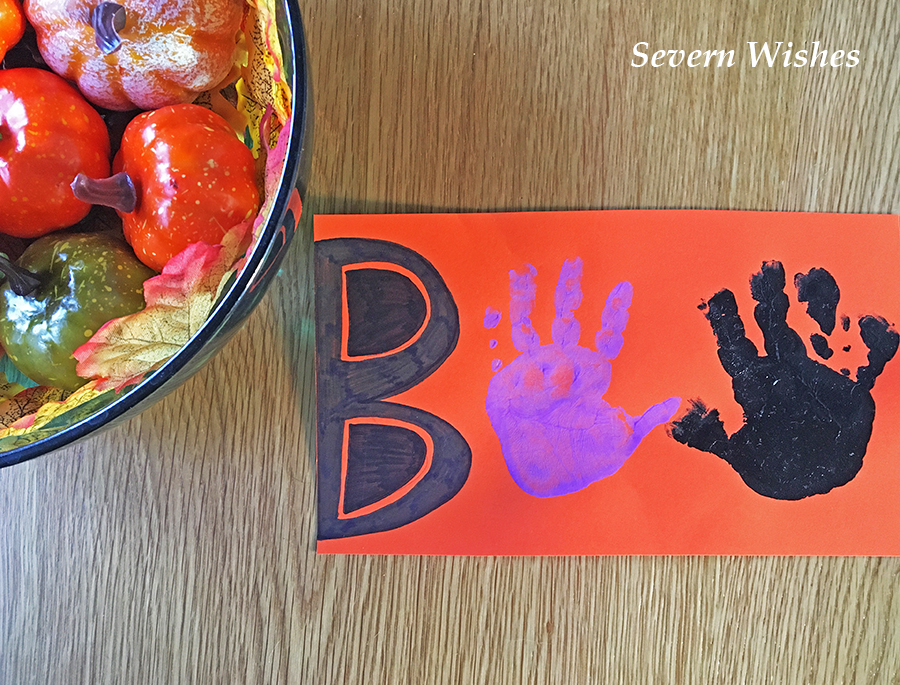
BOO – B and two hands for the O’s.
Ghost – Foot Print (upside down)

I’m planning to cut out the Pumpkins once they are fully dry and hang them up against my window.

You can make a Halloween poster for your window or you can cut the items out and hang them up with string.

Trick or Treat at home won’t be the same, but it can still be fun!
Check out my ideas below!

1. Make Every Room A Different Theme with a Different Sweet to Find. You can tailor them to meet the needs of your family, no choke-able sweets for little ones etc. If you don’t do Sweets you could use Numbered Fruit like Apples which result in a Toy prize if they find them all.

2. Make It A Halloween Treasure Hunt with the Treasure being Sweets! Write little clues on paper for the kids to follow. Create traps and fun obstacles for them to overcome, riddles and rhyming works well too!
“Where you Sleep, Often Deep, Beneath the Covers is what you Seek!” things like that, E.G Under their bed covers is a Sweet or another Clue.

3. Use A Dice And Clues to Make a Halloween Game of your Own! Using how many rooms you have and how many children, you can send each child off to a room where they have to either complete a task or seek and find the next clue, which once put together with their siblings answers, will reveal their bounty of Treats! E.G Two Siblings, they each find a clue on paper, one reads KITC and the other HEN and when put together they go to the KITCHEN for the next clue etc.

HALLOWEEN BAKING

I have done some step by step baking videos on my Halloween cookie baking and these are available to watch on my Facebook page, I will drop you the link here Severn Wishes on Facebook.

Find my Cookie Recipe Here too!

Before Baking
After Baking

You can use my Cookie Recipe or a Shortbread Recipe to make these awesome Halloween shaped treats!

I bought the set of cookie cutters off Amazon, if you would like the link to those then here that is… Amazon

I always do a Seasonal Bowl on my Dining Table. It is all Autumnal now!


Thank you so much for checking out this blog post today!

Please tag me over on Facebook on my page if you try and of my Halloween things! Baking, Craft or Decorations!

If you like my trick or treat at home ideas, let me know if you use them over the weekend too!

Have a great week at home everyone! Stay safe!

✩ Sabrina ✩

July 2019 Treatbox Reveal

Hello readers! It’s time for the July 2019 Treatbox Reveal
with me, Sabrina of Severn Wishes Blog.

Happy Treat Box Day! It’s July! It’s a little late this Reveal I will admit, but I have had some family commitments that have had to come before my blogging

In short… My Father got married and my little boy turned one! It’s been a busy start to July but a good one.

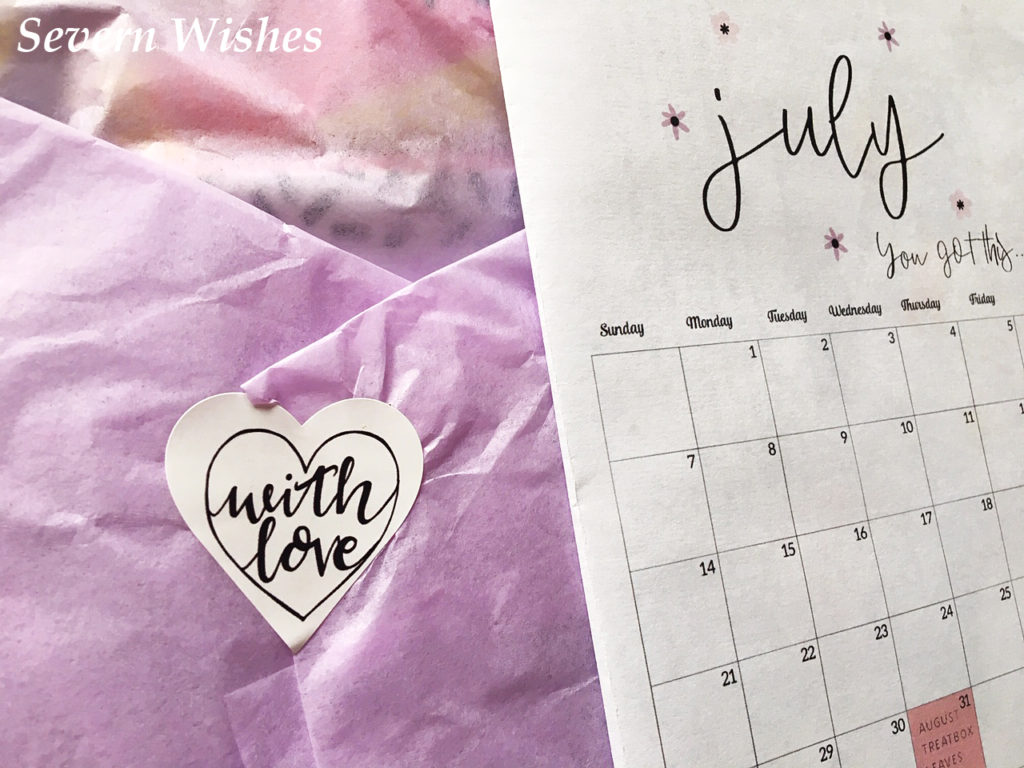
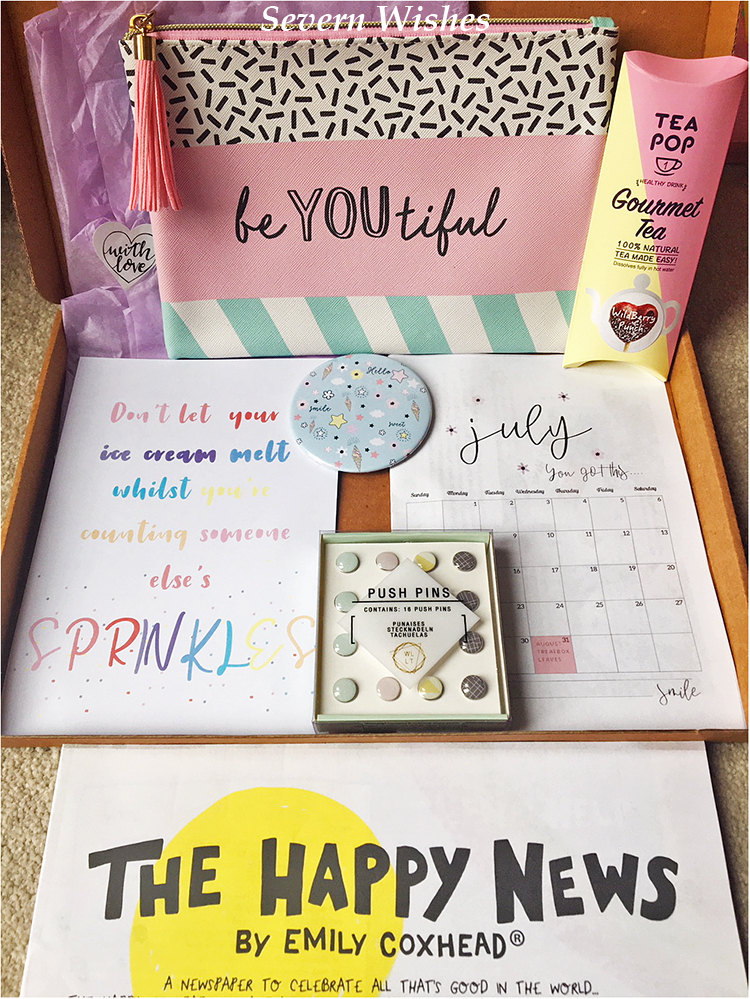
But now I am ready to Reveal and Review the July Treatbox. It has lilac tissue paper and the little sticker reads “With Love”.

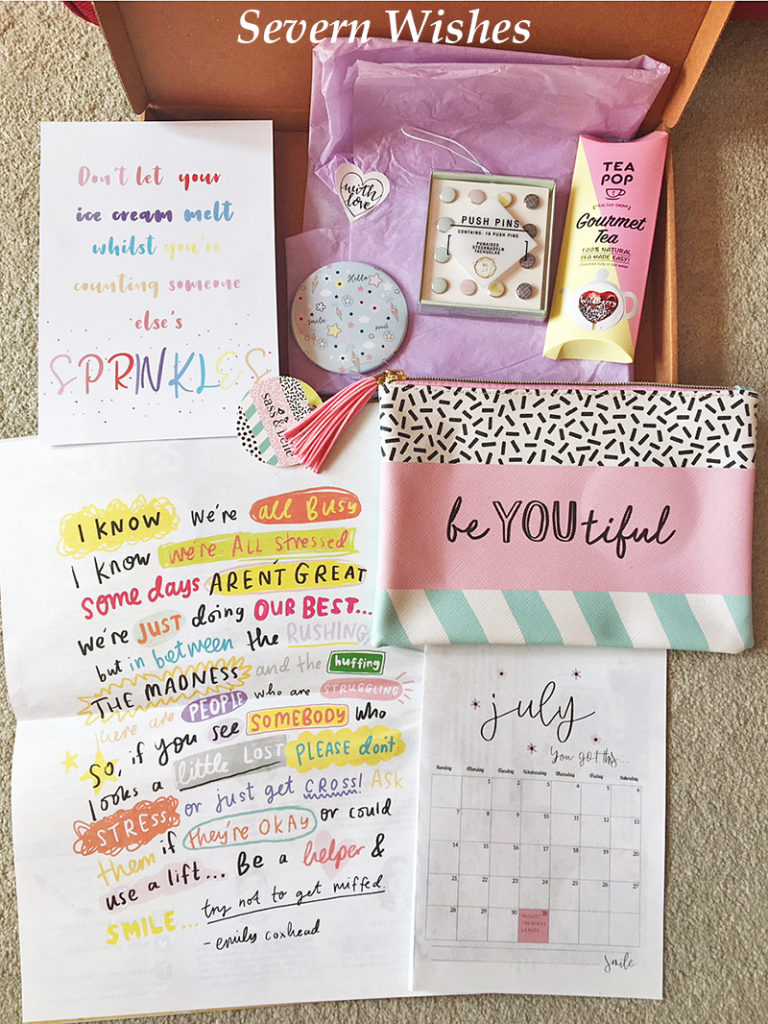
Here are the contents, July sees 5 items, an A5 Print and of course the Calendar Print.

July Calendar Print …you got this…
A5 Quoted Print
“Don’t Let Your Ice Cream Melt Whilst You’re Counting Someone Else’s Sprinkles”
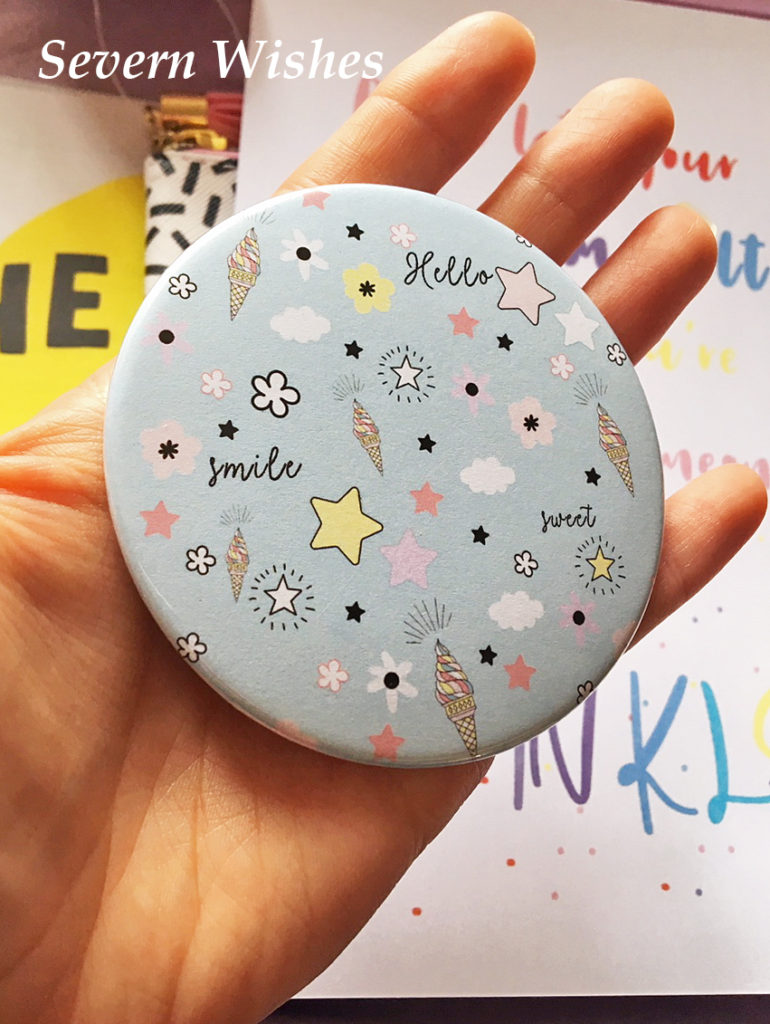
Compact Mirror light blue with ice cream and stars design
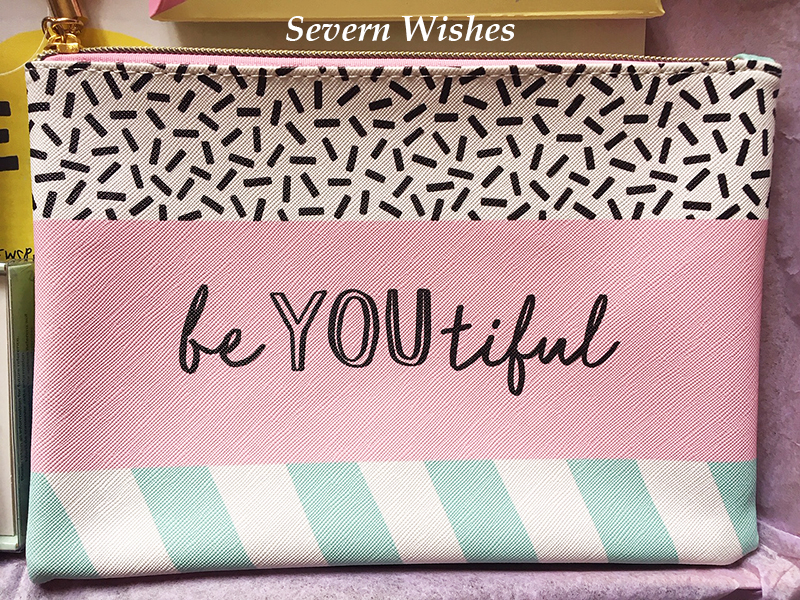
Small Bag ideal for Make Up “be YOU tiful”
pastel colours – ice cream design
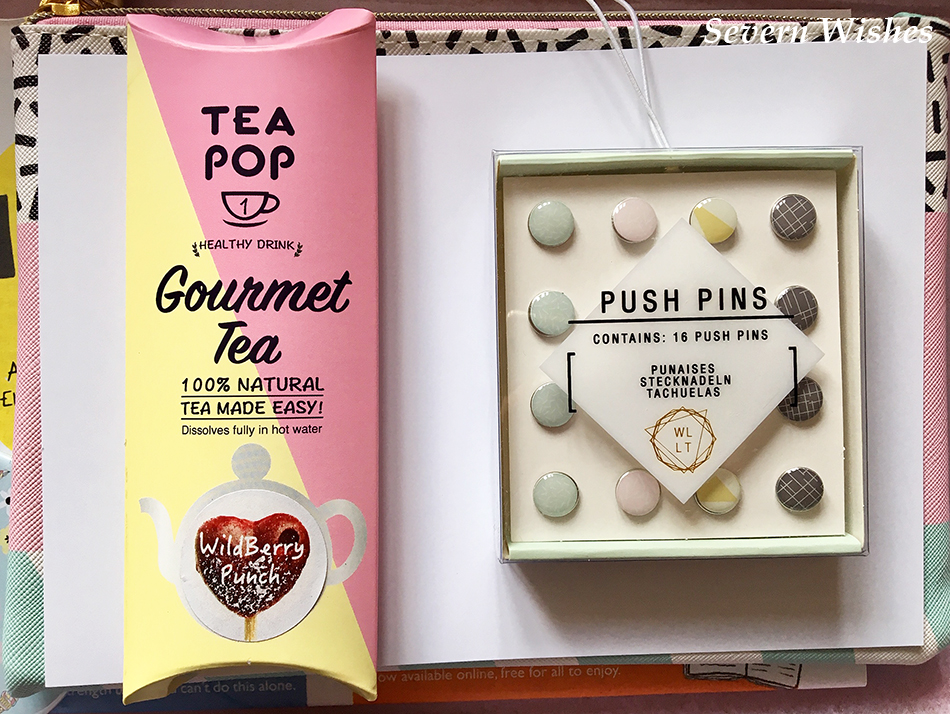
Push Pins
16 Coloured Pins
Tea Pop Gourmet Tea Wild Berry Punch
The Happy News Newspaper by Emily Coxhead June Edition

Compact Mirror
Small Bag
Gourmet Tea & Push Pins
The Happy Newspaper

What Are My Honest Thoughts On The July Box?

Overall I had mixed feelings about this box, so I will start with the negatives so that I can end on a more positive note.

So… Another Compact Mirror, don’t get me wrong it’s a lovely item, and it will make a lovely gift for a friend. However in my time of buying and revealing Treatbox I have now received a total of four mirrors. I still have them all! I have to say the quality of it is good, so I don’t mind about that, however it would be so nice to receive one box of items that are entirely new, something never before seen in a Treatbox.

So what else, there is the Happy News Newspaper, which is a great idea. Although I haven’t had chance to read much of that as yet. I like the idea of all positive news especially in a day and age where there is so much sadness, negativity and bloodshed. It’s nice to hear of good things happening, no matter how small they are.

The tea seems lovely, I’ve not drank it as yet, but a nice edition being 100% natural and because of the unusual flavour as well…

The best items by far for quality are the bag and the push pins. The bag has multiple uses, but again we have received a good number of small bags during the last couple of years. It is always useful to have one around if you need to store small items such as makeup or stationery for example. What I do really like is the design of the bag, it reminds me of an ice cream with its pastel colours and sprinkles! The push pins are great but only if you have a board that you can use them in! Ha! I currently don’t 🙁

Finally I would like to end on a positive and say that Zoe has once again done well on a theme, I guess this one is pastels and positivity? Don’t compare yourself to others and take a time out for yourself. I definitely need to try and do that more, I mean, look at how late this Review is getting on my website! And I haven’t even had time to read the Newspaper included in this box! Yet!

Do you get Treatbox? I would love to know how long you have been subscribed for? Do you feel the same way as me? Would you like to see something included in a box? Please leave me a comment.

Are you thinking of ordering a TreatBox for yourself or for a gift for someone?
Then you can find Treatbox subscriptions and build your own box at their website

Check out my previous posts in this unique category of my website called ‘Treatbox’ especially for these box reviews and reveals – Severn Wishes Treatbox.

Thank you for visiting Severn Wishes, I hope you enjoyed the Review of this Treatbox and that I see you here again very soon. 

✩ Sabrina ✩

Review of the Harmony Ball Necklace by Le Petit Bola

Le Petit Bola is a company based in France who create beautiful Harmony Jewellery for Pregnant women. Here is a quote from them…

“Originally from Indonesia the concept of a Harmony Necklace is known about worldwide. It is a pregnancy jewel that is a long necklace made of chain, string or fabric. There is a pendant situated at the end usually in the shape of a ball, often made of silver. This necklace is worn by expecting mothers on their belly, at the closest point to baby. Inside the ball of the necklace is another smaller ball which makes a light and sweet sound when the ball is moved”.

Post from France…
My Winning Necklace and the Lovely Post I received…

I won a competition and I’m so happy with my prize. The harmony ball necklace is not only beautiful aesthetically but the idea of its balance between mother and baby is also a lovely one. With fast delivery and friendly staff I’m very happy with my experience. There are so many choices on the website that I was spoilt in my decision on which one I wanted. This is the perfect gift for an expecting mother that can then be a lovely reminder of that time she carried her baby.

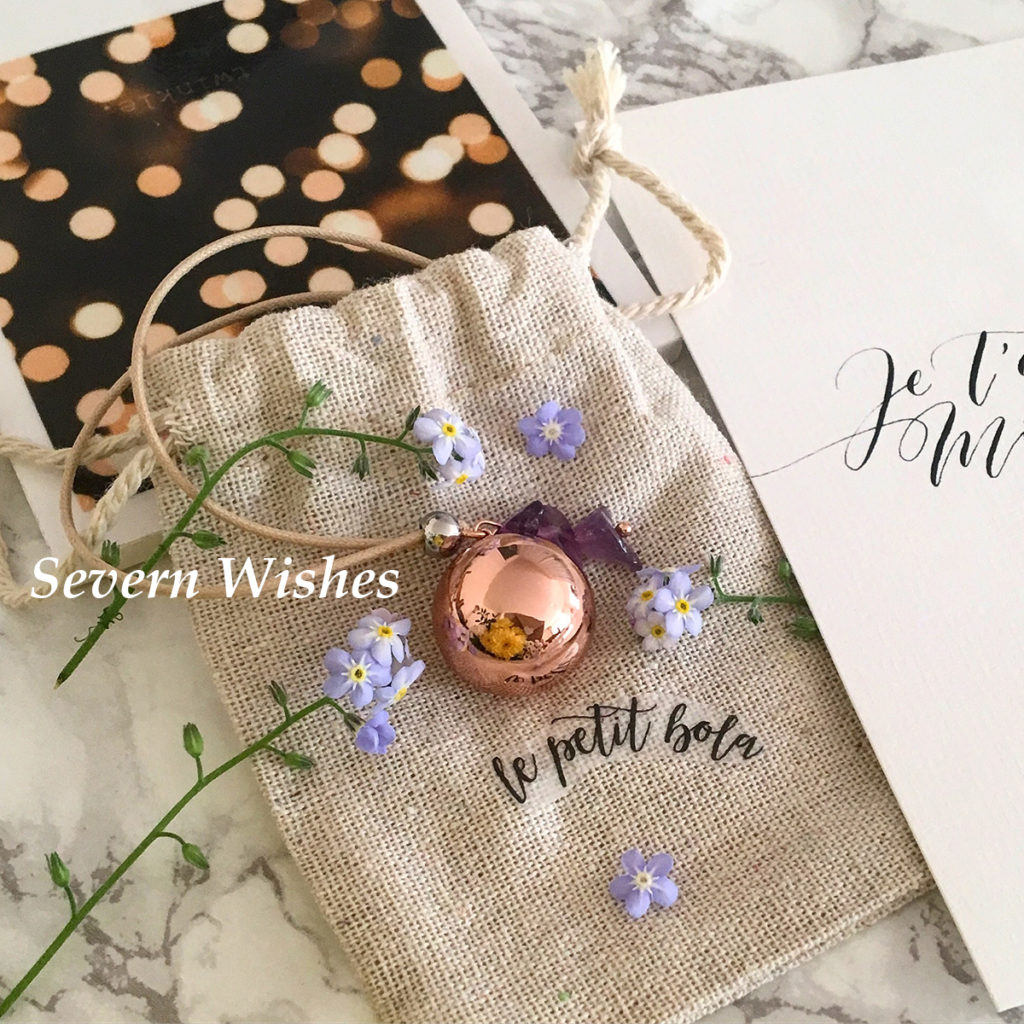
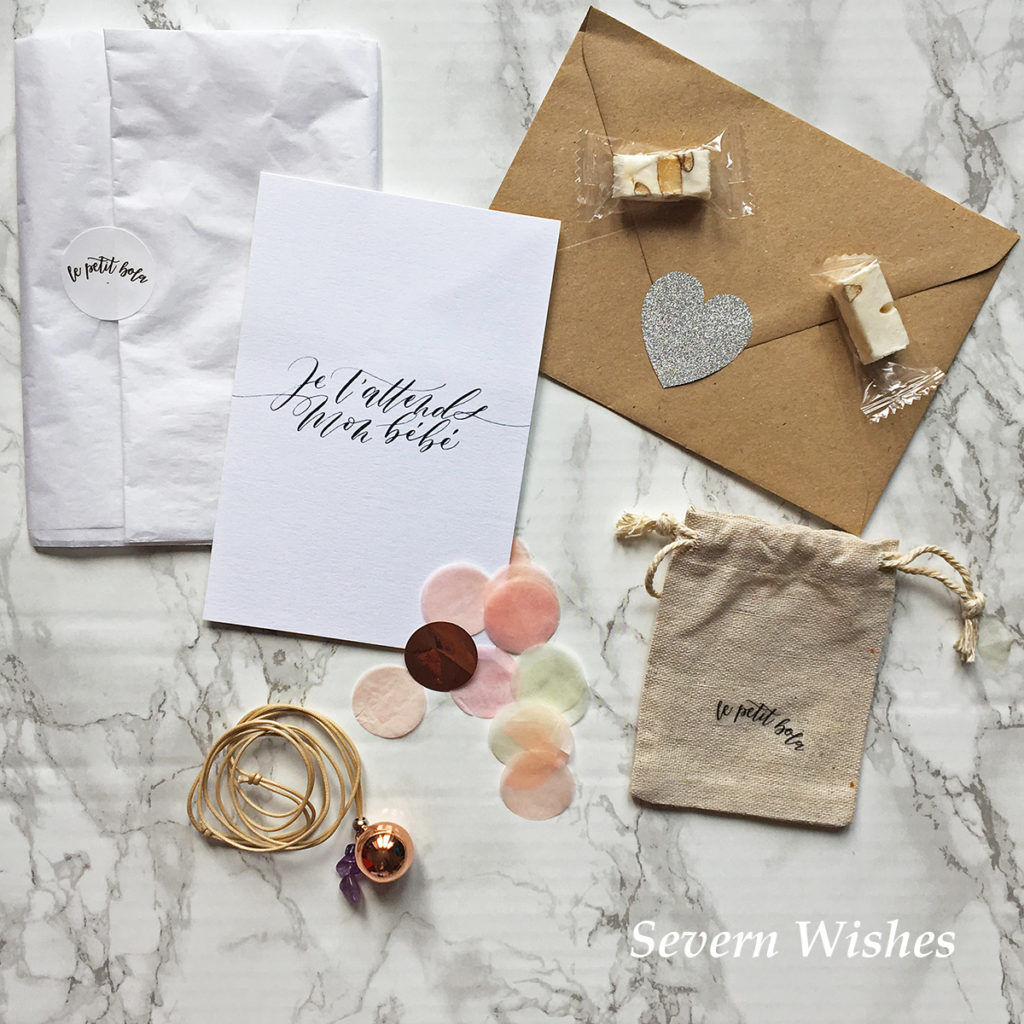
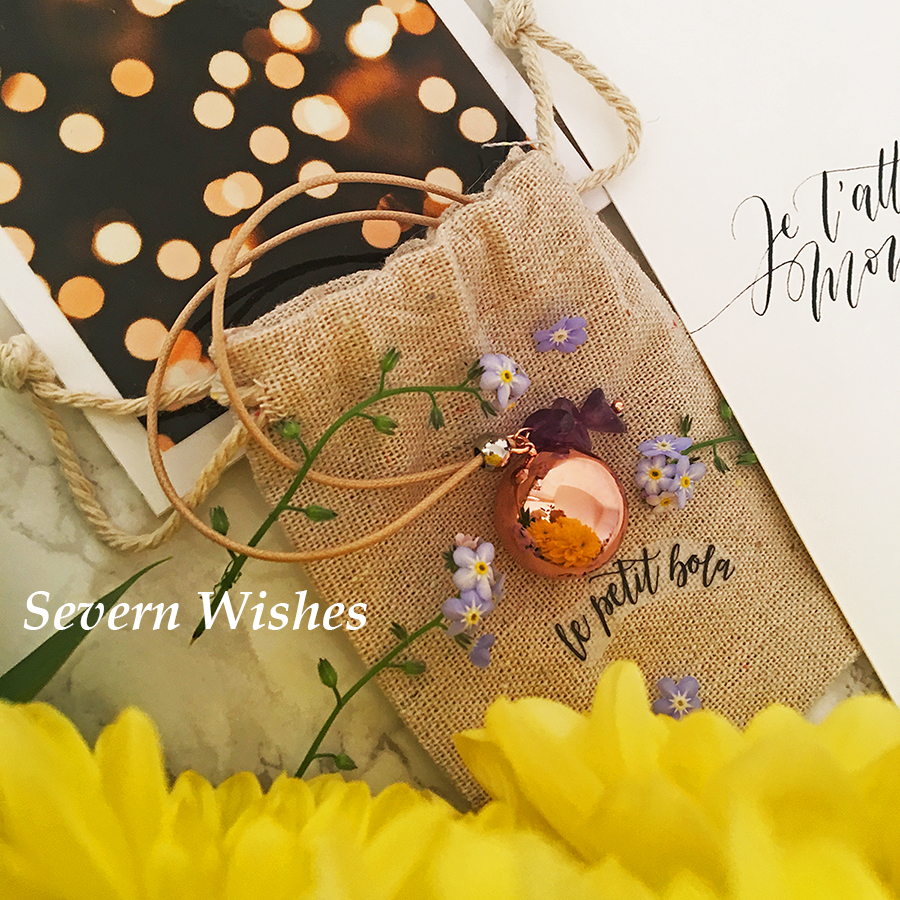
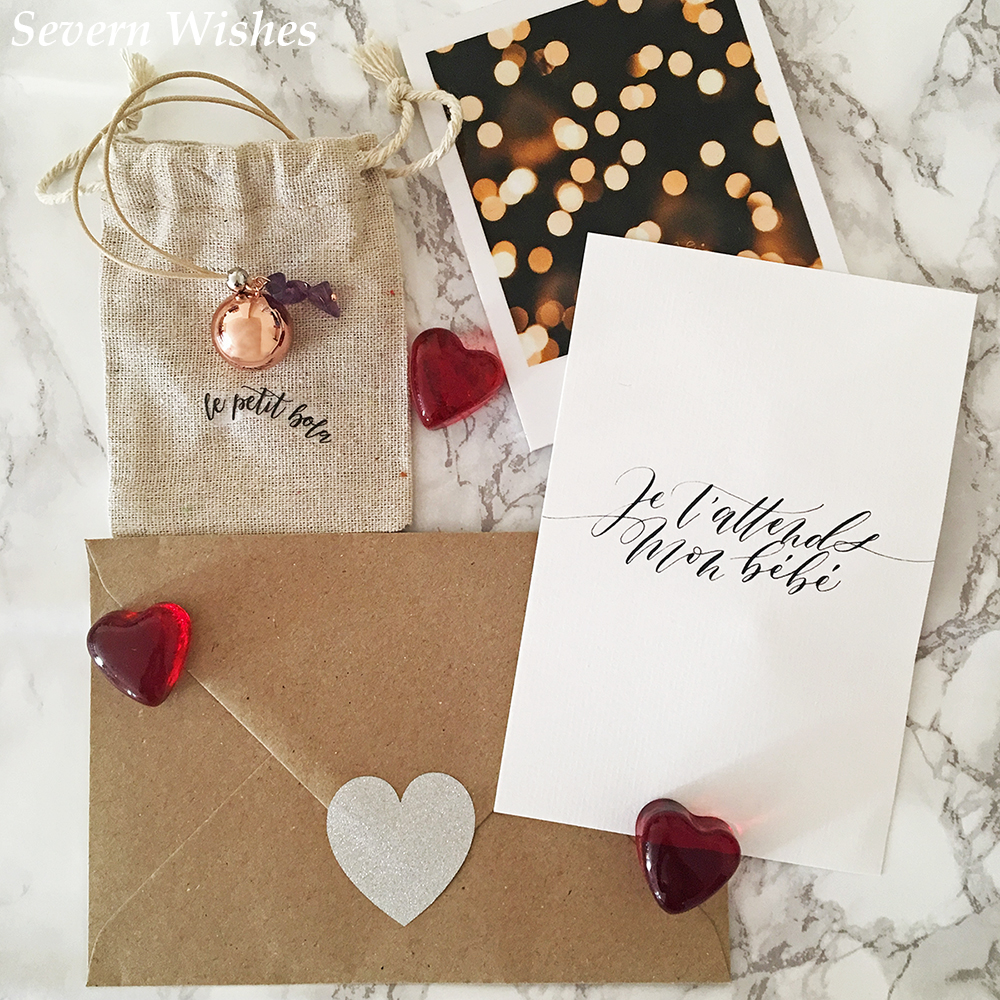
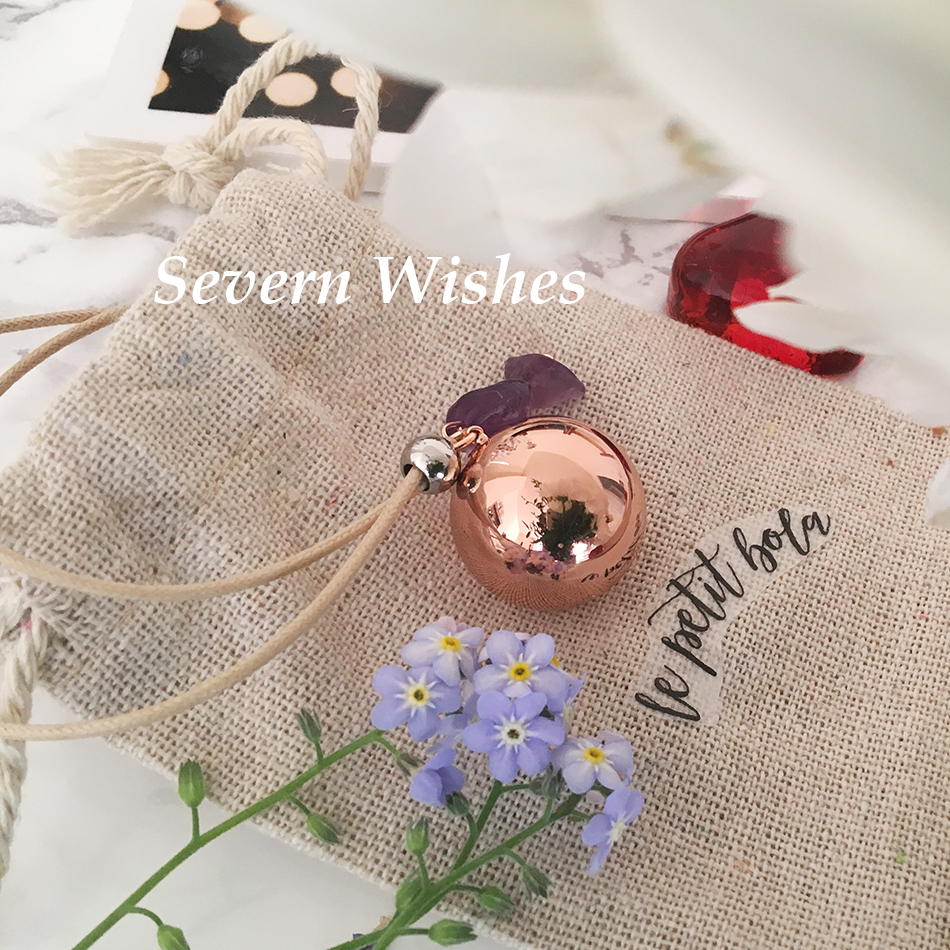
In the end I chose the Amethyst Necklace because this precious stone is linked to my own birthday. My necklace arrived in gorgeous packaging, a heart envelope and then a card that translates from the French “Je À’ttends mon bébé” to the English of “I’m waiting for my baby”.
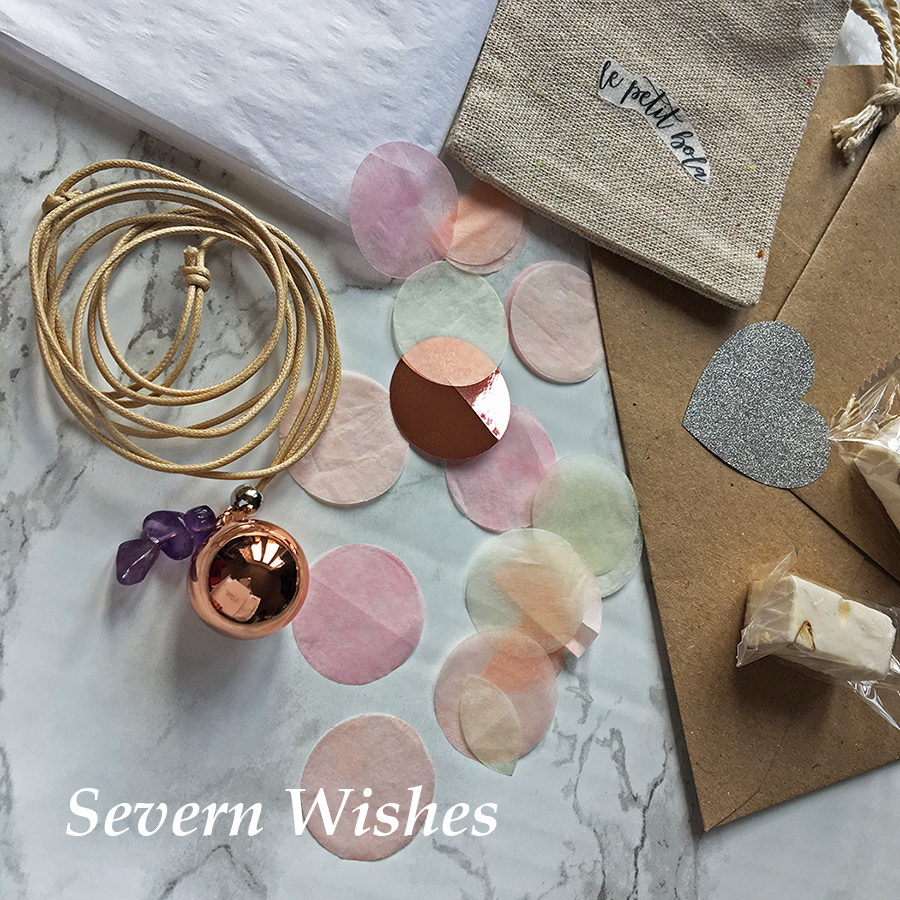
There were nutty fudge treats and the Harmony Necklace even has it’s own fabric bag. As well as pretty confetti thrown in too!

Here is more information about Le Petit Bola.

Based in the South of France this little studio creates harmony necklaces for pregnant women. The necklace creates a bond between mother and child by playing music from inside the ball itself. The idea is that baby hears it from inside the womb because the necklace is long and situated on the mothers bump. The unique bond between a mother and her baby is so precious.

My Harmony Necklace

Thank you for reading this review today, you can find out more by visiting Le Petit Bola on their website or on Social Media pages.

✩ Sabrina ✩

Links

Le Petit Bola Website
Le Petit Bola
Facebook
Le Petit Bola
Instagram

Reviewing The Spectrum Collections Zodiac Brushes

Spectrum Collections Zodiac Brushes Set for Water Sign
and
The Malachite Acrylic Pot

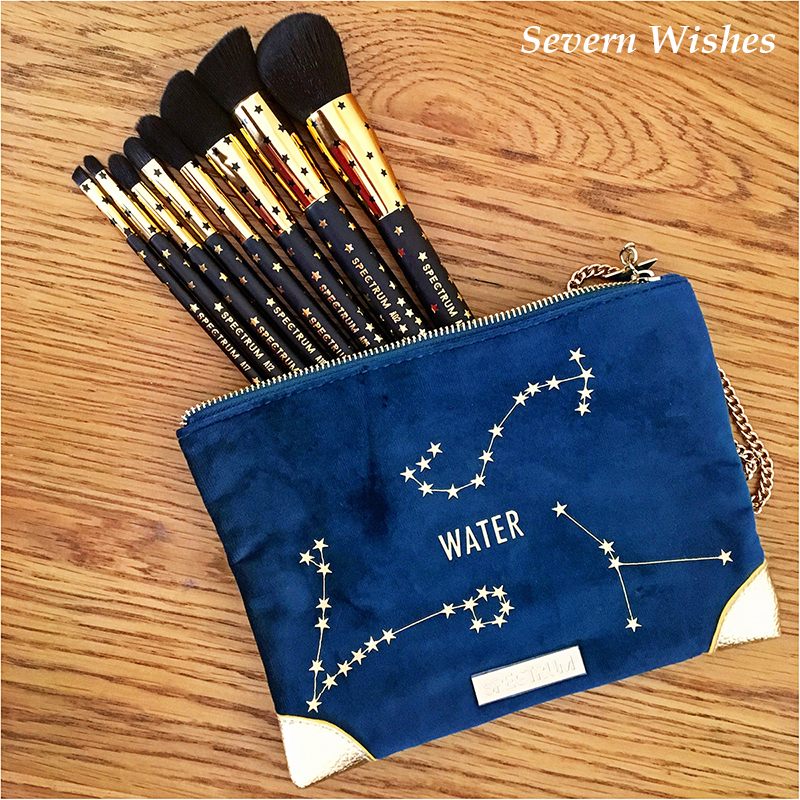
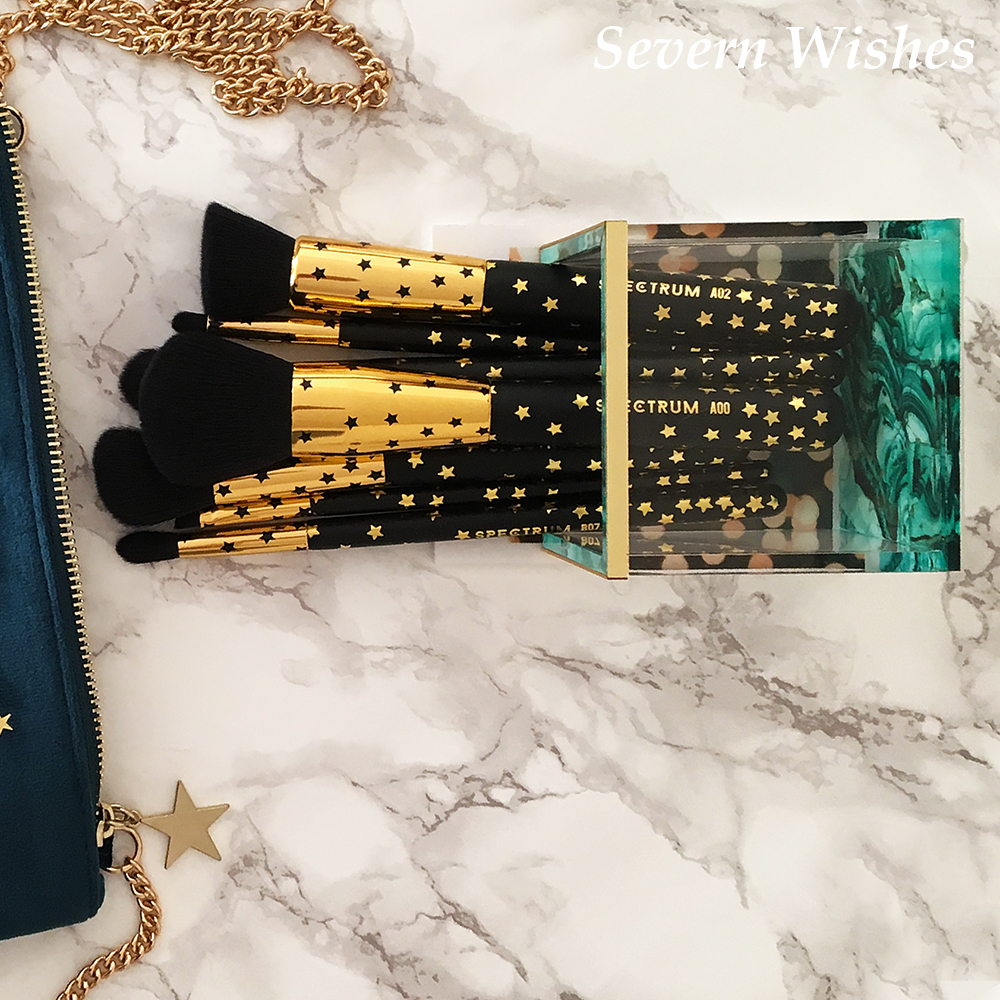
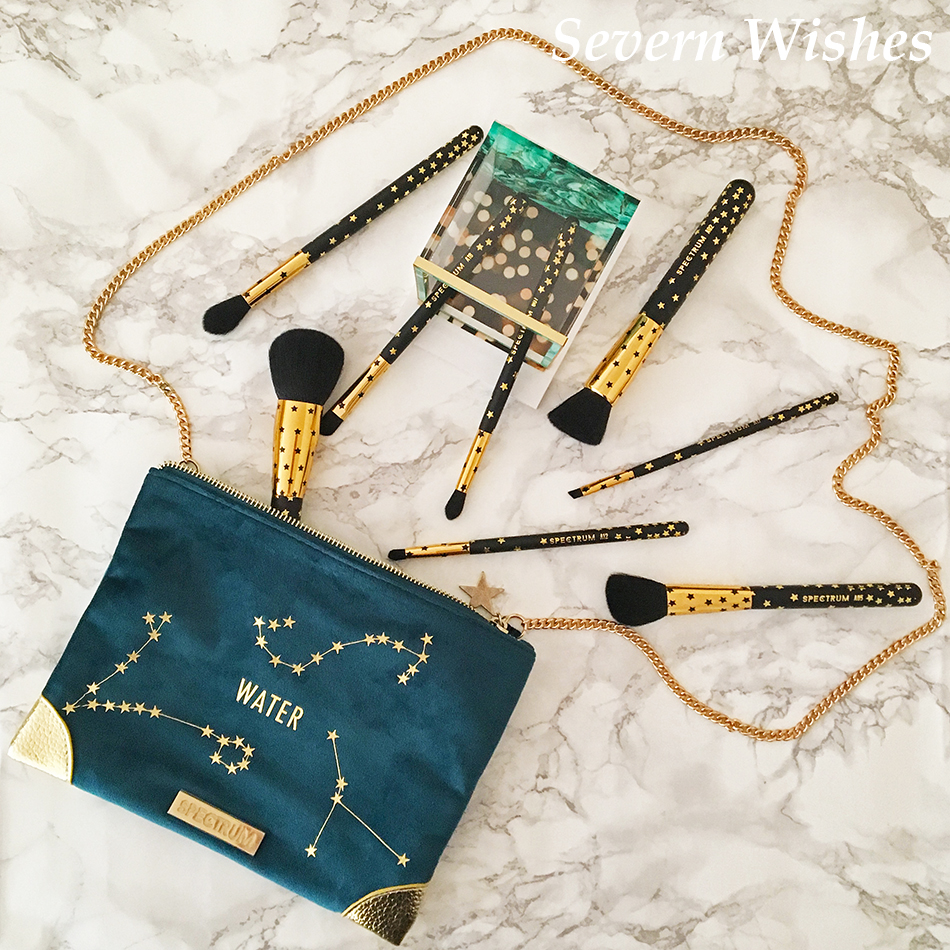
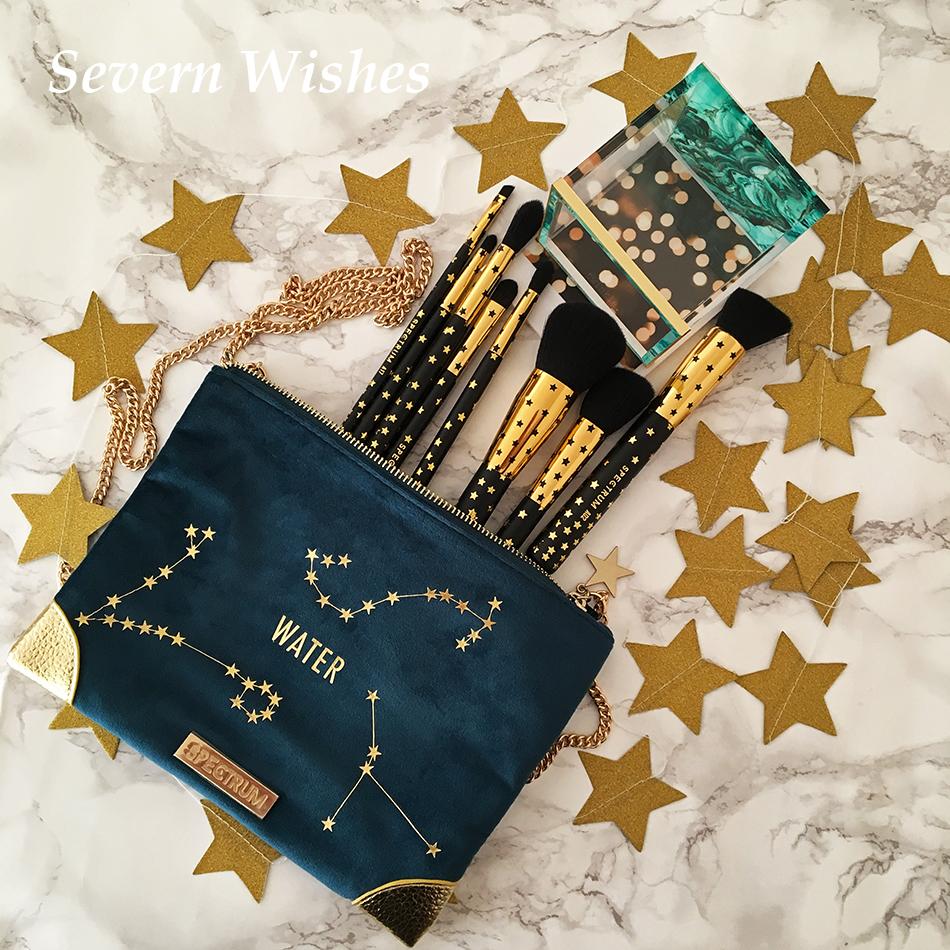
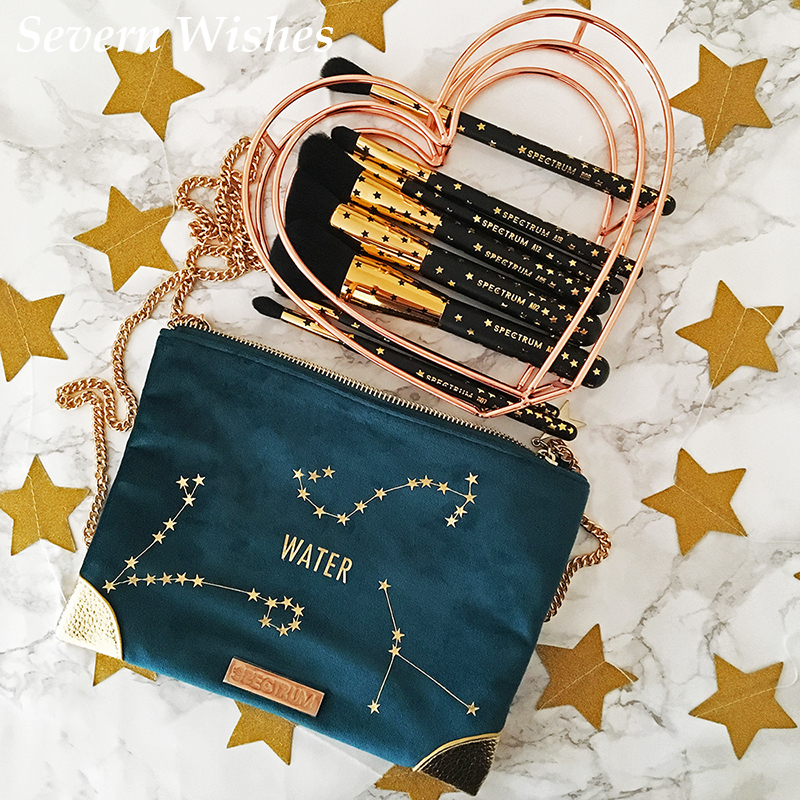
The Spectrum Brushes Zodiac Set retails for £49.99 on the Spectrum Collections Website. It features 8 beautiful black brushes with gold ferrules and star details all over them. Their black bristles are super soft and each brush is designed with a different use.

The brush numbers and types are as follows:
A00 Luxe Powder
A02 Angled Foundation
A05 Angled Blush or Contour
B08 Magic Wand for Highlighting or Setting
B07 Luxe Crease Blender
A18 Oval Concealer
A12 Fluffy Pencil
A17 Angled Brow


The bag that accompanies the set features a rich sea green blue in Velvet and is decorated in gold with the word Water on the front. The bag has the correct astronomy that represent the three water star signs as they are seen in the night sky. It has a fixed golden strap made of chain and faux leather corners. It is 21cm wide by 16.5cm high and has a black polyester lining inside. A small golden star on the zip is a lovely touch too.

Crystal Chic Malachite Acrylic Pot

The Malachite Pot is so gorgeous, it has a mixture of marbled greens on its base and edged with gold. Its crystal sides give off a positive energy which aids creativity and development.

The pot can hold up to 20 makeup brushes and is made of scratch resistant material for continual use. The acrylic is 5mm thick and the pot has rubber feet so it stays in place. The pot itself is a square measuring 8cm by 8cm.

This crystal chic look retails for £14.99 on the Spectrum Website. There are other items available in the Malachite range including Brushes too.

You don’t have to use this pot to store brushes in. And in fact I have decided to use mine as a decorative piece and I store my precious stones and crystals inside it. The look really compliments it, check out my images below and see what you think.

Appearance 5✩
Quality 5✩
Design 5✩
Versatility 5✩

How I’m Using My Acrylic Malachite Pot…
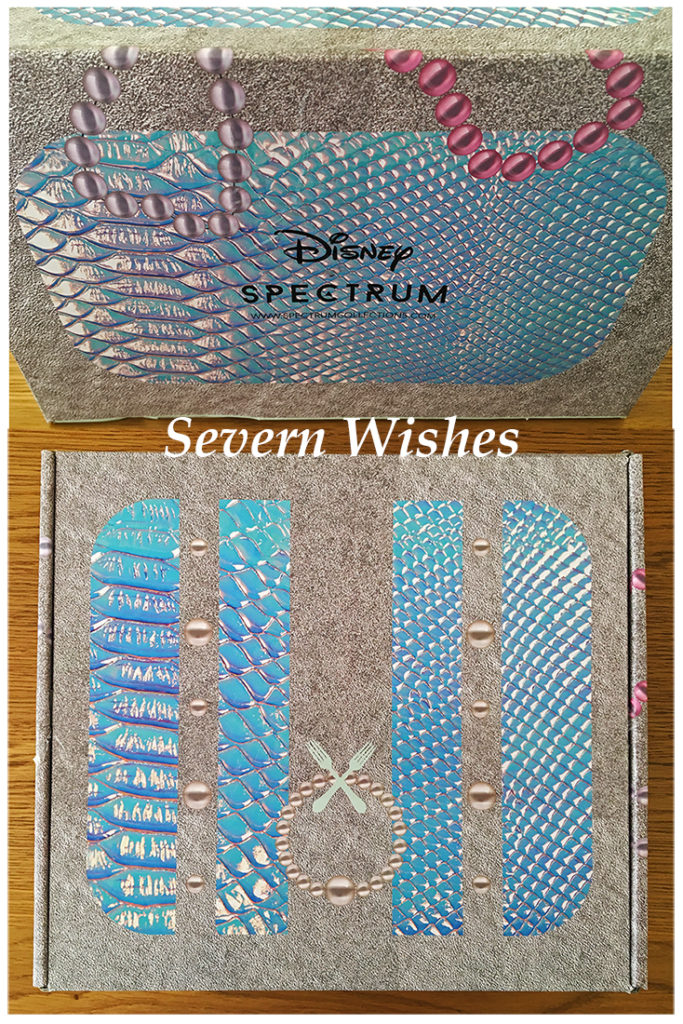
My Products Arrived In A Beautiful Disney Inspired Spectrum Box.

Final Honest Review and Scores

Spectrum Collections Brushes are Vegan and Cruelty Free. I have chosen Spectrum products now for over four years, because of the quality and unique designs. This newest set is no exception.

With all of my Honest Reviews I score the products as appropriately. I am giving this brush set 5 stars!
My reasons for my score is for the set as an accumulation, the bag is not only beautiful but can be used as an evening bag as well as a brush bag, the fact it has more than one use gives it extra appeal. Over all the brushes are designed well for use and are unique. The quality of each item is excellent, and Spectrum always present them beautifully too! My items came inside a Disney box this time! I was like “Wow” and have even re-purposed this box in my wardrobe.

Appearance of Products 5✩
Quality of Products 5✩
Delivery Aspects 5✩

Unique Designs 5✩

The bag is a good size, you could even use it as an evening going out bag.
These brushes are just so pretty to look at…

If you were looking to make a purchase on the Spectrum Collections website then I have a code that gives you a discount. My personal referral link will supply you with a code that gives you 15% off. Just follow this link here.

You also get a bottle of Vegan Brush Shampoo for free on all Orders over £50! And free delivery on orders over £30!

Spectrum Collections Website
Spectrum Collections
Zodiac Sets
Spectrum Collections
Zodiac Set Water
Spectrum Collections
Crystal Chic Set
Spectrum Crystal Chic Malachite
Acrylic Pot

Thank you for reading this review today, don’t forget to take advantage of my 15% off Spectrum Collections if you fancy a product for yourself or for a loved one.

And for more reviews on Spectrum items please see my category that is dedicated to all things Spectrum Collections including brushes and other products, click right here.

See you on Severn Wishes again soon I hope!

✩ Sabrina ✩

Reviewing Abelini Jewellery for the #MyAbelini Campaign

Today I have the pleasure to bring you a collaboration with *Abelini Jewellery. Their new campaign #MyAbelini has been created to help customers to find their ideal piece of jewellery. Whether you like Gold, Platinum, White Gold or Rose Gold Jewellery, Abelini have something for everyone, to suit all styles and tastes.

A Sparkling Collaboration

I have been approached by the incredible London based brand Abelini, to be a part of their new campaign #MyAbelini and I’m so excited about it. This collaboration saw me browse their unique collection and choose a piece of jewellery that I felt fitted my personality. The #MyAbelini campaign wants people to choose their unique piece to suit their individual style. It’s a celebration of diamond jewellery and a persons unique tastes. Abelini want people to “Wear It! Click It! Share It!” And show off their #MyAbelini Jewellery choices.

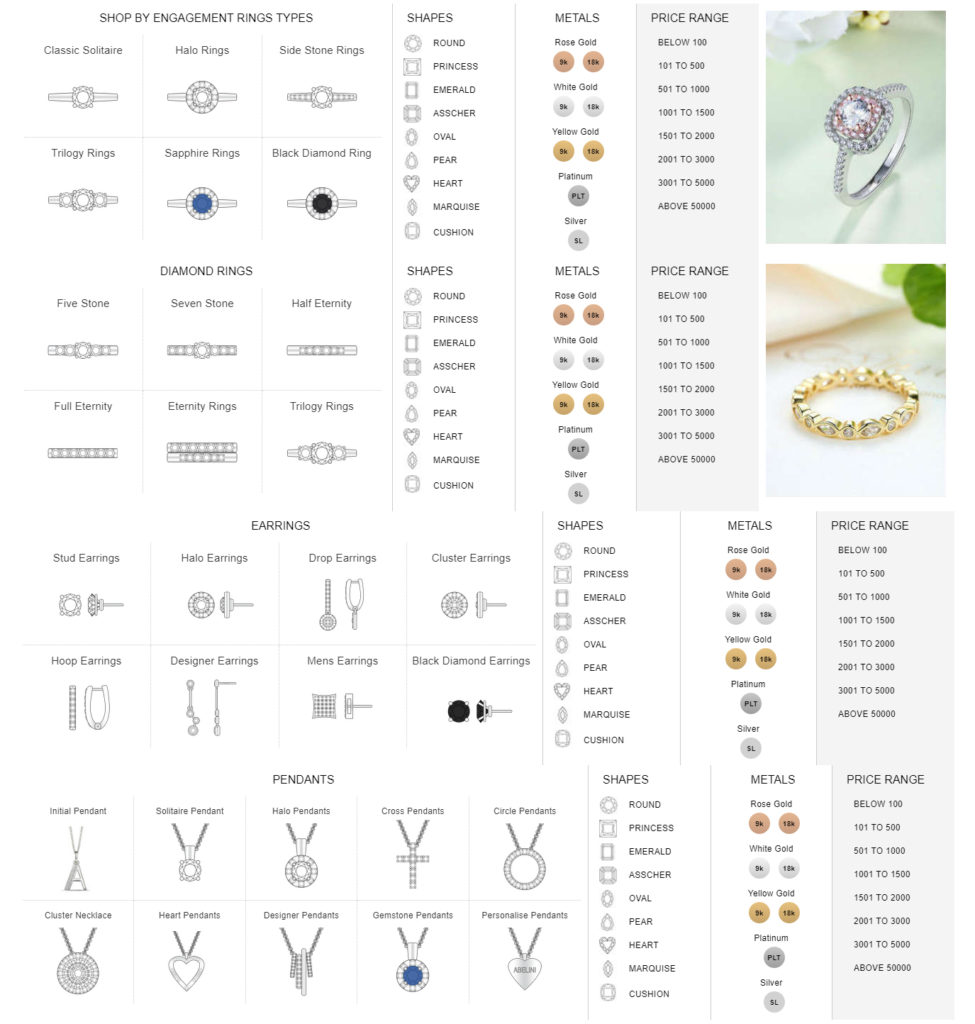
Abelini are based in the Capital City of London situated in Hatton Garden area, where they specialise in exquisite designs of jewellery. Including Rings, Pendants and Earrings, as well as Bracelets. If you would like to discuss about a bespoke piece they can accommodate a design that is unique to you and create it for you. Abelini pride themselves on turning Jewellery Dreams into Jewellery Realities.

You can also make appointments to go in store and pick your own Diamond, for example for an engagement ring. The types and styles available at Abelini can be seen in the images below.

I personally like Silver, White Gold or Rose Gold Jewellery, so I knew that was how I would narrow down my decision. My second parameter was that I would prefer a Necklace or Pendant, mostly because I have multiple piercings on my ears and cannot currently wear any dangling ones because my young son would pull at them.

I found the Pendant I liked part way down the page and I instantly loved the shape of it. As my eyes traced the design I knew it would be perfect for me and for doing this review. The necklace has a circular design that adds elegance to whatever I decide to wear it with.

When choosing Jewellery for myself I often go for a Silver shade because of my skin tone. I also like Rose Gold but find that the metal is harder to match clothing with. So much can compliment silvers.

I find that choosing quality jewellery means you’re making an investment, rather than needing to replace cheap items whose metal goes bad due to wear. Jewellery isn’t meant to stay hidden away in a box forever, it is meant to be worn and enjoyed.

About The Piece I Chose

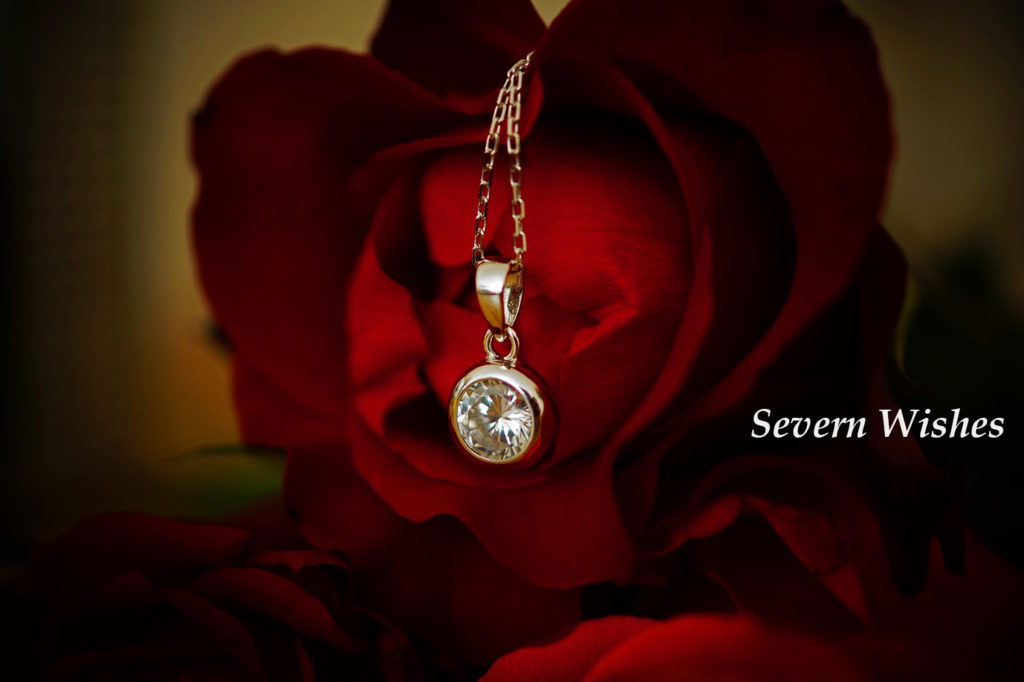
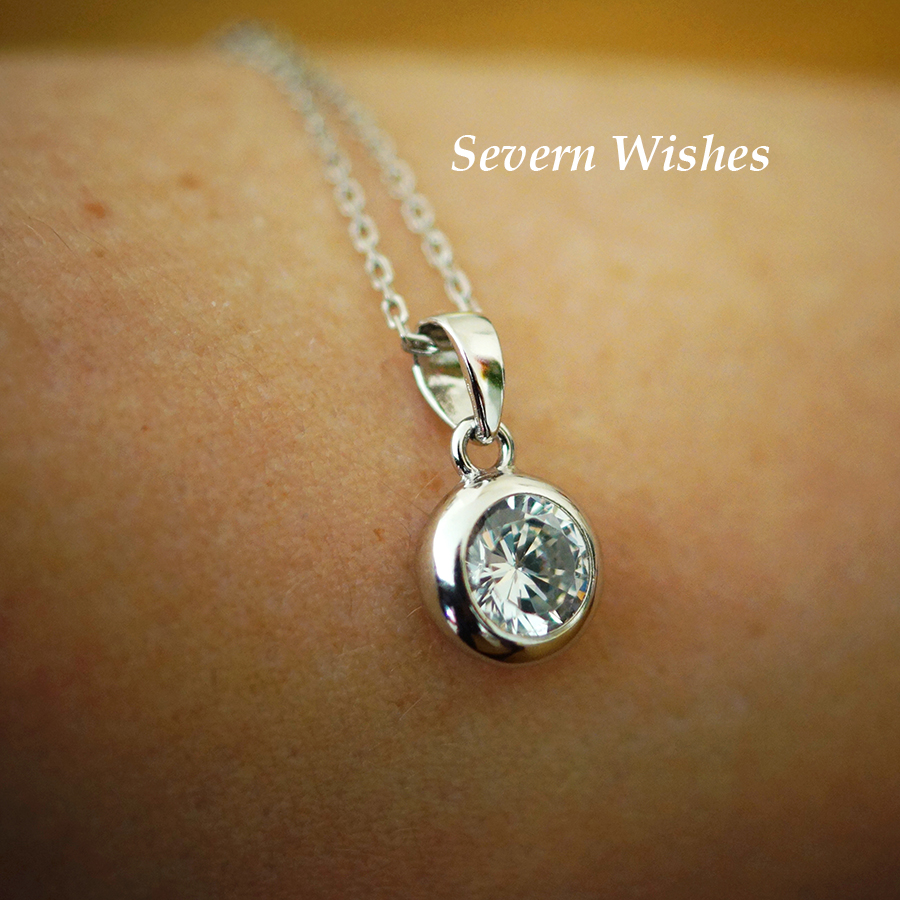
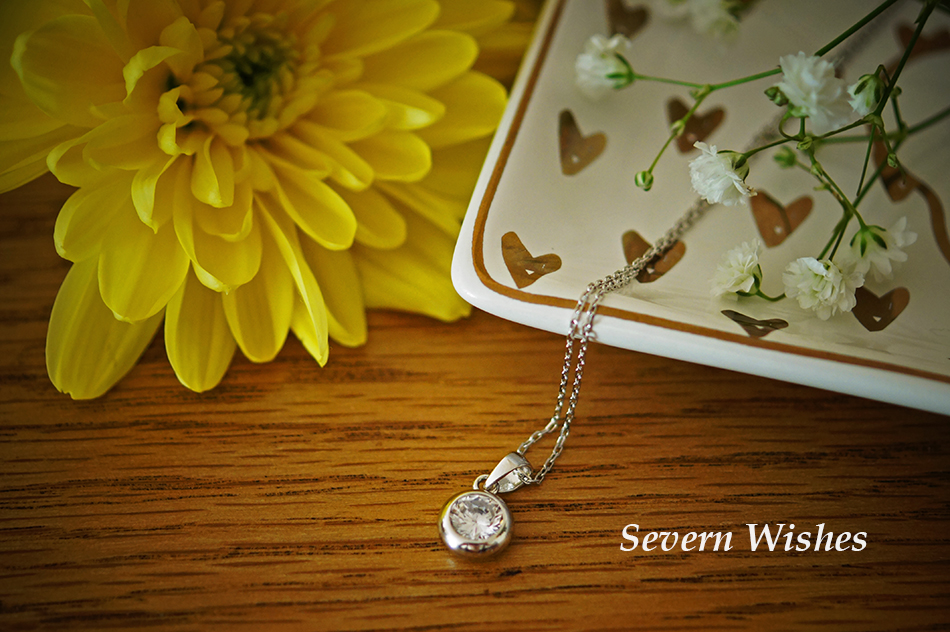
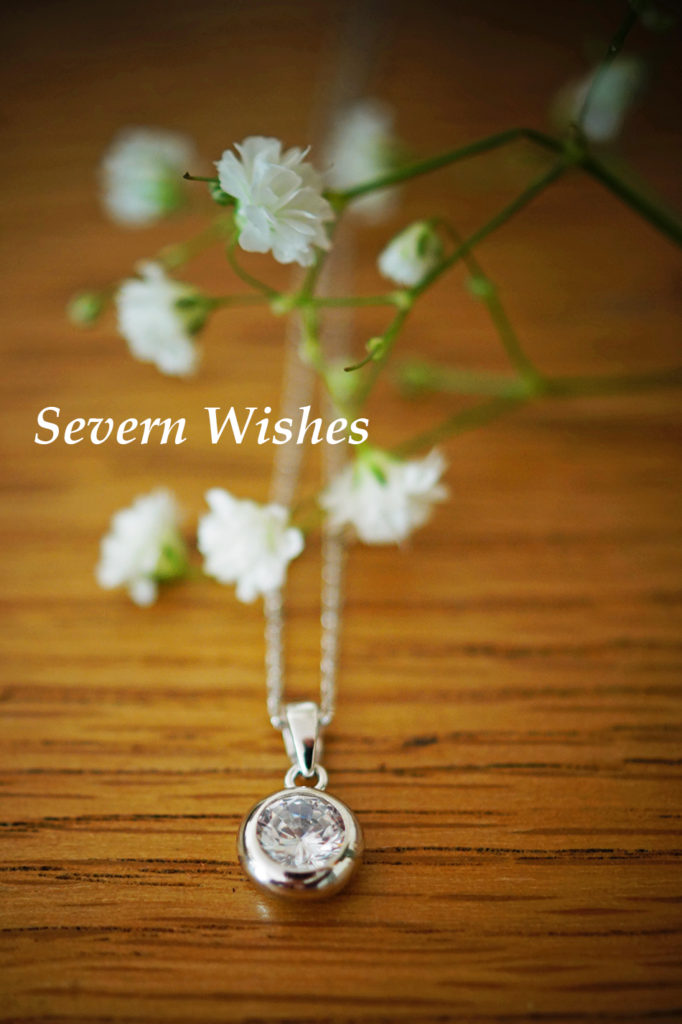
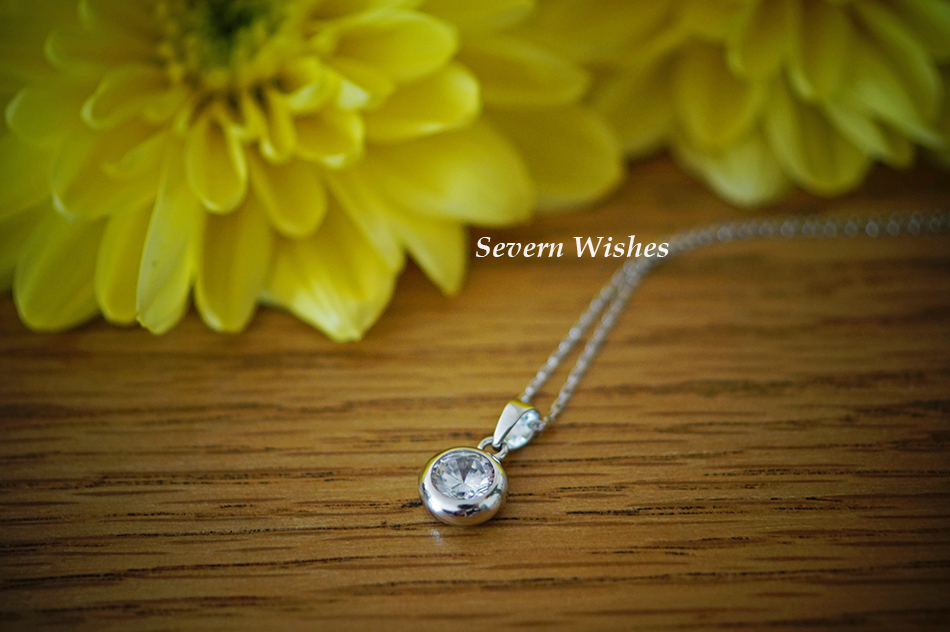
The necklace I chose is called a Round Diamond Solitaire Pendant. It features a beautiful multifaceted stone that sits perfectly inside the spherical design. From any angle it looks beautiful, catching the light and sparkling. It is a nice size so it looks delicate when worn and compliments many styles of outfit because of its shape.

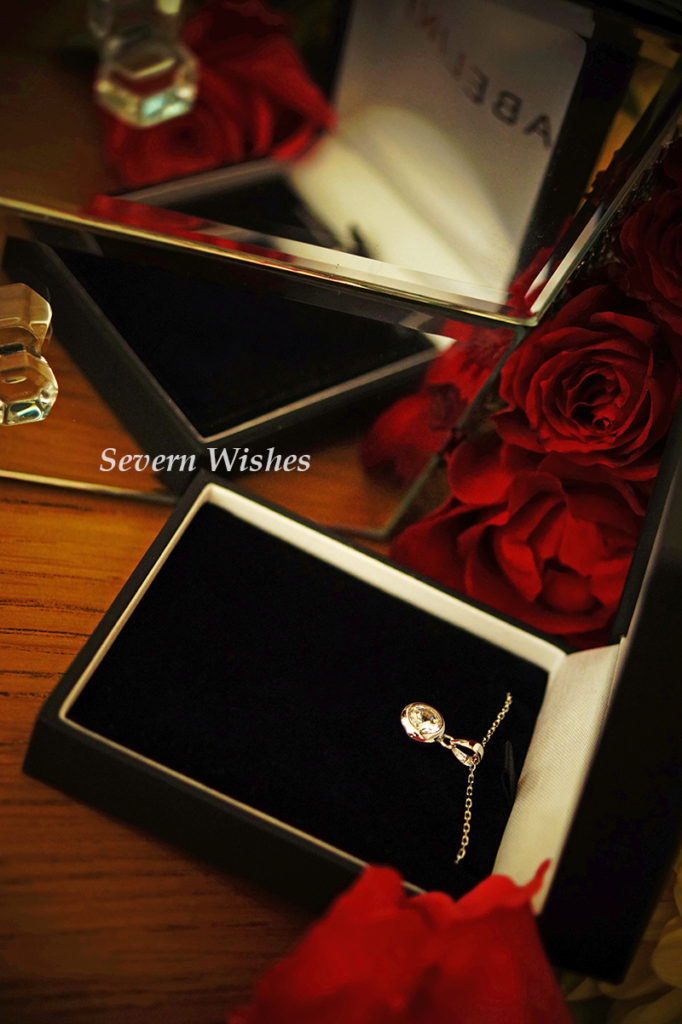
Each piece of jewellery comes inside an Abelini box so you can keep it safe when it isn’t being worn.

The quality of the piece I have is excellent and I cannot believe how sparkly it is. I love how the diamond is set inside a thick circular rim of the pendant and the chain is also beautiful with delicate tiny ovals. It looks delicate yet sturdy, it’s made with quality metal and finished with such shine it reflects like a mirror.

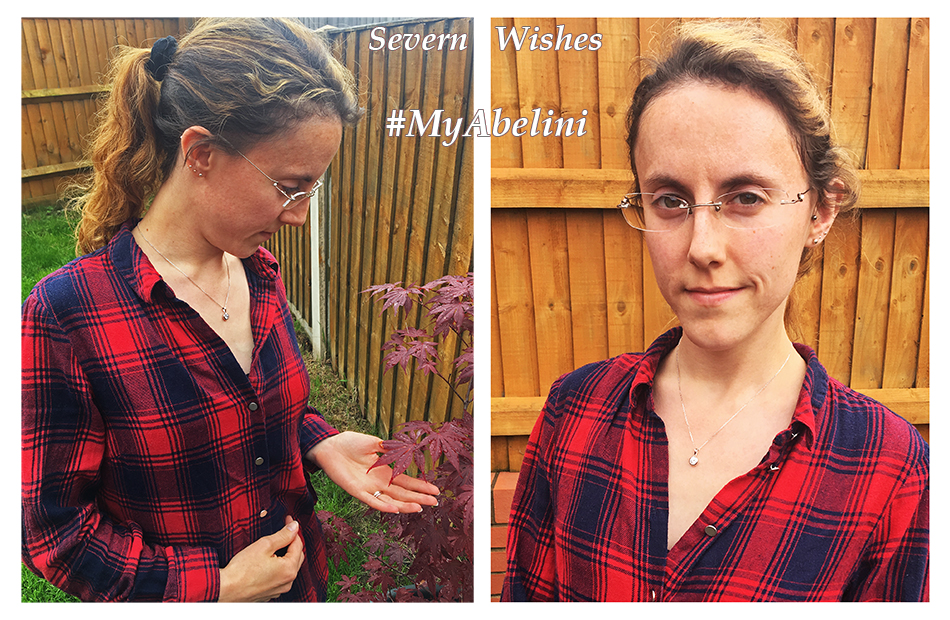
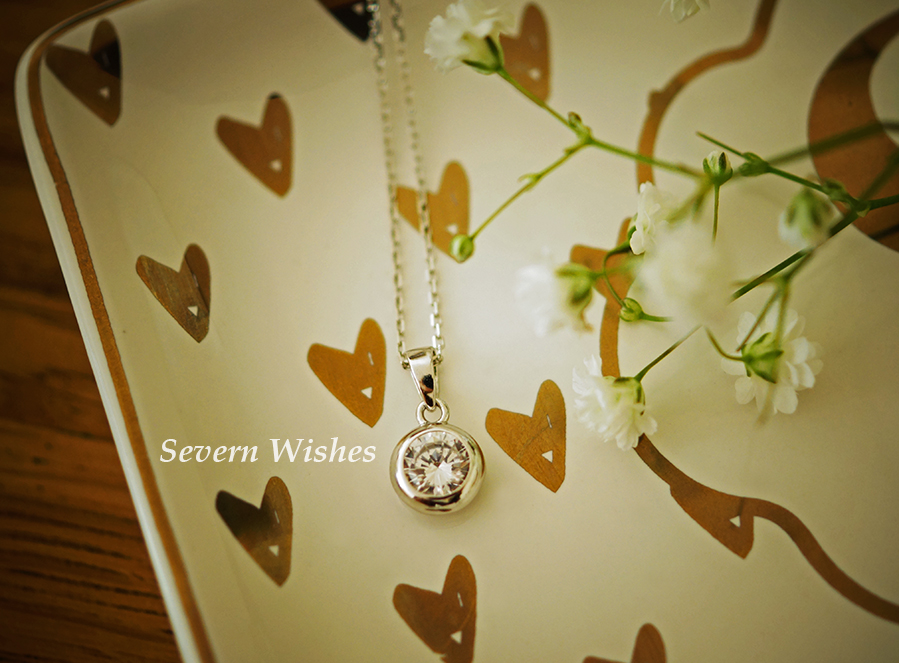
As you can see in the images below the pendant is both delicate and a size that makes it stand out. On a sunny day it sparkles with beauty and the silver compliments many coloured clothes. The size of this necklace is perfect for me, I feel like I chose well.

#MyAbelini

In order to make my review a sparkling success I wanted to take my time and photograph the necklace from many angles. Something this pretty deserved to be accompanied by a range of things that showed it off. Because the Pendant is round it was easy to photograph.

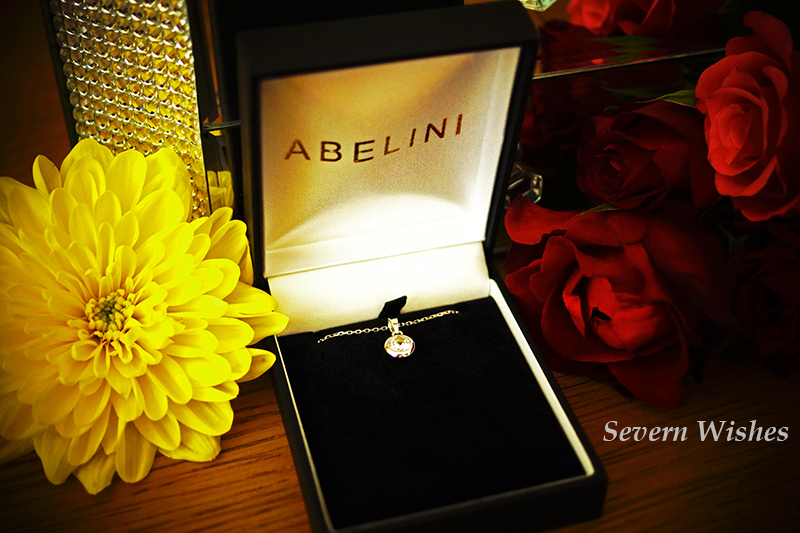
The Pendant arrived inside its own branded box.

Here are some more of my images that I have purposefully created to show this necklace in it’s best light.

Sparkling in the afternoon light…

Abelini Jewellery Links

Abelini Jewellery Website
Abelini Jewellery Instagram
Abelini Jewellery Twitter
Abelini Jewellery Facebook
Abelini Jewellery Link To The Pendant I Have Reviewed

Thank you for stopping by Severn Wishes for this Collaboration Review today, I hope you have enjoyed it. And remember if you want to see more of the Abelini Jewellery please click on the links I have provided in the paragraph above.

You can see more of Abelini across social media where they often hold giveaways too! So what are you waiting for! Click on one of the links and find your perfect #MyAbelini piece.

I would love to know what you would pick if you had the chance, Necklace? Ring? Why not leave me a comment below.

Have a great weekend! Thanks for reading.

✩ Sabrina ✩

Abelini Pendant with Gypsophila

Disclaimer: this piece of jewellery has been gifted to me for this collaboration with *Abelini. Any items that I am sent for the purpose of a collaborative review are written about honestly and all the opinions and photography are my own.

Abelini

My Tattoo Experiences – Hints and Tips and Photographs

Lifestyle Week on Severn Wishes

✩✩✩

My Tattoo Experiences

Tattoos, a lot of us have them, and a lot of us are happy to share our experience about it, be it good or bad. The vast majority of my experiences have been good ones though, and with so many of mine having specific meaning behind them, I wanted to share those with you today.

My first ever tattoo ended up being covered up a few years later, that wasn’t down to the design I chose but down to a bad artist who had convinced me he would do a good job. After he had inked me I realised how uneven it was and vowed that once I found a competent artist I would get it redone. Two years later I got a much better artist to do a cover up of it, keeping the design it just had to be made larger in order to become a cover up. Here is my before and after image below, including the fresh ink and fully healed. This Triquetra has family meaning for me.


This experience didn’t put me off having tattoos, in fact I have ten, and I would have more one day too. Having always been a very creative person and artistic, it was something I wanted to happen from a young age. I waited until I was over eighteen to have my first inking, but after that I had a new tattoo roughly every six months for the next four years.

✩✩✩

What My Tattoos Mean To Me

Now I am going to tell you about a few of my tattoos, and some information about the sorts of things most people would ask. Such as how long it took and whether or not it was painful in that area.

1. Teal Butterflies (2 of them) In Memory of my two Grand Fathers who both adored Nature and Gardening. They are either side of my Lower Back.

2. Pisces Symbol – My Star Sign – One of the Pisces Traits is to be Indecisive and that is most definitely me! This Tattoo is on the outside of my Right Leg.

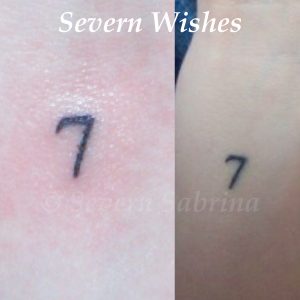
3. My Number 7 – I got this tiny and minimal tattoo after I had my Triquetra covered up, the artist was kind enough to do it as part of my sitting. Number 7 is my Lucky Number and my Birthday too! Right Wrist Tattoo.

4. Sparrow – Symbolising New Beginnings, A Fresh Start and Freedom. This Tattoo is on the outside of my Left Leg.

5. Cherry Blossom Branch – My favourite Tree and my first ever memory as a child was of the Blossom Tree in our Garden. I have always loved and adored pink blossom. This Tattoo is situated on the inside of my Right Leg.

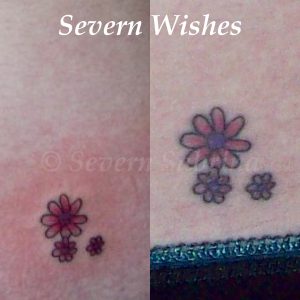
6. Daisy Flowers – I have always loved nature and nature reminds me of home. I wanted these tiny flowers to remind me of that. The colour has sadly faded a little over time… Situated on my Left Hip.

✩✩✩


Photographs of my Tattoos


✩✩✩

Time Taken Per Tattoo

1. Butterfly 40 minutes (for each butterfly on separate sittings)
2. Pisces 45 minutes
3. Number 7 5 minutes (same day as my cover up was done)
4. Sparrow 30 minutes
5. Blossom Branch 2 Hours
6. Daisies 35 minutes

✩✩✩

Price Per Tattoo (Correct at the Time 5+ years for most)

1. £40 (Each Butterfly Each Sitting)
2. £45 (Pisces)
3. £0 (Done As Part Of My Cover Up Which Cost Approx £60)
4. £130 (Sparrow and Blossom were the Same Sitting)
5. £130 (Blossom and Sparrow were the Same Sitting)
6. £40 (Daisies)


✩✩✩

Pain Level Per Tattoo On A Scale Of 1-10 (10 Being Worst)

1. Butterflies – Near Kidneys and it did ache during the outline – 6
2. Pisces – Leg Tattoo – Barely Felt It – 2
3. Number 7 – On My Wrist Near Nerves, Bones and Blood Vessels – 3
4. Sparrow – Leg Tattoo – Barely Felt It – 2
5. Cherry Blossom – Leg Tattoo – Barely Felt It – 2
6. Daisies – Near Hip Bone – Vibration Of Outline Hurt A Little – 5

✩✩✩

Sabrina’s Top Tips and Hints

Here are my top tips and hints for deciding if getting a Tattoo is the right thing for you. I believe you should be asking yourself most (if not all) of my points below. My tip is to write down the pro’s and con’s and make sure you do consider some research too.

Consider Timing, there is no point in getting a foot tattoo in the middle of freezing weather when you would have to cover it and therefore not letting it air and heal. Or getting a Tattoo right before a holiday in the sunshine, this can ruin the tattoo or cause infection to the healing skin.

Start Small with your first Tattoo, committing to a full back piece isn’t usually a good idea if you aren’t certain how you or your skin may react to the procedure, think about if you have sensitive skin or eczema for example (your tattooist will also need to know this and any medication you are on). Of course many people “go big or go home” and decide to do a large tattoo or commit to a sleeve for example. This of course is your choice, and is something that only you can decide upon.

Do you know your Pain Tolerance? This is a good question to ask yourself. Most people don’t realise that getting a tattoo has nothing to do with a phobia of needles or if you may have had many injections in your lifetime, it’s a totally unique experience and should be treated as such.

Choose Wisely both with your Design and Artist. Do your research and look into local artists and further afield, because if you want a good tattoo be prepared to travel for the artist. With regards to your Design, once you’re happy with it stick it in a location where you will see it every single day for a month. If at the end of that month you still love what you’ve chosen, then the odds are that you will still enjoy looking at it when it’s on your skin, in many years to come.

Use either Savlon or Bepanthen for After Care and apply regularly. Make sure that you keep the area clean and dry and air as often as possible to aid the healing process. I always used Savlon on all of mine, they healed beautifully and the colour has also remained in them all.

Visit your chosen Tattoo Artist, book an appointment to talk to them, ask them any Questions you may have before you book an actual inking appointment.

Take a friend or partner with you when you go, you may feel tired or uneasy after the inking is finished. You shouldn’t drive immediately after a tattoo or a piercing, give your body time to adjust to what has happened.

Make sure you’ve drank something and eaten before you get inked, and take water with you to sip, especially if its in a warmer month of the year.

Consider your bathing and sports when the tattoo is in the healing stages – no hot and forceful water can touch it and definitely no swimming because of the chemicals. Consider contact sports, if your tattoo could become easily knocked or bumped or is at risk of getting dirty and then infected.

Be aware that your tattoo placement might cause you some inconvenience, you may need to be shaved (for example on your lower leg even if you’re a man), and you might be swollen for a couple of days afterwards as well. Make sure the tattoo won’t hinder any job role or uniform that you need to wear.


✩✩✩

Thanks for reading this lifestyle post, I hope you’ve enjoyed it. Why not let me know what you thought by leaving me a comment! I would love to know if you have a tattoo that you love…

✩ Sabrina ✩


Windsor Castle Day Trip

REVIEW WEEK ON SEVERN WISHES


A Day Trip to Windsor Castle

During April I was lucky enough to spend a long weekend away with family. We decided that since we were staying close to Windsor Castle we would visit and spend the day there. Having not been to Windsor as an adult I jumped at the chance to experience this amazing place.

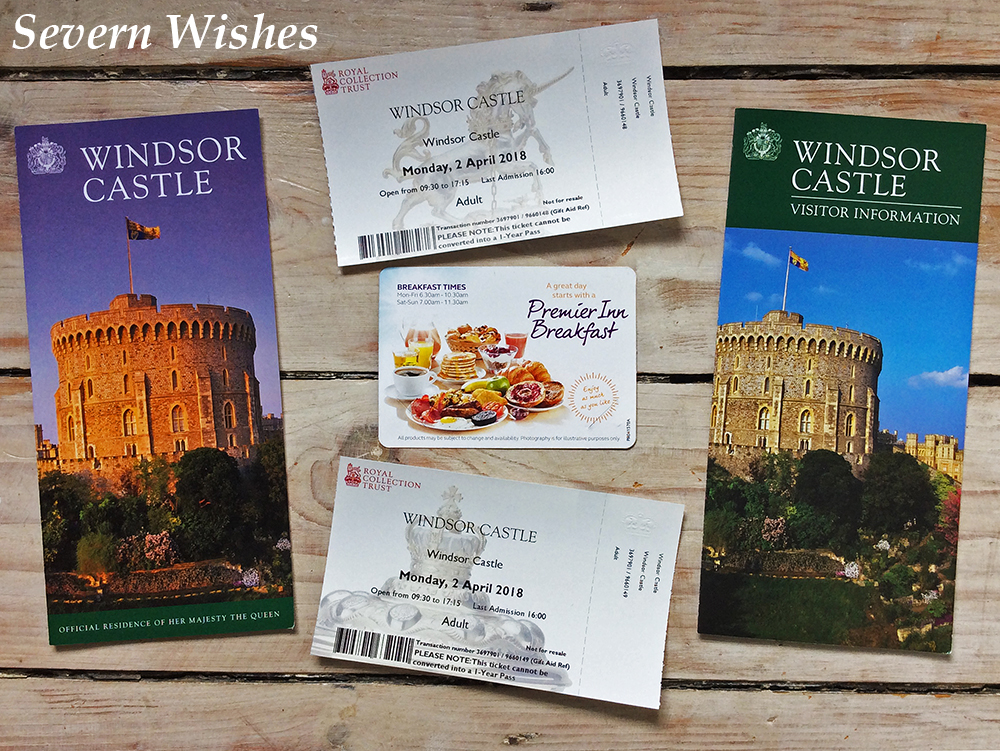
We got up early from our stay at the Premier Inn, had a good breakfast and got ready for our day trip. We were a little disappointed by the weather on the day that we went to Windsor, it was very wet with rain showers and fairly cold too. However the Castle was still looking incredible in all it’s splendor.


I took many photograph’s of the outside of the Castle, you are unfortunately not allowed to take images inside the buildings. So I will write reviews of the sections that I visited even if I don’t have an image to show you, and use my photographs that I have gotten to break up my day.

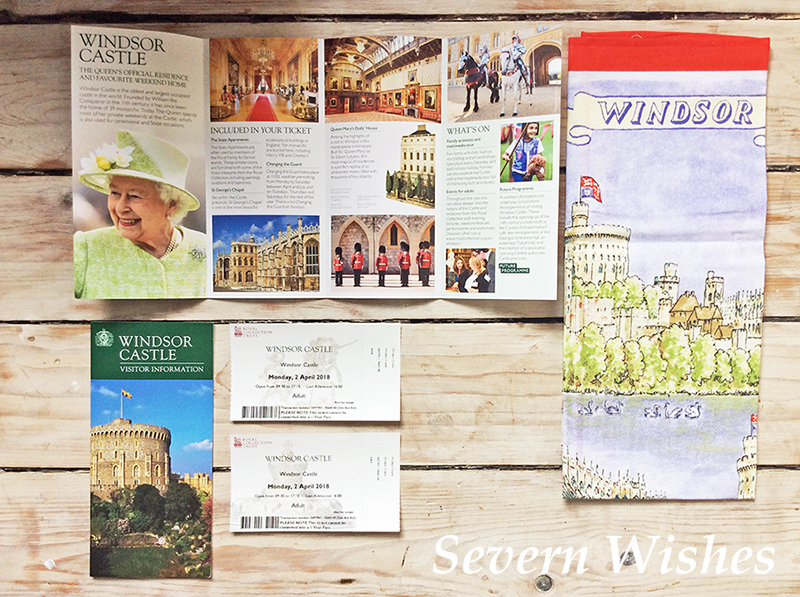
We booked our tickets online so that we could attend the fastest queue to get into the Castle. I can definitely recommend you doing this, it saved us hours of queuing time, although we have to queue for almost an hour. This was due to it being a Bank Holiday weekend and the whole town was busy. You also have to go through a search with yourself and your bag before being allowed into the castle.

There are beautiful stone walls, trees and sections of garden to look upon. As you walk around the Castle you cannot believe the sheer size of the place.

Walking around the Castle grounds you can see St George’s Chapel. It was an incredible place to walk through, steeped in both British and Royal history. The stained glass windows were beautiful, and I couldn’t believe how detailed the chapel was throughout its interior.

Here is a photograph of mine from the outside, due to the rain its Gothic splendor looking even more incredible. And as you can see by the crowds heading inside the weather does not put the tourists off.


My family and I decided we wanted to go inside the Castle, just to witness and experience exactly what it was like. Rooms were filled with all sorts of Paintings and Tapestries as well as Furniture from all centuries. The Castle is so old so you can imagine the pieces you can bestow, such as Clocks, Cabinets and China.

I was very impressed by the rooms, although it was so busy we just had to keep steadily flowing with the traffic of people. We didn’t get to hang around in one particular room, but the things that stick in my mind after my visit were the cabinets filled with incredible China, the restored sections of the Tower that was once destroyed in Fire, and the many pieces of Armor and Weapons that were on the walls.

We were also very lucky to see the changing of the guard when we finished our tour of the Castle interior. These people are very disciplined in their job, it was a fascinating sight to see.


The only disappointing thing for us was the lack of facilities. Being pregnant I expected to see more toilets and also perhaps areas to sit and rest and refresh, to get drinks and snacks. But there was only one small place that we found, that sold souvenirs, water bottles and ice cream. This was a shame and it meant that we left the Castle earlier than we had planned to go and find nourishment after walking around for several hours.

Before we left I managed to have a photograph in front of the Castle Postbox!


Here are some interesting facts that I learnt about Windsor Castle.

1. Windsor Castle is currently home to HM Queen Elizabeth II and her family. Other prior Royals to have resided there include forty others, including Queen Victoria and Prince Albert. The original monarch to live in the Castle was Henry I, and Henry VIII regularly visited during his lifetime and stayed in the Castle grounds.

2. The windows were all blacked out during World War II, this was partially to protect the Royal Family who still remained inside at night time – although this was not public knowledge at the time of the war – and a lot of the famous china and art work such as the paintings were all moved away to protect them from potential bombings.

3. Back in 1992 there was a fire in one of the towers of Windsor Castle. Over 100 of the rooms were either damaged by the fire itself or by the water used to extinguish it. It cost almost £40 million to restore the Castle to its former glory.

4. Windsor Castle is both the largest and oldest inhabited Castle in the World, and it was originally built around 1000 years ago. St George’s Chapel is located in the Castle walls and was built from the late 15th century to the early 16th. It has a Gothic style and is breathtakingly beautiful with many stained glass windows.


2018 Opening Times

1st November – 28th February – 9.45 until 16.15 (Last Admission 15.00)

1st March – 31st October – 9.30 until 17.15 (Last Admission 16.00)

Ticket Prices

Adult – £21.20
Over 60/Student (Valid ID) – £19.30
Under 17/Disabled – £12.30
Under 5 Free
Family (2 Adults & 3 Children Under 17) £54.70

To Book or check other information you can visit this website.


I realise I am submitting this Review and Travel Post of Windsor Castle on a very special day, the day of The Royal Wedding! It felt appropriate seeing as I was only there recently myself. So to Harry and Meghan – Congratulations! Congrats to the Duke and Duchess of Sussex!

Thanks for reading this post, I hope you’ve enjoyed it. If you have ever been to Windsor yourself why not leave me a comment and let me know what you thought!

 Sabrina 

Delicious Recipes That I Love To Cook – Time Saving Ideas For Healthy Eating And Tasty Eating

FOOD WEEK ON SEVERN WISHES


Delicious Recipes That I Love To Cook – Time Saving Ideas For Healthy Eating And Tasty Eating

My Culinary Background

If there is one thing I love, it’s eating food and cooking food. I was first taught how to cook by my grandparents, I was very young at the time, and it began with simple things like Omelette and decorating your own homemade Pizza dough. Then we moved on to more complex things like Lasange and Pies. But as I got older I carried on with my interest in cooking, I started to experiment with flavours, and I also liked various parts of my heritage to come through in the meals that I cooked.

When I went off to University my Nan had written out some of her basic recipes in a little book for me – just in case I forgot anything. It is kept safely away now in case I ever need it, but most of it is now cooked through memory. I am forever grateful for her teachings, and she still tells me about new things now and again more than twenty three years since we began cooking together.

I met my husband at University, and at the time he couldn’t believe how much I ate! I was this tiny petite women and everyone in my family used to say I had a hollow leg! I won’t ever forget when I first cooked for him, I introduced him to a whole new world of flavours when we first met. There were foods he had never tried before, and there were things we also tried together too. And since then I have branched out into cooking even further, into both his background and his culture, and even into some more diverse parts of the world after going travelling with him. We both love to try something new!
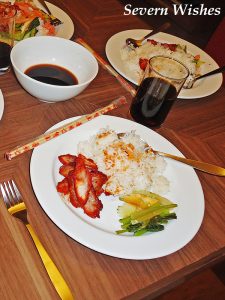
My husband does suffer with an array of allergies, the majority of which are food related. This was problematic when we went travelling. Since we began living together (almost ten years ago now!) I evolved my ways of cooking to exclude the things he couldn’t have and simply substitute them for something else.

One thing I do like to do is eat healthily but by making sure its tasty and enjoyable. I often pass my recipes on to family and friends, but I wanted to share some of my favourites on my blog too. Because they can be adapted for whether or not you eat certain meats, or are vegetarian, the possibilities are endless, if only you know what goes together. And that comes with years of experience in the kitchen.

What I wanted to achieve by writing and sharing this blog post was to help you cook, give you new and easy to follow recipes and if you love what I’m putting out you can tell me and then I can write more posts like this one!

So for now… Let’s talk Time Saving in the Kitchen!

Time Saving in my eyes is this, you don’t have to cook everything from scratch every night of the week. It means you either have leftovers in the fridge or a batch of something in the freezer that can either be cooked in the oven straight from or defrosted during the day and then heated on the hob later…

All you need to ensure is that all the ingredients you choose to cook with haven’t already been pre-frozen. So don’t defrost raw meat, cook it in this recipe and then freeze it again. Use fresh foods and then have some bags or tubs at the ready to freeze your leftovers if that’s what you plan to do. If storing in a fridge Glass is best, the amazing Glass Pyrex range of sized dishes with lids are an excellent investment to make. I have the set that can go straight from cold to hot such as fridge to oven.

Let’s Make Some Tasty Food!

Today I am going to share three of my favourite time saving recipes with you. This will either do you 8 portions to eat, refrigerate or freeze. It’s up to you!

Sabrina’s Tasty Italian Ragu

My Meaty and Tomato Ragu can be used for any of the following meals; Spaghetti Bolognese, Lasagne, Chilli Con Carne, OR simply Ragu Sauce to eat with Rice, Pasta or Potatoes.

All you would need to do is add additional herbs and spices to the Recipe below in order to make one of the meals above. Or leave the sauce as it is, and you can serve it with a wide variety of side dishes. If you aren’t sure how to turn this Ragu into one of the above meals leave me a comment and I’m happy to respond with that you’ll need.

✩ Ingredients 

Mince Beef – 400-600 grams (10-20% Fat is best)
Pork Mince 250-500 grams (Low Fat is best)
Lean Bacon or Lardons 250 grams – Diced (not Smoked for Children)

Tomato Puree – 100 grams
Chopped Plum Tomatoes – 3 Tins (400 grams each)
Carrots – 4 Large – Diced Fine
Large White Onion – 2 Sliced or Diced Fine
(Optional) Celery Sticks – 4 Diced Fine

Fill the 3 Empty Plum Tomato Tins with Boiling Water, then add these contents to a jug (careful the tins will go hot!) and add a Beef stock cube/pot to this and then stir through.

Vegetable Oil – 1 Tablespoon
Pepper – To Your Taste
Salt – To Your Taste

Oregano – 3 Tablespoons
Basil – 1 Tablespoon
Rosemary – 1 Teaspoon

✩ TOP TIPS 

You are aiming for around 1kg of Meat in this Ragu and it will then Serve Approx 10-12 Portions of Food.

If you have a Food Processor Use It! Blitz the Onions and Carrots together on Dice for a quicker start to your Ragu. Add your Optional Extra’s after this stage too so everything is the same size!


✩ Recipe ✩

1. In a large saucepan brown the meats together. You need very little oil due to the fat and then drain half of the fat off after around fifteen minutes.

2. Make sure your meats are cooked through and then add your tomato ingredients and then the jug of stock.

3. Simmer for twenty minutes with the lid on the saucepan.

4. Add all of your herbs and the diced vegetables, and mix well.

5. Simmer the saucepan now with a lid on top for around 1 hour. The liquid should reduce down and the sauce begin to thicken.

6. You know when your Ragu is ready because it will taste “together” with all the flavours having marinated as one and it will have thickened up nicely.

7. You can serve this with a range of side dishes, or freeze it all!

✩ Storage ✩

You can store this meal in freezer bags or in tubs, it will keep for a month! Remember to defrost a portion before you reheat it, and then you can also add other spices into it once it is chilled too!

✩✩✩✩✩✩✩

Sabrina’s Tasty Chicken Curry

My Curry is a mixture between a Chicken Tikka and a Chicken Bhuna. It isn’t spicy but it isn’t mild either, and it has a few vegetables in it as well. You can choose to leave these whole for adults or dice them finely for children who might be a little picky…

It’s also nice to consider adding other things to curry to bulk it out, peppers and onions work best but so do a variety of other vegetables. You can also bulk it out with additional tomatoes that aren’t just made for the sauce but left as chunks.

If you don’t want to use Chicken you could use a vegetable such as Cauliflower. Or Pork Belly is a nice meat for Curry, but it would need to be left in to Simmer for longer to make it tender.

If I am eating a portion of my curry alone I cheat by using one of those microwave Pilau Rice to go with it! They are Super Tasty and convenient! If you’re doing Rice for a few people though and on a regular basis then I highly recommend you invest in buying a Rice Cooker. They save you loads of time and you don’t have to stand their making sure your rice doesn’t stick to the bottom of the pan. Ours is from a simple one from Argos!

✩ Ingredients 

Chicken – Diced 400-600 grams (Portions 4-6)
Tomato Puree – 100 grams
Chopped Plum Tomatoes – 1 Tin (400 grams)
Plain Yoghurt – 100 grams
Large White Onion – 1 Sliced or Diced
(Optional) Yellow Pepper 1 Sliced into Chunks
(Optional) Red Pepper 1 Sliced into Chunks

Vegetable Oil – 1 Tablespoon
Salt – Pinch
Pepper – To Your Taste
Sugar – Pinch
Paprika – 1 Teaspoon
Garam Masala – 2 Tablespoons
Cumin – 1 Teaspoon (Mild) / 1 Tablespoon (Medium)
Chilli Powder – 1 Teaspoon (Mild for Children) / 1 Tablespoon (Medium)
Lemon Juice – 1 Tablespoon
Garlic – To Your Taste
Coriander Leaf – 2 Tablespoons
Curry Powder – 1 Tablespoon
(Optional) Ginger – 1 Teaspoon Sliced Thinly and Diced
(Optional) Coconut – Dried or Raw or Shredded – 1 Tablespoon

50ml of Warm Previously Boiled Water

✩ Recipe 

1. Fry the Onion and Chicken in a Pan until Browned in a little oil. Add the Chunks of Pepper and Fry until Softened.

2. Start Making Your Sauce In Another Larger Saucepan that has a lid, by combining the tinned and packet items first such as the Tomato ingredients and yoghurt.

3. Then add the spices and herbs in to the saucepan one at a time, stir the pot thoroughly after each one.

4. Once all ingredients are combined add the browned chicken and onions to the mixture and stir through until all the pieces are coated.

5. Finally add the Water and Simmer the Pan for up to 1 hour. Stir every few minutes to avoid sticking and stirring through the flavours.

6. The Curry is Ready when the Sauce has Reduced down and Thickened, and the Chicken is left tender and moist and cooked through.

7. Serve with Rice and perhaps a Naan Bread which is also delicious to mop up any sauce!

✩ Storage 

This meal can be cooled and stored in the fridge for two days or it can be frozen in portions once it is cooled and can be used within one month. Defrost thoroughly in the fridge over night before reheating.

✩✩✩✩✩✩✩

Sabrina’s Tasty Mediterranean Vegetable Pasta Bake

One dish that I love to make that also contributes to two of your five fruit and vegetables a day is my tasty Mediterranean Veg Pasta Dish!

What you will need for this tasty dish is a selection of your favourite vegetables that pair well with a tomato based sauce. I will firstly explain my main ingredients for this dish and then outline the other things you can choose to put in if you want… This also includes a choice of Topping as well!

✩ Ingredients 

Pasta 80 grams per person – the Shape is your decision

Tomato Puree – 50 grams (100 grams if you like a rich sauce)
Chopped Plum Tomatoes – 1 Tin (400 grams)

Large White Onion – 1 Diced
Green Pepper – 1 Sliced and Diced into Chunks
Yellow Pepper 1 Sliced and Diced into Chunks
Red Pepper 1 Sliced and Diced into Chunks
(Optional) Courgette – 1 Sliced
(Optional) Cherry Tomatoes – 3 or 4 per person
(Optional) Small Red Onion – 1 Diced

Oregano – 1 Tablespoon
Basil – 1 Tablespoon for Sauce 1 Tablespoon for Top
Garlic – As Fresh or Granules or Salt or Diced – 1 Tablespoon
Black Pepper – To Your Taste
Salt – To Your Taste

✩ TOP TIPS ✩

Use a Glass Tray for Pasta Bake, it makes it so easy to transfer from appliances!

De-Seed your Peppers before dicing them to ensure no seeds in your meal.


✩ 
Recipe 

1. While you boil a pan three quarters full for your Pasta to become cooked in, preheat an oven to 180’c (160’c Fan).

2. Place your chopped and diced vegetables into a tray, coat with a little oil and oven bake for 25 minutes. (This includes the peppers and onions and any of your optional extras etc). Stir after this time and put on for a further 15 minutes.

3. To make your sauce combine in a jug the tomato puree, chopped tomatoes and herbs and spices. Stir thoroughly. Season it to taste and place to one side.

4. Cook your pasta on a hob while your vegetables soften for their final minutes in the oven.

5. Once cooked strain your pasta. You then want to add it to the Roasting Vegetables in the tray. In order to do this remove the tray from the oven, place on a heat protective surface and stir the contents of it together.

6. Then quickly add your sauce from the jug and stir, followed by the pasta and stir. Your sauce should coat all of your ingredients, if it doesn’t seem like enough fill halfway up the now empty tomatoes tin with partly cooled boiled water. Add in 1/4 of the amount in the tin at a time, stirring constantly until all of in the tray is coated in sauce. You don’t want your pasta swimming!

7. Shake the tray from side to side gently allowing the contents to settle flat. At this stage you can add some cherry tomatoes on to the top and a sprinkle more of some basil if you like basil. These tomatoes will bake on the top nice and soft.

8. Put the Pasta Bake into the oven at the same temperature as earlier (160’c) and leave it for around 15 to 20 minutes. If at this stage you want to add some grated cheese on top, carefully remove the tray, wobble it and stir at the edges to make sure it isn’t sticking. If it is sticking then stir it all thoroughly before sprinkling on your cheese.

9. Bake for more 10 minutes or until the cheese is melted and browning. Serve in bowls with Garlic Bread on the side! Yum!

✩ Storage ✩

This pasta will keep overnight in the fridge for leftovers the next day. Ensure it is heated through thoroughly in smaller bowls when you come to finish it off.
✩ Additional Tips 

You can choose to add meat to the Vegetarian Pasta Bake if you wish, just remove one of the vegetables from the “you choose” part and keep the same amount of grams. For example, 100g of Chicken Breast Chopped OR 100g of Bacon Lardons (Avoid Smoked and Limit Portion for Children Due To Salt Content).

If you don’t like one of my ingredients remove it and substitute it for something else. It could be a herb or a spice or a vegetable. It will of course alter the taste slightly, but we’re all different at the end of the day.

Adding a little Grated Cheese on top of your food is definitely allowed in my house!

Don’t be afraid of just putting your favourite vegetable next to the meal on the plate, you don’t have to put it inside a meal if you don’t want to. Do that fresh every time you cook and that will count towards your five a day too.

Delicious!

✩✩✩✩✩✩✩

Thank you very much for reading this post, I hope you have enjoyed it. If you cook any of my recipes please leave me a comment and let me know how you get on! And if you want to republish any of my recipes then please credit me as the original recipe creator! Thank you!

✩ Sabrina ✩