Sabrina’s Easter Craft Ideas 2022

Happy Easter! I hope you’re having a wonderful long weekend!

If you’ve already been out and about and are now looking for something to do within your home to keep the children entertained, then why not check out all my craft pieces below, show your children and they might want to give them a go! They are all really easy and just need a few minutes of your time as the adult to deal with some scissor cutting and poking holes, and then they can begin! You won’t need any fancy craft equipment for any of these either, just gather the following items on my list below and you’re good to go!

If you were wondering what it cost me to make all of the craft items I have done in recent posts it was about £15. That includes all of the double sided tape, various packs of white and coloured card, good quality colouring pens, craft balls and pipe cleaners among other things. But I have lots of them left over from these purchases too for use in future craft projects. I actually have more crafty items in the works and I’m still using up the same items and haven’t needed to buy any additional ones.

Sabrina’s TOP TIP: Making up a Craft box is a great idea, it will keep everything neat and tidy. Throw in left over pieces of card, toilet rolls and crafting left overs. I recommend a Really Useful Box or a similar one which has a tight fitting lid. These are also really strong and stackable for easy storing away.

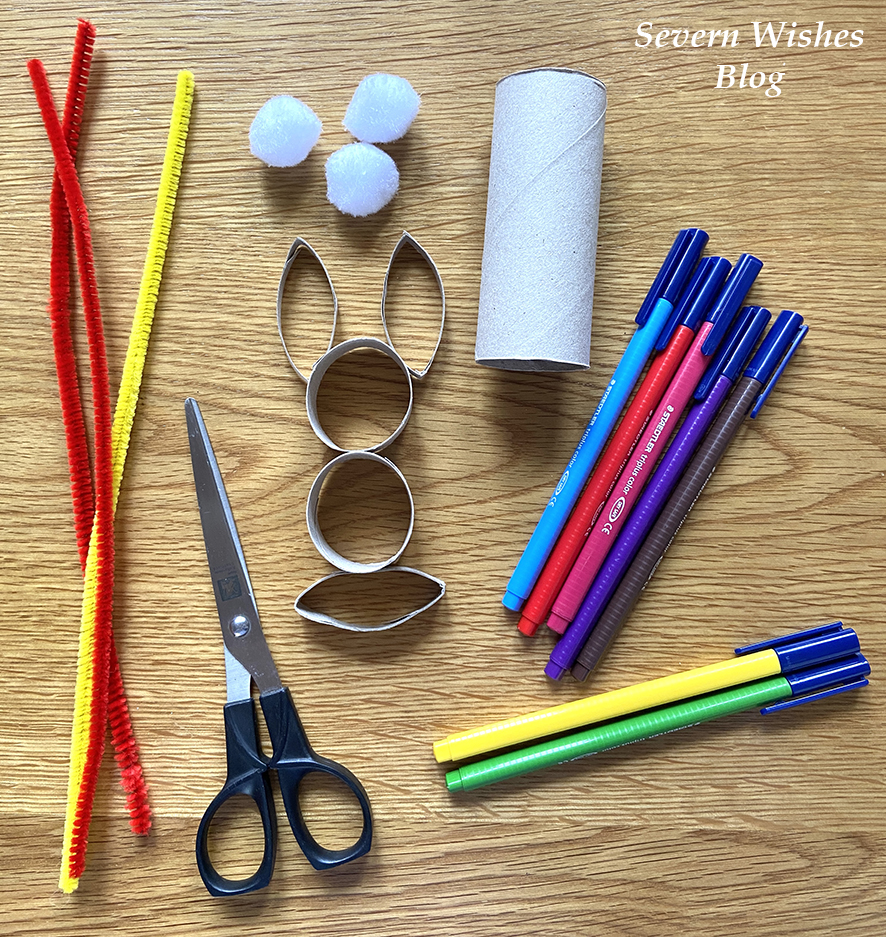
✩✩✩ What Will We Need for all these Projects ✩✩✩

Toilet Rolls
Cereal Box Cards
Pens to Decorate
Scissors
A Pen or Pencil
A Ruler
Pipe Cleaners
Fluffy Craft Balls
Coloured Card
Googly Eyes
Double Sided Tape
Pritt Stick or PVA used sparingly

✩✩✩

How to Make Sabrina’s Fluffy Craft Easter Animals

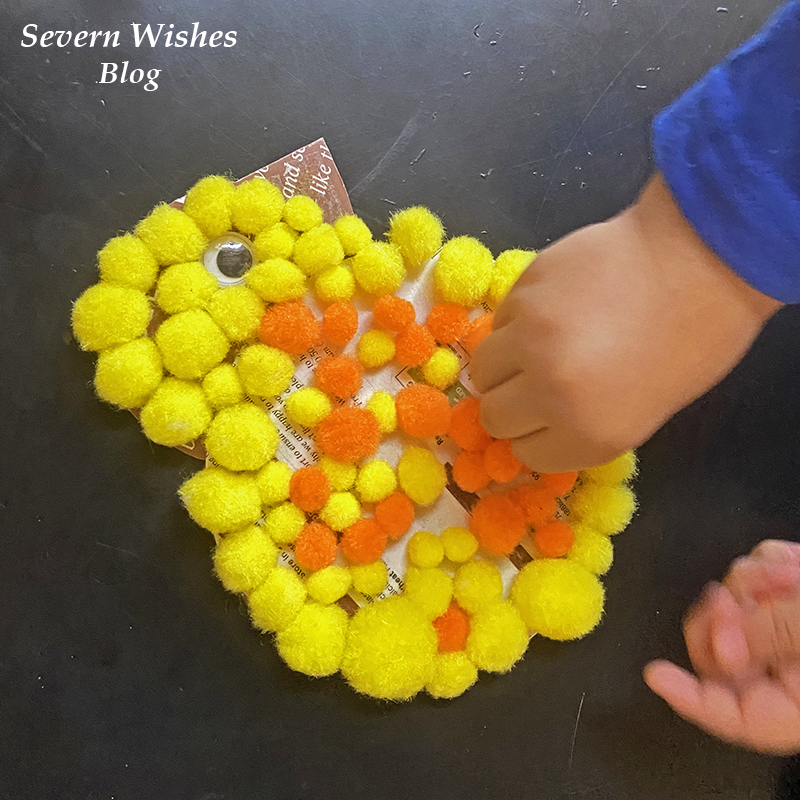
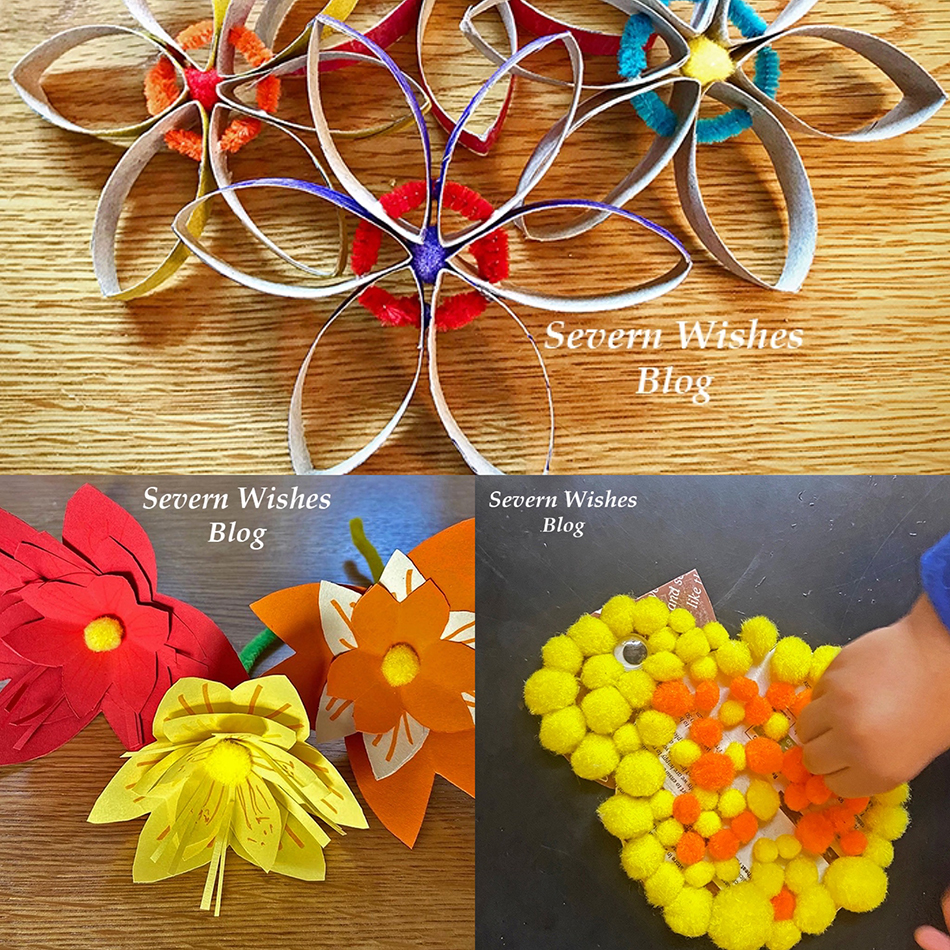
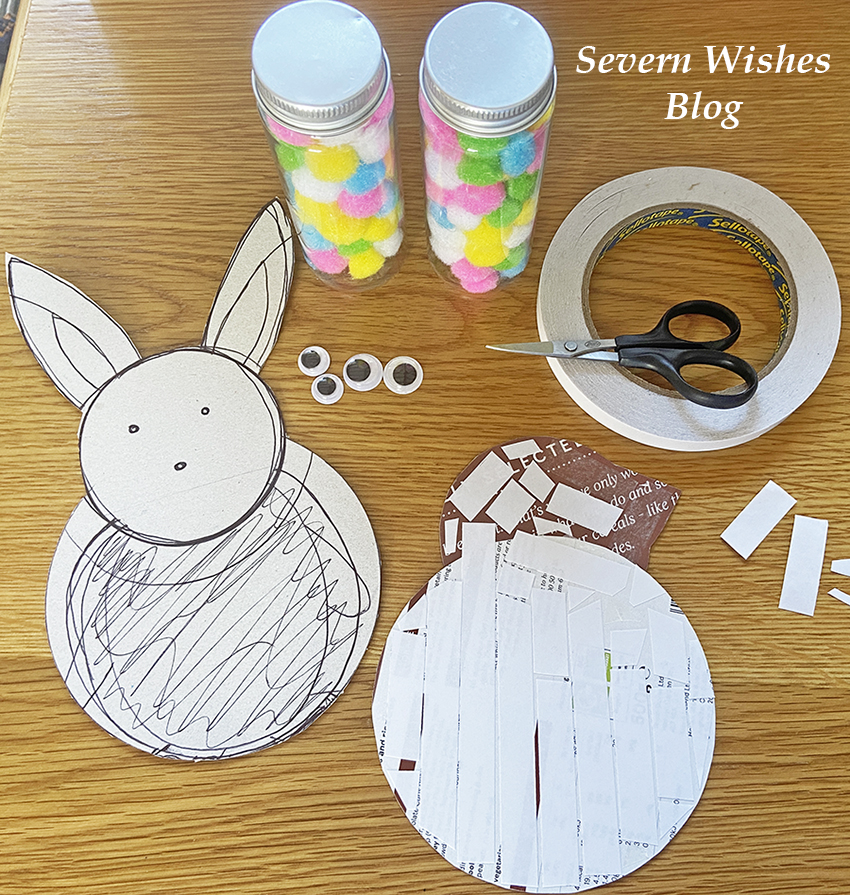
These cute and fluffy animals were made using cereal box card, double sided tape and a bag of craft balls! In all it cost me about £2! And we have a ton of balls left over which we can use as flower middles and things like that – I use them in other projects too. This one is easy for little children, you do the templates and then add the glue on and then they can go to town with all the sticking!

Step 1. Draw on a cereal box, inside on the flat side piece, whatever shape you like, a Rabbit, a Chick, an Easter Egg, whatever you like or your children want.
Step 2. Cut out your templates, make them as big or as small as you like.
Step 3. Use PVA or Pritt Stick or Doubled Sided Tape to coat your template with glue.
Step 4. Provide a clean and flat surface for your little ones to sit and stick the fluffy craft balls to their card template.
Step 5. Add googly eyes or card beaks or any other items you want to finish them off.
Step 6. Let them dry overnight, place a piece of kitchen roll or newspaper on a flat surface, add the template, add another layer of tissue or newspaper, and then place a heavy book on top overnight to flatten them down and help the balls to stick.
Step 7. Next day you can display them around your home.
✩✩✩
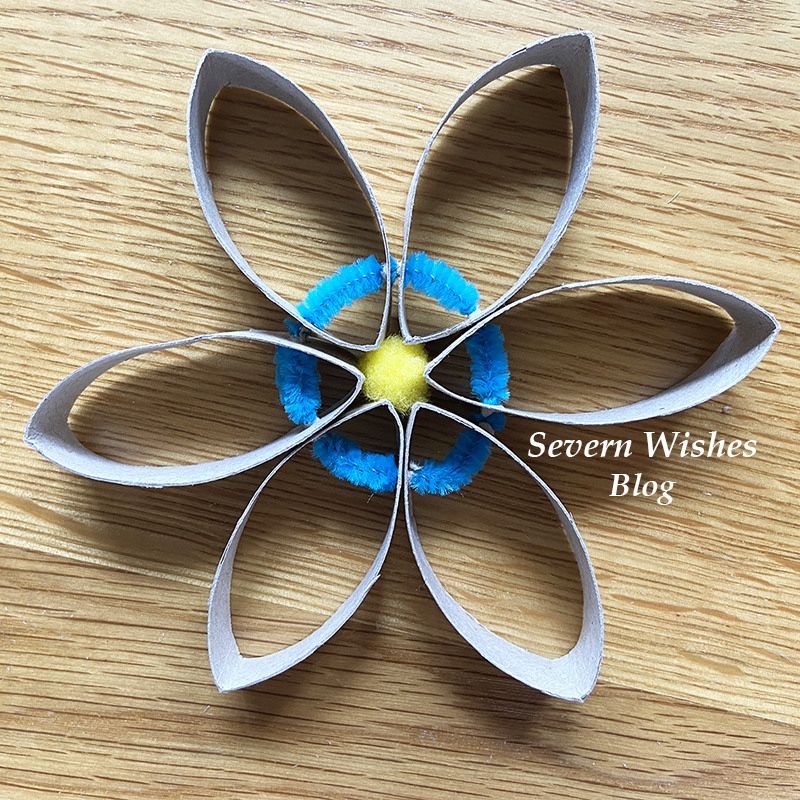
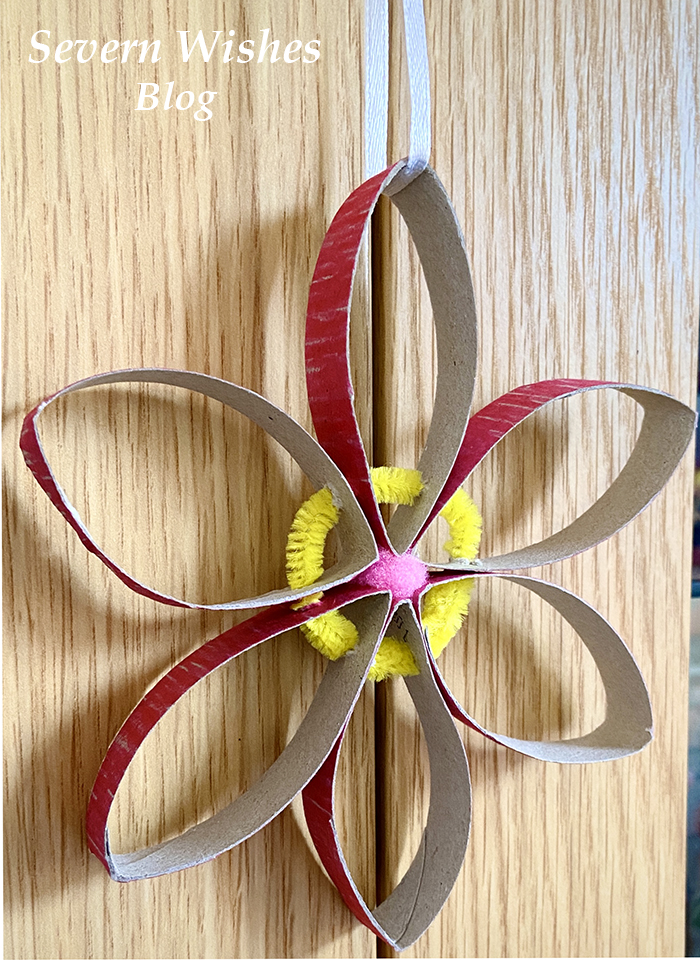
How to Make Sabrina’s Toilet Roll Flowers

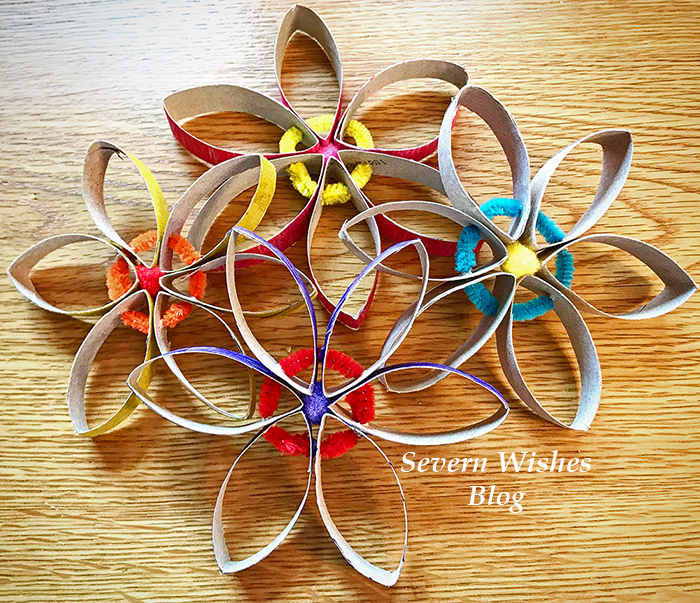
My easy toilet roll flowers are so simple to do! They only take about ten minutes to make once your toilet roll is decorated and dry. You could make a load of these, if you have a kitchen roll tube you may even get 3 flowers worth of petals from one tube! I would like to try and make a Rainbow of these!

Step 1. Let the Children decorate their toilet rolls and let them dry.
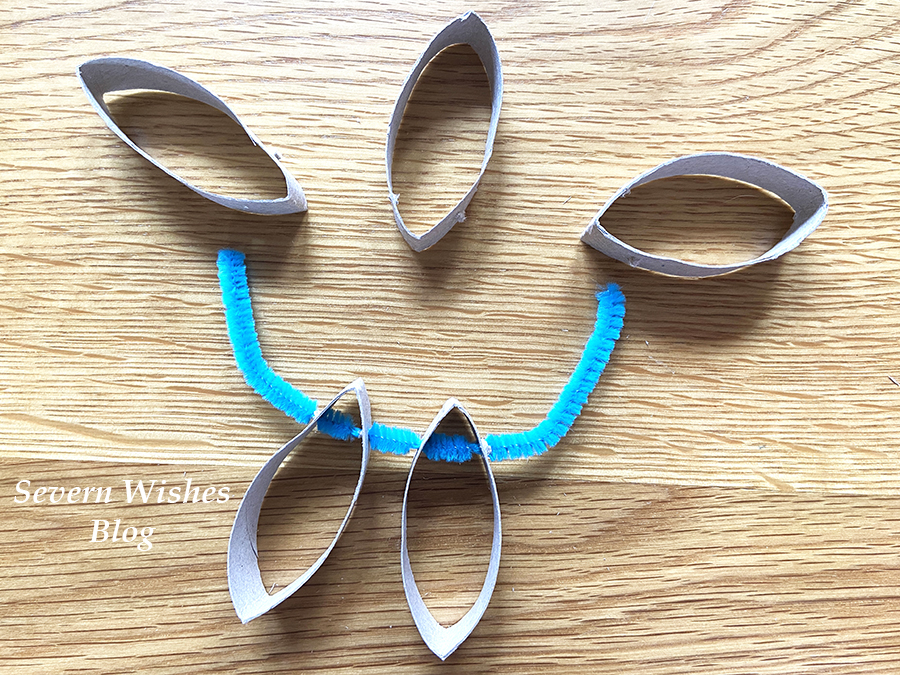
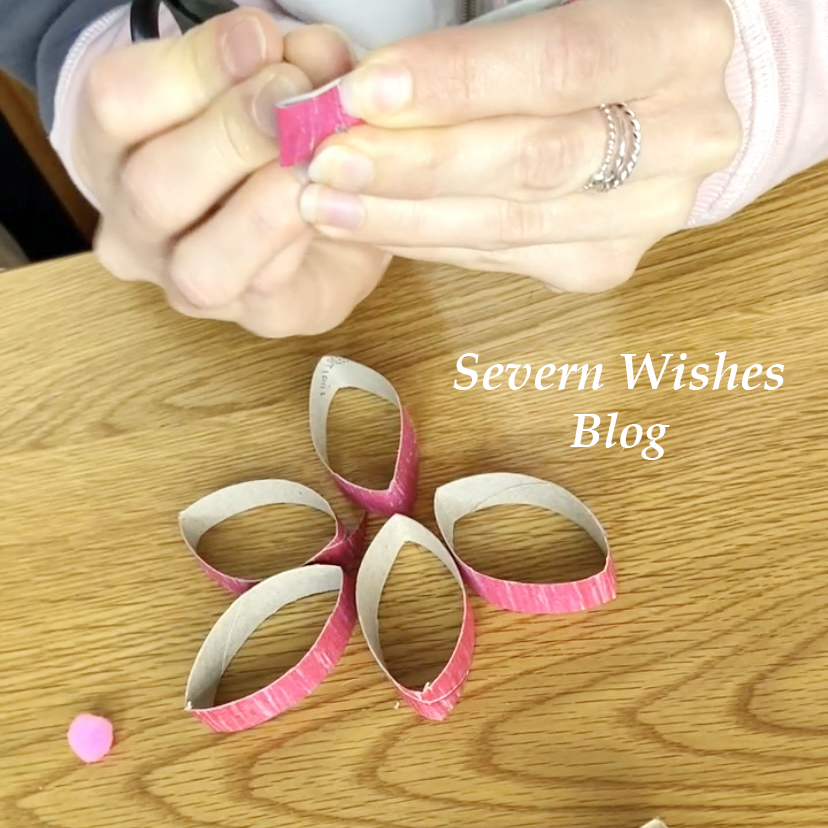
Step 2. An adult then cuts the toilet rolls into equal width pieces to make the petals.
Step 3. An adult also then uses the pointy end of their open scissors to poke holes that are 1cm up from the end and through both sides of each petal. (See my photo).
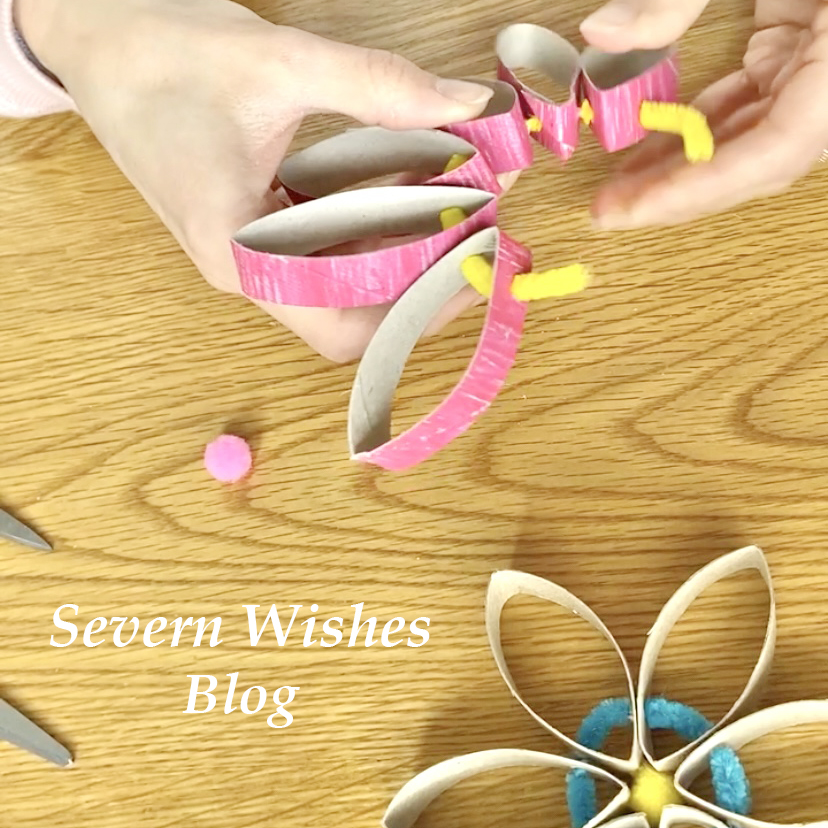
Step 4. The petals can now be opened out and gently threaded on to a pipe cleaner through the holes made with the scissors. Push them on until they hit the middle of the pipe and keep adding round.
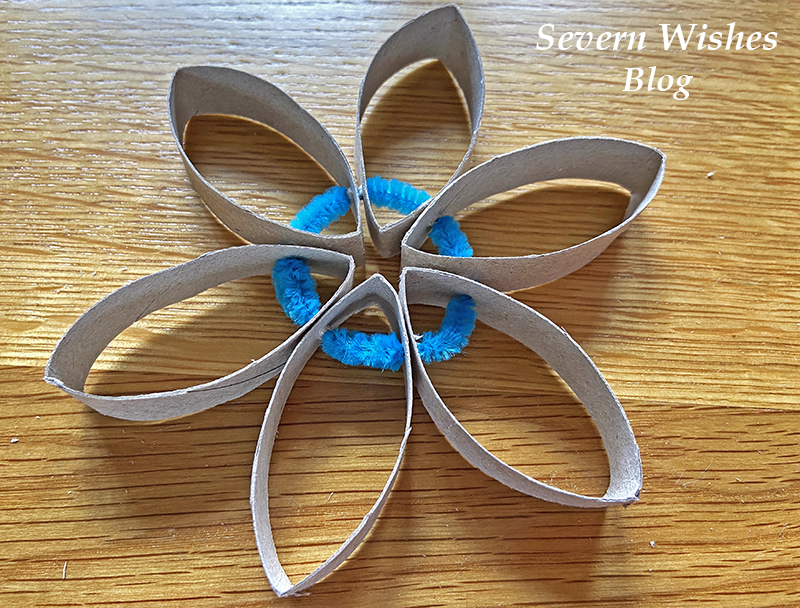
Step 5. Curve the Pipe Cleaner round as you go, after each petal, and then after the final one is added you push the ends of the pipe back through the final petal holes to neaten it up. Line it up spaced between the petals while it is flat on a table and then push a fluffy craft ball into the middle.
Step 6. Hang your flowers up around your home on ribbon or string for a nice decoration.
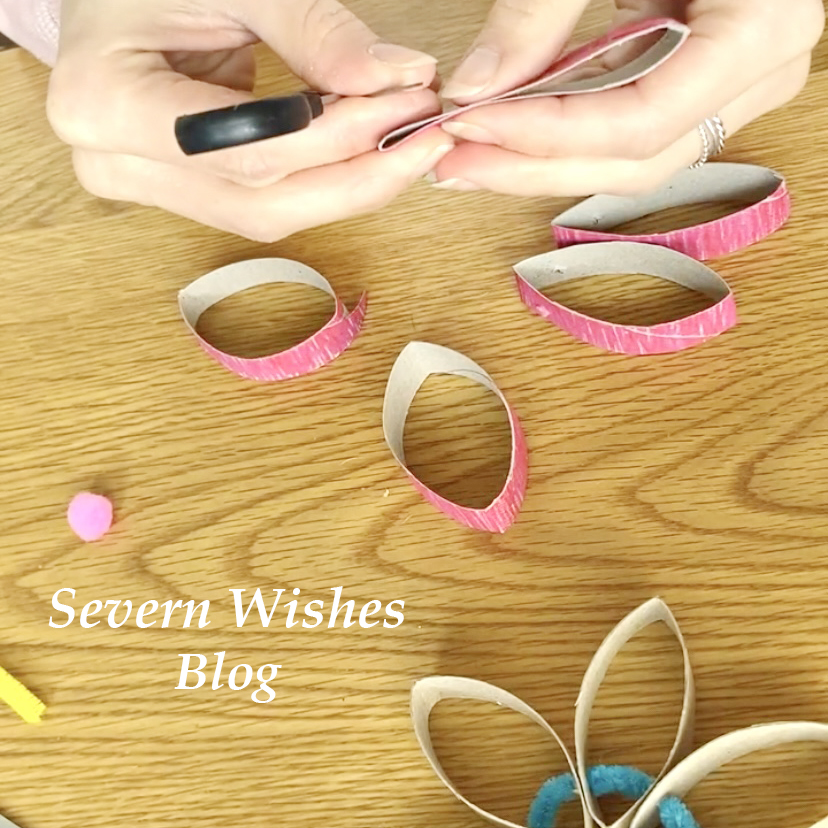
Step 3 – 1 cm in from the petal end
Step 3 – making holes through the petals
Step 4.
Step 4 to 5.
Step 5.
Step 6.

✩✩✩

Step 2 – Cut the Decorated Roll into 5 Pieces

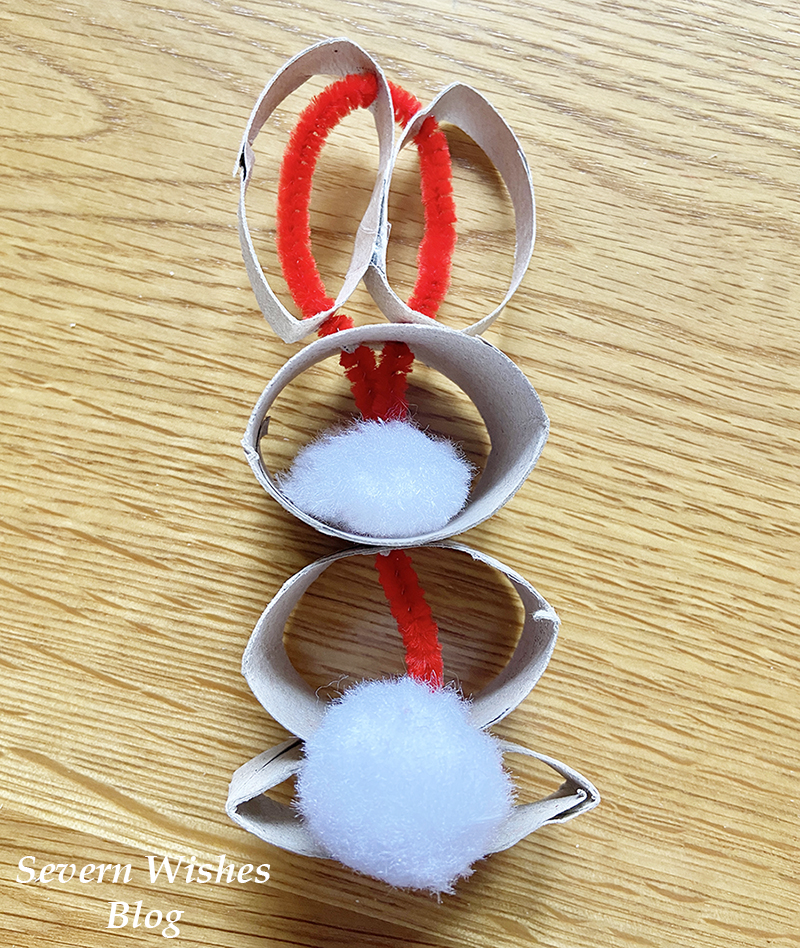
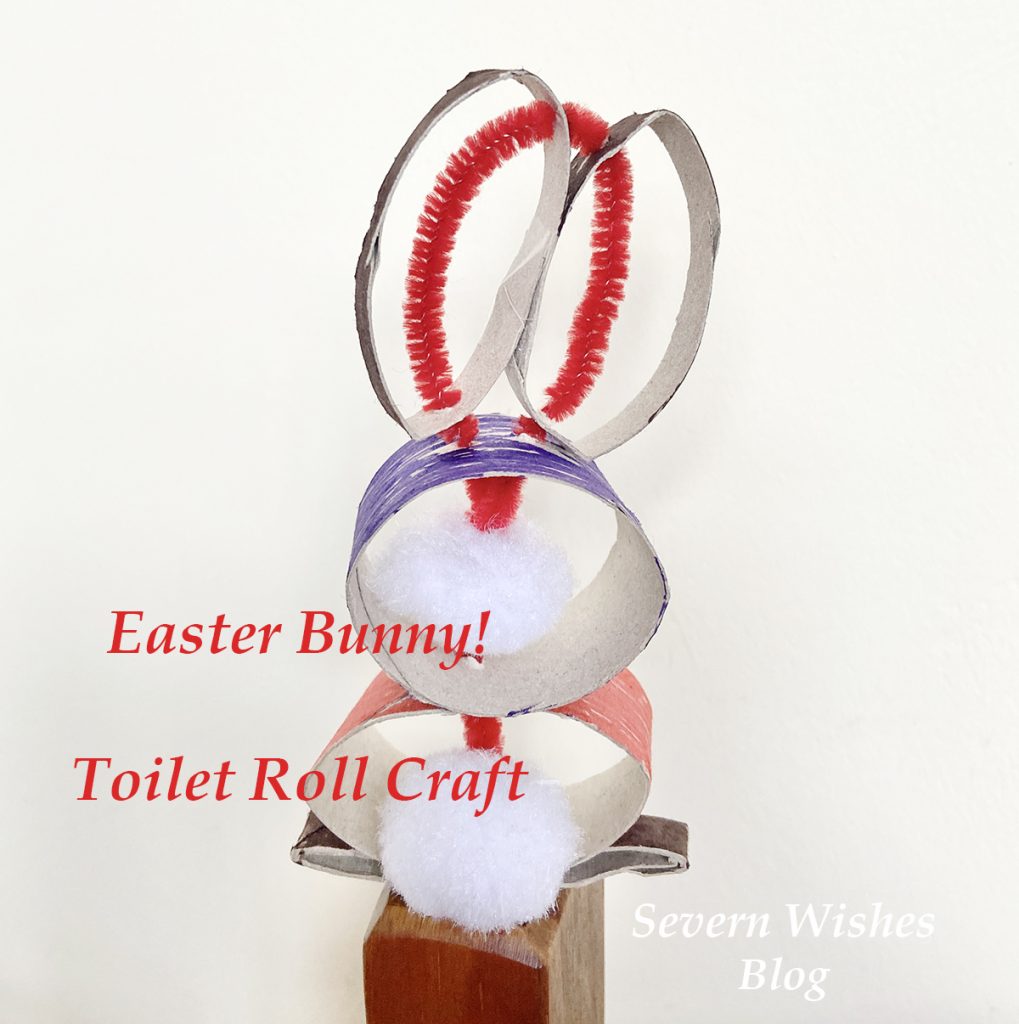
How to Make Sabrina’s Toilet Roll Easter Bunny

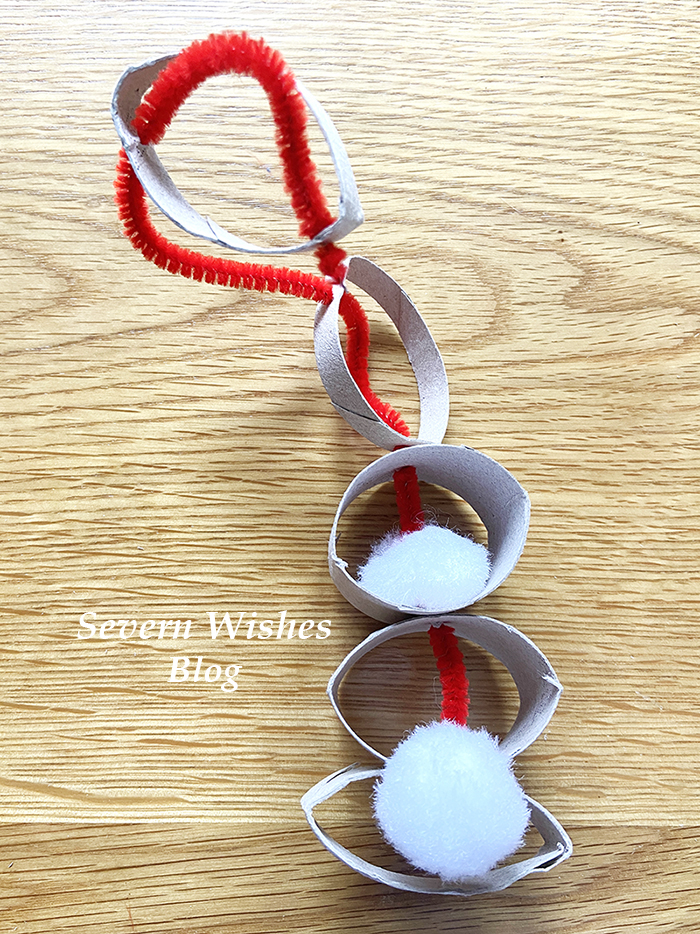
My cute toilet roll bunny’s are great for the Easter break! And they should stand up all by themselves! They are a little trickier than the flowers, but lots of fun still! They all start with a decorated toilet roll anyway so make sure you just save them up and get little ones to colour them in.

Step 1. Children decorate toilet rolls and let them dry.
Step 2. An adult cuts the toilet rolls into 5 pieces, a base, two ears, a middle and a head. (See Photo).
Step 3. An adult uses the pointy end of scissors to poke holes in the pieces, each one is specific. So…
Base is one hole, central on one side. Middle piece is two holes, one top one bottom just push the card flat together and the scissor end straight through. The Head piece needs one hole in the base at the centre, and off centre at the top it needs two holes. Each ear needs two holes, both on the same side at either end before the point. (See My Photo).
Step 4. Using a Pipe Cleaner push it on to the base and bend the end, attach the fluffy tail.
Step 5. Add the Middle to the pipe cleaner, push it down until it is flush and flat against the base.
Step 6. Take the Head piece, thread it on through the single hole, make it flush on the Middle piece of roll and then push another fluffy ball down the pipe cleaner until it sits in the middle of the roll.
Step 7. Push the pipe cleaner up through one of the holes in the top, and curve the pipe cleaner round, make sure the bunny parts are all flush and together for the body.
Step 8. Add each ear by pushing the pipe cleaner up through one side with the holes on, in through the bottom hole and out of the top hole, bend the pipe cleaner round and then through the top hole of the final ear and down through the bottom hole.
Step 9. The final step is to push the rest of the pipe cleaner down through the second hole on the bunny head, if you have more than 1cm of pipe left cut it off, then push the last 1cm into the fluffy ball within the roll bunny head, this neatens it up and gets the pointy end of the pipe cleaner hidden away.
Step 10. Adjust your bunny feet base and middle parts so that the bunny is aligned and he should stand up all by himself!
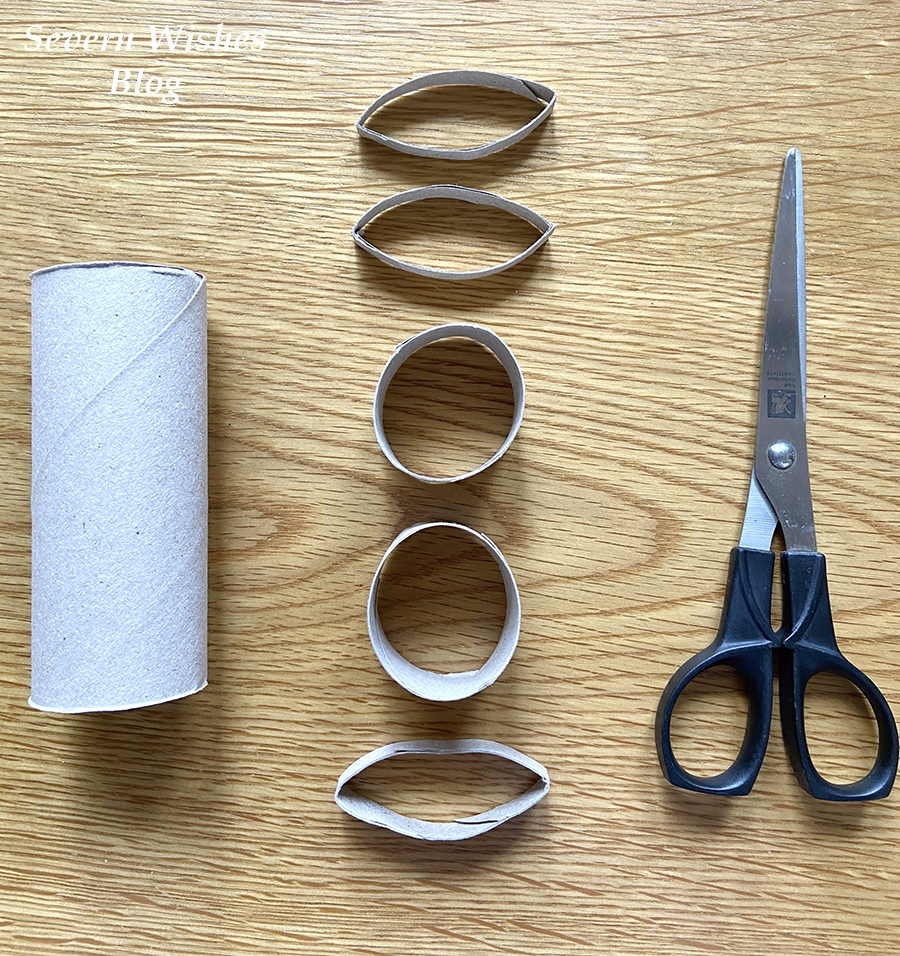
Step 3 – use my guide to make the necessary holes
Step 4 – Base and Tail
Step 7 and Step 8 – Threading the Ears

My bunny making video tutorial can be found on my Facebook page if you get stuck which is right here

✩✩✩
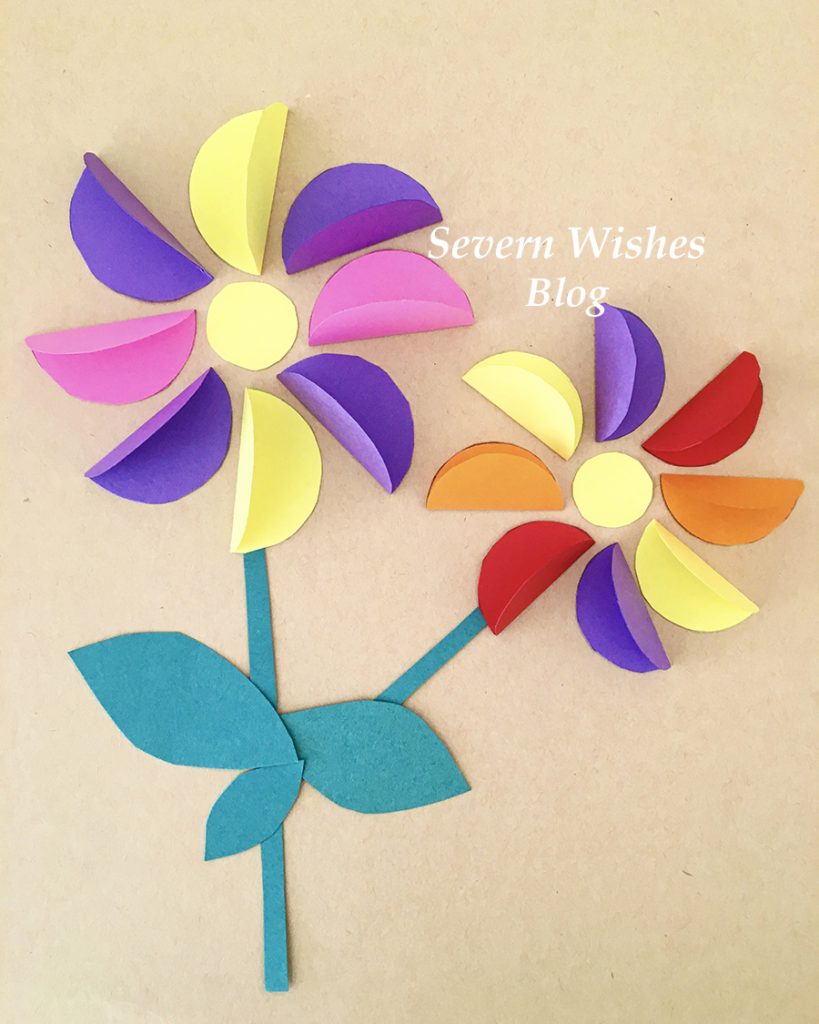
How to Make Sabrina’s Circle Petal Flower Card

This one is nice and easy and once all the cutting out is done, children can stick them down however they like to design their own flowers.

Step 1. Fold a Piece of Card in half for your card base.
Step 2. Draw around a circular object many many times on some different pieces of coloured card.
Step 3. Cut out these circles carefully and assemble flat.
Step 4. Every circle needs to be folded in half.
Step 5. Assemble your Flower by arranging the petals with one side sticking up to make it 3D.
Step 6. Cut out a small circle in a bright colour for the centre of each flower.
Step 7. Once happy with the design either pritt stick or double sided tape each petal down to the card.
Step 8. Make leaves or stems from card, or use pens to decorate your card.

✩✩

Thank you for reading this (long) Craft related blog post today, I always showing you my latest “Sabrina’s How To Make’s”! And if you have any questions for me about how to do something you’ve seen on my blog then please comment below on this post and I will happily answer them for you. I hope that you have seen something you would like to try and make yourself!

If you do make any of my craft items please tag me on social media using the hashtag #SabrinasHowToMake I really look forward to seeing them!

✩ Sabrina 

Check out my previous How to Make Craft posts for these beautiful 3D paper flowers!

Fun Easter Crafts

HAPPY EASTER FROM SEVERN WISHES

Fun to Make ~ Easter Art and Crafts ~ with Sabrina of Severn Wishes

I have wanted to do this blog post for the last three years, and I have always been too busy to complete it! Mainly because it is a mixture of writing the blog, creating and making the craft items, and then taking the step by step images, processing all of those and then putting the entire lot together in one blog post. It is both time consuming and a lengthy in process too. So what changed this year? Well for one thing, I was more determined to do some more craft this year, but isolation has also made me re-evaluate what’s important, and that is to make happy memories with my son. No matter what is going on outside our home, he doesn’t understand, and it is my job to keep things as normal as possible, so extra fun, extra learning and extra memories are all on the table at the present time. I’m so glad you could join me to hopefully make some memories of your own!

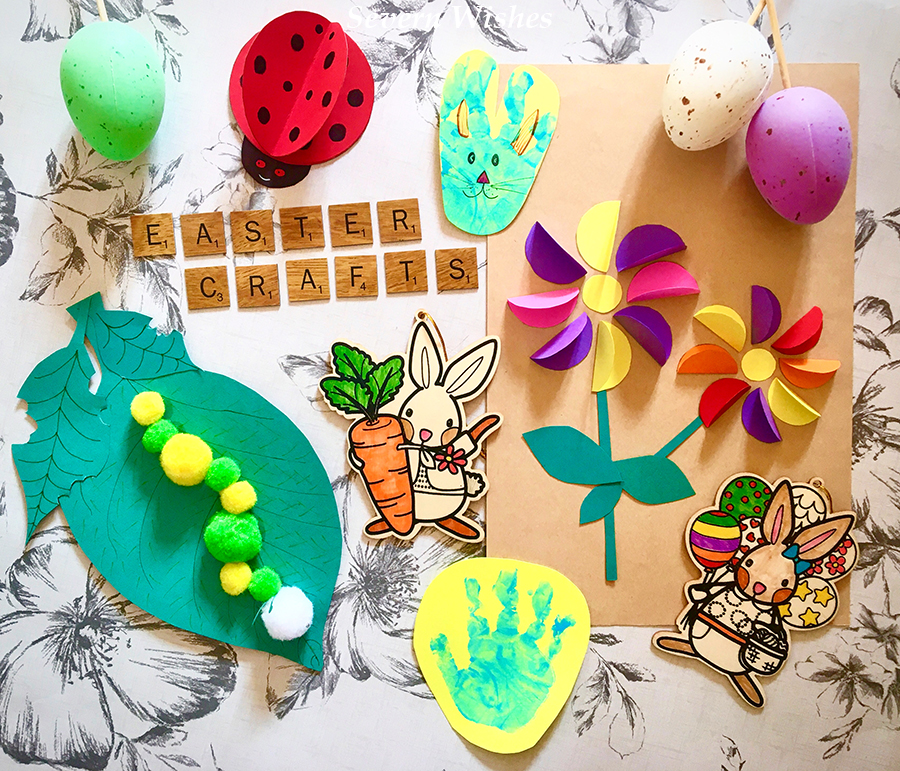
So without any further ado, let’s get our crafty fingers at the ready! Depending upon which Crafty Project you wish to undertake you will need a variety of items. My idea is this, pick an item from the four below, and then match the “You Will Need” items with what you already have at home. Providing you have all the necessary bits and bobs then feel free to scroll down to that Project and then get cracking with my Step by Step guides! Happy Crafting!

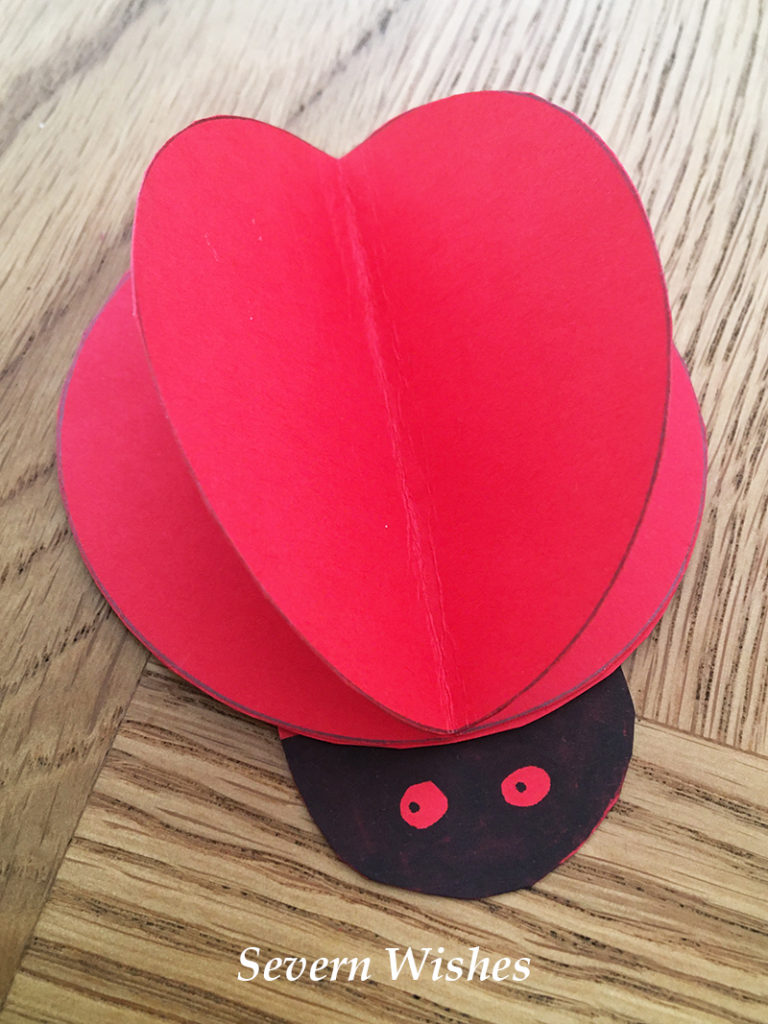
1. 3D Friendly Ladybird
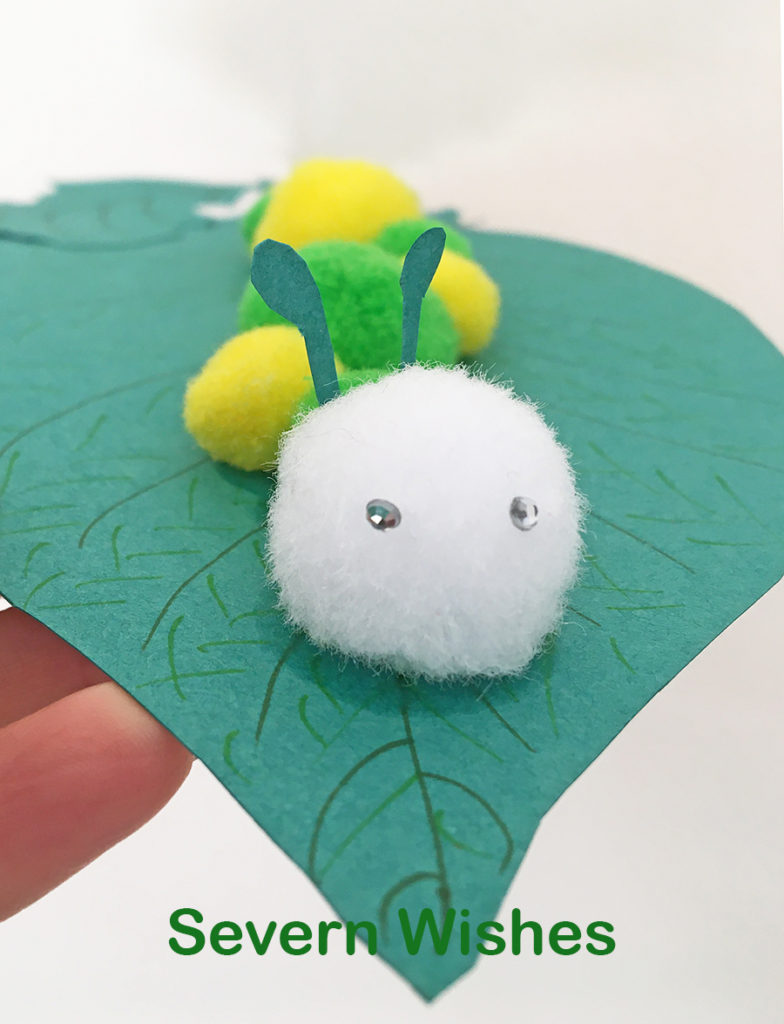
2. Wiggly Caterpillar
3. 3D Paper Flower (Can be Framed or Made into an Easter Card)
4. Hand Print Easter Bunny Rabbit

5. Other Craft Ideas

1. 3D Friendly Ladybird

You Will Need
Pritt Stick or Glue
Coloured Paper and / or Card
Circular Objects to Draw Around (This will determine the size of your Ladybird)
Pencil
Scissors
Black Pen
Googly Eyes (if you have some but not essential)

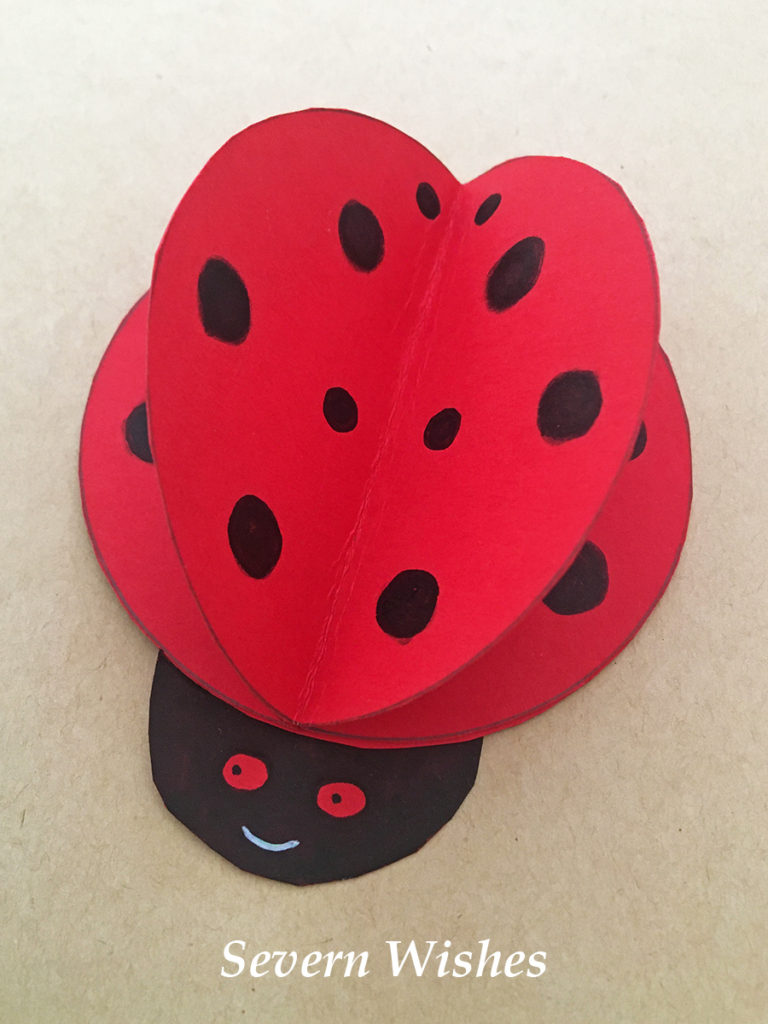
This is the easiest of my crafts today, and will take around twenty minutes to make. You can make it any size, any colour that you like. Why not make one for each member of the family? I am going to make several of them to put around my son’s bedroom. He loves Gaston from Ben and Holly’s Little Kingdom, so my son is the inspiration behind this particular craft project.

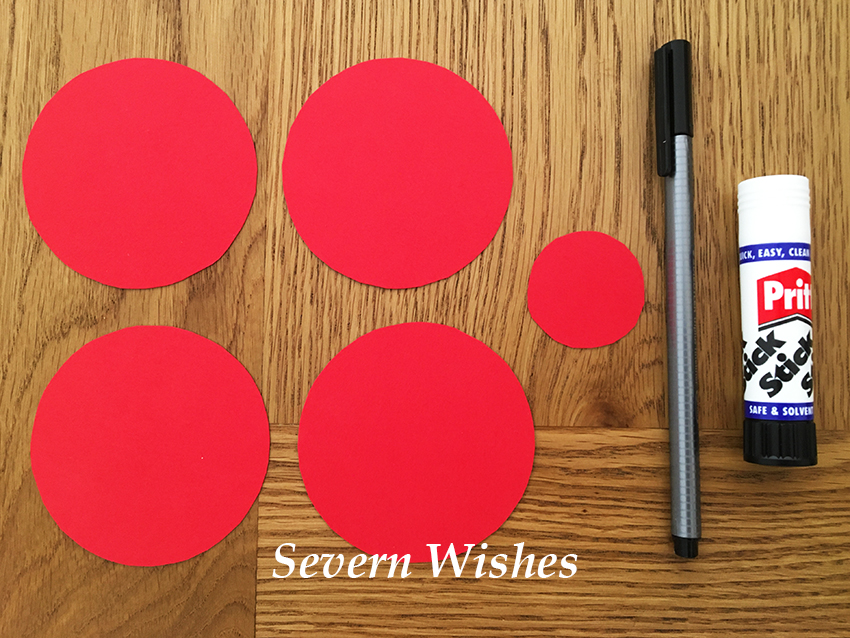
Step 1. Choose the Size of your Ladybird. Choose your colour. Draw around a Circular object so that you have 4 Circles the same size, and then you will need a smaller circle for the head, judge this depending upon the size of the body. Cut out these 5 circles and then you’re ready to begin.

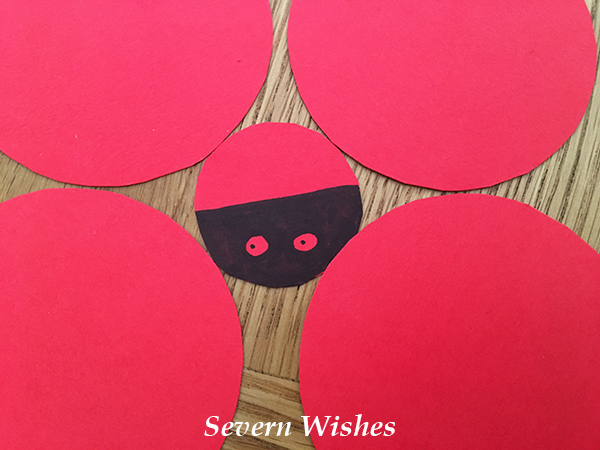
Step 2. On the small circle draw a line across the centre, you want to colour the half of this circle in with black pen. Don’t forget to draw eyes on it too like mine, if you don’t have any fun stick on eyes to hand! Then pop this face to one side you won’t need it now until Step 6.

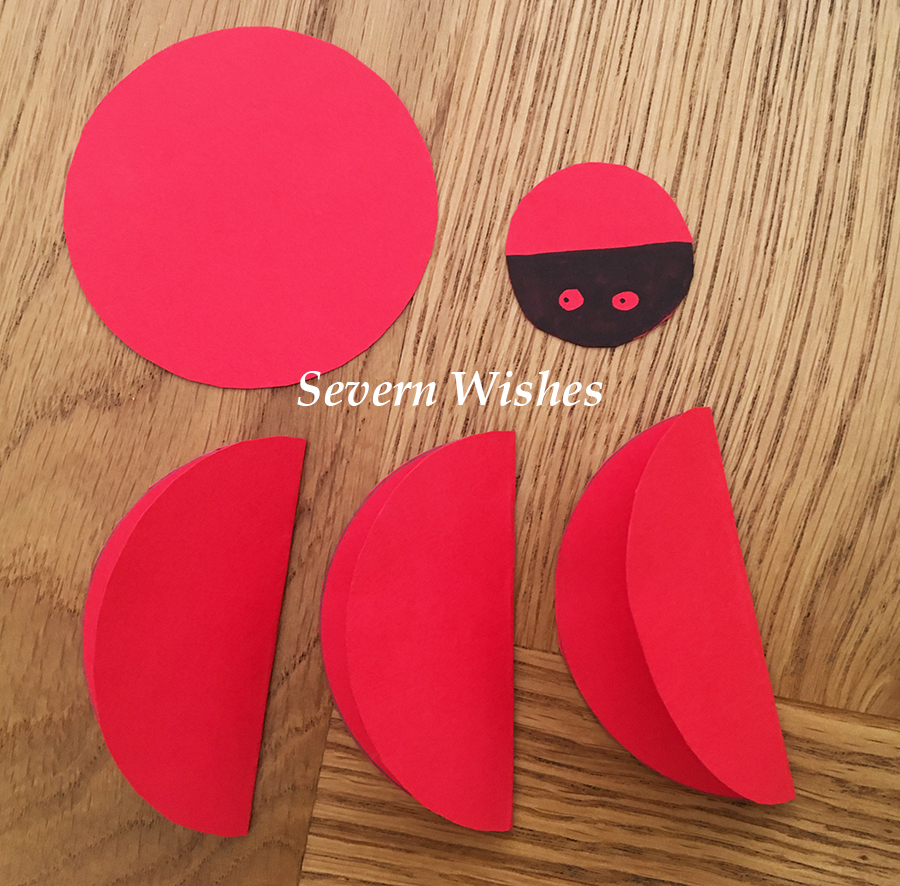
Step 3. Take 3 out of the 4 Large Circles and fold them in half across their centre. Gently crease them with your fingers, take a look at my image below to see how they should look.

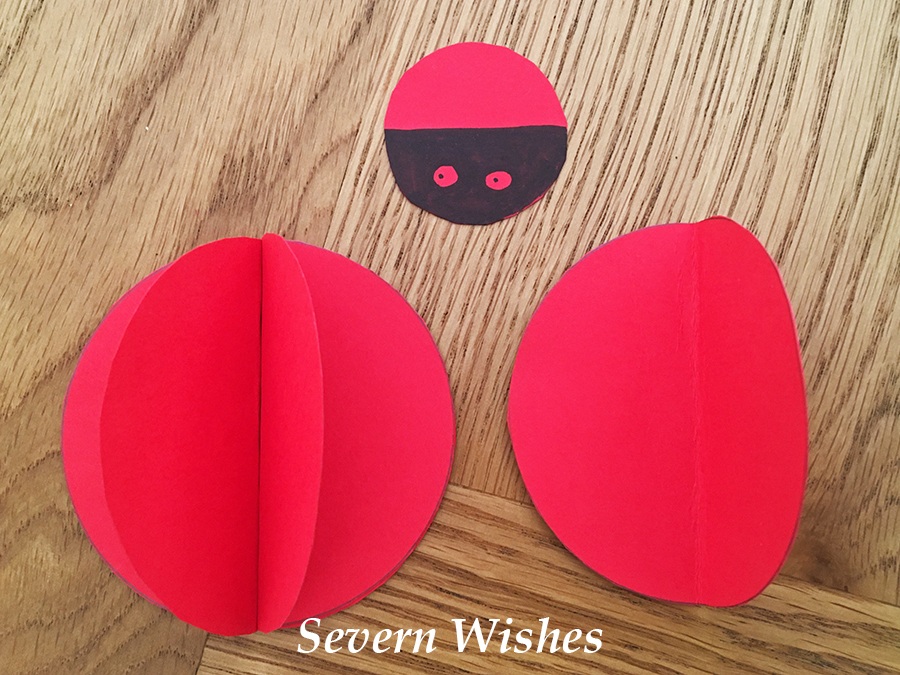
Step 4. Take the flat circle and cover it lightly in glue or pritt stick, I always prefer a glue stick when messing with card, less mess! Then take two of your folded circles, stick glue on their side that faces flat, place them back to back and glue them down on to the flat circle so that they make a V shape.

Step 5. Take the remaining Circle that is folded in half and cover it in glue before pressing it down into the centre of your Ladybird body, covering the two below neatly. You now have a finished insect body.

Step 6. You can now glue the head on by placing the glue on to the half you didn’t colour in, make sure you line it up with the V of the Ladybird to make it look right. See my image below.

Step 7. Push down all the flat surfaces of the Ladybird and leave for an hour or two for the glue to dry. Then using a Pen or Marker, draw on however many Spots you would like.

Step 8. Repeat steps for making other colours or other sizes if you have Card or Paper left over. If you need a base for your Ladybird to sit on, why not make him a cardboard leaf! (You need leaves for another of my crafts anyway!) 😉

CRAFT FINISHED

2. Wiggly Caterpillar (munching on a leaf)

You Will Need
Pritt Stick and PVA Glue
Green Paper or Card (Card is better)
A Mixture of Green and Black Pens
Poms Poms! All Colours Welcome!
Googly Eyes or Stick on Sequins
Scissors
A Pencil
A Piece of Cardboard (Cereal box is good!)

This is a fun craft to do with young children. They can make their Caterpillar whatever colour they want. All you need is some Pom Poms! You can follow my Steps or watch my video below!

Step 1. Draw and Cut Out a Leaf Shape (this is your main leaf) from your Cardboard. Then draw around this cut out piece of cardboard on to your green paper or card and Pritt Stick together.

Step 2. Draw your Leaf design on with Green pens. Set to one side.

Step 3. Decide what Pom Poms you want to use and arrange them!

Step 4. Make some antenna and extra leaves and stick your eyes on to a Pom Pom ready to assemble your bug!

Step 5. Using PVA glue stick your Caterpillar together, don’t forget the extra leaves, arrange however you wish, then leave to dry in a warm flat place.

Step 6. Add any additional things to your bug once it has dried.

Caterpillar Video

3. 3D Paper Flower (Can be Framed or Made into an Easter Card)

You Will Need
Pritt Stick or Glue
Different Coloured Cards or Papers
A Piece of Card for Sticking to
Scissors
Pencil
A Circular Object to Draw Around (it’s diameter will be half the width of the flower so choose wisely)

This idea is simple but looks so pretty when complete. It makes a great card.

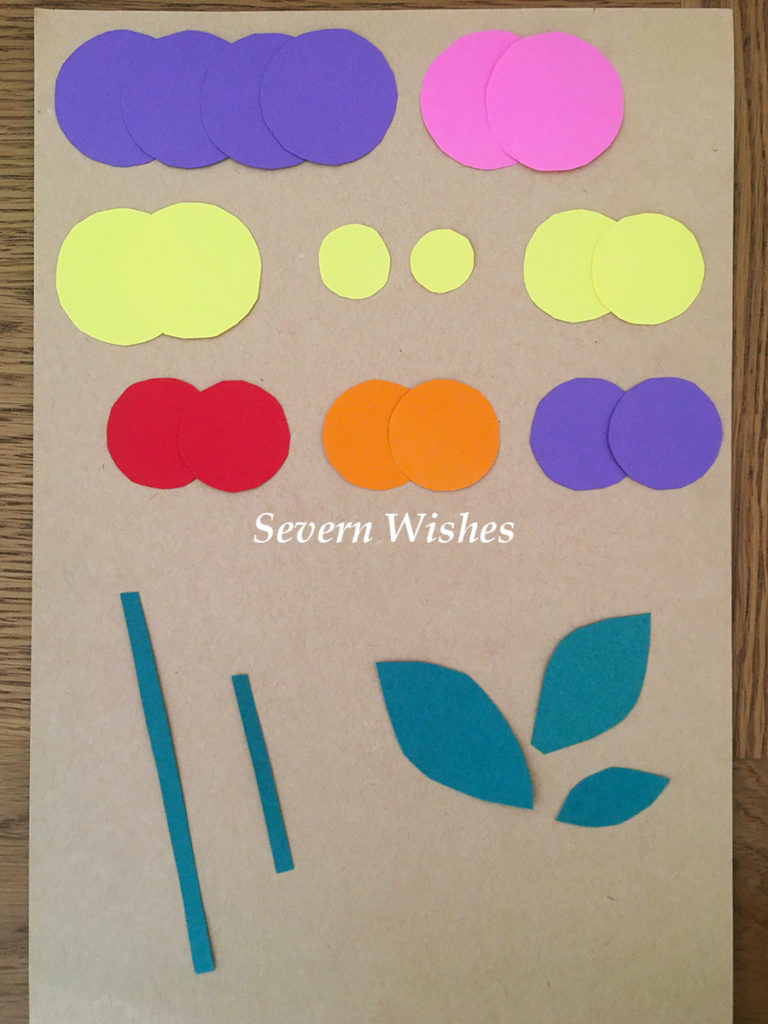
Step 1. Take a piece of plain card, this will be your base. Draw a Stem or Cut Green Card or Paper and create one. Make sure you leave plenty of room to stick the flower part. Cut out leaves and small circles of yellow paper to create the centre of the flowers. Be as creative as you like.

Step 2. Making the petals next, you need to cut circles of different colours, you will end up with 8 Petals in total per flower. I did two different sized circles to end up with two sized flowers.

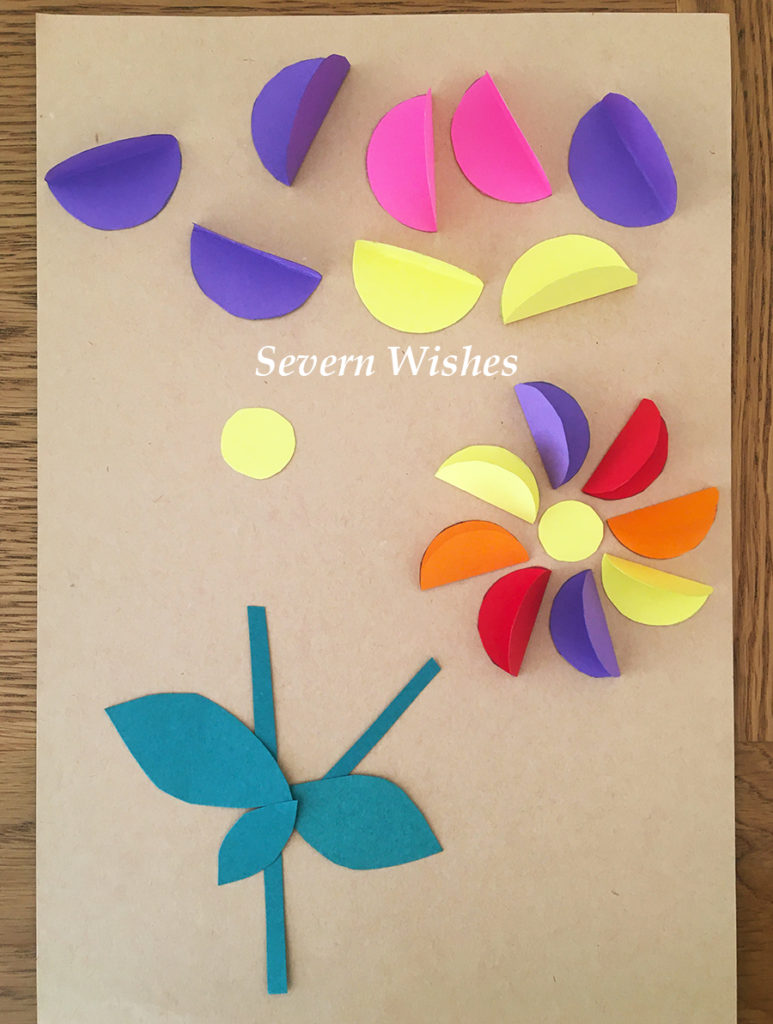
Step 3. Fold all of the petals in half so you end up with 16 halves with flat sides that stick up. This is how the petals will look 3D.

Step 4. Using Pritt Stick, stick the sides of the petals down so that they rotate around the centre of the flowers. You want them all to face the same way when you stick them around the yellow centre.

Step 5. Turn the flowers into a card if you like, or make other smaller flowers too using smaller circles, and make a pretty Easter meadow scene picture. Draw or Stick Easter Eggs and Rabbits and other Easter items along the edge like an Easter scene.

4. Hand Print Easter Bunny Rabbit

You Will Need

Paper or Card
Pencil
Hands!!!
Pens for the Details
Scissors
Paint

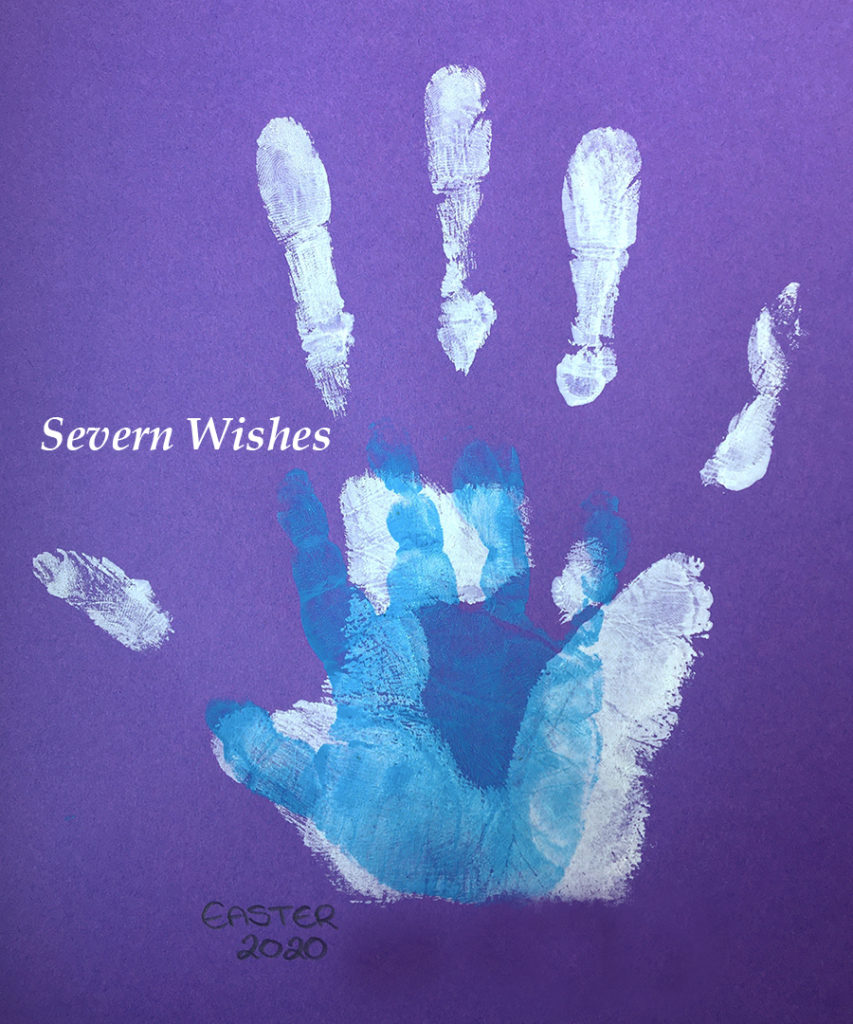
Paint works well for this one so you don’t have to colour in, unless you prefer to colour of course. It depends how much you’re painting, if you plan to do my hand prints picture (below) then you could do extra on different paper and make them into cute Rabbits!

Step 1. Draw around your hand and / or children’s hands. Or you can do a Hand Print on to Paper using Paint! MAKE SURE YOU LEAVE OUT THE THUMB! You want the shape to resemble a Rabbit head with two of each fingers being the ears! Keep two fingers together!

Step 2. Once dry you can cut the Rabbit shape out.

Step 3. Draw on Nose, Mouth and Eyes!

Step 4. Add any extras like whiskers, inner ears and freckles! Cut it out and hang it up or stick to a handmade card if you like.

FINISHED

Not the best hand print but you get the idea! My son was a bit reluctant to help out yesterday, ha ha!

5. Other Craft Ideas
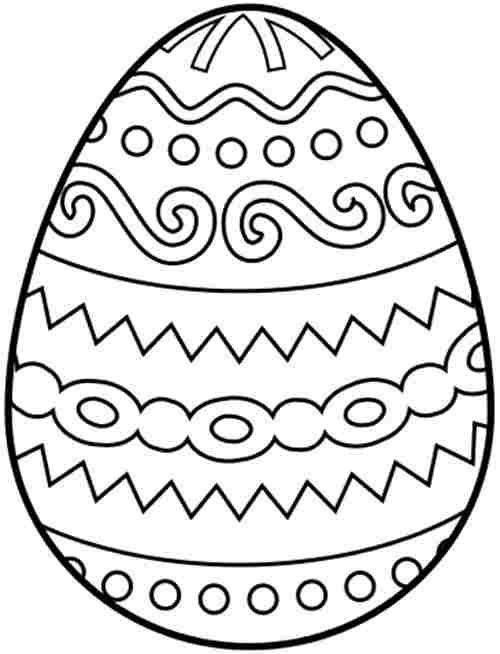
If you want to just Print some Easter Egg patterns and do some Colouring in with younger children then here are a few that I really like that you can save and print 🙂

Alternatively you could do some Painting of Hands and do some Prints!

Layer the Prints of your Hands to make a nice picture.

Thanks so much for joining me for this blog post. I hope that you’ve had fun, maybe even a laugh at my crafty items. If you made something please share it with me on social media, tag me or my page! I would love to see them! What was your favourite? Would you like to see more Art and Craft? Leave me a comment. Have a wonderful fun and safe Easter!

Best wishes from me!

Sabrina