Sabrina is a Lifestyle, Parenting and Product Review Blogger. A Writer, Photographer, Reviewer, Home Cook, Crafter & Nature Enthusiast. You will find a bit of all those categories here on Severn Wishes Blog, Welcome to Sabrina's Lifestyle Blogging & Honest Reviews.
How to make Birthday Bags on a Budget – it can be done!
My son recently had his birthday and a part of me was disheartened by the fact that I couldn’t afford to throw him a birthday party, one where his friends could come. We had family things going on all week but nothing with his school friends.
After talking to him about it one afternoon a week before his birthday, I asked him if he would like to do anything for his birthday on the day besides attend school, He said that he would like to share his favourite things with his school friends. I thought it was a lovely idea so we chatted about what sort of items he would include. After a lengthy conversation I decided we could do some birthday bags, and I hunted around for the best bargains. I was on a strict budget to I checked where things were on offer and started making a list.
So how do you make up a birthday bag?
You need either a birthday bag or a party bag, there are many varieties available online. You can get them usually with a handle so they are perfect for little hands to hold. I also chose to buy the plastic cones because I didn’t want Oreos to break up and/or go stale in the bags. This worked perfectly to break things up into sections, the Edibles and the Toys.
How do you stick to your Budget and get the best value?
✩ Sabrina’s Top Tips ✩
There are several ways to stick to budget and also find the best deals, here are my tips. 1. Decide your budget and make a list of what you need to buy. 2. How many are you buying for? Sometimes it’s cheaper to buy 50 bags than 20, bare this in mind. 3. Watch out for “lowest price in 30 days” and other useful slogans on offers. 4. Compare supermarkets online before you go out to do the shopping. 5. Use supermarket offers if you have a discount card with them. 6. Visit budget stores and compare the items you have seen online. 7. Always read the online reviews and filter by most recent as well. 8. Bulk Buy – Depending on whether you can reuse an item in the future for something else or even sell the remainder of the items on, bulk buying can be beneficial. (For us the Oreo’s were cheaper to bulk buy and so were the party bags). My son will happily eat any leftover biscuits let me tell you. 9. Work out the maximum you would like to spend, divide that by how many you are buying for, let’s say it’s 20 children. So divide your budget by 20, and you will understand how much it will cost to do a bag per child. Once you’ve made some essential purchases work out what is remaining of your budget and only spend what you have left. It might be that you have to buy a massive bag of sweets and divide them by hand into little sweet bags like I did with the Oreo biscuits.
Think smarter with your money and not buying things simply for convenience.
Why did we choose the items?
Picking for a mixture of genders is always tricky, but I don’t know a child who doesn’t love stickers and sweets / chocolate biscuits. Oreo is the choice because my son has food allergies but luckily he can eat original Oreo. The cars were because they were pull-back and super cool but also a car is gender neutral in my eyes, same goes for the bouncy balls. I asked all the parents (or my son told me) what peoples favourite colours were, and then labelled the bags and added the toys in accordingly. If I had someone who loved Red they got a red tie on their biscuit cone and they got a red car and a red ball. I would’ve loved to have included bubbles too but they would have sent me over budget. You could swap the bouncy balls for bubbles if your child would prefer those.
I divided the stickers between the children’s bags and kept the rest for my own reward charts at home, meaning each sheet only cost me 4 pence. Bargain!
Total Spent: £30.00 Total of Children: 16 Cost per Child: £1.79
I don’t think this was too bad, 16 happy children for less than £30 (as we had leftovers) and it was much cheaper than throwing a birthday party. My son got to share his favourite items with his friends too!
We have also got left over bouncy balls, birthday bags, cone bags, 6 sweet bags and 4 cars. The leftover pieces we can use whenever we like or give away at other occasions.
At the end of the day you can’t put a price on a child’s happiness and my son was over the moon to help me give out these little bags of joy to all of his friends at school, so that they could all celebrate his happy birthday together.
Thank you for reading this blog post today, I hope you have found it interesting and perhaps got a few useful tips in case you ever decide to do bags for your child’s birthday or a birthday party.
Well look at that, three years have literally gone past in a blur, and I am sitting here trying to fight back my eyes welling up. My baby boy is no longer my little baby boy, and in fact he has grown up so much this year that it’s scary. Having just emailed in all of the many forms I am now sitting on my sofa writing this blog post as I prepare for him to go off to Pre-School this September.
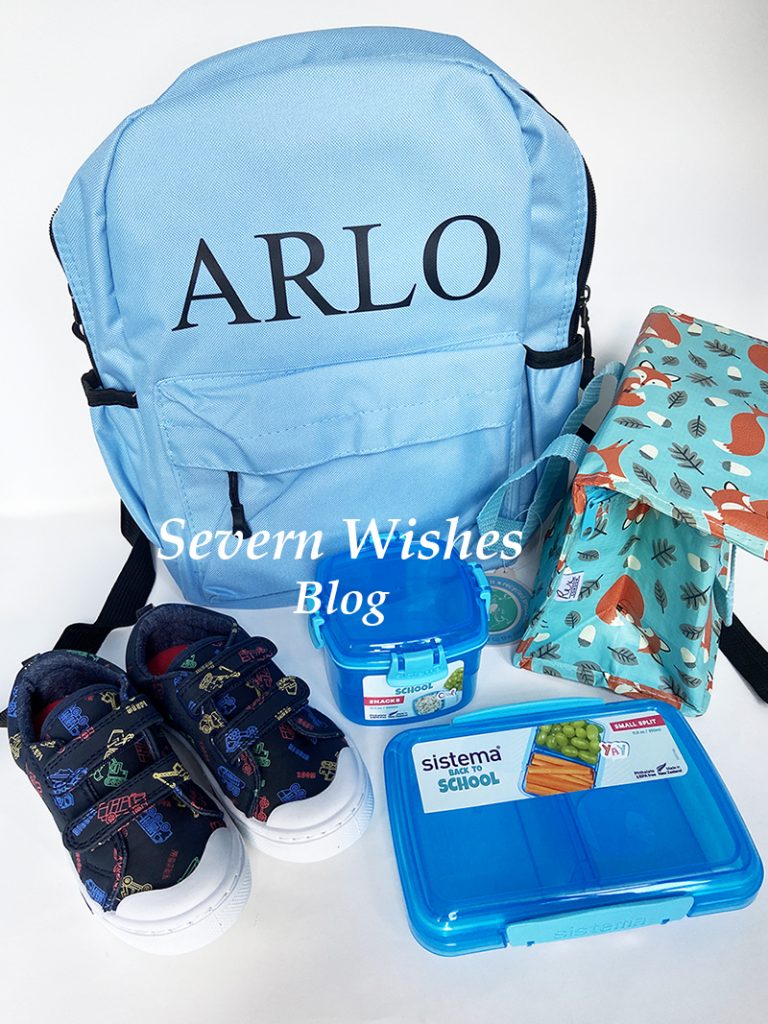
Backpack – Ollie & Millie’s Sistema Tubs – Tesco Kids Shoes – Tesco F&F Fox Cool Bag – Ollie & Millie’s
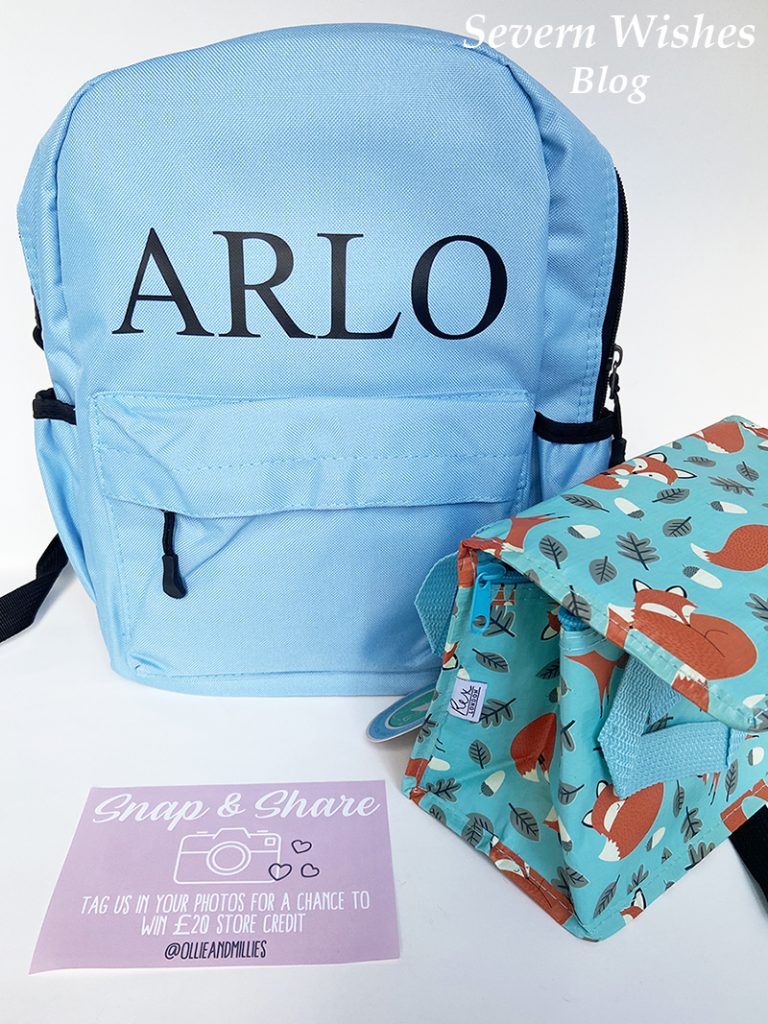
Going to school is like a right of passage and it’s a huge milestone in any child’s life. So I wanted to get my son some items to make that transition a bit easier. I had seen this gorgeous backpack on a page I follow on Facebook called Ollie & Millie’s. I had been looking at buying one for months, I looked around for a while, and then I decided to order one from them when I couldn’t find anything that looked as niceas theirs.
And because of Covid19 the School is not able to share some things any longer such as plasters, so every child must have their own in their bag. But that isn’t all, and my sons allergies also pose issues so he has to have everything he needs altogether in one bag. Luckily everything has fitted into the one I have chosen to buy from Ollie & Millie’s. Things such as a reusable water bottle (which we use already in my house but I bought my son a new one just for his school days), a (I chose personalised) backpack, snack pots, wellies for outdoor play and any medical items they require for the time frame they are at school are also included.
I’m very impressed with the backpack because of its quality in both material and its features such as strong straps and zips. There are several colours to choose from but my son loves blue so I chose blue for him, and because it’s a light sky blue colour the writing for his name really stands out. I was impressed with the time frame between ordering the product and receiving it from Ollie & Millie’s. The backpack also has versatility because I was surprised by just how much I could fit inside it, once I had gently opened it out when it arrived. Overall I rate it exceptionally highly and would recommend it to any parents who are after a good priced backpack with their child’s name on. The cool bag is also a lovely product and it is of excellent quality with a very cute fox design. Ollie & Millie’s have a wide range of products and also make personalised t-shirts and other clothing as well.
Other items that I have got to make things easier for both my son and myself are some fantastic plastic tubs from Tesco which are from the brand Sistema. The tubs are not only different sizes than what you would usually see in the supermarket, but they also have fun sections built in and have genius clips and lids too. Bonus points that I could get them in blue to match my sons bag as well!
Everything shown in my picture above is now inside the backpack, and with a handy bottle pocket on the side my sons drink is safe and secure too.
Thank you for clicking on this post, I hope you have enjoyed reading it.
Have you got any young children heading to School this term? I do hope they take it all in their stride! I will be doing a follow up post about how things went after the first few weeks too.
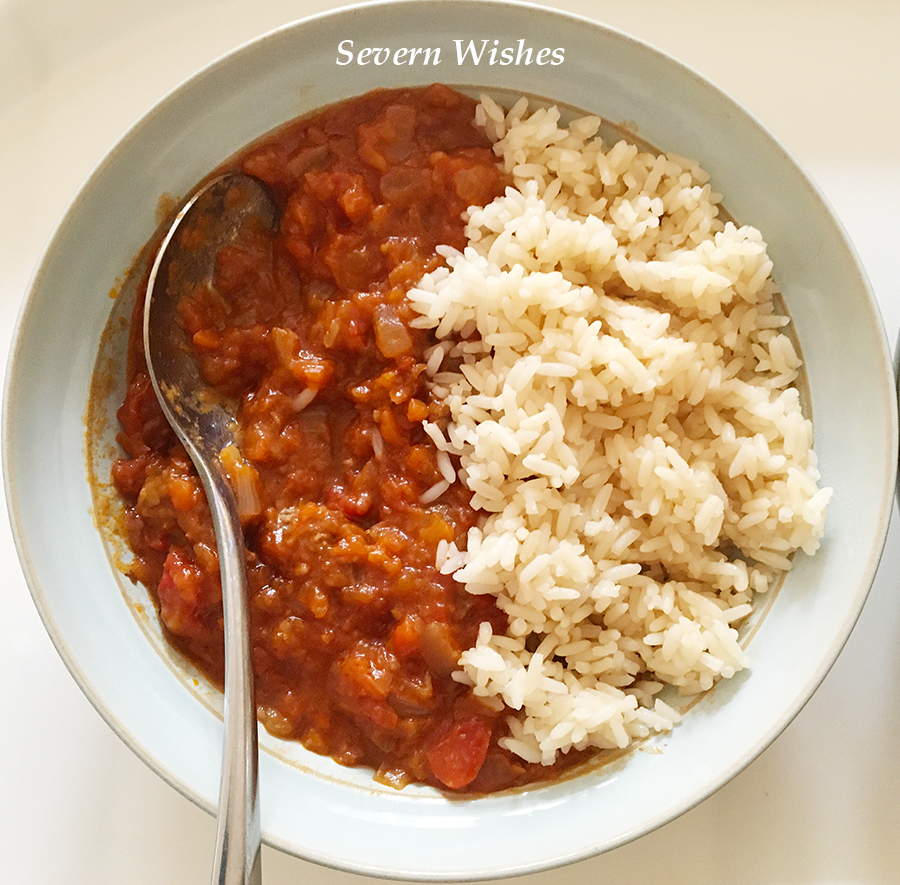
My Delicious Red Wine Casserole Recipe is a winner for the whole family to enjoy. And it’s got plenty of vegetables in it too, with a rich red wine gravy sauce.
You can have a tasty dinner in 3 hours, with a 30 minutes preparation time and a 2.5 hour cooking time. Easy to do and leave in the oven while you do something else! It is a very handy recipe to have when you have to help your children with homework this Autumn.
I will do my ingredients list as if you were serving 4 people. I do this meal for my son and I, and it then reheats well the next day when stored in a fridge once it has cooled from the original cooking. I do it in a Pyrex Casserole Dish with a lid, and it can then be cooked and stored easily.
Ingredients
Vegetables 4 Carrots (1 Medium Carrot per person) – finely diced is best. 2 or 3 Large White Onions (at least half a large onion per person) – finely diced or small pieces. 1 Tin of Chopped Tomatoes 400g (Make sure to add some warm water to the tin, add this in to the dish in order to create your liquid for your stock). (Optional) Mushrooms – Small Washed Button Mushrooms are best.
Accompaniment / Side
Long Grain Rice prepared per person. 1 Tin of New Potatoes 600g (serves 4 people) This can be added to the Casserole and they will cook during the time frame. 500g Mashed Potato prepared during the final half an hour of cooking.
Meat / Vegetarian Alternative
300g – 500g of Casserole Meat of your Choice – I use Beef or Chicken or Quorn – all of which go really well with the Red Wine Sauce. Plain Flour for Coating the Meat (Contains: Wheat)
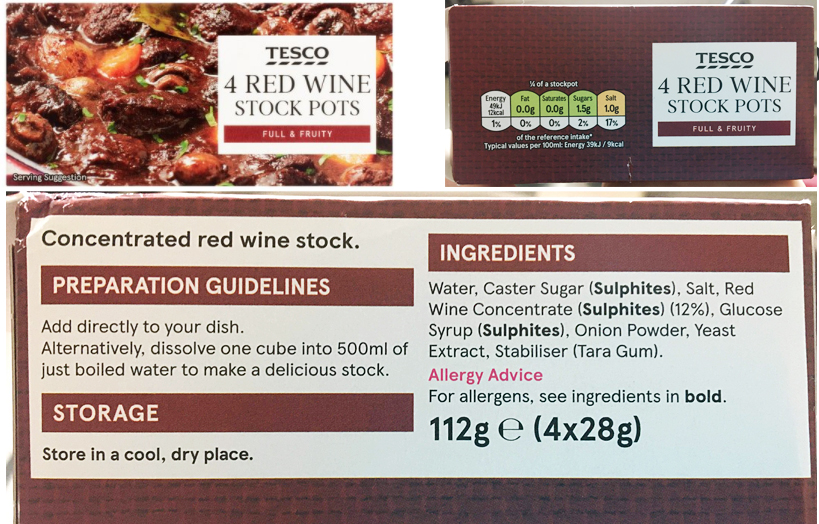
Sauce Tesco Red Wine Stock Pot – 1 for a 4 person Casserole. (Contains: Sulphites)
Tesco Stock Pot Red Wine Packaging 4 x 28g
Method
1. Start by preparing your meat, it will require 2 hours or up to 2.5 hours of cooking time. Mix your cut up raw meat with some plain flour in a bowl. You want bite size pieces and all coated in flour. Then you want to fry these off in a tiny bit of oil until sealed but not overcooked, you don’t want the meat to go dry.
2. Next you need to prepare your vegetables. Dice and Fry your Onions after you finish with the Meat/Veg Option. Dice with a knife or throw them all into a food processor to chop them up, it won’t matter to the end result, but you don’t want too big pieces. Don’t cook the Carrots, there is so need, you just want to chop and add them to the casserole dish, they will cook in the stock.
3. Speaking of Stock, that is your next thing, pop your chopped tomatoes in the dish, add water to the tin, and then add that to your dish. You need to add the stock pot, mix thoroughly.
4. Add the rest of whatever you have, vegetables, fried onions, sealed meat, mix together in the stock and then pop the lid on. Preheat your oven and cook at 160 degrees (fan oven) for 2 hours. Check and stir the casserole at that point and then pop it back in the oven for another 30 minutes. (You can do your mashed potato or rice during this half an hour if you didn’t add potatoes to the dish).
5. Be careful when you remove it from the oven as it will be very hot. Serve in bowls with your chosen accompaniment, and enjoy!
Thank you for reading this Recipe post today, I hope you will give this one a go if you can find the stock pots. I love Tesco own products and I love to shout about something if it’s an excellent product, and these most definitely are! They are affordable and allow you to make something that is both delicious and healthy. Please let me know in the comments below if you do this recipe and how it turns out! I hope you like it!
Our Weaning journey began delicately due to our son having suspected allergies. He is exclusively breastfed and he cluster fed for the first 5 months of his life. He was born slightly premature at 37 + 5 and after having bad jaundice at birth, it took him many weeks to recover. We spent so much time in hospital at the start that our first month with him went by in a blur. Problems with allergies began at around 12 weeks, so it was a steep learning curve in the next 10 to 12 weeks that followed.
Then, when it came to Baby A reaching the 6 month milestone he was still in size 3-6 month clothing and breast feeding up to 14 times in 24 hours. We hoped that Weaning would satisfy him more so and because we could introduce cooled boiled water with his meals, it would take a bit of pressure off me. This did work, but he had such an appetite that he continued regular breastfeeding including a minimum of two feeds a night, plus day times and extra weaning snacks. We had ourselves one hungry baby!
I recall the health visitor questioning how much I was feeding him at our 6 month visit… she couldn’t believe how much I was saying he ate, I’m almost sure she thought I was lying. I had read in a parenting book that you cannot over feed a baby, because they will simply refuse to eat it. Our son wanted more and more food as the days went by, so I used motherly instincts and I watched my baby for cues. So I continued on with my busy breastfeeding schedule plus I began our weaning journey in a rather swift fashion.
We Tried A Range Of 4 Month Plus Puree, These Are A Few Of Them Little One Loved.
Baby A enjoyed many things that we tried first off, including individual vegetables such as Carrot, Potato, Parsnip, Sweet Potato, Apple and Strawberry. There were only 2 things he spat out which were Prune and Peas. And I don’t blame him for either! Ha!
After doing some reading and noticing how keen Baby A was with eating and being fed, we decided to do 6 weeks of Purées to start with. We maintained that he was to ingest nothing dairy of course, I checked packaging meticulously or I made my own. This worked well, starting with a few mouthfuls twice a day for the first week, followed by doubling the amount in subsequent weeks. By the time we got to week 6 Baby A was eating 70g of fruit purée for breakfast and 70g of vegetable purée in the early evening. He also tried Melty Puffs around this time too.
Prices of Purée vary, but they usually cost anything from 40p all the way up to £1.50. They also range in size so look out for that. We made the most of any offers that were on in supermarkets and also used any store credit points and vouchers we had picked up to get our initial 6 week stash of purée. Boots vouchers can go a long way if you sign up to the Clubcard and baby club before hand. Keep a look out on social media for offers too.
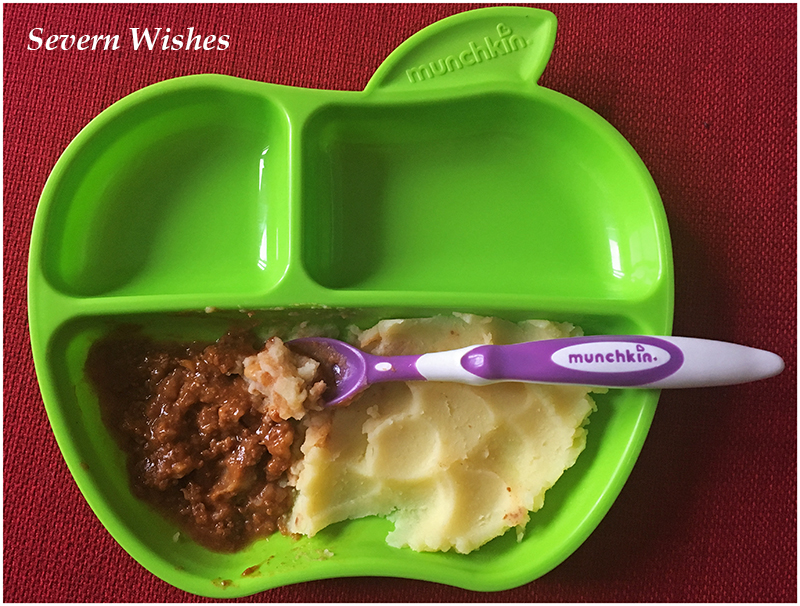
Minced Beef and Onions with Mashed Potato (7M)
He was enjoying the food we were giving him and he was obviously hungry. We were approaching his 8 month mark when we began moving to thicker purées and food with more textures. I was bulk cooking mashed vegetables at this point and freezing them in small pots (roughly 80g each). Some combinations included Potato and Carrot, Carrot and Swede, Carrot and Parsnip and Parsnip and Sweet Potato.
At 8 months Baby A was eating between 70g and 100g for breakfast, between 100g and 130g for his lunch and between 130g and 150g of food in the evening. This was on top of 12 breast feeds still most days, and we had began to try him on some more snacks. The melty puff kind that melted on his tongue were a real hit! Luckily they came in many flavours.
We also gave him fruit such as Raspberries, Strawberries and Melon as an evening pudding if he was feeling particularly hungry.
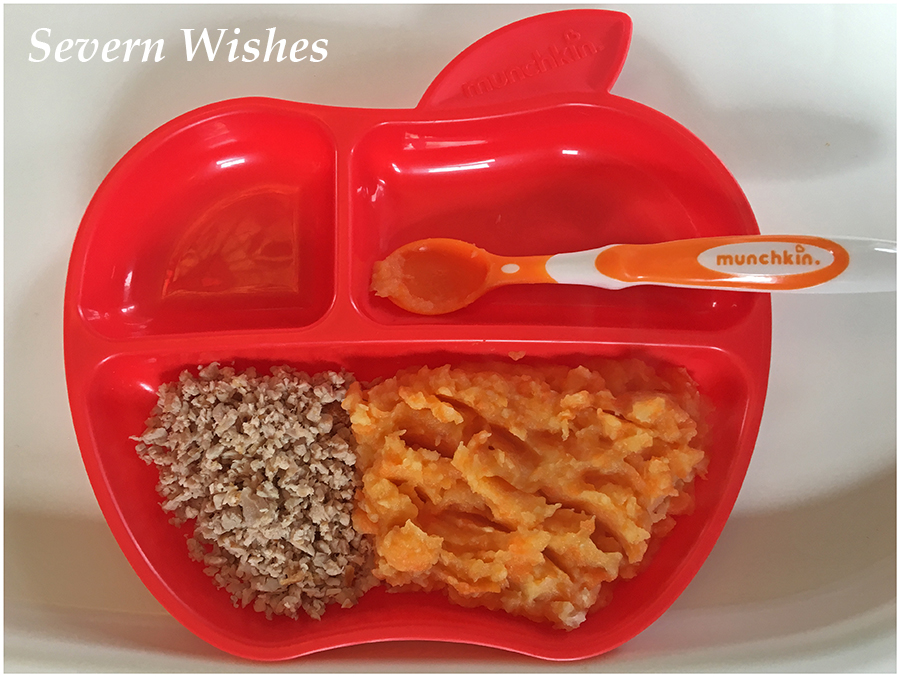
Minced Pork and Onions with Carrot and Potato Mash (8M)
Baby A ate most things from Day Dot but turned his nose up at the taste of Cucumber and also highly disliked the taste of Peppers. Some foods took a couple of times before he decided that he liked them, usually very strong tasting food groups. He was unsure about things like Tomato, Scrambled Eggs and Pasta, but we persevered and he eats them now. The trick is to leave a food for 2-3 weeks then try it with them again.
One thing I loved about Weaning was the way he learned and every day you saw him remember. Within two weeks he understood that cutlery went into his mouth, he began to chew even when food was super soft, and he was also cutting several teeth while we were trying most new foods. He did so well with all these milestone changes and I’m very proud of him.
Mashed Carrot and Swede with a Small Chicken Steak and some Rice (9M)
One thing I would recommend to mum’s who want to cook healthy meals for their little ones is to invest in a good strong vegetable mash utensil and a mini food processor. Mine is called the Russel Hobbs Mini Food Processor 22220 Mini Chopper and I cannot rate it high enough! It was used every day for 3 months and I still use it to dice up chewy meat because it saves me so much time. I still use it for my now one year old boy.
Russel Hobbs Mini Chopper In Use
At nine months Baby A began eating some more of the food I prepared for us adults. This includes the meat and sauce of bolognese but we gave him mashed vegetables and not much pasta. He ate my cottage pie (all of it), we had chicken steaks that I had diced in a blender with soft vegetables and rice, sausages were diced and served with mash and veg, and he even ate flaky white fish with rice and veg too!
I also used a weaning book that my mother had bought for me that had some great ideas inside for weaning recipes and snacks. I altered most of them to suit the various allergies in my family of course. Homemade Veggie Nuggets were by far my favourite thing to make, I bulked cooked them which was time consuming but then they’re frozen for convenience.
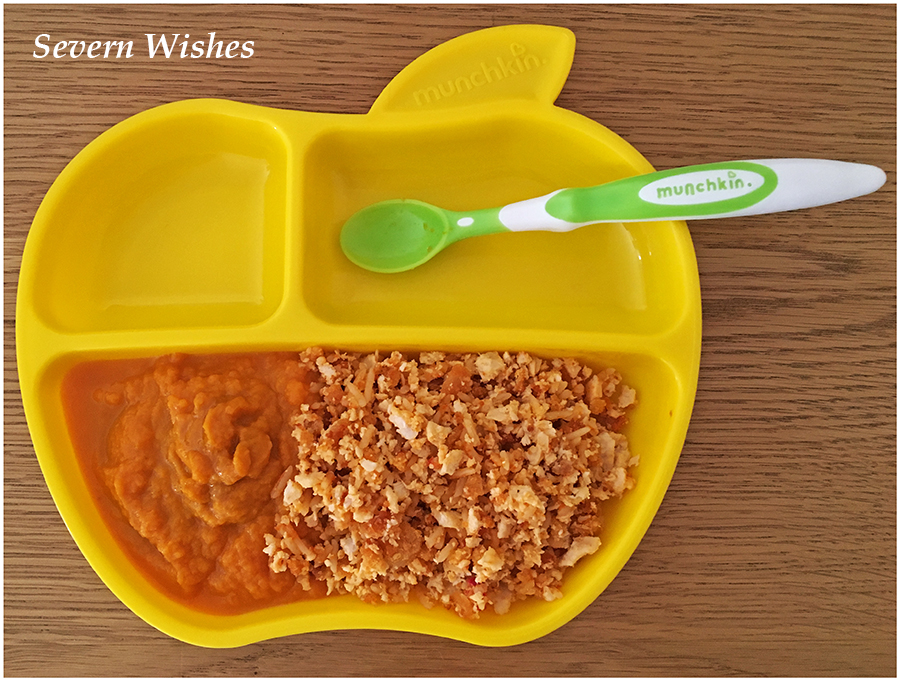
Minced Beef and Onions, Carrot and Swede Mashed with a Homemade Veggie Nugget
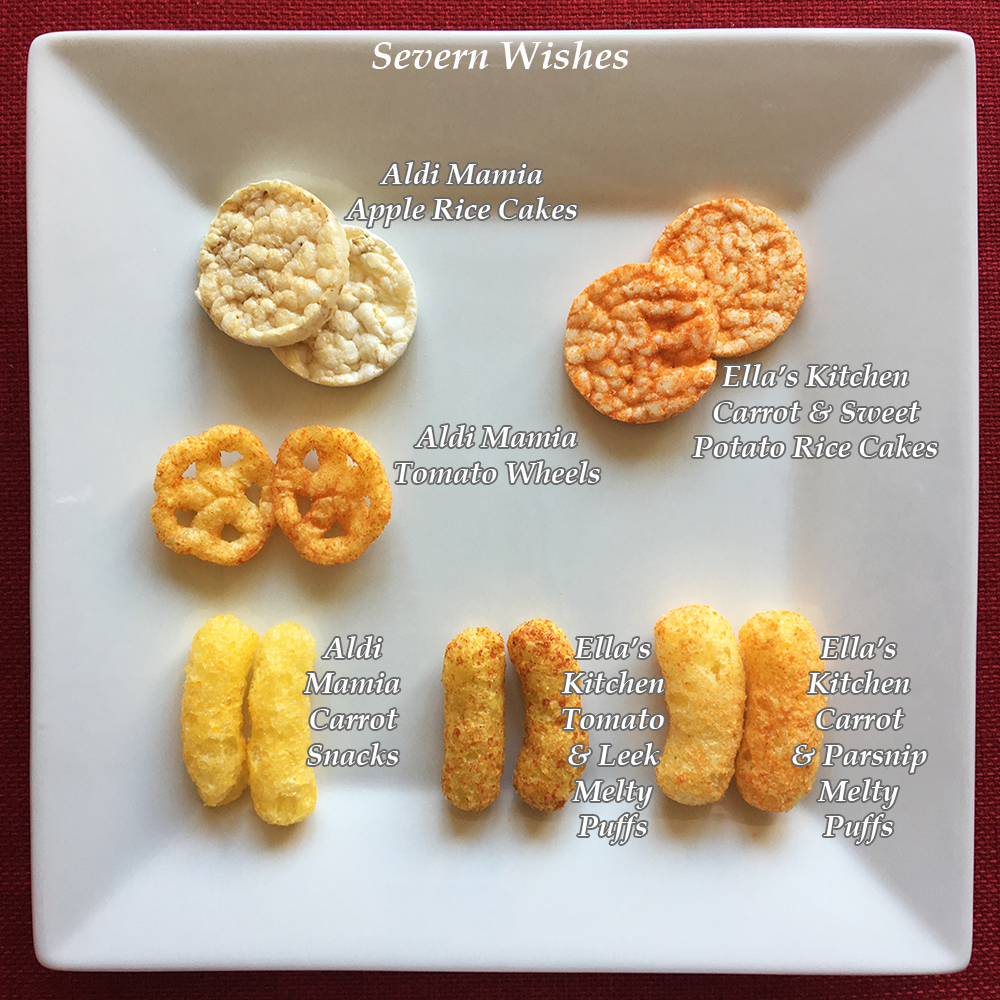
By the time he reached 10 months of age Baby A had 8 teeth and was eating 80% of what we were. He still loves his baby related snacks too! These include Vegetable Puffs, Rice Cakes and Flavoured Shaped Corn Snacks. A lot of these are Organic too.
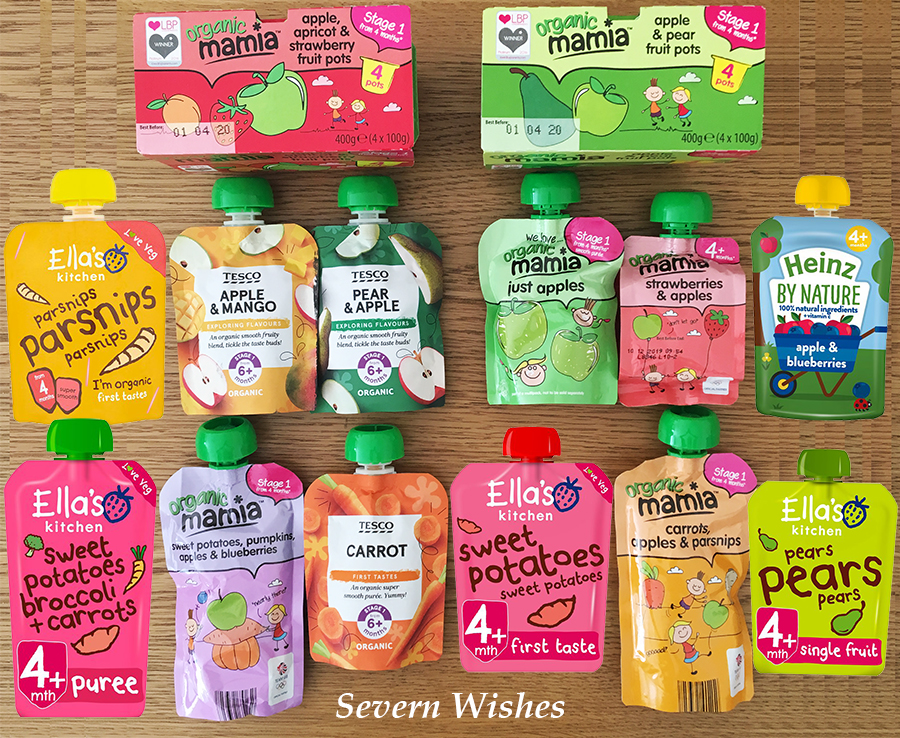
Some Of The Baby And Toddler Snacks We Buy Regularly.
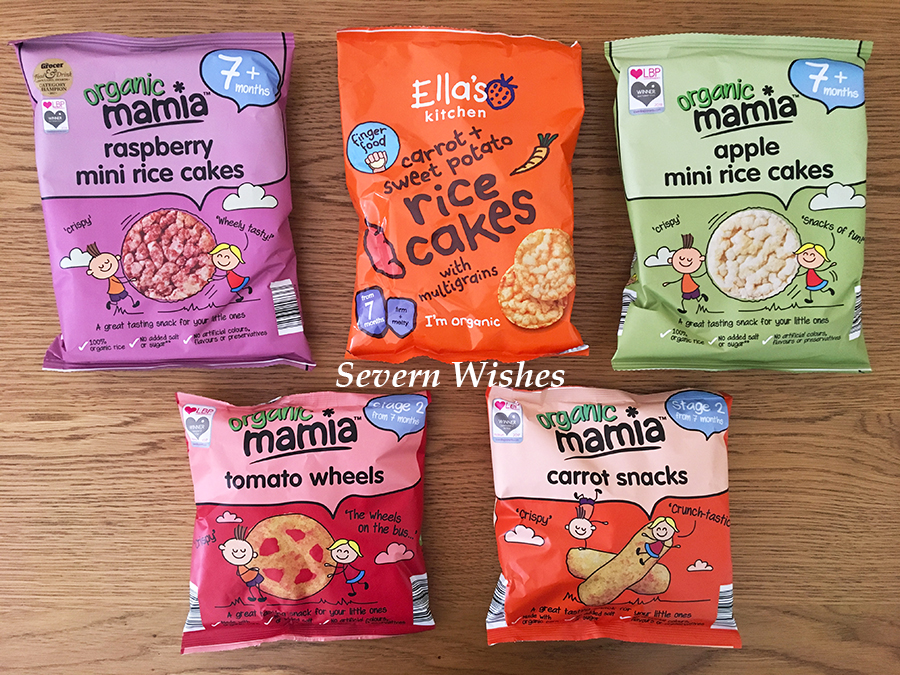
A Few Of The Pouches We Tried And Tested From 7 Months Plus
These snacks are very affordable from places like Aldi who have their Mamia range. If you sign up to Ella’s Kitchen on their website they will send you a pack and a voucher to try bits from their range which are purchasable at most large supermarkets and Boots stores.
Our little one loves to feed himself firm snacks but has been more than happy for us to feed him things that require a spoon such as fruit purée, cottage pie, mashed vegetables and the like. It’s so important to get your little one to eat their fruit and veg, and it doesn’t matter if you have to create a mashed version in order for them to eat it. Try different combinations and see what your baby likes. Keep a food diary to keep track!
Some of the 7 month snacks are little one loves.
Sabrina’s Weaning Tips For Parents
My top 4 tips for any parents about to wean a baby would be these…
1. Take it slowly and calmly. Your Baby will be intrigued but it can also be a stressful experience for all of you. All healthy Baby’s generally have a good gag reflex and don’t confuse this for choking, stay calm if they cough or spit things out and take all foods – even the purées – at a slow pace!
2. Start with Veg! You don’t want your little one to have too many sweet flavours in those first weeks, this is because when it comes to the savory kind they are less likely to want it. Start with Veg Purée or Mash and go from there…
3. If you plan on doing Baby Lead Weaning, then you must let your little one use their hands. Be prepared for mess! Get a good highchair, get a mat for the floor and keep plenty of baby wipes at hand too!
4. Keep a Food Diary! This is a useful tip for all new parents. It’s a great way to keep track of what baby has eaten, if your little one was to have a rash or reaction to anything they had eaten you can go back and check the diary before trying the substance again. Those first couple of months are critical in preparing baby for stronger tastes and good food habits, so start them early on the main products that your household enjoys together and move forward from there.
– ✩ – ✩ –
All Parents Should Definitely Sign Up To…
1. Ella’s Kitchen via the Website You get a free pack in the post with tips, a board with stickers, ideas for foods and even some vouchers for baby snacks.
2. Boots Parenting Club Using your Boots Advantage Card on the Boots App or Website you can add the addition of the Parenting Club which gives you bonus deals, free products and vouchers every month. For example we got a free bottle, a free weaning book and some promotions on nappies and baby food. Check the app each month for new promotions and deals. You also get extra points on your card when purchasing certain products in store and online too.
Ella’s Kitchen Have A Great Website and Their Melty Puffs Are A Real Hit!
✩ Russel Hobbs Mini Chopper Review ✩
I would highly recommend this chopper to any parents who want to make a lot of their own food for their baby. Not only is it simple to use, easy to clean and maintain, but it allows you to make just enough food for a large portion that can be good for a day, or if you’re bulk cooking into baby sized pots it made 6 pots of food no problem. The best thing about this mini processor is it’s size, it takes up very little room in my cupboard and is portable enough to take away for a weekend to a relatives house without being a burden.
Design 5/5 Features 5/5 Value for Money 5/5
RRP £16.00
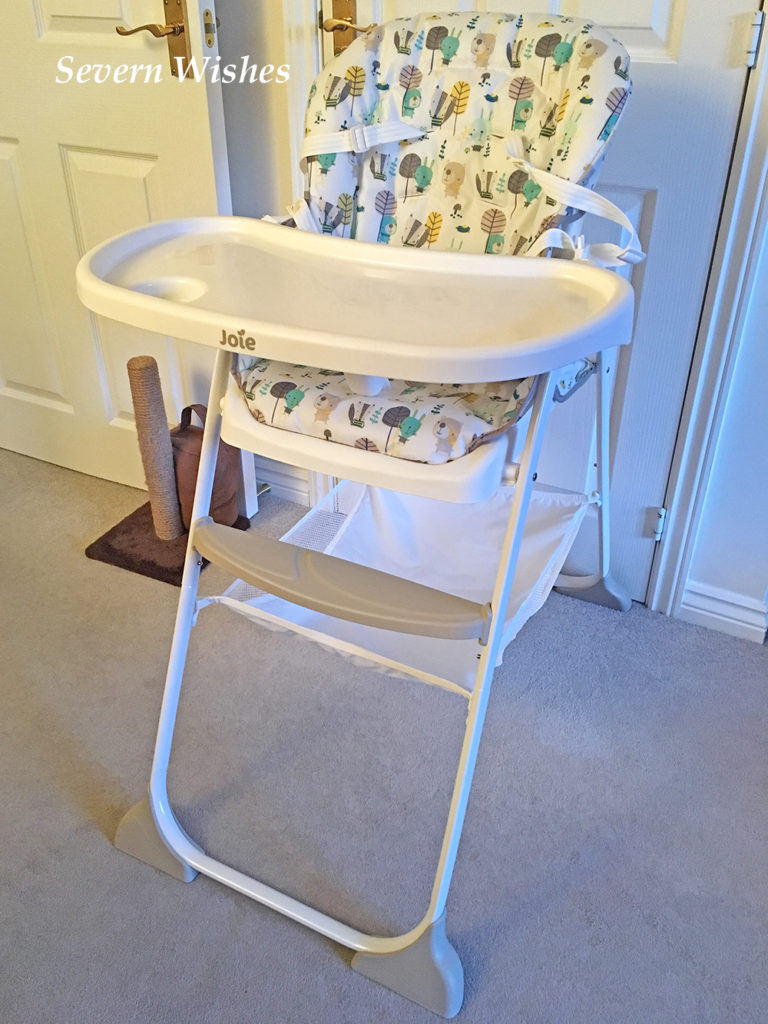
✩Joie High Chair Review✩
We highly recommend the Joie High Chair because it is affordable and also has some great features. These include the large sturdy tray, the beautiful animal design on the seat itself and the large fabric basket underneath which is great for storing extra bits and pieces close by for when you need them, such as bibs, wipes and toys. We only have one suggestion, that the straps could either be entirely removable for cleaning purposes or that they be a different colour than white, because they really show up every bit of food dirt.
Design 5/5 Features 4/5 Value for Money 5/5
RRP £55.00
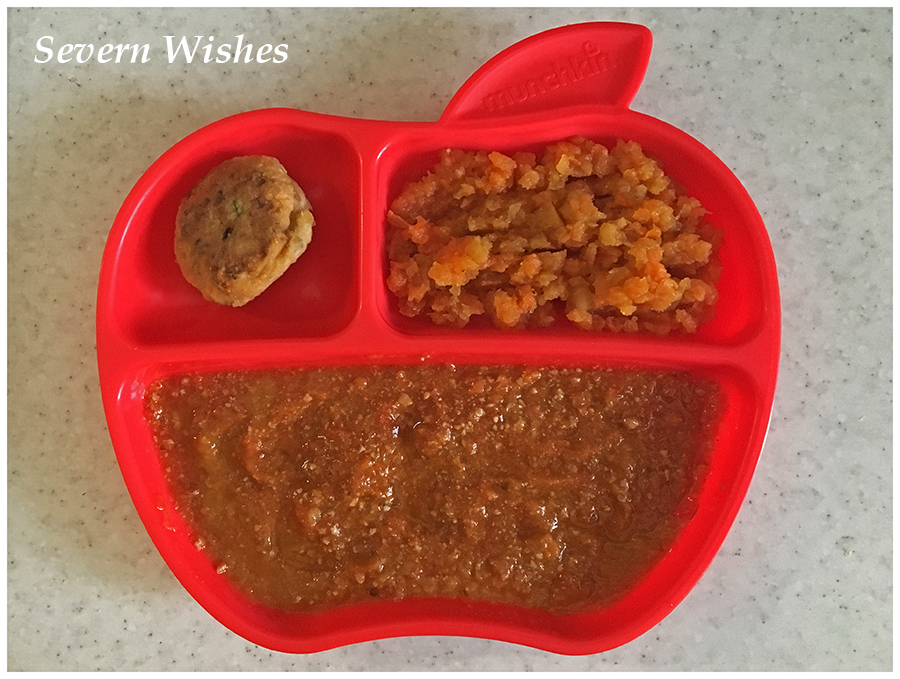
✩Munchkin Products Review✩
We have been really impressed by the Munchkin Apple Bowls and Plates, as well as their range of Spoons too. We picked most of them up at various baby events in Supermarkets and on Amazon UK. They are affordable and well made. They are designed for different stages of Weaning and further interactions with food, ranging from 4 months right up until Toddler ages. Our son found the spoons easy to eat off and the divider apple plates are a great idea when trying different foods at meal times. Or for separating the meal and the dessert when you get to that stage.
Designs 5/5 Features 5/5 Value for Money 5/5
Thank you for reading this post today, I hope you have found it interesting. If you try any of the products that I have recommended then please let me know in the comments below if your little one liked it.
If you have any questions about any of the products I have mentioned then feel free to also comment and ask me anything, I will do my best to answer you honestly.
✩Sabrina✩
By continuing to use the site, you agree to the use of cookies. more information
The cookie settings on this website are set to "allow cookies" to give you the best browsing experience possible. If you continue to use this website without changing your cookie settings or you click "Accept" below then you are consenting to this.