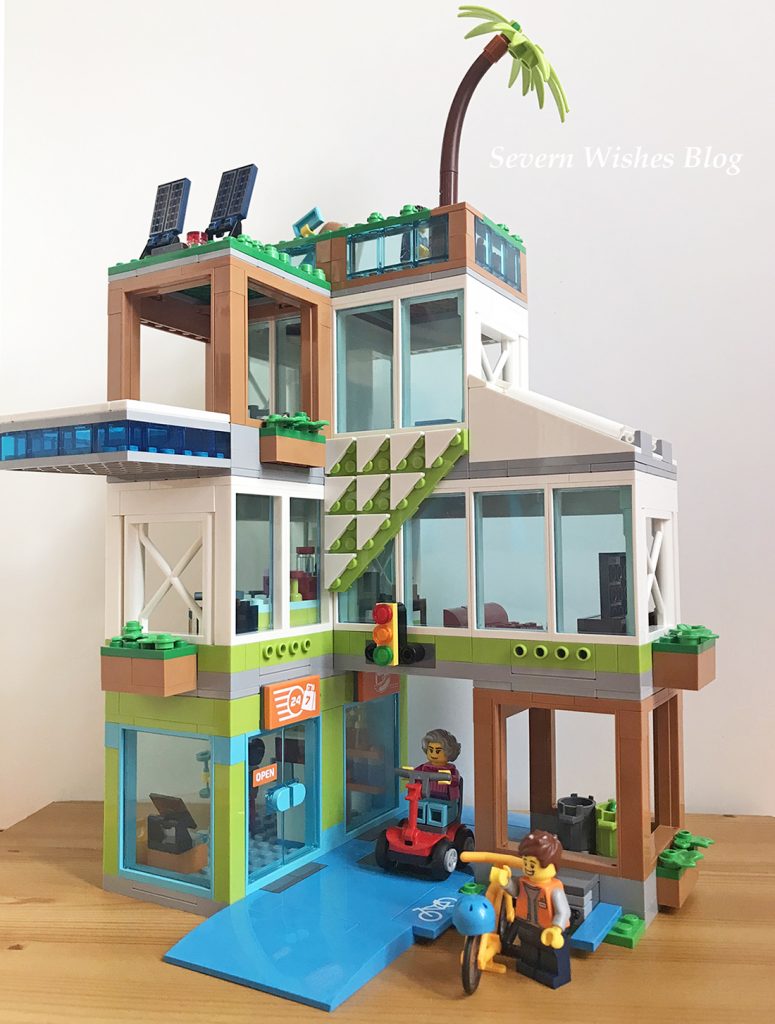
Argos Testers Product Review of LEGO City Set 60365 Apartment Building

Hello! I’m Sabrina! I am an Argos Tester, this means that I often get items sent to me for the purpose of an online review. I thoroughly test the products and take photographs of them before submitting my findings and honest thoughts over to Argos. This latest campaign was to test out brand new LEGO Sets, and because we need to choose something we haven’t reviewed before, I chose the modular construction LEGO. Not sure what that is? Keep reading my review.

#ArgosTester #ArgosTesters #ArgosTestersCommunity


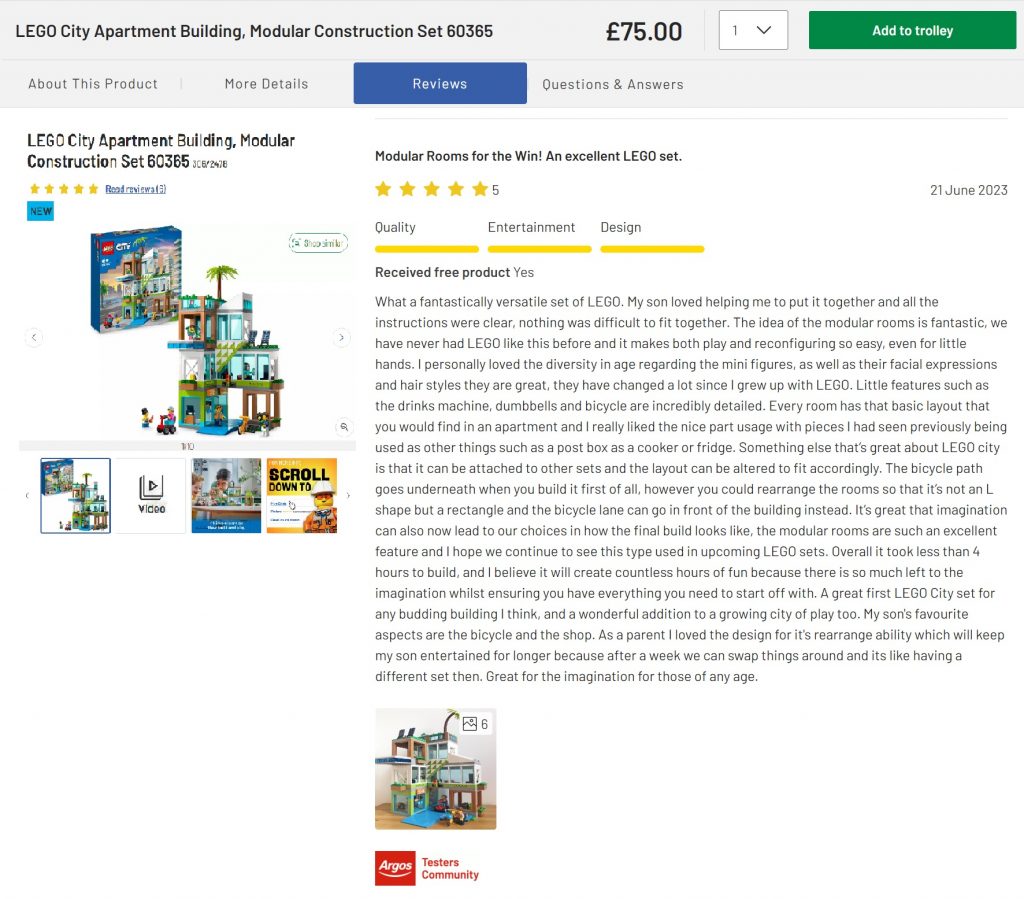
I have written this article about a product that I have been supplied for free, in order to test and then review it. This is my experience with said product and it is my honest review about the product listed below. I have already submitted my review to the Argos Website, and it has been accepted on to live public view when this blog post has been publishedPlease see my review on this screengrab below from the Argos website. All words and photography within this article are my own.
Product Details

Name: LEGO City Apartment Building Modular Construction Set
Set No: 60365.
Ages: 6+
RRP: £75.00
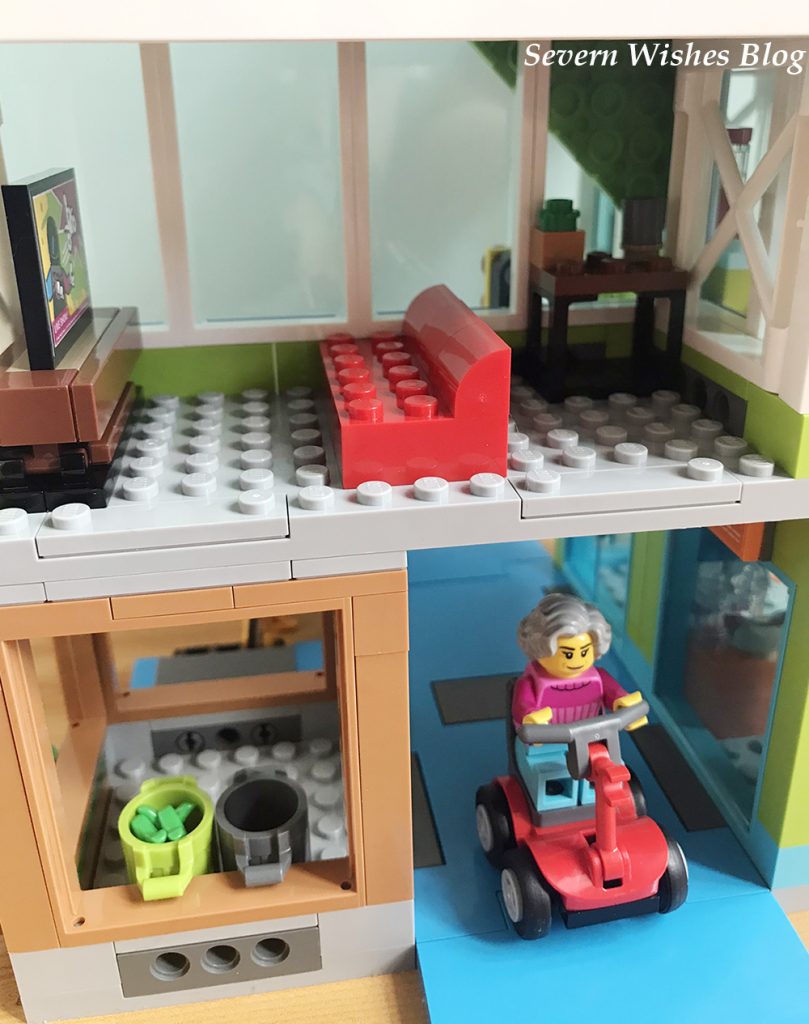
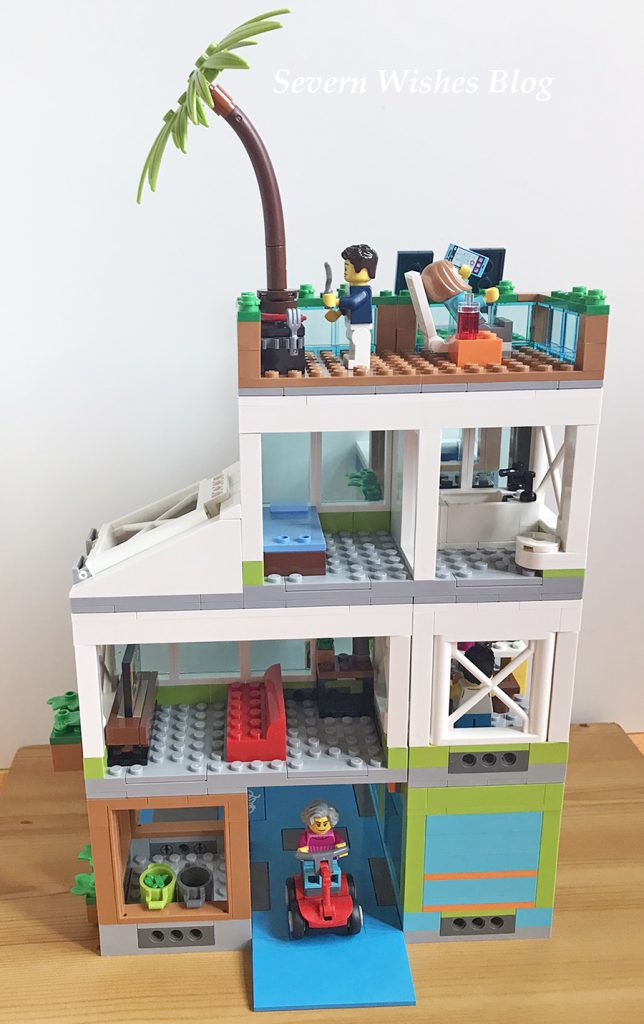
Pieces: 688 pieces, including 6 mini figures, a bicycle and a mobility scooter.
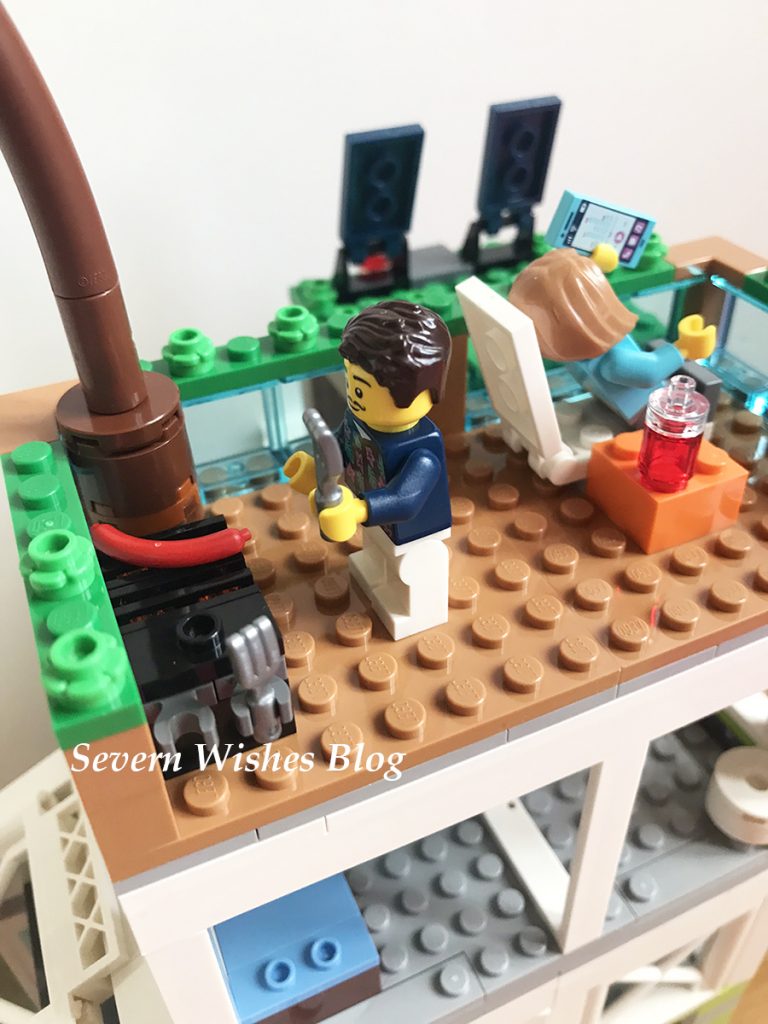
Description: Modular Rooms for easy reconfiguration and imaginative play, including roof terrace and swimming pool. Mixed age mini figures add to the play ability and the reality of the set. Excellent additional features such as stickers that add fun to some pieces like the signage and television set.
Argos Website: LINK

My Honest Opinion

Overall I would like to rate the LEGO Apartment Modular Construction set 5 stars.

Quality 5✩
Features 5✩
Design 5✩
Originality 5✩

Playability 5✩
My Argos Tester Review

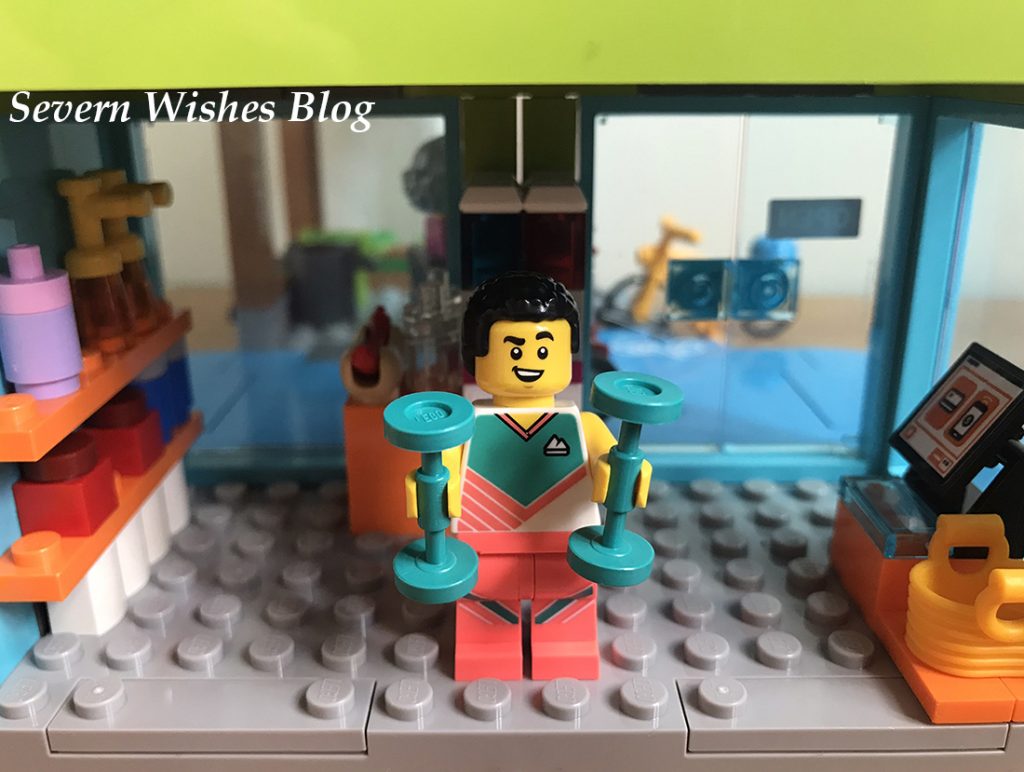
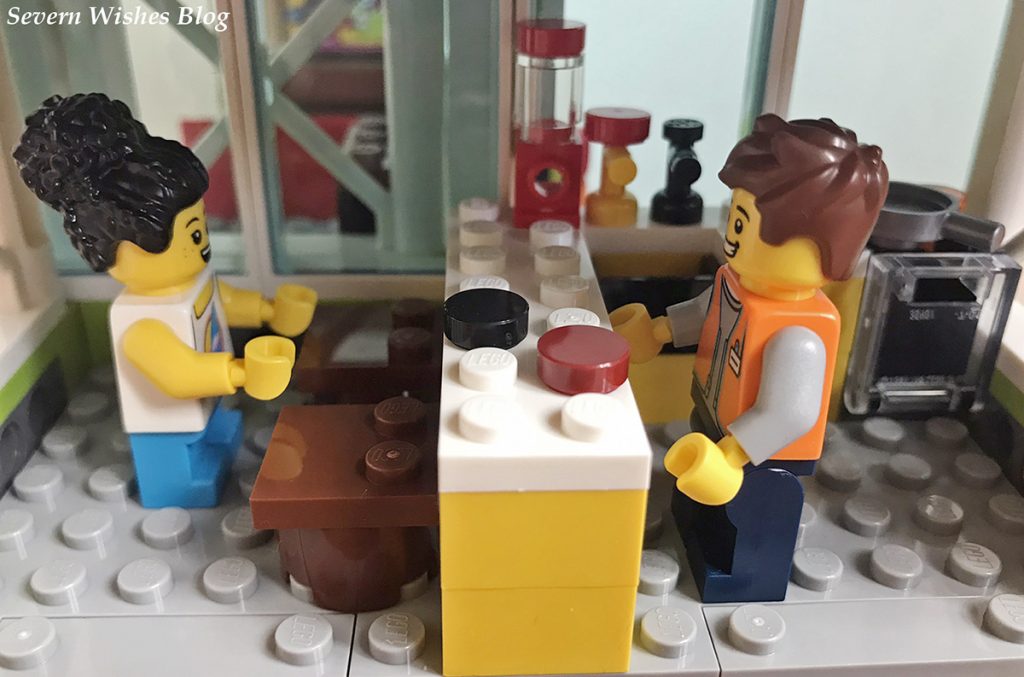
What a fantastically versatile set of LEGO. My son loved helping me to put it together and all the instructions were clear, nothing was difficult to fit together. The idea of the modular rooms is fantastic, we have never had LEGO like this before and it makes both play and reconfiguring so easy, even for little hands. I personally loved the diversity in age regarding the mini figures and their facial expressions and hair styles are great, they have changed a lot since I grew up with LEGO. Little features such as the drinks machine, dumbbells and bicycle are incredibly detailed. Every room has that basic layout that you would find in an apartment and I really liked the nice part usage with pieces I had seen previously being used as other things such as a post box as a cooker or fridge.
Something else that’s great about LEGO city is that it can be attached to other sets and the layout can be altered to fit accordingly. The bicycle path goes underneath when you build it first of all, however you could rearrange the rooms so that it’s not an L shape but a rectangle and the bicycle lane can go in front of the building instead. It’s great that imagination can also now lead to our choices in how the final build looks like, the modular rooms are such an excellent feature and I hope we continue to see this type used in upcoming LEGO sets.
Overall it took less than 4 hours to build, and I believe it will create countless hours of fun because there is so much left to the imagination whilst ensuring you have everything you need to start off with. A great first LEGO City set for any budding building I think, and a wonderful addition to a growing city of play. My son’s favourite aspects are the bicycle and the shop. As a parent I loved the design for its rearrange ability which will keep my son entertained for longer because after a week we can swap things around and it’s like having a different set then. Great for the imagination for those of any age.

Summary

Overall this LEGO City Set has hours of replay ability because of the fact it’s a modular construction, it’s so cool! By moving the rooms around you can create an entirely different layout, even move them every other day if you wanted to change it up. I feel like if my son was getting tired of the set I would simply reconfigure the layout and create a new look of the apartment for him.
More LEGO should be made like this to give users more choices on how they want the end result of the build to look like. As LEGO say “rebuild the world” and you can certainly do that with this box of bricks, and really easily too! Whoever designed it is ace!
I also loved the diversity in the LEGO figures, with different ages and jobs and many various faces, they are great new additions to the LEGO world. And the hair styles too, brilliant to see new ones!
I have nothing bad to say about this set, I give it 5✩ across the board. I would actually love to see more modular LEGO so that sets could be rearranged with ease and built on a similar scale.
Thank you for reading this product review today, I hope you have enjoyed seeing what we thought of this set. I have no doubt that we will have many hours of fun creating LEGO scenarios with the figures and the apartment block.

If you have any questions about this set then please leave me a comment below or on my social media posts and I will do my best to answer them with the knowledge that I have gained from reviewing this product. For anything else please refer to the Argos website the link I posted above.

Thank you, have a great day.

✩ Sabrina ✩
#LEGO #SevernSabrina #SevernWishesBlog #ProductReview #ArgosTesters #ProductReviewer #Photographer #Writer #Review #Reviewer #Toys #Play #Fun #LEGOcity #LEGOcityset #Argos

If you are looking for the ideal Stationery Gift this Season then why not check out the Gift Company Journal Sets

Hello and Welcome to another of my Product Review Collaborations! This month I am ecstatic to be working with Gift Company again, as I review their wonderful Journal Stationery Gift Sets.

I am thrilled to be bringing you this collaboration with Gift Company this November, I have been asked to review some of their incredible value Gift Sets! Each set of products has been sent to me in order for me to complete this honest testing and review. I wanted something versatile and unisex and this was what we decided upon.

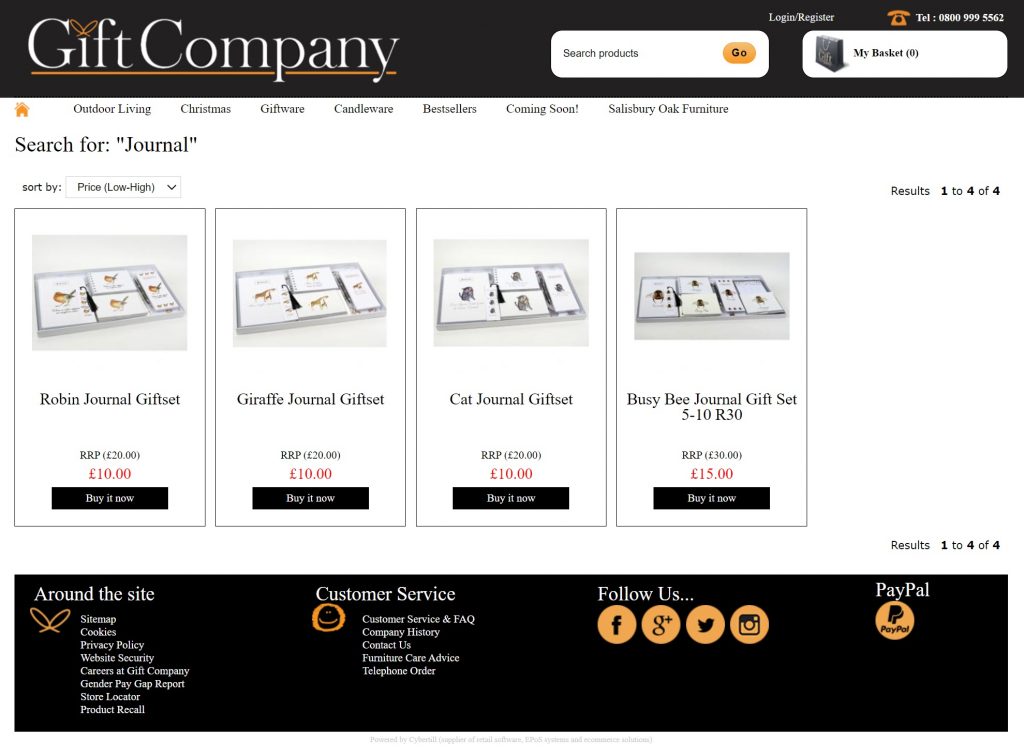
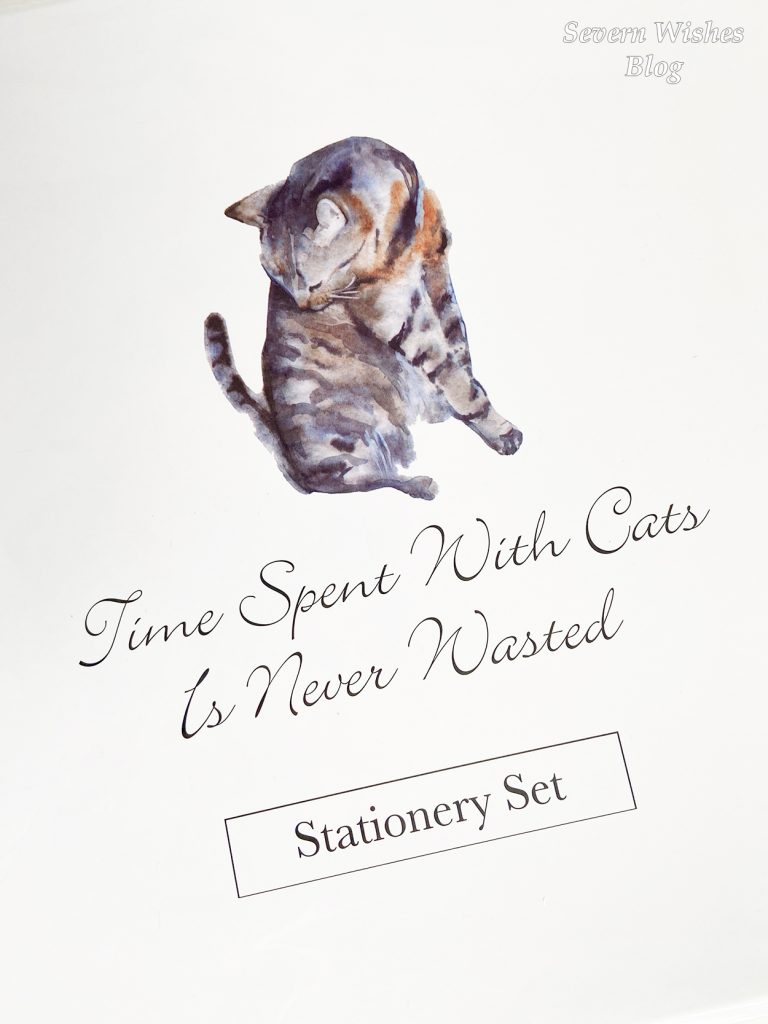
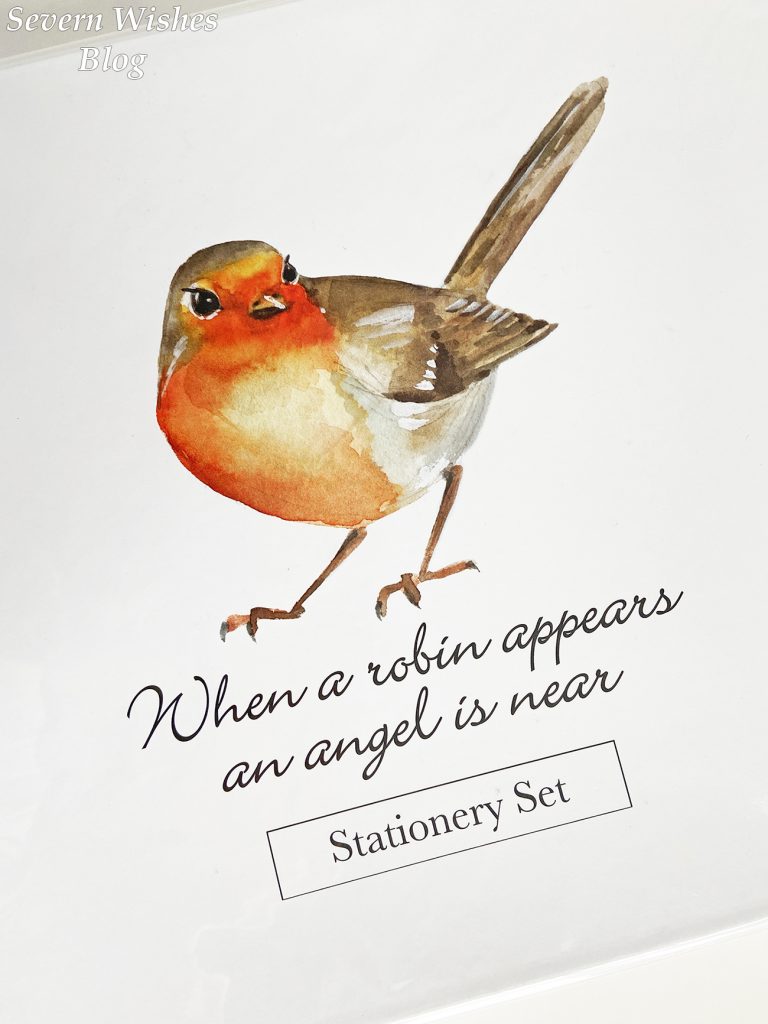
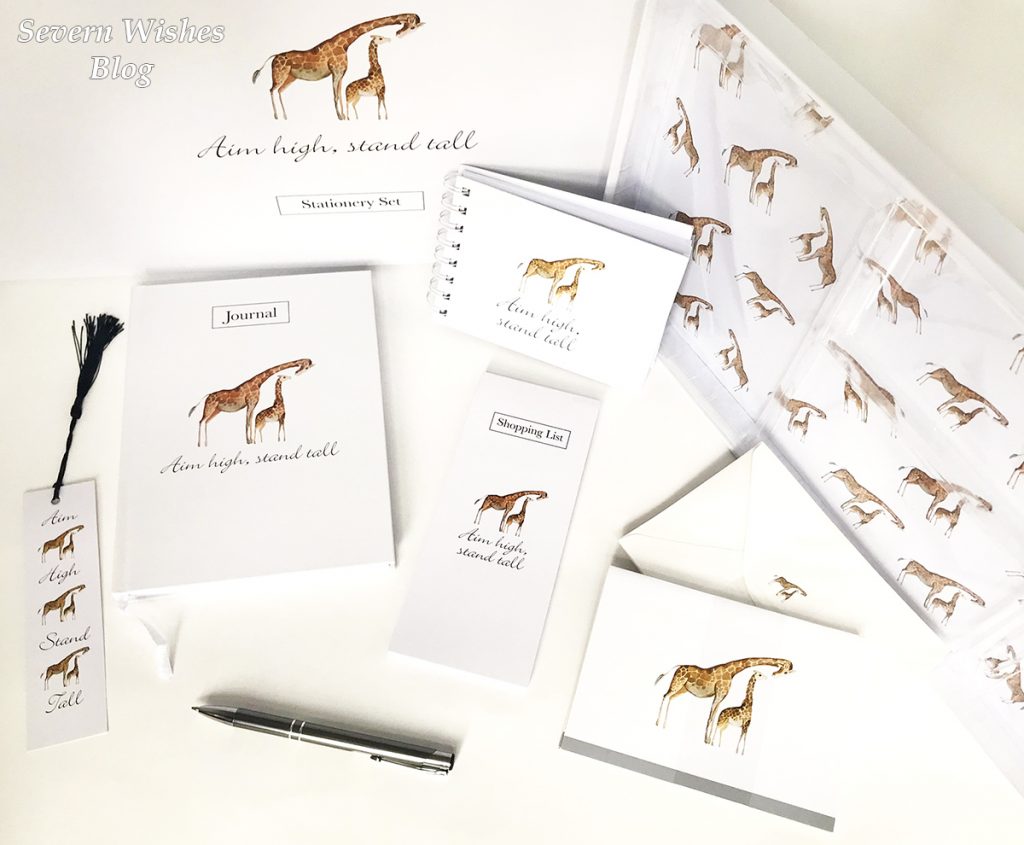
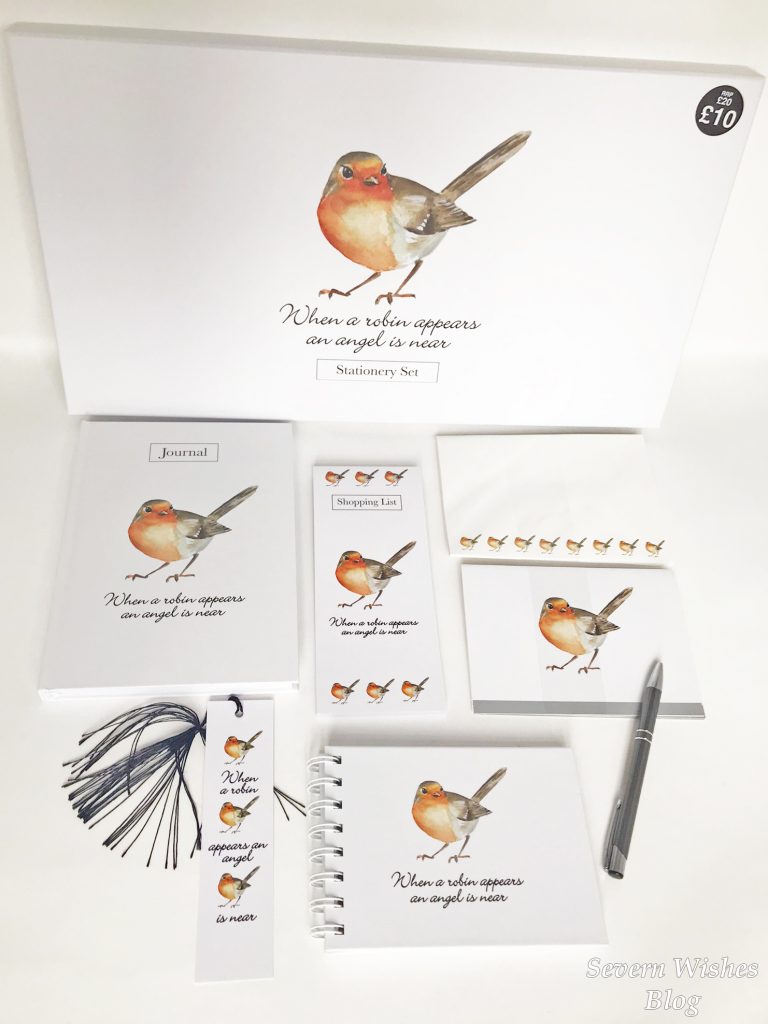
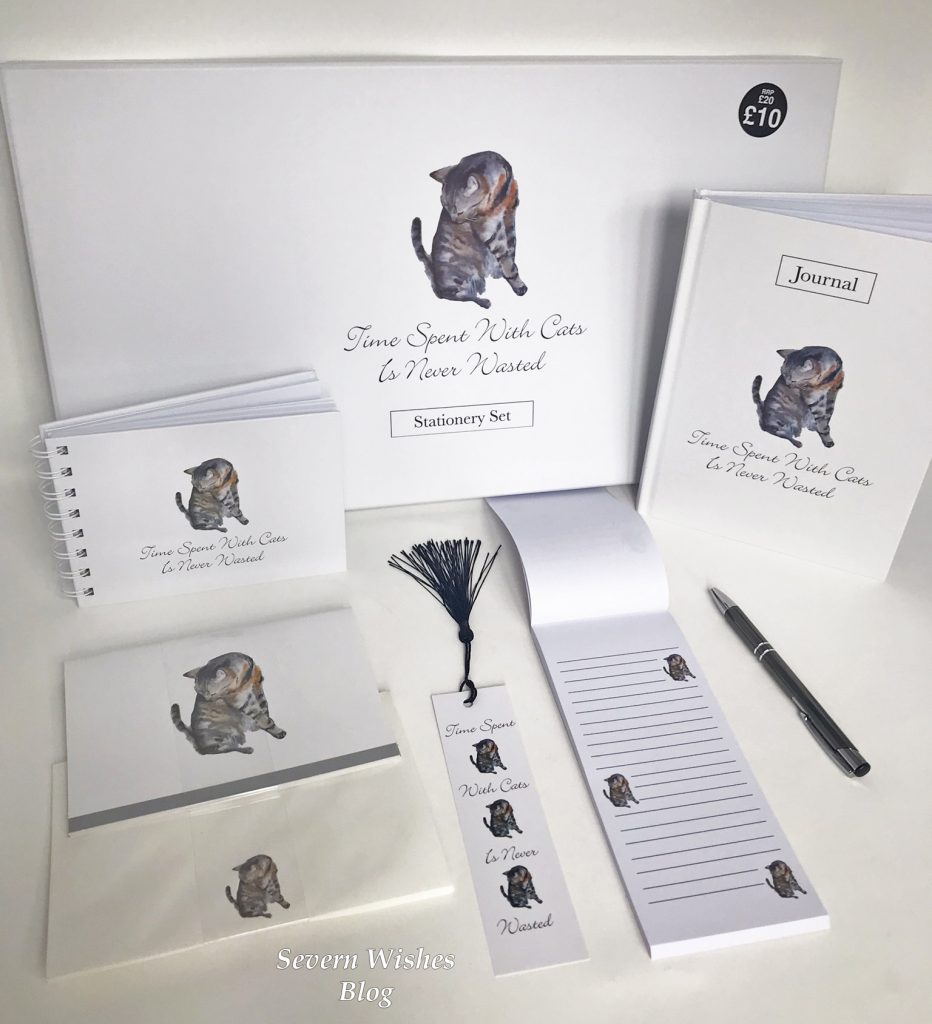
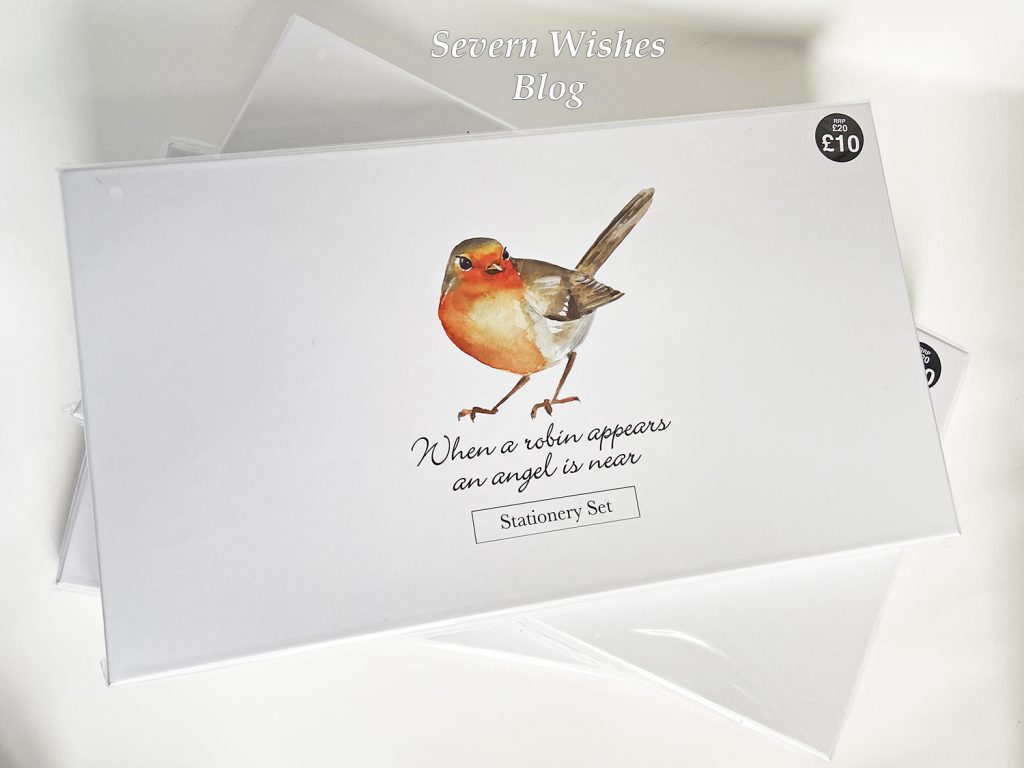
On the Gift Company website there are four sets to choose from, they include a Robin, Cat, pair of Giraffes and a Bee. I chose the three sets that contained exactly the same items so that I could compare their design and quality. Overall I have been very impressed with them, so let’s take a look at what’s inside each of the decorative display boxes for this stationery set.

Here are some of my photographs to show the quality of the stationery up close.

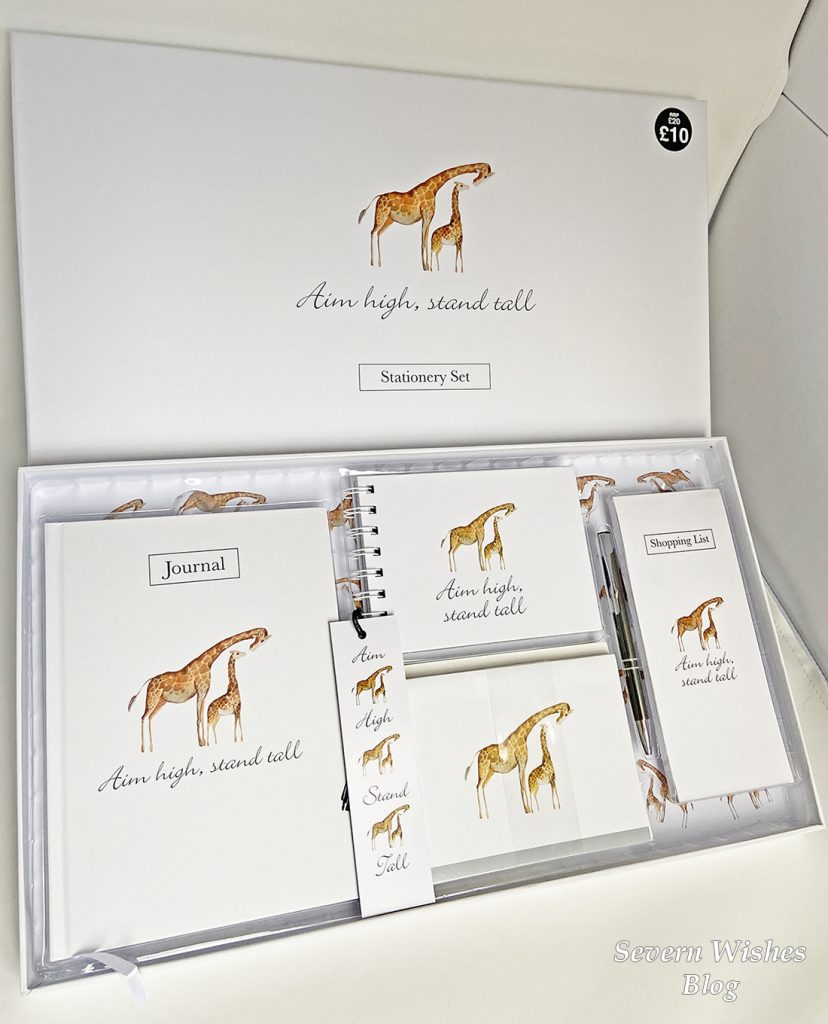
The gift set is very well presented inside the box which is also decorated front and back with the design that you chose.

Each of the Journal Gift Sets contains:
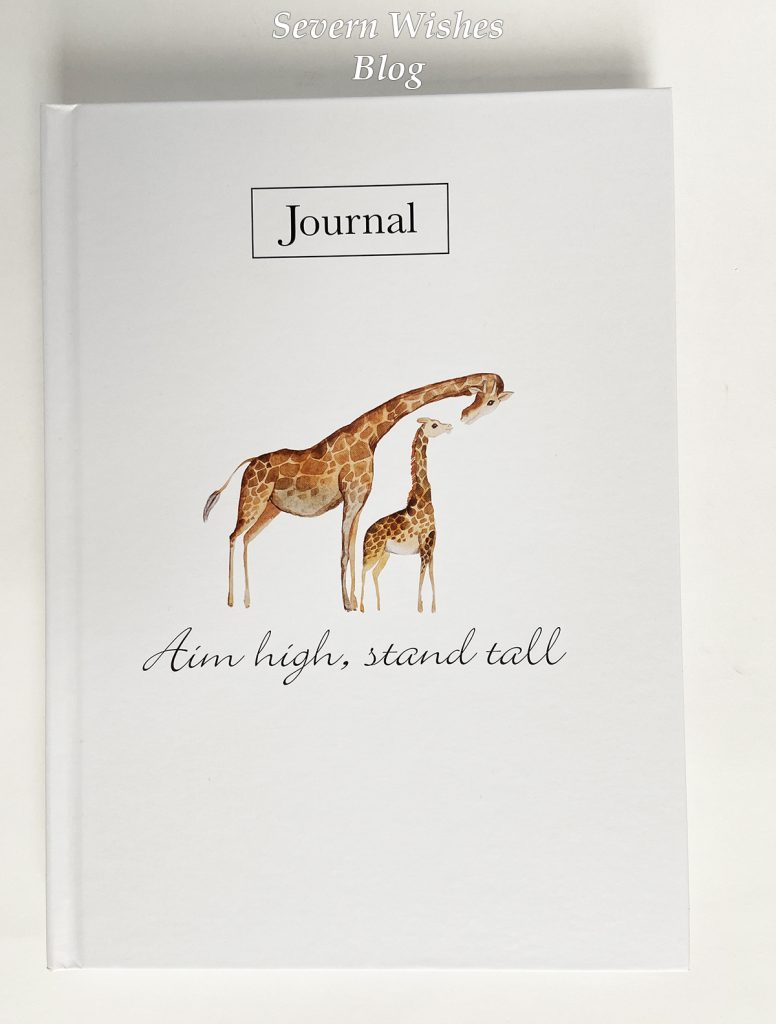
1 x Journal (with blank date headers to fill in as you please)
A Selection of Cards and Envelopes both personalised with set picture

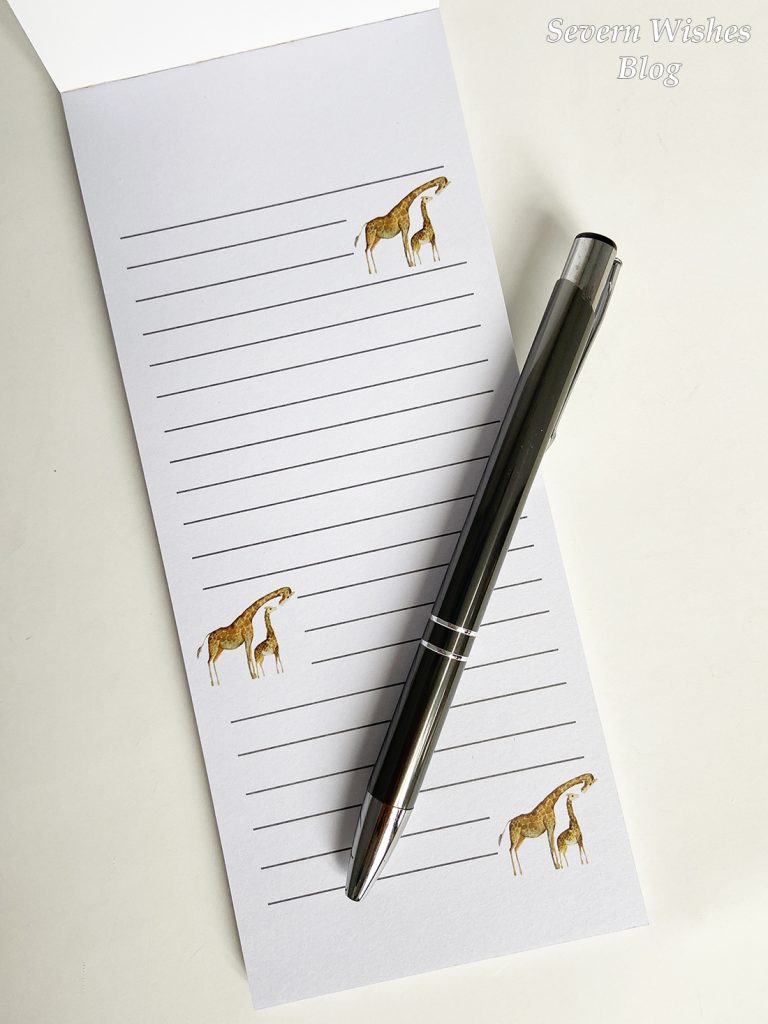
1 x Shopping List Notepad with a Magnetic Back
1 x Notebook on a Ring Bound Coil
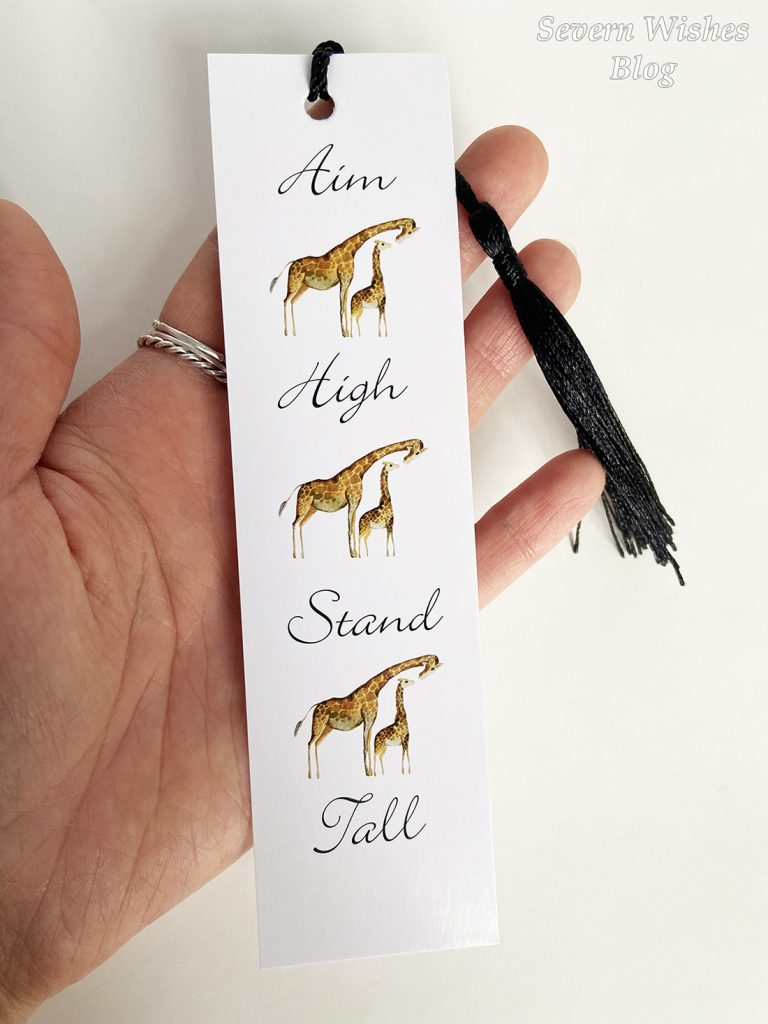
1 x Decorative Bookmark with black tassel
1 x Black Ballpoint Pen


Cat Journal Gift Set LINK
Robin Journal Gift Set LINK
Giraffe Journal Gift Set LINK

Shopping List and Pen
Notebook

My Honest Opinion

Overall these Gift Sets are of extremely high quality, the way the set is designed means that you receive the decorative box as well as the six individual items inside it. A set has every product made to a high standard, be it the manufacturing and final finish of the product, as well as the paper within them, it’s a decent thickness of all the paper products. The image that you decide upon for your set is bright throughout the products and the font on the quotes is easy to read and is clearly defined.

You could choose to gift the set as is, or you could split the set up and divide it into smaller gifts, you can give the journal and pen to one person for example. While offering the cards and envelopes to another loved one. Perhaps you have a family member who always does the food shopping, this list would be perfect for them. Is there an avid reader in your family as well, because this decorative bookmark would be a great addition in their Christmas box.


Considering you get six high quality items and a decorative box for only £10, I think it is definitely great value for your money. If you are on a budget this year, I would consider purchasing two gift sets and dividing the items between four or more different people. You could even buy a gift set and a pack of pens and give every item to a loved one, along with a pen.

You wouldn’t have to gift this set for Christmas though, it’s a perfectly acceptable gift for a variety of occasions such as a Birthday or an Anniversary too.
Do you know someone who is going off to University? Or somebody who recently started a new job? A gift like this might be both useful and very well received by people who will need to use stationery items such as these.

I personally love being organised and using stationery definitely helps me to do just that. If you know of someone in your life that does the same thing, then this gift would be perfect for them. And finally as a parent, you can never have enough notebooks and a journal to keep your year ahead organised.

Cards and Envelopes
Shopping List

My Review Scores

Functionality 5✩

Product Design 5✩
Versatility 5✩
Product Quality
 5✩
Value for Money 5✩
Universal 5✩

Journal Cover
Journal Inside
Bookmark

Thank you to Gift Company for the chance to do this review, it’s great to be working with you again.

For anyone who isn’t aware of Gift Company, they are a long standing British based company with shops across the country, as well as their website which houses a wide range of Gifts and Furniture too.

If you would like to know more you can find Gift Company at the following links and on social media.

Gift Company Website
Gift Company Facebook
Gift Company Instagram


You can also watch my Review Video as I show the products off, and that can be
viewed on my Instagram channel by clicking the image below.

Thank you for visiting Severn Wishes Blog today and reading my collaboration review.

Have a wonderful final few days of November 2022!

✩ Sabrina ✩

Sabrina’s Easter Craft Ideas 2022

Happy Easter! I hope you’re having a wonderful long weekend!

If you’ve already been out and about and are now looking for something to do within your home to keep the children entertained, then why not check out all my craft pieces below, show your children and they might want to give them a go! They are all really easy and just need a few minutes of your time as the adult to deal with some scissor cutting and poking holes, and then they can begin! You won’t need any fancy craft equipment for any of these either, just gather the following items on my list below and you’re good to go!

If you were wondering what it cost me to make all of the craft items I have done in recent posts it was about £15. That includes all of the double sided tape, various packs of white and coloured card, good quality colouring pens, craft balls and pipe cleaners among other things. But I have lots of them left over from these purchases too for use in future craft projects. I actually have more crafty items in the works and I’m still using up the same items and haven’t needed to buy any additional ones.

Sabrina’s TOP TIP: Making up a Craft box is a great idea, it will keep everything neat and tidy. Throw in left over pieces of card, toilet rolls and crafting left overs. I recommend a Really Useful Box or a similar one which has a tight fitting lid. These are also really strong and stackable for easy storing away.

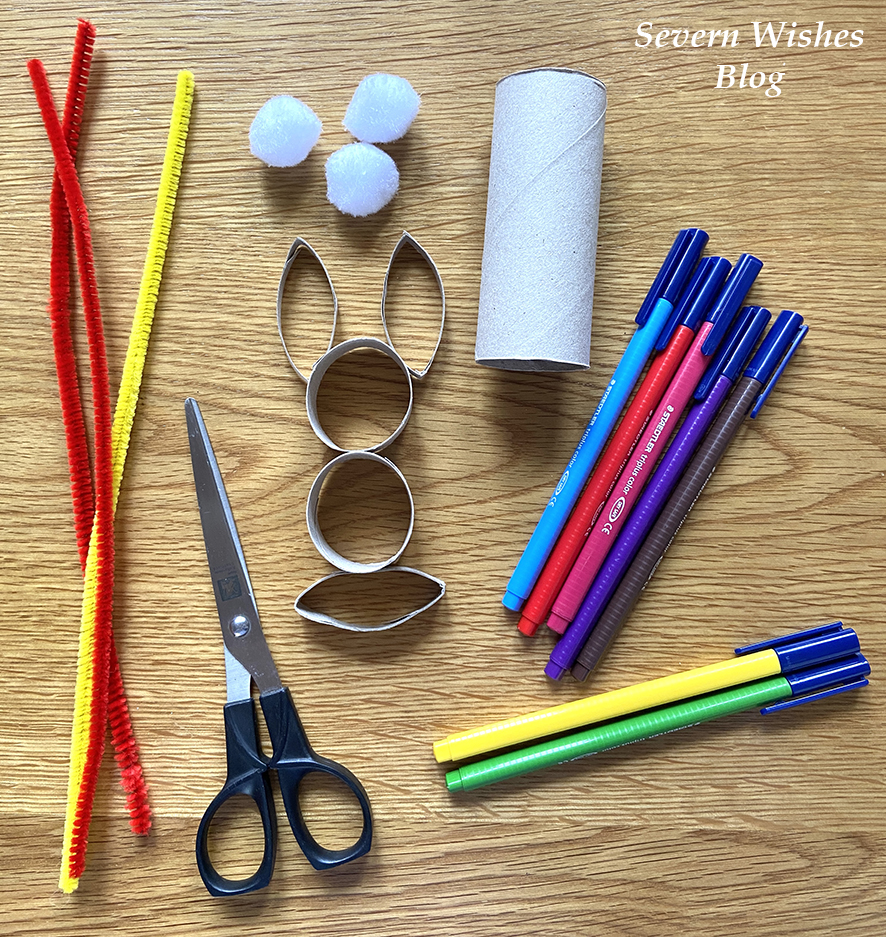
✩✩✩ What Will We Need for all these Projects ✩✩✩

Toilet Rolls
Cereal Box Cards
Pens to Decorate
Scissors
A Pen or Pencil
A Ruler
Pipe Cleaners
Fluffy Craft Balls
Coloured Card
Googly Eyes
Double Sided Tape
Pritt Stick or PVA used sparingly

✩✩✩

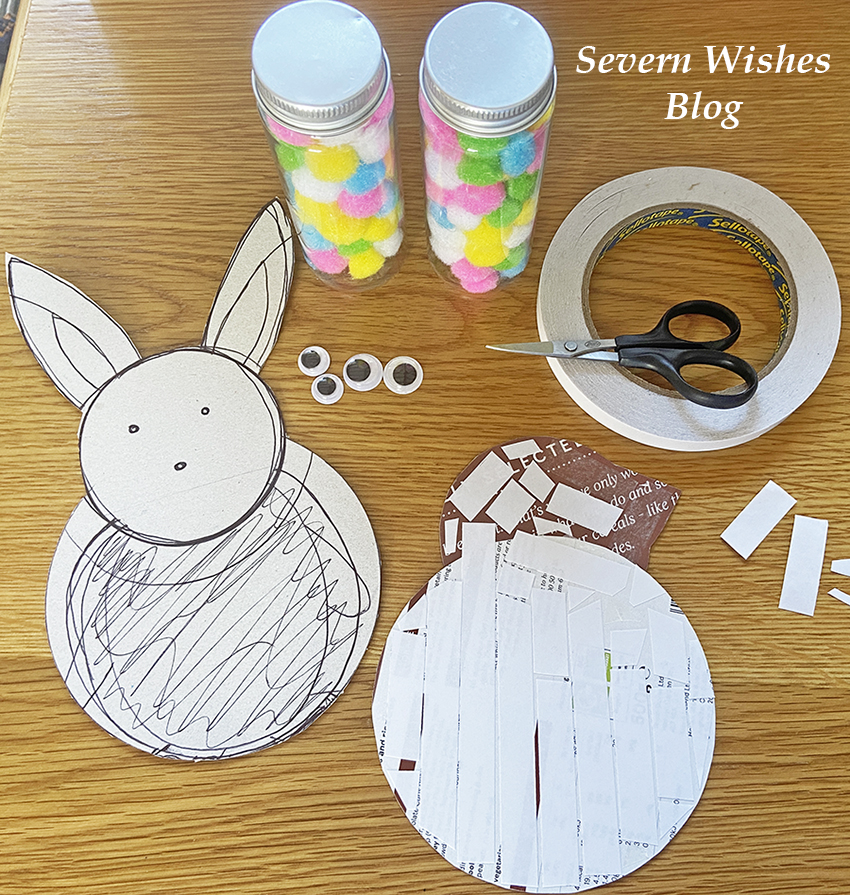
How to Make Sabrina’s Fluffy Craft Easter Animals

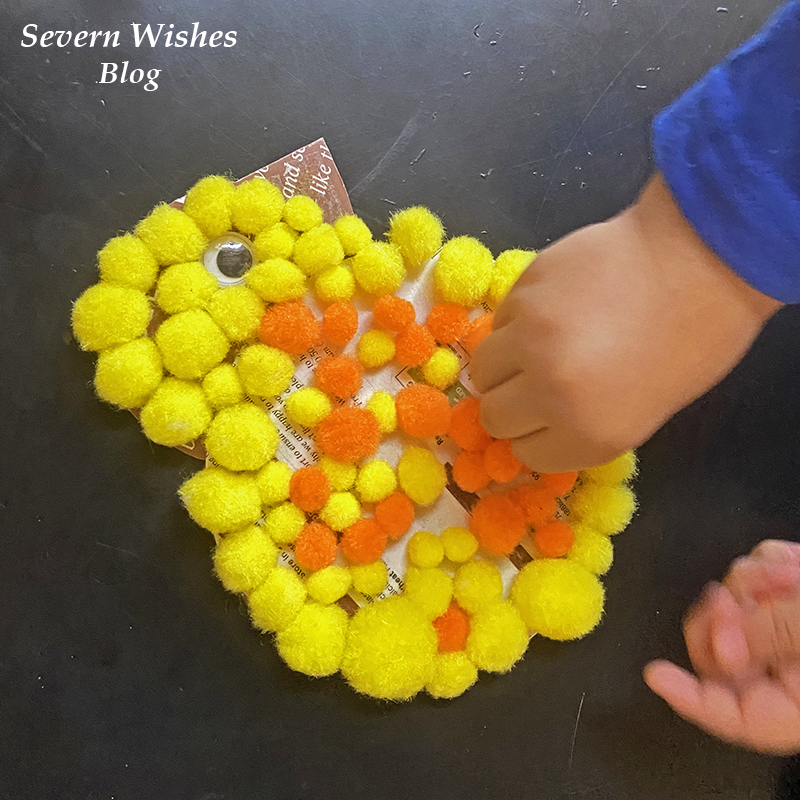
These cute and fluffy animals were made using cereal box card, double sided tape and a bag of craft balls! In all it cost me about £2! And we have a ton of balls left over which we can use as flower middles and things like that – I use them in other projects too. This one is easy for little children, you do the templates and then add the glue on and then they can go to town with all the sticking!

Step 1. Draw on a cereal box, inside on the flat side piece, whatever shape you like, a Rabbit, a Chick, an Easter Egg, whatever you like or your children want.
Step 2. Cut out your templates, make them as big or as small as you like.
Step 3. Use PVA or Pritt Stick or Doubled Sided Tape to coat your template with glue.
Step 4. Provide a clean and flat surface for your little ones to sit and stick the fluffy craft balls to their card template.
Step 5. Add googly eyes or card beaks or any other items you want to finish them off.
Step 6. Let them dry overnight, place a piece of kitchen roll or newspaper on a flat surface, add the template, add another layer of tissue or newspaper, and then place a heavy book on top overnight to flatten them down and help the balls to stick.
Step 7. Next day you can display them around your home.

✩✩✩

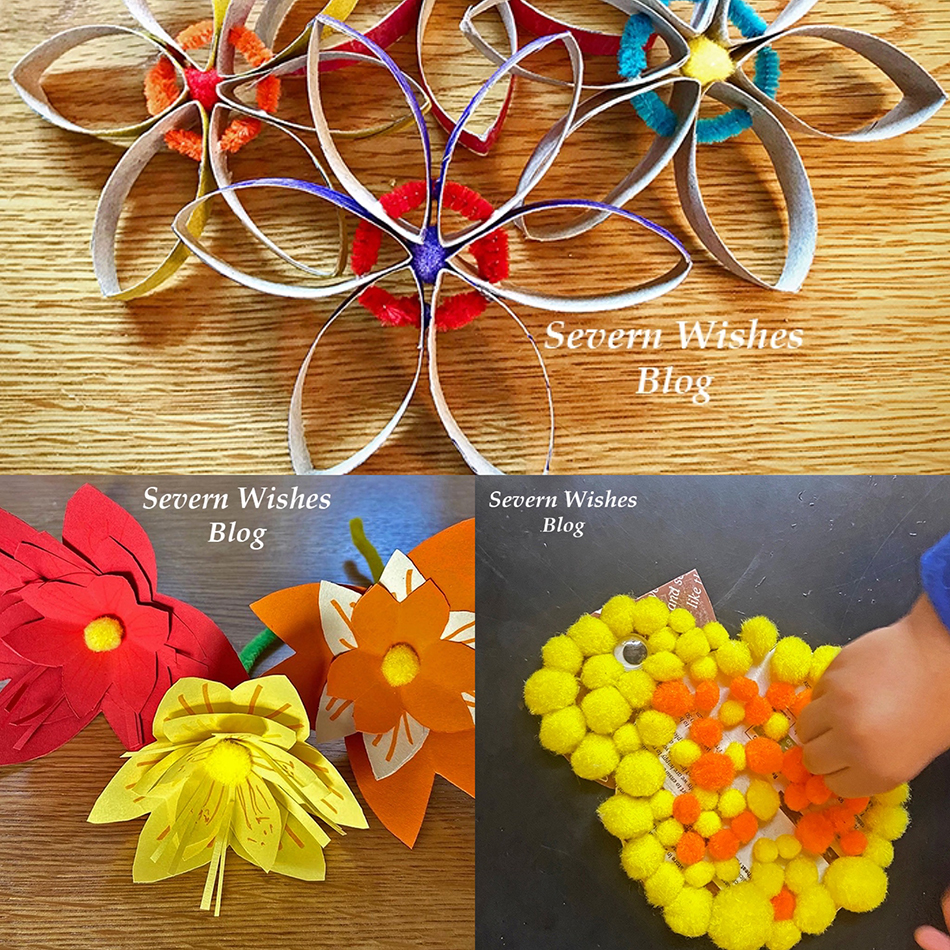
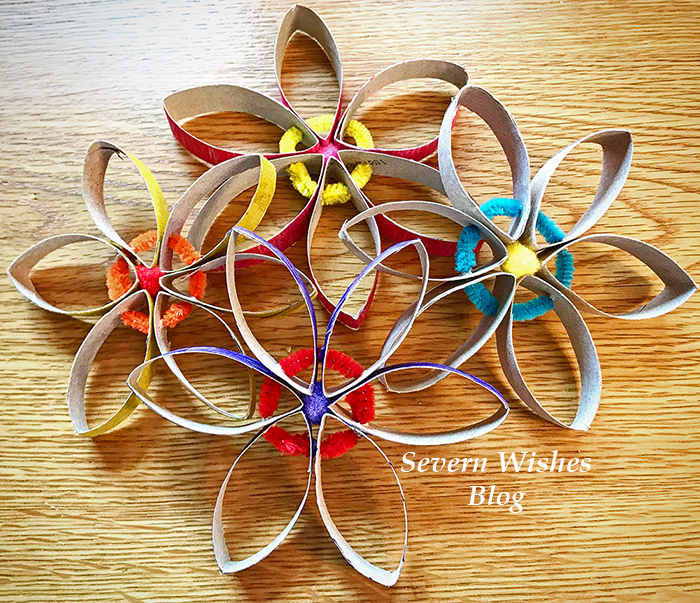
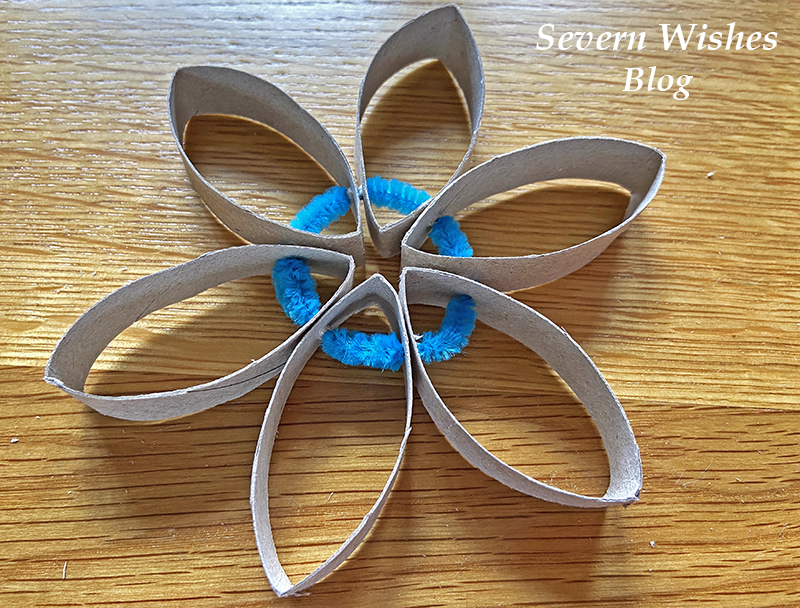
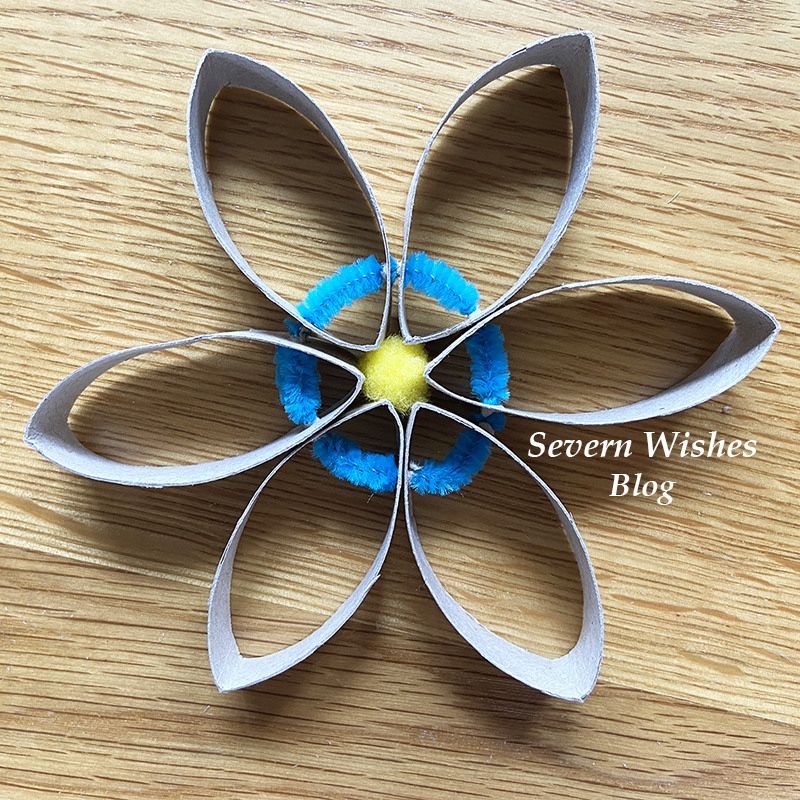
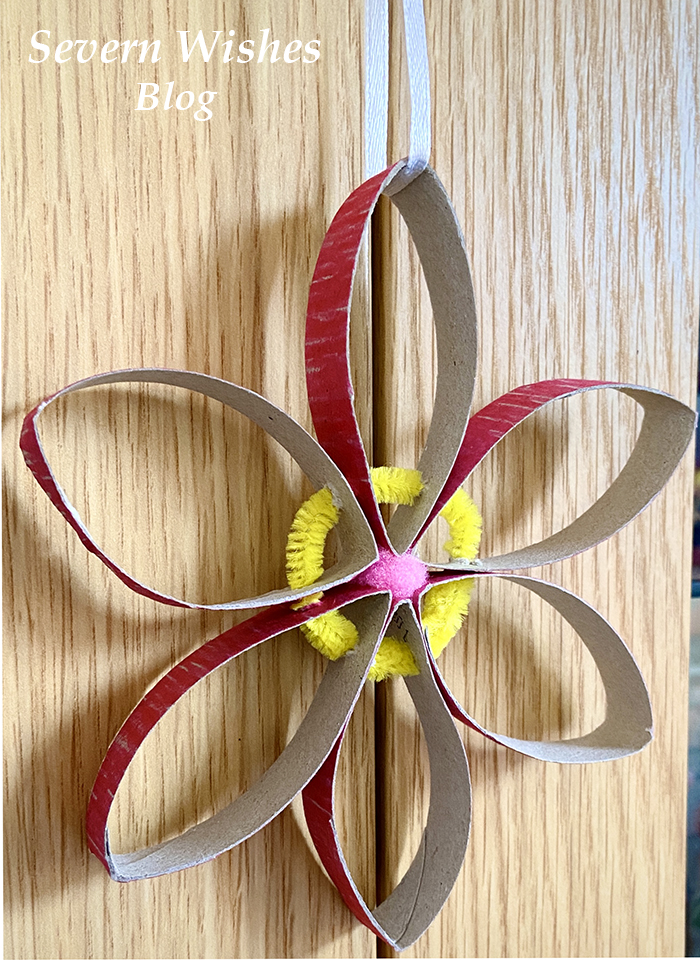
How to Make Sabrina’s Toilet Roll Flowers

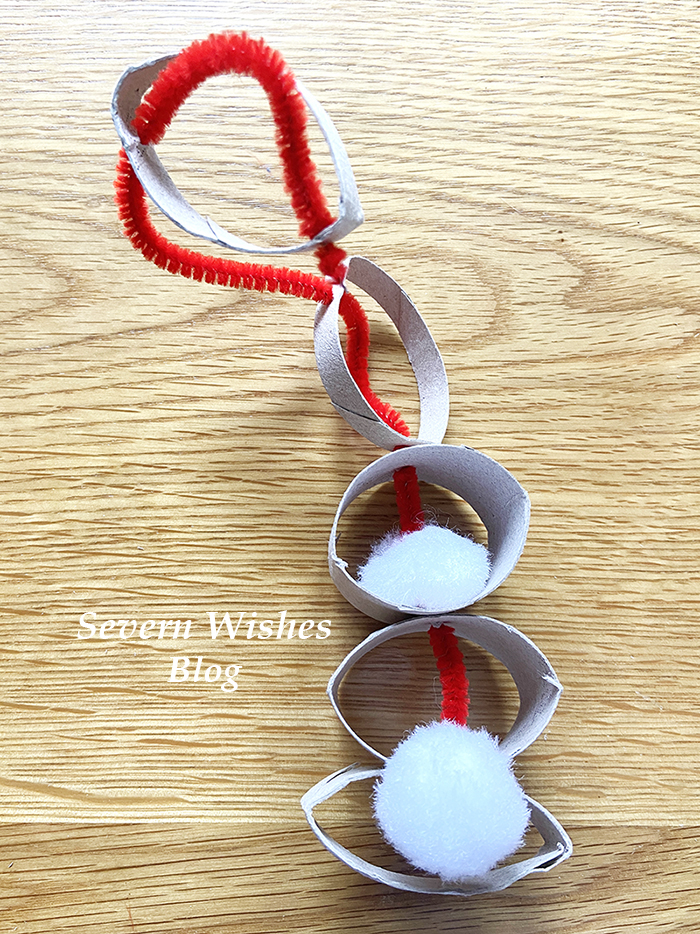
My easy toilet roll flowers are so simple to do! They only take about ten minutes to make once your toilet roll is decorated and dry. You could make a load of these, if you have a kitchen roll tube you may even get 3 flowers worth of petals from one tube! I would like to try and make a Rainbow of these!

Step 1. Let the Children decorate their toilet rolls and let them dry.
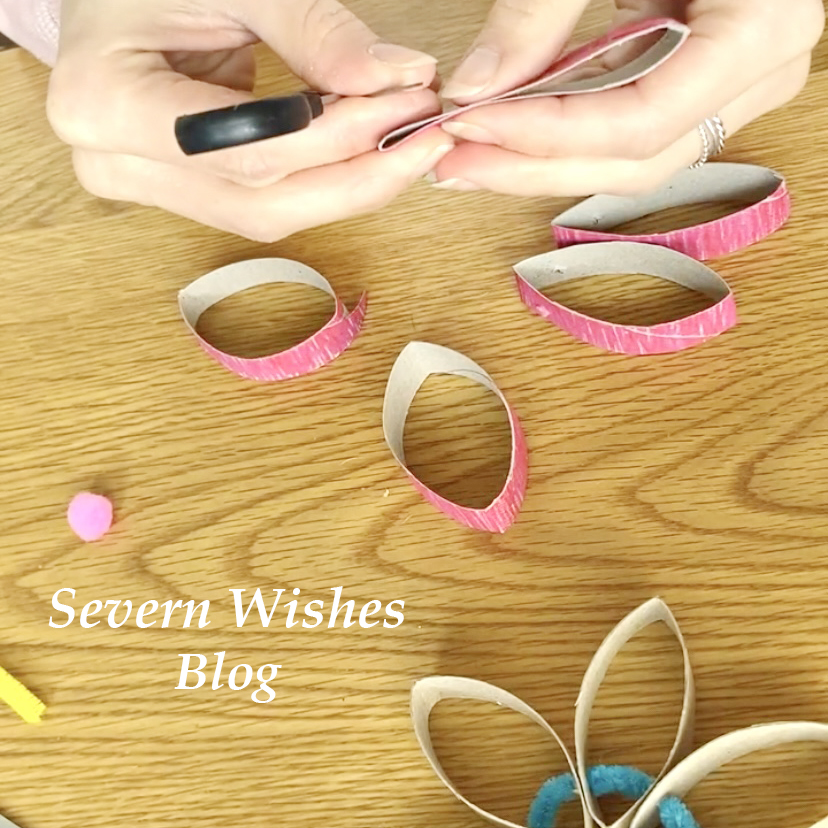
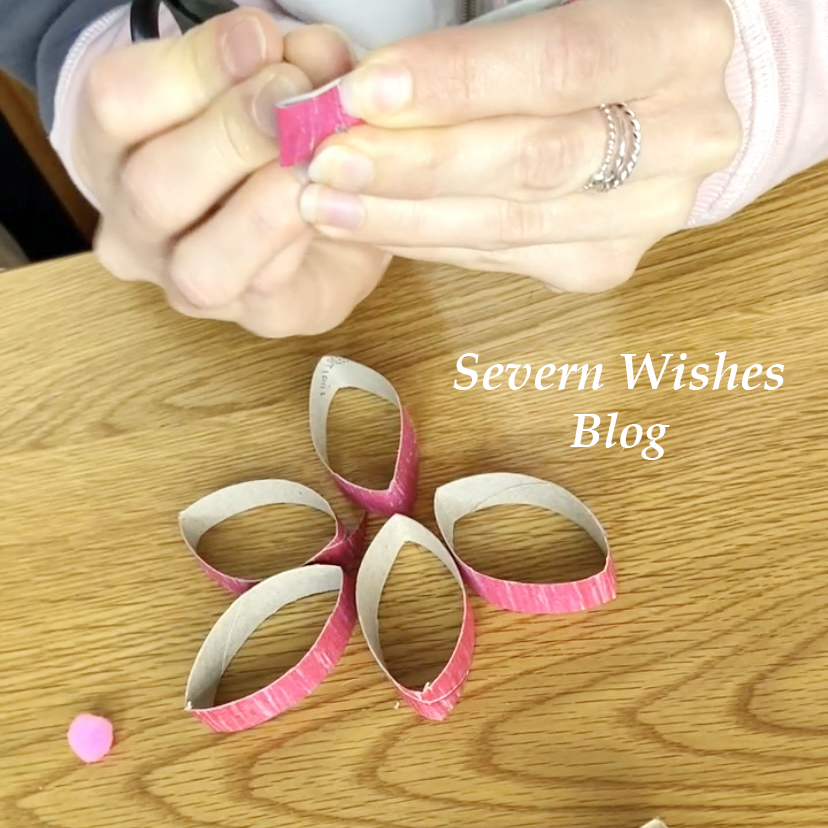
Step 2. An adult then cuts the toilet rolls into equal width pieces to make the petals.
Step 3. An adult also then uses the pointy end of their open scissors to poke holes that are 1cm up from the end and through both sides of each petal. (See my photo).
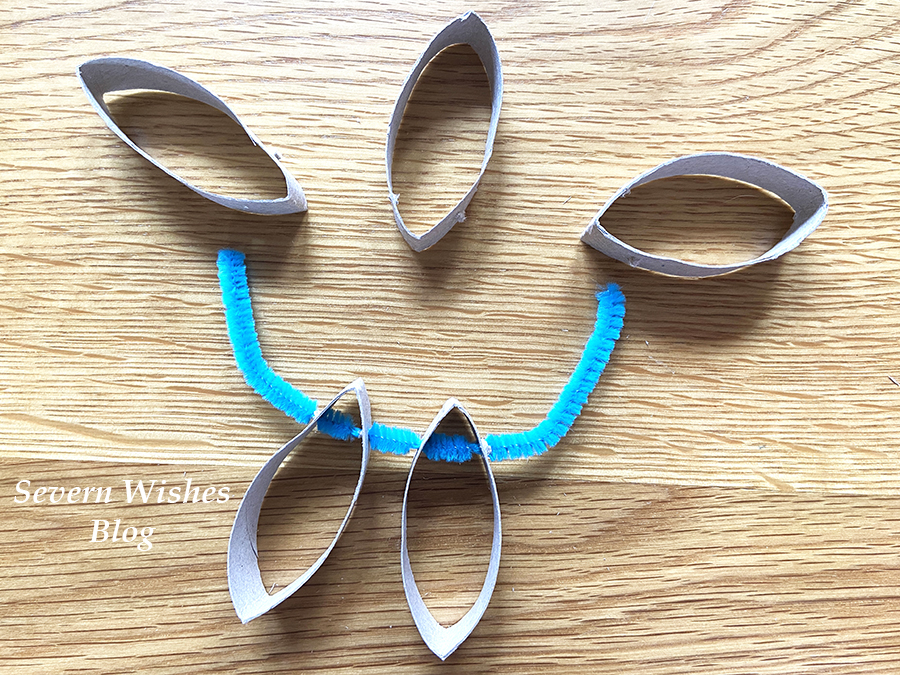
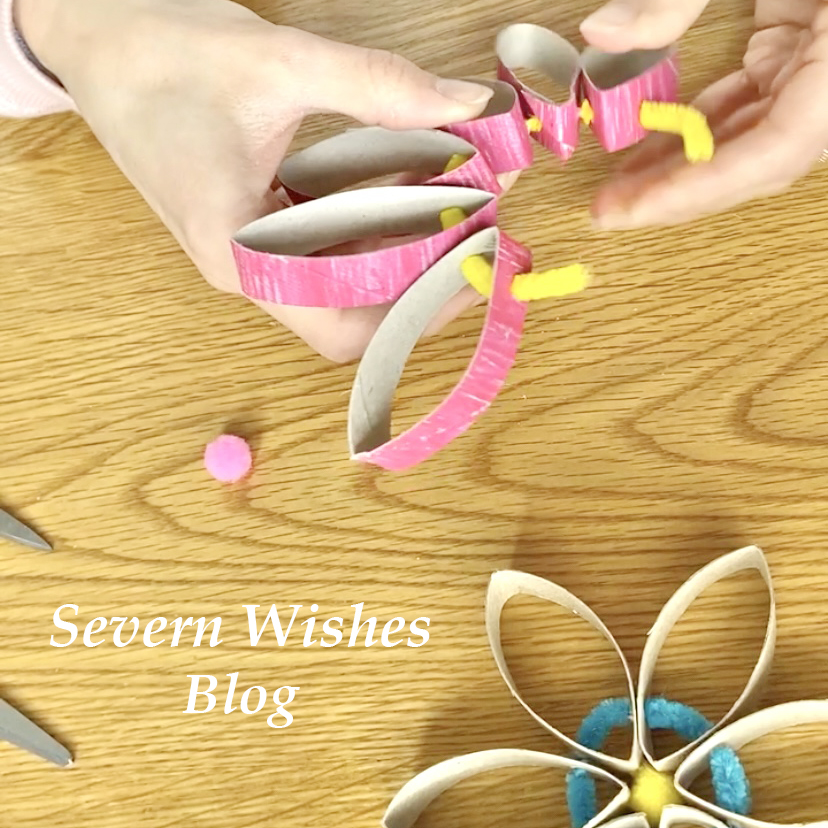
Step 4. The petals can now be opened out and gently threaded on to a pipe cleaner through the holes made with the scissors. Push them on until they hit the middle of the pipe and keep adding round.
Step 5. Curve the Pipe Cleaner round as you go, after each petal, and then after the final one is added you push the ends of the pipe back through the final petal holes to neaten it up. Line it up spaced between the petals while it is flat on a table and then push a fluffy craft ball into the middle.
Step 6. Hang your flowers up around your home on ribbon or string for a nice decoration.

Step 3 – 1 cm in from the petal end
Step 3 – making holes through the petals
Step 4.
Step 4 to 5.
Step 5.
Step 6.

✩✩✩

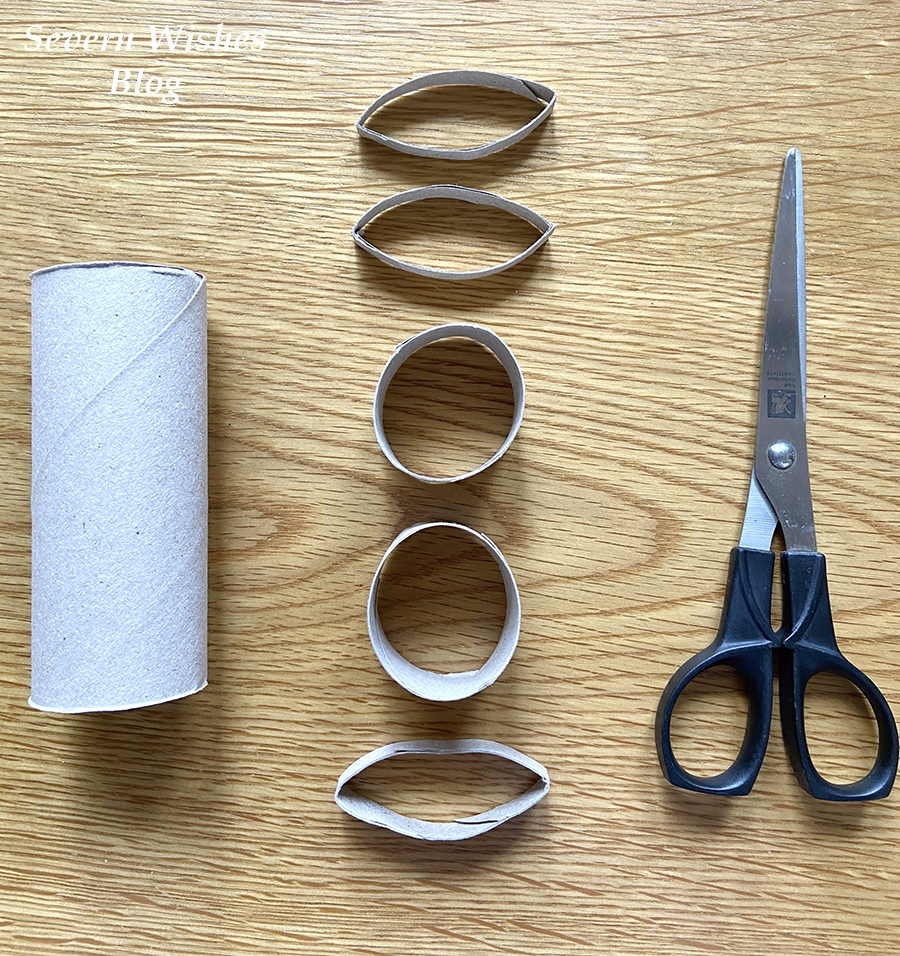
Step 2 – Cut the Decorated Roll into 5 Pieces

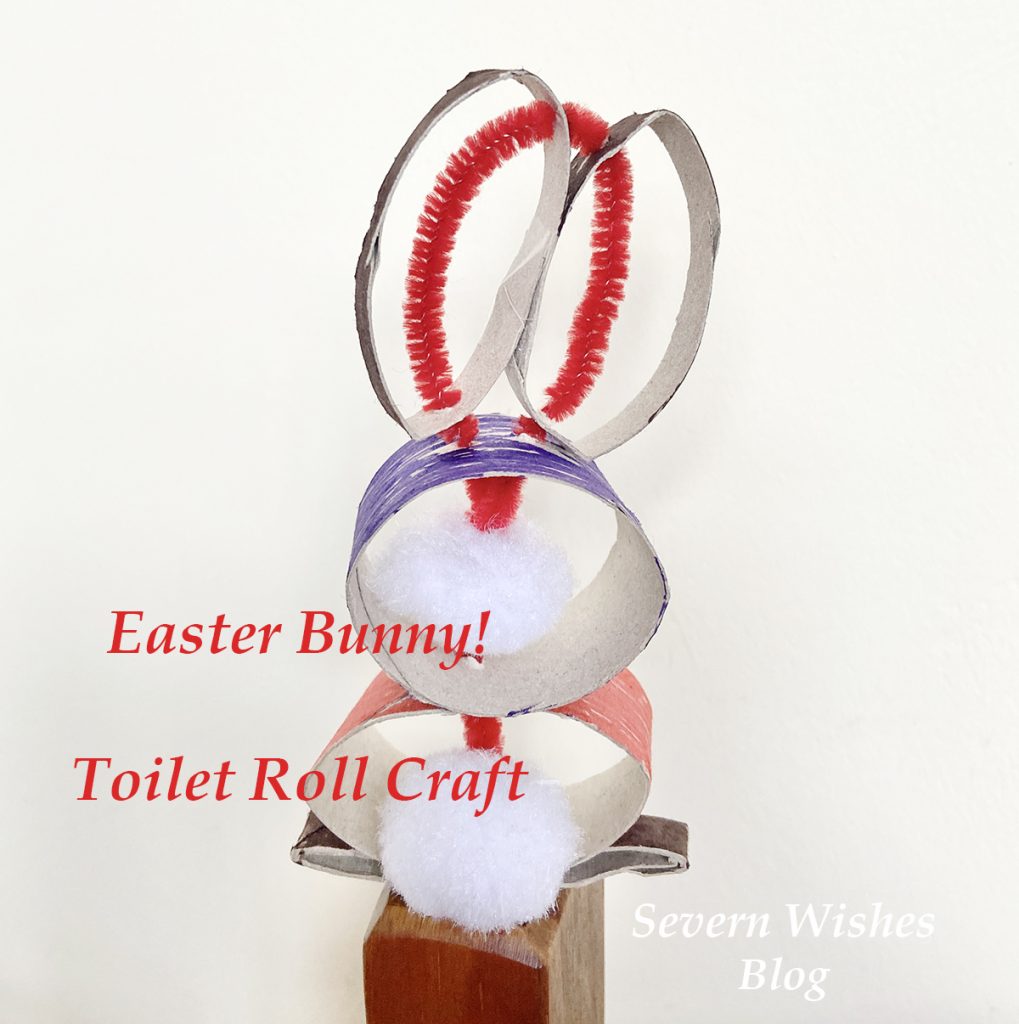
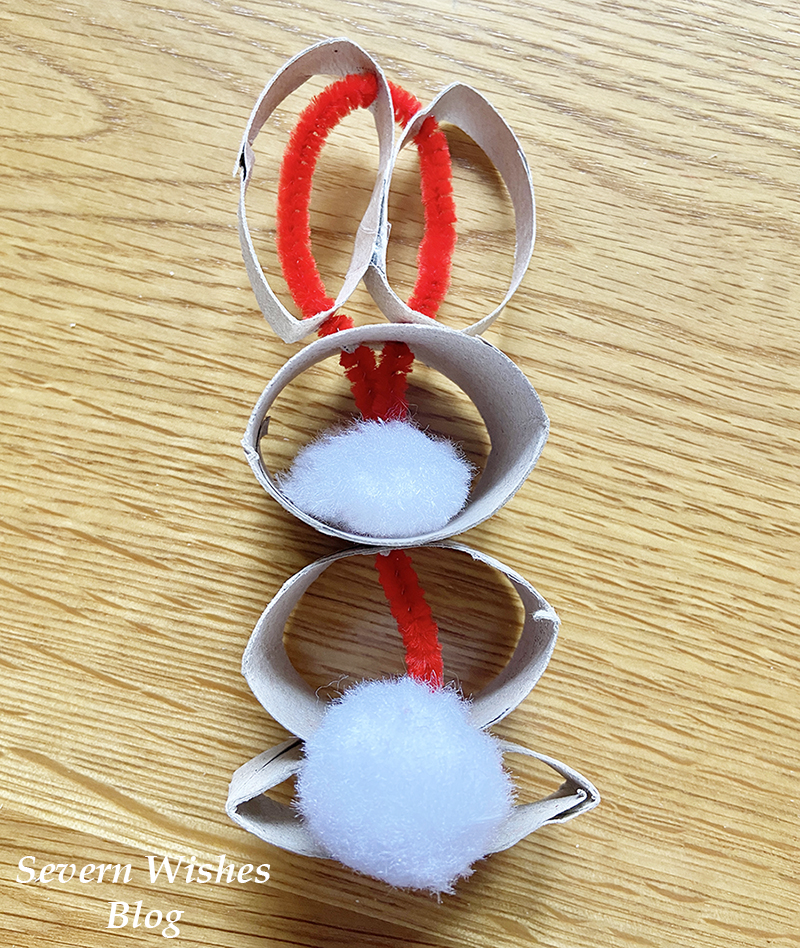
How to Make Sabrina’s Toilet Roll Easter Bunny

My cute toilet roll bunny’s are great for the Easter break! And they should stand up all by themselves! They are a little trickier than the flowers, but lots of fun still! They all start with a decorated toilet roll anyway so make sure you just save them up and get little ones to colour them in.

Step 1. Children decorate toilet rolls and let them dry.
Step 2. An adult cuts the toilet rolls into 5 pieces, a base, two ears, a middle and a head. (See Photo).
Step 3. An adult uses the pointy end of scissors to poke holes in the pieces, each one is specific. So…
Base is one hole, central on one side. Middle piece is two holes, one top one bottom just push the card flat together and the scissor end straight through. The Head piece needs one hole in the base at the centre, and off centre at the top it needs two holes. Each ear needs two holes, both on the same side at either end before the point. (See My Photo).
Step 4. Using a Pipe Cleaner push it on to the base and bend the end, attach the fluffy tail.
Step 5. Add the Middle to the pipe cleaner, push it down until it is flush and flat against the base.
Step 6. Take the Head piece, thread it on through the single hole, make it flush on the Middle piece of roll and then push another fluffy ball down the pipe cleaner until it sits in the middle of the roll.
Step 7. Push the pipe cleaner up through one of the holes in the top, and curve the pipe cleaner round, make sure the bunny parts are all flush and together for the body.
Step 8. Add each ear by pushing the pipe cleaner up through one side with the holes on, in through the bottom hole and out of the top hole, bend the pipe cleaner round and then through the top hole of the final ear and down through the bottom hole.
Step 9. The final step is to push the rest of the pipe cleaner down through the second hole on the bunny head, if you have more than 1cm of pipe left cut it off, then push the last 1cm into the fluffy ball within the roll bunny head, this neatens it up and gets the pointy end of the pipe cleaner hidden away.
Step 10. Adjust your bunny feet base and middle parts so that the bunny is aligned and he should stand up all by himself!

Step 3 – use my guide to make the necessary holes
Step 4 – Base and Tail
Step 7 and Step 8 – Threading the Ears

My bunny making video tutorial can be found on my Facebook page if you get stuck which is right here

✩✩✩

How to Make Sabrina’s Circle Petal Flower Card

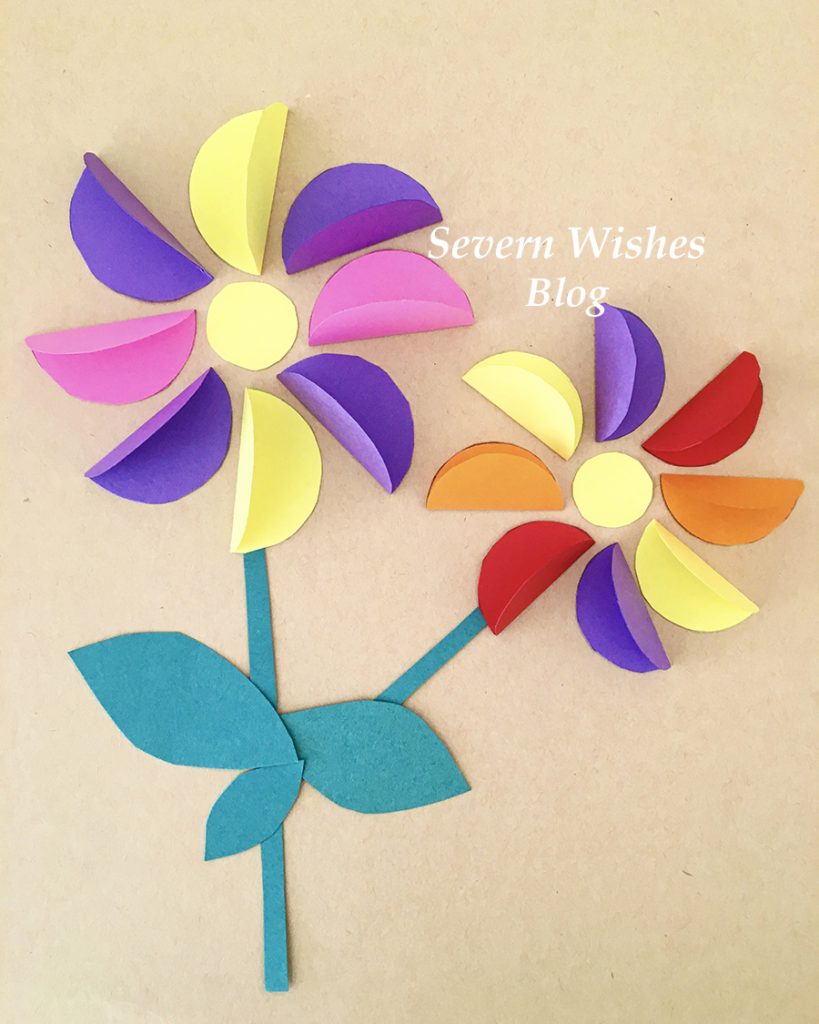
This one is nice and easy and once all the cutting out is done, children can stick them down however they like to design their own flowers.

Step 1. Fold a Piece of Card in half for your card base.
Step 2. Draw around a circular object many many times on some different pieces of coloured card.
Step 3. Cut out these circles carefully and assemble flat.
Step 4. Every circle needs to be folded in half.
Step 5. Assemble your Flower by arranging the petals with one side sticking up to make it 3D.
Step 6. Cut out a small circle in a bright colour for the centre of each flower.
Step 7. Once happy with the design either pritt stick or double sided tape each petal down to the card.
Step 8. Make leaves or stems from card, or use pens to decorate your card.

✩✩

Thank you for reading this (long) Craft related blog post today, I always showing you my latest “Sabrina’s How To Make’s”! And if you have any questions for me about how to do something you’ve seen on my blog then please comment below on this post and I will happily answer them for you. I hope that you have seen something you would like to try and make yourself!

If you do make any of my craft items please tag me on social media using the hashtag #SabrinasHowToMake I really look forward to seeing them!

✩ Sabrina 

Check out my previous How to Make Craft posts for these beautiful 3D paper flowers!

Sabrina’s How To Make Paper Flowers for all Occasions

Hello and Welcome! If you’re a regular visitor to Severn Wishes Blog then you’ll know that I love to do lots of Art and Craft! If you’re new here then hi, and after this blog post please check out the remainder of my fun Crafts in the section here.

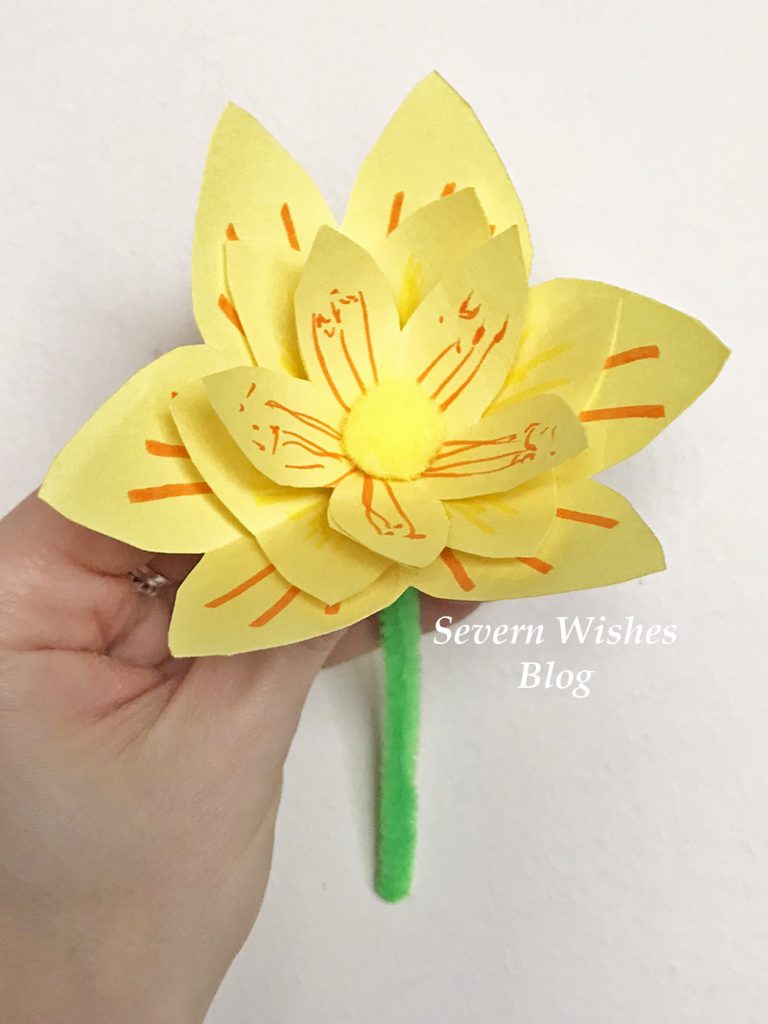
Paper Flowers are a wonderful alternative to buying fresh ones, the beauty of these homemade gifts is that they won’t wilt and have to one day be thrown away, these can be treasured by the loved one receiving them, forever! Give a single flower or make a bouquet it’s up to you!

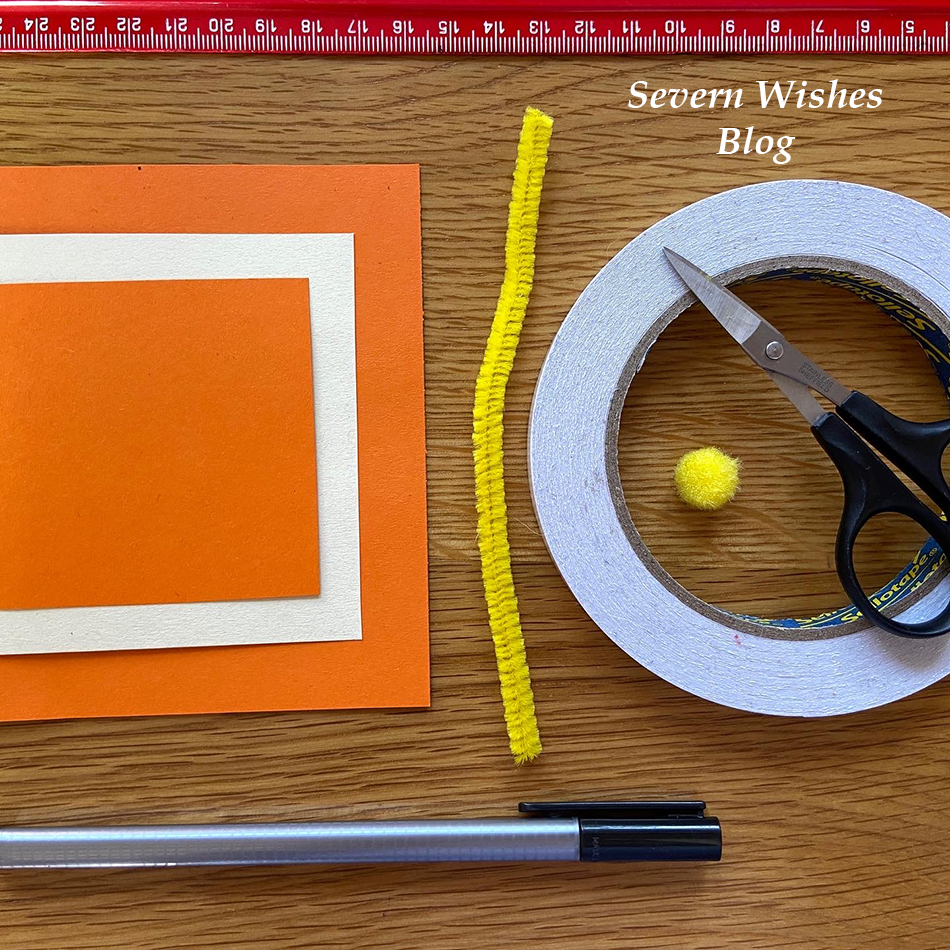
What Do I Need?

A Ruler (30cm)
A Pen or Pencil
Pipe Cleaners various Colours
Thin Coloured Card or Thick Coloured Paper
Pens for Decorating the Petals (optional)
Fluffy Craft Balls (Flower Centres)
Scissors

My Step by Step Visual Guide is really easy to follow, but I also uploaded videos to my social media if you would prefer to follow that! Carry on reading for my step by step and photographic guide.

SABRINA’S STEP BY STEP GUIDE

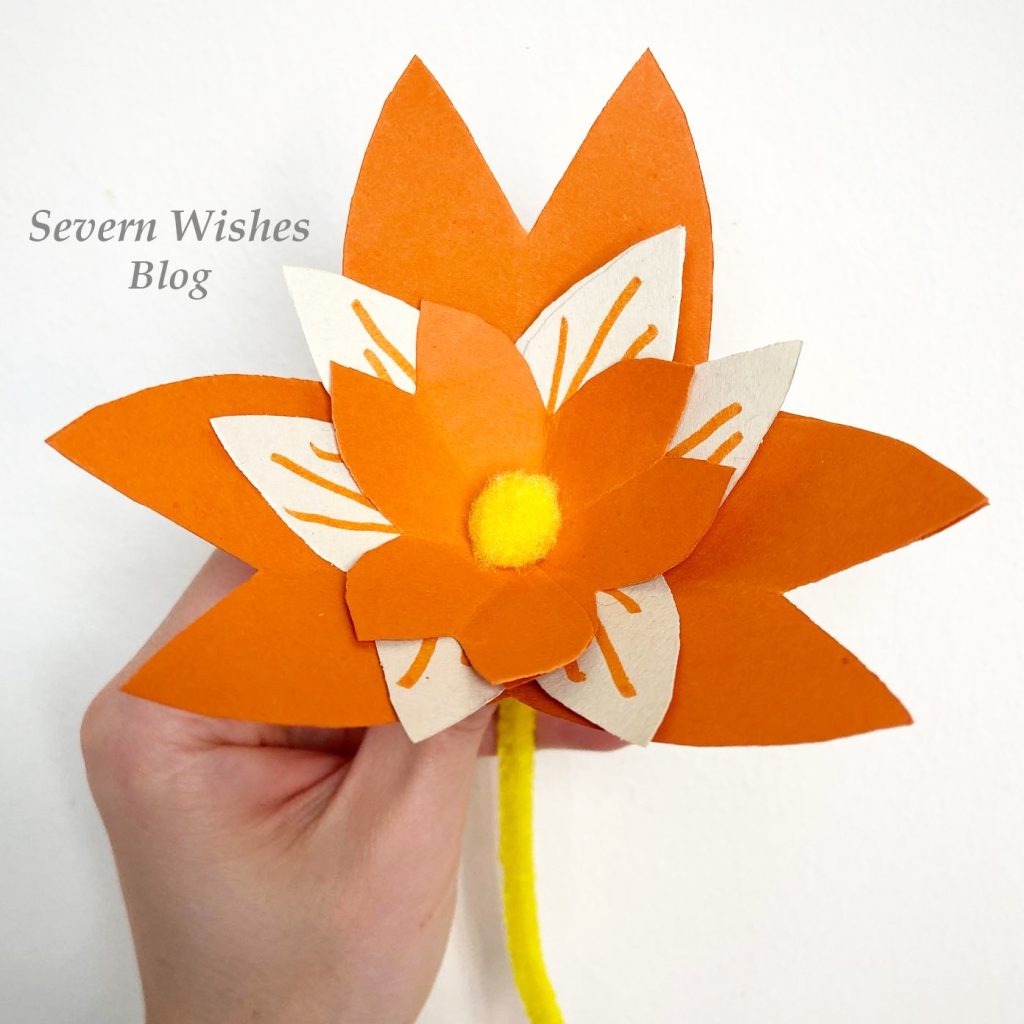
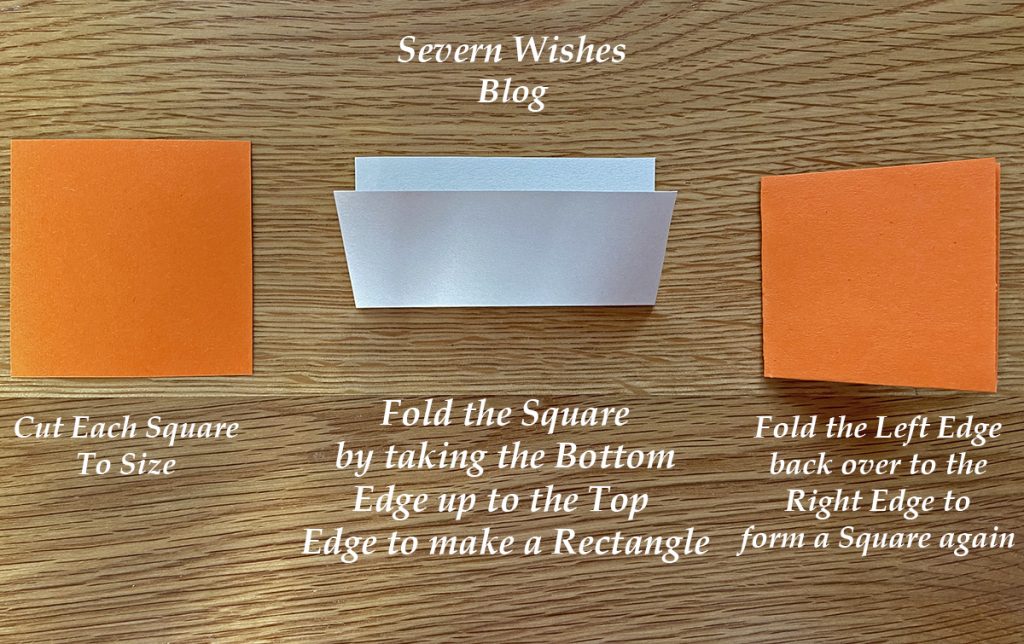
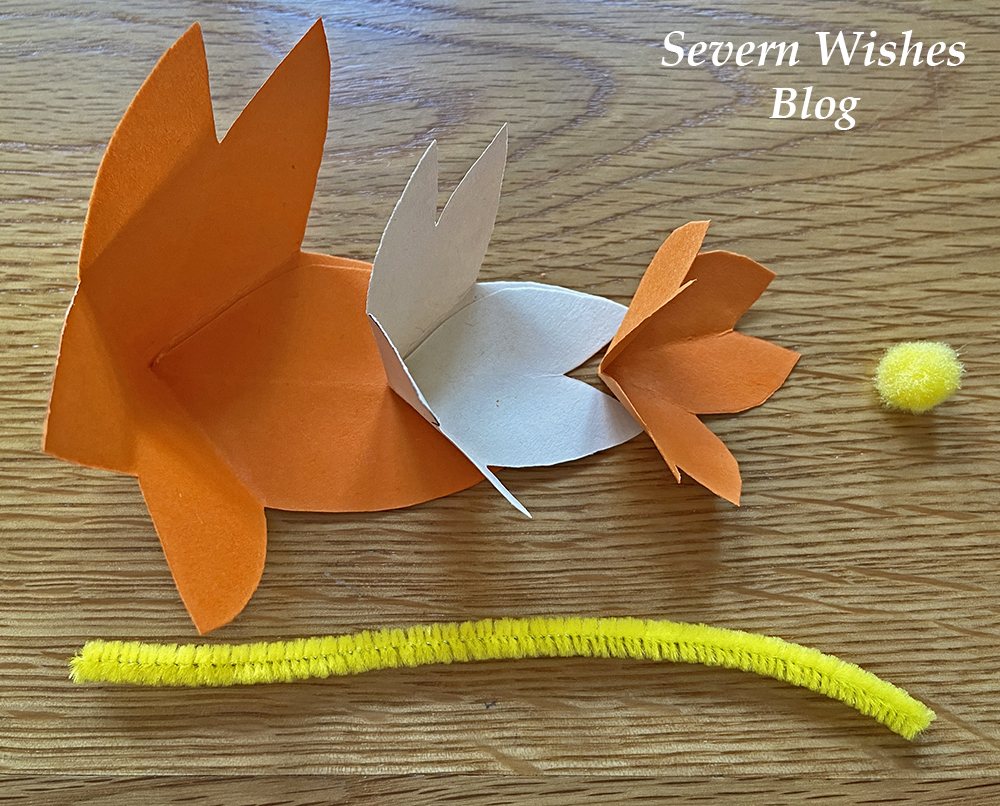
1. Cut Squares from your chosen Coloured Card. For example I made my Orange Flower with a 7cm, a 8cm and a 10cm Square. Three Squares is an ideal amount of layers but you can do just two or even more layers if you wish. Assemble these squares on a flat surface ready for the individual folding process. (See my images below for additional guidance).

2. Fold each square you have in half to form a rectangle, do this by folding the bottom line up to the top line and line up the crease and push flat. Repeat for every piece you have.

3. Next, you fold each rectangle back into a square shape by folding it from the left to right and flatten and crease down flat once again.

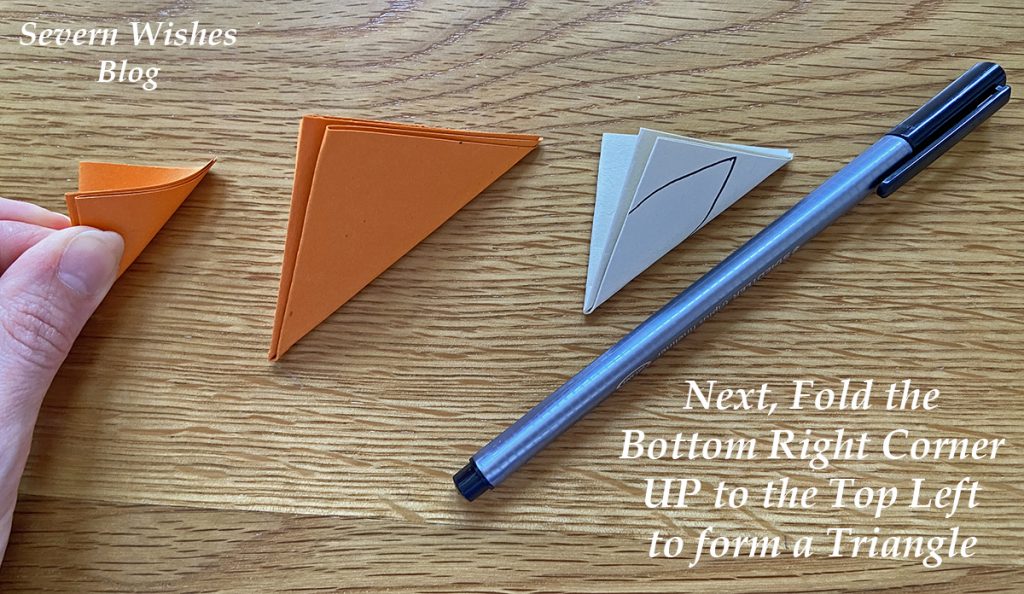
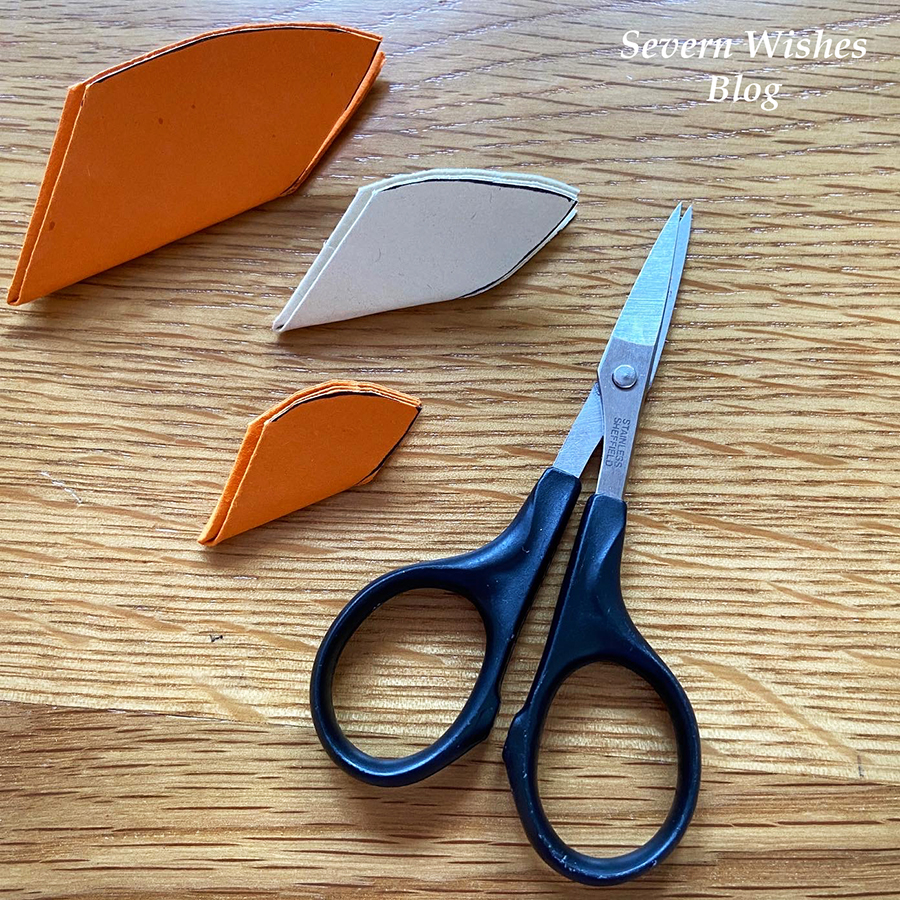
4. Finally you will have all your layers into folded squares, and these now need to be made into Triangles. But to do this correctly for the next steps you must not rotate them at all during the folding process. Make sure that you fold the bottom right corner of your squares up to the top left, flatten and crease.

5. Next you need to draw a petal shape on every flattened triangle, make sure not to rotate it from when you folded it when you draw on it, otherwise it won’t cut intact during step 6.

6. Now you need to carefully cut out your shapes, gently follow the line and then discard these cut offs for the recycling because you don’t need them.

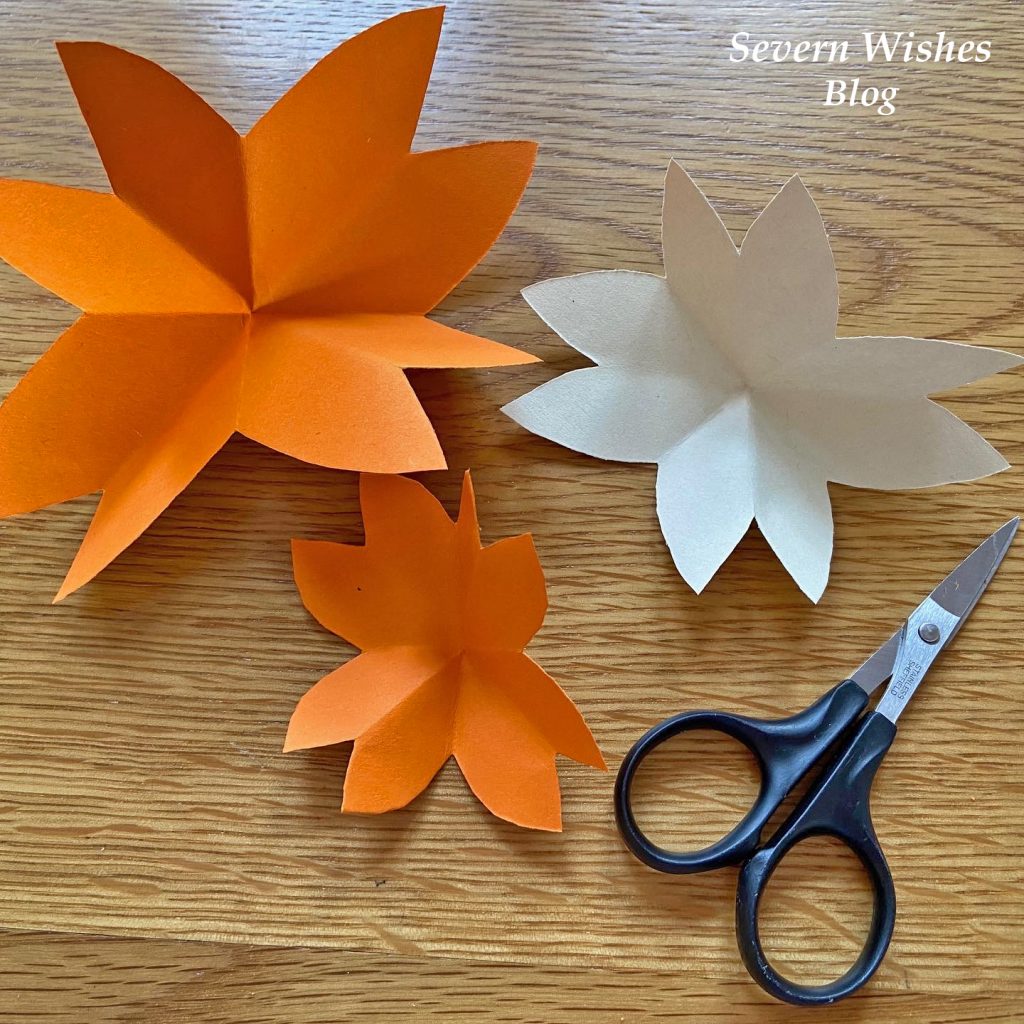
7. Time for the moment of truth, open out the flowers gently and slowly so as not to tear them. Lay them out flat and make sure they are an entire piece.

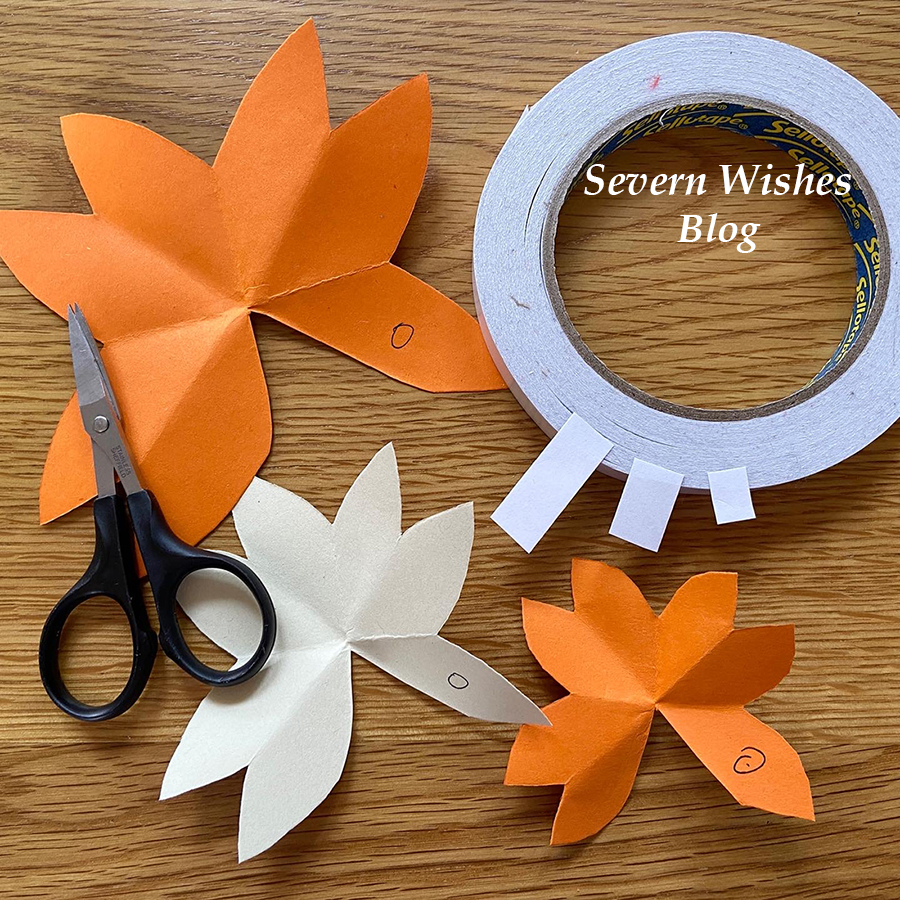
8. With the crease lines facing at each compass point you need to mark the petals that are in the South East corner of each flower. (See my images below if you are uncertain).

9. Carefully cut these petals away from the flower, be sure to only follow the crease lines of the folds when you cut and don’t be tempted to cut it too low in the centre, just enough for the spare petal to gently come free. You don’t need these now and these spare pieces can all be recycled at the end of your crafting session.

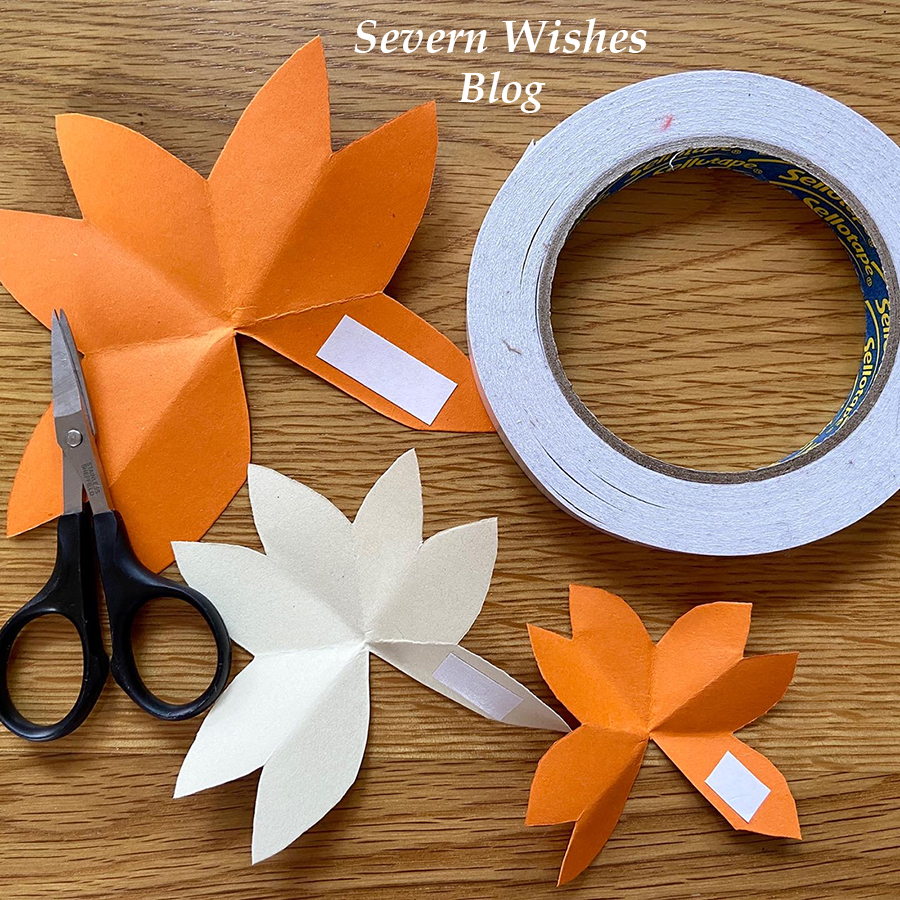
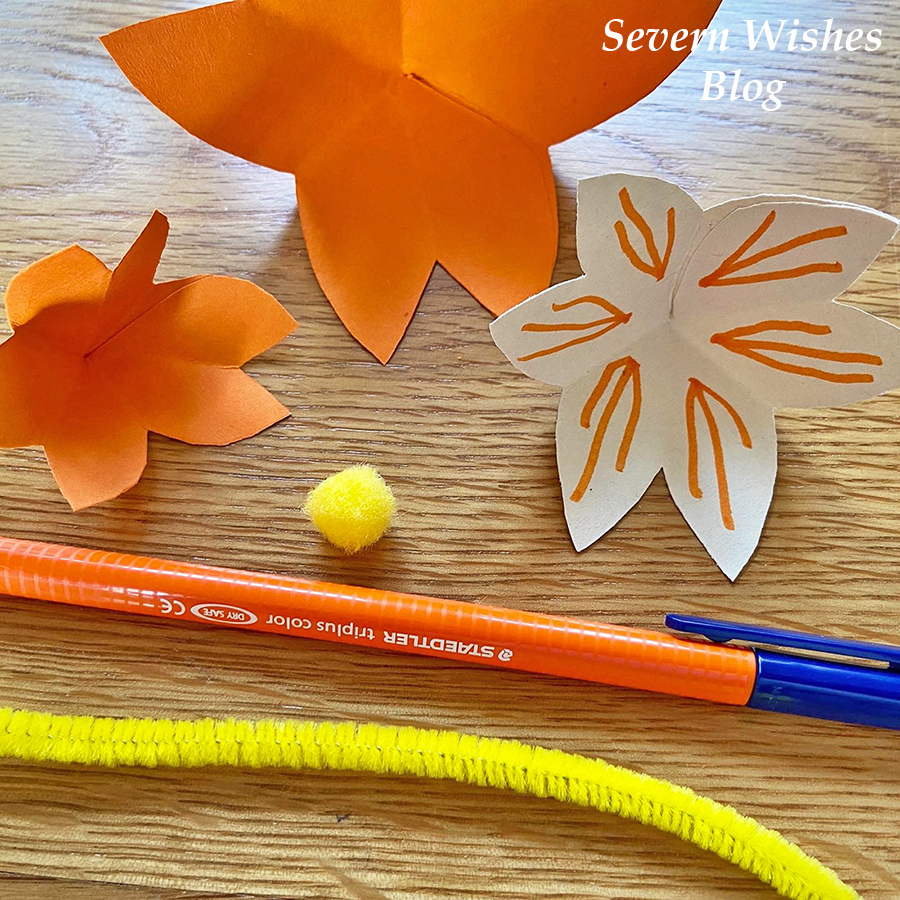
10. Next step is to mark the petal on the right of the one you just cut away, on each of your flower layers, and then stick a piece of double sided tape or a blob of glue on to that mark.

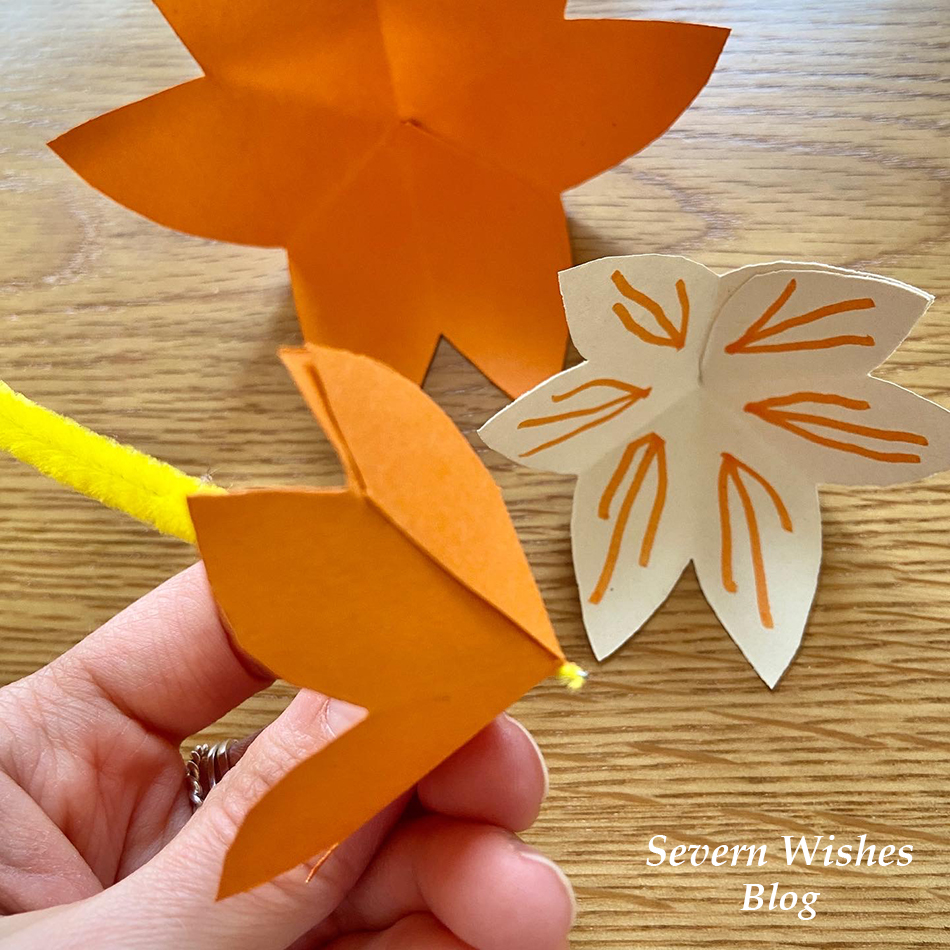
11. Doing each layer one at a time now, gently place the flower into your hand, and with the other hand carefully fold the petal on the left side over the petal on the right side. The creases and folds we made at the start should allow you to do this easily, if not gently fold the creases again and try again, the flower should (with some gentle persuasion) create a 3D flower with the shape similar to a cone. Push down on the glued part and make sure that you have aligned the petals and that it is stuck down. Repeat this for all flowers and layers that you want to make.

12. Carefully lay out each of the Flower layers now that they are 3D. You now need to decorate them if you want to with lines or dots before we assemble them. If making them with small children you may want them to decorate at Step 10, before you make them 3D.

13. During this step you want to use the end of the Pipe Cleaner you have chosen to gently pierce through the middle of the Flower layers, take one at a time, and force the pin end of the Pipe Cleaner directly through the centre where the creases and folds meet. Once all of the layers are pierced you can now arrange them in order of size.

14. Assemble your finished Paper Flower by sliding the layers on to the Pipe Cleaner, you do want to leave about a 4mm bit of the pipe cleaner poking out so that you can push on a coloured fluffy craft ball (if you have one) and this neatens the whole look of the flower plus it covers the pointed end of the pipe cleaner.

15. Adjust the Petals by rotating the layers slowly on the pipe cleaner stem until you are satisfied with the flowers final look. I hope you are happy with your flower! You can play around and add other things too if you like! Be creative and I cannot wait to see yours! Tag me! #SabrinasHowToMake

✩✩

Thank you for reading this Craft related blog post today, I always love doing my “Sabrina’s How To Make’s”! And if you have any questions for me then please comment below on this post and I will happily answer them for you. If you make some flowers please tag me on social media using the hashtag #SabrinasHowToMake and I really look forward to seeing them!

✩ Sabrina 

The Woodland Gift Company Rainbow Flower Earrings Review

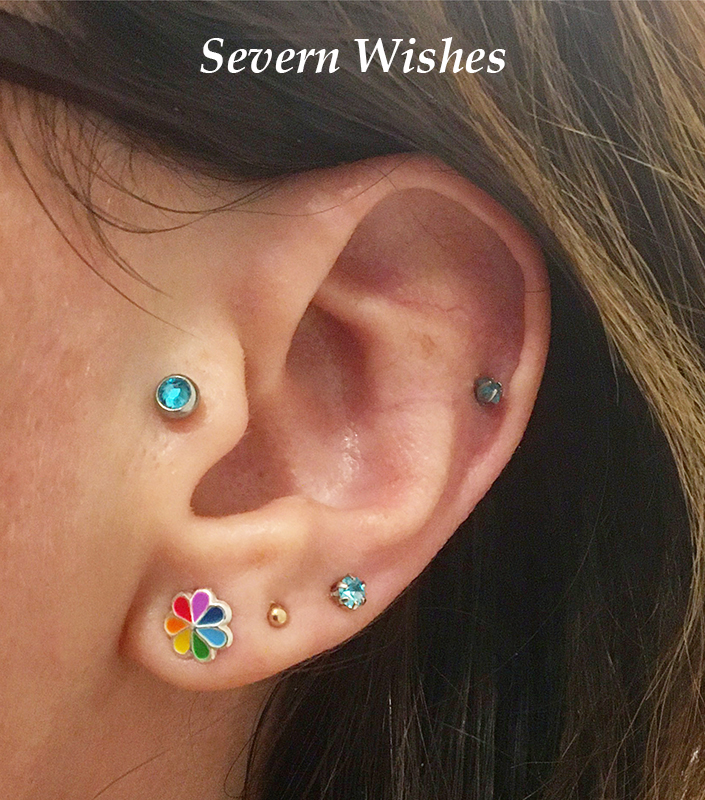
I recently made a purchase from The Woodland Gift Company, who I have been following on Facebook for quite some time. I have chosen to support small businesses where possible during this difficult time. Plus they had some gorgeous earrings! I was looking for something Rainbow related, but when I saw these I just fell in love with them.

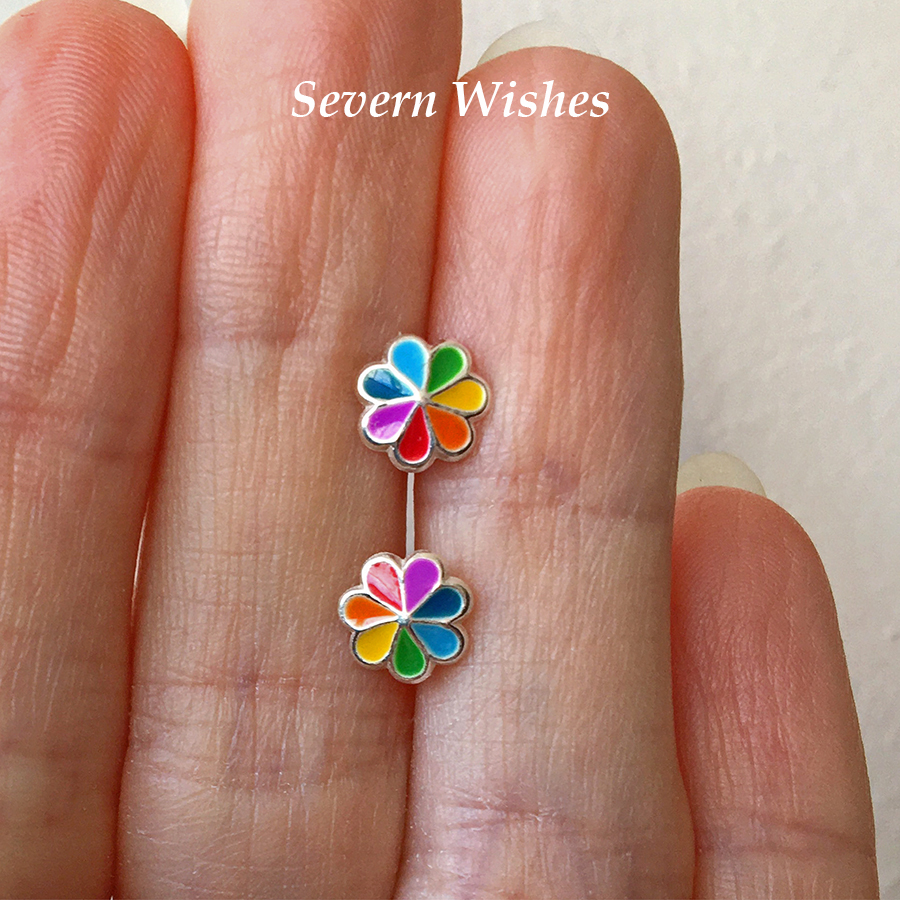
The stunning Rainbow Coloured Sterling Silver Flowers really stand out. They are beautiful and good quality.

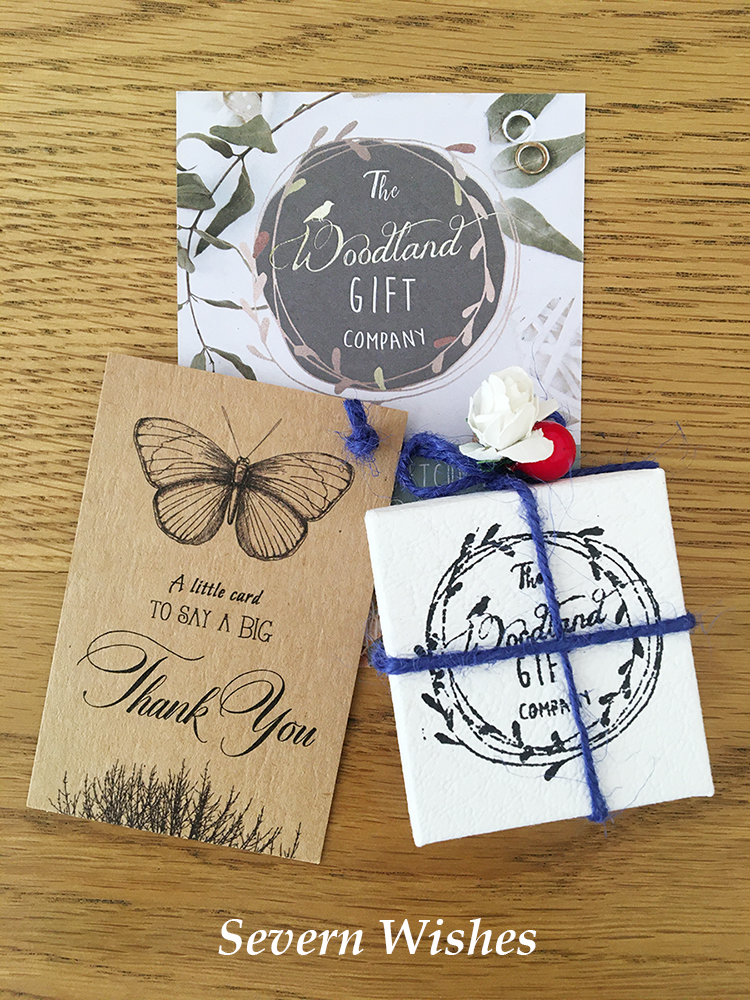
They arrived in lovely packaging and the little extra additions of the string and the paper rose, it just made the experience extra special.

Overall I would say I’m very happy with my purchase, the service was 5 star and the delivery was good too despite the current restrictions. I would definitely purchase from the company again after this good experience.

The earrings are unique, excellent quality with the 925 silver mark on the back. They are lightweight and the perfect size for my ears. They don’t get in the way of my gradual lobe piercings (which I thought they might). I would highly recommend them. And The Woodland Gift Company are giving some money to charity for every pair purchased as well.

If you would like to see more products from this company you can find their current stock
and choices on their website The Woodland Gift Company

And if you’d like to follow them on social media then here is their Facebook

I bought these particular Earrings in the Spring of 2020.

Thank you for reading this review today, I hope you have enjoyed it. If you would like to see more Rainbow related products click the tab category Rainbow on my home page. Have a lovely day!

✩ Sabrina ✩

November 2018 Treatbox Reveal

Hello and Welcome to the November 2018 Treatbox Reveal
with Sabrina of Severn Wishes Blog.

Happy Treat Box Day Everyone! It’s the last Treatbox of the year before the Christmas box!

This month the Treatbox UK theme is “Freedom and Me Time”.

The little sticker reads “With Love” attached to a deep navy blue tissue paper.

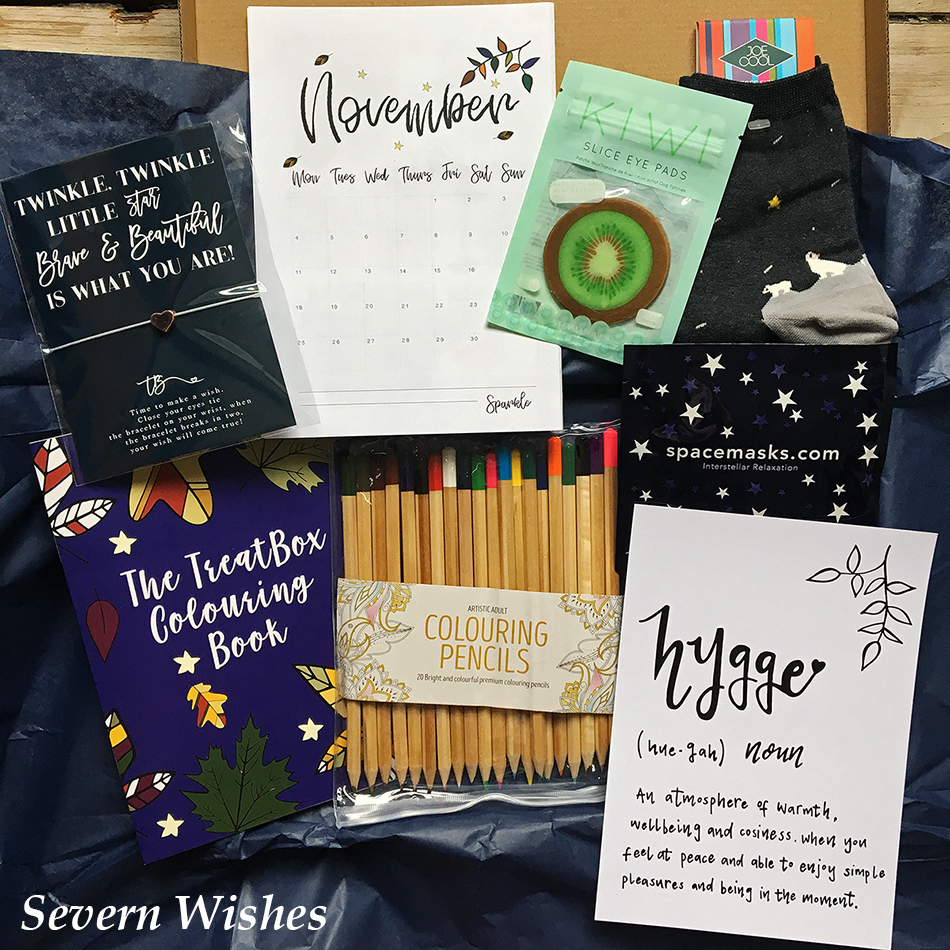
Here are all of the contents of the November 2018 Treatbox.

This month there are 6 items in the Treatbox plus a Calendar Print and an A5 Print.

Calendar Print for November 2018
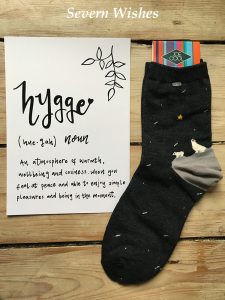
A5 Print – Definition of Hygge
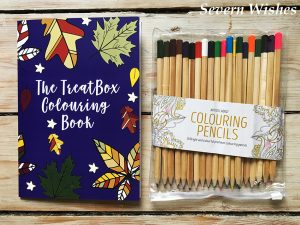
Treatbox Colouring Book featuring Treatbox drawn pictures
Set of Colouring Pencils
Pair of Socks – Polar Bears Design
Treatbox Rose Gold Heart Wish Bracelet
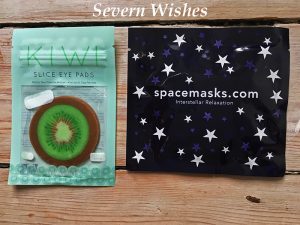
Spacemasks – Interstellar Relaxation
Kiwi Slice Eye Pads

Here is a selection of my photographs of this month’s box, I hope you enjoy seeing the items up close.

My Favourites

My favourite pieces in this box have to be the Colouring Book with Pencils, the Socks, and the Bracelet. As a mum to a young baby I don’t get much time to do things like face masks anymore! Ha! Ha! Maybe one day I can get an afternoon to myself, have a pamper! And with that in mind I hope that they will keep! It’s a lovely idea for a proper pampering though!


My Overall Opinion

I enjoyed the fact that we had several Treatbox Original and Unique items this month. The bracelet is beautiful and the over all quality of the items is good. Although we only received socks in the September box I do love socks, I always have cold feet and you always need quality and cute socks! Especially now with Winter fast approaching, Socks are indeed wanted!

✩✩✩

✩✩✩

Are you thinking of ordering a TreatBox for yourself or for a gift for someone?
Then you can find Treatbox subscriptions and build your own box at their website.

Check out my previous posts in this unique category of my website called ‘Treatbox’ especially for these box reviews and reveals – Severn Wishes Treatbox.

Thanks for reading this months box reveal today, if you have any thoughts of your own that you would like to share or if you have purchased a box after reading one of my reviews then I would love to hear your from you, why not leave me a little comment in the section below.

✩✩✩

Thanks for reading this post everyone! I hope you have enjoyed this months reveal and review. Have a great November! Check out my social media especially Instagram for more Reviews and products in use!

✩ Sabrina ✩

Reviewing Baby Items – Bean Bag Planet

Reviewing Baby Items – Bean Bag Planet

I first saw the Baby Bean Bag on Facebook several years ago. After years of following their page and reading customer reviews, when I got towards the end of my pregnancy I decided to order a Bean Bag for us and our new little one.

What appealed to me the most was that the Bean Bag can be used afterwards for Toddler and Child as our child grows up. It will eventually be a part of their bedroom as somewhere comfortable to sit and read.

There were many designs to choose from including unisex ones. You receive the Bean Bag with the Harness Cover and a Spare Non Harness Cover too in the same colour. Despite this I decided to order an extra harness one so that if our one ended up in the washing machine we would still be able to place baby on the bag safely.

You do have to pay an additional £3.99 for the Bean Bag Filling, but they guarantee that it is Fire Safe Polystyrene balls that they use.

I featured these bean bags on my “Baby Wish List Post” and we had one given to us as a joint gift for our son from friends who read my blog. This excellent coincidence meant that we received two bags the week before our son came into the world. And it’s been very handy to have one on both floors of our house.

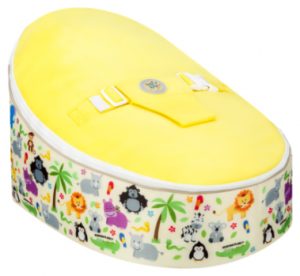
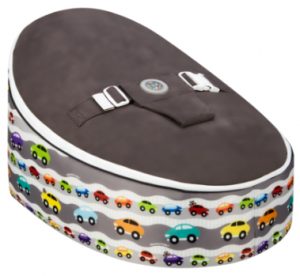
I purchased the Cars version of the bean bag in Grey, where as our friends got us the Safari one in Yellow.
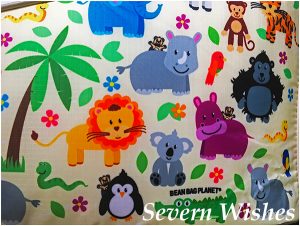
Here are some close ups I have taken of the very cool designs situated on either of the bean bag planet bags we have.


The bright colours are inviting, and there is also a bear that you can find playing peek-a-boo on all of the designs I have seen. This is a cute addition so when children are older they can search for this little bear on the sides of their seat.

So I wanted to include what my husband thought in this review too, I will firstly outline what I think and then dictate his thoughts.


My Opinion

A very handy product to have in more than one room of the home, it is convenient to place baby into safely while you need your hands free. An ideal size and height too because you don’t have to bend too low to place baby into it. This item has become one that we use daily in our home to accommodate our needs between feeds and changes of our newborn baby. We cannot wait for him to grow with the bean Bag too and it will be used in his bedroom one day.

I found the ease of ordering on the website a good experience, and there were a ton of great designs for us to choose from. As for delivery the bean bag comes wrapped and then boxed but is flat. You place the bean bags inner bag inside when it arrives.

The quality of the fabric, bean bag base and the unique design of it, is what had me intrigued enough to buy. I have not been disappointed in the item. I did think they were quite expensive for what they are, but when you use the product as much as we do, its convenience outweighs how much I ended up paying.

After using the product now for several weeks I have to say the easiest thing about them is the use, just place your child in the centre and strap them in using the harness. I am happy that I made this product purchase for our son. Here is a photograph of our son at a week old, enjoying a nap in his Safari bean bag.

Quality of Product 5/5
Value for Money 4/5
Delivery of Product 4/5

Overall Experience 5/5


My Husbands Opinion

A versatile and good quality material that is soft for baby to lay on. Our newborn is always comfortable when lay on it. I like that our baby has a good view when laying on the Bean Bag too. It’s a useful item that can be easily moved around the home into any room or living space. We think they are that good a product that we now have 2 of them (thanks to a gift)! We use 1 for upstairs and 1 for downstairs!

The bean bag itself is good value for money however be aware of the additional charges to fill the bean bag with the polystyrene balls, and there are quite high delivery costs as well.

I would recommend this product and it’s a good idea for first time parents. It’s also useful for parents with pets because it allows baby to be quite a lot higher than the floor and therefore easier to keep an eye on unlike the mats that require babies to be lay on to a flat surface on the floor. Here is another image of our son, as you can see he is happy and content on the bean bag, awake on this image as opposed to asleep on the previous one.

Quality of Product 5/5
Value for Money 4/5
Delivery of Product 4/5
Overall Experience 4/5

✩✩✩

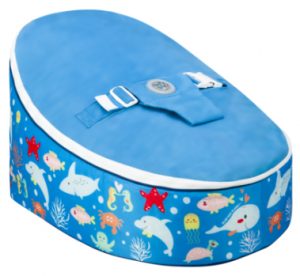
Here are some Bean Bag Planet designs.

✩✩✩

Links

Bean Bag Planet Website
Bean Bag Planet Facebook

✩✩✩

Thank you for supporting Severn Wishes blog today, don’t forget there are plenty more reviews to read across the website, just click one of the categories that interest you on the main page. I hope that you have enjoyed this review and I wish you a wonderful rest of your day.

✩ Sabrina 


Olivia Burton Enchanted Garden Square Dial Chalk Blue and Silver Watch Review


╰☆╮ Review of Olivia Burton Enchanted Garden Midi Square Dial Chalk Blue and Silver Watch ╰☆╮

When I turned 30 a couple of weeks ago, I created a Wish-list post about what I hoped to get for my birthday. I feel so lucky that I have a very kind husband who knew how much I had wanted a beautiful Olivia Burton watch, and he bought me this one!

I have a petite frame which includes having small hands and wrists. Most watches that I try on in shops are too big for me, they overhang either side of my arm and often rotate while on. This makes them uncomfortable to wear and I usually don’t bother putting them on unless it’s for a special occasion.

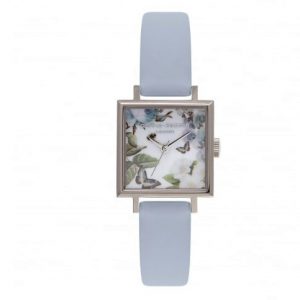
But now I’ve got this gorgeous and detailed watch, which is not only highly appropriate to my nature loving personality but it also has a specifically smaller dial size at 23mm.

ENCHANTED GARDEN MIDI SQUARE DIAL CHALK BLUE & SILVER WATCH

Website Code: OB16SS18
Price £82.00
Dial Size 23mm x 23mm
Strap is Genuine Blue Leather
Silver Plated Case
Three Hand Japanese Quartz Movement
A Sophisticated and Elegant White Dial Design with Flowers and Butterflies

You Can Buy This Specific Watch Here
All Watches On The Olivia Burton Website Can Be Viewed Here

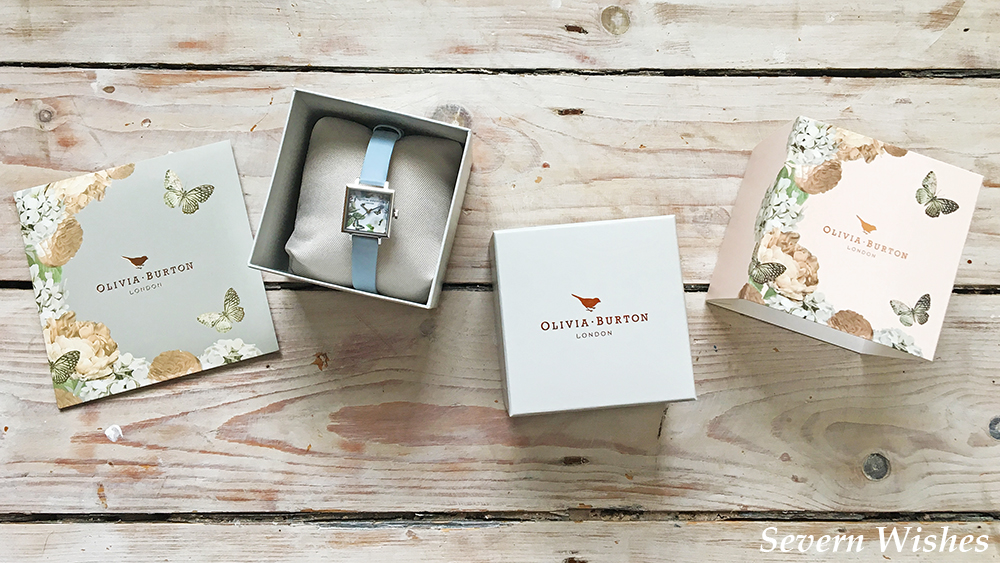
Here are some more detailed images of my watch and what I received with it.


╰☆╮ My Overall Opinion and Review Scores ╰☆╮

Appearance 5/5
Quality 5/5
Value for Money 4/5
Delivery 4/5

This watch is beautifully presented both in it’s delivery boxes and in it’s own silver plated case. The individual design is stunning and extremely detailed. If you look closely at the detail you wouldn’t expect it to be so intricate because of the overall size, it’s created with a very high standard.
In fact all the Olivia Burton watches are made to a high quality across the range, all of them with varying styles and straps to suit all customers desires. There are some straps that have leather, others are velvet, or mesh and even those that are mixed metal bracelets. With a varying dial size that ranges from 22.5mm to 32mm, and several shapes too including square, rectangle and circle.
I was impressed with how the watch came in a box within a box, it was a nice touch to have the whole piece inside it’s own personal box. It means that when I’m not wearing it, it can stay clean and safe inside.
The delivery of the watch took several days, which did surprise us, however it was after the snow was clearing so we wondered if that were the reason for the delay. It didn’t arrive until my birthday date, despite my husband ordering it 9 days prior.
Overall I am very happy with the gift and that is why I wanted to review it in such detail. Please check out my photography of the watch so you can see the minute details in the dial and the quality with which it has been made and distributed.
I would recommend the Olivia Burton website and it’s products, and I would consider more in the future.


╰☆╮☆╰☆╮

I hope you have enjoyed reading this review post, I can honestly recommend these watches if you want a high quality gift for someone, or you want to treat yourself to a high standard piece that you can treasure. It was easy to photograph being so pretty! And with a good warranty available on each watch that is sold, and a huge range of choice, they make ideal presents for both yourself and for others.

If I can answer any questions about the watch that you might have then please leave me a comment.

✩ Sabrina ✩

My Thirtieth Birthday Wishlist

╮ My Thirtieth Birthday Wish List ╰

If someone had asked me two or three years ago what I was planning for my milestone of a birthday, I would have reeled off a whole list of plans and ideas. Despite going through a rough time with my health I didn’t want to let it win, and therefore planned an array of things for my thirtieth year on Earth. But sometimes life has a way of sending you off into a completely different direction however, and now I am postponing or cancelling my plans from two years ago, for the foreseeable.

This isn’t all bad, although I am disappointed not be doing much for my big birthday, it’s all because I am now expecting my miracle baby.  They say things happen for a reason and this little one has been so wanted for so long, that that is so much more important to me right now. Other things can wait…

It means I’m going to hold off on 90% of my plans, and hopefully I can achieve some of them one day, perhaps I can do something for my thirty first birthday next March instead to make up for this year…
So instead of pondering on what I was meant to be doing this month I am focusing on things I can do instead! Plus putting together a little wish list has taken my mind off things too. Now the weather has been bad for weeks I am quite glad I hadn’t booked anything as such, so thanks for that weather! I hope it dissipates before the middle of next week and I can get out and about to see family and friends at least!

So what am I hoping for this year or what have I seen and just loved?

I usually ask family members for vouchers so I can go and buy what I like and take a shopping trip, or like I do most of the time these days, shop online! For both the time convenience and the fact I struggle to do a full day on my feet at the moment. I’ve seen some gorgeous Maternity Wear at both New Look and Dorothy Perkins online…

I will of course let you know if I get anything special this birthday!

Here we go then, this is my Birthday Wish List!

╰☆╮ Wish List 

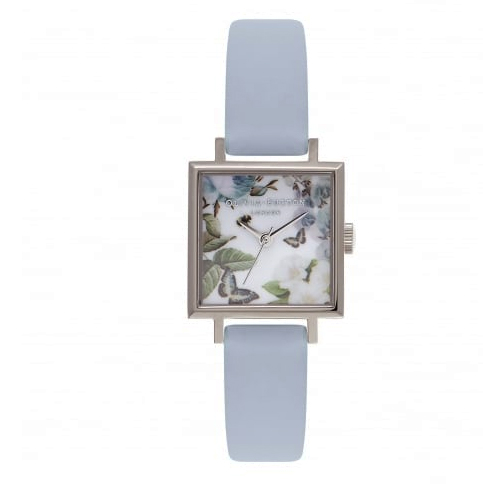
Olivia Burton – Ladies Enchanted Garden Square Blue and Silver Watch

LINK

I first saw these watches by Olivia Burton well over a year ago, and at reasonable prices for their unique look I thought. I have small wrists and therefore cannot wear a lot of watches. Imagine that so many of the faces stick out over the sides of my arm and look ridiculous and you’ll understand what I mean. However Olivia Burton has designed several with smaller faces, this one is only 23mm wide, perfect for me! I love the nature designs on them as well, very fitting for my personality.

╰☆╮

Next 12 Piece Marble Dinner Set

LINK

I saw these plates advertised on a recent email from Next so I went to the website and checked them out further. I have always liked the look or marble. I prefer the bowls more than anything in this set. I already own some awesome cutlery too so I don’t think I would invest in the entire set, I just really liked the marble effect on the plates. There is an awesome Marble Table Cloth available and I love the look of that! And the Rose Gold Wine Glasses are sold in 4’s…

╰☆╮

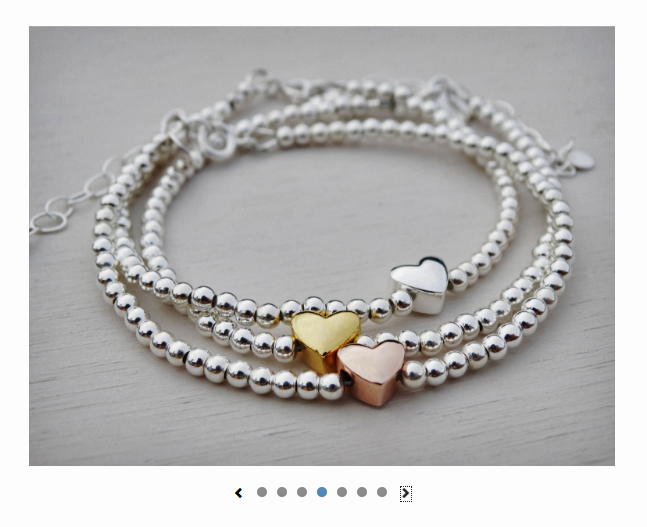
Tiny Silver – Silver Bracelets with Metal Hearts

LINK

I follow Tiny Silver on a variety of social media, and I have always admired the jewellery that is made by them. A lot of it is sterling silver which is what I love to wear myself. These bracelets are sold separately, but how gorgeous would it be to have and wear a set of all 3? I love the various metal hearts and think the simple design is lovely, especially because I have such small wrists too.

╰☆╮

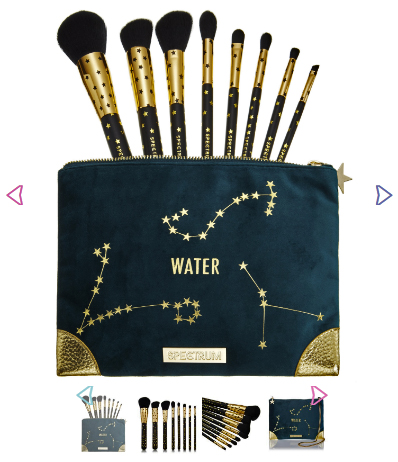
Spectrum Collections – Star Struck Water Star Sign Brush Set

LINK

I love the look of this set, they are so pretty and totally photograph able! Previous brushes I have purchased have really lasted and wash and use well every time. I would recommend them. This new design featuring your own star signs is unique and unusual.
“Featuring jet black super soft bristles, gold ferrules and matte black handles each of the 8 brushes is finished with an all over scattered star print, with a velvet ‘Water’ pouch bag with fixed gold chain strap, PU leather corners and cosmic foil detailing”.

╰☆╮

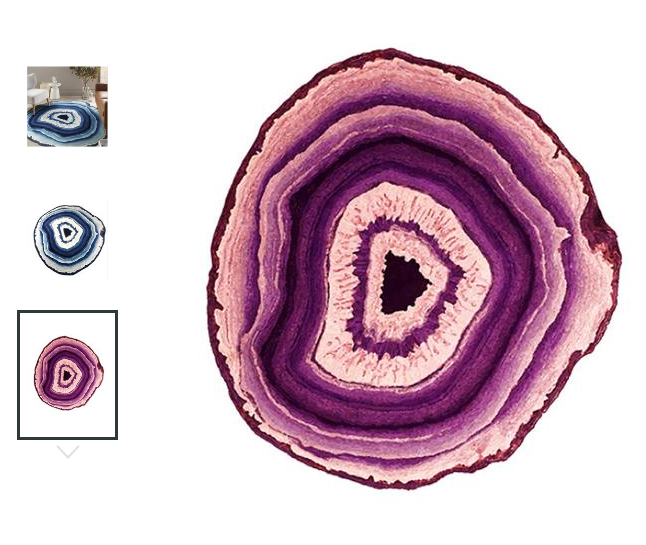
Free Boheme – Geode Print Rugs

LINK

On a recent blog reading spree over Twitter I came across a blogger that I follow and she was raving about the company that sell these incredibly cool looking geode rock rugs! I adore the purple that is meant to represent Amethyst! I think it would look amazing placed in the corner of a room with a chair next to it to sit upon…

╰☆╮☆╰☆╮

I really hope you have enjoyed seeing what is on my wish list! I have a sneaky feeling and hopes that I might be getting some of these items for my birthday, and if I do, then of course I will review them and let you all know what I think.

Have a great month of March everyone!

✩ Sabrina ✩

✩♡✩♡✩✩♡✩♡✩✩♡✩♡✩✩♡✩♡✩✩♡✩♡✩✩♡✩♡✩✩♡✩♡✩

The Crafty Giraffe Christmas Tree Decorations Review

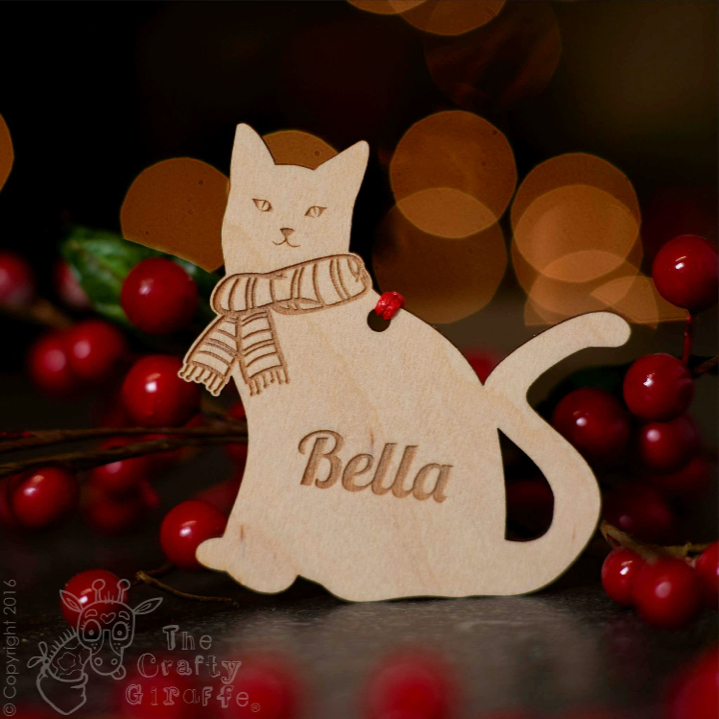
Just before Christmas I saw a post from a page that I follow on Facebook, they were advertising their Wooden Christmas Tree Decorations. These wooden shapes were based on your pets, and could be personalised with the pets name if you so wished.

I decided to purchase some Cat Decorations for myself and my family as gifts for Christmas 2017. Every year I buy one new decoration for our Christmas Tree. Having not done so yet, I thought these well made and personal gifts would be puurrrrfect! (I couldn’t resist please forgive me!).

Here’s the Crafty Giraffe advert that I saw that attracted me to buying these decorations.

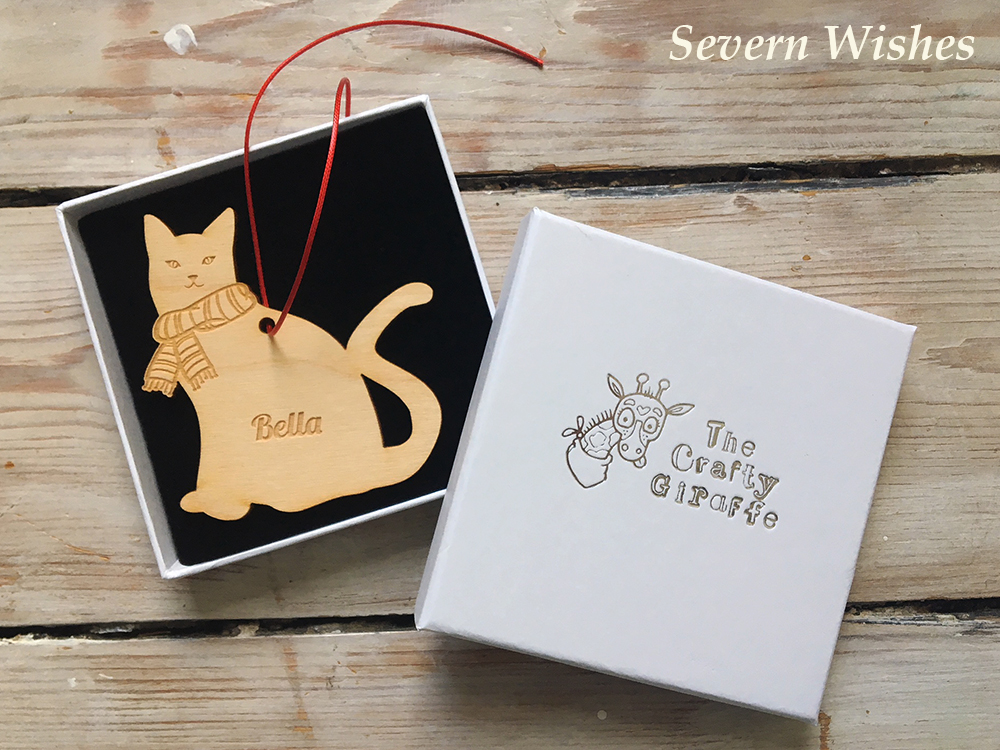
I was very happy with the delivery time considering it was November when I ordered. And I purchased one Gift Box with them, to keep mine inside until the next Christmas too. The professionalism of The Crafty Giraffe was excellent, and I was also impressed with the quality of the wood used and the finish with the name engraving.

Here is a close up image of what I purchased. You can see the nice details on the eyes and the little scarf too.
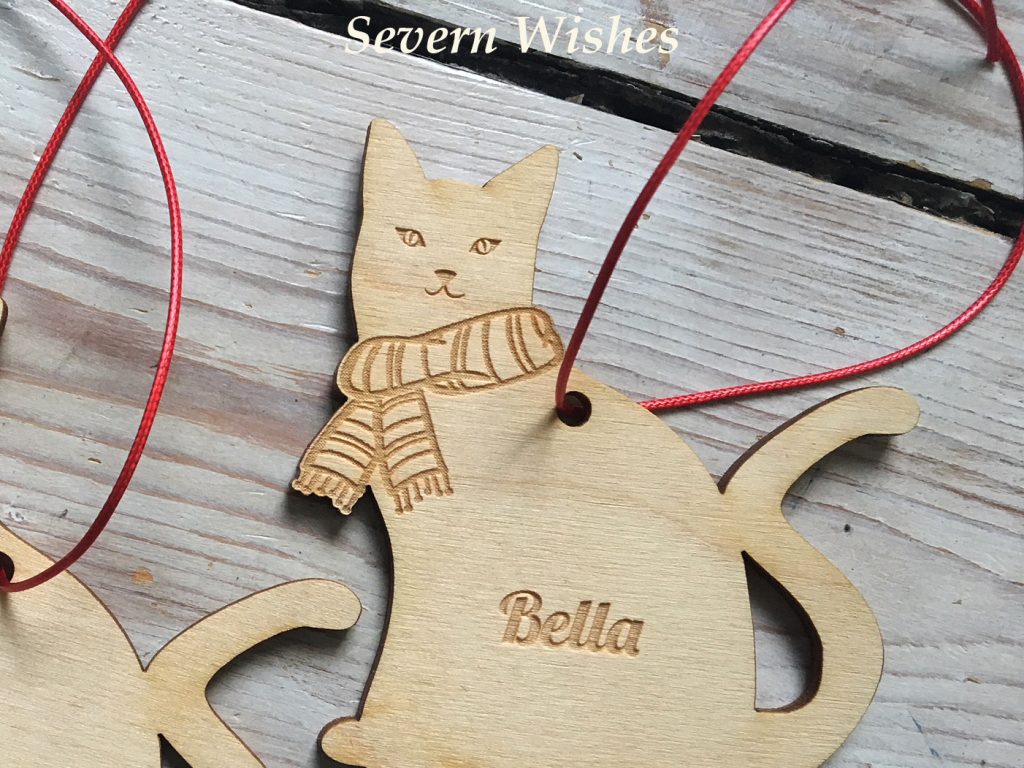
Their page can be found here The Crafty Giraffe – Personalised Engraved Gifts, if you wanted to take a look to see if you like anything. They of course don’t just do Christmas Gifts, but engraved gifts of all kinds. Go and check them out, you won’t be disappointed!

My Overall Review Scores.

Appearance 5/5
Quality 5/5
Value for Money 5/5

Thank you very much for reading this review today, I realise I’m talking about Christmas Decorations and it’s now of course over with for another 11 months! But do remember this company specialise in so many different types of gifts, it is worth checking them out. Or bear them in mind for the Autumn if you want Decorations like these later this year for your own tree. They did a variety of dog breeds as well as cats too.

Have a wonderful first week of January, and Happy New Year!

✩ Sabrina ✩