Six Tips for New Parents – the things that everyone forgets to mention!

These are my Six Tips for New Parents – but they are the things that everyone forgets to mention!

So despite being post birth and genuinely exhausted, most mum’s will admit to that feeling of pride that comes with the arrival of a child. Be it your first or fifth baby, they are all special and all little miracles. Just look what you have achieved!

However there are things people forget to mention to you and I thought I would share some of my tips in this blog post for getting passed these… we will call them the six newborn phases!

When you become a mum you look at your bundle of joy and you feel incredible, that rush of emotions and pride… you just grew and birthed (in whichever way you did) a small human being. Go you! Own it!

But, while trapped in a chair under said small human, (in fear of waking them up if you were to even clear your throat!), you can’t help but wonder why your amazing body didn’t also develop the ability of telekinesis while it was doing this awe shattering feat! How amazing and useful would that be?! So here are my six phases… I guarantee you’ll laugh before the end of this article…

Phase 1. The “I Can’t Put The Baby Down Because We Are Bonding Or Cluster Feeding” Phase.

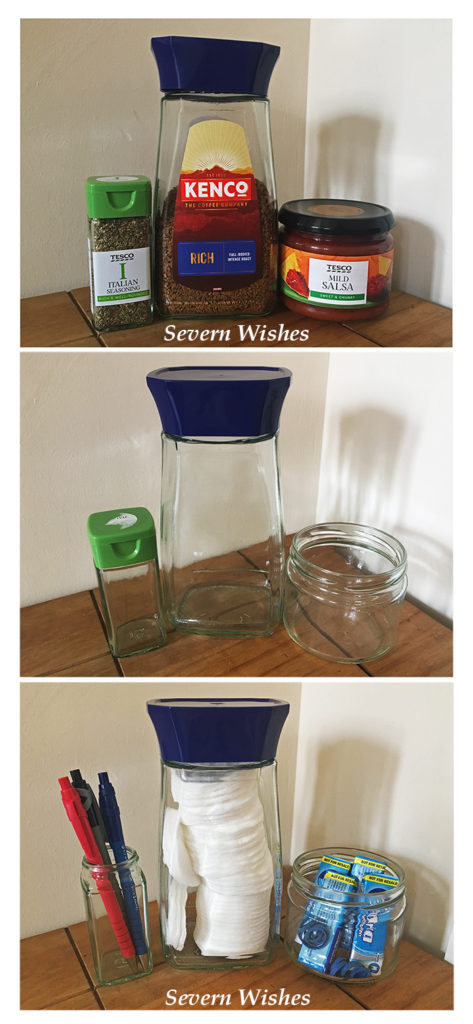
Always keep the essentials close by, as in within an arms stretch! This goes for the TV remote, your phone, at least one snack, your phone charger or a charging device, iPad or a book, and definitely a glass of water. If you have a little one who won’t sleep very much then life saving materials can be what get you through those afternoons, as you cradle your small bundle who is finally napping but you dare not put them down. Instead you settle in to an afternoon of Netflix binge watching and you have a whole packet of biscuits with your name on.

Personally I had a lunch bag size cool bag next to where I sat with my son. Inside it were snacks, a reusable bottle of water and piece of fruit. I kept a table to one side of me with the remotes and my phone on, and a box of tissues. On the other side within a stretch away was the cool bag, my iPad and a portable USB charger. Life savers for me on several afternoons!

Phase 2. The “Where’s The Flipping Muslin Cloth” Phase.

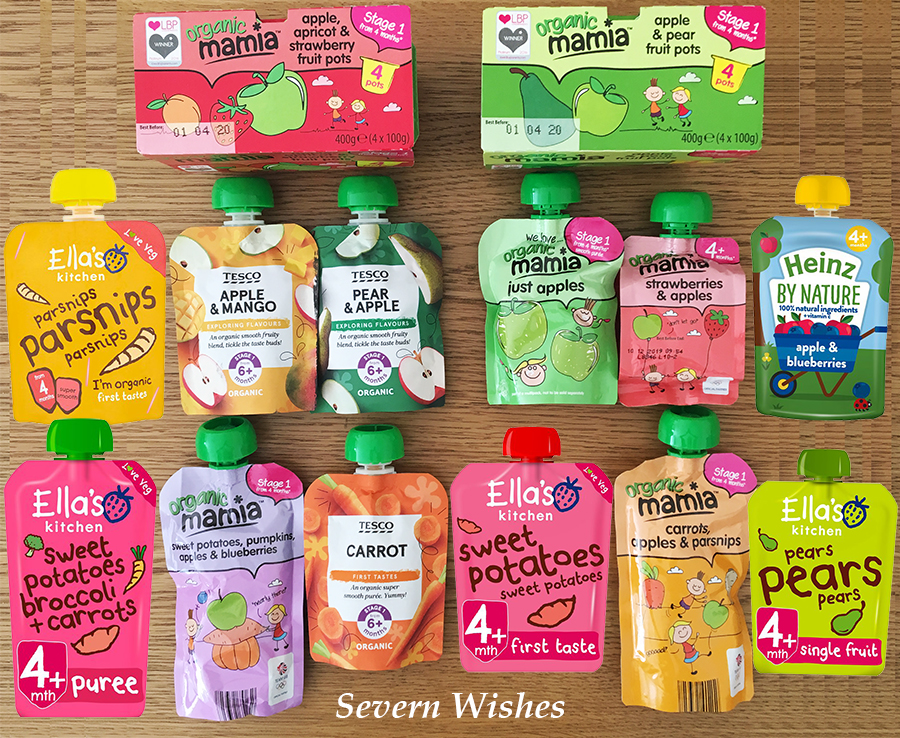
Buy Extra Cloths! So cloths for a newborn are a given, but have you considered you may need to wipe all sorts of things off your baby and multiple times in one day. I couldn’t believe how many cloths I went through a day at first. The tip for this is to keep a folded clean pile of muslin’s somewhere in every main room of your home. Also buy similar colours of cloth so that you can just throw them all in the wash together. Because Muslin cloths are thin they don’t take a lot to wash and also dry, but you won’t want to wait a few hours when you’re down to your last one and baby is due for a feed…

Phase 3. The “What Time Is It? Oh My Days, I Forgot To Stop For Lunch, Again” Phase.

Nobody tells you how fast the time goes. This isn’t a lie, time actually goes faster and you will forget what time of day it is and then realise you haven’t had a drink for hours! Make sure you always get nourished every time you journey into the kitchen, keep snacks and fruit handy, things you can eat one handed, and keep a reusable water bottle by your favourite seat. Keeping hydrated is most important especially if you’re breastfeeding and recovering from birth too. If baby is having something to drink then you should be too!

Phase 4. The “I’m Too Tired To Cook, Let’s Open Up The Fast Food App” Phase.

Every parent will admit to ordering fast food in those first few weeks with a newborn baby. But if you can organise yourselves in the weeks running up to their arrival, you’ll feel better for it, both stomach and bank balance!

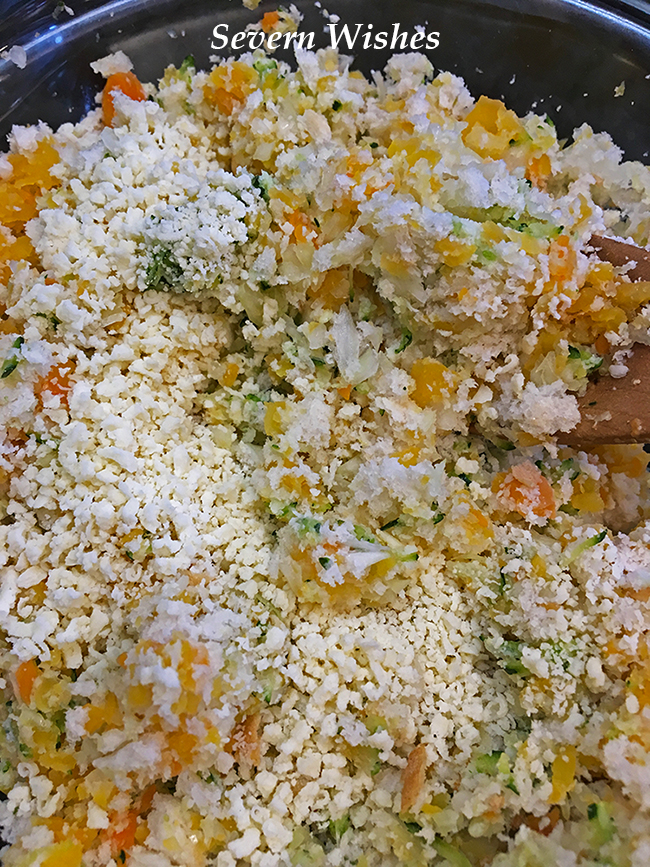
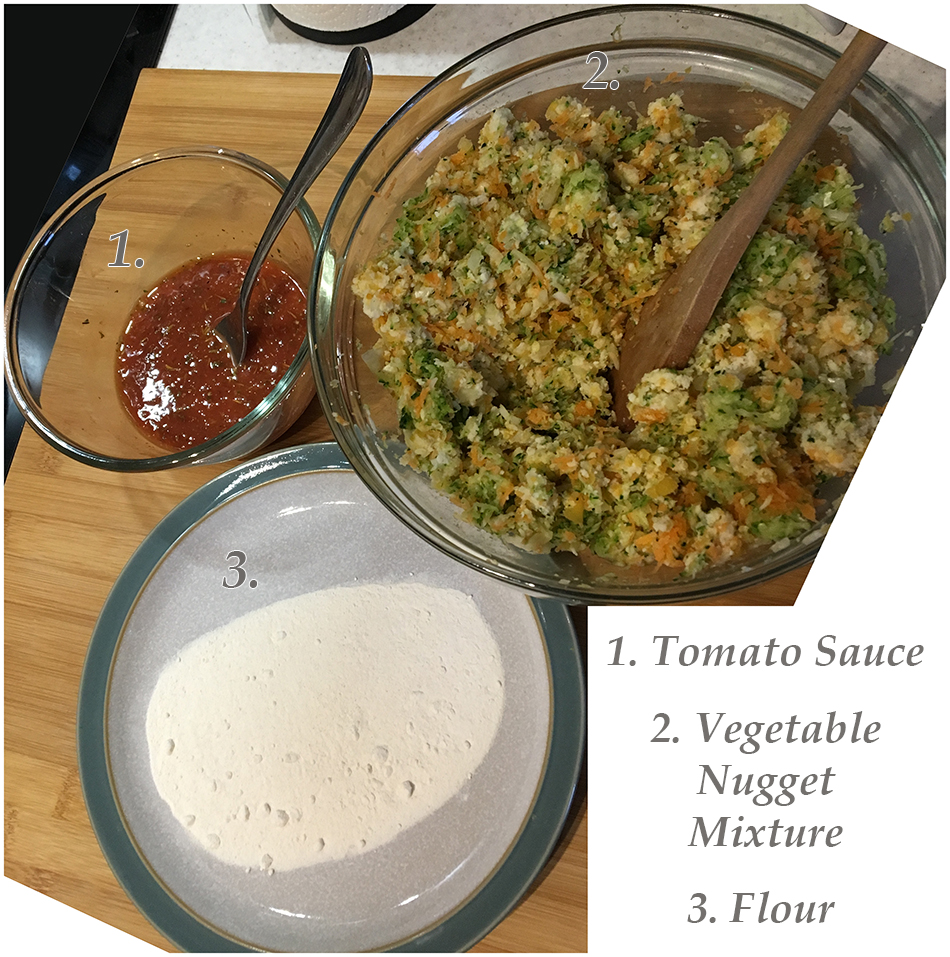
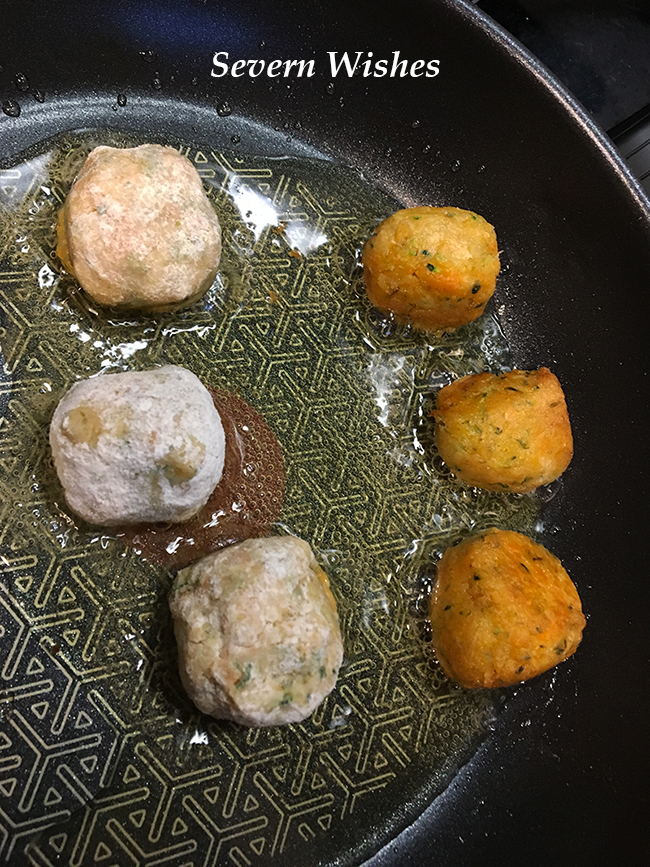
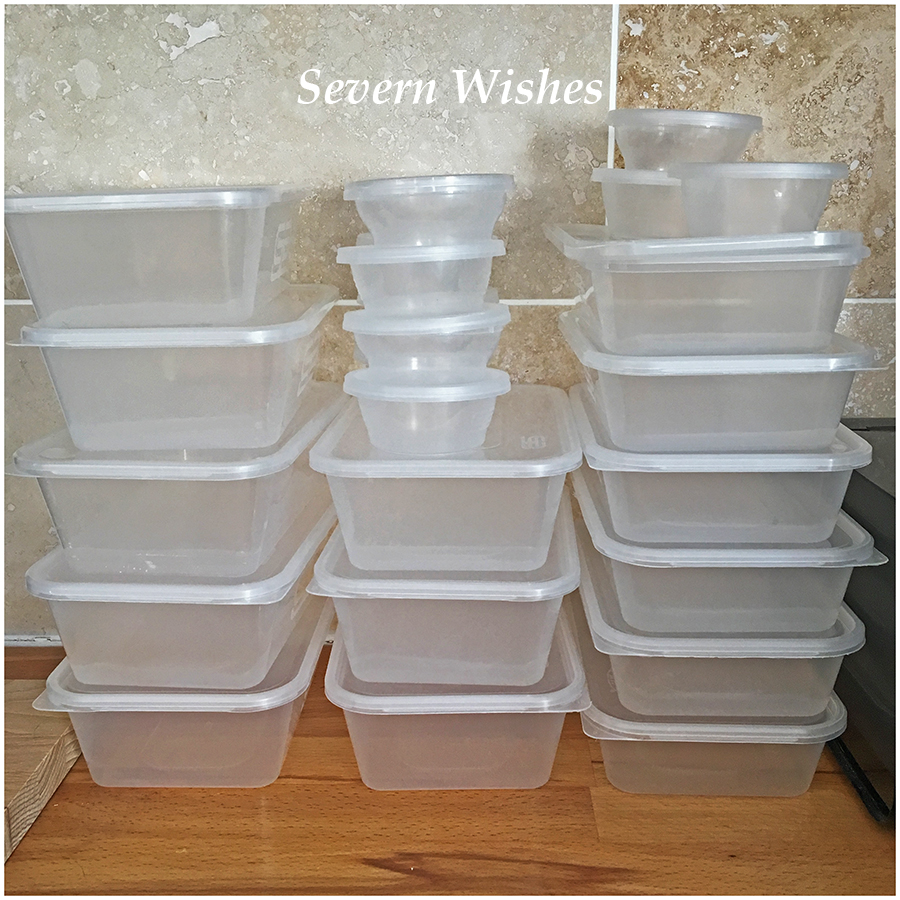
The answer is this, Bulk Cook your favourite Foods! Keep some of those previous takeaway Tupperware tubs, check how many you can stack in a drawer in your freezer. Then bulk cook a few of your favourite dishes using fresh ingredients. Then you can freeze them in tubs and in portions. Throw in Veg too if you like, at least then you’re getting healthy food inside you. Chicken Curry with added Veg or Spaghetti Bolognese made with a few Veg to bulk it out are both easy to reheat.

Phase 5. “I Managed To Put The Baby Down, Shall I Pop On That New Series On Netflix Or Go To Sleep?”

It’s really tough when Social Media blows up with the latest Netflix series, and you’re surviving on maybe 4 hours of sleep and only scrolling on your phone in order to stay awake during the 5am feed… But there will come a day when things get easier, your baby won’t need feeding every two hours forever. And then you’ll sleep a little more… (does 6 hours or less sound good to you?). Plus you’ll get used to the lack of sleep and gradually be able to do more, like managing to watch half an episode of something… once a week… then forget what happened and watch it again… and so it goes on…

Phase 6. “We haven’t had any us time for a long time…”

This phase is a serious one and more to do with you as parents, it’s brand new, it’s exhilarating and exhausting but remember you have become two different people. You are still you, and what time you spend together is still important. You might not get a date night in weeks, if not months after baby is born. But if you have the support of family and you trust them, then there will come a time where you can leave your baby with that person and get back to being you “both” again.
People don’t tell you how hard it is, not being able to go out just the pair of you, you won’t get to watch television or a film without interruption or pausing it every now and then. This is the new normal and it’s okay to find it a difficult transition. Especially if you’re used to going out for a meal once a week or pop off to the cinema at an hours notice…
My tip to get through this phase is this, plan, plan and plan some more. Make timetables and plan ahead with a calendar and try your best to stick to it. Change the usual cinema outings to a Netflix movie and a meal at home, with a big bag of popcorn and sweets from the supermarket as a great and cheaper alternative to the cinema treats…


Thank you for visiting Severn Wishes today, I hope that I see you here again soon for more parenting posts.

✩ Sabrina ✩

Sabrina’s Dairy Free Vegetable Nuggets

How To Make Delicious Dairy Free Vegetable Nuggets For All The Family To Enjoy!

Today I will be showing you how to make tasty, nutritious and dairy free vegetable nuggets that contain four different vegetables.
They are great fun for your children to eat as finger food and your older children can dip them in the sauce if they choose.
This recipe is ideal for weaning and beyond.

Veggie Nugget (broken so you can see the soft inside)


Ingredients for Sabrina’s Veggie Nuggets

3 Tablespoons of Tomato Ketchup
1 Tablespoon of Reduced Salt Soy Sauce
1 Tablespoon of Mixed Herbs
1 Large Egg (Beaten)
160 grams of Breadcrumbs (approx) roughly 4 slices of bread – I always use the 2 end bits if I have them!
6 Medium Carrots – Grated and Squeezed
2 Courgettes – Grated and Squeezed
100 grams of Swede Cooked First, then Diced Finely using a Chopper
1 Large White Onion Diced Finely
50 grams of Dairy Free Alternative to Italian Style Hard Cheese
Plain Flour (6 tablespoons approx) spread this onto a small plate ready for rolling…


Method

To make the sauce combine tomato ketchup and soy sauce together. Double the amount if you are preparing these nuggets for people to dip into the sauce straight after cooking them. Use half of the sauce for the vegetables mixture and leave half for the dip.

Once you have prepared all of the vegetable ingredients as directed above, you will need to ensure the mixture of vegetables isn’t too wet. Take a handful of the grated and chopped veg and place it between a few paper towels, a muslin cloth or a clean tea towel. Squeeze and press it in the cloth to squeeze out as much liquid as possible. Do this with all of the grated veg.

Get a large mixing bowl and crack the egg into it. Add the herbs and stir until combined. Next add some of the tomato dip. Next add the squeezed vegetables, then lastly add the hard cheese (or alternative) and the breadcrumbs, stir it all thoroughly. You don’t want lots of the same type of veg in each ball, try and mix it so you get a variant of all the ingredients. (I do my breadcrumbs in a small food mixer).

Place the flour onto a small plate ready to roll your nuggets in.

To make a nugget take a small handful of the combined mixture and roll between your palms. Top Tip! Do this with wet hands so it doesn’t stick to you! Roll them out into oval shapes, and then once happy you can roll each one in flour to coat it.

Have a large frying pan ready on your cooker with some oil getting hot. You should place the nuggets down gently so as not to break them or splash the oil. Fry each one until lightly browned all over. Top Tip! Use a pair of tongs to adjust them while frying to make sure you do all of the sides. Keep topping up the oil after every few nuggets.


Once they are cooked set the nuggets to one side on a piece of kitchen roll so as to drain any excess oil from them and let them cool a little, and then serve them while they’re still warm in a large bowl with the remainder of the tomato dip. They are great for a children’s party or a finger food family night in.

Squeezing the Veg so as to remove as much moisture as possible.
Veggie Nugget Mixture Ready For Mixing and Rolling

Vegetable Nuggets are ideal for children who are weaning at around 10 months and older, when they are learning to hold and bite into foods.
They are great for getting your children to eat vegetables.
The tomato dip provides a fun element for older children.
The leftovers can be frozen, defrost over night and re-fry them to give them a crunchy outside again.

My Recipe made me approximately 24 Nuggets.

Once you have rolled your nuggets between your palms you can get ready to fry them… My Top Tip is to have some done so you can fry one set while you make the next set…

Frying Tips

When frying the Nuggets take care and turn them frequently so that they cook evenly on all sides. You also need to maintain the oil so that they sit in a few millimetres at all times to avoid sticking to the pan.

Finished Veggie Nuggets

These Nuggets are great, and rather tasty too, that is providing you like the Veg I have chosen. You can substitute the Courgette for Mushrooms if you prefer those! And you can also do these without being dairy free by using a regular cheese like Parmesan if you wish.

Thank you for visiting, I hope you have enjoyed reading about this recipe, if you decide to give it a go then please leave me a comment with how it went afterwards… Check out my other recipes on the category list!

✩ Sabrina ✩

Plastic Free July – How I Am Cutting Down On My Plastic Usage And Reducing My Carbon Footprint

I’m writing this blog post to outline what I did for each day of July 2019 for the Plastic Free July Challenge. Globally people have been taking part in the hashtag #PlasticFreeJuly in a bid to reduce the amounts of Plastic being used and then ending up in landfill. Lots of people are being educated about the issues that Plastic causes and how it’s our job as human beings to help save our planet.

I’m going to begin with why you should cut down on both Plastics AND Paper waste in order to help the environment. And then I will be outlining the 31 other things I have done this July, ways that you too can reduce your carbon footprint this year…

I saw this being passed around on various social media, some of these things I already knew about but others I didn’t. I was shocked to learn about Plastics causing Hormone Disruption!

Reducing Your Plastic Usage

Use glass jars and dishes to store leftover food inside, instead of plastic tubs.
Consider purchasing food items that are packaged in recyclable trays.
Choose not to purchase items that come in non-recyclable packaging.

Reducing Your Paper Usage

Consider using Old Tea Towels to clean with instead of Paper Towels.
Buy A Set of Handkerchiefs to use at home instead of disposable Tissues.

Other Ways To Reduce Your Carbon Footprint

Walk More and Use Your Car Less
Walk More Instead Of Using The Bus
Grow Your Own Fruit And/Or Vegetables
Choose Packaging Free Fruit And Veg At The Supermarket
Recycle As Much As You Can And Do It Properly E.g Wash It Out
Reuse Your Tupperware, Glass Jars, Plastic, Cotton and Hemp Bags

I’m making some positive changes for #PlasticFreeJuly

But I, like so many other people, cannot afford to make tons of expensive changes. I certainly don’t have the money to make any investments in Solar Power Panels, buy an Electric Car or buy Organic Plastic Free Produce at a Farm in the middle of nowhere…

… But What I Can Do, Is Do Things Like What Is On My List Below…

Here is one example… we all need to use something in our kitchen bins, we have a counter top bin and nothing more because we recycle as much as we can. Usually 85% of our rubbish goes into recycling. For the things that are currently not recyclable I use bags in the bin that are made from already recycled materials.

Choosing to buy something made out of 100% recycled paper and plastic when necessary is just one of the ways I’m reducing my carbon footprint.

I have even considered using items to make things and reuse them and re-purpose them for something new. I saw this photo ages ago on a parenting website, where a Dad had collected the family’s toilet rolls and created this awesome car garage for his son. It is made out of an old crate and toilet rolls with some glue and paint, genius!

Plastic Free JulyHow I Reduced My Plastics This Month

1 Reusing A Specific Tupperware As A Lunchbox – No More Plastic Sandwich Bags. Did you know most sandwich bags and freezer bags cannot yet be recycled? If they can then they need to be clean with no food bits, that’s really hard to do if they’ve been screwed up in a lunch bag after use.

2 Using Cotton and/or Hemp Bags for going Shopping. Retail or Food Shopping I don’t purchase Plastic Bags and always bring my own. I have done this for several years now, and always have two bags folded up inside the main bag I take with me everywhere, so even if I forget my main bags I always have one or more available.

3 Reusing one specific Tupperware for Red Leftovers like Baked Beans or Pasta Sauce so as not to stain and ruin many different tubs. It’s really annoying when food stains something like plastic. If you don’t want to ruin lots of plastic tubs, when you buy a set, allocate ones for specific reasons.

4 Going through all the Plastic in the Kitchen Cupboard, Cleaning and then Recycling everything with the Recyclable Logo that I no longer need or use. Keep what you do use but only if its clean, has a lid and has a purpose, otherwise recycle it.

I do a lot of bulk cooking, but it’s useful every couple of months to go through all your plastic Tupperware and get rid of ones that smell odd, have any damage or wear to them, no longer have a lid or are no longer required.

5 Make Your Own Lunches and Picnics, buy less prepackaged foods, if they are in material that can be recycled then no problem, but if it’s single use plastic then don’t support this type of food packaging. This month I have tried to make choices that include packaging that I can recycle.

6 Decline Plastic Straws when out for a drink, only accept paper ones that can be recycled after use, or use metal ones that you can buy and carry with you.

7 Re-purposing Glass Jars and use them instead of plastic around the home in order to store food and / or items inside.

Lately I have been reusing Glass Jars and Bottles around the home. Here are just some uses, Cosmetics, Pen Pot, Kitchen Drawer Randoms!

8 Don’t replenish your Cling Film when it Runs Out – Change to Foil or reuse Tupperware boxes instead.

9 Reusing Tupperware for Bulk Freezing when bulk cooking, I do a lot of bulk cooking and I reuse old takeaway tubs when I freeze food. They are create for portion control and also for stacking up in the freezer.

10 Up-Cycle something in your home that you’ve not used for a year, gift it to a friend or start using it again at home.

11 Buy something from an Ethical Business or something that is Ethically Sourced and then let people know about it so they can do the same.

12 Choose to have a Takeaway that the containers can be recycled from like Pizza Boxes or Plastic Tubs.

13 Buy / Order / Use A Reusable Water Bottle Today. You can get them at most retailers these days, large Supermarkets or Amazon.

Tesco are selling some very pretty and affordable Insulated Reusable Bottles. They keep Cold drink cold for 24 hours and Hot drinks hot for up to 10 hours!

14 Today I Chose Unwrapped Fruit and Vegetables at the Supermarket to reduce my Plastics for the Day.

15 Go Paperless for your Bank Statements and Bills to save on both paper and plastics, you should be able to do this on your banking app or in branch.

16 Decline bottled water when out for a meal and ask for a glass jug of cold tap water with glasses for the table to share instead. No straws remember!

17 Buying Necessary Home Essentials that are made from 100% Recycled Materials such as bin liners or tissues…

These Bin Liners are made from 100% Recycled Plastic – Go Tesco!

18 Use old tea towels and micro fibre cloths you have at home to do some cleaning and home chores instead of using paper towels, then wash them on a eco washing cycle ready for next time.

19 Reuse any Newspaper or Tissue Paper to Wrap Presents for peoples birthdays. If it’s a large gift then once it’s been unwrapped cut off the best parts and re-use them again in the future.

20 When you go out for a drink choose a glass bottle or a glass, a can or a drafted liquid, rather than something provided in Plastic bottles.

21 Buy something that you need this month from a Second Hand Shop rather than buying it brand new and take a bag from home in order to carry it back in.

22 Bring your own container to a Fish & Chip* Shop & ask for them to serve your food into that to save using their packaging. * Some places won’t allow this due to health and safety, but it doesn’t mean you can’t ask.

23 Buy Less Disposable Tissues and Use A Handkerchief instead.

24 Use a Reusable Water Bottle All Day – Aim for 2 Litres (it should be with you by now if you ordered one online).

25 Buy and Use a Reusable Hot Drinks Cup – If you like hot drinks and don’t already have your own cup then invest in one. With the Cup Tax coming into force across stores it’s going to save you money in the long run too.

26 Refuse Plastic Cutlery if you’re eating out & carry your own set of metal ones when out for the day.

27 Buy Supermarket Own Products that come in Cardboard so you know that it’s easily Recyclable.

28 Choose Food Snacks in the Supermarket that aren’t contained in Single Use Plastic. Don’t purchase anything that comes in single use plastic, choose a different item this time around. Compare what is available to you.

29 Consider Purchasing Refill Packages for things such as Coffee In A Bag That Refills your original Jar…

Refill packets now come for a variety of products, one that we use regularly is this Kenco Coffee one.

30 Start Composting Your Food Waste – this is one I plan to do in the future once we have finished doing our garden, it’s a work in progress right now!

31 Invest in Beeswax Wraps for Food. If you cannot get some then only use Foil to wrap food or place it inside something made of glass.

✩✩✩

Sabrina’s Easy Tips For Recycling

There are some basic things that everyone can do when it comes to recycling, and there should be no excuses nowadays to do just a little bit. Most councils supply the bins, all you need to do is fill them up!

1 Have a designated bin or basket inside the home so that everyone can place recycling inside it. Toilet Rolls are one of the easiest things to recycle yet so many people put them in bathroom bins!

2 Teach young children the importance and ease of recycling now so that they consciously do it as an adult. Recycling doesn’t always mean it goes in a bin it can be used to make craft items for example for school projects.

3 Remember to remove some recyclable materials from one another before using them, such as peel off the label on a tin before you cut it open. That way the paper and the tin can be recycled separately once they’re collected from you.

Items that are easy to recycle Glass, Foil, Paper and Cardboard.


Thank you so much for reading this relatively long post today. I hope I have given you some ideas on recycling that you can put into practice in your own lives.

Even if you do one thing off this list it is helping the environment and your carbon footprint, let’s make the Earth safer and cleaner and better for our children’s children. After all it’s the only planet we have.

Thank you for visiting Severn Wishes.

Sabrina

Our Weaning Journey

Our Weaning journey began delicately due to our son having suspected allergies. He is exclusively breastfed and he cluster fed for the first 5 months of his life. He was born slightly premature at 37 + 5 and after having bad jaundice at birth, it took him many weeks to recover. We spent so much time in hospital at the start that our first month with him went by in a blur. Problems with allergies began at around 12 weeks, so it was a steep learning curve in the next 10 to 12 weeks that followed.

Then, when it came to Baby A reaching the 6 month milestone he was still in size 3-6 month clothing and breast feeding up to 14 times in 24 hours. We hoped that Weaning would satisfy him more so and because we could introduce cooled boiled water with his meals, it would take a bit of pressure off me. This did work, but he had such an appetite that he continued regular breastfeeding including a minimum of two feeds a night, plus day times and extra weaning snacks. We had ourselves one hungry baby!

I recall the health visitor questioning how much I was feeding him at our 6 month visit… she couldn’t believe how much I was saying he ate, I’m almost sure she thought I was lying. I had read in a parenting book that you cannot over feed a baby, because they will simply refuse to eat it. Our son wanted more and more food as the days went by, so I used motherly instincts and I watched my baby for cues. So I continued on with my busy breastfeeding schedule plus I began our weaning journey in a rather swift fashion.

We Tried A Range Of 4 Month Plus Puree, These Are A Few Of Them Little One Loved.

Baby A enjoyed many things that we tried first off, including individual vegetables such as Carrot, Potato, Parsnip, Sweet Potato, Apple and Strawberry. There were only 2 things he spat out which were Prune and Peas. And I don’t blame him for either! Ha!

After doing some reading and noticing how keen Baby A was with eating and being fed, we decided to do 6 weeks of Purées to start with. We maintained that he was to ingest nothing dairy of course, I checked packaging meticulously or I made my own. This worked well, starting with a few mouthfuls twice a day for the first week, followed by doubling the amount in subsequent weeks. By the time we got to week 6 Baby A was eating 70g of fruit purée for breakfast and 70g of vegetable purée in the early evening. He also tried Melty Puffs around this time too.

Prices of Purée vary, but they usually cost anything from 40p all the way up to £1.50. They also range in size so look out for that. We made the most of any offers that were on in supermarkets and also used any store credit points and vouchers we had picked up to get our initial 6 week stash of purée.
Boots vouchers can go a long way if you sign up to the Clubcard and baby club before hand. Keep a look out on social media for offers too.

Minced Beef and Onions with Mashed Potato (7M)

He was enjoying the food we were giving him and he was obviously hungry. We were approaching his 8 month mark when we began moving to thicker purées and food with more textures. I was bulk cooking mashed vegetables at this point and freezing them in small pots (roughly 80g each). Some combinations included Potato and Carrot, Carrot and Swede, Carrot and Parsnip and Parsnip and Sweet Potato.

At 8 months Baby A was eating between 70g and 100g for breakfast, between 100g and 130g for his lunch and between 130g and 150g of food in the evening. This was on top of 12 breast feeds still most days, and we had began to try him on some more snacks. The melty puff kind that melted on his tongue were a real hit! Luckily they came in many flavours.

We also gave him fruit such as Raspberries, Strawberries and Melon as an evening pudding if he was feeling particularly hungry.

Minced Pork and Onions with Carrot and Potato Mash (8M)

Baby A ate most things from Day Dot but turned his nose up at the taste of Cucumber and also highly disliked the taste of Peppers. Some foods took a couple of times before he decided that he liked them, usually very strong tasting food groups. He was unsure about things like Tomato, Scrambled Eggs and Pasta, but we persevered and he eats them now. The trick is to leave a food for 2-3 weeks then try it with them again.

One thing I loved about Weaning was the way he learned and every day you saw him remember. Within two weeks he understood that cutlery went into his mouth, he began to chew even when food was super soft, and he was also cutting several teeth while we were trying most new foods. He did so well with all these milestone changes and I’m very proud of him.

Mashed Carrot and Swede with a Small Chicken Steak and some Rice (9M)

One thing I would recommend to mum’s who want to cook healthy meals for their little ones is to invest in a good strong vegetable mash utensil and a mini food processor. Mine is called the Russel Hobbs Mini Food Processor 22220 Mini Chopper and I cannot rate it high enough! It was used every day for 3 months and I still use it to dice up chewy meat because it saves me so much time. I still use it for my now one year old boy.

Russel Hobbs Mini Chopper In Use

At nine months Baby A began eating some more of the food I prepared for us adults. This includes the meat and sauce of bolognese but we gave him mashed vegetables and not much pasta. He ate my cottage pie (all of it), we had chicken steaks that I had diced in a blender with soft vegetables and rice, sausages were diced and served with mash and veg, and he even ate flaky white fish with rice and veg too!

I also used a weaning book that my mother had bought for me that had some great ideas inside for weaning recipes and snacks. I altered most of them to suit the various allergies in my family of course. Homemade Veggie Nuggets were by far my favourite thing to make, I bulked cooked them which was time consuming but then they’re frozen for convenience.

Minced Beef and Onions, Carrot and Swede Mashed with a Homemade Veggie Nugget

By the time he reached 10 months of age Baby A had 8 teeth and was eating 80% of what we were. He still loves his baby related snacks too! These include Vegetable Puffs, Rice Cakes and Flavoured Shaped Corn Snacks. A lot of these are Organic too.

Some Of The Baby And Toddler Snacks We Buy Regularly.
A Few Of The Pouches We Tried And Tested From 7 Months Plus

These snacks are very affordable from places like Aldi who have their Mamia range. If you sign up to Ella’s Kitchen on their website they will send you a pack and a voucher to try bits from their range which are purchasable at most large supermarkets and Boots stores.

Our little one loves to feed himself firm snacks but has been more than happy for us to feed him things that require a spoon such as fruit purée, cottage pie, mashed vegetables and the like. It’s so important to get your little one to eat their fruit and veg, and it doesn’t matter if you have to create a mashed version in order for them to eat it. Try different combinations and see what your baby likes. Keep a food diary to keep track!

Some of the 7 month snacks are little one loves.

Sabrina’s Weaning Tips For Parents

My top 4 tips for any parents about to wean a baby would be these…

1. Take it slowly and calmly. Your Baby will be intrigued but it can also be a stressful experience for all of you. All healthy Baby’s generally have a good gag reflex and don’t confuse this for choking, stay calm if they cough or spit things out and take all foods – even the purées – at a slow pace!

2. Start with Veg! You don’t want your little one to have too many sweet flavours in those first weeks, this is because when it comes to the savory kind they are less likely to want it. Start with Veg Purée or Mash and go from there…

3. If you plan on doing Baby Lead Weaning, then you must let your little one use their hands. Be prepared for mess! Get a good highchair, get a mat for the floor and keep plenty of baby wipes at hand too!

4. Keep a Food Diary! This is a useful tip for all new parents. It’s a great way to keep track of what baby has eaten, if your little one was to have a rash or reaction to anything they had eaten you can go back and check the diary before trying the substance again. Those first couple of months are critical in preparing baby for stronger tastes and good food habits, so start them early on the main products that your household enjoys together and move forward from there.


All Parents Should Definitely Sign Up To…

1. Ella’s Kitchen via the Website
You get a free pack in the post with tips, a board with stickers, ideas for foods and even some vouchers for baby snacks.

2. Boots Parenting Club
Using your Boots Advantage Card on the Boots App or Website you can add the addition of the Parenting Club which gives you bonus deals, free products and vouchers every month. For example we got a free bottle, a free weaning book and some promotions on nappies and baby food. Check the app each month for new promotions and deals. You also get extra points on your card when purchasing certain products in store and online too.

Ella’s Kitchen Have A Great Website and Their Melty Puffs Are A Real Hit!

✩ Russel Hobbs Mini Chopper Review ✩

I would highly recommend this chopper to any parents who want to make a lot of their own food for their baby. Not only is it simple to use, easy to clean and maintain, but it allows you to make just enough food for a large portion that can be good for a day, or if you’re bulk cooking into baby sized pots it made 6 pots of food no problem. The best thing about this mini processor is it’s size, it takes up very little room in my cupboard and is portable enough to take away for a weekend to a relatives house without being a burden.

Design 5/5
Features 5/5
Value for Money 5/5

RRP £16.00

Joie High Chair Review

We highly recommend the Joie High Chair because it is affordable and also has some great features. These include the large sturdy tray, the beautiful animal design on the seat itself and the large fabric basket underneath which is great for storing extra bits and pieces close by for when you need them, such as bibs, wipes and toys.
We only have one suggestion, that the straps could either be entirely removable for cleaning purposes or that they be a different colour than white, because they really show up every bit of food dirt.

Design 5/5
Features 4/5
Value for Money 5/5

RRP £55.00

Munchkin Products Review

We have been really impressed by the Munchkin Apple Bowls and Plates, as well as their range of Spoons too.
We picked most of them up at various baby events in Supermarkets and on Amazon UK. They are affordable and well made.
They are designed for different stages of Weaning and further interactions with food, ranging from 4 months right up until Toddler ages.
Our son found the spoons easy to eat off and the divider apple plates are a great idea when trying different foods at meal times. Or for separating the meal and the dessert when you get to that stage.

Designs 5/5
Features 5/5
Value for Money 5/5

Thank you for reading this post today, I hope you have found it interesting. If you try any of the products that I have recommended then please let me know in the comments below if your little one liked it.

If you have any questions about any of the products I have mentioned then feel free to also comment and ask me anything, I will do my best to answer you honestly.

Sabrina

Honest Review of Gummee Teething Products

My review today is of Gummee Teething Products. Gummee began in 2011 when Jodine wanted to make products that were especially designed for teething babies. She couldn’t find what she wanted for her own children at the time, who were chewing their hands and making them sore. When she searched for a teething mitten she was surprised to see there was no such thing. So after some time designing and creating her business, Gummee was born and she began designing her own teethers. A few years down the line and Gummee has thousands of loyal customers and happy parents who have bought and used the products with their children.

So let me explain why I use them and why I love this brand!

My son has been teething for a few months now, and we have tried a variety of brands and styles of teethers. Not just Gummee ones, Supermarket own and various other brands too. However the one that our son uses every single day and picks up out of a handful of choices, are the ones from Gummee.

He loves the Link and Teethe Set, which usually retails at £14.99 however it is currently on offer on Amazon UK for £11.99 (Offer Correct as of the date of publication 1st May 2019). I will pop a link to it at the end!

I have been recommending these teethers on my own social media pages for months and I have also got many of my mum friends to buy them after seeing my son with them. This has lead me to write this blog post to support Gummee and its brand.

So a bit about Gummee first!

Gummee understands that one size doesn’t fit all, especially with our little ones. That’s why they designed a whole teething range for every different stage of teething. Each Gummee teething product is made specifically for little hands and little mouths at exactly the time that they need it. All the way from birth to toddler teething, every part of a baby’s teething journey is covered with their products, giving baby’s teeth the best possible start.

Our Baby A demonstrating the use of the Gummee silicone teething shapes.

The Range from Gummee

Gummee is most well known for their Gummee Glove. It was launched in 2012 and at the time it was the worlds first Teething Mitten. It goes on to Baby’s wrist and has silicone teethers attached to it.

Gummee Mitts 0-3 months – these are anti-scratch mitts are covered in silicone dots to soothe baby’s tiny gums and they STAY ON thanks to an adjustable, hook & loop closure at the wrist.

Gummee Glove 3-6 months – This is our flagship product – the world’s first teething mitten, designed for babies too young to hold other teething toys. It’s 2 teethers for the price of 1! The detachable, silicone teething ring can be used on it’s own once your little one’s fine motor skills have developed. The Glove comes with a handy laundry bag that doubles up as a travel bag for when you’re out and about.

Gummee Glove Plus 6-12 months – Our fantastic Gummee Glove is also available in our popular turquoise colour for 6 to 12 months. Due to a huge demand we have listened to our customers requests and designed a Gummee Glove with a slightly older baby in mind. It still contains all the fantastic features the original best-selling Gummee Glove has but with the added benefit of larger side teethers for heavier chewing.
Our son keeps pulling this particular teether off his wrist, he is far too clever! He just prefers to hold it himself and chew on the silicone parts.

Molar Mallet 12 months + – This teething toy enables your child to soothe the gums towards the back of the mouth when the molars make an appearance. This fun toy includes a wobble base to keep the mouthpiece off the floor if it is dropped. The teether also includes a collar to prevent over-insertion into the mouth.

Link n Teethe 3 month + – This colourful set of silicone links and shapes is incredibly versatile. It can be attached to pushchairs, highchairs, car seats, shopping trolleys etc. The silicone shapes also fit in the top of the Gummee Glove to give your child a wider variety of teether options.
You can even wear them as a Mummy and put them on to your wrist, they are on you if you need one that way.
We have used these by attaching some on the car seat and on to his high chair, our son loves them as a link and individually. He can very easily take them a part too!
We have two sets now because our son is cutting a few teeth, I find it is better to have them to hand in several rooms and our going out of the house changing bag!

All the Gummee products have passed all mandatory and non-mandatory safety testing. The Gummee Brand is protected by Copyright, all trademarks, designs and design rights are all the property of Jodine Boothby. Legal action will be sought for any infringement of these rights.

Information and Tips for using Gummee Products

Gummee Gloves can be machine washed in the bag that they arrive in on a delicate cycle and at 30 degrees.

The silicone teethers can be sterilised by washing them in warm soapy water or in a cold sterilising solution.

All of the teethers can be used with the gloves or linked together using the set. Attach them to wherever baby needs to reach them.


Sabrina’s Top Tips for Teething ✩

Never Leave A Baby Unattended With A Teether And Encourage Them To Use It Effectively

Pop The Teether In The Fridge For A Few Minutes – The Cold Soothes Gums

Attach A Teether To Your Baby’s Favourite Toy If It Has A Loop To Go Through To Encourage Them To See It And Use It Themselves, Helping Them With Developing Fine Motor Skills

Use One Of The Teether To Demonstrate Using Your Own Mouth, Baby’s Love To Copy You, Show Them How Easy It Is

Some of the Gummee Silicone Teethers

I don’t know what I would do with a teething baby without the teethers that are very well made, well designed and also excellent quality. The safety of a product when you have a baby is paramount, and it’s nice to have a British made brand to support while I’m at it.

My Over All Thoughts

Product Design 5/5
Product Value 5/5
Product Originality 5/5
Product Versatility 5/5
Product Functionality 5/5


You can find Gummee on a variety of Social Media, and they often Give Away products too. I will pop the links below if you want to see more about them or purchase teethers for your family. They come highly recommended from me!

Gummee Teething Facebook
Gummee on Twitter
Gummee on Instagram
Gummee Website

Gummee Link and Teethe Amazon

Thank you for visiting Severn Wishes, I hope to enjoyed this Review and that I see you here again very soon. If you purchase a Gummee product after seeing my review then please leave me a comment and let me know.

✩ Sabrina ✩

Breastfeeding – My Journey & Experiences

Breastfeeding – My Experiences

Today I am choosing to share my own Breastfeeding Journey and my own tips. Some I have established myself and others have been passed on to me by other mothers and also health care professionals.

Everyone has different experiences and I feel I’m lucky to still be feeding my son, there were many hurdles but we overcame them in the end. If you would like to learn more about my journey then please keep reading.

This piece is known as one of my honest posts because this is what happened to me in my life and how I dealt with it all. Thank you for supporting me by reading this article today.


My Breastfeeding Journey
 
I’ve just reached the 9 month mark of breast feeding, and while it’s a huge accomplishment and I’m very proud to be still doing it, it makes me sad that not more mothers are encouraged to do it from the beginning.

I understand that it’s not for everyone, depending upon your maternity leave and personal situation. Some babies just don’t get the latch, or are tongue tied, there are a ton of reasons why it won’t work. Yet certain hospitals in the UK seem to have staff that are more supportive than others.

I was one of the lucky ones who spoke to a breast feeding coordinator within 24 hours of my son being born. Despite the fact we had to stay in hospital for 2 weeks due to him being jaundice, I still soldiered on like a mummy warrior because it was what I wanted to achieve. I breast fed my son every 60 to 90 minutes, and pumped in between every 2 feeds. He was then breast fed and given a top up of expressed with a cup after every feed. Exhausting isn’t the half of it.

We were supported and my own perseverance served us in good stead for continuing with this schedule. I contracted Ductal Thrush during the 7th week of breast feeding and it reoccurred meaning I was on antibiotics for 6 whole weeks. Applying cream, then removing the creams before feeds, rubbing gel on my sons gums, I had lanolin for my bleeding nipples which were struggling also. It was a nightmare time and yet I still got through it.

Ductal Thrush was more painful for me than giving birth. I’m not exaggerating. Any mum that has had it will back me up. The only way I can describe it is like this… When baby latches on the first 30 seconds feel like he’s pulling your milk and nipple through shards of broken glass. Then it’s like a burning sensation that radiates down from the nipple into the deep tissue of the breast. As milk is drawn up and through by baby, the pain moves down the ducts and can be felt right down. For me it was all the way into my arm pit and into my back. The pain was present for the first 4 or 5 minutes of every feed. It was so bad at times that I cried out in pain if my baby let go during those first 30 seconds to a minute, and had to latch again and start the process over again. The one evening tears were rolling down my cheeks as I bit down on something to stop myself waking up the neighbours. My husband sat next to me looking terrified asking what he could do to help… the answer was nothing. I had had the tablets prescribed by this point but they took a few days to do anything.

I was asked if I wanted to stop feeding when my Ductal Thrush came back for vengeance. But I knew we could beat it and come out stronger the other side. It was a really difficult time, we had to ask people to stop visiting us because I was embarrassed by the amount of pain I was in. But because I have Stage 4 Endometriosis it was more beneficial to me to keep feeding my son. It was overall better off for both of us if we could continue. And we did it! I’m also proud of my pain threshold, I read about some mum’s having to give up after their infections. But I was not only determined for my son but for myself,  breastfeeding creates hormones that keep my cycles at bay, which means no Endometriosis pains, for now.

A lot of mothers are misdiagnosed where Ductal Thrush is concerned, so please speak to your local breastfeeding team before going to your GP if you’re concerned. They will be able to help with your symptoms are let you know what the GP needs to do to confirm it. My GP thought I had Mastitis but in fact it was Thrush. You must be aware of both of these as a Breastfeeding Mother, yet some people don’t know what to look for. To clarify Mastitis is when your Ducts get blocked with milk from engorgement and your baby not feeding effectively. Make sure that if you get any redness with heat, any pain and swelling of the breast that doesn’t subside after a feed and a let down, you should see your GP urgently.

Another hurdle that I had was to have a baby who cluster fed, some days he would have 16 feeds in 24 hours. The most he had was 18 feeds a day when he was having growth spurts. The feeds were anything from 15 minutes to 50 minutes and all times in between. It was an exhausting time, but the bond that we created was worth every moment of the no sleep and the bleeding body parts. Thank goodness for my Pregnancy Pillow!

By the time I got to 5 months I was infection free, we were down to 14 feeds in 24 hours and we were almost ready to begin some basic Weaning of vegetable purées. But my son had issues with his bowel and with his skin, eczema had flared up all over his body since he had his vaccinations. So our GP sent us to a pediatrician for advice.

They asked me if I wanted to continue feeding, if I did I would need to give up dairy products entirely, to consume nothing which contained dairy, that meant nothing with milk, lactose or whey powder in. That would’ve been easier if the alternatives weren’t all nut related. My husband has severe nut allergies and therefore products of this nature don’t even enter our house. I knew it was going to be a struggle to negotiate this new challenge before me and I remember shedding a few tears of frustration… after everything we now had this to deal with as well.
 
Finding a balance between getting my breastfeeding calories a day but still cutting out everything on the doctors list was hard. A few things were easy to change to, Soya Milk instead of regular Milk and Vegan Flora Spread instead of Buttery Milk Spread… but other things were much harder because you didn’t even realise that they contained milk. Usually it’s the lactose used to bind ingredients together…

In the end I gave up over half of my usual food items and I managed to swap into a third of alternatives. The rest is just given up on for the foreseeable. I would do anything to stop my son scratching his skin and/or experiencing his crippling wind pains. But it’s so hard when they’re little and they cannot tell you what’s wrong or how to fix it.
 
Our son has had a variety of creams and liquids for the bath, we are slowly getting on top of his skin conditions. The dairy issue is an ongoing battle, though we are Weaning and so far we haven’t had any other issues, we are avoiding a small list of some foods entirely. Dairy is something I eat one item of every 3 to 4 weeks and see if baby reacts to it a couple of days later,
that is because it takes time for the dairy proteins to pass into my milk supply and then into baby and their digestive system. So far we found him have a very unsettled sleep within 3 days of me having anything dairy. It meant he had wind and sometimes nasty nappies along with it. It was awful to see him react this way, though the doctor has advised we try dairy once a month to see how his digestive system copes, especially as he is getting older now.
 
I’m hoping that he grows out of this sensitivity and it doesn’t become an intolerance, some babies do! I am keeping so much crossed for this! In the meantime we are just taking things one day at a time. I’m so proud of him, he’s such a happy and intelligent baby, I am one proud mummy bear over here! The Breastfeeding comes to us so naturally now, and I even breastfeed in public without getting embarrassed or feeling insecure about it. At the end of the day I am feeding my child and his needs come first.
Here I am Breastfeeding my son while out recently.

I have a few tips for women hoping to Breastfeed, these are my personal tips and obviously won’t work for everyone. Some are factual though and you should be reminded of them by your midwife or heath visitor…

Sabrina’s Top Tips for Women New to Breastfeeding

1. Drink a ton of water! I’m not exaggerating when I say that feeding makes you really thirsty! I had to carry a 1 litre bottle with me everywhere I went, and I had a pint glass by the side of my feeding chair. A bottle by the side of my bed and also a cup in the bathroom for drinking at night. You will still pee quite a lot after the birth (natural or c-section) while your bladder recovers, and so despite needing to wee you’ll find yourself very thirsty at the same time. On average they recommend 3 litres of water a day. Limit yourself to one cup of coffee, two of tea or one can of pop. Water is what makes milk ladies! Drink up! Add a little squash if you’re not fond of water but get it down you.

2. The second tip I have is be comfortable! Your baby will be small when they’re born, but they won’t stay that way for long. I invested in a pillow, and it was one of the best things I ever bought. On offer from Online4Baby I paid around £12 for it. It’s a half circle shape and allows baby to lay across it while the pillow goes around your middle. I will pop an image below! In the end I bought two and kept one on my bed and the other in the lounge. Cushions for your neck and elbows are also essential when you have a baby who likes a longer feed.

4 in 1 Pillow for Nursing and Baby

3. Look after yourself! Keep showered and in clean clothes, changing them every 24 to 36 hours at least. You won’t have much time on your hands, but try and make your partner see that being clean is important so as to minimise risk of infections. You will feel so much more human too! Having a little human attached to you is daunting!

4. Eat Well! This might sound silly but you need plenty of protein related foods and also vegetables and fruit as a new mum. Calcium is important too! Unless like me you have a baby who has issues! If not then get yourself some milk and cheese. I ate cereal every morning that had extra iron and vitamins. It’s a good idea!

5. Fresh Air! Fresh air should help you be a bit more relaxed and also help baby sleep. Be careful if it’s cold and wrap yourself and baby up warmly. Remember to shelter baby from any sun rays as well if they’re a newborn. But getting out even for ten minutes for some fresh air is a good plan.

6. It took me a while to be comfortable breast feeding in public. I put that down to my sons problems and then my infections. Once those were all rectified we had no problem getting comfortable on a cafe sofa, usually rolling up my coat to go beneath him and help my arm take the strain. My biggest tip is to just consider it as your baby is having a meal. You wouldn’t deny yourself lunch if you were out for the day would you? Just because you’re not at home doesn’t mean you cannot do as you would do when at home. Baby will tell you when they’re hungry enough for you to not ignore that cry any longer… whip out a boob and stick that hungry baby on it, because they’re the most important thing.

7. Don’t be surprised if you get lopsided and baby prefers one boob over the other! I didn’t think I would ever get this lopsided but my son prefers my one boob over the other. Who am I to argue?! Despite trying to get him to feed off the other one for months, he only usually does so when he is half asleep and cannot tell the difference.

8. Pumping or Combination Feeding is not as easy as you’d think and it isn’t for everyone. I had to stop pumping after I got my Ductal Thrush infections. After those 7 weeks had gone by my breasts didn’t produce as much milk on a pump as they did when I was physically feeding my son. We had hoped to combination feed so my husband could help, but our son was reluctant to take to many bottle types and then I simply couldn’t pump enough anyway. Just because you pump doesn’t mean that’s all there is, some mum’s require babies own latch to produce milk, others find they have a bigger supply and can feed and pump large amounts easily. Remember what I said above about Water – it’s what makes the milk so you need to increase your intake of it so as to increase milk for baby. At a certain point your boobs will be less hard and your baby will stimulate the making of the milk rather than your body just constantly producing it…

9. My final breast feeding tip is to go with the flow. Not the milk flow as such but the flow of you and baby. Feed when baby wants it, those first few weeks will be a mess of body fluids and bits hanging out. But you’re learning and your baby is also learning as well. After a month or two it will feel so natural to you, and hopefully you will choose to continue feeding for as long as is appropriate for you and your baby. I’m hoping to get to the year mark and maybe even go for longer, it all depends if baby has an allergy or not… until then we will just be feed feed feeding!

The hours are long but the cuddles make it all worth it…

✩✩✩


Thank you for reading this post today, I know it has been an honest one, and I hope it helps someone out there. Breast feeding is one of the most rewarding things I’ve ever decided to do in my life, and I wouldn’t change my experience despite the ups and downs. The bond I have with my son is incredible and it’s the look on his face when he knows we are going to settle down for a feed that makes it so worth it. The look he gives me sometimes part way through feeding, locking eyes with me and smiling, sometimes he smiles so much he either lets go of his latch or spills milk all down himself, it’s so cute and it’s a look of love and thanks. It’s amazing…

If anyone has any questions about breast feeding I’m happy to try and answer them. There are also pages on Facebook, local groups you can contact and your GP too. Forums are also good I’ve heard people say (although I’ve not joined one) that there are also some good breast feeding apps too!

✩✩

Thank you for reading my Breast Feeding journey so far…

Dr. Jack Newman has a Channel on YouTube, known as a Breastfeeding Guru and has lots of tips for a new mum. Including Latch, Cup Feeding and tons of other videos. It’s worth a look if you’re stuck.

Always ask your friends who are Breastfeeding mum’s for advice.

Breast Feeding Apps
Breast Start
Baby Buddy
Wonder Weeks

Top Tips For New Breastfeeding Mums from the Breastfeeding Team
With a newborn you’re looking for 3 sucks, then a swallow and a breathe.
A good latch is essential learning for you and for baby, usually before you leave hospital after the birth. If unsure then don’t go home uncertain.

Thank you for joining me on Severn Wishes for this honest post, I hope you have found it useful or in the very least interesting.

Breastfeeding is not the easy way of feeding your baby, especially when there are many issues with things that some people aren’t even aware of.

The main thing is that if you’re pregnant and you want to feed baby yourself, get the help you need that first day in hospital and speak to the right people, they will support you if you’re willing to work hard and make it work.

But remember that not all babies take to breasts, and you shouldn’t feel like a failure if it doesn’t work for you.

Just give it a go, that’s all you can do to start with. Good luck if you’re starting your BF journey!

✩ Sabrina 

Sabrina Has 6 Ways to Improve your Well Being

Today On The Blog I Am Discussing Ways to Improve your Well Being.

It’s actually easier than you think to improve your well being. I began to do these things last year and am happy to say that I achieve most of these most weeks still.

✩ Stay Active
✩ Read More
✩ Eat Well And Proportionally
✩ Remember To Climb Those Stairs
✩ Try Something New Once In A While
✩ Do Something You Love Every Day And Enjoy Yourself

✩ Staying active is easy providing you stick to what you’re able to do. Even a ten minute walk is better than not walking at all. Other easy exercise includes gentle swimming and cycling. However if you’re generally a healthy person you might want to take up a new hobby this summer, walking outdoors is often free to do. You can make it fun for children by playing Spotting or Eye Spy games.

✩ Reading more is something I’m passionate about myself and I aim to increase mine even further. Whether you read the news, a book, a magazine, you are still working your brain by reading the words, and looking up words you don’t know is also beneficial. But more than that you are exercising your brain and taking in knowledge, despite what you read, a physical book or on a screen, it’s still reading.

✩ Eating well is so important anyway for your health, but portion sizes and proportion is vital. You need a good ratio of the main elements of food types as well as the right sizes of these types. Your 5 fruit and vegetables a day is also a key element in keeping your body healthy.

✩ Climbing a couple more staircases every day rather than taking the easy routes of lifts and escalators is something to consider. Your heart rate increases when you climb inclines or stairs, this is classed as exercise, even if it only takes you one minute to do the task. Stairs are also good for using muscles in your legs.

✩ Your mind needs to remain healthy too, and one way you can accomplish this is by trying something new. Whether it’s a hobby or activity, playing a board game or simply going somewhere new. New things stimulate your brain.

✩ No matter what kind of day you have, a busy day, a slow day, a stressful day or a day of fun! You should do one thing that you love each day. This is more for a sanity reason, but we all get busy and chores and work come ahead of what we want to do or love to do. For example, I love to play games, so I allocate twenty minutes in an afternoon or evening where I play Scrabble on my mobile phone. It’s not just something I enjoy but it also stimulates my brain by getting me to think.


Sabrina’s Top Tip!

Don’t try and accomplish all of the sections above in the same go! Perhaps do one a week and then see if you can achieve it again the following week. Also my tip is to pick the one you believe is most achievable to you!

Thank you for visiting Severn Wishes for this lifestyle post today, I hope that you have enjoyed it. Leave me a comment if you want to, I would love to hear what you think about it.

✩ Sabrina ✩

How to make Chinese Food from Scratch at Home for this Chinese New Year

Happy Chinese New Year!
新年快乐

A great way to enjoy some tasty Chinese style cuisine this week is to do it yourself. To celebrate Chinese New Year I thought that I would share my own recipes with you all. Many people think it’s a complicated type of cuisine to make but if you’re good at following step by step recipe guides like mine, then you can create my delicious dishes in your own kitchen!

In today’s blog post I’m going to outline some of my own tips and tricks, as well as share my own recipes on how to make some flavoursome Chinese meals. Follow my instructions as much as you can, and substitute the meats for other meat or fish or a vegetarian alternative where I indicate you can with this symbol ⇕ . You can decide which of the sauces you’d rather make too, I will show you a few.

Why not give some cooking a go this Chinese New Year week! I’ve worked out that you can make 4 of my dishes for 4 people, plus a bowl of Sabrina’s Special Egg Fried Rice, for around £6.50 per person. That’s a heck of a lot cheaper than ordering in! On average a dish from a Chinese Takeaway comes in at around £7.00 in most parts of the UK. You can have 3 dishes and a rice for the same price! All you have to do though is cook it!

SHOPPING LIST

Stir Fry Pork ⇕ 500g is £2.75 at Tesco
Stir Fry Beef ⇕ 375g is £3.50 at Tesco
Chicken Fillets ⇕ 500g £4.00 at Tesco
Rice Wine Vinegar – £1.99 for 150ml
Reduced Salt Soy Sauce 65p for Tesco own brand or £1.30 for Amoy
Egg Noodles – Range from 80p to £1.40 – You need 150g for 2 people
Rice Noodles – Range from 90p to £1.80 – You need 300g for 4 people
Spring Onions – 55p for 100g at Tesco
Peas – Petit Pois Frozen at Tesco for £1.60 for 1kg
6 Free Range Eggs – Medium are 85p at Tesco
4 Peppers 2 Red 1 Green 1 Yellow 55p each at Tesco
2 White Onions – 85p per kg at Tesco
Carrots 59p per kg at Tesco
Jasmine Rice – Thai Jasmine Rice 1kg £2.00 at Tesco
Chinese 5 Spice Jar 85p at Tesco
Cornflour​ £1.30 at Tesco
Sunflower Oil 500ml 80p at Tesco
Seasame Oil – 250ml £1.80 at Tesco
Sweet Chilli Sauce – don’t have this at home buy supermarket own
Tomato Sauce – don’t have this at home buy supermarket own
Garlic – if you don’t have this at home buy supermarket own or jar
Ginger – fresh or jar or paste all work the same
Chilli – fresh or jar of flakes is fine but fresh taste better
Black Bean Sauce – Various Brands and Sizes Available

Remember that for some of these items you will have leftover amounts of them that you can use the next time that you cook Chinese food, such as the Petit Pois, the Rice Wine Vinegar, the Cornflour and the Soy Sauce.

Optional Extras

Bean Sprouts for the Stir Fry & Chow Mein Dish – 300g for 50p Tesco
White Cabbage are 79p each in Tesco
Water Chestnuts 225g Tin at Tesco for £1.10
Button Mushrooms – 90p for 200g at Tesco

I have worked out that your shopping list will cost between £27 and £30 depending on supermarket offers and whether or not you pick those offers or brands versus own brand. I shopped at Tesco but prices are similar else where when I looked online. For 4 people this equals approximately £6.50/£7.00 each, that is for the 4 people to have 3 Chinese Dishes and Rice.

TIME TO COOK

How To Make The Crispy Meat Element of the Dishes.

One of the most delicious parts of Chinese food is crispy strips of meat seasoned with Chinese spices. You can pick up a jar of Chinese 5 Spice for less than £1 in most supermarkets, and because it’s so strong in flavour it goes a long way.

Options for this type of meal are…
Crispy Beef in Sweet Chilli Sauce
Crispy Pork in Sweet and Sticky Sauce

Ingredients

Meat In Strips (your choice from Shopping List) Cut It If Not Already
5 Tablespoons of Cornflour
3 Tablespoons of Chinese 5 Spice

How To Prepare

You need a small saucepan that you pour oil in to until it is around an inch deep. You need to heat this on a hob until it’s very hot before you place meat inside to fry. The Meat Strips take around four minutes to cook through depending upon their thickness, so always test one piece before you do the remainder. You will also need several pieces of kitchen roll/towel to place your fried goods upon to drain and soak up any excess oil.

In bowl number one you need to place the cornflour and Chinese 5 Spice, mix it using a spoon. You need to coat each piece of meat in this mixture, by adding meat slowly a few at a time, once coated place them into the hot oil and time them frying. Remove them from the saucepan using a spoon or spatula with holes so as to drain the oil. Dry the strips on some towel until they are ready to mix with your chosen sauce.

A great way to use up those Takeaway Sauces you get given is to use them like I did to make a Chinese Sauce. See my image below…

How To Make Chinese Sauces

Here are my recipes for some sauces and stir fry meals I love to make. They are easy to follow and take around half an hour to prepare and cook.

There is one sauce that I always buy because it is more expensive to try and make it, that is black bean sauce. You can pick this up in most supermarkets for between 35p to £1.50. Packets or Jars depending upon if it’s for a one off dish or for several if you wish to make it again. Black Bean Sauce is the Perfect accompaniment with Chicken.

Chicken in Black Bean Sauce
Serve this with chunky chopped Onions, ribbons of Carrots and sliced Green Peppers.

Crispy Meat in Sweet Chilli Sauce
Serve with Carrot Ribbons, Onions and a chopped Chilli Pepper.
2 Tablespoons of Soy Sauce
2 Tablespoons of Tomato Sauce
4 Tablespoons of Sweet Chilli Sauce
4 Tablespoons of Rice Wine Vinegar

Crispy Meat in Sweet and Sticky Sauce
Serve with fried peppers and onions.
1 Tablespoon of Garlic
2 Tablespoons of Soy Sauce
3 Tablespoons of Tomato Sauce
3 Tablespoons of Sweet Chilli Sauce
4 Tablespoons of Rice Wine Vinegar

Chicken Chow Mein Sauce with Onions
1 Tablespoon of Garlic
1 Tablespoon of Ginger
3 Tablespoons of Soy Sauce
2 Tablespoons of Sesame Oil
5 Tablespoons of Boiling Water
1/2 A White Onion Chopped Chunky & Fried
Add other Veg as Optional Extras

Add the Chow Mein Sauce to pre-cooked Rice Noodles or Thin Egg Noodles and your already fried and seasoned meat. If you want a richer flavour then marinate the chicken in soy sauce for an hour prior to frying it.

Homemade Sweet Chilli Sauce
Crispy Beef in Sweet Chilli Sauce
As Delicious As It Looks!

Sabrina’s Delicious Stir Fry

You need 2 pans. Once prepared fry all your Vegetables together in a little oil. In the other pan, take some of the garlic, ginger and spices and add them to season your main element while you cook it, don’t forget to season with pepper and salt.
Once everything is cooked combine the main and the vegetables. Add your noodles and a splash of boiling water to the pan. Stir fry until cooked, serve immediately.

Meat / Fish / Vegetable of your choice (Main Element)
Shallots OR White Onion
2 Tablespoons of Ginger
2 Tablespoons of Garlic
2 Peppers – 1 Yellow & 1 Red – Sliced Long Ways
1 Tablespoon of Chinese 5 Spice – Season Chosen Main
Noodles of your choice
Add Spring Onions too if you like Onion as much as I do for a pop of colour!

Fry all these tasty vegetables together to begin your Stir Fry.
Soy and Chilli Chicken Stir Fry with Onion, Yellow Pepper & Egg Noodles.

How To Make Sabrina’s Special Egg Fried Rice

Egg Fried Rice is relatively easy to make and is a great accompaniment to lots of Chinese dishes. You can partially cook this dish too to save time! Cook the rice either on the hob or preferably in a Rice Cooker if you have one. Then you’re ready to begin.

Ingredients

Jasmine Rice – 300g – 400g Cooked
2 Tablespoons of Oil
2 Tablespoons of Soy Sauce
1 Teaspoon of Garlic
Peas or Petit Pois – 1 Small Cup – 150g approximately
Spring Onions – 4 to 6 Chopped Up – 100g plus
Scrambled Eggs – 3 Medium Eggs season with Salt, Pepper & Soy Sauce to your tastes

Method

In a large frying pan add oil soy sauce and garlic, then fry the Spring Onions and Peas together. Add the Eggs (previously whisked in a small bowl) and scramble together using a wooden spoon on a high heat. Turn the heat down and add the cooked rice. Mix thoroughly and add any more seasoning to taste. Fry until hot and all flavours are combined. Serve in a large bowl so people can help themselves and scatter some fresh spring onion on top.

The Final Dishes

Your final options for the Chinese Dishes are…

Main Dish 1. Crispy Pork with Sweet Sticky Sauce & Stir Fry Vegetables
Main Dish 2. Chicken in Black Bean Sauce with Vegetables
Main Dish 3. Chicken Chow Mein with Rice Noodles
Main Dish 4. Crispy Beef with Sweet Chilli Sauce & Stir Fry Vegetables
Main Dish 5. Soy and Chilli Chicken Stir Fry with Egg Noodles
Side Dish. Sabrina’s Special Egg Fried Rice
Side Dish. Stir Fry Vegetables

Thank you for joining me on Severn Wishes, I hope you enjoyed this lengthy food post! Let me know in my comments or tag me on social media if you make any of my recipes!

✩ Sabrina ✩

Our Experience of Baby Sensory Class and How I Teach My Baby At Home

Our Experience of a Baby Sensory Class

Beach Theme – Under The Sea.

Using textures, sounds, bubbles, bright colours, animals, music, voices, singing, shiny surfaces, sign language and toys… Baby Sensory has something for babies of all ages. This class that I attended was for babies of only a few weeks old right up to 13 months.

Our son Baby A has just turned 6 months old, so he was able to appreciate a great deal of what was going on. There were various mats on the floor for parents to sit upon and soft mats to lay babies upon in front. The class interacted with the children on many levels, be it laying on their back, sitting up, laying on their fronts, and sat upon their parents laps even!

There is always a hello and a goodbye section of the class, then in between is a theme plus a short break midway through for feeding and changing, or just more playing.

Sand was substituted for oats so that babies weren’t in any danger if they happened to eat any. I thought this was a great idea! A variety of textures were used doing the hour, silk, organza, bubbles and soft mats. Sign language is used during songs to make the babies think about the words being sung and said. This is also a really nice part of the group activities.

Baby A enjoyed some aspects of the class more than others, such as the objects and instruments that he could personally interact with, especially when he could hold and feel them. He very much liked the shells and wooden objects that were in the bucket I was given in this class.

I have paid for a course of classes for my son and I to attend. I feel it’s a good idea to introduce him to other babies, various sounds and activities that I cannot do very easily at home. Plus it’s a good reason to get out of the house and for my son and I to have some fun learning things together.

If there are classes in your town I recommend that you give this type of learning class a go! If you find a good one the activities can be essential to your baby learning things and experiencing things in a safe environment.

Baby Sensory Class
Bucket and Mat for the Under The Sea Theme

How and What I Teach My Baby At Home

There are many things that I teach Baby A at home, and also when we are out and about. Such as pointing out colours, numbers, weather and words as well as the basics like animals and objects. You don’t need to spend a lot of money on things, and you can use items at home to create sensory things.

I really enjoy showing my son real objects. Ones that make noises and have great textures are the best types. We often use toys and explain what in reality they are based upon. We try and expose him to educational television programs and we try and use books daily too. Ones with pictures are best at the moment but we always interact with the books with words and noises to help him understand further.

Young babies can only see Black, White and Red colours, so it’s a good idea to begin showing them shapes and every day objects and short words that are designed in this colour pattern. As baby gets older you can show them more colours and build upon it week after week.

Repetition is the best way of learning, and a baby will begin to recognise objects from an early age when shown them on a regular basis. Our son liked particular animals that were on flash cards, so we aimed to buy him other things that had these things as the theme. Such as he liked the image of a snail in one of the books and so we attached a snail hanging toy for the arch on his play mat.

My Top Tips for teaching your child things at home, are to incorporate a section of learning time into your routine so that once a day your baby is learning. Use repetition and do any teaching when your baby is most awake and alert. Making the learning fun means your little one is more likely to enjoy it and recall aspects of it.

Learning with your child should be an activity that you can both enjoy, you can always get other people involved too such as grand parents and friends. If there are babies of different ages in the room you can get everyone to do things in a way that they would all benefit. Such as explain colours and objects to the younger baby while getting an older child to spell the word for example.

Baby Sensory Light Display


If anyone found this post useful then please leave me a comment. I may elaborate on ways that I teach if people would find it beneficial. And also explain about the items that I have made and created for our at home sensory experience.

Thank you for reading my blog today and for visiting Severn Wishes, I hope you’ll stop by again soon. Have a great day!

✩ Sabrina ✩

Health and Well Being – Steps to Smarter Eating


Well Being and Health – Steps to Smarter 
Eating

Smarter Eating is something that we can all get into doing more often. Because some of these things are so easy to become good habits too, you just have to be patient. Try introducing them one at a time, and after some time why not do several on occasion and then give yourself a day off from them once a month? There are many ways in which you can look out for your health, and these are the ways I have found to be quite easy. Remember food should be enjoyed but some things need to be in moderation.


✩ Hydration ✩

So we all know that we should be drinking a minimum of 8 glasses of water a day. Depending on the size of the glass that you use, this can equate to anything from 1.5 litres to 2 litres each day. When they say “a day” they mean within 24 hours.

So here is my Top Tip – Keep a reusable bottle or glass by the side of your bed, make sure that when you wake with your alarm in a morning that you drink before getting out of bed. Not only are you having your first glass of water, but you are also helping your body to wake up and your blood pressure to regulate as well.

Another tip is to carry a reusable bottle of water with you everywhere you go. Not only will it remind you to drink, but it will also save you money because you won’t be buying drinks from shops or vendors.


✩ Embrace Your Favourites ✩

Favourites! We all have them! Embracing the ones that are good for you is definitely the way to go. And if not then why not try and add good things to your faves. Such as halving your bowl of ice cream and adding fresh fruit. Or you could add frozen spinach on top of your favourite pizza! Enjoy your foods but make them better for you.


✩ Boost Flavours ✩

Boosting the flavours of bland foods that are good for you but not entirely pleasant to eat is a great idea. Why not try and add low fat yoghurt to a bowl of fruit or to a bland (but good for you) cereal. You can try low fat versions of your tastier favourites such as cheese, or add fresh herbs to your meals.


✩ Eat More Vegetables ✩

It may sound easy, but sometimes we get lazy after a long day when we look at a pile of vegetables that need to be prepared. The trick and tip from me here would be to buy frozen. You waste less doing this and can only get out what you are going to use. It’s faster to measure up portions too! Easy to add two cups of mixed diced vegetables into a curry or a pasta sauce, for example, than counting out how many carrots you need to peel and then chop and then cook…


✩ Eat More Grains ✩

Dependent on your dietary requirements getting more grains could be difficult. However if you don’t have any allergies you should consider this. Getting more fibre through your diet. I love cereal, and my favourite happens to be high in fibre. Why not make a switch for a week if yours does not and see how you feel. Add fruit or jam if you require a sweetness rather than adding sugar.


✩ Try Something New ✩

We all get curious from time to time. My most recent example of this would be when I tried the new range of juice drinks from Tropicana – Tropicana Essentials. Although more expensive than my usual choices I wanted to try something that was meant to be better for me, and more beneficial to my health…  It is made of fruit and vegetables and I did notice I had more energy after consuming it on consistent days.

✩✩✩

Thank you for joining me for this next installment in my well being and health related posts today. I hope that you are able to take something from my tips and they can help you improve your lifestyle.

✩ Sabrina ✩