Sabrina is a Lifestyle, Parenting and Product Review Blogger. A Writer, Photographer, Reviewer, Home Cook, Crafter & Nature Enthusiast. You will find a bit of all those categories here on Severn Wishes Blog, Welcome to Sabrina's Lifestyle Blogging & Honest Reviews.
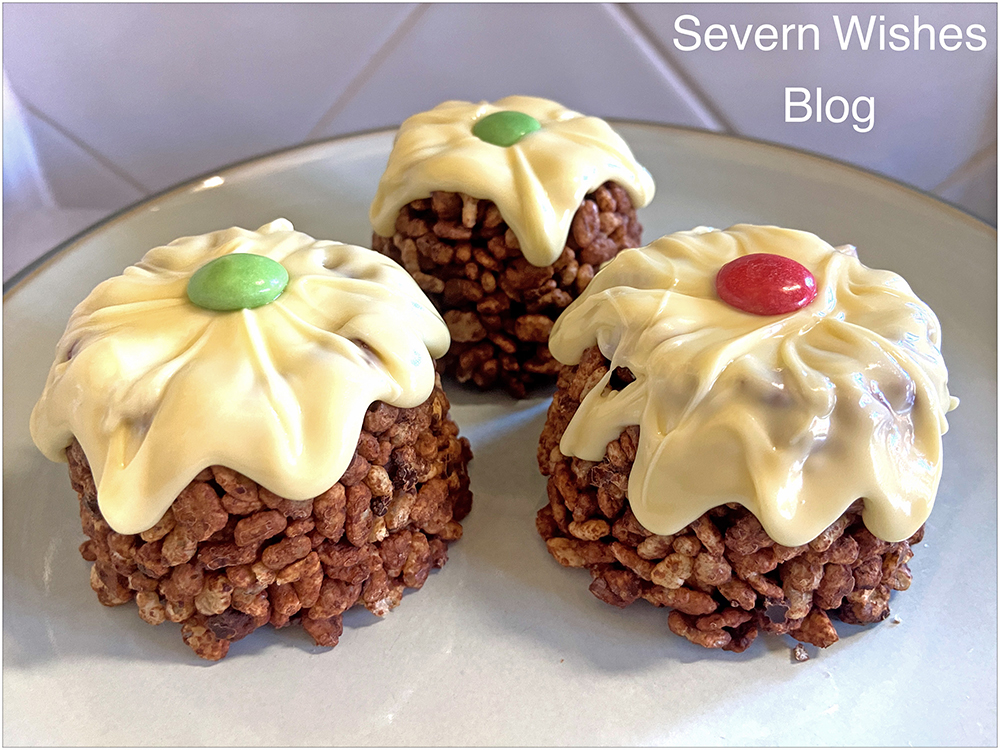
If you’re looking for a fun dessert for a Christmas Party that lots of children are attending then this might be the one for you! Look no further than these Christmas Puds! You can make them the day before and leave them to set overnight in a fridge. It will take just half an hour to make up to six Crispy Puds!
What You Will Need
Saucepan Wooden Spoon Rounded Moulds – I use an empty fruit pot that is from Tesco! They are the perfect size! Teaspoon
Crispy Cereal 300g-400g (depends on how coated in chocolate you want them to be) Milk or Plain or Free From Milk Chocolate 200g White or Free From White Chocolate (for the topping) 60-100g Decorative Item such as a Sweet or Smartie
How To Make
1. Melt the Chocolate on a low heat. 2. Once Smooth take off the heat and Stir in Crispy Cereal. 3. Push into Moulds of your Choice Firmly.
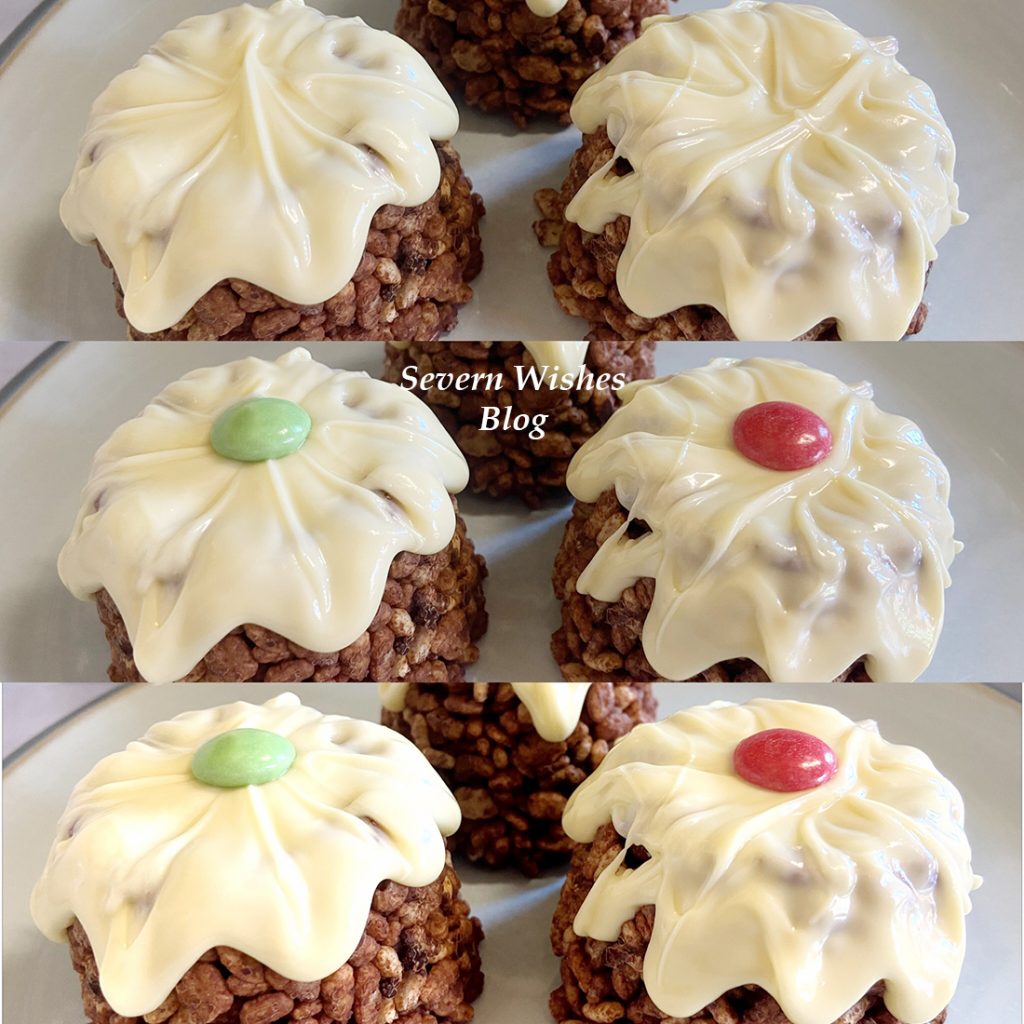
4. Refrigerate for a minimum of 4 Hours or Overnight. 5. Remove from Fridge, Turn Upside Down and Squeeze Gently to Remove from Moulds. 6. Melt the White Chocolate, Pour Over Each Pudding and Let it Drip down the Sides.
7. Using the End of a Tea Spoon Drag the White Chocolate to Form a Star Shape on Top of the Pudding .
8. Add a Sweetie or a Smartie on the Top to Decorate. 9. Pop Back in the Fridge until the Hour of Serving. 10. Keep in an Airtight Container for up to 3 days.
EASY PEASY!
Thank you for reading this blog post today, I hope that you like my recipe. If you make any of these yourself I would love to see a photo of how they turn out! Please tag me on Social Media! #SabrinasRecipes #SabrinasHowToMake
If you’re reading my blog today you might be in the same boat that I was last summer, which is wondering if it were time to make the move for your little one. The transition to a toddler bed is not one to be taken lightly, it is a huge step for our little person, and they deserve lots of time, patience and assistance from us (as their parent/s) to help them feel safe and secure in their new upgraded space.
Hopefully this article that I have combined with my review of the toddler bed that I bought, can help you to make informed decisions on what is best for you and your child/ren. Is it time? Only you will know by the actions and dependence your child currently has.
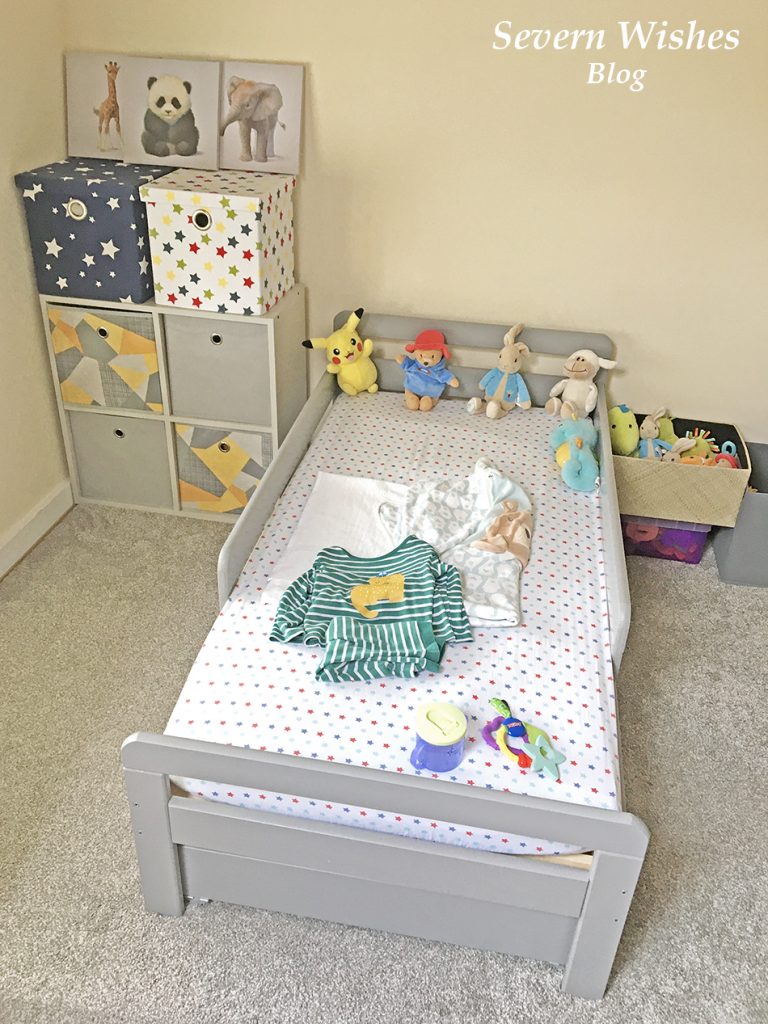
When the bed was finally in place…
When my son turned two I wanted him to start using a toddler bed and there were several reasons why I thought this needed to happen now. The first reason was that it was difficult to lower him inside his cot when he had fallen asleep in my arms, and he was now tall enough to consider trying to climb over. I didn’t want that to happen, so I purchased his first toddler bed after measuring up the space that I had in his bedroom.
I bought the Argos “Ellis Toddler Bed” in Grey, to match my sons furniture, and then bought a mattress online. I had chosen this bed for three reasons, the first being its height from the floor, the second was that it came with a drawer for under bed storage, and the final reason was because of the three quarter sides.
My son moves frequently in his sleep and I knew that it would be quite a while before he could sleep safely without any sides to his bed. This bed was a great size for the price and I would hope it to last him two years at least due to the length. The handy draw keeps tidy all of the towels and bedding I use for my sons room and it is easy enough to slide in and out on its rolling caster wheels.
Bed Frame size L144, W75, H57cm. Required Mattress size L140, W70cm. Clearance between floor and underside of bed 19.5cm. Drawer size H18.5, W139, D73.5cm.
There are now limited stock on this bed but it does also come in different colours. Here is what I would give it on my review scores having used it now for a whole year.
Quality of Paintwork 4✩ Quality of Manufacturing 4✩ Quality of Finished Product 5✩ Correct Specifications 5✩ Product Design 5✩
Overall this product is excellent quality and although it was difficult to put together, overall we have been very happy with it. A fantastic size for toddlers and small children and my son hasn’t fallen out of it due to the great design with those side bars. Although he is average height for his age (at 3) he still has plenty of room left to grow into this bed.
The Transition from a Cot to a Bed – My Tips and Tricks
The biggest thing about change for toddlers is that it can be unnerving to them. They get anxious and have to get used to something over time, so don’t worry if this alteration in routine and sleeping area takes a few weeks for them to get used to. The best thing that you can do for the first few nights is to keep the routine the same, but just place them in the new bed. If you have a routine that ends with them being placed into bed keep doing that. Then on the second week add one new thing now that the child is older such as, can they now get into bed themselves because they are old enough to do so? It will make them feel bigger if they do it themselves and gives them confidence, but only when they are willing to get into bed on their own. Don’t forget to use positive reinforcement when they are on the bed or in the bed so that the praise gives them positive ideals of being in the furniture. Saying things as “What a lovely new bed you have!” and “Now that you are two/three you can sleep in this special big kids bed” and remember to let them know that this is a good thing, a positive step and not one away from you. Definitely praise little one when they get into bed without you having to prompt them too!
Getting the child to stay in bed is another matter though. Don’t worry if they frequently get out of bed or even tumble out of bed half asleep for the first few weeks, wondering where you are (especially if you have had them sleeping in your room up until this point). And the beauty of the toddler bed is its distance to the floor. They usually are only between 15 and 20cm from the floor. Make sure to implement rules in their new bedroom, such as no toys after bed time. The child is not too young at this age to be putting their own toys back into a box or tub or basket, so why not start them off if you haven’t already done so (good practice for preschool). I have found that it’s also a good idea to introduce a clock or show the time to a child at this age, and tell them that at “7 o’clock” (or whatever your bedtime is) their toys are put away and your bedtime routine begins. Personally we are in the room for 7.30pm but it can take up to an hour to settle my three year old, some nights a story or two is enough and other nights I’m still reading at the hour mark. But it’s just imperative that you keep the routine the same, even if the time differs slightly, it’s still the act of doing things in the order that they are used to, and the act of then getting them into their own bed.
Talk About Their Safe Space
I tell my son every single night that he is “safe in his bed” and he is “safe at home with mummy” and this has reinforced him to stay in his bed. For the first few weeks if he woke in the night he would come and find me because he wasn’t sure on things. Now he’s more than happy to climb into his bed and choose the stories he wants at bedtime. He knows that I’m never far away now, but his bedroom is a safe place for him to be. He doesn’t always come and find me now that he is older either. He often wakes (and I hear him) but he presses his singing toy and lays back down or he will have a sip of water from his bottle and then turn over and go back to sleep. Again positive reinforcement is key when organising their safe space. When little one wakes up they want to recognise where they are and that it is home or safe, favourite toys or items around the room will help.
If you find your little one is struggling initially with the bed transition then you could choose to sleep on the floor in their room for a few nights. Whenever they wake up in the night make sure they know that you aren’t far away and they are safe. It is totally normal for most children to find their new surroundings daunting, but remember to just keep praising and comforting, they will soon get there. All children are different and it could take a few weeks of patience to achieve the end goal, but everyone should sleep better once that is over with.
Ensure Comfort
Make sure that they are comfortable on a firm but soft mattress and that the room is an optimum temperature. I still use our Gro-Egg from when he was a baby to tell me the room temp! My son had sleeping bags until he was two and a half, he was happy to sleep in them until he got older then he kept trying to take them off. I gave him his own thin pillow at three years of age, and I now put him in Pyjamas and a blanket over him. I have bought a toddler duvet this summer ready for the colder winter months, now that he is old enough to be able to push it away from his own face.
Keep Stories Gentle at Bedtime
I have found that stories that talk about bedtime or going to sleep are best at bedtime, other books can just excite little ones too much. My son has an absolute favourite book about a bear and a baby bear and he’s on his way to going to sleep, and we read it every night. I can now recite it from memory while he falls asleep in my arms (that is how many hundreds of times I have read it). But it’s such a lovely and gentle book that talks about how much mummy bear loves little bear and she is never far away no matter what he is getting up to. Consider what you are doing during your bedtime routine and make sure that there is nothing that is causing your little one to become more awake as opposed to be falling asleep. The best books we have found come from The Works.
My sons favourite book that I highly recommend, we found it at The Works.
Thank you so much for reading this blog post that I have written today, I do hope that you have found it informative and if my lifestyle experience with my son can help you in some way then I am more than happy to share it.
Well look at that, three years have literally gone past in a blur, and I am sitting here trying to fight back my eyes welling up. My baby boy is no longer my little baby boy, and in fact he has grown up so much this year that it’s scary. Having just emailed in all of the many forms I am now sitting on my sofa writing this blog post as I prepare for him to go off to Pre-School this September.
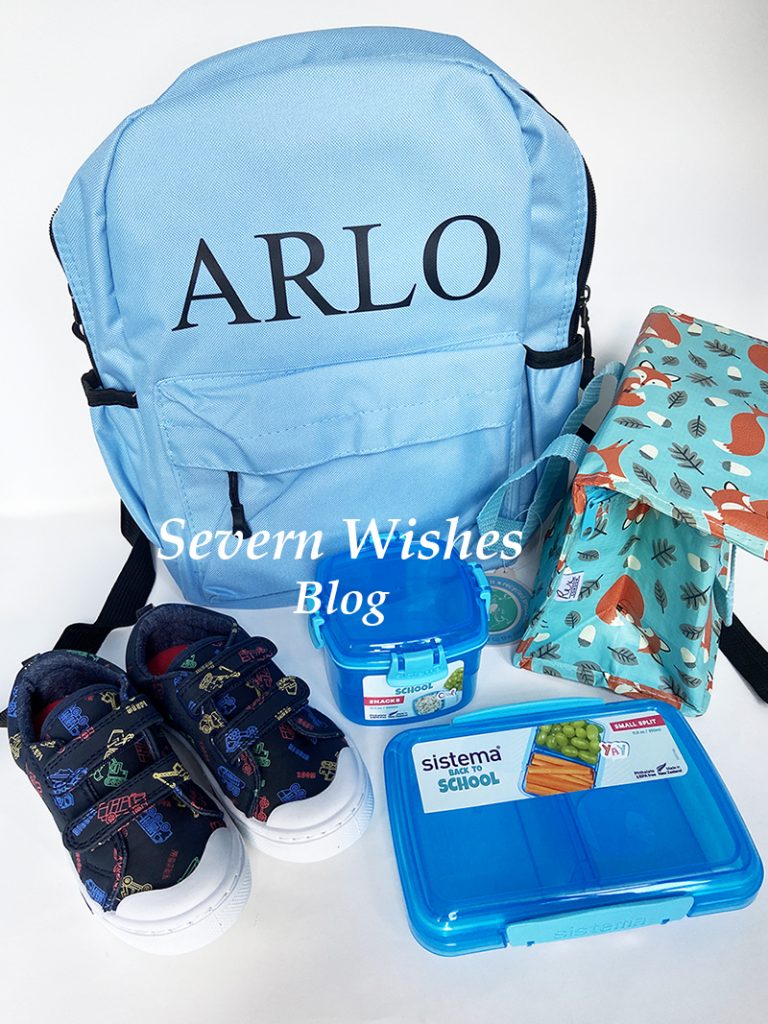
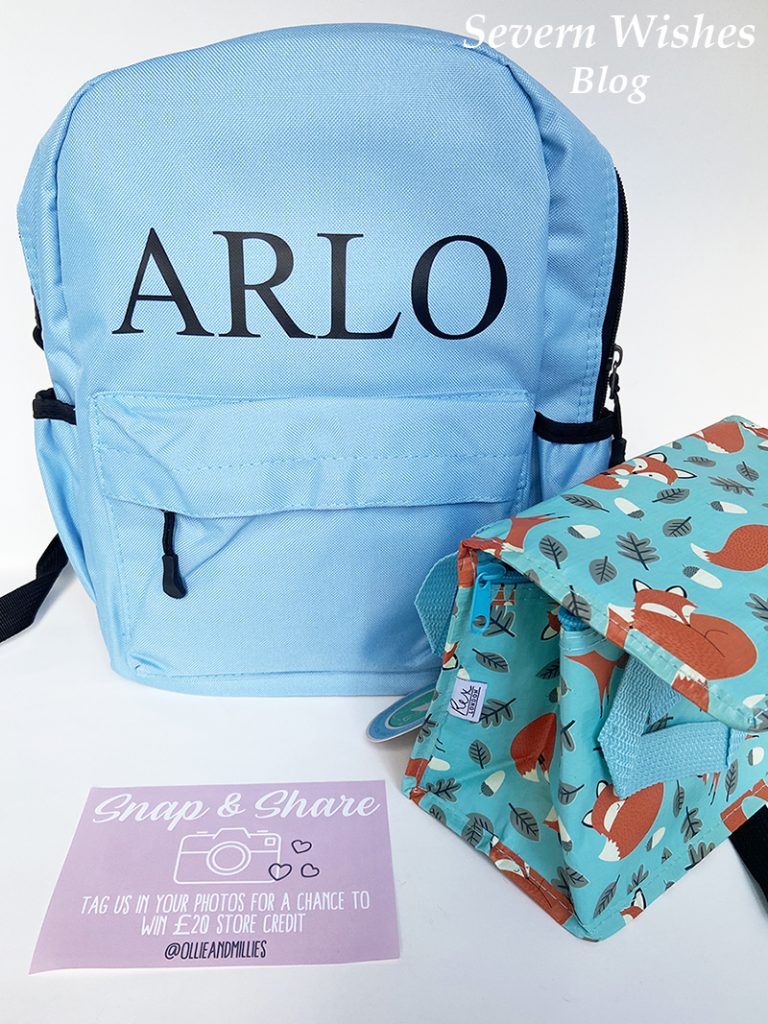
Backpack – Ollie & Millie’s Sistema Tubs – Tesco Kids Shoes – Tesco F&F Fox Cool Bag – Ollie & Millie’s
Going to school is like a right of passage and it’s a huge milestone in any child’s life. So I wanted to get my son some items to make that transition a bit easier. I had seen this gorgeous backpack on a page I follow on Facebook called Ollie & Millie’s. I had been looking at buying one for months, I looked around for a while, and then I decided to order one from them when I couldn’t find anything that looked as niceas theirs.
And because of Covid19 the School is not able to share some things any longer such as plasters, so every child must have their own in their bag. But that isn’t all, and my sons allergies also pose issues so he has to have everything he needs altogether in one bag. Luckily everything has fitted into the one I have chosen to buy from Ollie & Millie’s. Things such as a reusable water bottle (which we use already in my house but I bought my son a new one just for his school days), a (I chose personalised) backpack, snack pots, wellies for outdoor play and any medical items they require for the time frame they are at school are also included.
I’m very impressed with the backpack because of its quality in both material and its features such as strong straps and zips. There are several colours to choose from but my son loves blue so I chose blue for him, and because it’s a light sky blue colour the writing for his name really stands out. I was impressed with the time frame between ordering the product and receiving it from Ollie & Millie’s. The backpack also has versatility because I was surprised by just how much I could fit inside it, once I had gently opened it out when it arrived. Overall I rate it exceptionally highly and would recommend it to any parents who are after a good priced backpack with their child’s name on. The cool bag is also a lovely product and it is of excellent quality with a very cute fox design. Ollie & Millie’s have a wide range of products and also make personalised t-shirts and other clothing as well.
Other items that I have got to make things easier for both my son and myself are some fantastic plastic tubs from Tesco which are from the brand Sistema. The tubs are not only different sizes than what you would usually see in the supermarket, but they also have fun sections built in and have genius clips and lids too. Bonus points that I could get them in blue to match my sons bag as well!
Everything shown in my picture above is now inside the backpack, and with a handy bottle pocket on the side my sons drink is safe and secure too.
Thank you for clicking on this post, I hope you have enjoyed reading it.
Have you got any young children heading to School this term? I do hope they take it all in their stride! I will be doing a follow up post about how things went after the first few weeks too.
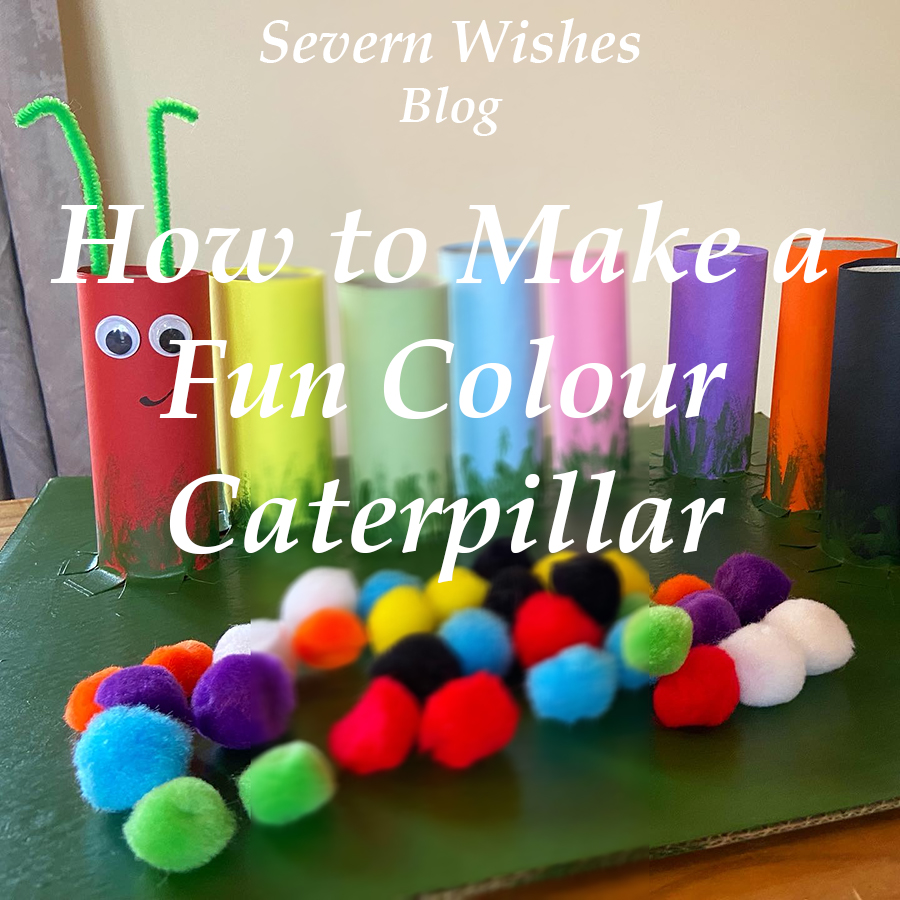
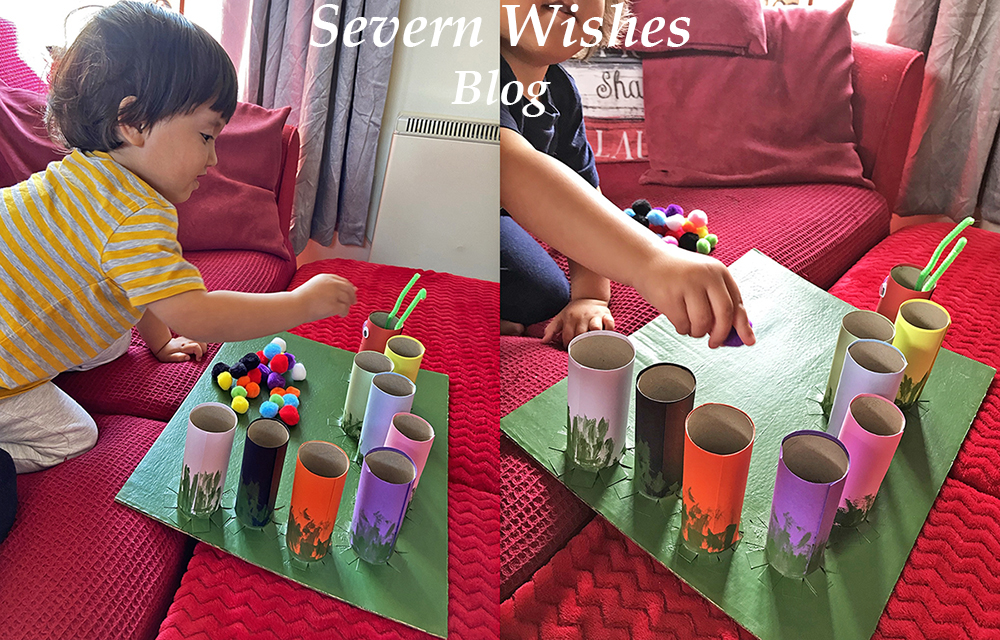
My Fun Craft Caterpillar is an easy to make craft project, that can help you to teach your toddler about colours and counting. You can make it any size you like and with only a few simple and non expensive items. Ideal for children aged two plus with good fine motor skills.
Designed for Age Group – 2 Years Plus (Supervised) Parent Difficulty to Make – 3/5 Time it takes to Make – 4 – 6 Hours Cost to Make – £10 Reasons to Make – Learning about Colours and Counting. Helps Develop Fine Motor Skills.
When my son began having issues with delayed speech I came up with several things to aid him in his communication. One of which was a Caterpillar friend that I made into several different items. Today I’m going to be showing you how I made my Fun Craft Colours Caterpillar!He is cute and great for helping little ones learn about colours, counting out and developing fine motor skills.
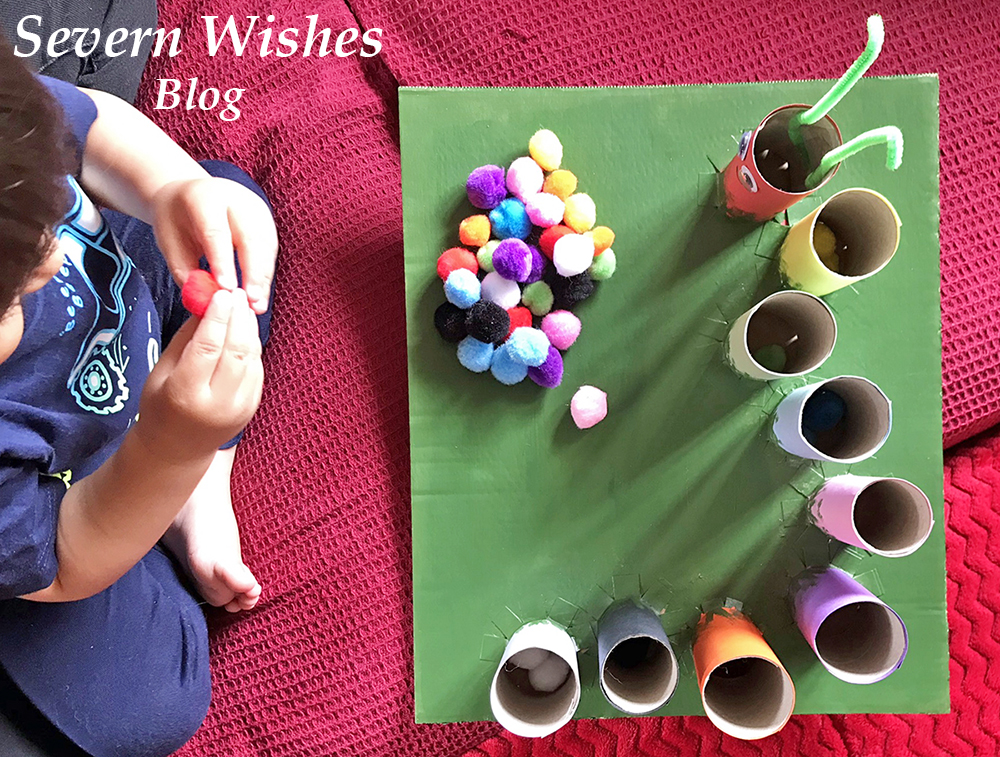
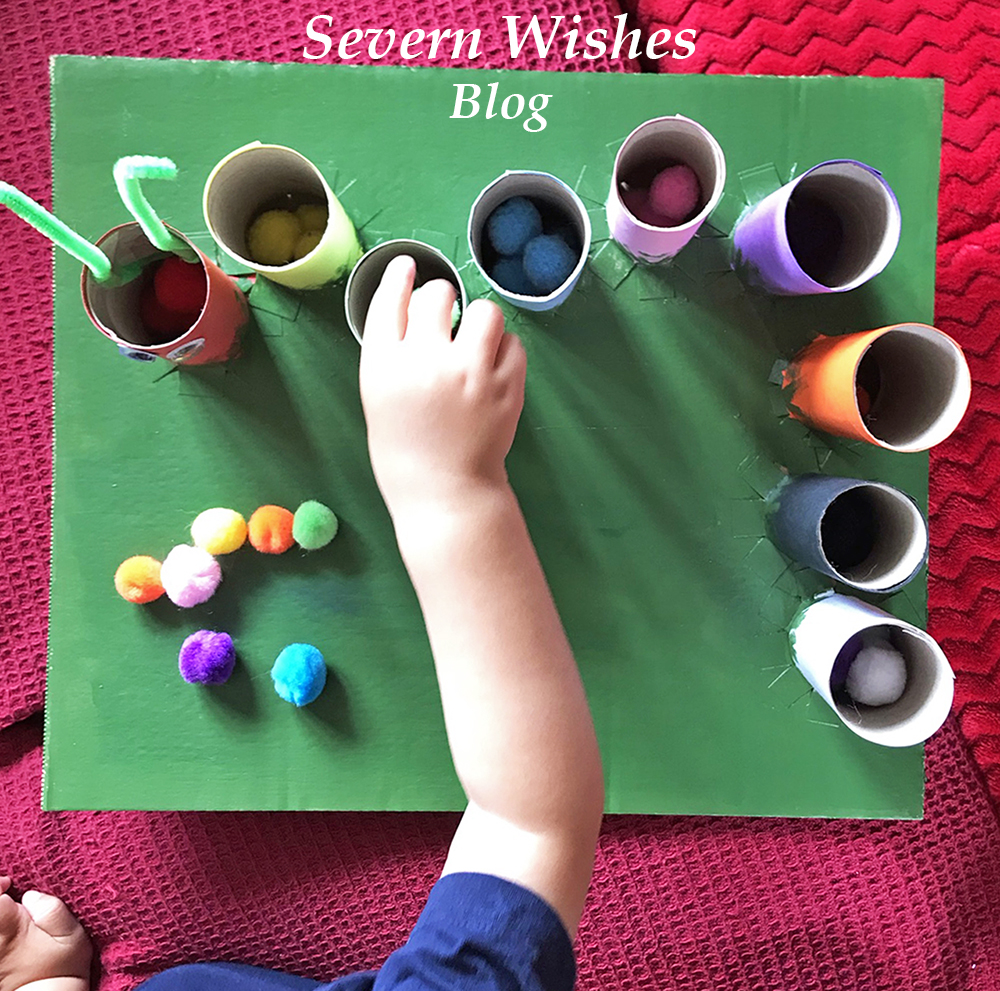
TOP TIP I wanted to help my son develop his fine motor skills as well as improve him saying different colours, picking up the Pom Poms and getting them to drop inside the correct tube does take some skills for little ones, so don’t worry if they have to learn how to do it. My son got the hang of it really quickly and was soon getting faster at doing it. One Tip is to show your little one what you want them to do, and then let them figure it out on their own a bit too. Always supervise but encourage and praise when they succeed.
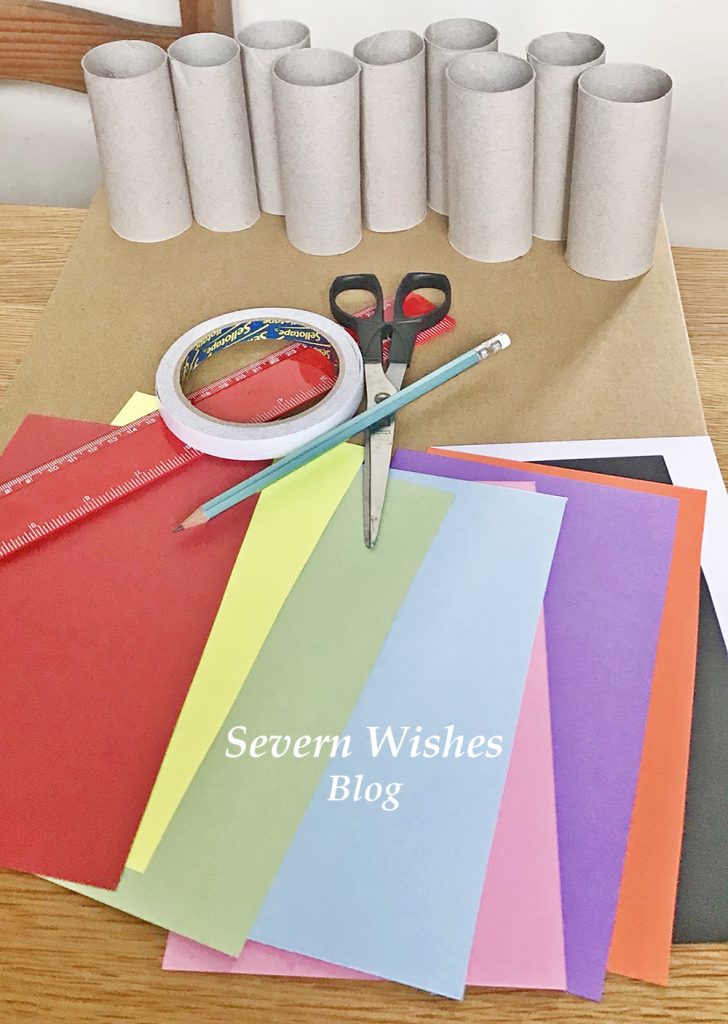
What You Will Need
Toilet Roll Tubes – You can use toilet rolls and kitchen rolls and just trim them so they are a similar height. Order your card and Pom Poms and work out how many rolls you will need, you require one roll per colour.
A Thick Cardboard Base – Do you have a sturdy box after going shopping or have had something delivered? You need a piece of strong thick cardboard either a Square or a Rectangle for your Base that the Caterpillar will stand on.
Coloured Card – You need to try and match the coloured card with the Pom Poms you are ordering. If you want to do a simple Caterpillar just go for a pack with Red, Yellow, Green and Blue mix, sometimes you get an Orange or a Pink in those packs. I bought two packs to ensure I got black, white, purple, pink and orange for my more complex Caterpillar.
Coloured Pom Poms – A toilet roll tube is a certain width across, so make sure you only order Pom Poms that are less than this. My tubes are 4cm wide so I purchased a bag of mixed coloured 2cm Pom Poms. This means they are easy enough to tip back out after every use. Also ensure you get non toxic child friendly craft items from reputable companies.
Double Sided Tape – You need this tape for cleanly applying your Card to your Rolls, this is the most time consuming of the craft build but it’s easier and less messy than waiting for lots of paint to dry. (See my How To below).
Paint for the Base – I chose to just paint my base Green, as if the Caterpillar were on a leaf or some grass. You can be as creative as you like! You only need to paint the base, once you have fixed on all your tubes (see my How To below for more clarity).
Stationery and Craft Extras – You may want to stick on googly eyes and feelers, or draw them on, it’s totally up to you, your Caterpillar, your choice! 🙂 You will also need a Pencil and a pair of Scissors.
Where I Got My Craft Items
Coloured Card Packs – Hobbycraft Online Pom Poms – Hobbycraft Online Goggly Eyes and Pipe Cleaners – Craft Bundle from The Works Double Sided Tape – Tesco Store Green Paint and Brush – The Works
How To Make Colour Caterpillar – Sabrina’s Step by Step Guide
Step 1. Assemble all of your items as described above and ensure you have enough of what you need. Place a tube, a piece of coloured card and your desired amount of Pom Poms (I used 4 per colour) into individual piles. See what you have and how many tubes with the right colours and Pom Pom matches.
Step 2. Arrange the plain tubes on your base, and see how you would like them arranged. You need a one centimetre gap between each roll where it will be attached to the base. Bearing this in mind, arrange your tubes and mark with a pencil on the base where you would like them to go.
Step 3. Satisfied that you have all the pieces you need you can begin the card craft. Start by marking the pieces of coloured card for your tubes. For example mine were 15cm high, so I marked the card at 16cm with a pencil leaving the gap of one additional centimetre. Then cut all the card pieces to size ready for wrapping around the tube. TOP TIP ensure you leave enough card to wrap all the way around a tube with the extra at the bottom. You need at least a one centimetre section of card at the bottom of every tube for attaching it to the base.
SABRINA’S TOP TIPS: Don’t throw away pieces of card that you have left over from this make, I have plenty of Craft and Art ideas on my blog that you could use these bits for 🙂
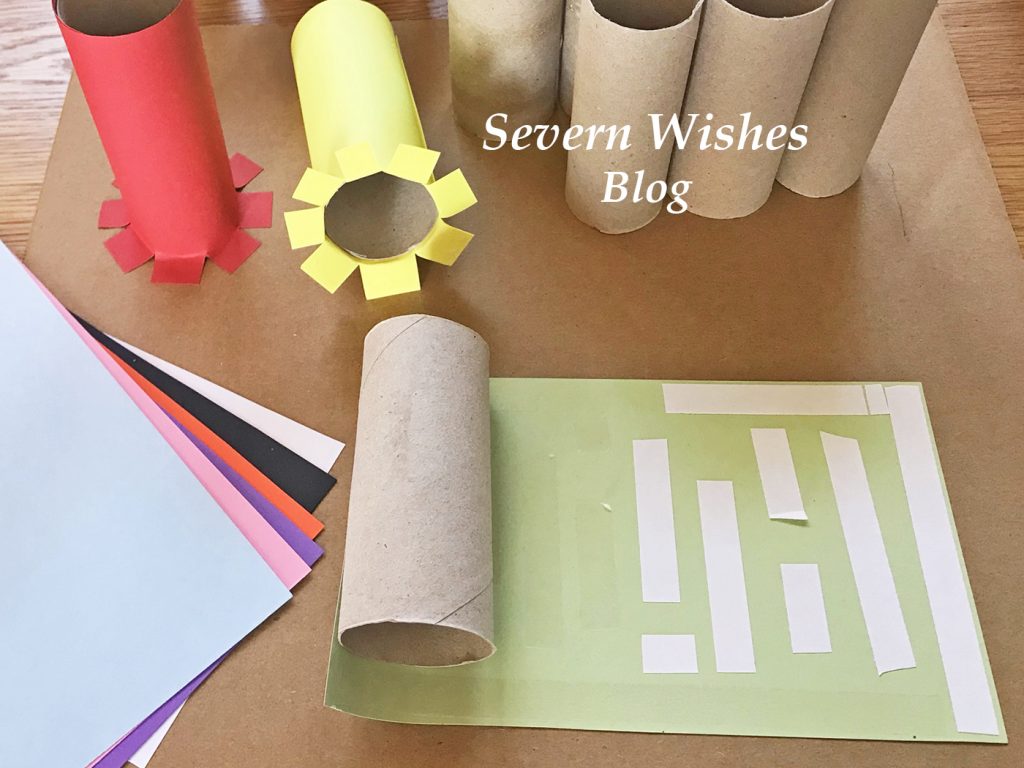
Step 5. Cut strips of double sided tape, align them along the top and edges of the coloured card and down the centre, ensure there is enough at the edges. At what will be the base of the tube stack the pieces vertically, using a small gap between them, this will be cut in Step 7 to ensure an easy attachment to the cardboard base. Make sure you put tape on all of the coloured card pieces. TOP TIP Make sure to do this Step and on to Steps 6 to 7 at the same time and don’t leave the craft part way finished, otherwise the double sided tape will dry out before you can affix it to the base.
Step 6. Time to roll the card on to the tubes. Remove all of the double sided tape strips. Line up the top section of the cardboard with the edge of the tube, on a flat surface like a table, gently roll the tube along the card. The tape will stick well to the thin tube, using your thumb and first fingers you can smooth out the card as it sticks. Try keeping it in line at the top. Once you come to the end of the coloured card make sure the final line of it is secure to its tube, smooth with your fingers and hold the edge in place for a minute per tube making sure that its firmly stuck in place. Repeat this per tube, laying them down on their sides once you are finished.
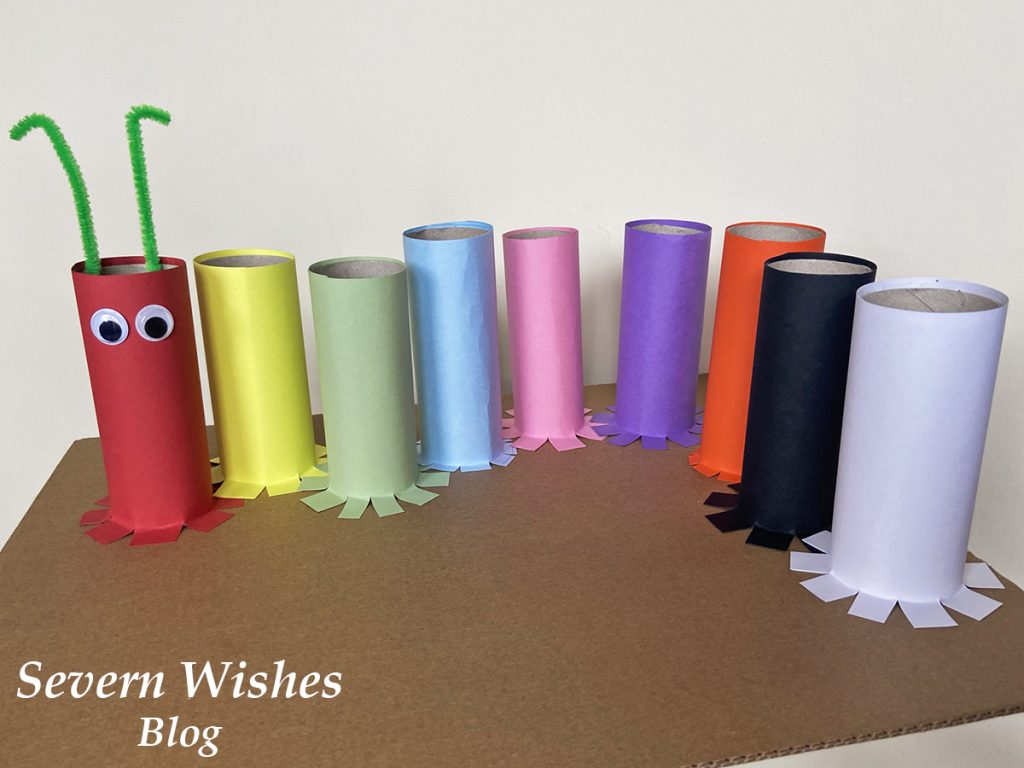
Step 7. You now need to be cutting the base of each tube so that they can be attached to the base. Take the first coloured tube you want to attach to the base (I did a Rainbow so mine was Red) and using sharp scissors cut a one centimetre slice up into the card at the tube base. Rotate the tube around cutting vertical slices as you go. Then once cut all the way around, gently peel back the slices and make a base for your tube. Affix it into place on your cardboard base because they should already have the double sided tape attached. Press down firmly and hold for one minute. Repeat this action with all of the coloured tubes until they are all attached to the base. (See images above and below).
TOP TIP Painting the base last ensures the tubes stay in place after the double sided tape has helped stick them down on the base. It also neatens up any edges that may have tape sticking out or tubes that weren’t quite level.
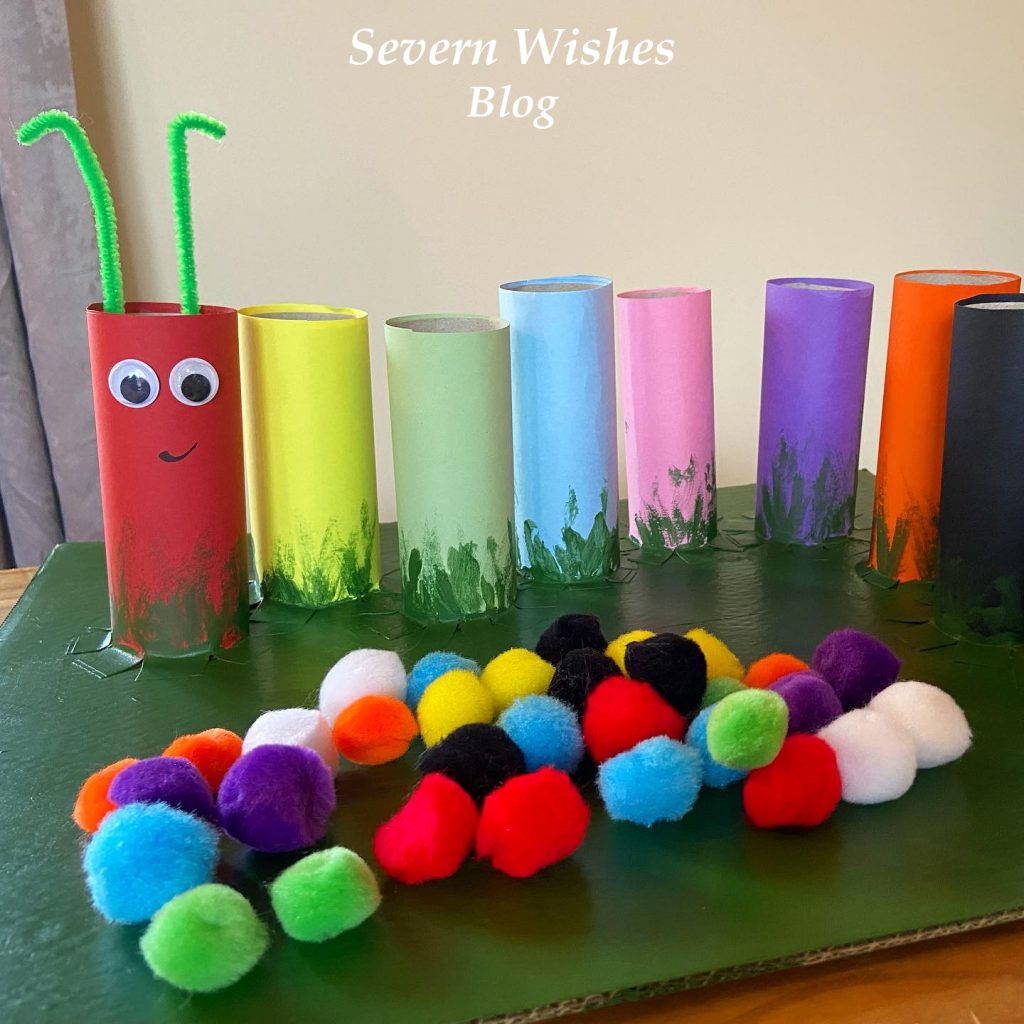
Step 8. With all your coloured tubes attached to the base you can now consider adding anything else to your caterpillar, and also paint the base with whatever paint you choose. I added googly eyes and some pipe cleaners as my Caterpillar feelers.
Step 9. Leave your Caterpillar to dry overnight before showing it to your little one. Ensure that you only play with it supervised either by you or another adult. The Pom Poms should be stored inside something that little ones can’t get into unless you are doing the toy together. Most children wouldn’t eat them at this age but better safe than sorry. I recommend a small plastic box like the really useful ones with the clip over lid handles.
TOP TIP Your Caterpillar friend can now be used to teach colours and numbers! Ask your child to count how many body parts the Caterpillar has, how many Pom Poms fit in each tube, can they separate the colours correctly and add them to the correct tube? This craft project can be used for play and learning and will keep your child occupied for hours.
Have you enjoyed this Craft Project? I would love to know what you think! Please leave me comments on the blog section below or on social media. Please tag me if you make a Caterpillar of your own! Use the hashtag #SabrinasCraftCreations
Thank you for reading this blog post today, I hope I see you again soon!
I am very fortunate to be an Argos Tester, this means that I often get items sent to me for the purpose of an online review. I test products and take photographs of them before submitting my findings and thoughts to Argos. For April I was offered one of a selection of Children’s Toy Sets. I love testing something that my young son would be allowed to partake in, his reactions and opinions would matter to me during the reviewing process. The item I am reviewing today is the Playmobil 6765 1.2.3 Floating Take Along Noah’s Ark Set.
#ArgosTester #ArgosTesters #ArgosTestersCommunity
I have written this article about a product that I have been supplied for free, in order to test and then review it. This is my experience with said product and my honest review about the product which is listed below. I have already submitted my product review to the Argos Website when this post has been published on my blog.
Product Details
Product Name: Playmobil 6765 1.2.3 Floating Take Along Noah’s Ark Set
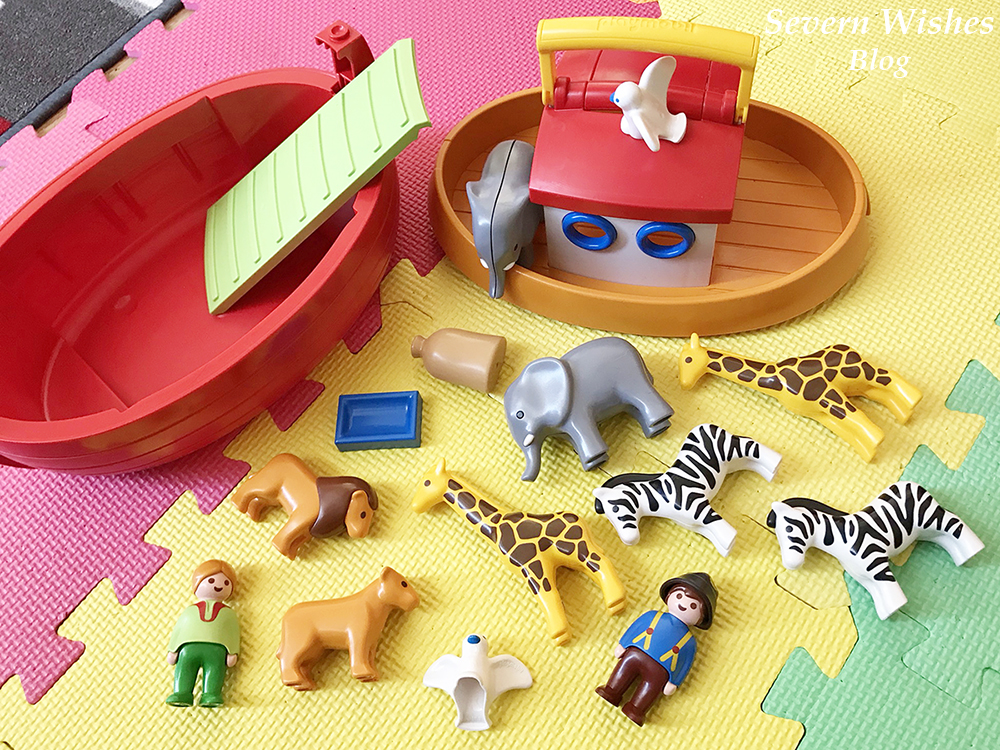
Product Details: A Red and Orange Boat / Ark with Animals and People for Imaginative Play. For Ages 18 months plus.
Product Dimensions: H20cm W30cm D12.5cm
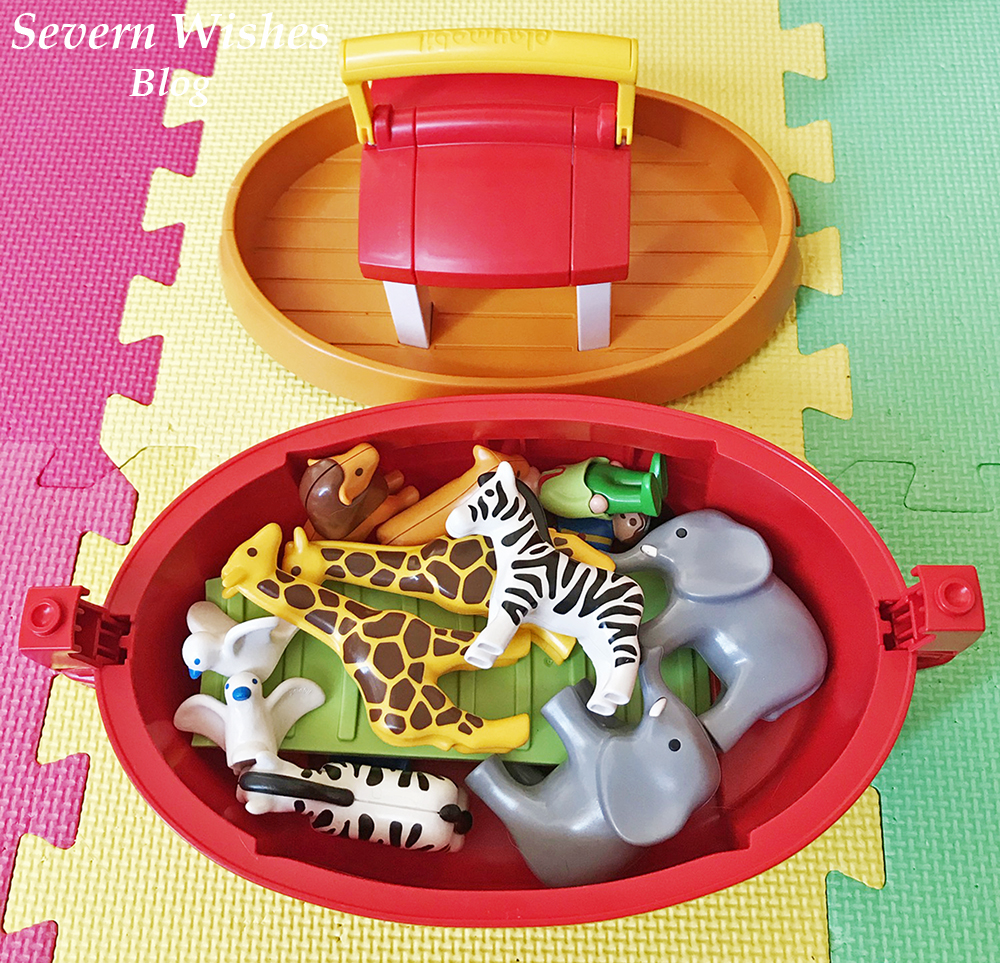
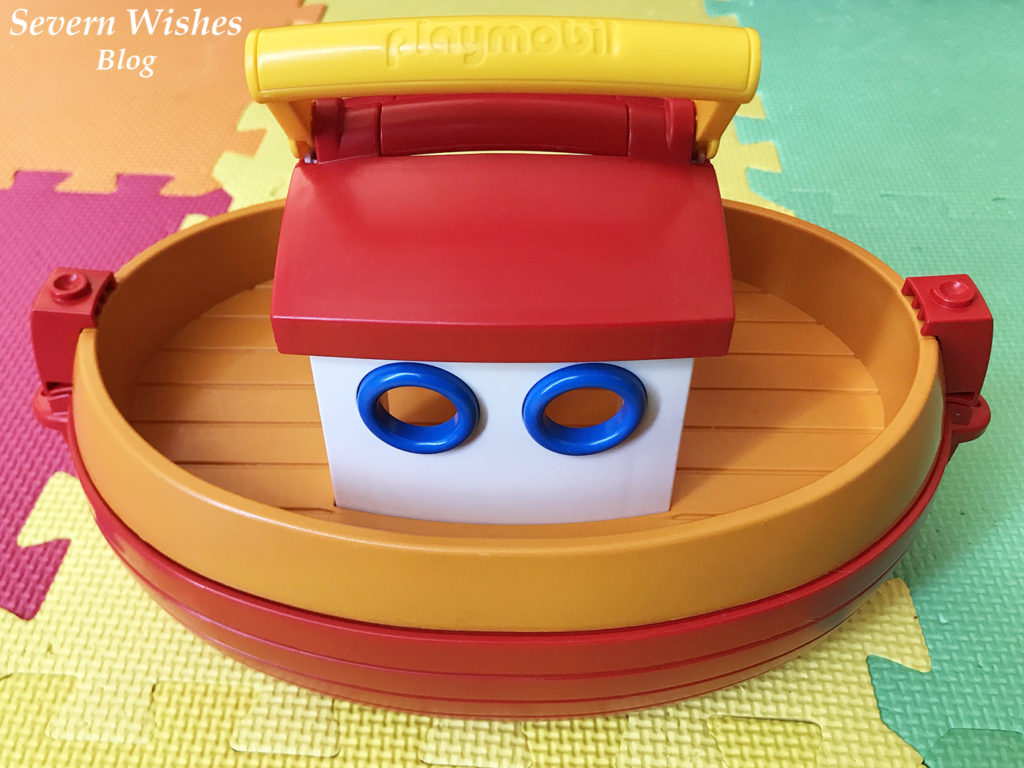
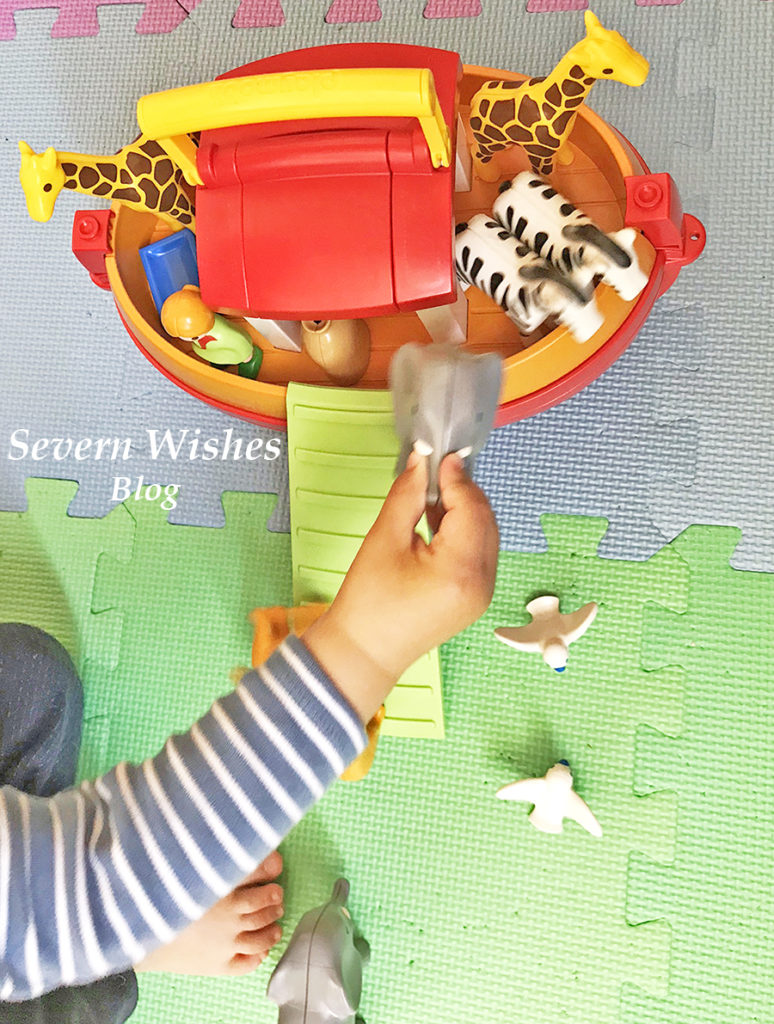
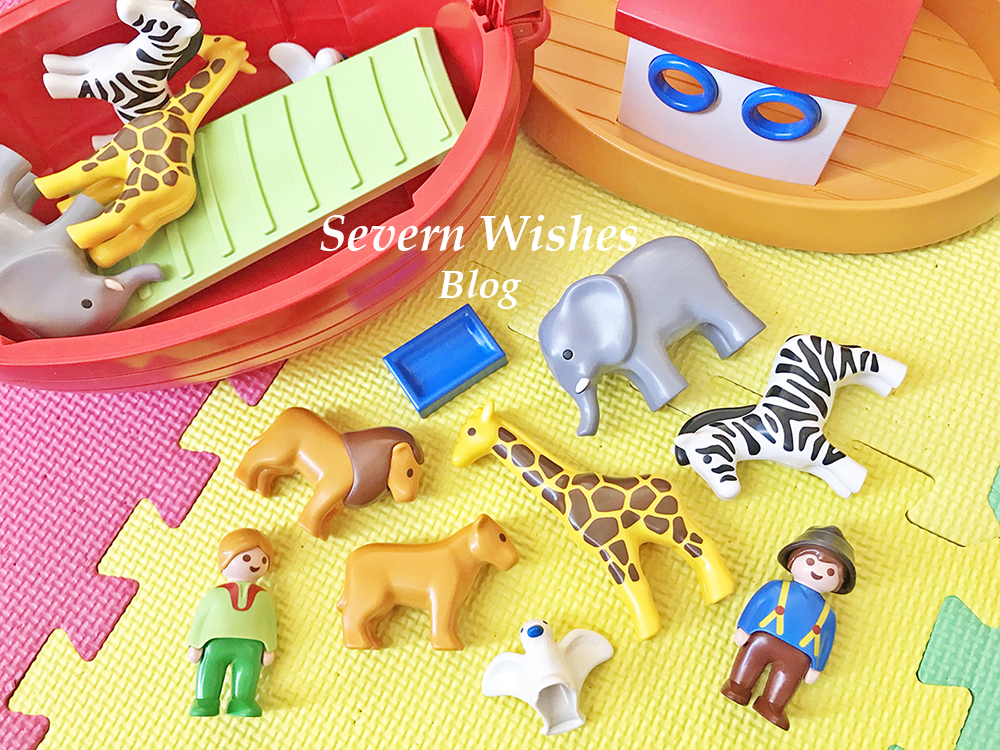
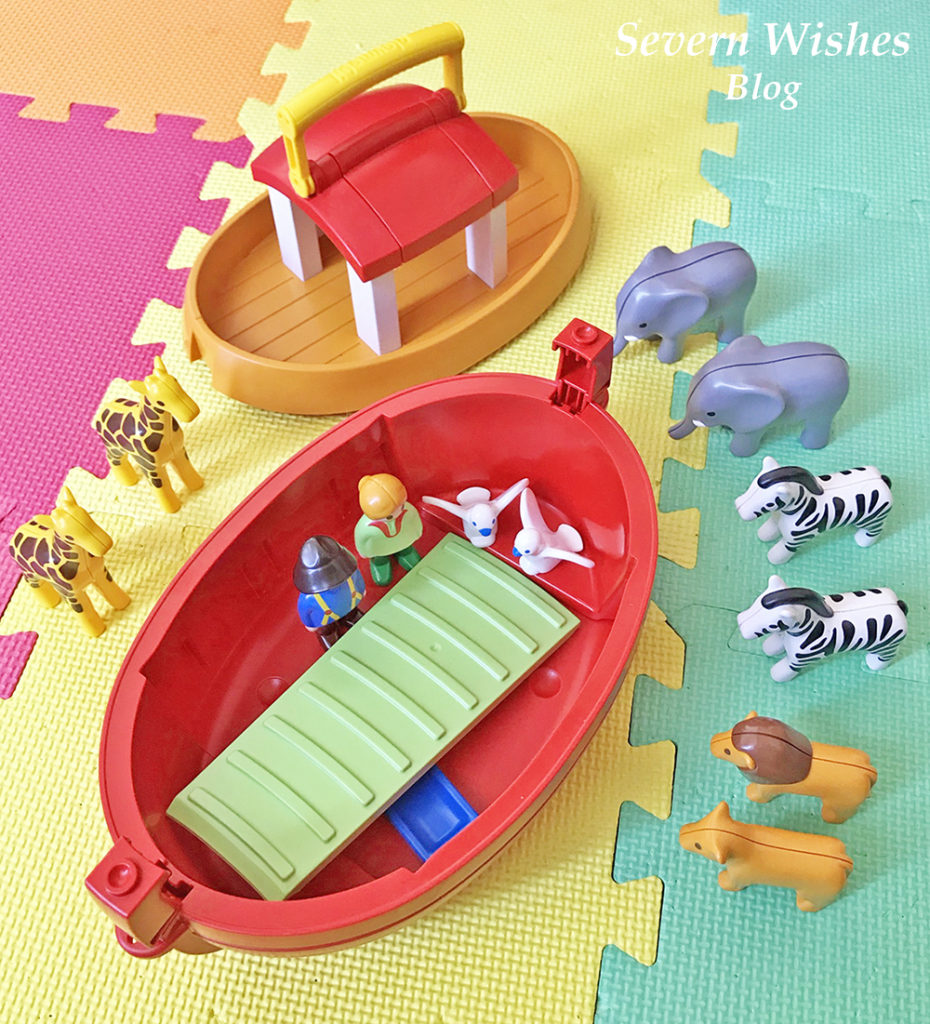
Product Description: A fantastic set for young children to learn about animals. The set includes four sets of paired animals and two birds, two people, a food bag and water trough and a ramp. The Ark itself features a top piece and a bottom half, all of the pieces fit inside it for convenient storage. The top half features a carry handle easy enough for young children to use. The Ark can be used in the bath or in a paddling pool, it does float on water but it is advised not to use it in water that has had things added to it like soap, and not to use the Ark in direct sunlight for prolonged periods of time, as this will affect the condition and colour of the toys. Two clips, one at either end of the boat, hold the two pieces in place, they are quite tight so it is advised to supervise your child when they want to play with this toy.
Argos Website Price: £30.00 (Price Correct as of 24th April 2021).
My Son and his Reactions
I got my son to help me with this review, his reaction to the toy allowed me to give a more detailed review. He instantly loved the animals, they were a nice size for him to hold and he was happy that they came in pairs too. He is a little too young to understand the “Two by Two” Scenario but he liked how he could place the pairs together on his play mats and then move them on to the boat. With my help we managed to get all of them on to the top deck with clever positioning! He loved to pick it up by the carry handle and it got easily transported around our home.My son couldn’t open the locks at either end of the boat, they were stiff, but I wonder if over time and with use they will get a little easier to open. Until then I ask him if he wants the boat open or closed dependent on how he is planning to play.Overall it has been a big hit and is a beautiful and colourful set for young children to learn about animals and have imaginative play time.
My Argos Tester Review Submission
Very impressed by the overall quality of the Playmobil set. Animals are accurate in both colour & pattern & great for small hands. The Ark has nice features such as the handle for carrying, the ramp to re-enact the “two by two” scenario & the fact that all the pieces fit neatly inside for storing away when not in use. My son loves animals & really loved how he could stand these up and they wouldn’t easily fall over. A fab set that has captured imagination & also teaches children about animals.
My Overall Honest Opinion
There is a strong carry handle on the top of the Ark for children or adults to carry the set. This is a great idea in order to transport the set around the home or to a grandparents house for example. The clips on either end are strong so as the pieces don’t fall out of the Ark during transportation. But they are a bit stiff, too much for children to open up, maybe they get easier with frequent use. The accurate colourful pieces and bright vibrant boat make for fun imaginative play for children.
Having studied the pieces in detail they are beautifully made, smooth with no sharp edges or danger of any small parts. A great set for young children and great up to around the age of 5 or 6. The animals could still be used after that age however, just in other imaginative play. A fantastic set overall with lots of nice attention to details such as the lines on the Ark deck and simple decorations on the animals.
There is only one issue I have with the animals, and that is they all have a hole in one leg which would allow water inside if you were to use the set in water. I am always concerned about mould growing inside toys that are used to get wet. Therefore we will not be using this set in the bath, and instead using blue play mats to pretend that it the water.
If you are interested in finding out more about this product then please click the link above in my Product Details section to go to the Argos website.
Thank you for reading this review, have a lovely day.
Sometimes we are all guilty of spending too much time on technology, and now that the weather is improving we should all be putting down our TV remotes and phones and getting outside! (I know that you’re thinking about doing that now, as you read this blog post on a piece of tech, but please bare with me as I have some great activities you’ll want to be inspired by I’m sure!)
So where to begin! If you’re not naturally adventurous for the great outdoors it can seem a bit overwhelming! So how about we just start small! I have come up with a range of things to suit everyone, outdoorsy types and not so much! All you need to do is choose one of these to do each day during the school break or even at the Easter weekend and voila you have some outdoor fun, nature related or outdoor activity to enjoy!
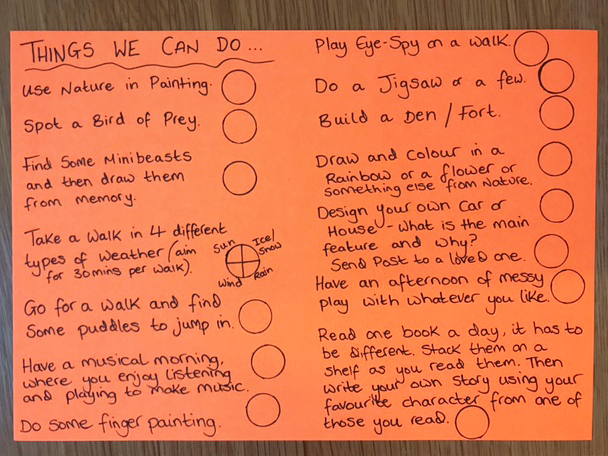
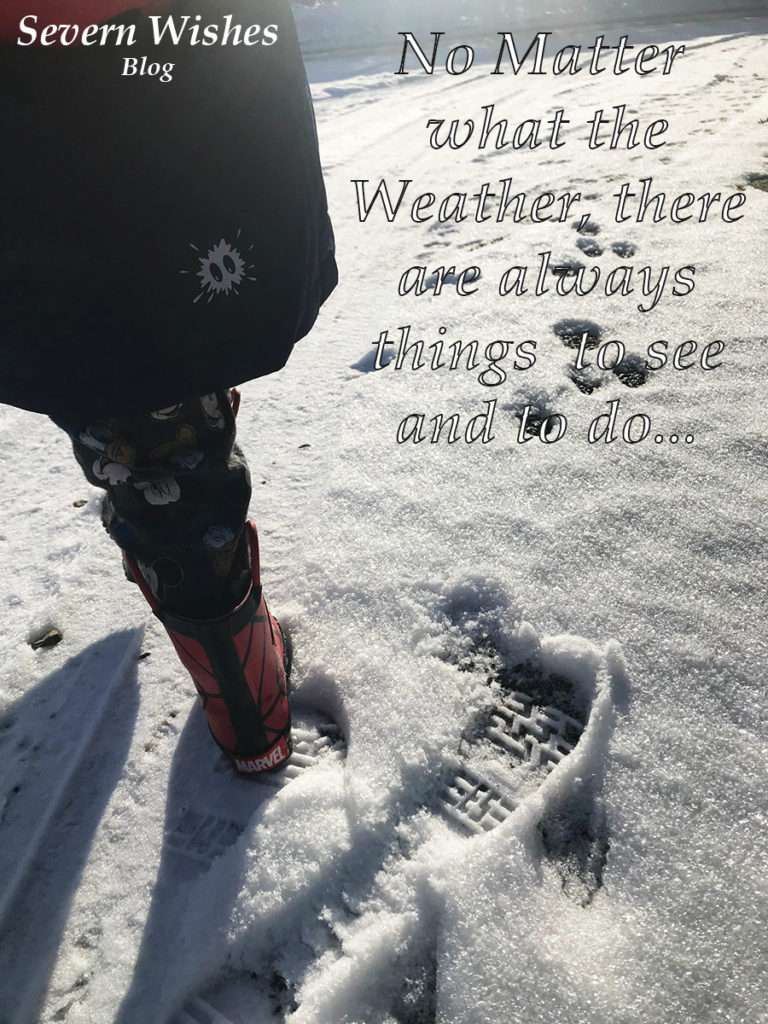
Here are my 15 “Things We Can Do” of Fun Ideas to do Indoors and Outdoors…Weather Dependent!
🥚 Use Nature in a Painting – Use sticks or leaves to paint with! 🥚Spot a Bird of Prey – Look up and see what is flying above your head! 🥚Find Some Minibeasts and Draw Them from Memory – Bugs can be colourful and interesting! 🥚Take a Walk in 4 Different Types of Weather – No matter what the weather it can be fun to take a walk!
🥚 Go For a Walk and Find Some Puddles to Jump in – Who doesn’t like jumping in a puddle! Wear wellies!
🥚 Have a Musical Morning, Listening or Playing – Music can help you relax!
🥚 Do Some Finger Painting – Draw the trunk of a tree and make the leaves with your fingers! 🥚Play Eye-Spy on a Family Walk – Eye Spy is great for a range of ages! 🥚Do a Jigsaw on a Rainy Day – Jigsaws can be a fun family activity on a rainy day or a board game!
🥚 Build a Den or Fort Together – Who doesn’t love building a den! Cushions and Throws work well!
🥚 Draw and then Colour in something you’ve seen in Nature on your Walk, a Rainbow, Tree, Flower etc
🥚 Design your own Dream Car or Dream House (for older children to imagine)
🥚 Create Post for a Loved One and Walk to a Post Box to Send it – Draw a Picture or Write a Letter
🥚 Have an Afternoon of MESS with Messy Play or Fun with Paint or Food items – Paint and Rice Crispies…
🥚 Read More! Read as a Family, decide on what your Favourite Book is and why – Books help you learn!
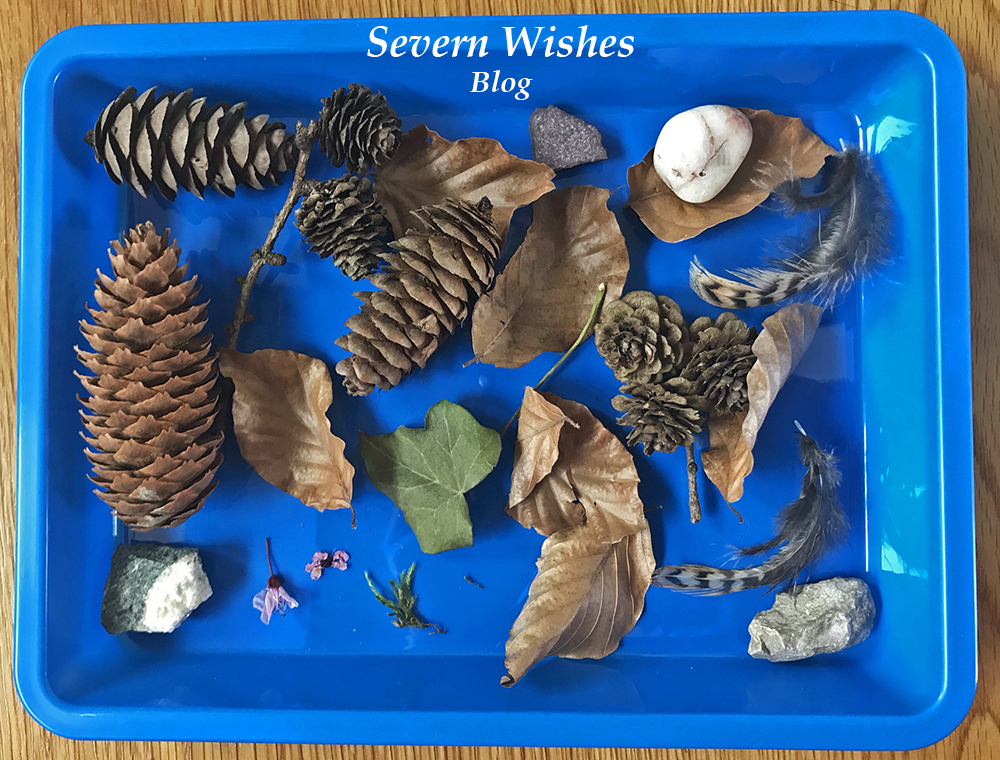
🥚 Nature Hunter Gatherers – Collect some things from in your local area to look at when you get home such as leaves and pinecones, things that have fallen from trees and bushes. Don’t deliberately destroy nature though! Fallen Leaves are great, discover what tree they come from by looking at the shape!
The image above is from when my son and I did a day of Nature Hunter Gatherers. It was a lovely warm day and we spent six hours outside having fun, games and walking. This activity is great for learning about where things come from such as pinecones and feathers. Make sure you do this on a dry day. We took a long walk through our village and picked up things that we found on the ground. Leave them somewhere cool and dry for a few days to dry out and make sure there are no creatures living in them before you handle them again!
I highly recommend getting some coloured trays like these, they were only £3 for a pack of 3 from The Works. Perfect for both Art and Craft and collecting things too!
✩✩✩
Picking Up Litter
If your children are a little older than mine you might want to pop gloves on when you go on your walk, take a plastic bag with you, and do a litter picking up hour in your local village or town. This helps the environment and the animals and birds in your area from getting injured.
🥚 Easter Ideas 🥚
You could also do Easter themed Drawings, Colouring In and Games such as an Easter Egg Hunt in your house or garden this weekend.
Check out my previous Easter blog posts for Art and Craft ideas and Baking fun… Here…
Thank you for reading this blog post today! I hope that I have inspired you to do at least one of these activities with your own family. Let me know in the comments section or on my social media if you get up to anything fun in the next few weeks!
I am fortunate to be an Argos Tester, this means that I often get items sent to me for the purpose of an online review. I test products and take photographs of them before submitting my findings and thoughts to Argos. For February I was offered Children’s Toys. I was excited at the thought of testing something that my young son would be a huge part of, and his opinions would matter during the reviewing process.
#ArgosTester #ArgosTesters #ArgosTestersCommunity
I have written this article about a product that I have been supplied for free, in order to test and then review it. This is my experience with said product and my honest review about the product which is listed below. I have already submitted my product review to the Argos Website when this post has been published.
My Honest Opinion on the Product
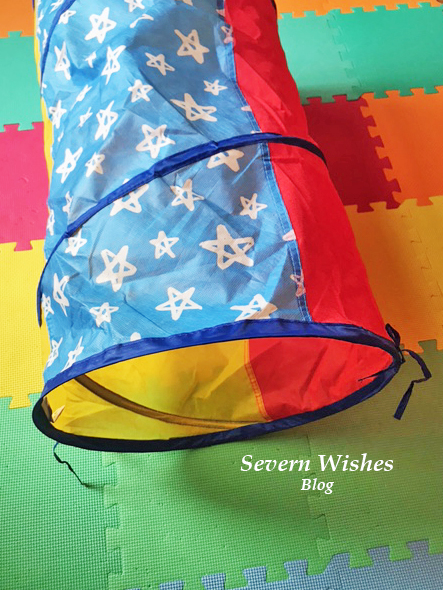
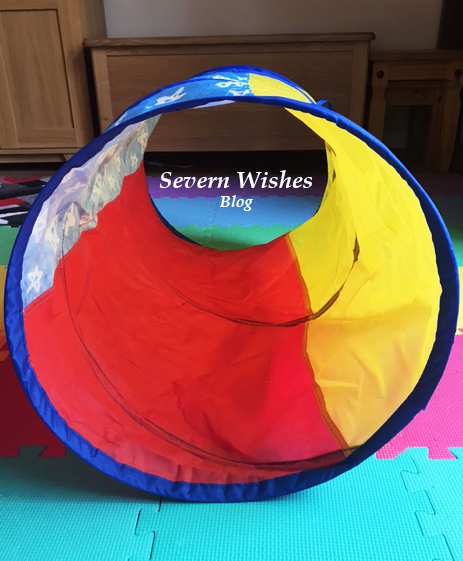
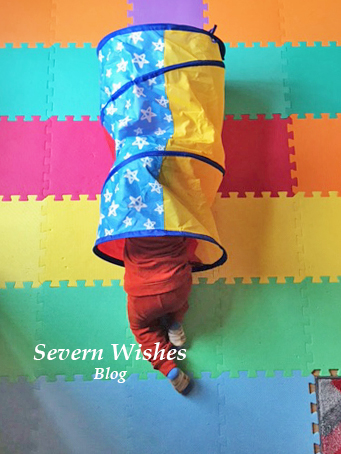
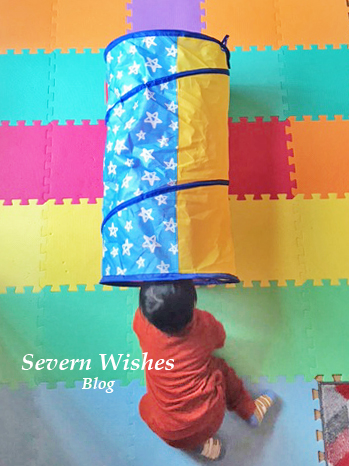
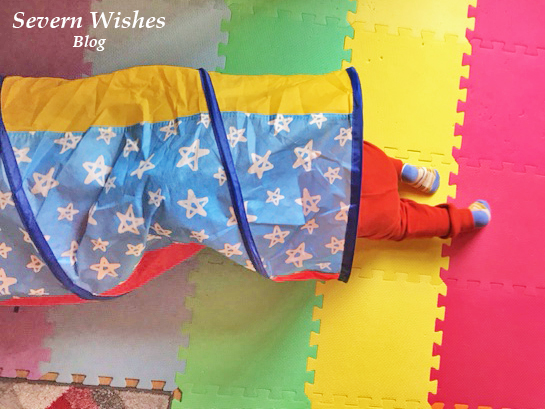
I have been rather happy with the overall look and quality of this product. The Pop Up Tunnel is something that doesn’t only entertain my toddler, but we can add learning into play and he also gets exercise indoors on poor weather days. It is bright and inviting and my son wanted to play with it immediately after I had set it up for him. I look forward to setting it up outside in the summer too on some outdoor play mats. I think it’s an excellent product for the price it is available at, and most children would have the imagination to be able to use it effectively. Because it folds away neatly it even fits into our large toy chest so it takes up no additional room. This product is ideal for any parents who may have a toddler or young child with lots of energy like mine. The best features are the ideal length (it is not too long to overtake your floor but long enough for a toddler to crawl through and have lots of fun), its bright colours and fun stars pattern, the genius tabs at either end so it can be securely fastened and put away for another day, and finally the imagination factor of it!
✩✩✩
Sabrina’s Top Tips for Using this Tunnel for Learning during Play
Once your child is used to the tunnel and is having fun with it, then there are several ways you can use it to increase learning while your child is playing. Words such as “Through” for them crawling through the tunnel is a good one, as well as “In”, “Out” and “Under”. You can also name the various Colours such as “Red”, “Yellow” and “Blue” and the “Stars” on the pattern too. See if your toddler can indicate which is which and say them back.
✩✩✩
Usage of the Product
The tunnel is made from material that is not waterproof, and is only wipe clean, so it is best used indoors and on a soft surface such as carpet, a rug or play mats. Keep food and drink away from it in my opinion. It will move around and slip easily on a wooden floor so perhaps look at where is safest in your home to set it up. Always supervise your child or children when using toys. The tunnel can be used outdoors in dry weather but I would suggest it was still set up on play mats still to avoid the material getting torn by anything sharp or pointed.
Product Name: Chad Valley Bright Stars Pop Up Play Tunnel
Product Details: A Red, Yellow and Blue Tunnel with White Stars. Ideal for children aged 2 years and over. Pop Up means it has minimal assembly required and also folds away neatly using the tabs at either end to secure and store reasonably flat. It is advisable to supervise children at all times while using this toy tunnel and to keep any sharp toys or furniture away from the material to prolong use. It can be used indoors or outdoors, but should only really be used on a flat and soft surface indoors, ideally set up on play mats or carpet. Due to the nature of the material it should be stored appropriately. Play Mats that can be set up outdoors is also a good idea when planning to use this outside because this tunnel is not waterproof.
Product Dimensions: H42cm W80cm D42cm
Product Description: Ideal for bringing children into a world of imagination. This tunnel can be anything they want it to be, and you can also use it with other items such as when children want to build a den for example. A tunnel to a secret dinosaur world, a secret passageway out into the world of spies… this can be whatever your child can dream up.
Argos Website Price: £8.00 (Correct as of 14th February 2021)
My Argos Tester Review Submission
My son was over the moon with this bright & fun tunnel he loves anything with stars on. It took no time to set up & easily packed away again, tabs either end secure it together almost flat so storage is no issue when not in use. A lovely item filled with possibilities with a bit of imagination, good for learning, teaching & great exercise on days we can’t get out of the house.
If you are interested in finding out more about this product then please click the link above in my Product Details section to go to the Argos website.
Thank you for reading this review, have a lovely day.
There are many ways to introduce toddlers and young children to nature. No matter where you live there will always be something to see. So here are my top tips on how you can start showing off the nature where you live, to your children. It’s never too early to start learning!
And I am sure that David Attenborough would agree with me when I say that “You’re never too young or too old to learn about the world around you”.
By making things fun children are more likely to learn and remember the information you are portraying.You can still stay safe at home but enjoy nature around where you live by keeping to social distancing guidelines.
Here are my Top 5 things to do at Home but Outside! Be it in your Garden or if you don’t have one you could just go on a Walk around your village or town or park. It may be lockdown but that doesn’t stop you walking socially distanced from other families.
Children are more likely to learn and listen if you turn things into fun and a game. So why not make your own games up, or take a look at my ideas below.
1. Bird Spotting 2. Bug Finding 3. Pick a Creature – Try To Find It 4. What Is That I See? What Is Around My Home 5. Eye Spy Lockdown Edition
1. Bird Spotting is easy enough to do, take a notepad and pen with you and write everyone’s names at the top. Make columns down the page and write down every different sort of bird that you spot. The person who spots the most species of birds is the winner!
2. Bug Finding is great fun in a small space, depending on how old your children are you could just spot basic bugs and say things like “Beetle” or “Spider” or you can go into what type of bug you are looking at such as “Stag Beetle” etc. You could even ask little ones to draw what they saw on the walk from their memory when you get back home.
3. Pick a Creature is a great game to play with children who already know what certain animals are. Take a walk and get everyone to pick something, one person might count Crows, the other Cats, another Pigeons, but whatever it is they have to keep score of their creature until you get home.
4. What is that I see? Use your knowledge of things around where you live and discuss things with your children like the seasons, if there are evergreen trees, what colour the flowers are you can find, any buildings and their purpose etc.
5. Eye Spy Lockdown Edition is literally eye spy but your children are only allowed to pick one type of thing during your walk. You could say just birds, or just objects, whatever is best for your children’s age.
Books I Recommend
I recently invested in several books for my son who is two and a half. He is interested in matching things up lately so I thought books with pictures of things to spot when we go out for a walk are ideal. I also have a number of nature books I have collected over my lifetime, anything with large pictures and easy to see nature depicting scenes are engaging for most children.
“Usborne Minis” are Great little books ideal to carry with you on a walk, and they have a range so you could pick which is most relevant to you and where you live, for example Birds, Trees or Bugs. There are always National Trust books and also RSPB for birds. Another great book I own is the DK Pocket Nature Wildlife of Britain book, it’s a few years old now but has excellent photography and information about British wildlife.
Of course you can always use a search engine on your phone to find out what you’ve seen, but the joy of these sorts of books is being able to mark things off when you have spotted them. The Usborne Mini book set have stickers for you to place on a grid inside the book in order to tick them off. This is great because you also have to identify the sticker as well as the creature or tree for example. Simple but it’s still learning at its best.
Thank you for reading this post today, I hope I have inspired you to get out and about in your area with your children (or just your other half). I have many more lockdown friendly ideas coming up over the next few weeks, so please check back another time if you enjoyed this post.
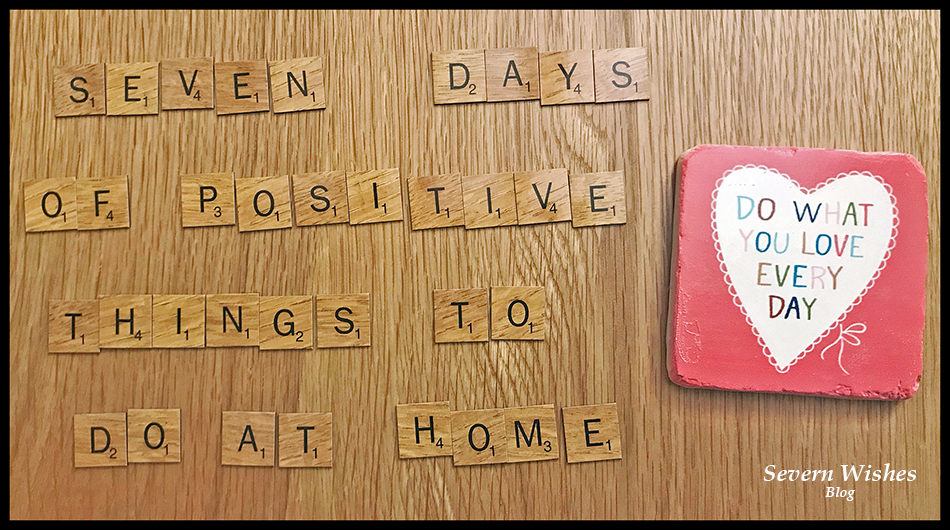
Sabrina’s Top Tips for having a more Positive 7 Days
Everyone seems to be feeling a bit low lately, it’s bound to be the Winter Blues mixed in with everything to do with the Pandemic. There are so many people who have found themselves working from home again, and many young people who are studying at home again too. With all this time stuck at home there are lots of anxious feelings and negativity, so I’m here with some suggestions to try and put a positive spin back into your home environment!
So here is my solution to tackle the blues, try to take half an hour out of your day as a family unit, every afternoon for the next week, after work is over and after the schooling is done for the day. Pick one of these ideas of mine to do together, a different one every day in any order you like.
I guarantee they will have you feeling more positive by the end of day 7! You can do them in any order you like! Or do one of them twice if it’s a hit! If you play along please comment on this post or on my socials at the end of the week and tell me which activity your family preferred and whether these activities did in fact work for you and increase your family’s positive attitudes.
Go for a Walk (Weather Dependent) and play a game as you go! Ideal for parents with younger children who are still enthralled by the nature of “eye spy”. But the fresh air and endorphins combined should make all of you feel better too. Older children may want to go for a jog or a bike ride if that’s more your thing, so long as it’s half an hour outdoors with your family, all together.
Watch a Funny TV Show or Cartoon. Laugher really can help you to feel better, even for a brief moment, so why not stick on a tv show or a favourite cartoon that never failed to make you laugh and giggle together. Tom and Jerry is a good one!
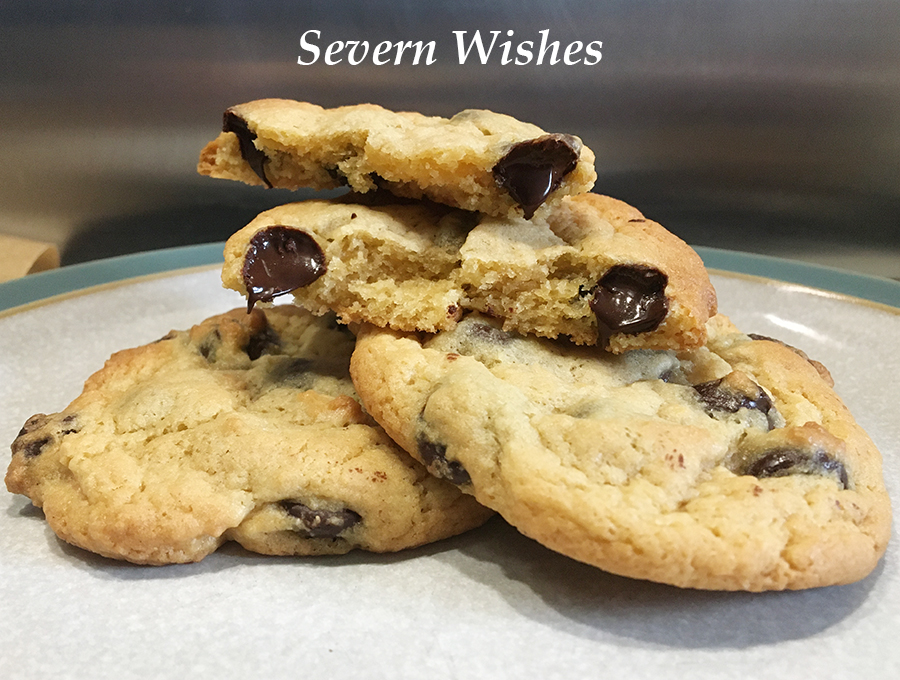
Bake or Make Something Delicious! I have a ton of recipes on my blog and some don’t even take that long to do. So why not make some chocolate crispy cakes or even some rocky road, something simple and even something that doesn’t require baking to save you time! Then you’ll have a tasty treat for a few afternoons to come! See what you’ve got in the cupboard! Here is my baking section HERE.
Get Creative. You can do one of two things with this creative activity depending upon the age of the people in your household. Either, do a rotating draw-off where by you each start with a piece of A4 paper and one coloured pen (all varying colours) and you keep rotating the papers every minute, do this until 4 minutes is up. Everyone should’ve drawn on each of the pieces of paper. No talking! See what you’ve come up with! Share them with me on social media! #SabrinasCreativeCrafts OR You can play the Sentences Game. The idea is to make up a creative story, it should be funny, and you once again rotate the papers. This time you want long strips and not A4. Cut a vertical A4 in half twice or get your strips. Once the first minute is up and the first sentence has been written, you all fold over the section and pass it on. When the time is up you each open up the papers to find a story.
For example; There once was a man who couldn’t find his shoes. I think I want some KFC he thought. He headed off in the direction of the sunset. In the end his dog ran away and joined the circus.
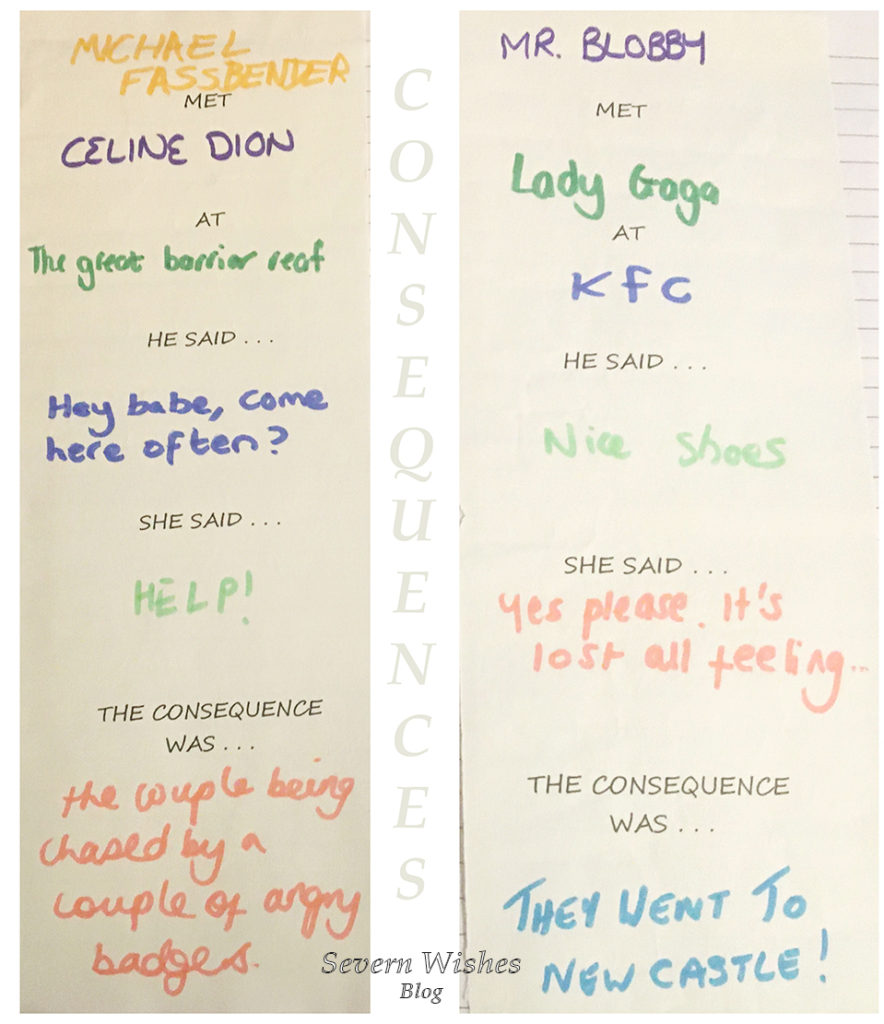
If you have teenagers then you could play the game another way, this is called CONSEQUENCES, you start by writing on each of the papers the following things, add extra if you have a large family so that everyone will get a go at each section when the papers are passed on. They usually go like this… ___ Met ___ At ___ They said ___ What happened next was ___ OR The Consequence was ___
Then unroll it after everyone has had their turn and the sections are completed, then take turns in reading them out. See my photo below this list for an idea of what it would look like when you finished! Warning my examples may cause laughter!
Photos! Another fun thing that would brighten your spirits is to look back at any photo albums that you have or digital slideshows. You could even play a game while you look through them. Every time that your mum is seen with sunglasses on she gets a point, each time someone hasn’t got their hat on when they should you lose a point! First person to spot the water in the photos gets a point. Etc etc! Make up some rules before you start and say that the first person to 10 points gets out of doing the washing up tonight! Or the winner chooses what’s for dinner the next night! Involve one another in every day things.
Write a List of Goals and Aspirations for 2021 – but only write the do-able ones! For example, I want to bake a cake for mums birthday. OR I would like to walk a mile on the next weekend that is dry and sunny. When you achieve something, even if it’s a little thing, you feel so much better about having accomplished it. Setting some realistic goals now for the year might seem silly when we don’t know what’s around the corner, however even if the goals are just for the people in your bubble, it’s still doable. Put them up on your fridge or board and tick yours off when you have completed it.
Make a Meal Together. No matter how old you all are there is something fun about making dinner together. May I suggest something that everyone can get stuck into such as Fajitas, Curry, Sausages and Mash or Lasagne (dietary requirements permitting). I have tons of recipes on my blog if you need inspiring! But making and preparing food together before you eat it can be a real bonding experience, and it can also be important for teaching younger children where foods come from or that by mixing this with that you achieve this outcome. Food is something that has been so important during the first lockdowns so I thought I would continue on with that and try and get you back into your kitchen to make something you love together. Check out my Recipes HERE.
Why Not Try And Make My Delicious Cookies? Click the link in section 3 for the recipe!
The Consequences Game – Imaginative Fun for the older children in your family.
I really hope that you’ve enjoyed this blog post and that you would like to participate in my week of positivity. If you do participate in any of them or attempt to get those in your bubble to do so, then please let me know how you got on! I can’t wait to see if you make anything as well 🙂 tag me online! And thanks for joining me!
Halloween is one of those holidays where people either love it or loathe it. Whether or not you like Fancy Dress and Decorating your Home, it’s an important right of passage for your little ones to experience the fun of a Halloween.
If it’s their first Halloween then I have lots of ideas that you could achieve easily at home and make some nice memories and keepsakes to show the child when they are older.
With the pandemic still affecting us all, there are many children who would love to be trick or treating and having fun and games with their friends. It’s highly likely not to happen this Halloween 2020, however that doesn’t mean you cannot do things at home.
WHAT IS IN THIS BLOG POST… HALLOWEEN 2020
Fancy Dress Photo Shoot Fun – My Tips and Tricks
Hand and Feet Print Halloween Decorations – Fun Family Keepsakes
Halloween Games with Treats to be Found (at home) – My Lockdown Halloween Trick or Treat Ideas
Baking with Halloween Shapes – Fun Baking Tips for the Family to do together
What Else Can You Do With Halloween Baking Cutters as Stencils!
Fancy Dress Photoshoot at Home
One way in which I always like to remember a holiday event or day is to do a photo shoot. For the last two years I have dressed my son up and surrounded him with a variety of Halloween related items. I got some good photographs doing this at home that I can treasure. If you set it up correctly you won’t need to pay anyone to take photographs for you.
You Will Need
A decent camera or a phone with a decent camera A camera which has a timer if you want to do a family portrait Natural light coming through a door or window is best for colours Fancy Dress items and any props that you would like to include
My Photography Tips
Natural Light is important to get clear and sharp imagery.
Use fairy lights to add depth to your image (supervised around the child/ren of course).
Props are important and make sure you arrange them so they can be seen, if you’re going for a theme try and stick to it.
If you want things to be inside the frame then choose your layout carefully and keep looking through the camera lens as a guide.
A sofa or chair is ideal to sit a baby on or you could even use a ball pit or a rocker with a sheet over it to block out any unwanted branding or colours.
Set up your photo shoot before you get a baby ready otherwise they may get fed up rather quickly if you ignore them to move things around.
If you can get a large pumpkin or a cushion you can sit babies inside or on top, just make sure to always have their necks supported!
If you can’t pull off a Photoshoot then why not use some Free Filters on some Photo Apps. Some of them are highly detailed. We did one to show you just how cool! And if you have older children they might be more interested in that too!
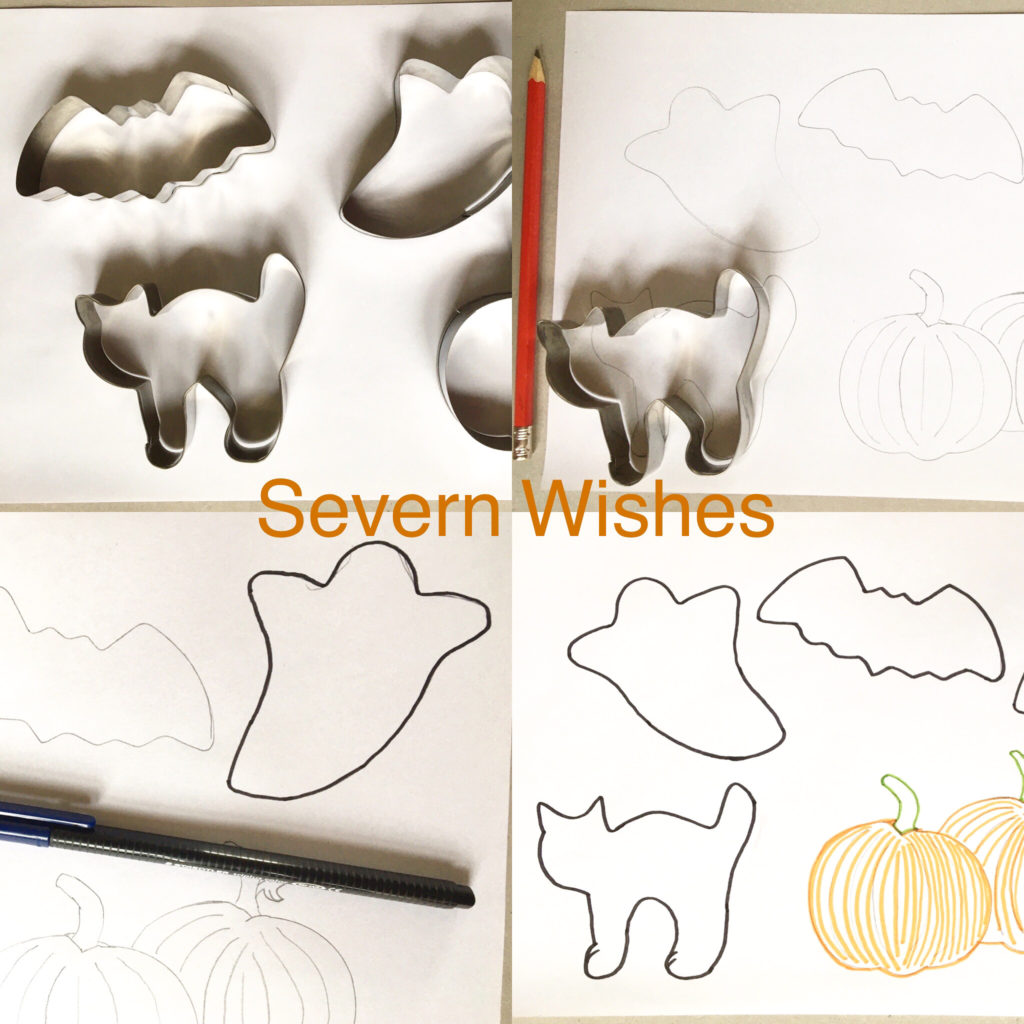
4 WAYS TO USE HALLOWEEN BAKING CUTTERS AS STENCILS
I’m not very good at drawing so using these cutters as outlines was a great idea for me! If you can draw well you won’t need to do this! Ha! Ha!
Halloween Decorations
Halloween Posters
Halloween Colouring In
Halloween Baking
I drew around the shapes and outlined them in pen, then let my child colour it in.
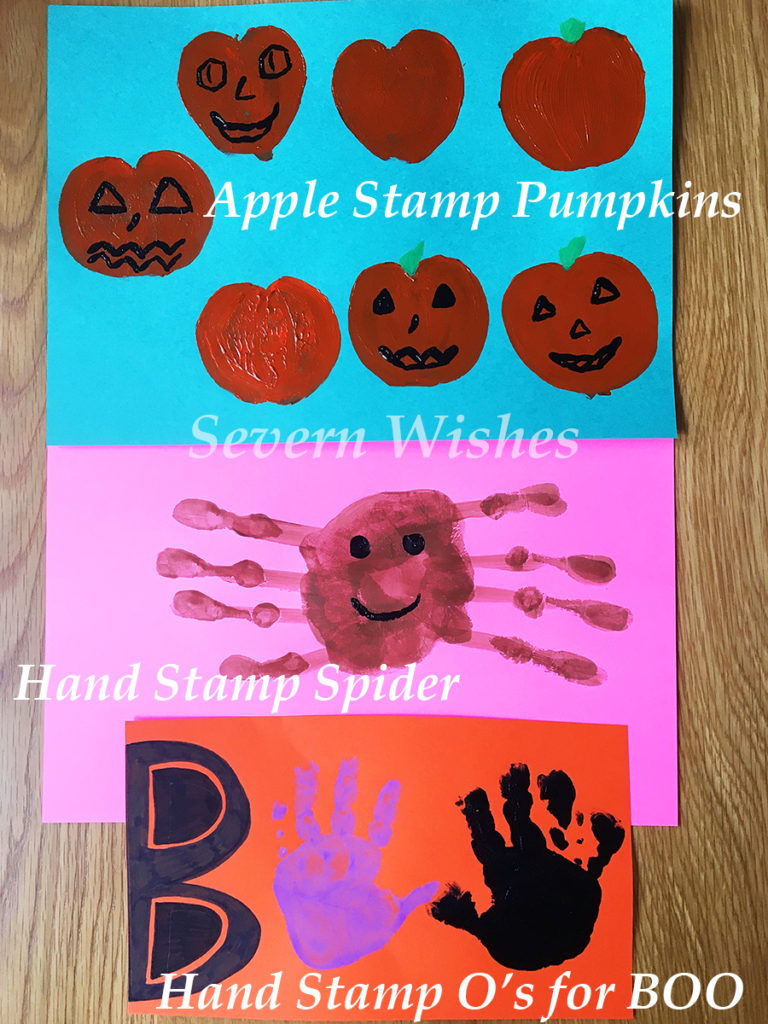
Halloween Decorations
Making Halloween Decorations is easier than you think! So long as you have got some card and some paint. There are tons of ways you can make nice posters or decorations. Here is how I have made mine…
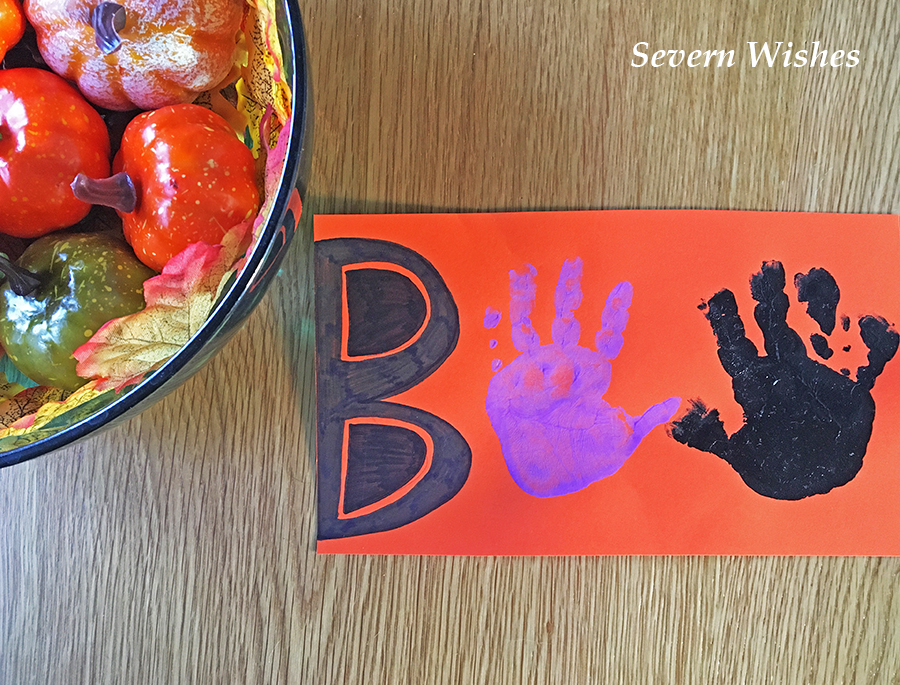
Pumpkins – Apples Halved and Dipped in Paint. Spider – Hand Prints leaving off the thumb so fingers make 8 legs. BOO – B and two hands for the O’s. Ghost – Foot Print (upside down)
I’m planning to cut out the Pumpkins once they are fully dry and hang them up against my window.
You can make a Halloween poster for your window or you can cut the items out and hang them up with string.
Trick or Treat at home won’t be the same, but it can still be fun! Check out my ideas below!
1. Make Every Room A Different Theme with a Different Sweet to Find. You can tailor them to meet the needs of your family, no choke-able sweets for little ones etc. If you don’t do Sweets you could use Numbered Fruit like Apples which result in a Toy prize if they find them all.
2. Make It A Halloween Treasure Hunt with the Treasure being Sweets! Write little clues on paper for the kids to follow. Create traps and fun obstacles for them to overcome, riddles and rhyming works well too! “Where you Sleep, Often Deep, Beneath the Covers is what you Seek!” things like that, E.G Under their bed covers is a Sweet or another Clue.
3. Use A Dice And Clues to Make a Halloween Game of your Own! Using how many rooms you have and how many children, you can send each child off to a room where they have to either complete a task or seek and find the next clue, which once put together with their siblings answers, will reveal their bounty of Treats! E.G Two Siblings, they each find a clue on paper, one reads KITC and the other HEN and when put together they go to the KITCHEN for the next clue etc.
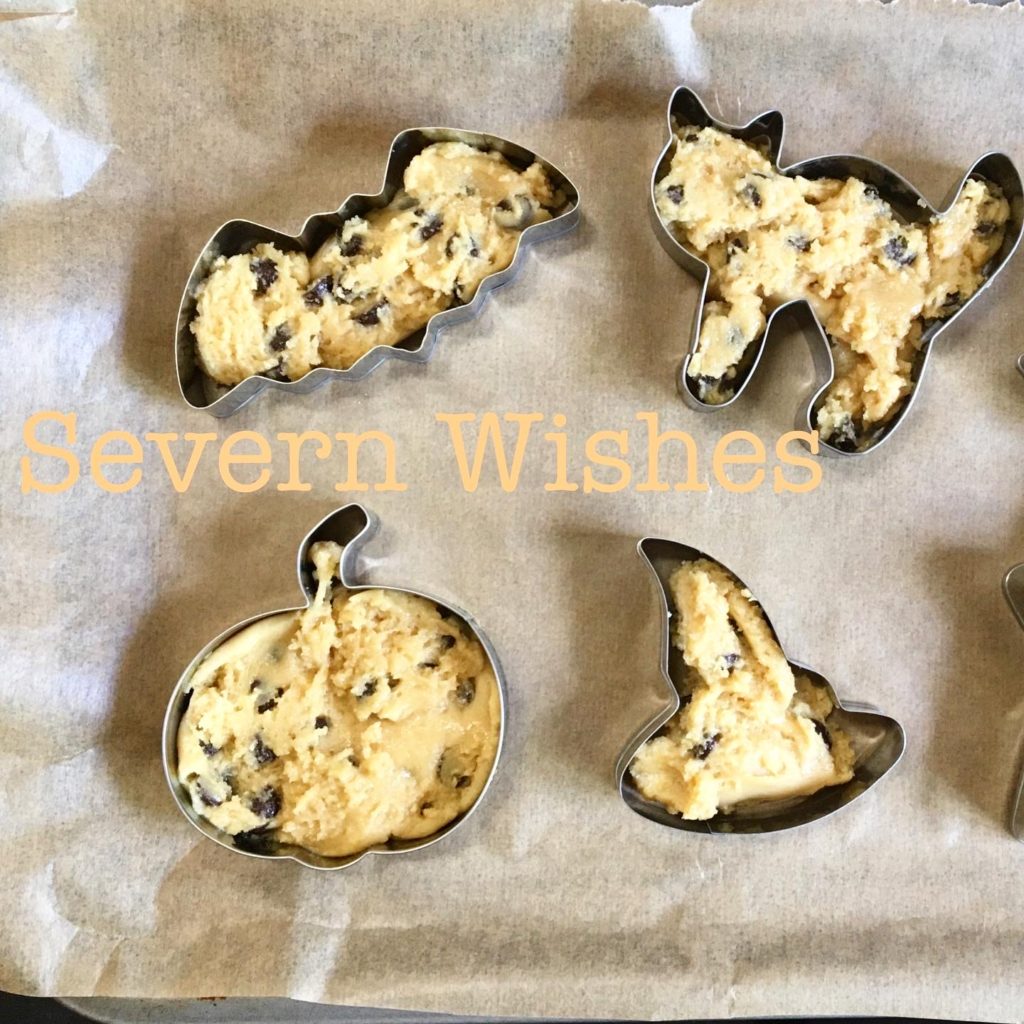
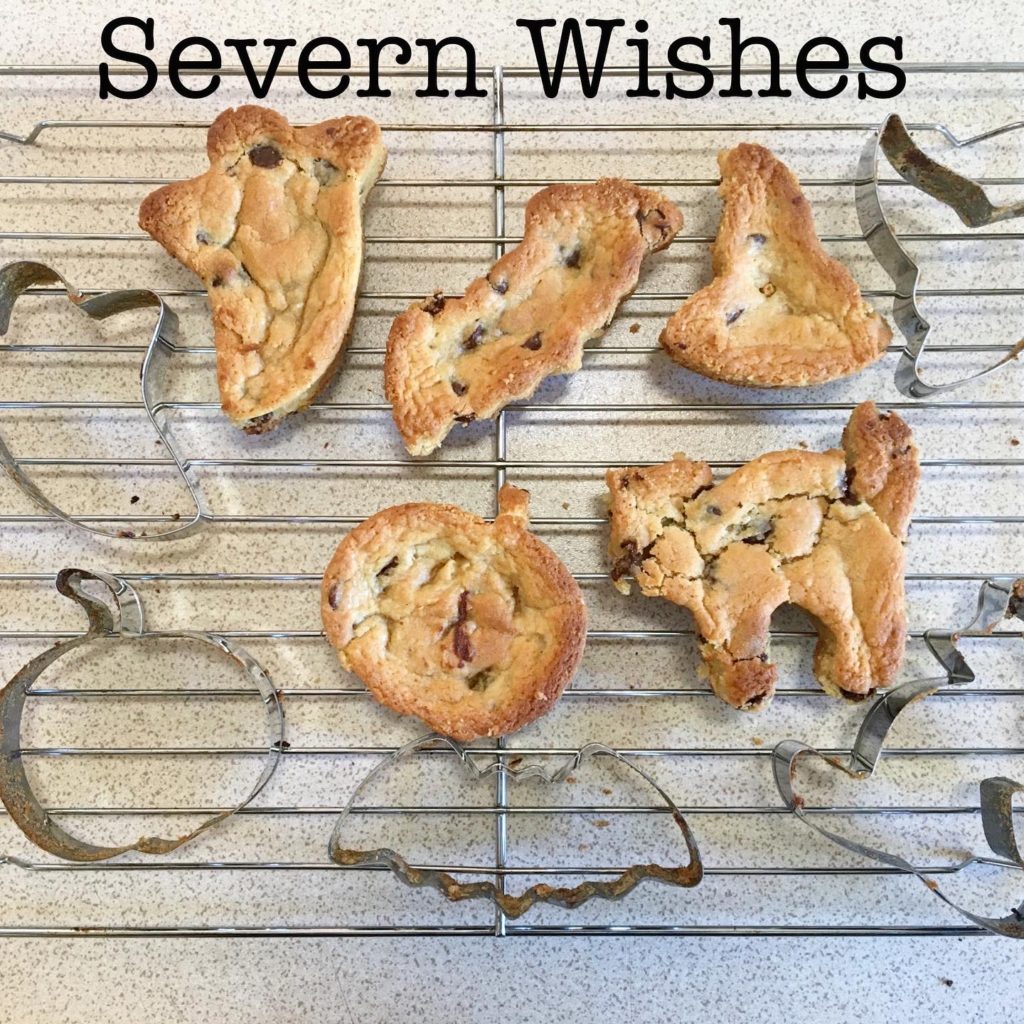
HALLOWEEN BAKING
I have done some step by step baking videos on my Halloween cookie baking and these are available to watch on my Facebook page, I will drop you the link here Severn Wishes on Facebook.
You can use my Cookie Recipe or a Shortbread Recipe to make these awesome Halloween shaped treats!
I bought the set of cookie cutters off Amazon, if you would like the link to those then here that is… Amazon
I always do a Seasonal Bowl on my Dining Table. It is all Autumnal now!
Thank you so much for checking out this blog post today!
Please tag me over on Facebook on my page if you try and of my Halloween things! Baking, Craft or Decorations!
If you like my trick or treat at home ideas, let me know if you use them over the weekend too!
Have a great week at home everyone! Stay safe!
✩ Sabrina ✩
By continuing to use the site, you agree to the use of cookies. more information
The cookie settings on this website are set to "allow cookies" to give you the best browsing experience possible. If you continue to use this website without changing your cookie settings or you click "Accept" below then you are consenting to this.