Sabrina is a Lifestyle, Parenting and Product Review Blogger. A Writer, Photographer, Reviewer, Home Cook, Crafter & Nature Enthusiast. You will find a bit of all those categories here on Severn Wishes Blog, Welcome to Sabrina's Lifestyle Blogging & Honest Reviews.
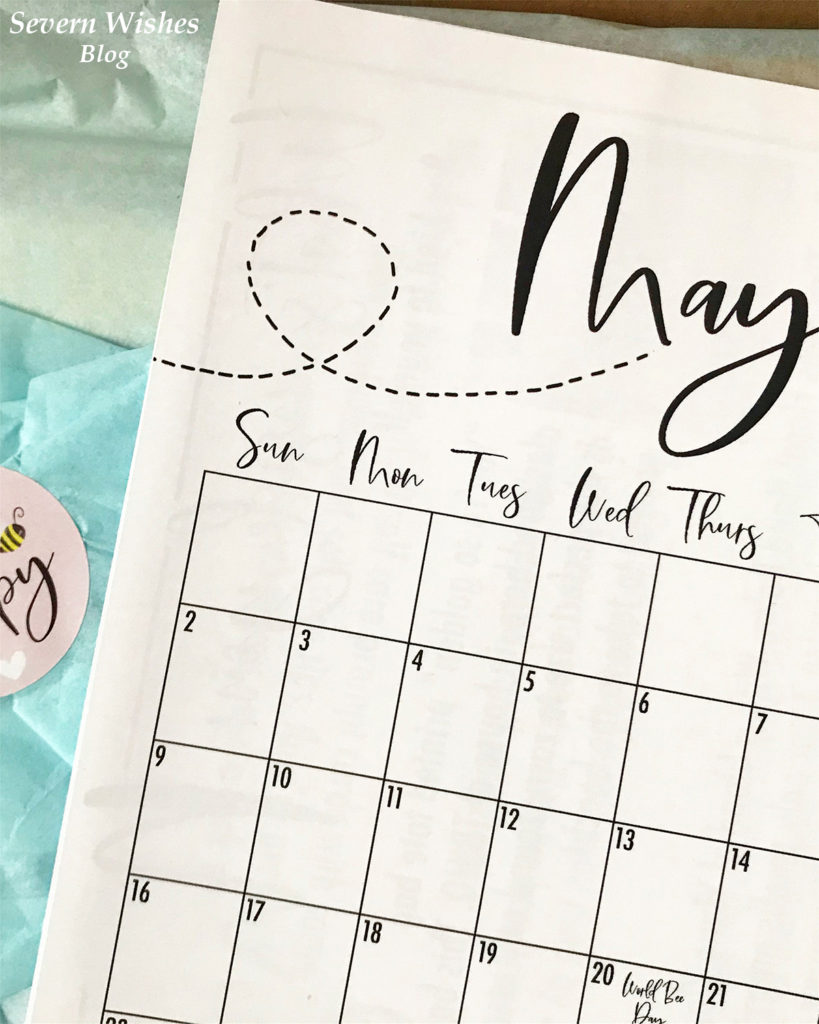
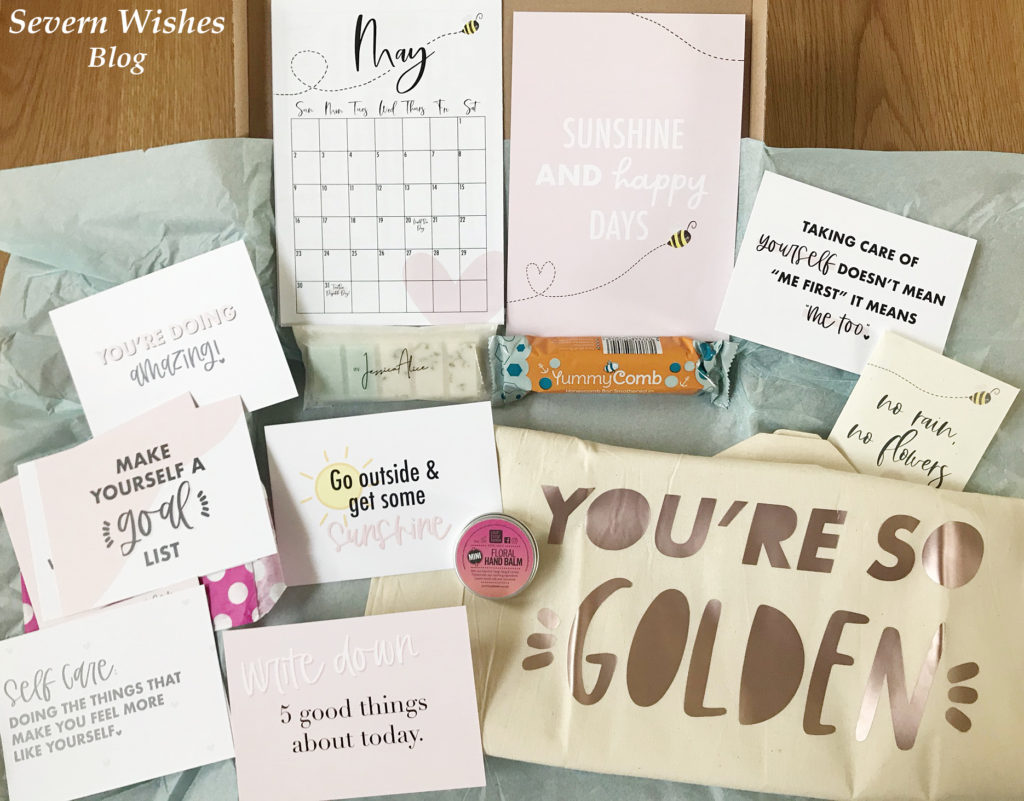
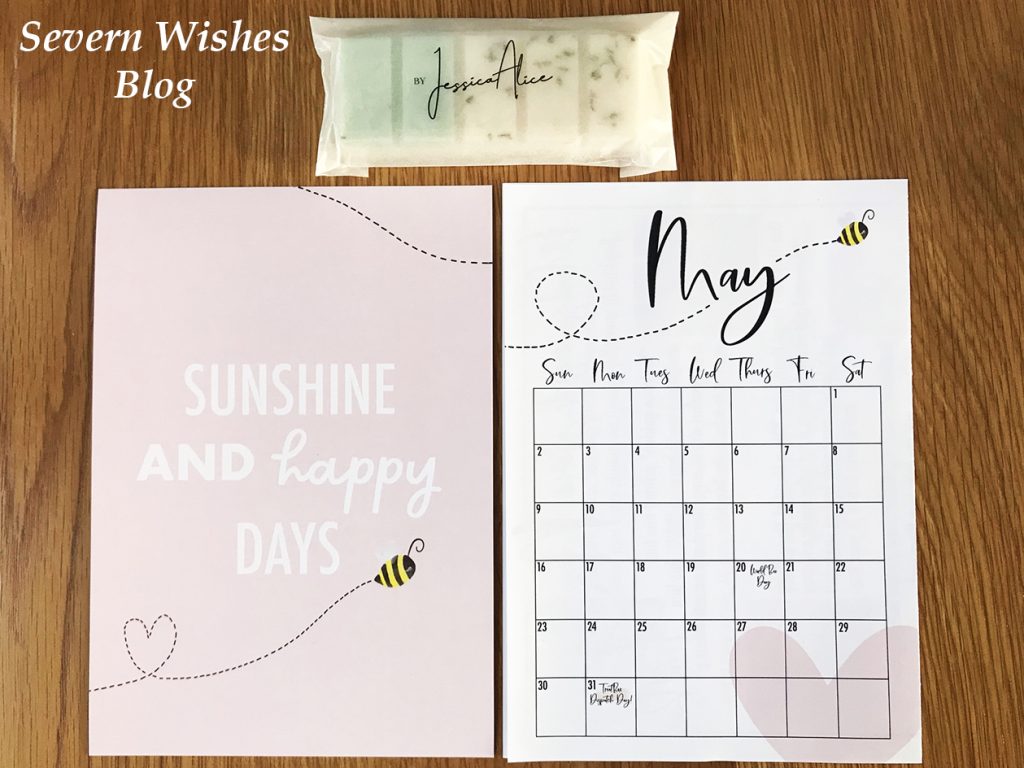
✩ My Opinion of the May Box Contents ✩ What I really liked this time around were the themed products and how most of them were handbag size. Most were Vegan and Cruelty Free as well. I am looking forward to enjoying the honeycomb chocolate on a day that my son is away (as it contains dairy and he has allergies). And the Wax Melts smell lovely! They are currently making my lounge smell beautiful without even the need to melt them, it smells so strong through the packaging and such a Spring like scent!
The bag is so cool! Cannot believe you’re now doing things like this in house at Treatbox HQ! They look amazing! The hand cream is lovely and smells nice.
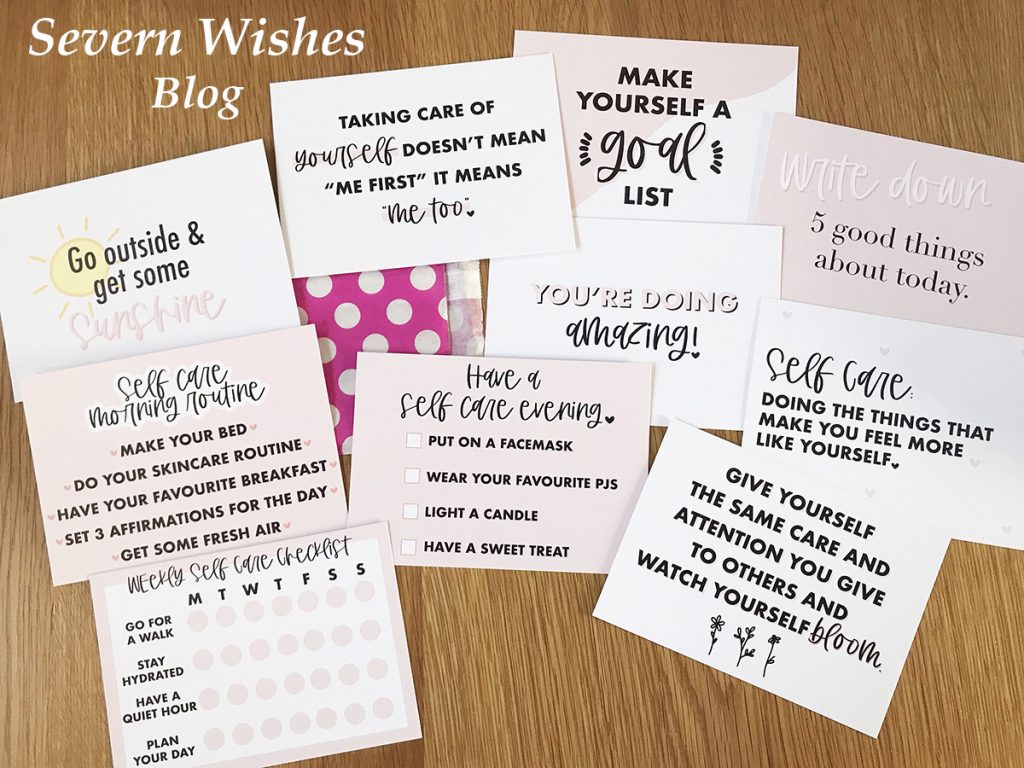
Love the Bee theme! The Print and the Cards are all lovely and very well appreciated during this difficult time. It’s nice to get little reminders to look after yourself. As a single mum some days I might not get another adult conversation and I am often busy and tired. Treatbox is a little pick me up which contains even more little bits and bobs to remind me that “I’m Amazing” – so thanks Treatbox!
Did you know that you can view all of my previous Treatbox unboxing posts in this unique category of mine called ‘Treatbox’ it is specifically for these box reviews and reveals – Severn Wishes Treatbox.
Thank you for joining me while I Review and Reveal this May Treatbox! If you liked it why not check out my other reviews too!Have a great remainder of May!
It’s time to Reveal the April 2021 TreatboxUK box!
I was intrigued to see what would be inside because of how much I loved the March box!
I wasn’t disappointed! The box is filled with uplifting items!
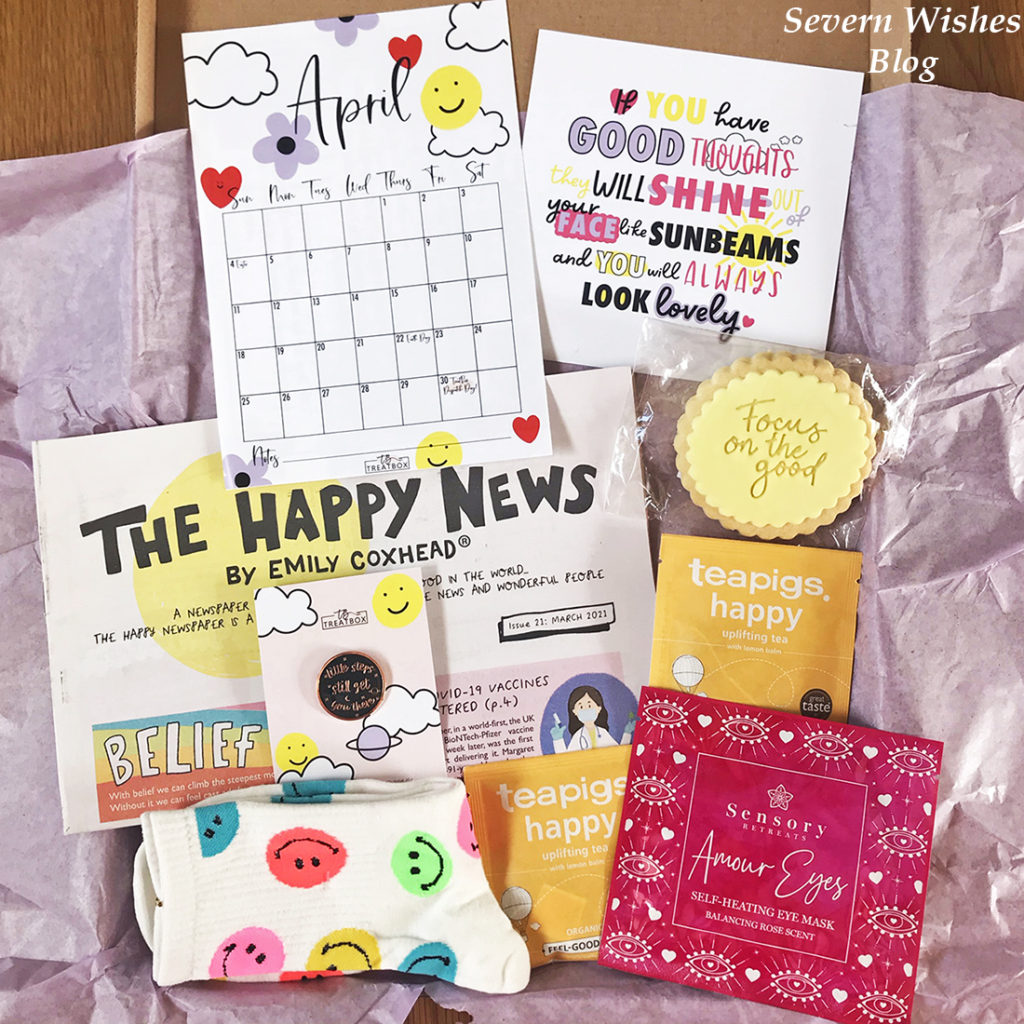
✩ What Was In The April 2021 Box? ✩
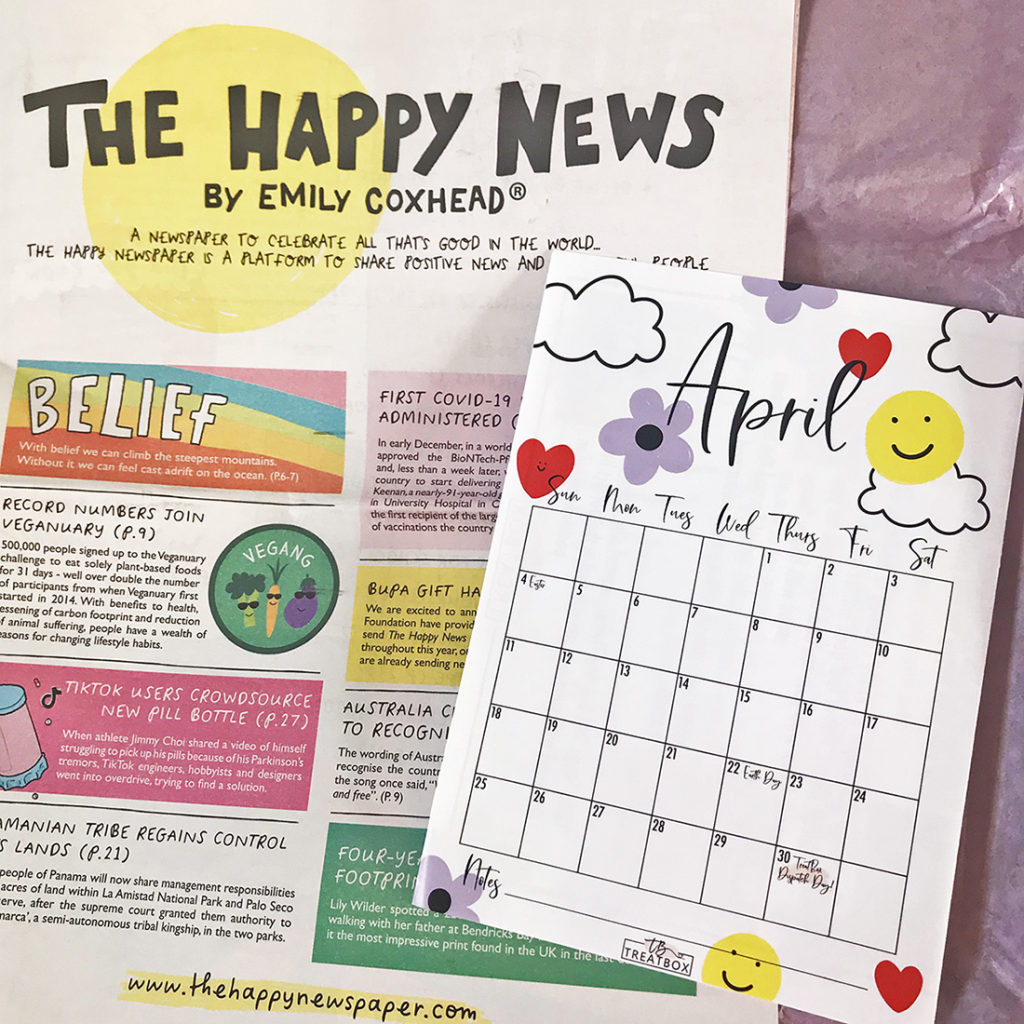
April Calendar Print
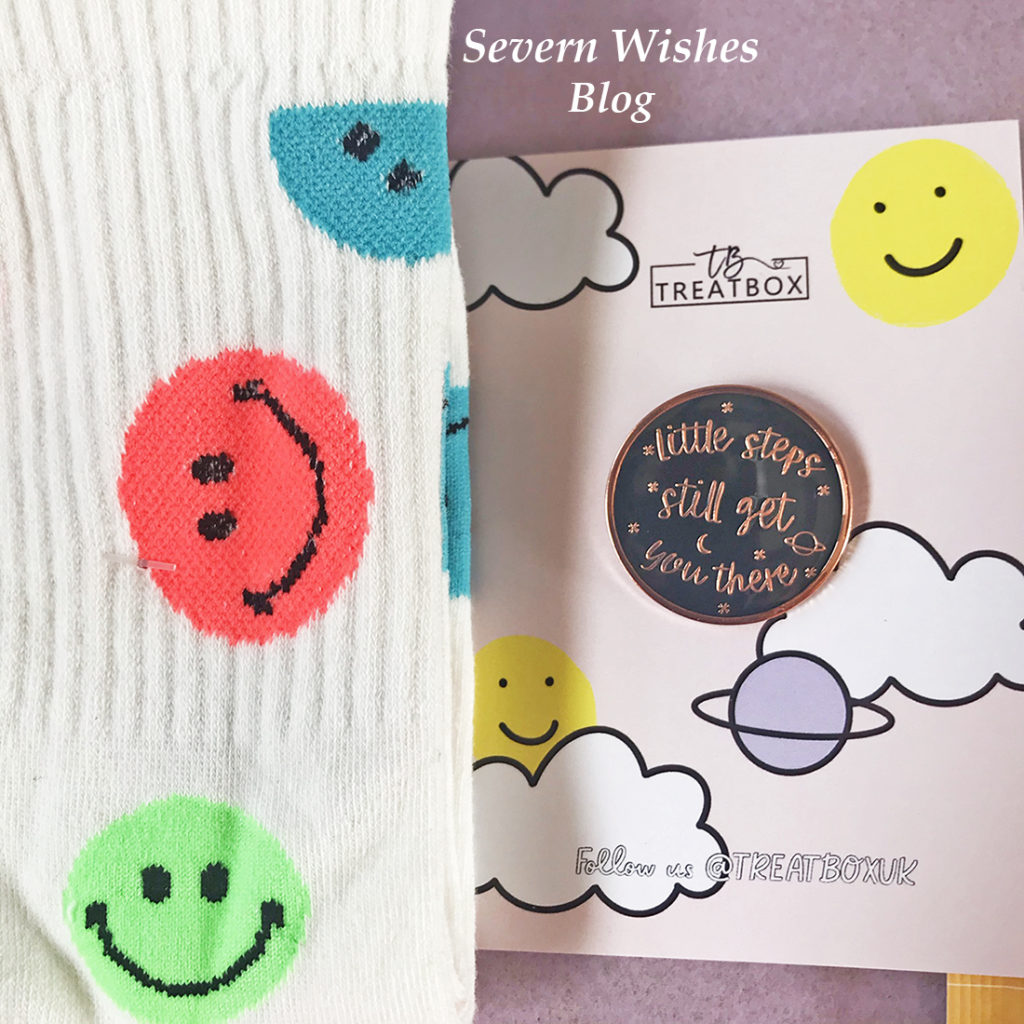
Treatbox Original Pin “Little Steps Still Get You There” Treatbox Square Print “If You have Good Thoughts they will Shine out of your Face like Sunbeams and you will Always Look Lovely”
Biscuit “Focus on the Good” Smiley Design White Ribbed Socks
teapigs Happy Tea ~ Tea Bags x 2 Lemon Balm
Sensory Retreats Amour Eyes Self Heating Eye Mask
The Happy News by Emily Coxhead~ A Newspaper filled with Positivity
✩ My Opinion of the April Box Contents ✩ What I really liked most about this box was how happy it was! The positive vibes emanated from every item. I laughed out loud when I saw the socks, they are so funny! Then I began to read the TreatboxUK originals like the Print and the Pin. They are all positive or uplifting and that makes for an overall delightfully lovely box. I look forward to eating the biscuit and drinking the uplifting tea. A Calendar Print is always handy, I am going to use mine as a meal planner for the month I think! The eye mask I will certainly use at some point in the future too!
Did you know that you can view all of my previous Treatbox unboxing posts in this unique category of mine called ‘Treatbox’ it is specifically for these box reviews and reveals – Severn Wishes Treatbox. The April 2021 was box number 61 for me!!!
Thank you for reading this Review and Reveal for the April Treatbox! If you liked it why not check out my other reviews too!Have a great Easter weekend!
With much of the United Kingdom still in lockdown and people unable to purchase their usual items for loved ones, I have decided to write this blog post to help people out. Mother’s Day is a special day for everyone who is classed as a Mummy, whether that is to furry children, human children, step children or children who may still reside inside us. It’s for Grandmothers, Nan’s and Great Grandparents too don’t forget, so why not make a loved one a card and let them know you’re thinking of them.
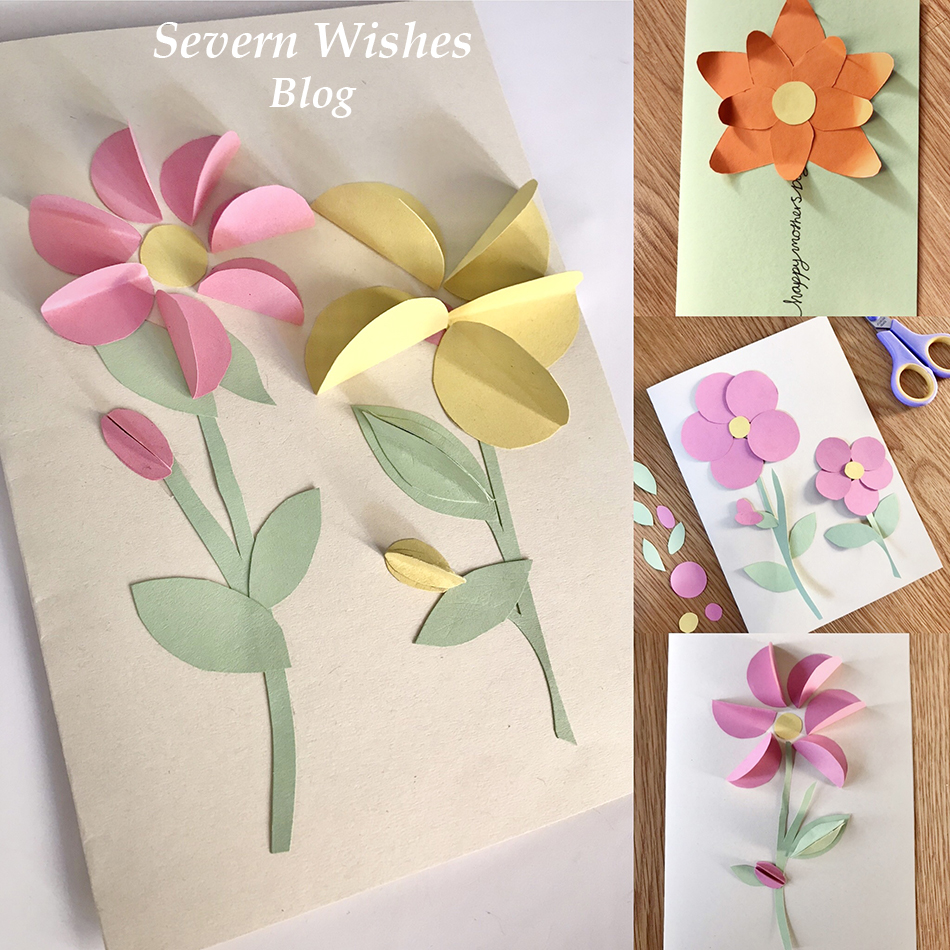
I have several ideas that should suit most people, because Mother’s Day Cards are usually floral or feminine, but you can personalise your design to fit the people in your life. If you can draw then even better! I’m not very good at drawing so I prefer to use paper and card to create pretty cards instead. This blog post is all about how I make cards using coloured card and paper.
WHAT YOU WILL NEED
Coloured Paper and Coloured Card A Pencil Items to Draw Around – to make the Circles for the Flowers Scissors Coloured Pencils or Crayons if you are Drawing Pens – Mixed Colours and Thickness Glue or Sticky Tape Ruler Coloured Tissue Paper Pipe Cleaners
HOW TO MAKE YOUR CARD – 3D FLOWERS
Step 1. Take a piece of pale coloured card and fold it in half to get your card shape. Decide if your design is going to be a landscape or portrait style.
TOP TIP 1. When you come to make your shapes maximise the paper by doing them close to one another and along one edge. It makes it easier to cut them out but also and more importantly you’re not wasting any of the paper, and the leftovers can be used on your next awesome project!
Step 2. Draw around circular items in order to make your petals. Carefully cut them out and then fold them in half to create your three dimensional petals.
TOP TIP 2. The ideal size for the petals for an A4 Card design (an A5 when it is folded) are the size of a Nail Varnish bottle. Draw around the base of the bottle when it is stood up on the card. Another tip is to cut out one shape and use that as a guide to cut out the other petals so you get them the same size.
Step 3. Arrange your design on the Card first before gluing anything down, so as to make sure it all fits nicely.
Step 4.Glue or Stick the Card pieces down and finish decorating with any details or wording that you choose.
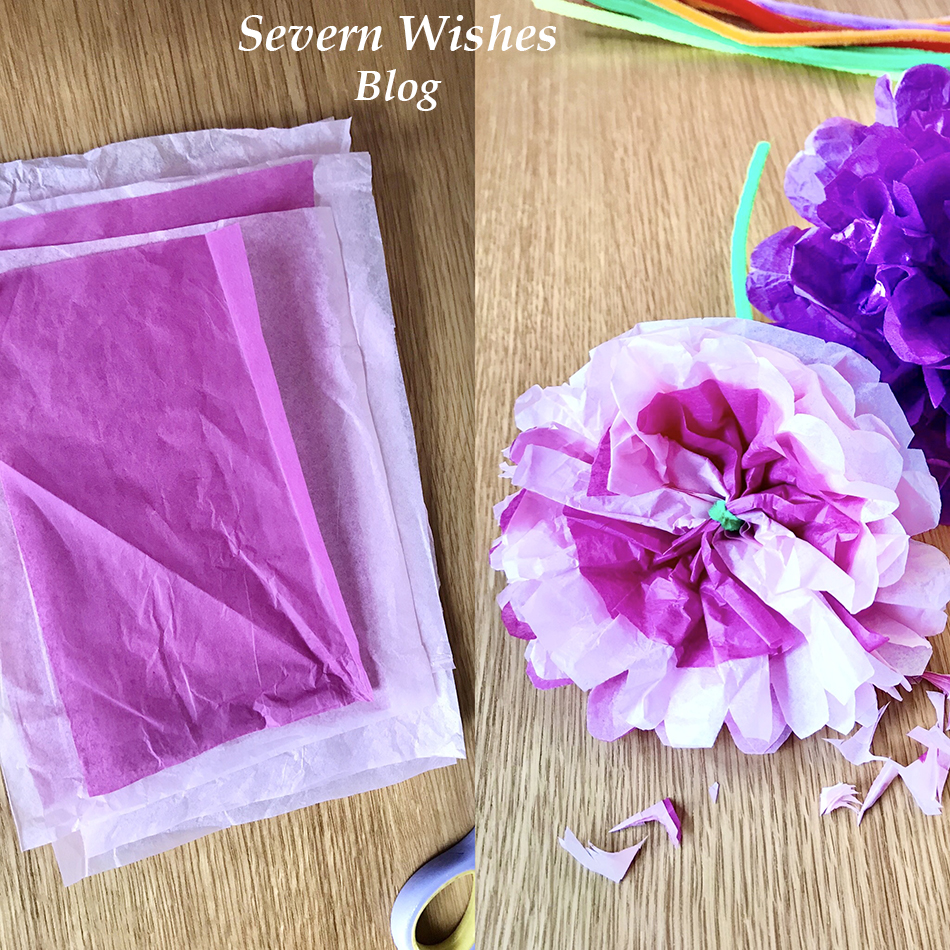
HOW TO MAKE A TISSUE PAPER FLOWER
You Will Need; A Coloured Pipe Cleaner Sheets of Coloured Tissue Paper
Step 1. Lay out your tissue paper flat, you want to cut it into equal rectangles. Once cut you stack them one on top of the other.
Step 2. Fold the tissue paper stack into a concertina, like a fan, until it is all folded and flatten it down. Stick the pipe cleaner in the middle, folding it over and under the stack, then wrap the remainder of it around.
Step 3. Next you need to trim the edges of the tissue paper, you can round them off or make them pointed, it depends on how you would like your flower to look like at the end. This determines the shape of the petals of your flower.
Step 4. Once the ends are trimmed lay the flower concertina across your hand with the pipe cleaner part pointing down. You want to gently and carefully tease the layers of the flower up and out. Once they are all up spread them out and make it look like the petal layers of a real flower.
(There is a video tutorial on this on my Facebook page as well).
Check out my images below!
My Tips for Opening your Flower: Open the tissue paper out gently and carefully, you should start to see a fan shape at first, and then you can raise the inner layers of the flower, just start by pulling upwards towards the middle part where the pipe cleaner is so as to make the flower look three dimensional.
Step 5. When you are finished it should look like my images below. Bend the pipe cleaner a little to make it look like a flower. Fan the petals out gently to make it three dimensional.
Paper Flower Dimensions
It depends upon how much you trim on the ends to create the petal shapes of your flower, but here are some rough dimensions of the size that your flowers will be. The larger the flower the easier it is to fluff up. Why don’t you experiment like I have below with different shaped petals and layering different colours of tissue paper too!
Rectangle Size 20cm equals a 17cm flower Rectangle Size 15cm equals a 12cm flower Rectangle Size 7.5cm equals at 7cm flower
HOW TO MAKE YOUR CARD – Happy Mother’s Day – Their Favourite Flower or Favourite Item
Step 1. Work out what your loved ones favourite thing is, then you want to write the words Happy Mother’s Day either vertical or horizontal on the folded A5 card. You incorporate those words into the item, such as the stem of the flower, or the base of an item like a slice of cake. (See my photo below for inspiration).
Step 2. To make a flower you need to cut twelve identical coloured card petals. Layer them up on the card to make the flower, don’t forget the middle bit either.
TOP TIP 3. If you want the petals to all be the same cut one and then use that one to draw around to make the additional ones.
Step 3. Other things you could do include a slice of cake with a triangle piece of card decorated with smaller shaped pieces. Or draw an outline and let smaller children colour them in.
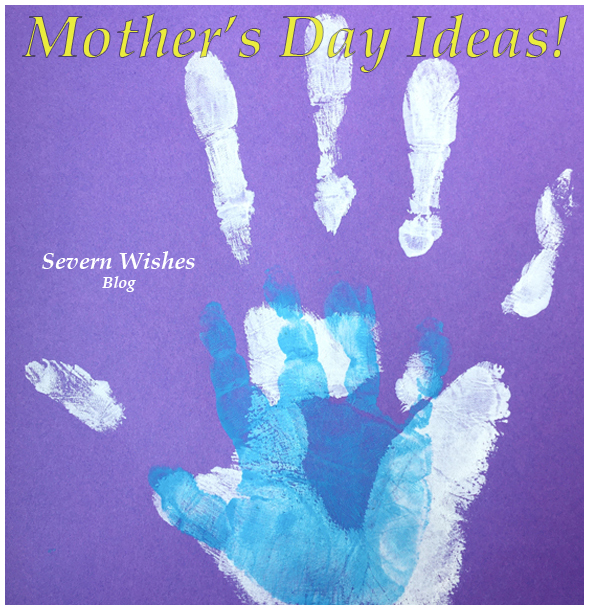
Another easy thing to do is a card of family hand prints.
Other Card Designs that are Easy to Achieve are…
Flat Flowers Three Dimensional Flowers Drawing Bouquet of Flowers Family Hand Prints Cake Slice Drawing Favourite Animal
Use a Ruler and Pen to make the stem lines and the bow, colour them in with pens and draw little flowers on the end of the stems. I did daisy like shapes, but if you can draw better then me be creative with it! Do any colour combination that you like. Add some wording around your design like “Happy Mother’s Day”.
I really hope that you have enjoyed this blog post and find it beneficial. If you do make some cards I would love to see them! Please tag me on any of my social media using the hashtag #SabrinasArtandCrafts
Thank you and I wish you all a lovely Mother’s Day.
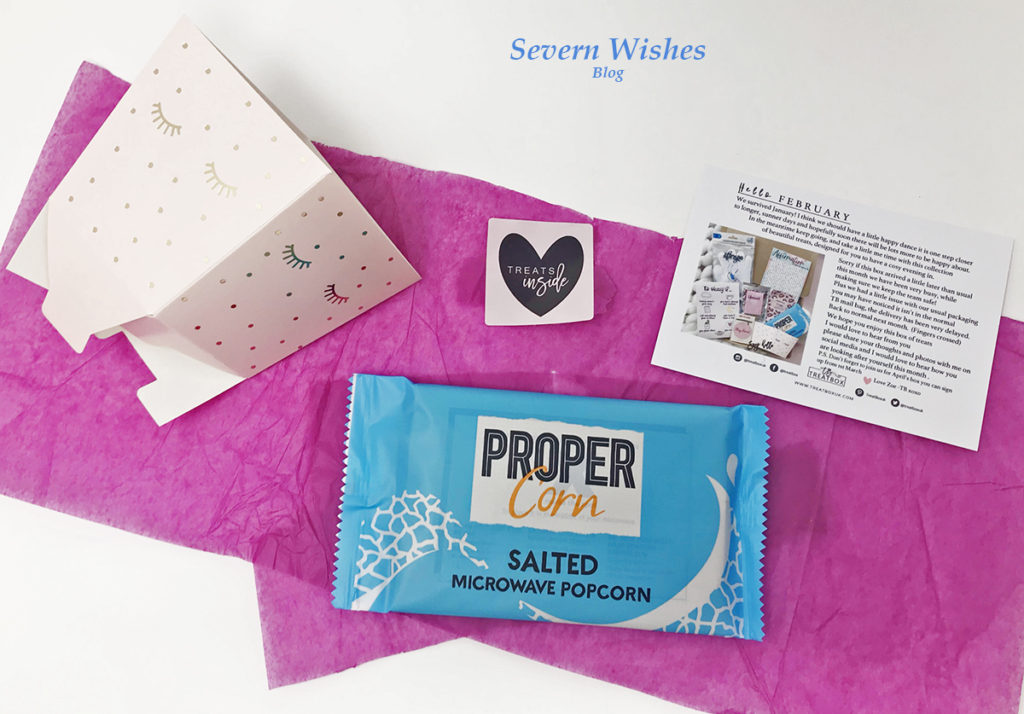
Welcome to the February 2021 Reveal and Review of Treatbox.
Here I am, photographing and reviewing the items within my 59th Box. My box of Treats arrived a little late this time around so I’m sorry for bringing this to you a little later into the month than I would have liked! Hopefully the March box won’t be too late and I would love it to arrive on my birthday!
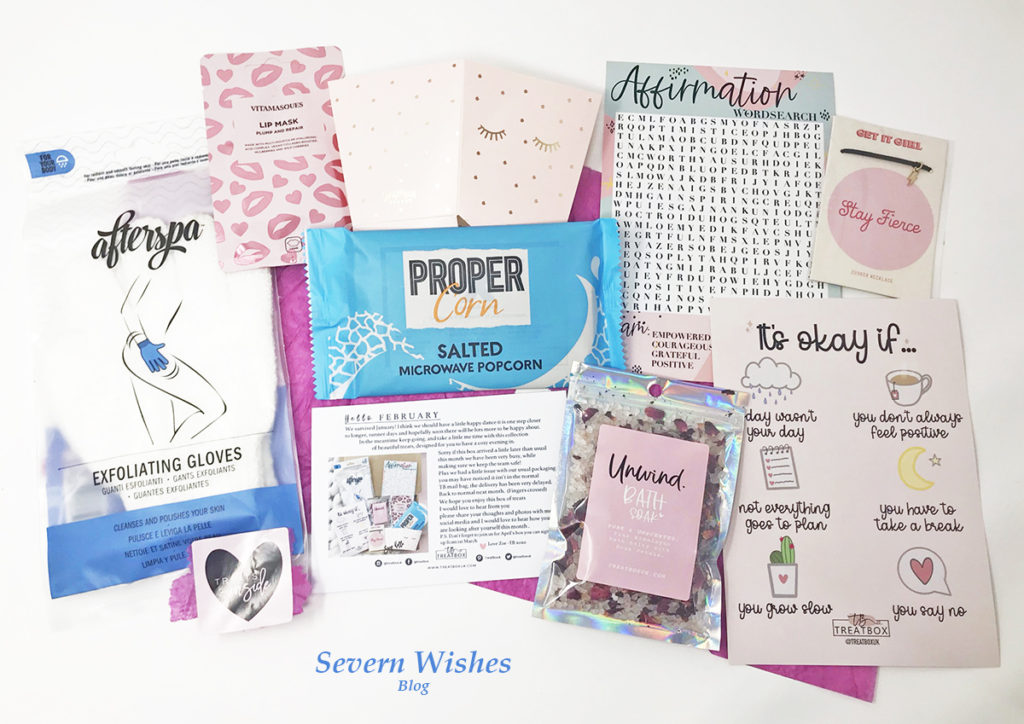
What is inside the February Box?
A “Ginger Ray” Pop Up Box to put Popcorn or Treats inside on Movie Night at home
Propercorn – A bag of Microwavable Popcorn
AfterSpa Exfoliating Gloves
Treatbox Print “it’s okay if…”
Treatbox “Affirmation Word Search” A5 activity sheet
Unwind Bath Soak
Vitamasques Lip Mask
Get It Girl – Choker Necklace – Stay Fierce – Lightning Bolt on a Leather Cord
My Opinions on the Box
I love that this box was all about relaxation and taking time for myself. I am saving the bath soak and gloves for this upcoming weekend when I will be dyeing my hair and having a relaxing bath.
The word search and print were both lovely and nice reminders that I don’t have to have my stuff together every day and it’s okay to take a mental health day or a self care Saturday!
I am really looking forward to box number 60 in March because it’s also my birthday! So it’s like an extra little treat to myself!
Did you know that you can view all of my previous Treatbox unboxing posts in this unique category of mine called ‘Treatbox’ it is specifically for these box reviews and reveals – Severn Wishes Treatbox.
Thank you for reading this Review and Reveal of the February Treatbox, I hope you pop back here again soon for the next one.
I am fortunate to be an Argos Tester, this means that I often get items sent to me for the purpose of an online review. I test products and take photographs of them before submitting my findings and thoughts to Argos. For February I was offered Children’s Toys. I was excited at the thought of testing something that my young son would be a huge part of, and his opinions would matter during the reviewing process.
#ArgosTester #ArgosTesters #ArgosTestersCommunity
I have written this article about a product that I have been supplied for free, in order to test and then review it. This is my experience with said product and my honest review about the product which is listed below. I have already submitted my product review to the Argos Website when this post has been published.
My Honest Opinion on the Product
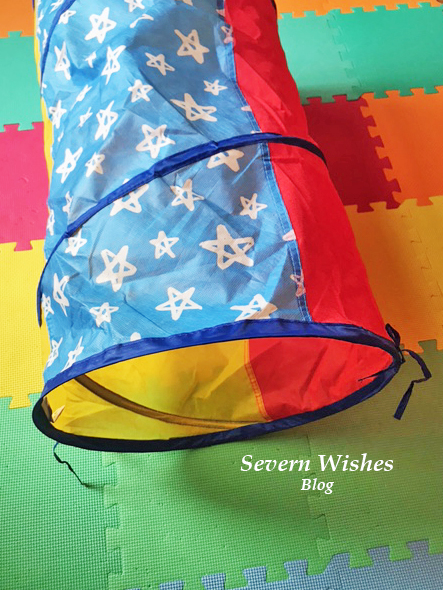
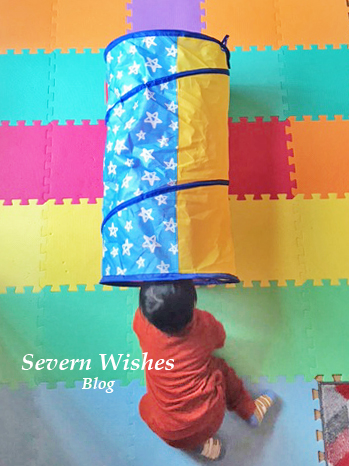
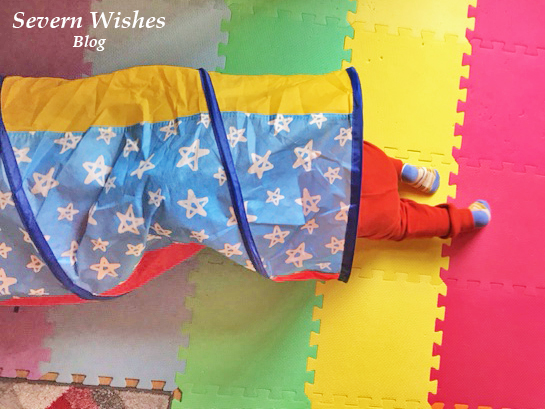
I have been rather happy with the overall look and quality of this product. The Pop Up Tunnel is something that doesn’t only entertain my toddler, but we can add learning into play and he also gets exercise indoors on poor weather days. It is bright and inviting and my son wanted to play with it immediately after I had set it up for him. I look forward to setting it up outside in the summer too on some outdoor play mats. I think it’s an excellent product for the price it is available at, and most children would have the imagination to be able to use it effectively. Because it folds away neatly it even fits into our large toy chest so it takes up no additional room. This product is ideal for any parents who may have a toddler or young child with lots of energy like mine. The best features are the ideal length (it is not too long to overtake your floor but long enough for a toddler to crawl through and have lots of fun), its bright colours and fun stars pattern, the genius tabs at either end so it can be securely fastened and put away for another day, and finally the imagination factor of it!
✩✩✩
Sabrina’s Top Tips for Using this Tunnel for Learning during Play
Once your child is used to the tunnel and is having fun with it, then there are several ways you can use it to increase learning while your child is playing. Words such as “Through” for them crawling through the tunnel is a good one, as well as “In”, “Out” and “Under”. You can also name the various Colours such as “Red”, “Yellow” and “Blue” and the “Stars” on the pattern too. See if your toddler can indicate which is which and say them back.
✩✩✩
Usage of the Product
The tunnel is made from material that is not waterproof, and is only wipe clean, so it is best used indoors and on a soft surface such as carpet, a rug or play mats. Keep food and drink away from it in my opinion. It will move around and slip easily on a wooden floor so perhaps look at where is safest in your home to set it up. Always supervise your child or children when using toys. The tunnel can be used outdoors in dry weather but I would suggest it was still set up on play mats still to avoid the material getting torn by anything sharp or pointed.
Product Name: Chad Valley Bright Stars Pop Up Play Tunnel
Product Details: A Red, Yellow and Blue Tunnel with White Stars. Ideal for children aged 2 years and over. Pop Up means it has minimal assembly required and also folds away neatly using the tabs at either end to secure and store reasonably flat. It is advisable to supervise children at all times while using this toy tunnel and to keep any sharp toys or furniture away from the material to prolong use. It can be used indoors or outdoors, but should only really be used on a flat and soft surface indoors, ideally set up on play mats or carpet. Due to the nature of the material it should be stored appropriately. Play Mats that can be set up outdoors is also a good idea when planning to use this outside because this tunnel is not waterproof.
Product Dimensions: H42cm W80cm D42cm
Product Description: Ideal for bringing children into a world of imagination. This tunnel can be anything they want it to be, and you can also use it with other items such as when children want to build a den for example. A tunnel to a secret dinosaur world, a secret passageway out into the world of spies… this can be whatever your child can dream up.
Argos Website Price: £8.00 (Correct as of 14th February 2021)
My Argos Tester Review Submission
My son was over the moon with this bright & fun tunnel he loves anything with stars on. It took no time to set up & easily packed away again, tabs either end secure it together almost flat so storage is no issue when not in use. A lovely item filled with possibilities with a bit of imagination, good for learning, teaching & great exercise on days we can’t get out of the house.
If you are interested in finding out more about this product then please click the link above in my Product Details section to go to the Argos website.
Thank you for reading this review, have a lovely day.
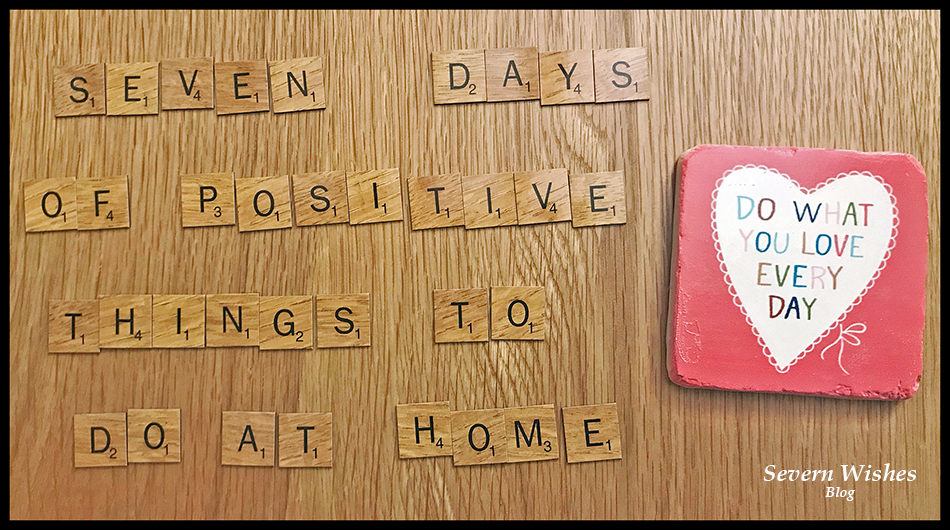
Sabrina’s Top Tips for having a more Positive 7 Days
Everyone seems to be feeling a bit low lately, it’s bound to be the Winter Blues mixed in with everything to do with the Pandemic. There are so many people who have found themselves working from home again, and many young people who are studying at home again too. With all this time stuck at home there are lots of anxious feelings and negativity, so I’m here with some suggestions to try and put a positive spin back into your home environment!
So here is my solution to tackle the blues, try to take half an hour out of your day as a family unit, every afternoon for the next week, after work is over and after the schooling is done for the day. Pick one of these ideas of mine to do together, a different one every day in any order you like.
I guarantee they will have you feeling more positive by the end of day 7! You can do them in any order you like! Or do one of them twice if it’s a hit! If you play along please comment on this post or on my socials at the end of the week and tell me which activity your family preferred and whether these activities did in fact work for you and increase your family’s positive attitudes.
Go for a Walk (Weather Dependent) and play a game as you go! Ideal for parents with younger children who are still enthralled by the nature of “eye spy”. But the fresh air and endorphins combined should make all of you feel better too. Older children may want to go for a jog or a bike ride if that’s more your thing, so long as it’s half an hour outdoors with your family, all together.
Watch a Funny TV Show or Cartoon. Laugher really can help you to feel better, even for a brief moment, so why not stick on a tv show or a favourite cartoon that never failed to make you laugh and giggle together. Tom and Jerry is a good one!
Bake or Make Something Delicious! I have a ton of recipes on my blog and some don’t even take that long to do. So why not make some chocolate crispy cakes or even some rocky road, something simple and even something that doesn’t require baking to save you time! Then you’ll have a tasty treat for a few afternoons to come! See what you’ve got in the cupboard! Here is my baking section HERE.
Get Creative. You can do one of two things with this creative activity depending upon the age of the people in your household. Either, do a rotating draw-off where by you each start with a piece of A4 paper and one coloured pen (all varying colours) and you keep rotating the papers every minute, do this until 4 minutes is up. Everyone should’ve drawn on each of the pieces of paper. No talking! See what you’ve come up with! Share them with me on social media! #SabrinasCreativeCrafts OR You can play the Sentences Game. The idea is to make up a creative story, it should be funny, and you once again rotate the papers. This time you want long strips and not A4. Cut a vertical A4 in half twice or get your strips. Once the first minute is up and the first sentence has been written, you all fold over the section and pass it on. When the time is up you each open up the papers to find a story.
For example; There once was a man who couldn’t find his shoes. I think I want some KFC he thought. He headed off in the direction of the sunset. In the end his dog ran away and joined the circus.
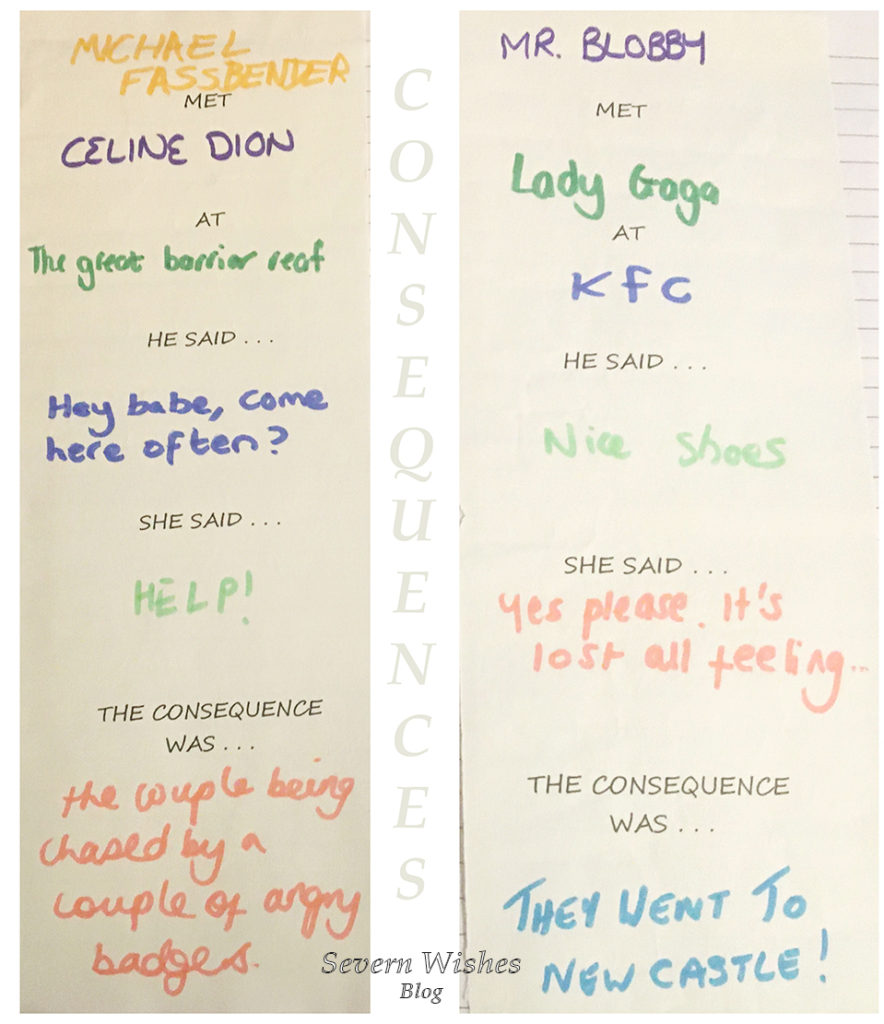
If you have teenagers then you could play the game another way, this is called CONSEQUENCES, you start by writing on each of the papers the following things, add extra if you have a large family so that everyone will get a go at each section when the papers are passed on. They usually go like this… ___ Met ___ At ___ They said ___ What happened next was ___ OR The Consequence was ___
Then unroll it after everyone has had their turn and the sections are completed, then take turns in reading them out. See my photo below this list for an idea of what it would look like when you finished! Warning my examples may cause laughter!
Photos! Another fun thing that would brighten your spirits is to look back at any photo albums that you have or digital slideshows. You could even play a game while you look through them. Every time that your mum is seen with sunglasses on she gets a point, each time someone hasn’t got their hat on when they should you lose a point! First person to spot the water in the photos gets a point. Etc etc! Make up some rules before you start and say that the first person to 10 points gets out of doing the washing up tonight! Or the winner chooses what’s for dinner the next night! Involve one another in every day things.
Write a List of Goals and Aspirations for 2021 – but only write the do-able ones! For example, I want to bake a cake for mums birthday. OR I would like to walk a mile on the next weekend that is dry and sunny. When you achieve something, even if it’s a little thing, you feel so much better about having accomplished it. Setting some realistic goals now for the year might seem silly when we don’t know what’s around the corner, however even if the goals are just for the people in your bubble, it’s still doable. Put them up on your fridge or board and tick yours off when you have completed it.
Make a Meal Together. No matter how old you all are there is something fun about making dinner together. May I suggest something that everyone can get stuck into such as Fajitas, Curry, Sausages and Mash or Lasagne (dietary requirements permitting). I have tons of recipes on my blog if you need inspiring! But making and preparing food together before you eat it can be a real bonding experience, and it can also be important for teaching younger children where foods come from or that by mixing this with that you achieve this outcome. Food is something that has been so important during the first lockdowns so I thought I would continue on with that and try and get you back into your kitchen to make something you love together. Check out my Recipes HERE.
Why Not Try And Make My Delicious Cookies? Click the link in section 3 for the recipe!
The Consequences Game – Imaginative Fun for the older children in your family.
I really hope that you’ve enjoyed this blog post and that you would like to participate in my week of positivity. If you do participate in any of them or attempt to get those in your bubble to do so, then please let me know how you got on! I can’t wait to see if you make anything as well 🙂 tag me online! And thanks for joining me!
Iam very fortunate to be an Argos Tester, this means that I often get items sent to me for the purpose of a review. For November I was offered technology related items. I was excited at the prospect of testing something that would be so useful to me with my writing.
#ArgosTester #ArgosTesters #ArgosTestersCommunity
This post has been written by myself about a product that I have been supplied for free, in order to test and then review it. This is my experience with said product and my honest review about the product that is listed below. I have already submitted my product review to the Argos Website when this post has been published.
Argos Tester Review
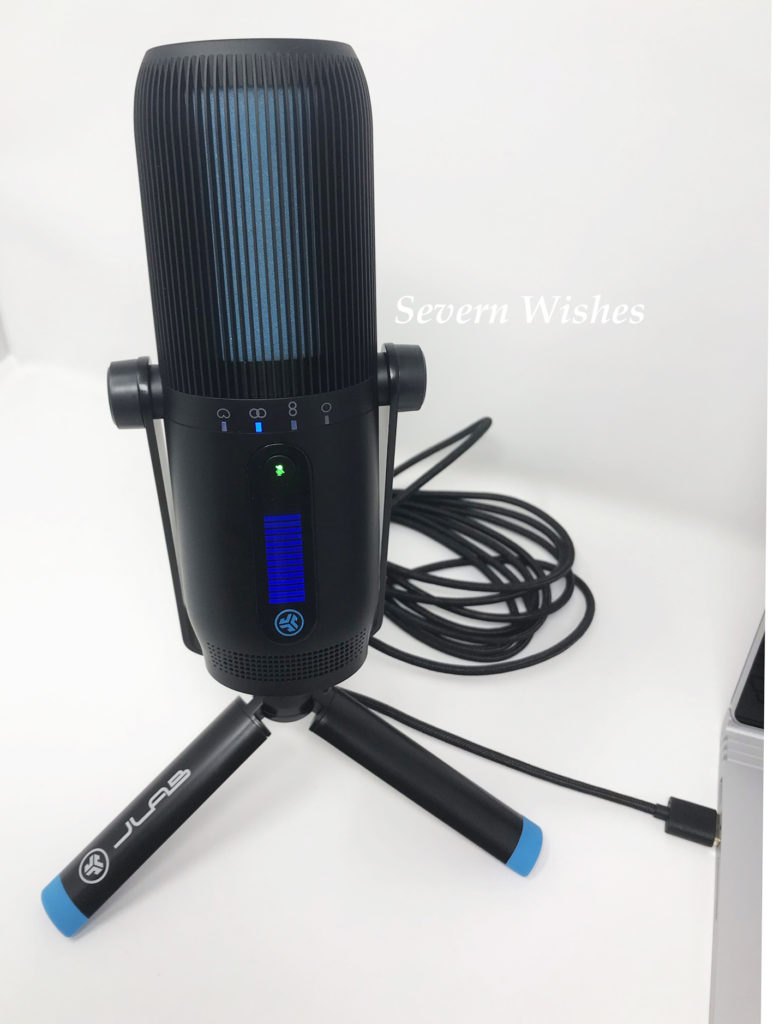
The Talk Pro is a professional piece of tech that is simple to set up & easy to use. It looks so stylish with the black & blue design & has varying modes for different types of sound streaming & recording. I have used this microphone with a speaking voice, singing voice & a narration type of use. The microphone sound on playback was clear & of excellent quality. Overall I am hugely impressed by this tech & I will be retiring my four year old current mic in favour of using this one, the quality surpasses anything I already owned.
PRODUCT DETAILS
Product Name: JLab TALK PRO USB Microphone
Product Information: The Ultimate Professional Microphone. This piece of tech has 4 Different Pattern Modes and 3 Condensers that suit all types of microphone usage. This is ideal for Streaming, Gaming, Narration, Singing, Meetings, Duets, Dual Voice Synchronisation, Recording Music and / or the Voice. With Volume and Gain controls and easy to use buttons and levels, it is simple to set up and use. With a 3m long cable, and a USB connection this Mic can be set up quickly for a wide range of reasons.
The JLAB Talk Pro Microphone is both professional looking and clear sounding. I have tested this thoroughly with Narration over video, simple voice recording, singing into the microphone and more. As a blogger and gamer a piece of equipment like this is essential for good video editing. I’m very lucky to have gotten the opportunity to have this particular product.
What I really like about the Talk Pro is how sturdy it is. Inside the box you receive a base for the microphone, this is not only strong but easy to attach and assemble to the microphone itself. You gently pull the legs of the base away from one another until you can stand it up on a flat surface. It looks very professional once it’s all set up.
I like that the colour scheme of Black and Blue compliments the design of the microphone, such as the Blue lights indicating volume and which mode you are using, in correlation to the Blue accents on the physical piece of equipment, such as the base tripod. An aesthetically pleasing piece of tech.
The sound quality during both streaming and recording whilst using this device is hugely impressive. I have a four year old mic from another brand which has served me well for my blogging years so far with creating video narration and things. I have now discovered however, after rigorous testing on my part, that the quality of sound from the Talk Pro is on a totally other level. Not only is there clarity but it picks up everything in a quality that, even when being recorded, is maintained throughout the piece, be it speaking or singing.
Overall this piece of technology is simple to start using for anyone who needs a clear way of getting their voice heard and recorded. Great for multiple uses such as work as well as hobbies. I am very satisfied with the product and highly recommend it for anyone who relies on a good microphone quality on a regular basis.
Thank you for reading this review, I hope you have enjoyed it. You can purchase this product or read more about it by looking online from Argos, I have left the link in the product description above.If you have any questions about it please leave me a comment below and I will do my best to answer them.
I am very fortunate to be an Argos Tester, this means that I often get items sent to me for the purpose of a review. This month I was offered an item that I jumped at a chance to own. It is a Wireless Portable Speaker developed by the company Marshall.
#ArgosTester #ArgosTesters #ArgosTestersCommunity
This post has been written by myself about a product that I have been supplied for free, in order to test and then review it. This is my experience with said product and my honest review about the product that is listed below. I have already submitted my product review to the Argos Website when this post has been published.
My thoughts on the Marshall Emberton – Portable Loudspeaker
I am using the Marshall Emberton with my iPhone to make my music portable around my home. So far I am very impressed with the clarity of sound, the ease of use and the quickness of setting up its Bluetooth capabilities.
Playing a wide range of different music on the portable loudspeaker including pop music, rock music, soundtracks and themes as well as vocal pieces, I have to say I’m very happy with how the Marshall Emberton sounds. The Emberton boasts two amazing speakers, one either side of it, so no matter where you are in a room you can clearly hear the music.
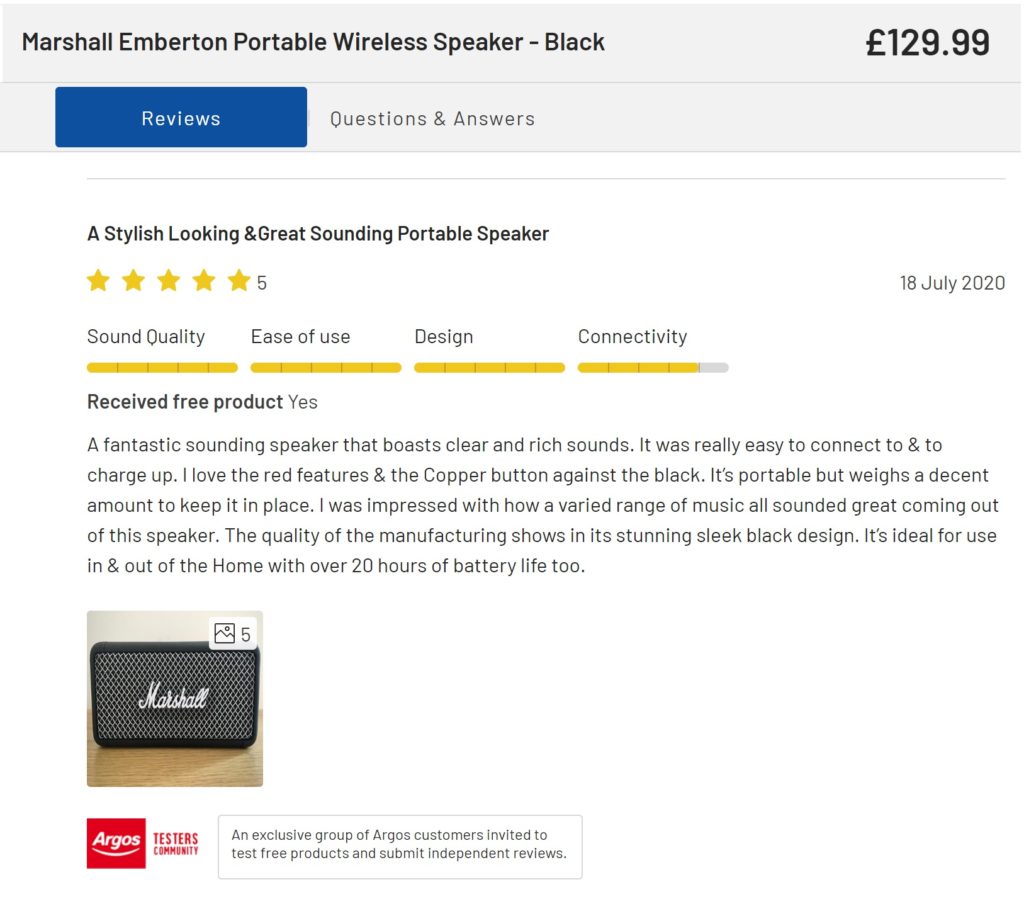
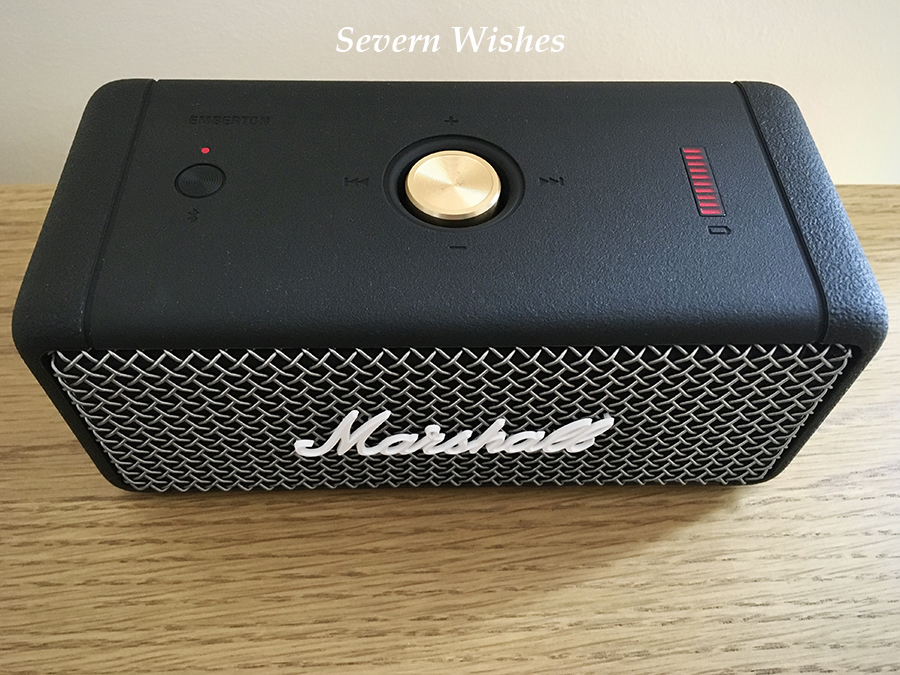
The Loudspeaker weighs 0.7kg and sits sturdily on a flat surface whenever you wish to play your music. With over 20 hours of battery life this portable speaker also has a multi-functional control button in the centre which feels very nice to push. The overall look and feel of this Marshall Emberton speaker is one of quality and sophistication.
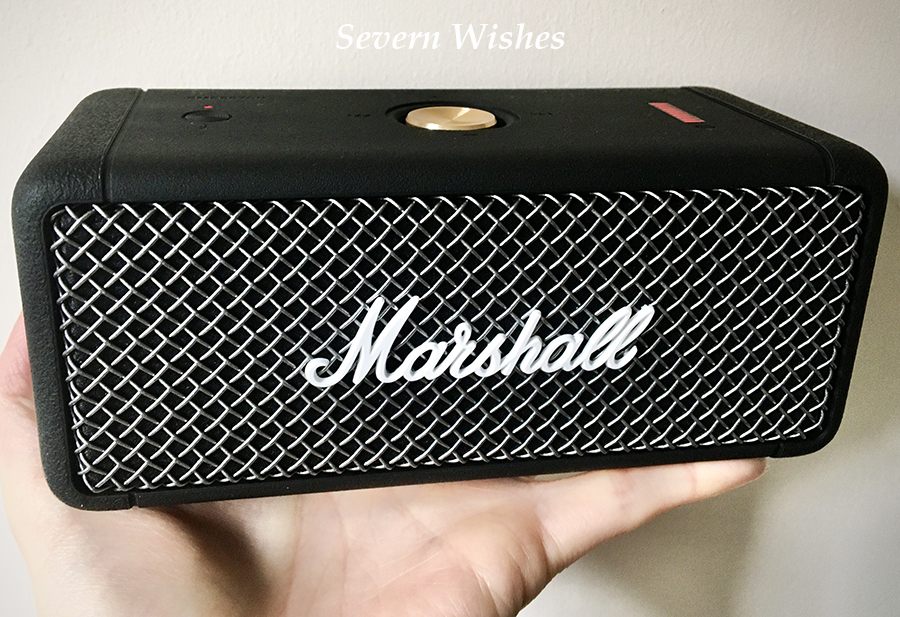
The design is in black with its red and white details along with the copper button in the centre. The word Marshall is written across the front with a metallic mesh speaker look. The leather exterior is water resistant and when that rich sound comes out from this loudspeaker you can hear every note and beat clearly.
I’m very impressed with this portable device, I feel confident in its design and the quality. Because it’s so easy to charge up using a USB attachment, you can then take it anywhere you like.
After using the Marshall Emberton now for over two weeks, I couldn’t help but think that Marshall could have developed this portable speaker to appeal to gamers, like myself. If they had also allowed for an auxiliary cable attachment, then the speaker could have been attached to a television. This would have given an incredible dimension to gaming using the rich sound that the speaker can produce. Maybe this is something they could consider for a future model.
Overall I have been delighted with this speaker. It’s good that it’s waterproof casing is so durable, because I have a toddler, and also that it is wipe clean because it can become quite static and attracts dust and hairs. But that is easily wiped off so it’s not a problem for me. I very much look forward to taking it outside of my home when we go for walks and things like that, the battery has been amazing, I have only had to charge it once so far and it’s still going! The little red lights (as seen below) go down as the battery does so it is easy to see what charge you’ve got remaining.
Once again thank you for Argos Testers and Marshall for this wonderful opportunity. I really love the item.
Details on the Product as Described on the Argos Website
Product Name: Marshall Emberton Portable Wireless Speaker – Black
Product Details: 2 Internal Speakers, Bluetooth Compatible, USB Charging Cable included, 20+ Hours of Battery Life, Tough Resilient Design featuring a waterproof covering.
Product Description: Emberton is a compact portable speaker with the loud and vibrant sound only Marshall can deliver. With 20+ hours of playtime, you can enjoy the superior sound of Marshall for hours on end. This lightweight speaker is tough and resilient, boasting an extremely durable and easy to use design that make it a must for any occasion. A solid metal grille and the iconic Marshall script adorn the front of the speaker, echoing the legacy of rock ‘n’ roll that you know and love.
Superior Signature Sound. By separating out the spatial content of stereo recordings, Emberton produces a sound much larger than its size and outperforms most speakers in its class. Its custom-tuned audio components enhance the multi-directional sound by providing brilliantly powerful and clear sound throughout the entire frequency range.
Roadworthy Design Rated IPX7. Emberton is tough and resilient. With its silicone exterior and solid metal grille, it boasts an extremely durable and easy to use design. Its IPX7 water-resistant rating means you can submerge Emberton in 1m of water for a period of up to 30 minutes.
Emberton is simple and easy to use. Control it with the multi-directional control knob. You can play, pause, skip tracks and adjust the volume of your speaker, as well as turn it on or off.
Product Price: £129.99 (Correct as of 29th July 2020) Product Link:Argos Website
If you have any questions about this product and you would like to ask me about it please do! Either leave me a comment or ask on one of my social media and I would be happy to help.
Have a great weekend! Thanks for visiting Severn Wishes today.
Good Day All! It’s time for a cookery related blog post today. If you follow me on social media you will have seen me share images of this one already, it’s a great alternative to a take away, and it costs a fraction of the price of one too! It’s a simple recipe, easy to make and complete in just a few minutes. Of course I am making mine dairy free because of my sons allergies, I have worked on this recipe for months. You can use alternatives and I will outline those in my recipe below if you want to alter it.
So why am I sharing this particular recipe? Well, I really miss a proper Chicken Tikka, and I thought with a little experimenting I could make a recipe I would really enjoy. Coconut is often used in curry sauce anyway, so by using coconut yoghurt as part of the base it eliminates the dairy aspect and allows me to play with the spices. This recipe I have made is great, although proper Tikka has nuts and dairy in, usually Almonds, and I can’t have either because of my son. It is also more red in colour, so I am considering adding some Paprika next time! So I will be continually trying to better this recipe and cooking in every aspect of my life, but this is the best I have so far. If I make an awesome adjustment I will edit this post! But for now my Curry is both Tasty and a little spicy too!
This is my Dairy Free Chicken Tikka Style Curry Recipe
Author: Severn Sabrina Prep Time: 20 Minutes Cook Time: 40 Minutes Total Time: 60 Minutes Serves: 2 for Curry & Rice OR 4 (if you add sides) Allergens: This Recipe is Dairy Free unless you change the Yoghurt
You Will Need
A Teaspoon A Wooden Spoon A Bowl for the Marinade A Medium Saucepan A Knife for Chopping A Flat Oven Tray Scissors for Cutting the Chicken
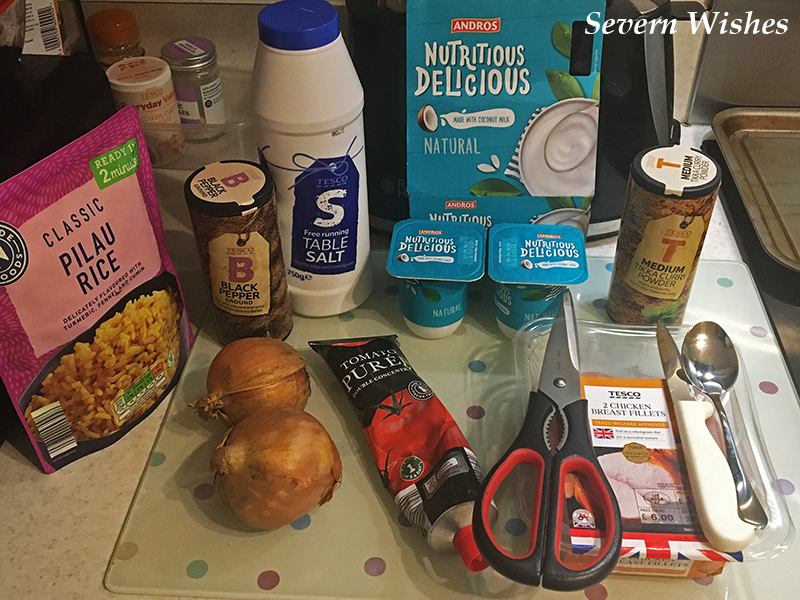
INGREDIENTS
Pilau Rice (it compliments the flavours of my sauce but you can have plain white rice if you would prefer) I sometimes just use a microwave rice packet for convenience. 300g Chicken or for a Vegetarian Alternative use Quorn Chunks White Onion – 2 Onions chopped two different ways, large chunks and diced 2 Pots of Coconut Yoghurt (average size from a usual pack of 4 pots)
Optional Extras (to increase it for the amount peopleyou’re serving) 1 Pepper diced into bite sized cubes and fried off with the onions 1/2 Tin of Chopped Tomatoes (if you prefer a more tomato based curry with less spice) Poppadoms and Chutneys Naan Bread (Shop bought usually contains Dairy) Chips
For the Marinade 1 Pot of Coconut Yoghurt 1 Teaspoon of Tikka Curry Powder (or something similar)
For the Sauce 6 Teaspoons Tomato Puree 1 Small Pots of Coconut Yoghurt (You can use regular yoghurt if not doing DF) 2 Tspn Tikka Curry Powder OR 1 Tspn of Garam Massala + 1 Tspn Cumin Salt and Pepper to taste
(If you want to make a more complex curry sauce look through my blog for my other recipes).
METHOD
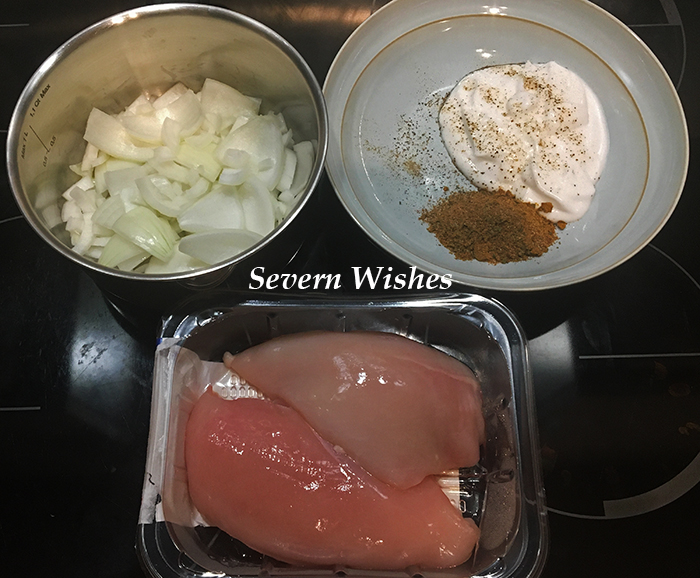
1. Start by chopping your onions and frying it off in a saucepan with a little oil. You want the onions to be softened but not caramelised. Once they are cooked you can start to build the sauce up. Start by using a teaspoon to measure out the other sauce ingredients and add them into the onions. Including the spices, yoghurt and tomato puree. Stir gently to combine. Leave this on a low heat stirring it frequently. Your sauce should resemble mine in the image below.
Onions Ready to Fry, Chicken Marinade and Ready to Chop Fresh Chicken.
2. Then take your chicken, cut it bite size pieces, try and get them all roughly the same size so they cook evenly. You want to marinade the raw chicken for as long as possible before cooking it, so I would often do this as a first step and then go ahead to chopping and cooking. But it all works the same way and it will be just as soft and tender but slightly less flavoursome than if you marinaded it for a few hours! So if you’re planning to do this recipe and have some time on your hands, marinade the chicken in the fridge for a couple of hours before putting it in the oven. (With a toddler in tow I often just get a short window to cook!) When you do get to this stage you should lay the chicken pieces out evenly on a tray and oven them for around 20 minutes at 180’c. They should look baked and coated, cooked through and still tender. See my images below as a guide.
3. For the next step you want to remove the cooked chicken pieces from the oven tray gently, and set them down in the sauce, try not to lose much of their tasty marinade coating! This will add extra flavour to your sauce. Stir all of the chicken up with the sauce and then leave it on a low heat for around twenty minutes.
Mix the oven cooked chicken with the sauce you made earlier.
4. Serve the curry as soon as your rice is cooked and hot, half and half works well, you could even accompany it with some poppadoms and chutneys, a naan bread to tear and share or even do half rice and half chips while the oven is hot – if you’re that way inclined! 😉 There should be plenty of that tasty sauce for dipping things in whatever way you decide to serve it!
The Final Curry Dish Served with Pilau Rice
Thank you very much for reading this post today, if you do try my recipe let me know how you got on. If you have any questions feel free to leave a comment, I’m more than happy to answer them.
In coordination with Endometriosis Awareness month this March 2020 I am going to be telling my diagnosis story. I know I have talked about my Endo in many of my posts, but this is the real true and honest story of mine. I will also be sharing statistics, symptoms and other information, as well as giving links to the websites you might find useful to find more out about Endometriosis if you wish to.
Not only is this going to be emotional post, it is raw, and it could also be disturbing for others. I am choosing to share some pictures post surgery too. I will therefore by putting a Trigger Warning on this post, because I am showing pictures but also talking about things that may upset others.
Please don’t let this put you off reading it, I think people need to see what effect this horrible condition can have upon the body. The female body already endures so much, so to have to deal with this condition too, it is exhausting. I should know.
There was light at the end of the tunnel for me, so this post does end on a positive, but I do believe more people need to realise the repercussions of having this debilitating and incurable condition.
Please continue reading now as I tell my story of pain, loss and eventual diagnosis.
Endo and Me
I have a love hate relationship with my body. Sometimes I love that I have a fast metabolism, it keeps me slim and I’m generally quite fit and strong despite my thin frame and small bones… however the Endo side of me causes unimaginable pain at times. It’s a chronic and incurable illness that doesn’t just affect your period like so many ignorant and uneducated people might believe. It is so much more than that because a number of things that happen to you can have a real negative affect on your life as well as your body. Let’s start at the beginning for me. I first had issues with my body when I was around fifteen years of age. I began getting unusual pain that I had to take medication for. All you could get at that age was paracetamol and ibuprofen tablets which were 200mg a piece and trust me; they barely touched the sides of my pain. As I got older I began having more symptoms, I didn’t know back then they were to do with Endometriosis. Except that whenever I sat in front of a doctor they tried to tell me it was anything and everything but that, it was never even mentioned. When I was seventeen I lost weight suddenly and quickly, I was tested for Thyroid issues and even Cancer! All tests came back negative and I tried to just deal with my awful periods and pains. Doctors were reluctant to explore further, so I let it go. At 19 I was fed up with the ridiculously heavy flow I had every month and the fact that I had no regular cycle, it was so exhausting and an anxious time. So after some persuasion on my part, I went on to a contraceptive pill. Regulating my cycle was a bonus of the tablets, and for the first time in my life I could be social with confidence. By knowing when things would be occurring allowed me to be at home with my hot water bottle and tablets when I needed to be.
When I was 25 I came off all medication in the hope of starting a family. Little did I know that all the pill had done for years was masking other symptoms of my Endo. When I had been off it for just six months I had such pain that it began affecting my everyday life. I cancelled social time with friends and family, I ended up avoiding things that I usually enjoyed because I was worried about being unwell in front of people. This caused me to suffer with anxiety, and that never went away, it just got worse as years went by… and so did my pain.
When I failed to conceive for years I went to my doctor and had various tests, blood tests for Thyroid, Hormones and Vitamin Deficiency amongst them. Then when everything came back with no issues and my pains were so bad that they affected me daily, I began seeking more answers. Endometriosis or Polycystic Ovary Syndrome was just two conditions that female members of my blood line suffer with. I must have told this to over a dozen doctors over the years. There are correlations between female genes that are often ignored. It wasn’t until I finally conceived after three years of trying, and then I tragically miscarried, that I ended up in Accident and Emergency every four weeks when I got my period, and I began getting sussed on this…
When I lost my baby I blamed myself and it made me depressed. I was so unwell physically I just didn’t know to what extent just yet.
So to help my state of mind I kept a diary, what I ate, what I did daily, what my pains were and where, I kept track of my cycle down to the hour and tried to make sense of it all. I looked for answers online and anything that told me what it could possibly be. Going in and out of hospital with no answers was exhausting, and it was wasting so much time too.
One afternoon I had written out all of my symptoms and matched them to the condition Endometriosis. All I wanted was someone to take me seriously and try and attempt to diagnose me. Instead I was in hospital nine times over the course of eighteen months. I had one MRI, seven ultrasounds, I went on a drip three times due to dehydration, I was given antibiotics twice, I had examinations with five internal swabs checking for infections… Nothing came back with anything concrete. On an ultrasound they told me that I had had a cyst that had burst. That time I ended up almost passing out in the bathroom at home from the pains, I was vomiting and couldn’t keep anything down. A&E was the only option when I had so much blood loss and was so sick from pain that I became dehydrated and needed a drip.
When I was admitted during the period that came after I lost my first child it was clear that I was incredibly ill and needed help. I had doctors who wanted to take me to surgery to check my appendix and my bowel, but I kept telling them it was Gynaecological. After I had a complete meltdown and shouting because I was kept nil by mouth for three whole days while two doctors argued over what to do with me, a lovely doctor who was a cancer specialist offered to do a basic laparoscopy on me that evening, to simply look inside me and take some pictures, so I could be passed on to whichever department I needed to be. This was the turning point for me; it was the start of my actual diagnosis. Over thirteen years since my first unexplained pains had begun…
It was severe. I was diagnosed with Stage 4 Endometriosis, with a mass the size of a Tennis Ball attaching my Left Ovary, Bladder, Bowel and Womb to each other. My organs were all pulled off to the left side of my body, which was contributing to other symptoms that I was having, including bloating, bowel pain and problems, pain when I had a full bladder and pain during intercourse. The pictures that were taken inside my body showed extensive Endometriosis, like a mesh of tissue, thick cobwebs and various sized pockets of blood. At this time I had been ill for a long time, and I had lost weight, I was a size 6 and I didn’t feel like me anymore. The pain was all I knew some days. Having a diagnosis was like a light bulb had been turned on in my darkened room…
I was lucky because there was an Endo Gynaecologist Specialist at my local hospital. After speaking with him he agreed to operate, to try and save my left ovary. I wanted to be a mother so badly and he understood this. We also agreed to check for reasons why I couldn’t carry a baby thus far, four years of trying and a miscarriage was an indication things weren’t right. And he wanted to find out if it was all down to this Endo and the position of my organs. He would also do the dye test on my Fallopian tubes while I was under to see if they were clear of Endo too.
So I was popped onto his waiting list for surgery twelve weeks later. Every day was hard during that time, it was a blur of medication and hot water bottles and I had to give up work and go off sick after trying and failing to do my shifts and ending up just collapsing. After dealing with the chronic pains during that time, having hardly any sleep because I couldn’t get comfortable and my constant anxiety and nausea… I finally went in for my surgery…
The day afterwards I felt like a new woman, this man and his team had literally given me my life back. It was bad, but they had fixed me for now… I had had the Endo mass and tissue removed, then my organs gently coaxed back into place, my tubes flushed, my bowel that was damaged had a resection, and my left ovary was carefully saved. I could feel that constant pressure was gone; there was no more dull pain in that area. In fact recovering from the surgical incisions wasn’t anywhere near as bad as the pain I had lived with every day for years. I stopped taking pain medications three days after I got home from my surgery, because I felt like I could deal with the pains I was getting, which were less than ten per cent than what I was used to. How mad is that?
The worst thing about the surgery for me was the gas, it fills every part of your body as it absorbs and fills the spaces between your organs, it can be very painful until it’s gone. I had to drink so much peppermint tea to help with the bloating! Below is my abdomen after surgery, you can see I’m swollen and bruised and you can see the three incision sites.
Days After Surgery…
The worse thing about having Endo is that it has stolen friendships away from me, and it put strains on other relationships too. People don’t understand how you can look so “well” on the outside but feel incredibly ill on the inside. Pain is something your body gets used to but it is the fatigue that most people struggle to deal with. Sometimes I would visit family and I would be talking one minute and falling asleep the next. Even after my surgery, although I didn’t have the same pain levels as before, I was still keeping up with the feelings of being tired, and my periods were exactly the same.
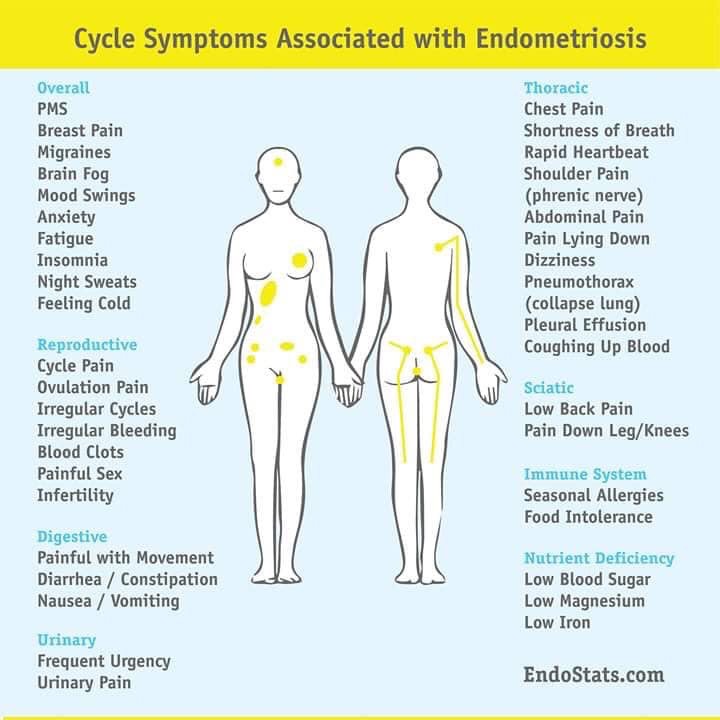
Did you know that Endometriosis also causes a whole range of other issues? I had over half of these when I eventually got diagnosed. Most women get told they have painful periods and IBS. Most of us only have these things because we have Endo. Here is a great diagram that was shared on the social media Endo pages earlier this month outlining most of what women like me have to deal with, sometimes these are daily symptoms, some are infrequent but they still occur, often brought on by hormone changes and cycles.
I experience a great deal of these symptoms. Some are daily and some are infrequent.
Endo Warrior is a term I use often to describe myself, because some days it feels like a battle just to get through the day. I am extremely lucky because I got the time to recover from my surgery, both body and soul searching too. Then when I was ready I had to do IVF in order to have my son. He is my entire world and I would be lost without him. I look back at all that I’ve been through and I am proud that I never gave up, despite everything.
If you want something in life and you have to work harder to get it then it makes it all the more worthwhile. I overcame a needle phobia and dealt with my Endo pain during my IVF treatment. But I would do all of it again if I had to. Being a mother is one of the most incredible and rewarding things I have ever done.
I realise some women have too bad a diagnosis and never get the chance to be mothers because of this condition, and that makes me sad. I class myself as one of the lucky ones.
To anyone out there who is suffering, make your voice heard. I once said to a friend that “Living a life in pain is like letting pain decide your life for you” and I got to a point where I just couldn’t live like that anymore. If your pain is ruling your life, then perhaps it is time to do something about it. Find a Doctor willing to listen and willing to take you seriously. Keep a diary, show that to a specialist if you’re lucky enough to get referred quickly.
Endometriosis has cost me so much in my life already, and because there is no cure I deal with those uncertainties for my future every single day. I still class myself as one of the lucky ones, I still have all my organs at the moment, and I was able to carry and have my son. I love being a mum. I try not to let my pain get in the way of that. As my son gets older I will be able to explain why mummy cannot bend and play today, and I will come up with other things for us to do together on those, my bad days. But I know it won’t stop me from being the mother he deserves. Of that I will make sure.
Thank you for visiting Severn Wishes today. If you would like to leave a comment please do so, I hope that my words help even just one person to stand up for themselves, to explain to a doctor that you want answers, that you deserve to live a life without pain.Stay strong.
✩ Sabrina ✩
By continuing to use the site, you agree to the use of cookies. more information
The cookie settings on this website are set to "allow cookies" to give you the best browsing experience possible. If you continue to use this website without changing your cookie settings or you click "Accept" below then you are consenting to this.