Sabrina’s Dairy Free Vegetable Nuggets

How To Make Delicious Dairy Free Vegetable Nuggets For All The Family To Enjoy!

Today I will be showing you how to make tasty, nutritious and dairy free vegetable nuggets that contain four different vegetables.
They are great fun for your children to eat as finger food and your older children can dip them in the sauce if they choose.
This recipe is ideal for weaning and beyond.

Veggie Nugget (broken so you can see the soft inside)


Ingredients for Sabrina’s Veggie Nuggets

3 Tablespoons of Tomato Ketchup
1 Tablespoon of Reduced Salt Soy Sauce
1 Tablespoon of Mixed Herbs
1 Large Egg (Beaten)
160 grams of Breadcrumbs (approx) roughly 4 slices of bread – I always use the 2 end bits if I have them!
6 Medium Carrots – Grated and Squeezed
2 Courgettes – Grated and Squeezed
100 grams of Swede Cooked First, then Diced Finely using a Chopper
1 Large White Onion Diced Finely
50 grams of Dairy Free Alternative to Italian Style Hard Cheese
Plain Flour (6 tablespoons approx) spread this onto a small plate ready for rolling…


Method

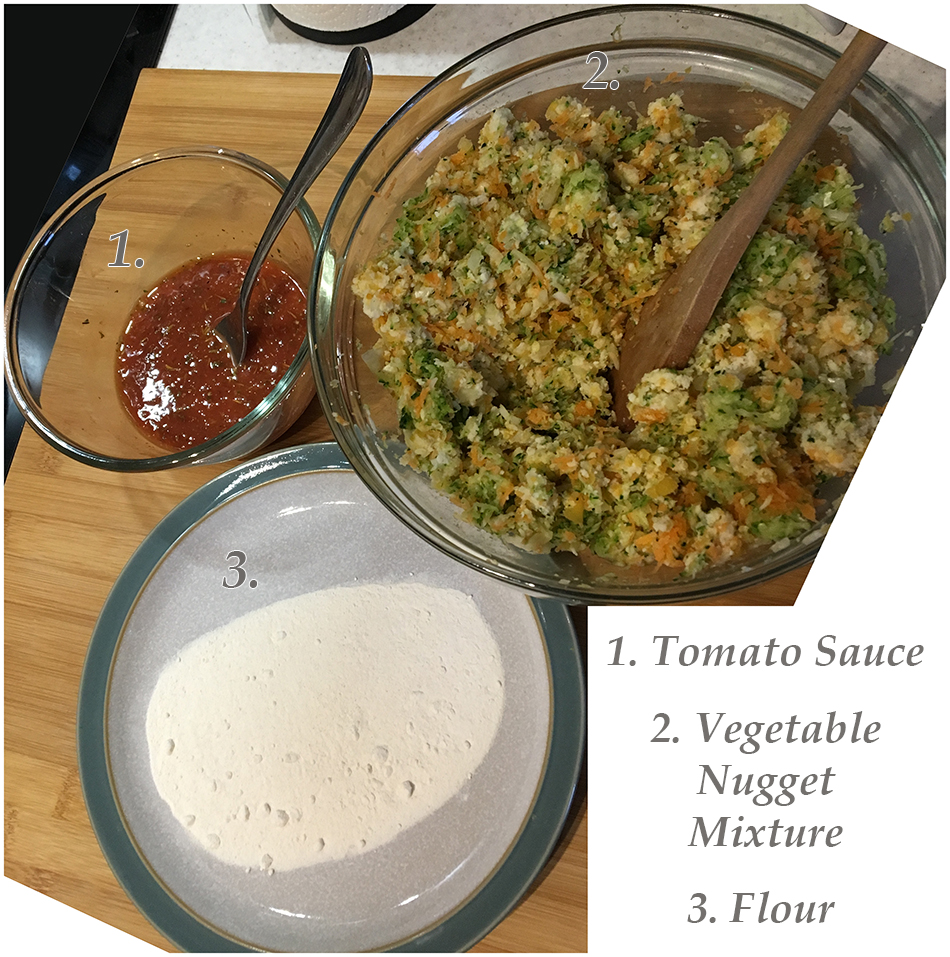
To make the sauce combine tomato ketchup and soy sauce together. Double the amount if you are preparing these nuggets for people to dip into the sauce straight after cooking them. Use half of the sauce for the vegetables mixture and leave half for the dip.

Once you have prepared all of the vegetable ingredients as directed above, you will need to ensure the mixture of vegetables isn’t too wet. Take a handful of the grated and chopped veg and place it between a few paper towels, a muslin cloth or a clean tea towel. Squeeze and press it in the cloth to squeeze out as much liquid as possible. Do this with all of the grated veg.

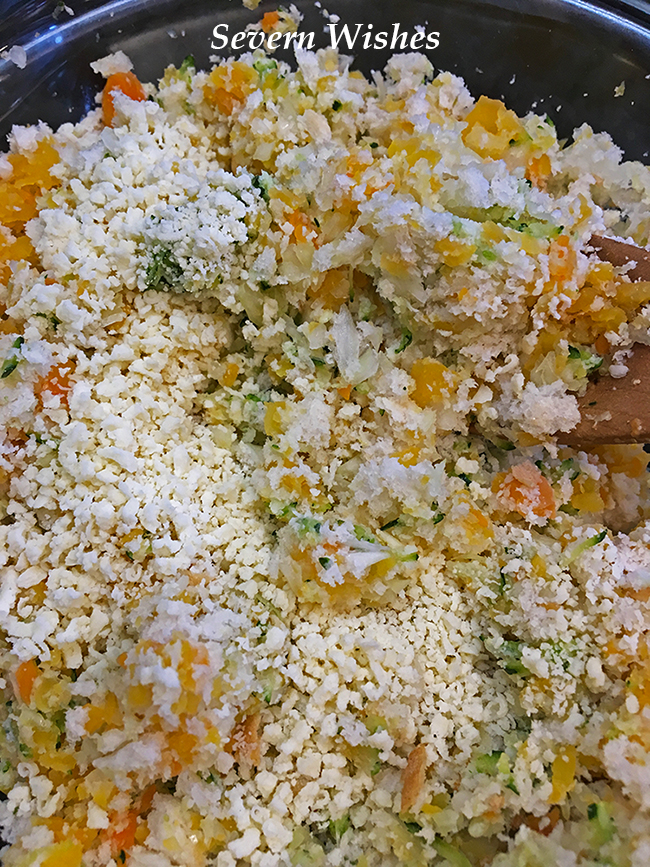
Get a large mixing bowl and crack the egg into it. Add the herbs and stir until combined. Next add some of the tomato dip. Next add the squeezed vegetables, then lastly add the hard cheese (or alternative) and the breadcrumbs, stir it all thoroughly. You don’t want lots of the same type of veg in each ball, try and mix it so you get a variant of all the ingredients. (I do my breadcrumbs in a small food mixer).

Place the flour onto a small plate ready to roll your nuggets in.

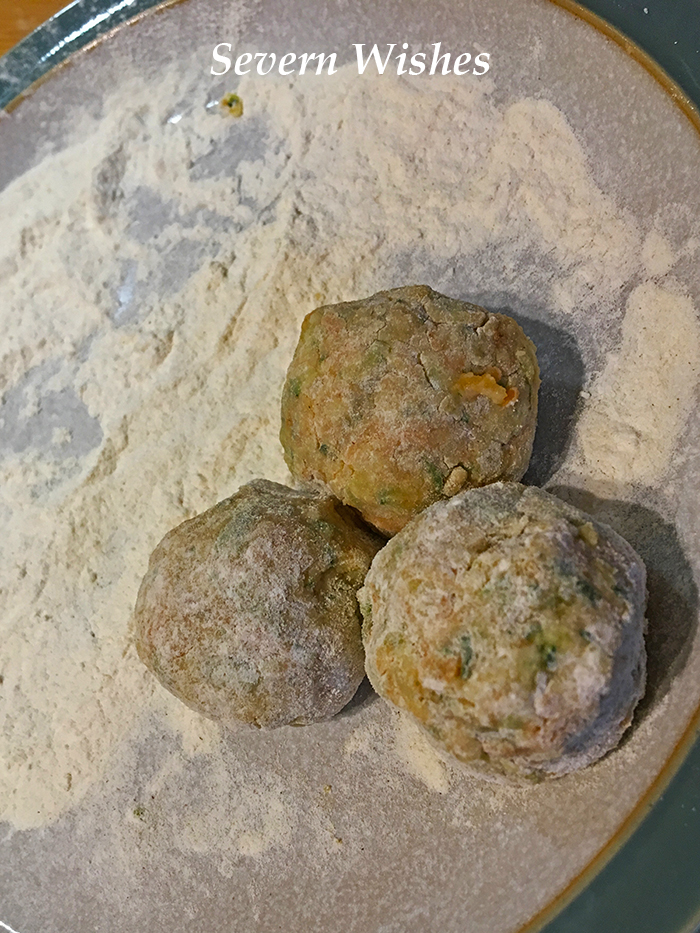
To make a nugget take a small handful of the combined mixture and roll between your palms. Top Tip! Do this with wet hands so it doesn’t stick to you! Roll them out into oval shapes, and then once happy you can roll each one in flour to coat it.

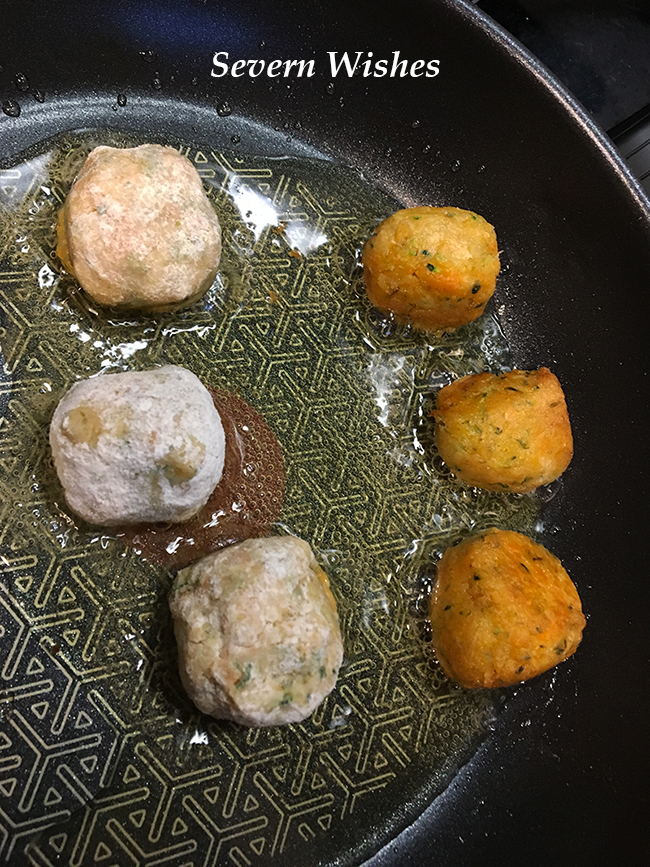
Have a large frying pan ready on your cooker with some oil getting hot. You should place the nuggets down gently so as not to break them or splash the oil. Fry each one until lightly browned all over. Top Tip! Use a pair of tongs to adjust them while frying to make sure you do all of the sides. Keep topping up the oil after every few nuggets.


Once they are cooked set the nuggets to one side on a piece of kitchen roll so as to drain any excess oil from them and let them cool a little, and then serve them while they’re still warm in a large bowl with the remainder of the tomato dip. They are great for a children’s party or a finger food family night in.

Squeezing the Veg so as to remove as much moisture as possible.
Veggie Nugget Mixture Ready For Mixing and Rolling

Vegetable Nuggets are ideal for children who are weaning at around 10 months and older, when they are learning to hold and bite into foods.
They are great for getting your children to eat vegetables.
The tomato dip provides a fun element for older children.
The leftovers can be frozen, defrost over night and re-fry them to give them a crunchy outside again.

My Recipe made me approximately 24 Nuggets.

Once you have rolled your nuggets between your palms you can get ready to fry them… My Top Tip is to have some done so you can fry one set while you make the next set…

Frying Tips

When frying the Nuggets take care and turn them frequently so that they cook evenly on all sides. You also need to maintain the oil so that they sit in a few millimetres at all times to avoid sticking to the pan.

Finished Veggie Nuggets

These Nuggets are great, and rather tasty too, that is providing you like the Veg I have chosen. You can substitute the Courgette for Mushrooms if you prefer those! And you can also do these without being dairy free by using a regular cheese like Parmesan if you wish.

Thank you for visiting, I hope you have enjoyed reading about this recipe, if you decide to give it a go then please leave me a comment with how it went afterwards… Check out my other recipes on the category list!

✩ Sabrina ✩

Sabrina Has 6 Ways to Improve your Well Being

Today On The Blog I Am Discussing Ways to Improve your Well Being.

It’s actually easier than you think to improve your well being. I began to do these things last year and am happy to say that I achieve most of these most weeks still.

✩ Stay Active
✩ Read More
✩ Eat Well And Proportionally
✩ Remember To Climb Those Stairs
✩ Try Something New Once In A While
✩ Do Something You Love Every Day And Enjoy Yourself

✩ Staying active is easy providing you stick to what you’re able to do. Even a ten minute walk is better than not walking at all. Other easy exercise includes gentle swimming and cycling. However if you’re generally a healthy person you might want to take up a new hobby this summer, walking outdoors is often free to do. You can make it fun for children by playing Spotting or Eye Spy games.

✩ Reading more is something I’m passionate about myself and I aim to increase mine even further. Whether you read the news, a book, a magazine, you are still working your brain by reading the words, and looking up words you don’t know is also beneficial. But more than that you are exercising your brain and taking in knowledge, despite what you read, a physical book or on a screen, it’s still reading.

✩ Eating well is so important anyway for your health, but portion sizes and proportion is vital. You need a good ratio of the main elements of food types as well as the right sizes of these types. Your 5 fruit and vegetables a day is also a key element in keeping your body healthy.

✩ Climbing a couple more staircases every day rather than taking the easy routes of lifts and escalators is something to consider. Your heart rate increases when you climb inclines or stairs, this is classed as exercise, even if it only takes you one minute to do the task. Stairs are also good for using muscles in your legs.

✩ Your mind needs to remain healthy too, and one way you can accomplish this is by trying something new. Whether it’s a hobby or activity, playing a board game or simply going somewhere new. New things stimulate your brain.

✩ No matter what kind of day you have, a busy day, a slow day, a stressful day or a day of fun! You should do one thing that you love each day. This is more for a sanity reason, but we all get busy and chores and work come ahead of what we want to do or love to do. For example, I love to play games, so I allocate twenty minutes in an afternoon or evening where I play Scrabble on my mobile phone. It’s not just something I enjoy but it also stimulates my brain by getting me to think.


Sabrina’s Top Tip!

Don’t try and accomplish all of the sections above in the same go! Perhaps do one a week and then see if you can achieve it again the following week. Also my tip is to pick the one you believe is most achievable to you!

Thank you for visiting Severn Wishes for this lifestyle post today, I hope that you have enjoyed it. Leave me a comment if you want to, I would love to hear what you think about it.

✩ Sabrina ✩

How to make Chinese Food from Scratch at Home for this Chinese New Year

Happy Chinese New Year!
新年快乐

A great way to enjoy some tasty Chinese style cuisine this week is to do it yourself. To celebrate Chinese New Year I thought that I would share my own recipes with you all. Many people think it’s a complicated type of cuisine to make but if you’re good at following step by step recipe guides like mine, then you can create my delicious dishes in your own kitchen!

In today’s blog post I’m going to outline some of my own tips and tricks, as well as share my own recipes on how to make some flavoursome Chinese meals. Follow my instructions as much as you can, and substitute the meats for other meat or fish or a vegetarian alternative where I indicate you can with this symbol ⇕ . You can decide which of the sauces you’d rather make too, I will show you a few.

Why not give some cooking a go this Chinese New Year week! I’ve worked out that you can make 4 of my dishes for 4 people, plus a bowl of Sabrina’s Special Egg Fried Rice, for around £6.50 per person. That’s a heck of a lot cheaper than ordering in! On average a dish from a Chinese Takeaway comes in at around £7.00 in most parts of the UK. You can have 3 dishes and a rice for the same price! All you have to do though is cook it!

SHOPPING LIST

Stir Fry Pork ⇕ 500g is £2.75 at Tesco
Stir Fry Beef ⇕ 375g is £3.50 at Tesco
Chicken Fillets ⇕ 500g £4.00 at Tesco
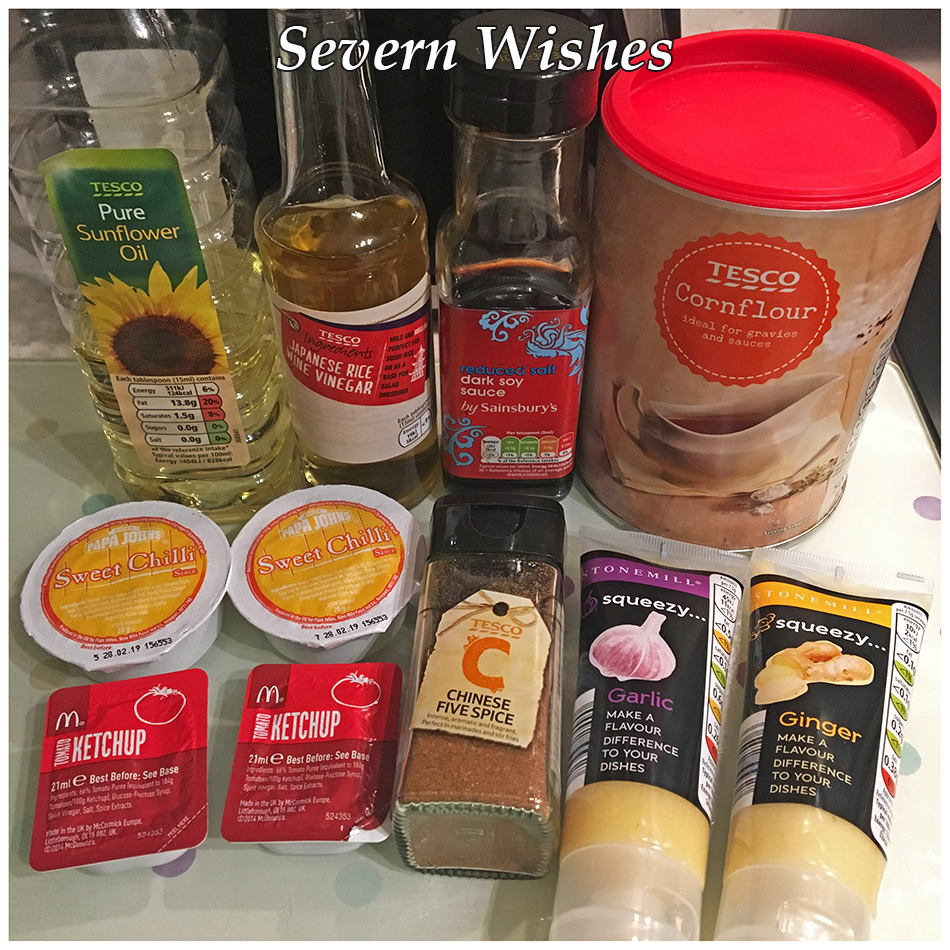
Rice Wine Vinegar – £1.99 for 150ml
Reduced Salt Soy Sauce 65p for Tesco own brand or £1.30 for Amoy
Egg Noodles – Range from 80p to £1.40 – You need 150g for 2 people
Rice Noodles – Range from 90p to £1.80 – You need 300g for 4 people
Spring Onions – 55p for 100g at Tesco
Peas – Petit Pois Frozen at Tesco for £1.60 for 1kg
6 Free Range Eggs – Medium are 85p at Tesco
4 Peppers 2 Red 1 Green 1 Yellow 55p each at Tesco
2 White Onions – 85p per kg at Tesco
Carrots 59p per kg at Tesco
Jasmine Rice – Thai Jasmine Rice 1kg £2.00 at Tesco
Chinese 5 Spice Jar 85p at Tesco
Cornflour​ £1.30 at Tesco
Sunflower Oil 500ml 80p at Tesco
Seasame Oil – 250ml £1.80 at Tesco
Sweet Chilli Sauce – don’t have this at home buy supermarket own
Tomato Sauce – don’t have this at home buy supermarket own
Garlic – if you don’t have this at home buy supermarket own or jar
Ginger – fresh or jar or paste all work the same
Chilli – fresh or jar of flakes is fine but fresh taste better
Black Bean Sauce – Various Brands and Sizes Available

Remember that for some of these items you will have leftover amounts of them that you can use the next time that you cook Chinese food, such as the Petit Pois, the Rice Wine Vinegar, the Cornflour and the Soy Sauce.

Optional Extras

Bean Sprouts for the Stir Fry & Chow Mein Dish – 300g for 50p Tesco
White Cabbage are 79p each in Tesco
Water Chestnuts 225g Tin at Tesco for £1.10
Button Mushrooms – 90p for 200g at Tesco

I have worked out that your shopping list will cost between £27 and £30 depending on supermarket offers and whether or not you pick those offers or brands versus own brand. I shopped at Tesco but prices are similar else where when I looked online. For 4 people this equals approximately £6.50/£7.00 each, that is for the 4 people to have 3 Chinese Dishes and Rice.

TIME TO COOK

How To Make The Crispy Meat Element of the Dishes.

One of the most delicious parts of Chinese food is crispy strips of meat seasoned with Chinese spices. You can pick up a jar of Chinese 5 Spice for less than £1 in most supermarkets, and because it’s so strong in flavour it goes a long way.

Options for this type of meal are…
Crispy Beef in Sweet Chilli Sauce
Crispy Pork in Sweet and Sticky Sauce

Ingredients

Meat In Strips (your choice from Shopping List) Cut It If Not Already
5 Tablespoons of Cornflour
3 Tablespoons of Chinese 5 Spice

How To Prepare

You need a small saucepan that you pour oil in to until it is around an inch deep. You need to heat this on a hob until it’s very hot before you place meat inside to fry. The Meat Strips take around four minutes to cook through depending upon their thickness, so always test one piece before you do the remainder. You will also need several pieces of kitchen roll/towel to place your fried goods upon to drain and soak up any excess oil.

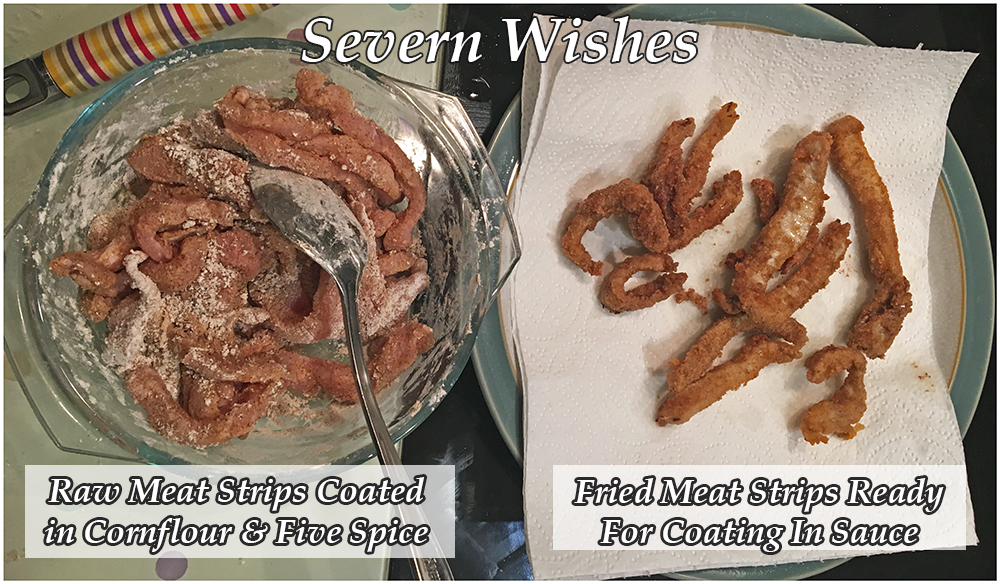
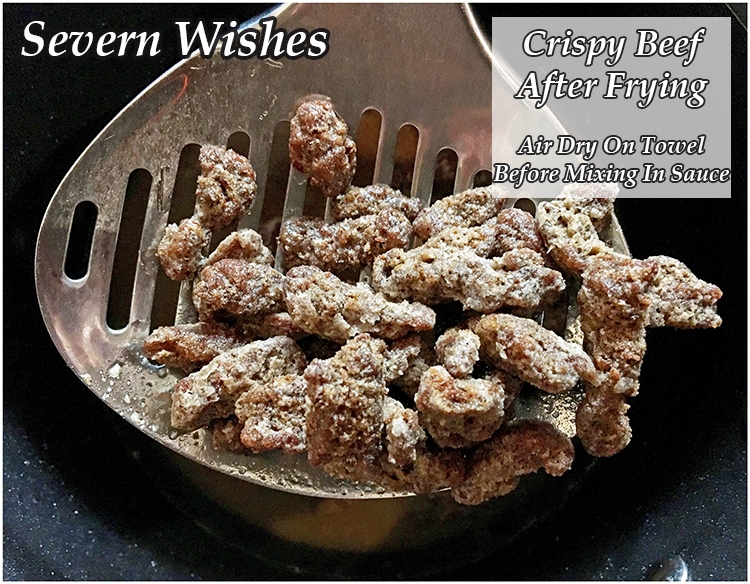
In bowl number one you need to place the cornflour and Chinese 5 Spice, mix it using a spoon. You need to coat each piece of meat in this mixture, by adding meat slowly a few at a time, once coated place them into the hot oil and time them frying. Remove them from the saucepan using a spoon or spatula with holes so as to drain the oil. Dry the strips on some towel until they are ready to mix with your chosen sauce.

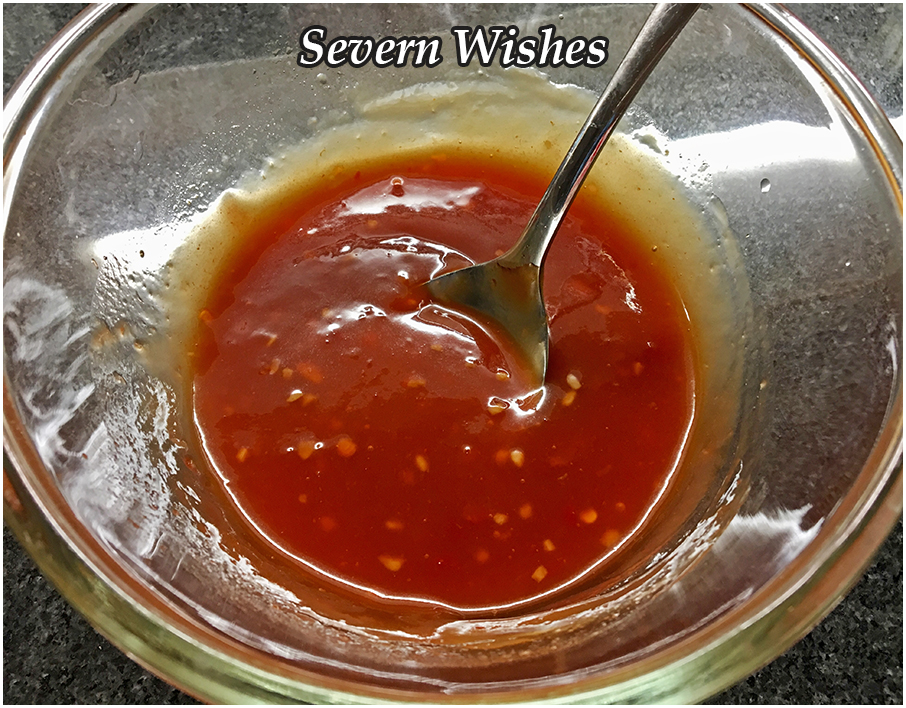
A great way to use up those Takeaway Sauces you get given is to use them like I did to make a Chinese Sauce. See my image below…

How To Make Chinese Sauces

Here are my recipes for some sauces and stir fry meals I love to make. They are easy to follow and take around half an hour to prepare and cook.

There is one sauce that I always buy because it is more expensive to try and make it, that is black bean sauce. You can pick this up in most supermarkets for between 35p to £1.50. Packets or Jars depending upon if it’s for a one off dish or for several if you wish to make it again. Black Bean Sauce is the Perfect accompaniment with Chicken.

Chicken in Black Bean Sauce
Serve this with chunky chopped Onions, ribbons of Carrots and sliced Green Peppers.

Crispy Meat in Sweet Chilli Sauce
Serve with Carrot Ribbons, Onions and a chopped Chilli Pepper.
2 Tablespoons of Soy Sauce
2 Tablespoons of Tomato Sauce
4 Tablespoons of Sweet Chilli Sauce
4 Tablespoons of Rice Wine Vinegar

Crispy Meat in Sweet and Sticky Sauce
Serve with fried peppers and onions.
1 Tablespoon of Garlic
2 Tablespoons of Soy Sauce
3 Tablespoons of Tomato Sauce
3 Tablespoons of Sweet Chilli Sauce
4 Tablespoons of Rice Wine Vinegar

Chicken Chow Mein Sauce with Onions
1 Tablespoon of Garlic
1 Tablespoon of Ginger
3 Tablespoons of Soy Sauce
2 Tablespoons of Sesame Oil
5 Tablespoons of Boiling Water
1/2 A White Onion Chopped Chunky & Fried
Add other Veg as Optional Extras

Add the Chow Mein Sauce to pre-cooked Rice Noodles or Thin Egg Noodles and your already fried and seasoned meat. If you want a richer flavour then marinate the chicken in soy sauce for an hour prior to frying it.

Homemade Sweet Chilli Sauce
Crispy Beef in Sweet Chilli Sauce
As Delicious As It Looks!

Sabrina’s Delicious Stir Fry

You need 2 pans. Once prepared fry all your Vegetables together in a little oil. In the other pan, take some of the garlic, ginger and spices and add them to season your main element while you cook it, don’t forget to season with pepper and salt.
Once everything is cooked combine the main and the vegetables. Add your noodles and a splash of boiling water to the pan. Stir fry until cooked, serve immediately.

Meat / Fish / Vegetable of your choice (Main Element)
Shallots OR White Onion
2 Tablespoons of Ginger
2 Tablespoons of Garlic
2 Peppers – 1 Yellow & 1 Red – Sliced Long Ways
1 Tablespoon of Chinese 5 Spice – Season Chosen Main
Noodles of your choice
Add Spring Onions too if you like Onion as much as I do for a pop of colour!

Fry all these tasty vegetables together to begin your Stir Fry.
Soy and Chilli Chicken Stir Fry with Onion, Yellow Pepper & Egg Noodles.

How To Make Sabrina’s Special Egg Fried Rice

Egg Fried Rice is relatively easy to make and is a great accompaniment to lots of Chinese dishes. You can partially cook this dish too to save time! Cook the rice either on the hob or preferably in a Rice Cooker if you have one. Then you’re ready to begin.

Ingredients

Jasmine Rice – 300g – 400g Cooked
2 Tablespoons of Oil
2 Tablespoons of Soy Sauce
1 Teaspoon of Garlic
Peas or Petit Pois – 1 Small Cup – 150g approximately
Spring Onions – 4 to 6 Chopped Up – 100g plus
Scrambled Eggs – 3 Medium Eggs season with Salt, Pepper & Soy Sauce to your tastes

Method

In a large frying pan add oil soy sauce and garlic, then fry the Spring Onions and Peas together. Add the Eggs (previously whisked in a small bowl) and scramble together using a wooden spoon on a high heat. Turn the heat down and add the cooked rice. Mix thoroughly and add any more seasoning to taste. Fry until hot and all flavours are combined. Serve in a large bowl so people can help themselves and scatter some fresh spring onion on top.

The Final Dishes

Your final options for the Chinese Dishes are…

Main Dish 1. Crispy Pork with Sweet Sticky Sauce & Stir Fry Vegetables
Main Dish 2. Chicken in Black Bean Sauce with Vegetables
Main Dish 3. Chicken Chow Mein with Rice Noodles
Main Dish 4. Crispy Beef with Sweet Chilli Sauce & Stir Fry Vegetables
Main Dish 5. Soy and Chilli Chicken Stir Fry with Egg Noodles
Side Dish. Sabrina’s Special Egg Fried Rice
Side Dish. Stir Fry Vegetables

Thank you for joining me on Severn Wishes, I hope you enjoyed this lengthy food post! Let me know in my comments or tag me on social media if you make any of my recipes!

✩ Sabrina ✩

Argos Home House Shelf Review and How I Am Customising It For My Own Needs


Recently while browsing on the Argos App during a clearance sale I came across a set of shelves that I absolutely fell in love with. The triple wooden shelves were shaped like houses and hollow inside, sporting a backboard and sturdy sides. The colours weren’t to my taste but upon looking up the materials of the product I was satisfied that I could modify them to my tastes.

Reduced to clear from £44.99 to just £17.99 I got an absolute bargain! The shelves are triple white houses that you screw together to form a solid block. What I wanted to use them for was our baby nursery. The theme we had chosen was yellow and grey, gender neutral and colours that could be easily adapted over time. One of the back boards of this shelving set was grey with white stars, which was perfect! But I needed to customise the other two. Luckily as well the grey stars was the largest one, so all I needed was to alter the smaller two, and this is how I did it.

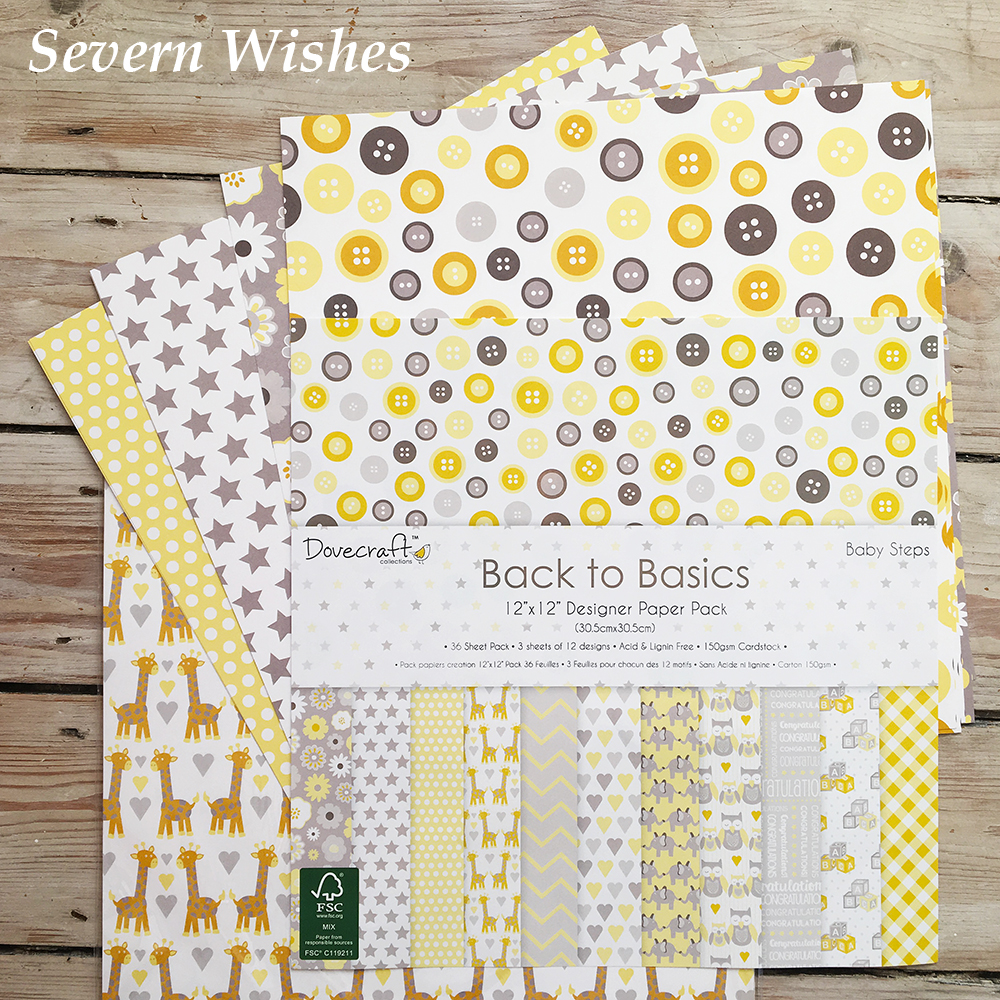
On Amazon a while ago I was searching for good quality crafting card and paper. I came across a brand called Dovecraft, and purchased several packets from them in various colours and sizes. I was lucky enough to get some beautiful Yellow and Grey ones, which were reasonably priced at the time too. I began to figure out how I was going to fix and cut these pieces to fit the triangle back boards of the shelving. Eventually I completed my designs and began working on it.

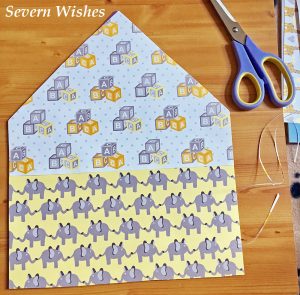
Here are some images of me working on the pieces. As you can see I used very strong double sided tape, cutting the card before hand for size. Then I made sure it was fully stuck down once I was finished by leaving the wood panel underneath some heavy books for forty eight hours before screwing to the shelf.

The finished shelving with the Argos design would usually look like this…


My finished and customised shelving however, looks like this…


✩ Sabrina’s How To & Top Tips 

My Top Tips for making craft work for you are;

✩ Be clear on your design so you know what the end result should look like.
✩ Research what you will need to get the job done including things like time frame.
✩ Shop around to get the best deals on materials and products.
Take your time and do it right first time.

✩ Review ✩

Name: DoveCraft Collections Designer Paper Pack
Details: Yellow and Grey “Baby Steps”
12″ x 12″ (30.5cm x 30.5cm)
36 Sheets – 3 Sheets of 12 Different Designs on 150gsm Card
Acid and Lignin Free
Purchased: On Amazon
RRP Price: £6.99
Link to Dovecraft on Amazon HERE

Quality 5
Designs 5
Value for Money 5✩


✩ Review ✩

Name: Argos Home House Shelf
Details: White Wooden House Shaped Shelving Unit with Back Boards
Purchased: Argos (In April 2018)
RRP Price: £44.99 (I Paid £17.99)
Unavailable Now (This Was A Clearance Item)

Quality 5
Designs 4
Value for Money 5✩


Over All Opinion

I have loved how my shelf has turned out, I’m very happy with it and how I made it unique to our home. I would recommend items from Argos and always read the reviews on the website. The paper from DoveCraft is excellent too, and if you’re a keen craft person then I would highly recommend their products. They do a huge range of colours and also sizes of Paper and Card, so it’s definitely worth a look if you have been inspired by what I have done.
I plan to use the remainder of the card pieces as backgrounds for photo frames and for a scrapbook that I am making for our baby’s first year.

✩✩

I hope you have enjoyed reading this post. Have a great day and thank you for visiting Severn Wishes Blog today!

✩ Sabrina 

Delicious Recipes That I Love To Cook – Time Saving Ideas For Healthy Eating And Tasty Eating

FOOD WEEK ON SEVERN WISHES


Delicious Recipes That I Love To Cook – Time Saving Ideas For Healthy Eating And Tasty Eating

My Culinary Background

If there is one thing I love, it’s eating food and cooking food. I was first taught how to cook by my grandparents, I was very young at the time, and it began with simple things like Omelette and decorating your own homemade Pizza dough. Then we moved on to more complex things like Lasange and Pies. But as I got older I carried on with my interest in cooking, I started to experiment with flavours, and I also liked various parts of my heritage to come through in the meals that I cooked.

When I went off to University my Nan had written out some of her basic recipes in a little book for me – just in case I forgot anything. It is kept safely away now in case I ever need it, but most of it is now cooked through memory. I am forever grateful for her teachings, and she still tells me about new things now and again more than twenty three years since we began cooking together.

I met my husband at University, and at the time he couldn’t believe how much I ate! I was this tiny petite women and everyone in my family used to say I had a hollow leg! I won’t ever forget when I first cooked for him, I introduced him to a whole new world of flavours when we first met. There were foods he had never tried before, and there were things we also tried together too. And since then I have branched out into cooking even further, into both his background and his culture, and even into some more diverse parts of the world after going travelling with him. We both love to try something new!
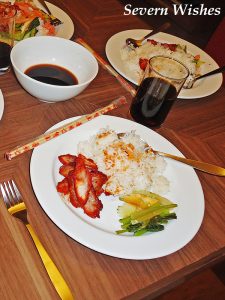
My husband does suffer with an array of allergies, the majority of which are food related. This was problematic when we went travelling. Since we began living together (almost ten years ago now!) I evolved my ways of cooking to exclude the things he couldn’t have and simply substitute them for something else.

One thing I do like to do is eat healthily but by making sure its tasty and enjoyable. I often pass my recipes on to family and friends, but I wanted to share some of my favourites on my blog too. Because they can be adapted for whether or not you eat certain meats, or are vegetarian, the possibilities are endless, if only you know what goes together. And that comes with years of experience in the kitchen.

What I wanted to achieve by writing and sharing this blog post was to help you cook, give you new and easy to follow recipes and if you love what I’m putting out you can tell me and then I can write more posts like this one!

So for now… Let’s talk Time Saving in the Kitchen!

Time Saving in my eyes is this, you don’t have to cook everything from scratch every night of the week. It means you either have leftovers in the fridge or a batch of something in the freezer that can either be cooked in the oven straight from or defrosted during the day and then heated on the hob later…

All you need to ensure is that all the ingredients you choose to cook with haven’t already been pre-frozen. So don’t defrost raw meat, cook it in this recipe and then freeze it again. Use fresh foods and then have some bags or tubs at the ready to freeze your leftovers if that’s what you plan to do. If storing in a fridge Glass is best, the amazing Glass Pyrex range of sized dishes with lids are an excellent investment to make. I have the set that can go straight from cold to hot such as fridge to oven.

Let’s Make Some Tasty Food!

Today I am going to share three of my favourite time saving recipes with you. This will either do you 8 portions to eat, refrigerate or freeze. It’s up to you!

Sabrina’s Tasty Italian Ragu

My Meaty and Tomato Ragu can be used for any of the following meals; Spaghetti Bolognese, Lasagne, Chilli Con Carne, OR simply Ragu Sauce to eat with Rice, Pasta or Potatoes.

All you would need to do is add additional herbs and spices to the Recipe below in order to make one of the meals above. Or leave the sauce as it is, and you can serve it with a wide variety of side dishes. If you aren’t sure how to turn this Ragu into one of the above meals leave me a comment and I’m happy to respond with that you’ll need.

✩ Ingredients 

Mince Beef – 400-600 grams (10-20% Fat is best)
Pork Mince 250-500 grams (Low Fat is best)
Lean Bacon or Lardons 250 grams – Diced (not Smoked for Children)

Tomato Puree – 100 grams
Chopped Plum Tomatoes – 3 Tins (400 grams each)
Carrots – 4 Large – Diced Fine
Large White Onion – 2 Sliced or Diced Fine
(Optional) Celery Sticks – 4 Diced Fine

Fill the 3 Empty Plum Tomato Tins with Boiling Water, then add these contents to a jug (careful the tins will go hot!) and add a Beef stock cube/pot to this and then stir through.

Vegetable Oil – 1 Tablespoon
Pepper – To Your Taste
Salt – To Your Taste

Oregano – 3 Tablespoons
Basil – 1 Tablespoon
Rosemary – 1 Teaspoon

✩ TOP TIPS 

You are aiming for around 1kg of Meat in this Ragu and it will then Serve Approx 10-12 Portions of Food.

If you have a Food Processor Use It! Blitz the Onions and Carrots together on Dice for a quicker start to your Ragu. Add your Optional Extra’s after this stage too so everything is the same size!


✩ Recipe ✩

1. In a large saucepan brown the meats together. You need very little oil due to the fat and then drain half of the fat off after around fifteen minutes.

2. Make sure your meats are cooked through and then add your tomato ingredients and then the jug of stock.

3. Simmer for twenty minutes with the lid on the saucepan.

4. Add all of your herbs and the diced vegetables, and mix well.

5. Simmer the saucepan now with a lid on top for around 1 hour. The liquid should reduce down and the sauce begin to thicken.

6. You know when your Ragu is ready because it will taste “together” with all the flavours having marinated as one and it will have thickened up nicely.

7. You can serve this with a range of side dishes, or freeze it all!

✩ Storage ✩

You can store this meal in freezer bags or in tubs, it will keep for a month! Remember to defrost a portion before you reheat it, and then you can also add other spices into it once it is chilled too!

✩✩✩✩✩✩✩

Sabrina’s Tasty Chicken Curry

My Curry is a mixture between a Chicken Tikka and a Chicken Bhuna. It isn’t spicy but it isn’t mild either, and it has a few vegetables in it as well. You can choose to leave these whole for adults or dice them finely for children who might be a little picky…

It’s also nice to consider adding other things to curry to bulk it out, peppers and onions work best but so do a variety of other vegetables. You can also bulk it out with additional tomatoes that aren’t just made for the sauce but left as chunks.

If you don’t want to use Chicken you could use a vegetable such as Cauliflower. Or Pork Belly is a nice meat for Curry, but it would need to be left in to Simmer for longer to make it tender.

If I am eating a portion of my curry alone I cheat by using one of those microwave Pilau Rice to go with it! They are Super Tasty and convenient! If you’re doing Rice for a few people though and on a regular basis then I highly recommend you invest in buying a Rice Cooker. They save you loads of time and you don’t have to stand their making sure your rice doesn’t stick to the bottom of the pan. Ours is from a simple one from Argos!

✩ Ingredients 

Chicken – Diced 400-600 grams (Portions 4-6)
Tomato Puree – 100 grams
Chopped Plum Tomatoes – 1 Tin (400 grams)
Plain Yoghurt – 100 grams
Large White Onion – 1 Sliced or Diced
(Optional) Yellow Pepper 1 Sliced into Chunks
(Optional) Red Pepper 1 Sliced into Chunks

Vegetable Oil – 1 Tablespoon
Salt – Pinch
Pepper – To Your Taste
Sugar – Pinch
Paprika – 1 Teaspoon
Garam Masala – 2 Tablespoons
Cumin – 1 Teaspoon (Mild) / 1 Tablespoon (Medium)
Chilli Powder – 1 Teaspoon (Mild for Children) / 1 Tablespoon (Medium)
Lemon Juice – 1 Tablespoon
Garlic – To Your Taste
Coriander Leaf – 2 Tablespoons
Curry Powder – 1 Tablespoon
(Optional) Ginger – 1 Teaspoon Sliced Thinly and Diced
(Optional) Coconut – Dried or Raw or Shredded – 1 Tablespoon

50ml of Warm Previously Boiled Water

✩ Recipe 

1. Fry the Onion and Chicken in a Pan until Browned in a little oil. Add the Chunks of Pepper and Fry until Softened.

2. Start Making Your Sauce In Another Larger Saucepan that has a lid, by combining the tinned and packet items first such as the Tomato ingredients and yoghurt.

3. Then add the spices and herbs in to the saucepan one at a time, stir the pot thoroughly after each one.

4. Once all ingredients are combined add the browned chicken and onions to the mixture and stir through until all the pieces are coated.

5. Finally add the Water and Simmer the Pan for up to 1 hour. Stir every few minutes to avoid sticking and stirring through the flavours.

6. The Curry is Ready when the Sauce has Reduced down and Thickened, and the Chicken is left tender and moist and cooked through.

7. Serve with Rice and perhaps a Naan Bread which is also delicious to mop up any sauce!

✩ Storage 

This meal can be cooled and stored in the fridge for two days or it can be frozen in portions once it is cooled and can be used within one month. Defrost thoroughly in the fridge over night before reheating.

✩✩✩✩✩✩✩

Sabrina’s Tasty Mediterranean Vegetable Pasta Bake

One dish that I love to make that also contributes to two of your five fruit and vegetables a day is my tasty Mediterranean Veg Pasta Dish!

What you will need for this tasty dish is a selection of your favourite vegetables that pair well with a tomato based sauce. I will firstly explain my main ingredients for this dish and then outline the other things you can choose to put in if you want… This also includes a choice of Topping as well!

✩ Ingredients 

Pasta 80 grams per person – the Shape is your decision

Tomato Puree – 50 grams (100 grams if you like a rich sauce)
Chopped Plum Tomatoes – 1 Tin (400 grams)

Large White Onion – 1 Diced
Green Pepper – 1 Sliced and Diced into Chunks
Yellow Pepper 1 Sliced and Diced into Chunks
Red Pepper 1 Sliced and Diced into Chunks
(Optional) Courgette – 1 Sliced
(Optional) Cherry Tomatoes – 3 or 4 per person
(Optional) Small Red Onion – 1 Diced

Oregano – 1 Tablespoon
Basil – 1 Tablespoon for Sauce 1 Tablespoon for Top
Garlic – As Fresh or Granules or Salt or Diced – 1 Tablespoon
Black Pepper – To Your Taste
Salt – To Your Taste

✩ TOP TIPS ✩

Use a Glass Tray for Pasta Bake, it makes it so easy to transfer from appliances!

De-Seed your Peppers before dicing them to ensure no seeds in your meal.


✩ 
Recipe 

1. While you boil a pan three quarters full for your Pasta to become cooked in, preheat an oven to 180’c (160’c Fan).

2. Place your chopped and diced vegetables into a tray, coat with a little oil and oven bake for 25 minutes. (This includes the peppers and onions and any of your optional extras etc). Stir after this time and put on for a further 15 minutes.

3. To make your sauce combine in a jug the tomato puree, chopped tomatoes and herbs and spices. Stir thoroughly. Season it to taste and place to one side.

4. Cook your pasta on a hob while your vegetables soften for their final minutes in the oven.

5. Once cooked strain your pasta. You then want to add it to the Roasting Vegetables in the tray. In order to do this remove the tray from the oven, place on a heat protective surface and stir the contents of it together.

6. Then quickly add your sauce from the jug and stir, followed by the pasta and stir. Your sauce should coat all of your ingredients, if it doesn’t seem like enough fill halfway up the now empty tomatoes tin with partly cooled boiled water. Add in 1/4 of the amount in the tin at a time, stirring constantly until all of in the tray is coated in sauce. You don’t want your pasta swimming!

7. Shake the tray from side to side gently allowing the contents to settle flat. At this stage you can add some cherry tomatoes on to the top and a sprinkle more of some basil if you like basil. These tomatoes will bake on the top nice and soft.

8. Put the Pasta Bake into the oven at the same temperature as earlier (160’c) and leave it for around 15 to 20 minutes. If at this stage you want to add some grated cheese on top, carefully remove the tray, wobble it and stir at the edges to make sure it isn’t sticking. If it is sticking then stir it all thoroughly before sprinkling on your cheese.

9. Bake for more 10 minutes or until the cheese is melted and browning. Serve in bowls with Garlic Bread on the side! Yum!

✩ Storage ✩

This pasta will keep overnight in the fridge for leftovers the next day. Ensure it is heated through thoroughly in smaller bowls when you come to finish it off.
✩ Additional Tips 

You can choose to add meat to the Vegetarian Pasta Bake if you wish, just remove one of the vegetables from the “you choose” part and keep the same amount of grams. For example, 100g of Chicken Breast Chopped OR 100g of Bacon Lardons (Avoid Smoked and Limit Portion for Children Due To Salt Content).

If you don’t like one of my ingredients remove it and substitute it for something else. It could be a herb or a spice or a vegetable. It will of course alter the taste slightly, but we’re all different at the end of the day.

Adding a little Grated Cheese on top of your food is definitely allowed in my house!

Don’t be afraid of just putting your favourite vegetable next to the meal on the plate, you don’t have to put it inside a meal if you don’t want to. Do that fresh every time you cook and that will count towards your five a day too.

Delicious!

✩✩✩✩✩✩✩

Thank you very much for reading this post, I hope you have enjoyed it. If you cook any of my recipes please leave me a comment and let me know how you get on! And if you want to republish any of my recipes then please credit me as the original recipe creator! Thank you!

✩ Sabrina ✩
How I Live An Organised Lifestyle And How You Can Too!


How I Live An Organised Lifestyle And How You Can Too!

So being organised has always come naturally to me. It became more apparent as I got older, and through high school especially I was the one with folders and tabs and lists… I have been to university and I have had working jobs since I was fourteen years old. So I have learnt how to be organised with both my time management and my money. When you have needed to be organised for work, I find that it rubs off on to the rest of your daily life.

If you are someone who struggles with being organised in some or all aspects of your lifestyle, then take a look at the rest of this blog post for some ideas. These are just a few of the ways that I stay on track of all things Sabrina!

Wall Calendars and Phone Calendars

One of the ways that I stay on track is to manage my calendar. I vary rarely forget a birthday or an appointment, and now with my iPhone and the cloud, it is even easier to synchronise everything together and be organised daily. I also synchronise it with my husband as well.

Not only do I use a calendar on my phone, but I use a wall calendar too. Every year I make a custom one on an online site, with my own photographs, and I adjust the days each month for special dates. These customise calendars are becoming both affordable and popular, and I have created one for three years running now. You can purchase an array of sizes to fit your wall space, and the sections you can alter for your own reasons are becoming more detailed every year I make them.

Some outline birthdays and anniversaries, but you can now add more detailed things to them as well such as events.

My Top Tip for Calendars are to sync your digital devices with family members so everyone is on the same page. And for written ones keep one close at hand that you pass every day, bedside table or kitchen wall work best for me.


Always Arrange Easy To Keep Appointments

We all know how busy family life can be, so why try and stick to appointments that become increasingly difficult. Don’t give yourself just twenty minutes to get to the Dentist after work, rearrange your schedules and make appointments (or change them) to suit your week. I nearly always try and arrange certain things for days off, depending upon the time frame of the appointment.

Many places let you book appointments online now too, so if you cannot get through at rush hour on the telephone why not try that! Don’t be afraid to cancel appointments and reschedule them to suit your needs.

Consider Reducing Your Paper Footprint

A lot of us receive post that often gets stuck in a drawer until we have time to look at it. Why not look into being digital for some of your current paper trails? Most banks are giving people the option to go Paperless and I have to say that for me it was a great thing to do. Less papers to store in the home and emails that can instead be stored in the digital cloud space.

And cutting down of less trees of course! Win! Win!

Use Planners or Boards to Keep Track of your Week

We often waste a lot, I’m not talking time here – though social media has a lot to answer for! No, what I mean is waste of food, wasting energy by not turning things off around the home. All of these examples are habits that are so easy to change and get into a good habit of changing. I have taught my family members to recycle more, to turn off plugs when they are no longer being used, and to be more organised with food.

I have a blackboard in the kitchen now, where I write up each weekend what the meals will be for the rest of the week. Everyone knows where they are and what we are having, and food is wasted less because sell by dates do not go by. It does take a bit of organising, but the family all know what is happening and we can also plan ahead a few days so that things can be altered if needs be.

If anyone in the family has a particularly difficulty schedule, be it with shift work or with medications for example, then a planner might be a good item to invest in. You can buy weekly ones that have days of the week with various sections upon them. These are very useful for multiple things that might occur on a specific day or time.

My final Top Tip for being organised is to make time once a week for creating either a To-Do List or Weekly Schedule. Don’t try and remember everything all in your head, we all lead busy lives and even the best of us with good memories are bound to forget things once in a while! Trust me, make those lists, notes and schedules work for you!

Thank you for reading this blog post today, I do hope that you have enjoyed it and can take some inspiration from my tips.

 Sabrina 

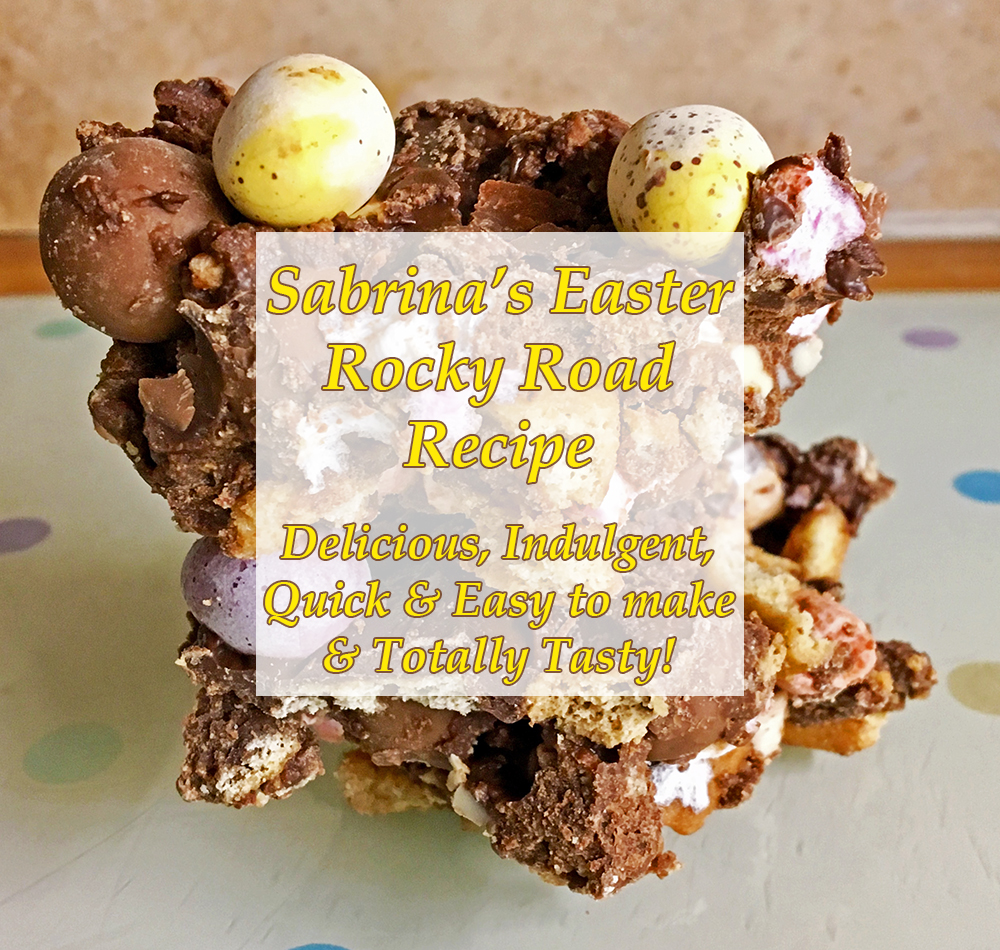
Sabrina’s Delicious and Delectable Easter Rocky Road

Sabrina’s Delicious and Delectable Easter Rocky Road!

☆ Welcome to a post about Sabrina’s Recipes! ☆

So with Easter only being a day or so away, I had wanted to share one of my favourite recipes with you all. This is rather indulgent and it is quite a sweet treat, but if you like this sort of thing, this will be right up your treat tasting alley!

My Easter Rocky Road is a Nut Free delicious treat for the whole family, it takes only minutes to prepare and a couple of hours to set and that is all! And you can add other options in to it in order to make it go further, and to allow your family to get some fruit into their diet too.


You can tailor this recipe to suit yourselves, like I said above this is a Nut Free Recipe due to the allergies in my family. However feel free to substitute items and adapt this recipe in any way that you need to. Just keep the same measurement. For example, if you want a Vegetarian Recipe and are fine with Nuts, you can remove the 50 grams of Mini Marshmallows and replace those with 50 grams of Chopped Nuts.

This recipe will make approximately 24 squares of Rocky Road. You can determine the depth of yours by choosing a baking tin or glass dish that suits you. When making for children, make sure that you supervise when eating due to the mixture of textures. Also make sure you cut this dessert into small portions due to the high sugar content. The serving is designed as one square of Easter Rocky Road at a time. Once it has set and been cut, place the pieces into a cake tin or baking tin with a lid, keep it closed between servings and the cake will last up to 7 days.

☆ What You Will Need ☆

A Baking Tray / A Glass Dish (Approximately 1.5 inches Deep)
Baking Parchment Cut To The Size Of Your Tray
A Large Bowl For Mixing
A Saucepan and A Glass Bowl for Melting The Ingredients Listed Below
Water for Boiling in the Saucepan
Two Wooden Spoons
A Spatula

☆ Sabrina’s Easter Rocky Road – Ingredients ☆

Mini Marshmallows 50 grams
Maltesers 50-75 grams
White Chocolate Chips 25-40 grams
Digestive Biscuits OR Ginger Biscuits 150-200 grams
Milk Chocolate (for melting) 250 grams
Dark Chocolate (for melting) 120 grams
Butter (for melting) 140 grams
Golden Syrup (for melting) 4 tablespoons


Mini Eggs – 2 bags – 1 to be used inside the Rocky Road (these need to be cut up into quarters) and then you need to leave 1 bag with some whole or halved to push in to the mixture at the last minute before putting it in the fridge for setting.

You can also add any of the following things that go brilliantly with this recipe – Cherries / Cranberries / Nuts / Raisins etc… You will need 50 grams of your chosen one/s and make sure you increase the depth of your tray by half an inch / 2 cm if you decide to include more than one of these.

☆ Sabrina’s Easter Rocky Road – Method ☆

☆ Crush the Biscuits into mixed sized pieces and add to a large bowl.

☆ Melt the Milk and Dark Choc with the Syrup and Butter until Smooth.

☆ Set 150ml of the melted chocolate mixture to one side in a jug to cool a little.

☆ Add your chosen Rocky Road Ingredients into the Bowl with the Biscuit bits and Mix up thoroughly.


Once you’re happy with the distribution, add the melted chocolate mixture from the saucepan / glass bowl. Mix it up completely coating all the ingredients.

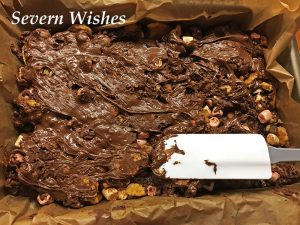
☆ Transfer to the baking / glass tray with the parchment already lined inside it and smooth it out as flat as possible, push down gently using a wooden spoon.


☆ Pour the remaining melted choc (from the jug) over the mixture and smooth it over the top with a spoon or spatula, you need to try and coat most of the mix.

☆ Add your chosen decorations of Mini Eggs OR even Malteser Bunnies!

☆ Put the whole tray in the fridge to set for a couple of hours, then gently remove the paper from the baking tray and cut the Rocky Road into nice squares ready for serving.


☆ Remember to put the pieces into a seal-able tin or tub to make sure it stays fresh. Once set and cut just store it at room temperature for the best results. And Enjoy!


Thank you very much for joining me for this food related blog post today. I hope you have enjoyed it and I hope you find my instructions easy enough to follow yourself.

If you end up making my recipe then please leave me a comment, I would love to know what you think about it and also do tell me how it turns out!

Wishing all of you a great Easter!

✩ Sabrina ✩

Sabrina’s How To Make Your Own Christmas Boxes

✩ Welcome to Sabrina’s How To Make Your Very Own Christmas Boxes ✩​ 

I know that so many of you will be thinking, but why don’t I just buy a Christmas box? Well if you don’t have much time then of course by all means do just that. But let me first explain to you why I think you should give this little craft project a chance.

Having browsed the internet for other kinds of Christmas Boxes I was astounded to find that they can range between £5.99 to £15.00 for just an empty one! And if you wanted gifts inside it too? Well you’re looking at around £25.00 and upwards for boxes with items already packed.

It sounds like a lot to me and honestly it is, when you add in a delivery charge too. I think that companies like these are great if you don’t have any time or creativity, and the money to spend, but this craft project is so easy to do, why not try and make just the one box with me?

I will now tell you how much it has cost me to make one of my basic boxes… So nothing inside it, just the box all done up pretty and ready to be used…

Each Box has Cost me Around £1.50 to make! Yes just £1.50!

Here is how I worked it out… I bought a roll of 12 metre Christmas wrapping paper from Primark for 90p, the boxes themselves were free because I picked them up from my place of work and supermarkets, and the only other things that you’ll need you probably have in your house already, but in case not here is the list…

You Will Need✩ A Ruler ✩ A Pencil or Pen ✩ Sellotape ✩ Stickers 

You get the idea. You will also need some bits to decorate after and (if you’re gifting this box) a Christmas Tag. These are the things that make up the rest of those £1.50 worth of spent pennies! I have now made 6 boxes for my family, using half of two rolls of paper, one roll of sellotape and 6 gift tags… So you get how cheap it is right? Now you need time!

Is this an easy craft project? Yes it is, providing you have around an hour to two hours spare and all of the items mentioned. Children would need adult help and supervision with the cutting but they could do the sticking into place with some guidance. It’s more fun for them to decorate their boxes, add in some paper to the mix and they could do festive drawings that you could then cut out and stick on top of the box even!

What tips can I give? Take your time, cut correctly and carefully with the scissors. Remember you can do any sized box, so it could be really large to house a massive present, or you could make a jewellery box size one instead of using a gift bag. Write down a list of what you would use the boxes for and also what sizes you may need. Gather everything you will require to do this before you start, and make sure it’s somewhere flat surfaced and comfortable – we don’t want any bad backs!

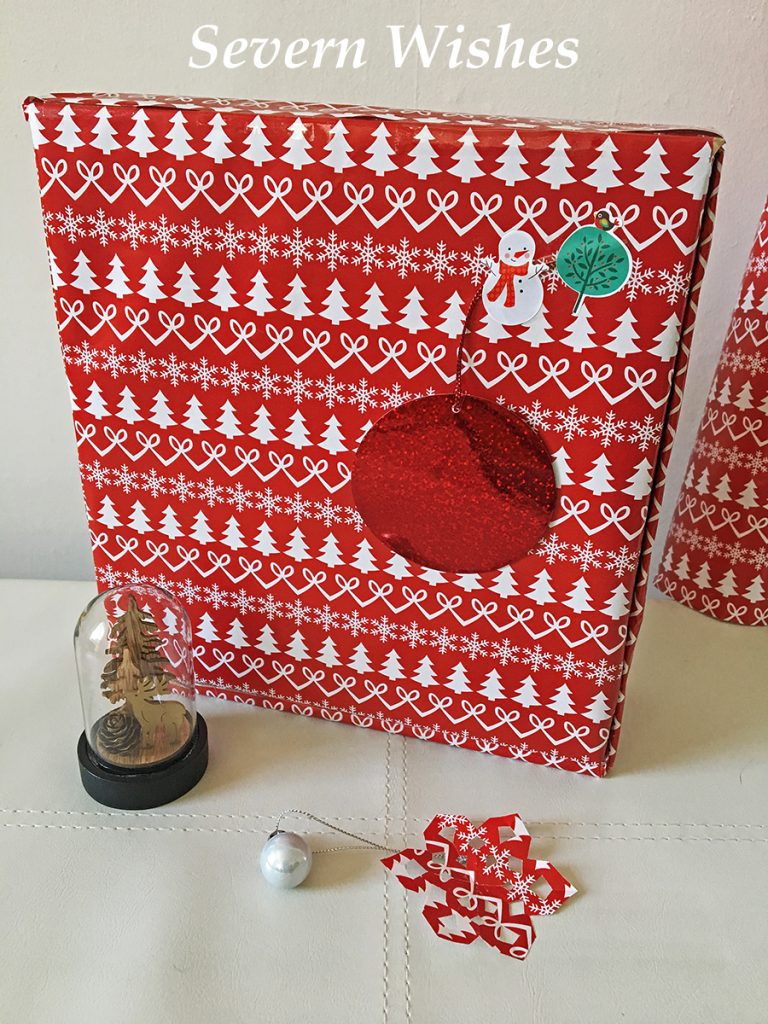
Here is a photograph of some of my finished boxes, you could make one even better using your imagination.

I think the best thing for you all to do is watch my video first, and then come back to the blog to go through the step by step. It’s easier than you think, plus then you can have the time to gather what you need (if anything) and work along with the post.

✩✩✩ SABRINA’S HOW TO MAKE YOUR OWN CHRISTMAS BOXES VIDEO ✩✩✩

✩ STEP BY STEP MAKING YOUR BOX GUIDE ✩

Step 1. Lay out your paper on a flat surface white side up, using a piece of scrap paper and a pen, take the box measurements.

Step 2. With a Ruler and Pencil mark down on the paper (with the white side up) what pieces you need to cut. (If you have a no hinge box you could draw around its lid and base and then just measure the sides).

Step 3. Carefully cut out all the paper parts and label the white side in pencil which part will stick to which part of the box.

Step 4. Begin to stick your pieces in place, remember the parts that need some over hang are the parts you stick on first (sides and top in my video).

Step 5. Once you have all the paper pieces in place, trimmed any over hanging parts and neatly taped it all on the box, you will be ready to decorate.

Step 6. Decorate depending on the theme you have chosen for your box.

Step 7. Fill your box accordingly… Enjoy!

✩✩✩

✩✩✩ HOW TO MAKE PAPER SNOWFLAKE DECORATIONS ✩✩✩

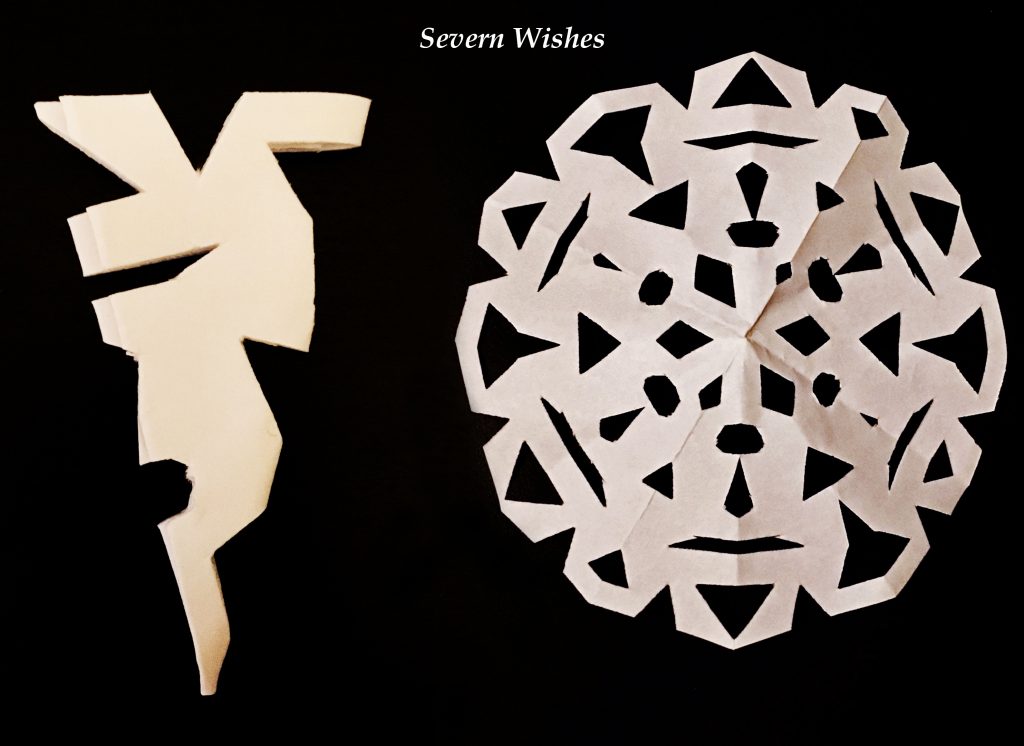
The most popular snowflakes are the six sided ones, follow this guide to make them, but remember that there are many folds, so don’t make your starting square too small or you’ll struggle to cut any pieces out of it…

Here is one of my designs (below) and it was fairly easy to make… this image on the shows you what the design would be (on the left) when you have cut the paper but not yet opened it and then (on the right) the finished paper snowflake…

I would love to see what you come up with, tag me on social media if you decide to make any snowflakes after seeing mine…

✩ WHAT CAN I USE MY BOX FOR NOW THAT I HAVE MADE IT? ✩

Why Make Them? 1. As An Alternative to a Stocking on Christmas Day
Why Make Them? 2. Use A Box Instead of a Gift Bag for Gifts
Why Make Them? 3. To Store All This Years Cards and Tags Inside
Why Make Them? 4. Use As A Christmas Eve Box For The Family

Christmas Boxes for Christmas Day – Sabrina’s Ideas

While making these boxes I had an idea, a great one if there are arguments between siblings on Christmas morning… I thought about putting all the families names in the box, the youngest of age picks out first and whoever gets their name pulled out gets the first present. Mum or Dad would have to count the gifts though and obviously write out the names corresponding to those gifts, but that way there would be no arguing. You could design the box as if it came from Santa, saying there will be no arguments and my magic box will decide who gets the next gift… It may have a treat inside too at the end of it… Think of it as a Pass the Parcel idea but with names relating to presents…

What to put Inside your Christmas Day Boxes

Mixed Festive Treats and Snacks
Game/s to play in a Group/s – Mini Jenga is great! Dominoes or Card Games!
Christmas Baked Goods from Christmas Eve if you made some!
A Festive Film to Watch together
Festive Coloured Paper so you can all make some Snowflakes
A Present or All Presents – Depending upon Size

If You Would Prefer To Make A Christmas Eve Box… designed for Families, Here are some of my ideas for putting inside yours…
A Christmas Book to read together – I loved the Snowman growing up!
A Christmas Cuddly Toy for each Child
Some Christmas Festive Snacks or Baked Items (1 per person)
A Game to play together – Junior Scrabble but you can only use Christmas words!
Christmas Cookie Cutters – if you’re bakers why not make something for Santa today
A Festive Film to watch before bed – there are so many now!
A New Decoration for each Family Member to put on this years Tree…
Food for Santa and his Reindeer – the kids can set it up on a plate before they go to bed

Pen and Paper – Get everyone to write down a wish for next year, roll it up and leave it for Santa to take with him…

Dependent on their age “A Project” – Writing A Wish / Thanking Santa for Something…

Here is one of my finished boxes… You can make the box any size you like! Perhaps you want one to hold a small present, perhaps to put some jewellery inside? You can use these boxes in so many ways, and you can make them whatever sizes you choose or need for your Christmas.

Remember you can decorate the top of it depending on what you decide to do with it. You can cut out letters or numbers that might be relating to your family, for example “Smith Family Christmas Eve Box” or “Christmas Memories for 2017″…

I know I keep explaining it but the possibilities are endless and I would personally have a little think as a family and jot some ideas down. It would make a lovely project to complete once school has finished too!

Christmas Boxes for Children instead of a Stocking – End of the Bed or By their Bedroom Door

If you have young children you might encourage them to stay in their bedroom on Christmas morning until a designated time. The best idea I had was inspired by something my mum did one year. That was to put our stocking in our room and tell us that we could have what was inside it, but we were not to go downstairs until a specific time on the clock. This keeps the child occupied for a while and allows the parents to get a well deserve lie in… hopefully! Here are my “Stocking Box” ideas…

An Edible Treat
A Short Game to Play
Christmas Drawing or Craft – Print off a Christmas Image and give them colours
A Recipe to Bake with Family Or Something You Can Use To Decorate from C-Eve
A Small Toy – Parents Choice
A Pack of Cards or a New Game – Teach Each Other Something New
One Small Present to Open in Bed
Instructions for the Day – Go Downstairs at a Certain Time…
A Fun Riddle or Quiz they have to get correct…

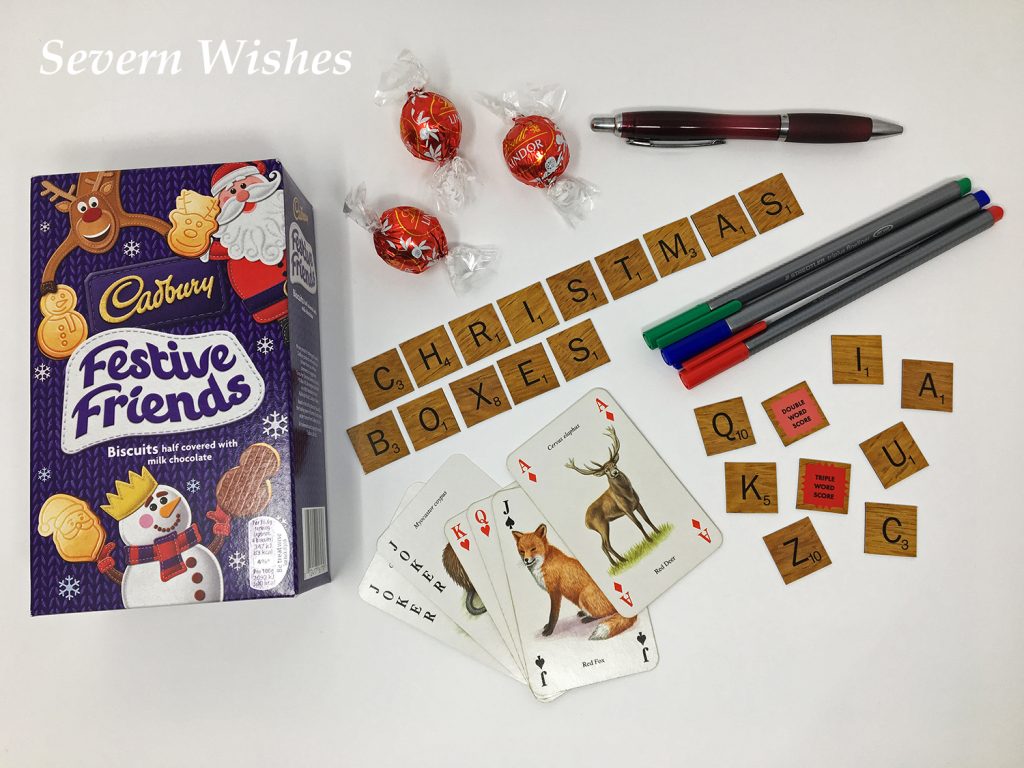
Here is one set of my Christmas Eve Box ideas, a pack of playing cards that have animals on them to teach your children while you play. Junior Scrabble is another great game for children! You could play but they are only allowed to put down Christmas related words! Cadbury Festive Friends are tasty chocolate biscuits shaped for the festive season that children can share. And the adults have to have something… Lindor Chocolates perhaps?! Festive Pens for some colouring thrown in there too… The box possibilities are as much as you can imagine!

Some Little Extra Traditions That Are Fun

Ideas to make your children believe what happened the evening before…

Use flour or fake snow on the kitchen floor to make Reindeer and Santa footprints like they came in at the back door OR if you actually have a chimney then do it there, and don’t forget to take bites out of all the food before the kids see it! They will be amazed!

What Is Still To Come On Severn Wishes…

I have a ton more blog posts to bring you this month, many are Christmas related, Gift related or Craft Related! I hope that you’ll come back to Severn Wishes soon for the next latest installments.

If you enjoyed anything in particular on this post and plan to use any of my ideas practically this Christmas then leave me a comment with what you loved, it would make my day if I helped you out.

I really hope that you’ve enjoyed this special blog post today, and perhaps I’ve given you some inspiration for making something too! Please let me know in the comments either on here or on my channel if you do decide to make a Christmas box. You can tag me in images on social media too I would love to see them! Happy Crafting!

 Sabrina 

How To Make Your Own Autumnal Looking Bracelet

✩✩✩ Welcome to Sabrina’s How To Make! ✩✩✩

Today The Post Is “How To Make Your Own Autumnal Looking Bracelet”.

✩ Before We Begin… What You Will Need;

Elastic + Scissors to Cut
Seed Beads in Red/Orange/Yellow/Brown/Green
Leaf Shaped Beads – Any Colour That Matches The Seed Ones
Other Autumn Coloured Beads In Various Sizes – You Need A Few Large Ones
Crimp Beads – Large Enough To Thread (3mm approx)
Creative Inspiration from Nature or the Internet or Me!
Bead Board – Not Essential – A Pot or Bowl so Beads don’t roll away though…

✩ Time Frame 

A bracelet like this would usually take me around 2 hours to make from start to finish. That includes doing a basic design for it and placing the beads on to my board for a general idea of what the finished piece may look like.

✩ Video ✩

If you would prefer to watch my video first and come back to this blog post later on then by all means do. It might be easier to see how I make mine before you attempt your own, if you’re a first time maker.
The link to my channel is here.

How To Make Your Own Triple Thread Autumnal Bracelet

✩ Step 1. ✩

Once you have designed your bracelet, be it in your head, on a bead board or on paper, assemble the components you will need in order to make it. Gather them all together in one place and make sure it’s well lit and a flat surface.

✩ Step 2. ✩

Begin by cutting your elastic to size. You will need three identical lengths if you wish to do a triple thread. If this is your first time beading then I would recommend you either try a single thread or a double if you’re feeling creative and adventurous. To start measure around your wrist, then leave at least an inch or 4cm of elastic over, in order to manipulate the beads and tie at the end.

If you’re not confident with using the elastic to pull on and off you can buy a bracelet clasp and attach that on to either end, it’s very simple and if anyone needs help leave me a comment.

Once you have the one, two or three pieces of elastic, you then need a 1mm/2mm/3mm crimp bead to hold them in place. Let’s say you’re doing a triple, you need to thread all three pieces of elastic into the crimp bead, make sure they are level and leave a 1cm over hang (at least), then using flat edged pliers, squash the crimp bead flat into place.

You’re now ready to start your bead design.

✩ Step 3. ✩

There is NO Wrong way to have designed it, it’s your bracelet!!! Go for it! Start by using a small bead, remember that symmetry often looks good at times but you can literally do whatever you want!

TIP: Remember if you’re doing a triple thread to work out matching lengths between the sections. If you want one that looks like mine then figure out what beads go together, larger and smaller, before you thread them. That way you can make the bracelet look more 3D and it will stand out as the sections don’t lie flat against the skin.

✩ Step 4. ✩

Keep working your bracelet until you are 100% happy with it. Remember by doing a crimp at one end nothing will fall off while you’re working (providing you’re the one holding the other end!!!). And that way if you don’t like a section you can just slide them all off and start again.

TIP: Once you’ve finished your bracelet pop it down and look at it carefully. Make sure there are no sharp beads that may hurt you when you wear it. Also make sure that you have enough room to tie at the end but it also will fit comfortably over your wrist.

✩ Step 5. 

Once you’re finished with the design, happy with it, and you know that you have plenty of room to finish the bracelet, then you need to choose a large bead in order to cover up the ends. I ended up having to change my plans during the end of my video, I had a large red and black bead picked out, but it wouldn’t fit. I ended up having to use a dark green, which was fine, it still fitted in with my Autumn theme.

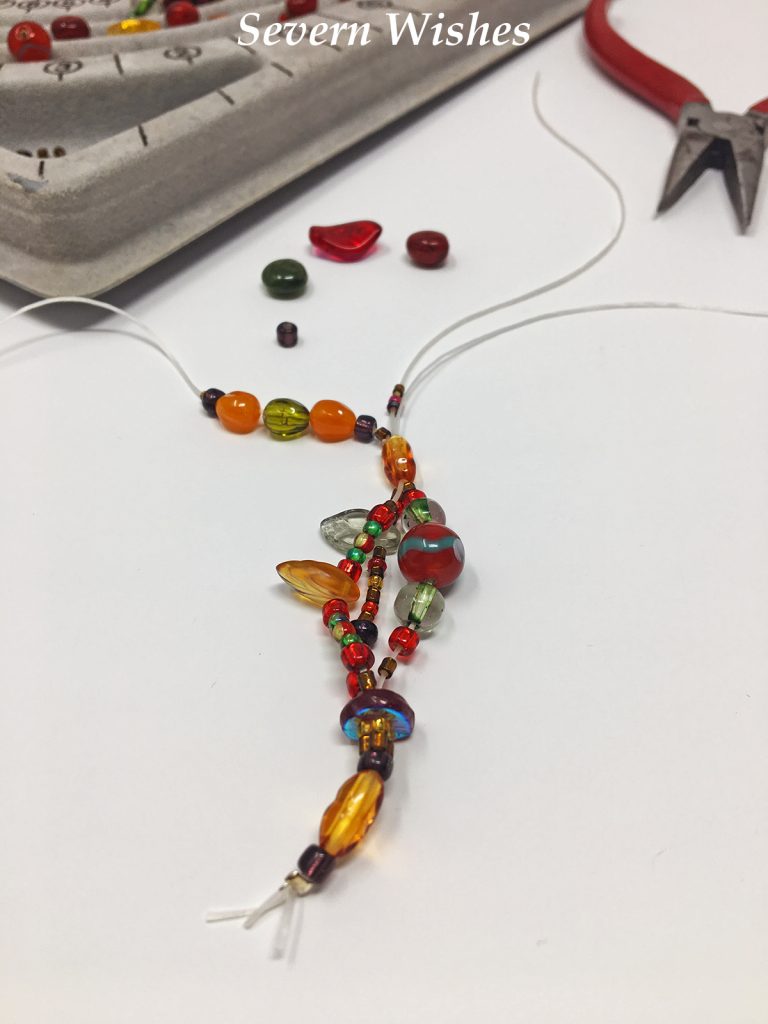
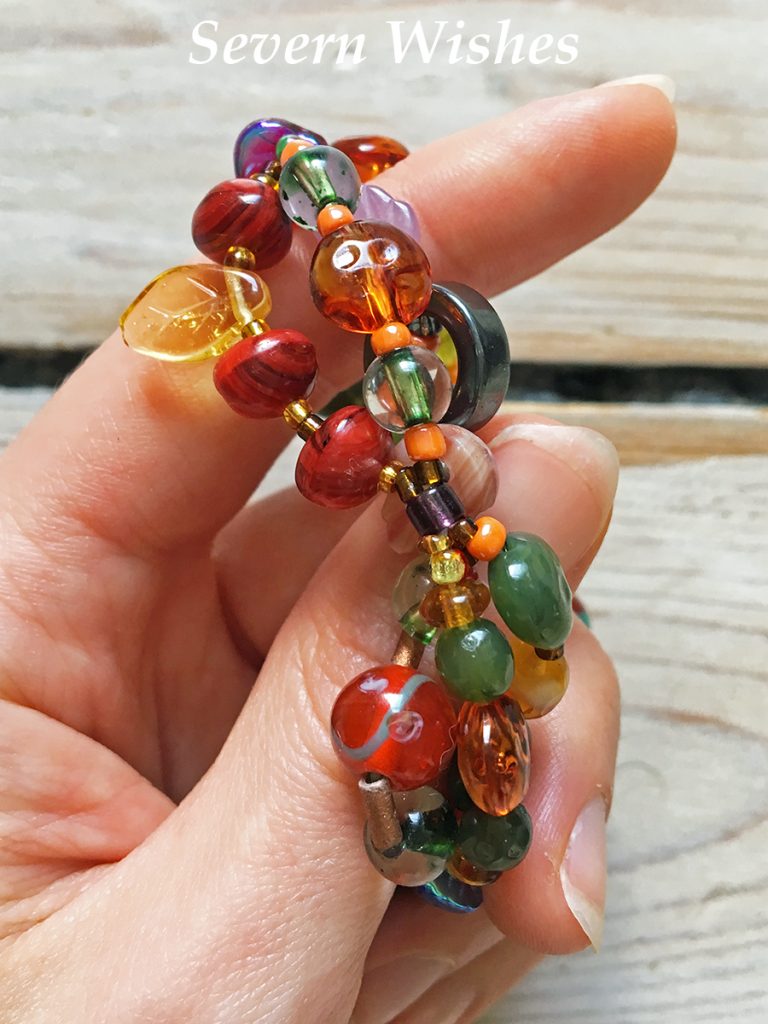
Push the large bead on to the end of the bracelet that you just completed, and ensure it’s large enough to contain all the threads. (If you’re not sure see my video or one of the photographs).

To complete your bracelet you will need a large crimp bead, and some pliers and a steady pair of hands. What you need to do is gently remove the first original crimp bead from the end that we began with using the pliers, you should now have two sets of loose ends, each have between one and three elastic strands.

You need to thread all (up to six) pieces through the new crimp bead. Once through you clamp it down hard using the pliers, and then you pass the ends through that large final bead you placed on. The ends should fit through the larger bead so they cannot be seen now. You’re finished!

✩ If you don’t know much about beads…

There will be some of you out there reading this and thinking, what are all these?! Well here is a little guide from me about the basic types of beads and then I will do a list of my top places to get beads from too!

✩ Types of Bead ✩

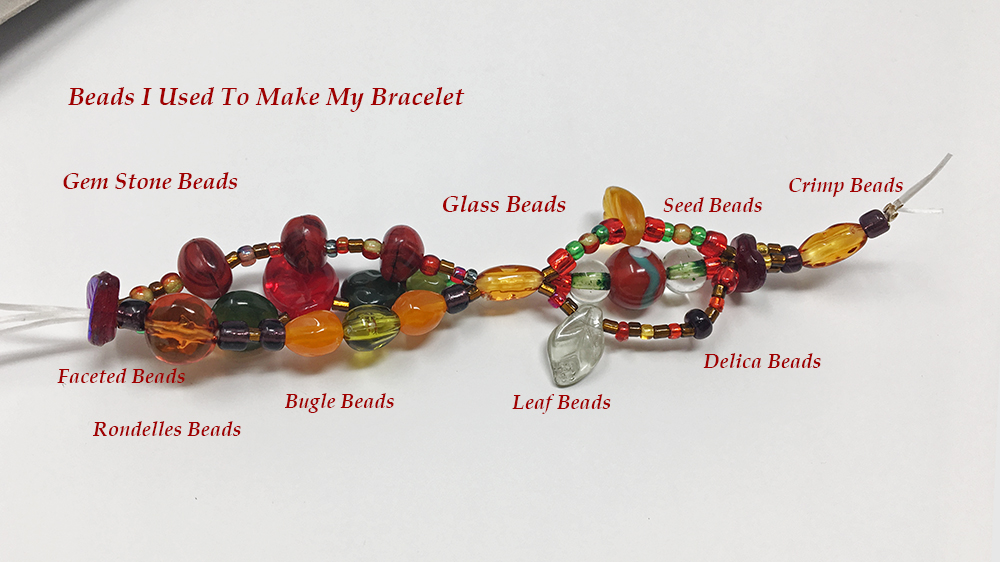
Seed Beads
Small beads in every colour you can possibly imagine! Also known as just “Round Beads” they can be very tiny or they can be up to 3 or 4mm wide. I used a variety of colours and sizes in my bracelet, take a look at the images. Nowadays you can get a range of Seed Beads, some in Triangular Shapes and even Square! These are hard to find but so fun! Usually made from glass that is heated and cut and molded until it is smooth.

Glass Beads
Completely made from Glass they are often more expensive and quite heavy compared to plastic. They can often be incredible colours and patterns though, depending on what you’re making worth the price for a couple. Usually quite large in size and oval or round is easy to find.

Bugle Beads
Small but long cut beads, Bugle beads are found in many colours and lengths. Usually round ended tubular shapes, they can be as small as a couple of millimeters (0.5) but also very long up to 2cm.

Crimp Beads
Usually only a couple of millimeters in diameter, they are used to hold jewellery sections in place. They are used by being squashed using pliers. Delicate and often in silver colour, they range in sizes and are usually sold as a small packet.

Gem Stone Beads
Gem Stone Beads are just that, made from actual rock, stone or precious gems. Usually more expensive than your standard plastic ones but you cannot believe the quality and the beauty of some available.

Faceted Beads
Beads that are cut so they that have many sides to them. They are often shiny because of their multiple faces and are usually made from fire polished glass.

Delica Beads
Delica is the modern term for a Japanese bead that is perfectly cylindrical and often small in size. They are thinly produced so they have large holes through them.

Rondelles Beads
Very compressed originally round beads, often have many sides and make great finishing beads. Also ideal as spacers, thin ones can often be made of wood or glass.

Shaped Beads
Such as Flowers and Leaves. Usually made from Plastic or Glass in varying sizes and colours. Pick them up at good bead shops or online.

✩ Other Cool Beads To Look Out For ✩

Pearl Beads
Crystal Beads
Drop Beads
Wooden Beads

✩ Where I Get My Stock From ✩

Amazon Sellers
Bead Shops
Hobby Craft
The Works
Dunelm

After Something Specific? Search Online.

I’m happy to answer any questions about how I do things or if you get stuck pop and message me on social media, I would be happy to give you advice.

Thank you for reading this blog post today, I hope you have all enjoyed an insight into my lifestyle as a hobby jewellery maker! I love making things and experimenting, why not give it a try if you have the time 🙂 If you enjoyed this a lot and would like to see more posts like this then please leave me a comment letting me know, I would really appreciate the feedback.

✩ Sabrina ✩

Using BooHoo Shorts and Iron On Patches to Create my own Unique looking Embroidery Style

Using BooHoo Shorts and Iron On Patches to Create my own Unique looking Embroidery Style Summer Shorts

In the blog post today I am going to be explaining how I managed to make these awesome, unique, and I have to say pretty cool looking embroidery style shorts.

(The Sunflower, Palm Tree and Eye were already sown on).

The original shorts are from BooHoo, I will pop a link to them at the end of the post…

(All the Patches I have had in my Treat Boxes and Artemis and Xena Box!)

The Iron On Patches have all been from past Treat Boxes, the first one I received is from a whole year ago! And it has been sat in a drawer waiting to be used.

I saw the shorts ages ago when I placed an order, to replace an old black pair. And then I had an idea! Seeing as they already had a couple of patches sown on to them, why not add to them! I decided exactly what I was going to do… and this is the result!

If you ever did this as a child, then you had a great childhood! Picking an iron patch in the local shop, taking it home and choosing an item of your clothing for it to go on to. Usually a denim jacket in the 1990’s with patches covering the back! But I wanted to spruce up these already great shorts! I hope you like what I did!
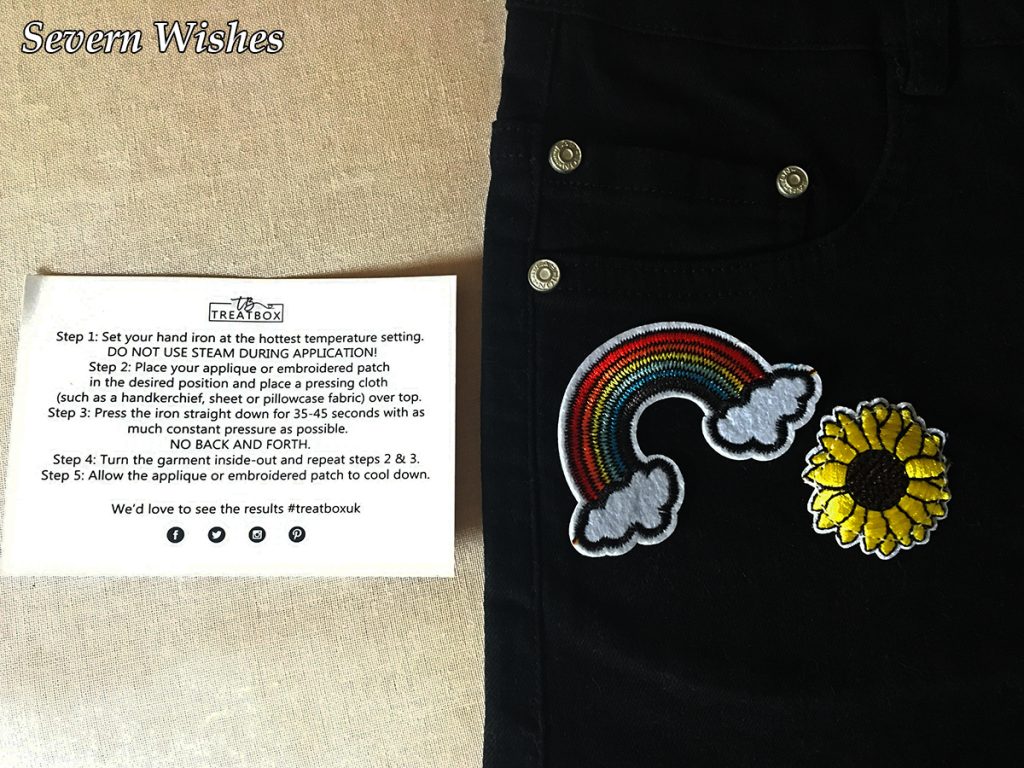
Here are the Treatbox Iron On Instructions and a closer look at the beautiful Rainbow patch that we had last year in our August 2016 box.

Here is a closer look at the Flamingo and Pineapple which were in the July 2017 box.
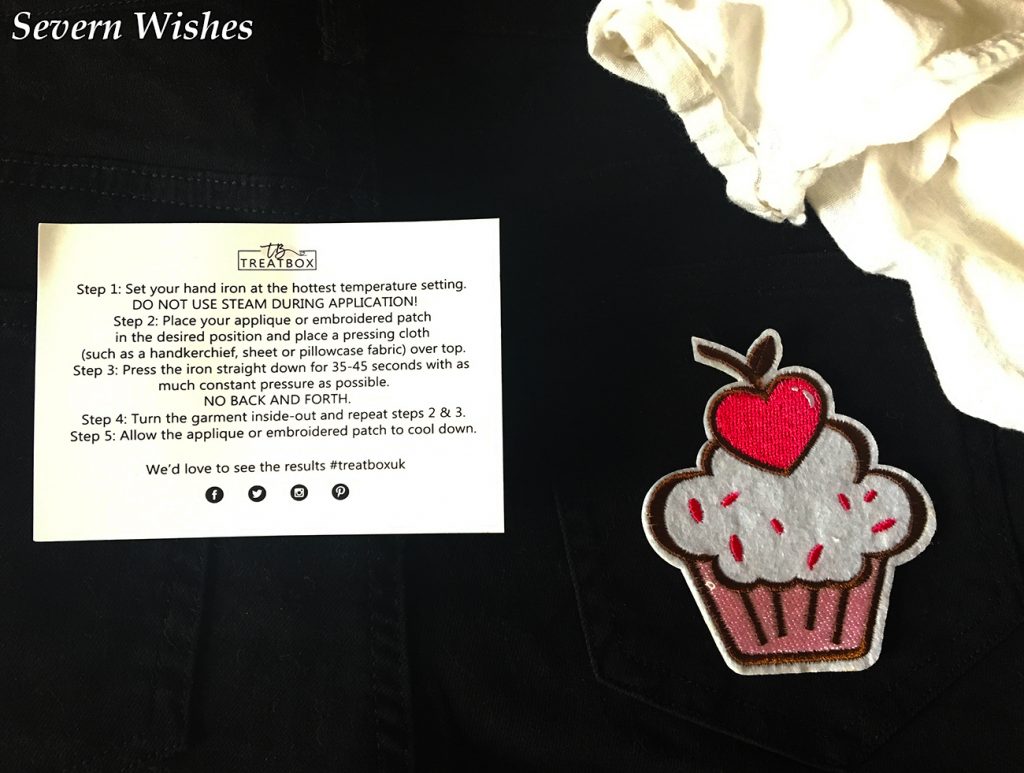
Recommending to use a handkerchief or an old pillow case to place over the patch while you are ironing is not only a tip but a definite necessity.

This lovely Cup Cake Iron On Patch came out of the Artemis and Xena Box I had earlier on this year in March.

Getting down to the ‘How To Do This’ Part of the blog post now, and basically just be creative! Make sure that you get patches that are good quality, and make sure you choose both areas of the fabric that are easy to iron on to, and choose a fabric that can be ironed on a high heat without it getting damaged!

Otherwise just follow the instructions carefully and make sure you do this with an adult if you’re of a young age.

My final tip is to play around before ironing anything on, you might change your mind. Imagine wearing the item and where the patches will be when you do. Once you’ve made a final decision why not ask someone in your family for their opinion, it couldn’t hurt. And remember this is a creative and fun activity you can do as a family if you all wanted to participate.

Review of BooHoo’s Polly Palm Embroidered Denim Shorts

Comfort 4/5
Value for Money 3/5
Appearance 4/5

Now I’m going to show you a photo of me wearing my finished shorts! I’m really pleased with the way that they turned out.


Here is a link to the boohoo shorts BOOHOO, and don’t forget to check out my category for my Treat Box REVEALS, the Treat Box shop link is also here if anyone wants it SHOP.

If anyone has any questions please feel free to leave me comments, I’m happy to answer them.

✩ Sabrina ✩