How I Helped My Child Fall in Love with Numbers

I am a huge believer in passing on knowledge to people when it might be useful to them, and for many years I had considered being a teacher. However my life took a different direction once I went off to university. It didn’t stop me from coming up with things that others may find handy though, it was just one of many reasons I decided to start my blog all those years ago.

After I became a parent I found I was coming up with lots of hacks and tips for my son that other parents might also find useful. This particular blog post today is all about NUMBERS! My son learnt his numbers 1 to 10 very quickly thanks to my tips and tricks, by the time he started preschool at 3 he could count to 31. He is now 4 and thanks to my encouragement he can count to a whopping 500!

The fab thing about my tips is that you may already have some of these items laying around in your home that you can use, and if not you can make your own cards like I have also done. Check out online second hand and local shops if you don’t have anything, as well as asking friends who may have slightly older children if they could have a clear out for you. Let me tell you about how I introduced and taught my son about numbers.
Child Clocks or Numbered Blocks

Your baby may already have toys with numbers on, things for age 6 month plus normally have various things on them, you may find a mix of nature and numerical combinations or well known characters with basic shapes and or numbers too. Toys and playmats also sometimes have numbers, those talking toys certainly will, but teaching your little one how to recognise a number visually is important.

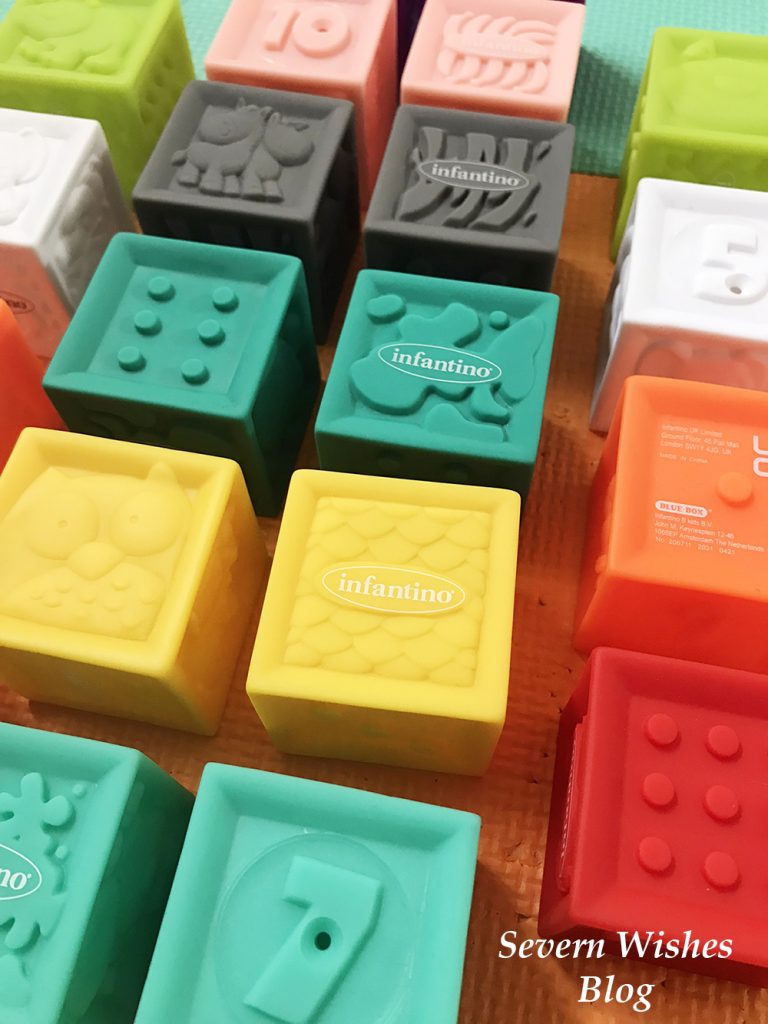
You can easily get wooden toys that contain clocks on them or boards with numbers that can be removed and set out in a numerical order. These toys are great for learning the starter numbers (1-10) but also for starting with basic mathematics too. I bought my son a board of numbers and he has a wooden clock as well gifted by a relative. The blocks in my image above were bought online and are of the brand Infantino, these BPA free plastic cubes have an array of animals and numerical variations on them such as dots and actual written numbers. They were some of the first numbers my son saw as a baby.

My son would like to count things around him, so say I gave him 4 smiley faces for his tea I would ask how many I had given him, soon he started counting everything. 2 swings at the park, 7 birds on the fence, 5 sheep in the field. And so on, and lots of praise and encouragement when they get something right is also essential. Make learning a fun thing to do and participate in.

You can also begin time telling by showing them a phone or a watch and asking them to find the time. If they have a child’s clock they can match that time. A children’s clock may just have turn-able clock hands or some have the digits that are also removeable too. For example it might be 10.30am so you ask them what that would look like on their clock and see if they select the numbers appropriately. Making it fun means that it is more likely to sink in to their mind. If they have breakfast at 7.30am every day, you could ask them what the time is on the kitchen clock if you have a steady routine, or if bedtime is 7pm too.
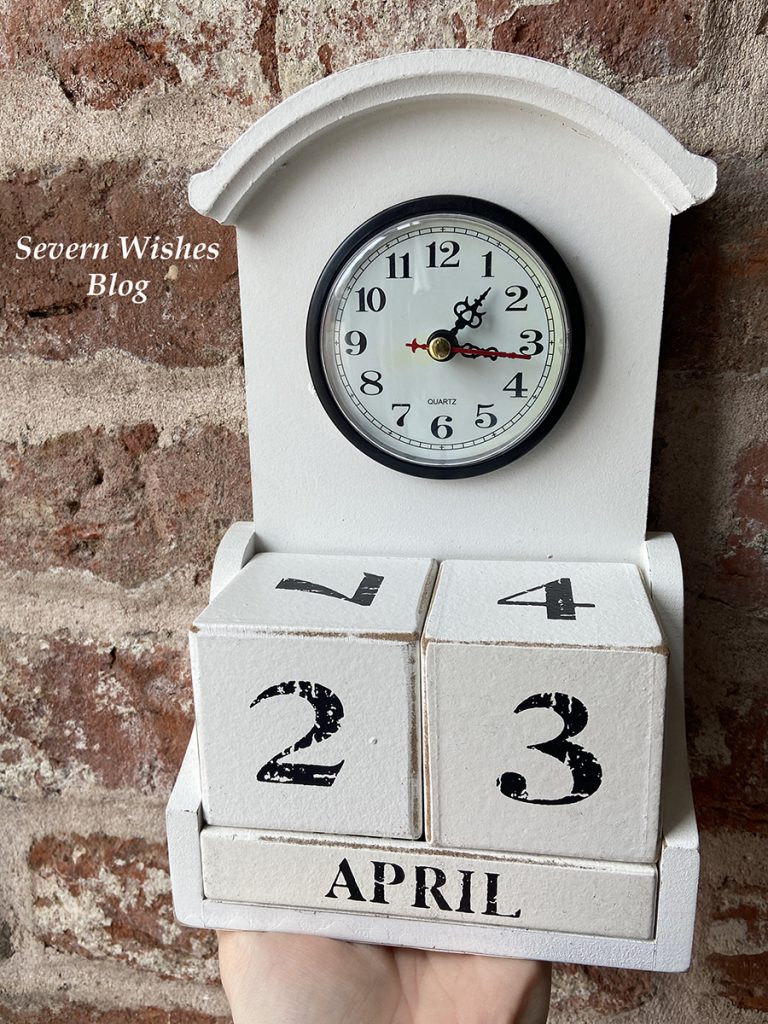

The Home Calendar Block

My calendar block is also a clock! Many of us will have a Calendar block at home, these blocks rotate daily and allow children to understand the passing of days into months. When my son was two I introduced him to my block set, and every single morning before breakfast we would rotate the blocks. I started by giving him one and me the other, I would say something like “Today is the 17th so we need a 1 and a 7, I have the 7, can you find me a 1 please?” And his interest developed from there. Soon I could ask him to find any of the numbers from One to Thirty One and he could place them on the block correctly. For the past two years we have done this every day and he has learnt to count up to 31 just by doing the calendar. My son also asked me why the months were different numbers, why it didn’t go up to Thirty Two and such, it sparked an interest which lead to me making his flashcards up to 50 numbers.
Flashcards – Bought or Homemade

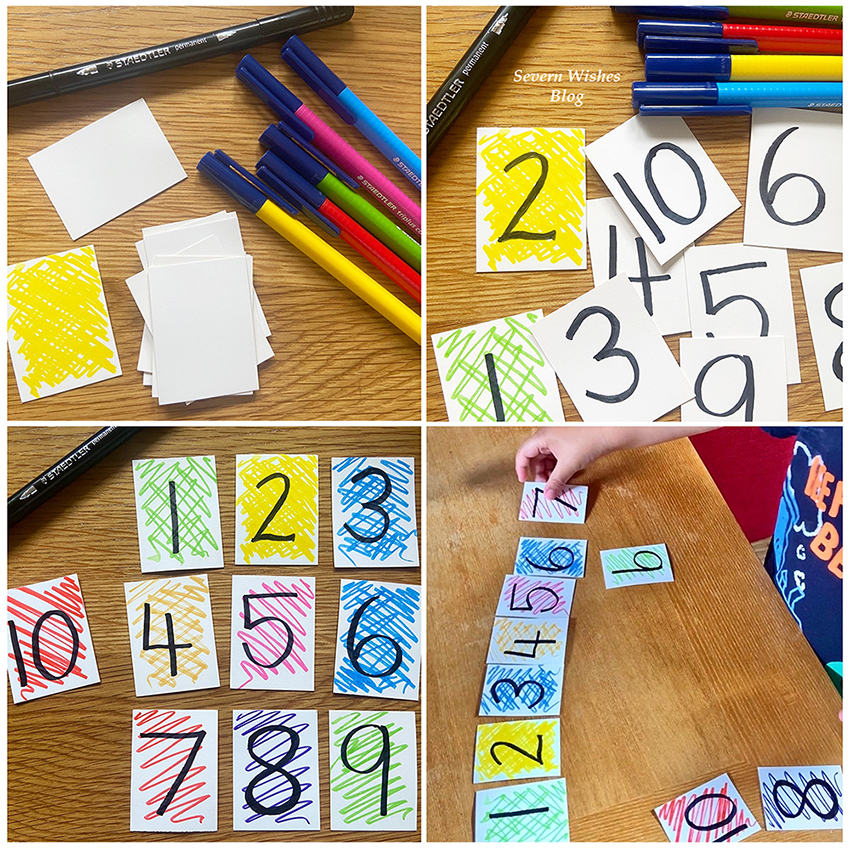
Flashcards are great, you can buy them from most online toy retailers, or if are creative and have pens, like me you could make them. My son has 50 of these homemade numbers now, and thanks to some games he can count up to 500. He does number work at school, and even got an award recently for how good he was with counting numbers. Making it colourful and fun is inviting the child to participate. Always encourage but never force your child to learn, do it on their own terms when you are at home. Plus if it is fun they will be more likely to want to repeat the exercise. My son is currently doing writing practice for his letters and numbers and coming on great thanks to wipeable board books which I highly recommend because they are reusable.

Originally I only made ten numbers but my son was soon asking for more, and the more he enjoyed counting them and laying them out in their order, the more I wanted to continue making and encouraging that growth in learning.

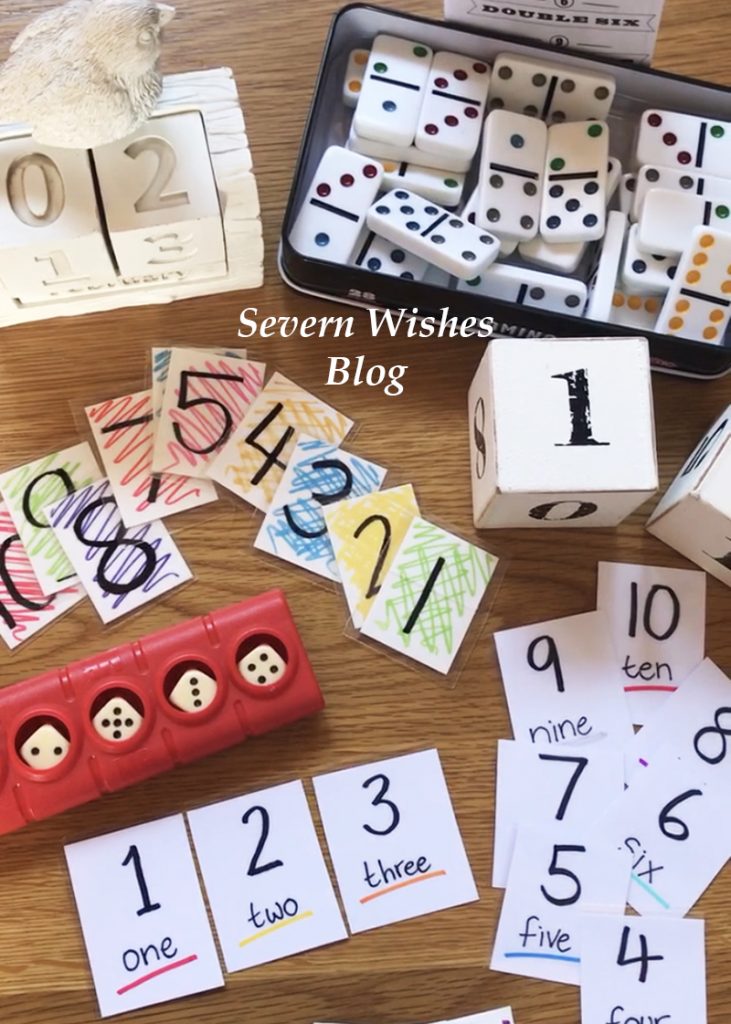
When my son turned 3 I also made a set of flashcards that had the number and the written word such as One and 1 on them, this was so my son learnt the word associated with the number in preparation for reading and writing them.
Other Fun Number Related Activities

Playing Dominoes is another fun learning activity which requires the counting of numbers, and games like Yahtzee, Playing Cards or Rummikub are also fun to start with children of a going to school age.

However you keep using numbers in your child’s life, know this, you are helping them learn through play.

✩✩✩

Thank you for reading this parenting related blog post today. I have tons of parenting tips and hacks across my blog and social media. I even do a Monday Mum Hack on Instagram.

Search #SevernSabrina and #SabrinasMondayMumHacks

Hope to see you here again soon.

✩ Sabrina ✩

Fantastic Quality Magnetic Weekly Whiteboard from Tesco allows you to Plan for the Week ahead with ease

Hello and Welcome to my blog!
Today I am writing up another product review for you from a recent purchase that I really felt the need to shout about.

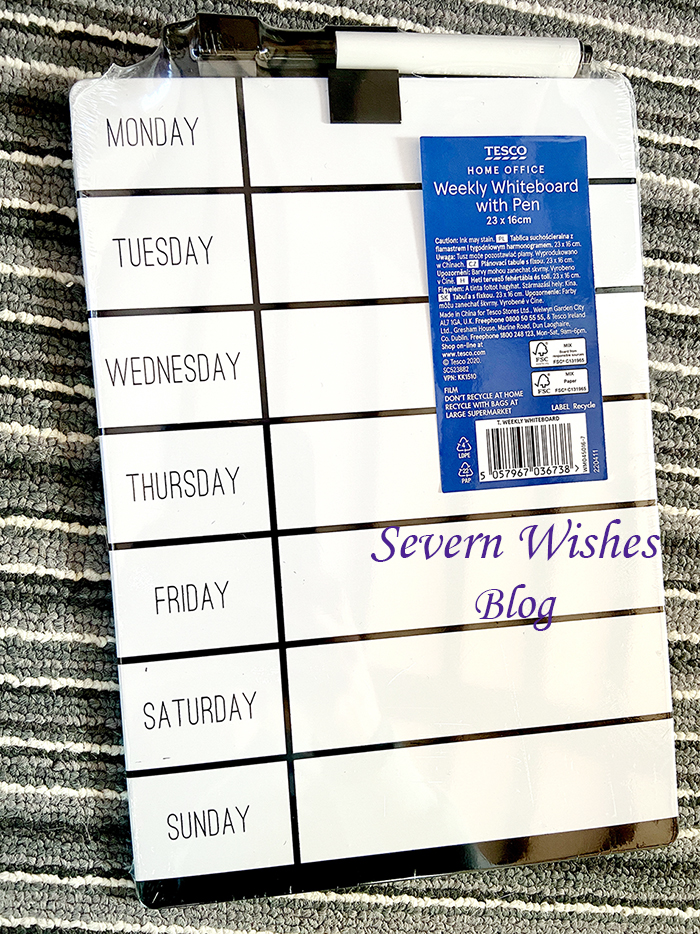
The Tesco Magnetic Planner Board was only £3.00 in my local Tesco Extra store. Not only is that great value for money, but it is high quality throughout. As a whiteboard it’s both easy to write on and easy to see with the contrast in white board and black pen.

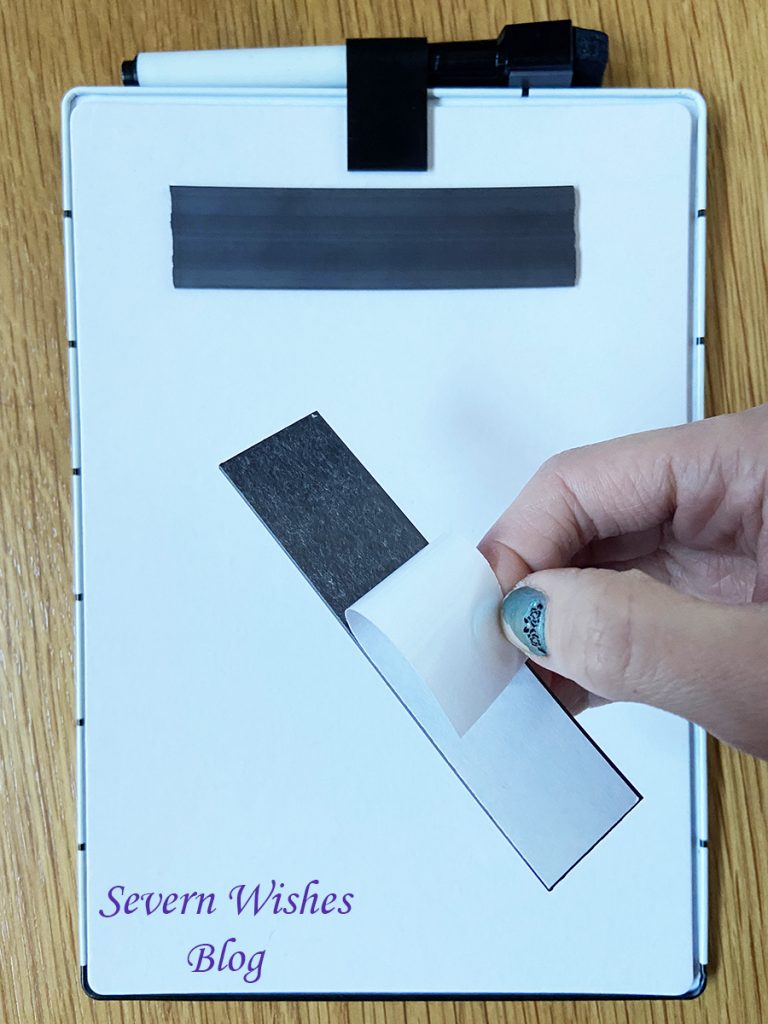
Inside the cellophane you get the white board planner with the seven days of the week and space to write on the other side. You find two magnetic strips with sticky tape attached so that you can align them and stick them down to suit your needs. Having this board on the fridge in the kitchen is a great idea for keeping track of meals. But you may want to use it for appointments or children’s activities, it’s so versatile.

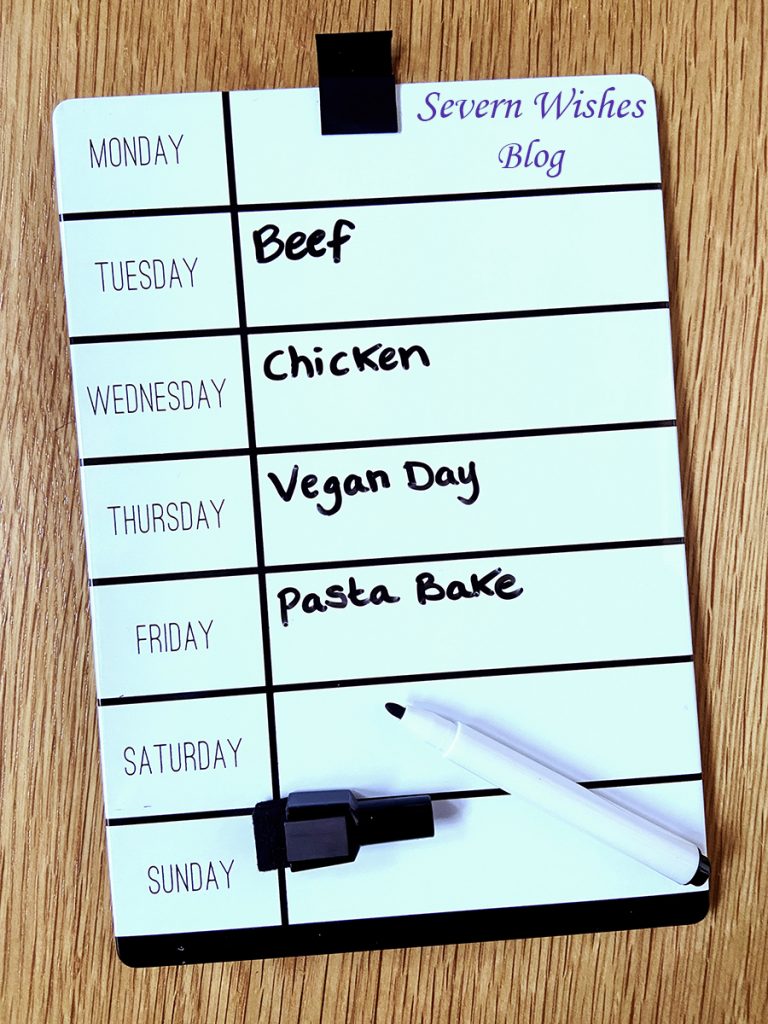
I bought this to be a meal planner, and was pleasantly surprised when I opened up the pen to find that not only does it write well and smooth, but it has a sponge attached on the lid part so that you can use it to rub writing out once you’re done! That means no more wasting kitchen roll towels cleaning off the board! Another big tick for me!
You can also recycle the cellophane the board comes wrapped in at your local Tesco too.


Something else very useful is that the pen does have a designated stand and loop to go into at the top of the board, however there is also a magnet attached to the pen lid squared off part too! Meaning you can even have the pen anywhere on your fridge. Handy!

My final thought about this planner is how well it’s design has been thought out, it doesn’t take up too much space because it’s only 16cm wide by 23cm high. Even if you have a small kitchen like I do, it’s still ideal. The only way I would see you needing more of these would be if you had many children and you wanted to keep track of each one with multiple activities and appointments, which isn’t a bad thing at £3 a board you could get several.

As a mother who has a son with multiple food allergies I always write down the meals that we have had either together or separately because if any reactions were to occur I can refer back to the board that way. I have chosen to buy this so that I am not using as much paper, as I had previously written out my meal planners for the week on a Sunday and then clipped them to the fridge. This board is far more practical and if plans change it is easy to alter it too.

My Final Product Review Scores

Quality 5✩
Product Design 5✩
Product Cost 5✩
Features 5✩
Versatility 5✩


That’s a score of 5/5 and it means I highly recommend this product.

My TOP TIP would be to use this as a meal planner, you can also do one
board per child as an activities board, you can have one board as a family
board which looks at appointments and schedules. The list is endless but
you can decide what you would use yours for, and now thanks to me you
know where to find one!


Thank you for reading this product review today, I hope
I have inspired you to get a planner of your own.


Let me know what you would use yours for!

This product is my Monday Mum Hack for Monday 20th of February
too, why not check out my video on my Instagram.

✩ Sabrina ✩

How I Am Making the Return to School Easier for Everyone

Anyone who has ever put a child in school will know that there is so much to remember that it can make your head spin. For example, last weekend I labelled shoes, 37 items of clothing, 7 lunch boxes and a variety of other smaller items. Your child will have a Bag, a Lunch Box or Bag, quite often a Book Bag, a PE Kit and Bag as well as maybe other things to take in with them too. It’s a lot of work for one person (a single parent like me) to handle, and there are time saving ways of doing things and ways to make it easier on yourself too. Let’s see what ideas I have below and what I have done during these last two weeks in preparation for school starting up again.

Yearly Wall Planner and / or Yearly Diary
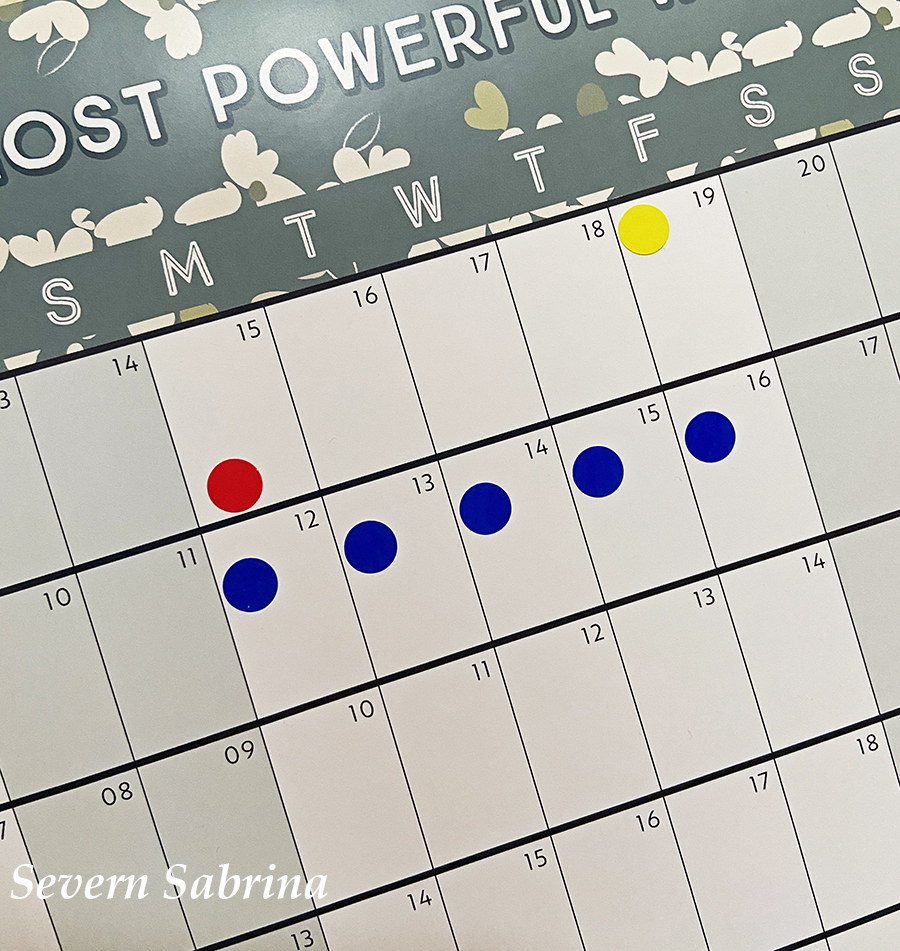
Get a year long wall planner and some little round stickers to keep track of everything, make a key at one side and then add any appointments, school trips, swimming days, special dates (like those where additional things are required like dressing up or concerts) and keep updating it every time you know a knew agenda item. This is useful as well for the non-school days and other important reminders too such as Dentist, Doctors or Opticians for example. I think I would be lost without my wall planner.

Weekly Planner
A weekly planner is also something that I have on my dining room table, it’s so that on a weekend I can prepare for the week ahead, read up on any paperwork sent home from school on a Friday and let my child know what is expected of them for that upcoming week. It could be school photo week or they are expected to bring an item in for show and tell, but we will know not to forget because of the planner. I can also arrange this planner in a way that has both adult and child organised, as well as meal planning if I have items to be used on a certain evening. A useful item and much better than a phone calendar you may forget to look at, but if you sit down to eat as we do together as a family, the planner is there for you to go through so everyone knows what is what and where and when.

Labelling – It is so Important!
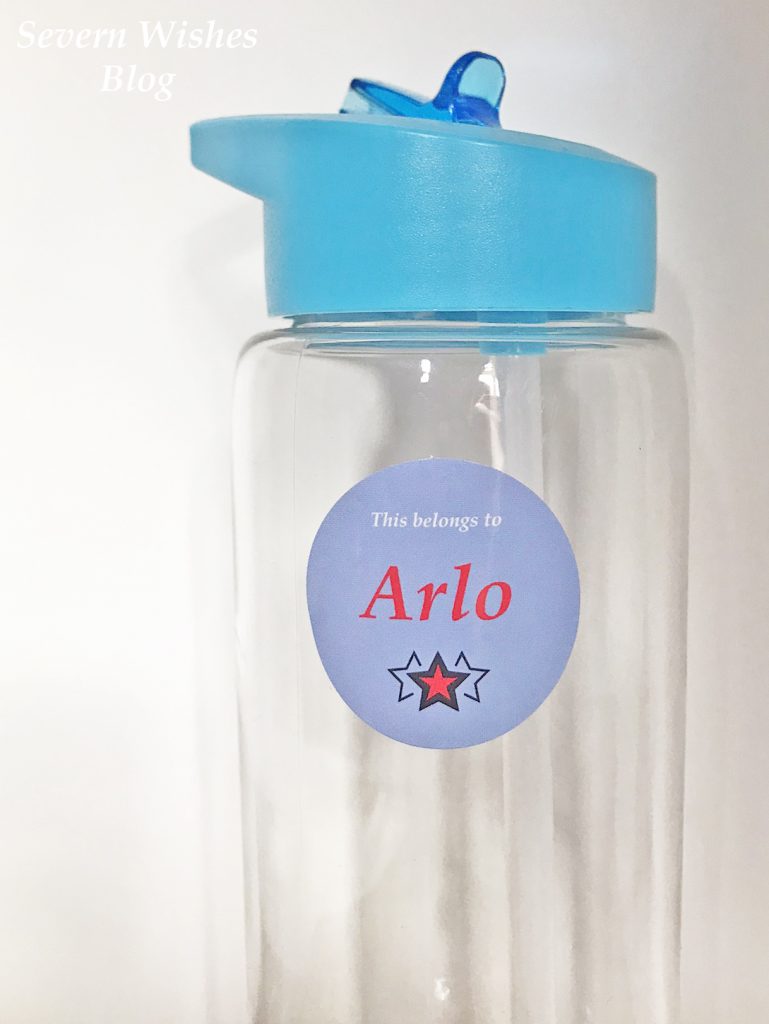
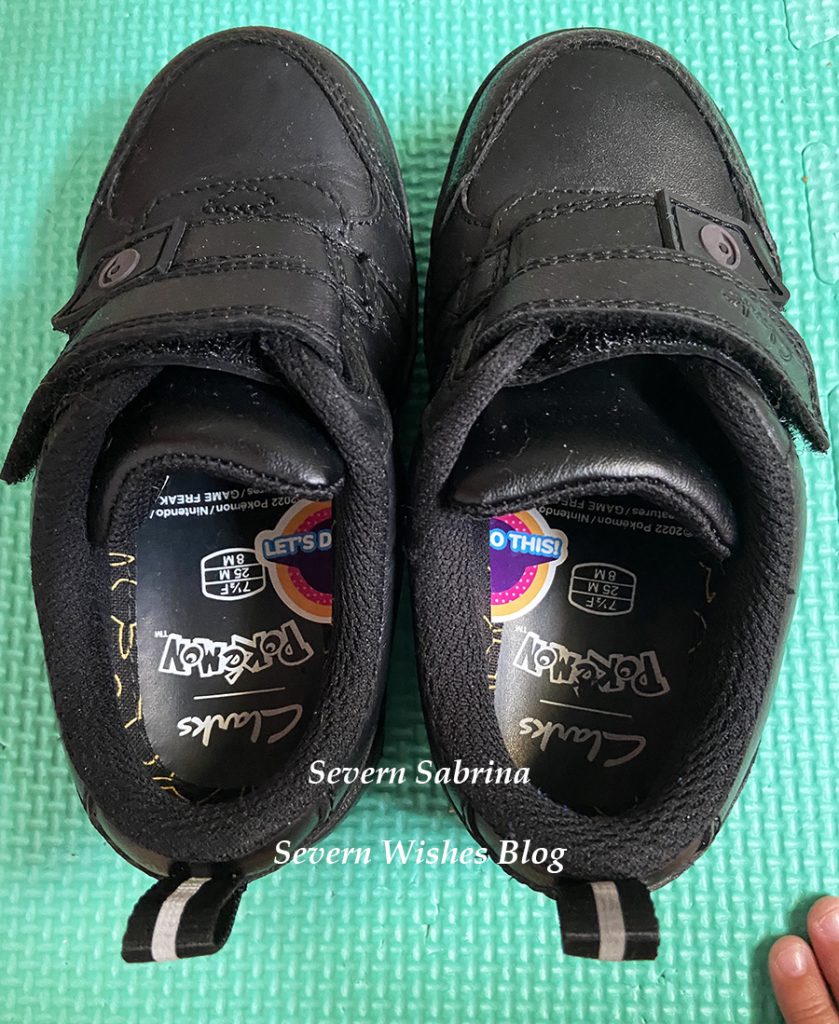
Label all of your children’s items for school including their lunch boxes, clothing, bags and shoes. There is nothing worse than them going to school and losing something, and because it’s not labelled it’s unlikely to be returned to you. Schools tend to have lost property boxes that are checked at the end of every day or the end of the week and the items appropriately returned, but this cannot be done without labels. I used a permanent laundry pen to write on my sons clothing labels, and I used stickers for the more solid items. Consider using their full names or even getting their own personalised stickers printed as I have done. Especially if your child has a popular first name.

Use the halved sticker hack for getting your children to put their shoes on themselves and to ensure that everyone knows which shoe is who’s. The sticker inside hack allows them to put their shoes on the correct feet every time and it’s genius. Simply cut a large sticker in half and place either side of it into the shoes. When the shoes are correct the sticker will match and the child will know that they have the shoes the correct way to go on their feet. See my photo below for inspiration.

Clothes Piles per School Day
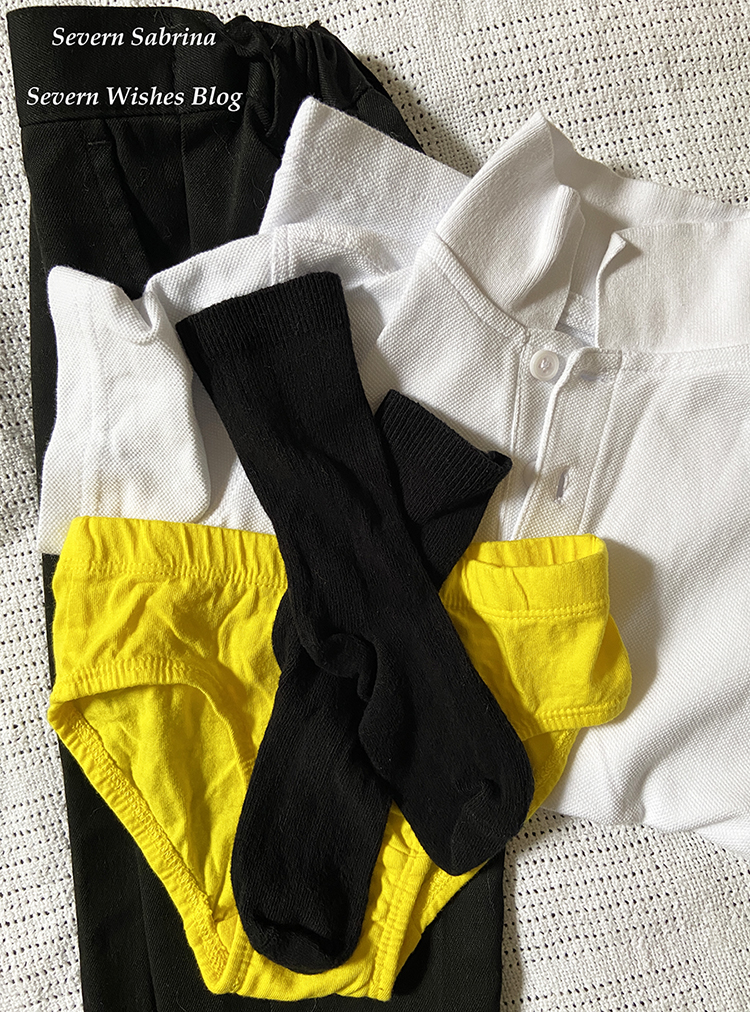
Fold up any school clothing into “day piles” in their bedroom on a weekend ready for the school week ahead. This hack of mine is so useful, I did it over the summer too with day clothes as I was getting my son to practice getting dressed by himself. It’s so that I don’t have to police every single item of clothing going on every morning. My son has pants with the days of the week on them, and because that’s the item he will put on first he then has a pile beneath that. So you start with a pair of pants with his daily school uniform laying under it. Pants, Socks and Trousers, then his Polo Shirt last and his jumper is always downstairs and the last item to go on (to save any breakfast getting on it). It’s also so much easier on a Sunday to just make these piles up and put them in the correct bedrooms ready for the week. If you have to wash midweek, even doing two piles of clothing is better than searching drawers first thing on a Monday morning for that missing sock.

Save On Washing – Remove at the Front Door
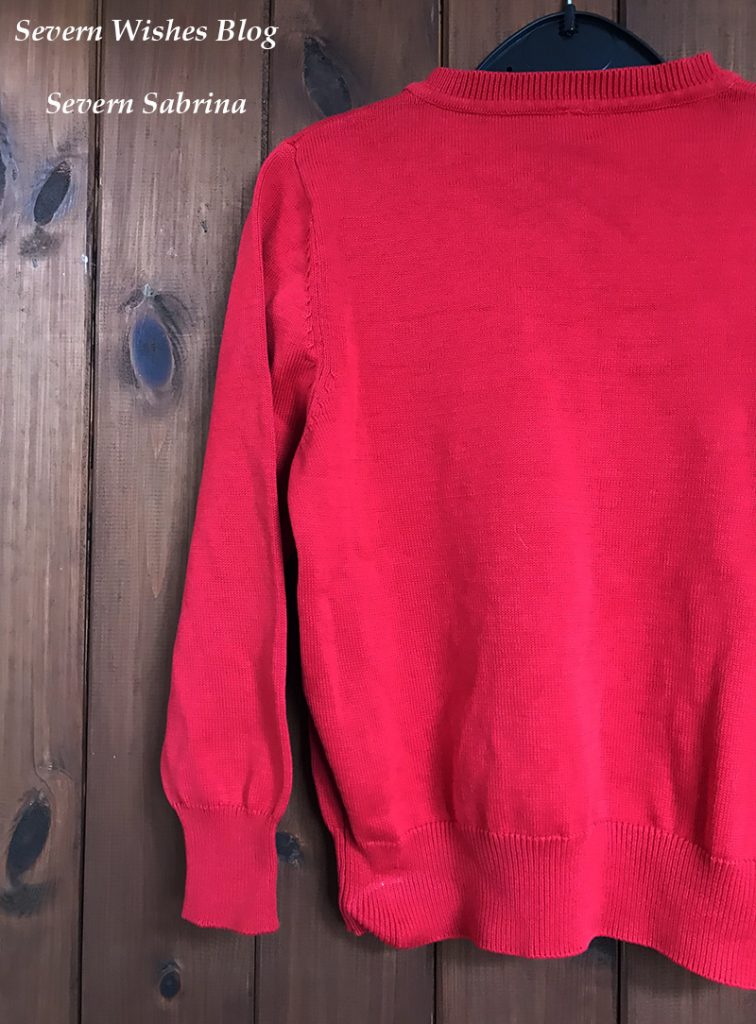
This is always a good one! Take off their school jumpers and any “still clean” uniform pieces as soon as you get home through the door before they have time to get messy and creased. Hang the jumpers up especially on hangers close to the front door ready for the next morning. This helps save on the clothes washing and the ironing by hanging them up safely as soon as they take them off. And it’s always a good idea that a school jumper be the last item to go on in a morning routine anyway, after breakfast and teeth brushing so that it stays cleaner for longer.

Something else you can do to save on washing is always wash with full loads, if that means you get to Thursday and it isn’t full yet then why not consider wearing those similar colours yourself so as to fill up the load space.

Mini Cool Blocks
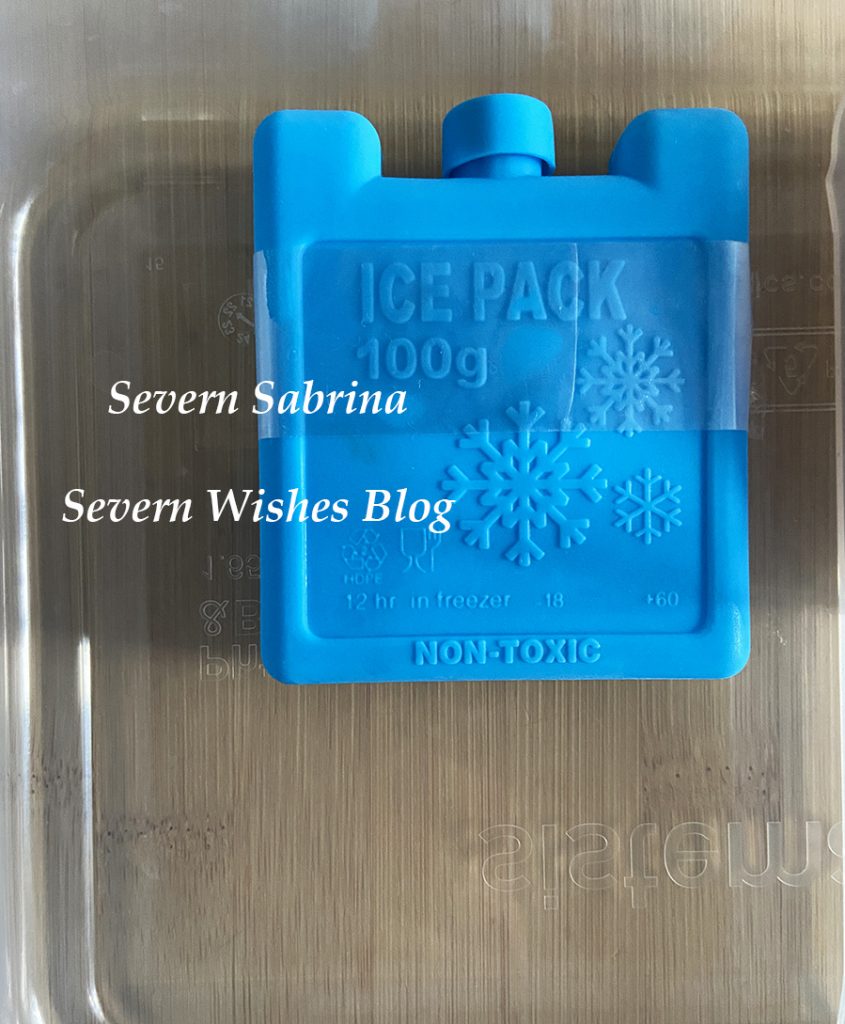
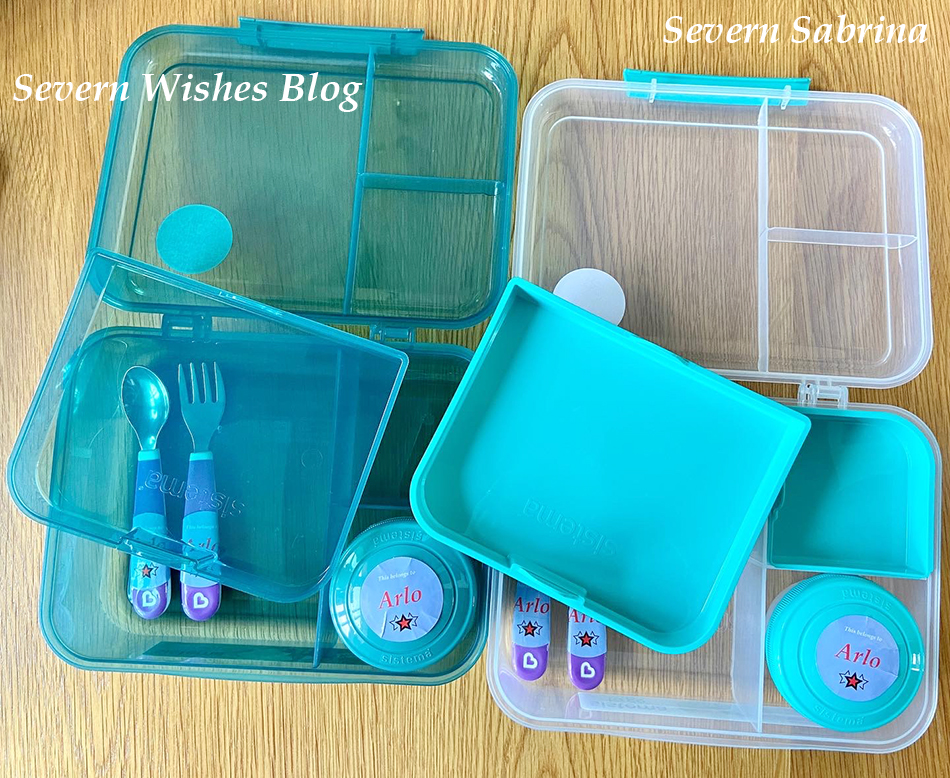
Investing in some mini cool blocks so that the children’s lunch food stays fresh is important during the warmer months of the year. I place a block under a removable plastic section of his large Sistema lunch box, or I place it at the bottom of the small cool bag I send with him. It’s important if he’s wanting chicken for his lunch which should be maintained at a low temperature to prevent it going off.
These are great for adult lunches and days out throughout the year too.

Practice Makes Perfect and Less Stressed Children
Practice the opening and closing of lunch boxes, bags with zips and coats too. We are getting to that time of the year where bags need to be closed from the weather and our coats need to be zipped up. During the summer holiday we might not have used those items very much so it’s good to refresh your children’s memories by having them practice doing these things again.
Lunch boxes are another one, as they might have a new one this term and you’ll need to make sure they can safely open and close it in order to get at their food or snacks. It’s important that your children drinks enough water while they are at school too, so get them a reusable water bottle that they really like and will continue using throughout the day.

Thank you for reading this blog post today I really hope that you’ve liked it and found at least one of my ideas to be useful. By getting yourself and your family into good habits like these early on, it will make sure you have more time and energy to deal with anything else that happens. Because life nearly always throws you a curve ball when you just about have everything under control am I right?

I hope I see you again for another of my parenting articles, I hope you have a lovely month of September with (I also hope) minimal stresses.

Best wishes,

✩ Sabrina ✩

The Transition of moving my son from a Cot to a Toddler Bed, my Tips and First Hand Experiences plus Reviews of the Purchases I made.

If you’re reading my blog today you might be in the same boat that I was last summer, which is wondering if it were time to make the move for your little one. The transition to a toddler bed is not one to be taken lightly, it is a huge step for our little person, and they deserve lots of time, patience and assistance from us (as their parent/s) to help them feel safe and secure in their new upgraded space.

Hopefully this article that I have combined with my review of the toddler bed that I bought, can help you to make informed decisions on what is best for you and your child/ren. Is it time? Only you will know by the actions and dependence your child currently has.

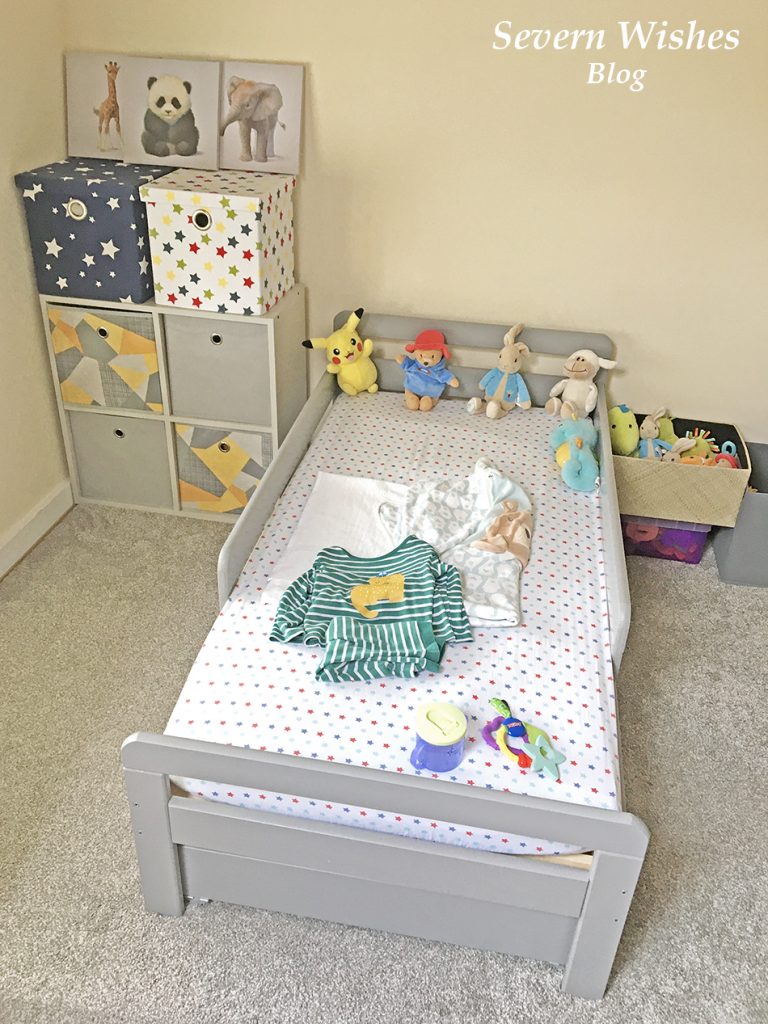
When the bed was finally in place…

When my son turned two I wanted him to start using a toddler bed and there were several reasons why I thought this needed to happen now. The first reason was that it was difficult to lower him inside his cot when he had fallen asleep in my arms, and he was now tall enough to consider trying to climb over. I didn’t want that to happen, so I purchased his first toddler bed after measuring up the space that I had in his bedroom.

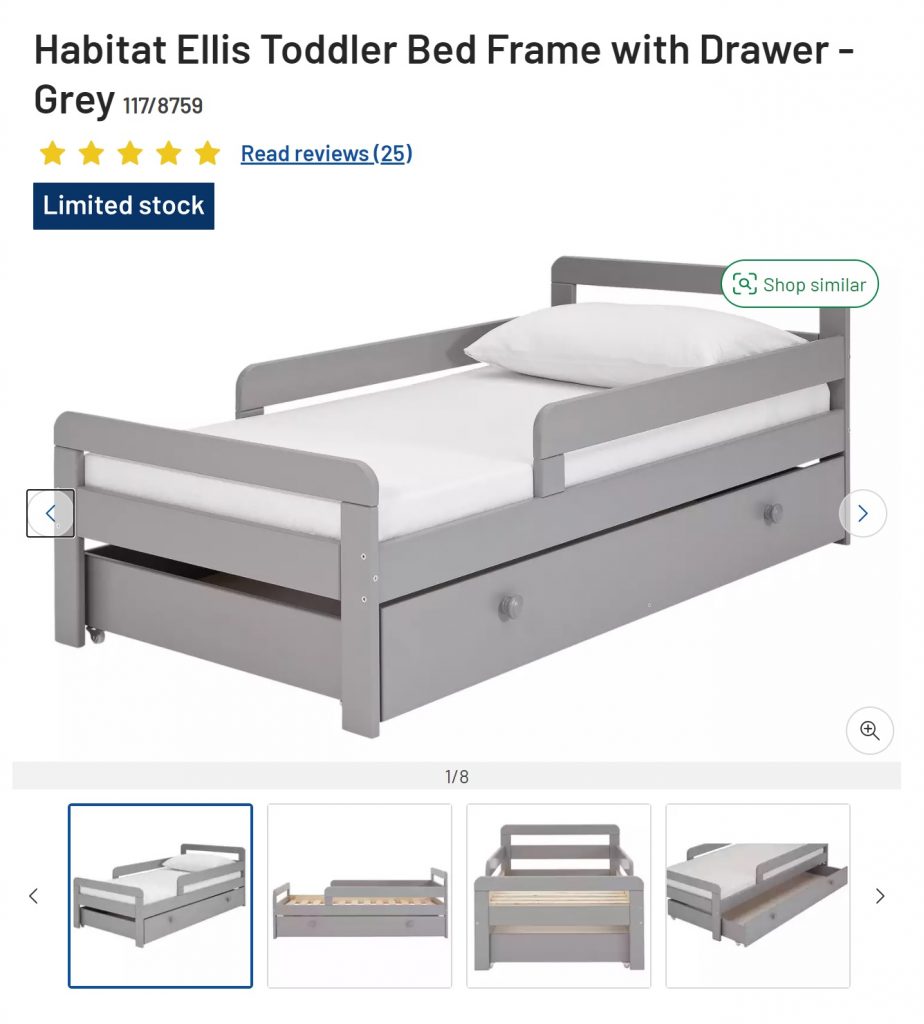
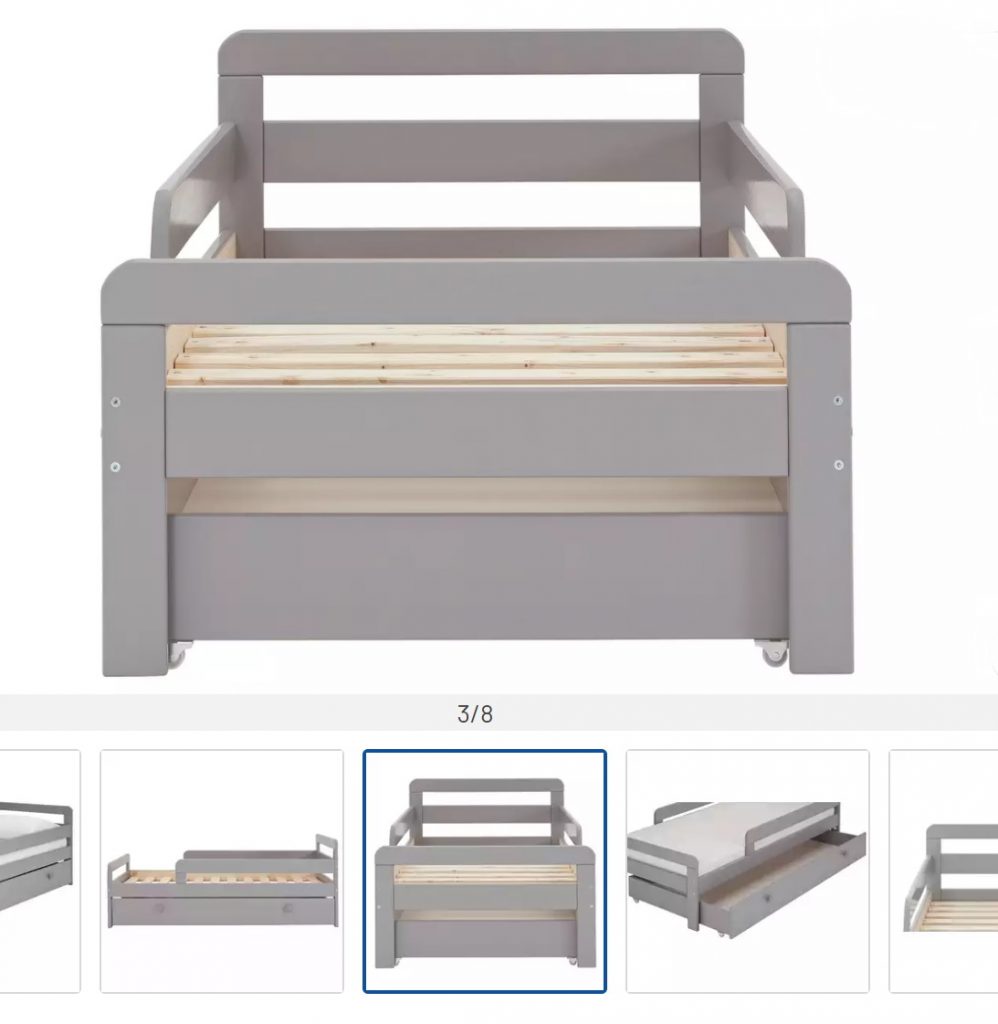
I bought the Argos “Ellis Toddler Bed” in Grey, to match my sons furniture, and then bought a mattress online. I had chosen this bed for three reasons, the first being its height from the floor, the second was that it came with a drawer for under bed storage, and the final reason was because of the three quarter sides.

My son moves frequently in his sleep and I knew that it would be quite a while before he could sleep safely without any sides to his bed. This bed was a great size for the price and I would hope it to last him two years at least due to the length. The handy draw keeps tidy all of the towels and bedding I use for my sons room and it is easy enough to slide in and out on its rolling caster wheels.

Bed Frame size L144, W75, H57cm.
Required Mattress size L140, W70cm.
Clearance between floor and underside of bed 19.5cm.
Drawer size H18.5, W139, D73.5cm.

There are now limited stock on this bed but it does also come in different colours. Here is what I would give it on my review scores having used it now for a whole year.


Quality of Paintwork 4✩
Quality of Manufacturing 4✩
Quality of Finished Product 5✩
Correct Specifications 5✩
Product Design 5✩


Overall this product is excellent quality and although it was difficult to put together, overall we have been very happy with it. A fantastic size for toddlers and small children and my son hasn’t fallen out of it due to the great design with those side bars. Although he is average height for his age (at 3) he still has plenty of room left to grow into this bed.

The Transition from a Cot to a Bed – My Tips and Tricks

The biggest thing about change for toddlers is that it can be unnerving to them. They get anxious and have to get used to something over time, so don’t worry if this alteration in routine and sleeping area takes a few weeks for them to get used to. The best thing that you can do for the first few nights is to keep the routine the same, but just place them in the new bed. If you have a routine that ends with them being placed into bed keep doing that.
Then on the second week add one new thing now that the child is older such as, can they now get into bed themselves because they are old enough to do so? It will make them feel bigger if they do it themselves and gives them confidence, but only when they are willing to get into bed on their own.
Don’t forget to use positive reinforcement when they are on the bed or in the bed so that the praise gives them positive ideals of being in the furniture.
Saying things as “What a lovely new bed you have!” and “Now that you are two/three you can sleep in this special big kids bed” and remember to let them know that this is a good thing, a positive step and not one away from you. Definitely praise little one when they get into bed without you having to prompt them too!

Getting the child to stay in bed is another matter though. Don’t worry if they frequently get out of bed or even tumble out of bed half asleep for the first few weeks, wondering where you are (especially if you have had them sleeping in your room up until this point). And the beauty of the toddler bed is its distance to the floor. They usually are only between 15 and 20cm from the floor.
Make sure to implement rules in their new bedroom, such as no toys after bed time. The child is not too young at this age to be putting their own toys back into a box or tub or basket, so why not start them off if you haven’t already done so (good practice for preschool).
I have found that it’s also a good idea to introduce a clock or show the time to a child at this age, and tell them that at “7 o’clock” (or whatever your bedtime is) their toys are put away and your bedtime routine begins.
Personally we are in the room for 7.30pm but it can take up to an hour to settle my three year old, some nights a story or two is enough and other nights I’m still reading at the hour mark. But it’s just imperative that you keep the routine the same, even if the time differs slightly, it’s still the act of doing things in the order that they are used to, and the act of then getting them into their own bed.


Talk About Their Safe Space

I tell my son every single night that he is “safe in his bed” and he is “safe at home with mummy” and this has reinforced him to stay in his bed. For the first few weeks if he woke in the night he would come and find me because he wasn’t sure on things. Now he’s more than happy to climb into his bed and choose the stories he wants at bedtime. He knows that I’m never far away now, but his bedroom is a safe place for him to be. He doesn’t always come and find me now that he is older either. He often wakes (and I hear him) but he presses his singing toy and lays back down or he will have a sip of water from his bottle and then turn over and go back to sleep.
Again positive reinforcement is key when organising their safe space. When little one wakes up they want to recognise where they are and that it is home or safe, favourite toys or items around the room will help.

If you find your little one is struggling initially with the bed transition then you could choose to sleep on the floor in their room for a few nights. Whenever they wake up in the night make sure they know that you aren’t far away and they are safe. It is totally normal for most children to find their new surroundings daunting, but remember to just keep praising and comforting, they will soon get there. All children are different and it could take a few weeks of patience to achieve the end goal, but everyone should sleep better once that is over with.


Ensure Comfort

Make sure that they are comfortable on a firm but soft mattress and that the room is an optimum temperature. I still use our Gro-Egg from when he was a baby to tell me the room temp! My son had sleeping bags until he was two and a half, he was happy to sleep in them until he got older then he kept trying to take them off. I gave him his own thin pillow at three years of age, and I now put him in Pyjamas and a blanket over him. I have bought a toddler duvet this summer ready for the colder winter months, now that he is old enough to be able to push it away from his own face.


Keep Stories Gentle at Bedtime

I have found that stories that talk about bedtime or going to sleep are best at bedtime, other books can just excite little ones too much. My son has an absolute favourite book about a bear and a baby bear and he’s on his way to going to sleep, and we read it every night. I can now recite it from memory while he falls asleep in my arms (that is how many hundreds of times I have read it). But it’s such a lovely and gentle book that talks about how much mummy bear loves little bear and she is never far away no matter what he is getting up to. Consider what you are doing during your bedtime routine and make sure that there is nothing that is causing your little one to become more awake as opposed to be falling asleep. The best books we have found come from The Works.

My sons favourite book that I highly recommend, we found it at The Works.

Thank you so much for reading this blog post that I have written today, I do hope that you have found it informative and if my lifestyle experience with my son can help you in some way then I am more than happy to share it.

✩ Sabrina ✩

At Home Storage Hacks for Parents, How To Keep All The Kids Toys Stored Tidy and Neatly

Featuring…
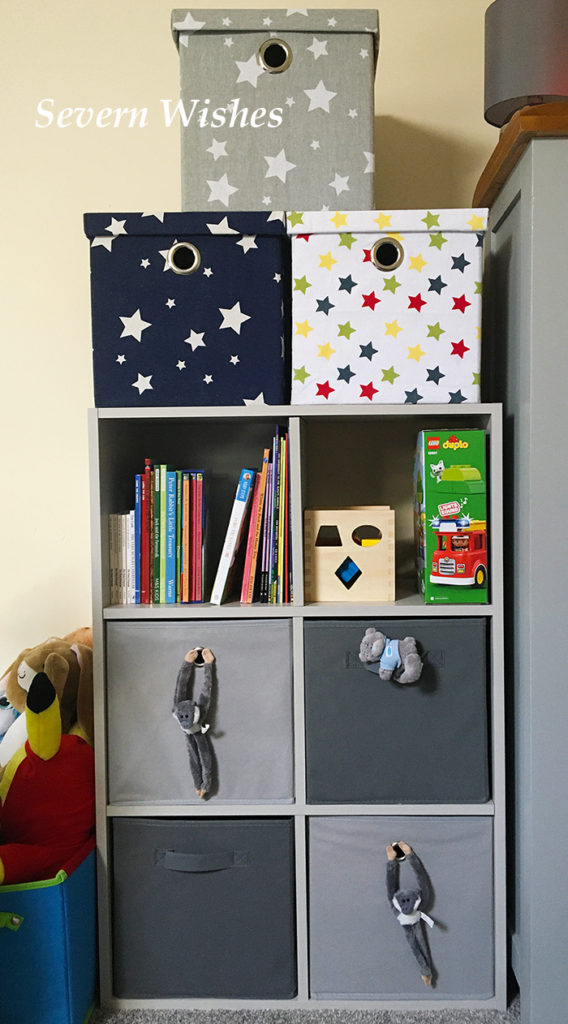
Aldi Stars Boxes
Argos Silver Grey Boxes
B & M Dark Grey Fabric Boxes

I think every parent will agree with me when I say “mess is a fact of having children” but that doesn’t mean you can’t have a tidy home when the children are asleep, or for when relatives come around! And can I just say, Square Furniture really excites me, its versatility knows no bounds!

But first, Tidy Hacks! When my son was only twelve months old I began a routine with him which involved us tidying up once we have finished with certain things. It started with me showing him then handing him the item and encouraging him to copy me. So… Books went back in his Book Tub and toys went back in the Toy Box. He soon realised that it was important to tidy up. My son took to it really well, he even puts balls back in his ball pit now, and has done since he was eighteen months of age. Instilling this notion early enough has paved a way for a toddler who understands how important it is to put something back when you have finished with it. My first TIP is to allocate boxes for different items, such as, the Grey box is for books, the Red box is for Cars, the Blue box is for trains and the Green box is for animals.

There is no right or wrong way to have your home, however one thing is for sure, cleaning it is far easier when everything has its own place. Boxes are filled and put back on to shelves. I love furniture and I love how it brings a room together too. I have a large wooden chest in my lounge along with several small lidded boxes to store my sons toys in. I always like to have that option to tidy things away completely, in case I have family over for example, or I may need the space to do messy play.

In my son’s bedroom I have several pieces of furniture that are square and contain various storage tubs and boxes. They look neat and tidy and are easy enough to maintain. The boxes are made of fabric and are often purchasable in many styles and colours to maintain the theme for your chosen bedroom. Great for anywhere in the house, such as hallway or living room too. Do you have any Square Furniture? I think they’re just great!

I have always been a fan of the clean lines that square furniture gives you. And with so many places now creating the relevant boxes to go into these holes, you have a wide range of choice to make your home how you want it.

B & M Boxes


Excellent Value for Money Square Storage Boxes

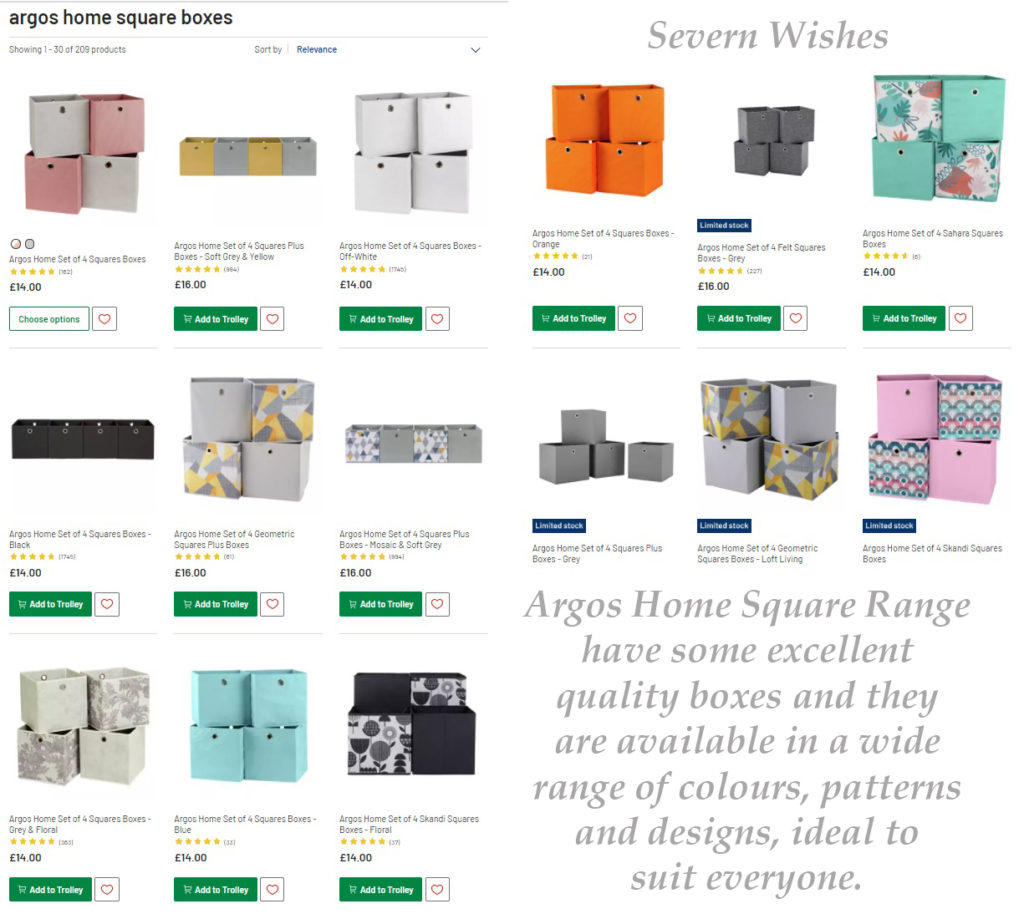
Argos – Great Quality and in a Variety of Colours and Patterns. Boxes are in packs of 4 with 2 Sizes Available. And prices start from £14.00 for 4 boxes. Argos also do lidded Square Storage Cubes in fabric and a leather look, which can double as seating for children in a bedroom too.

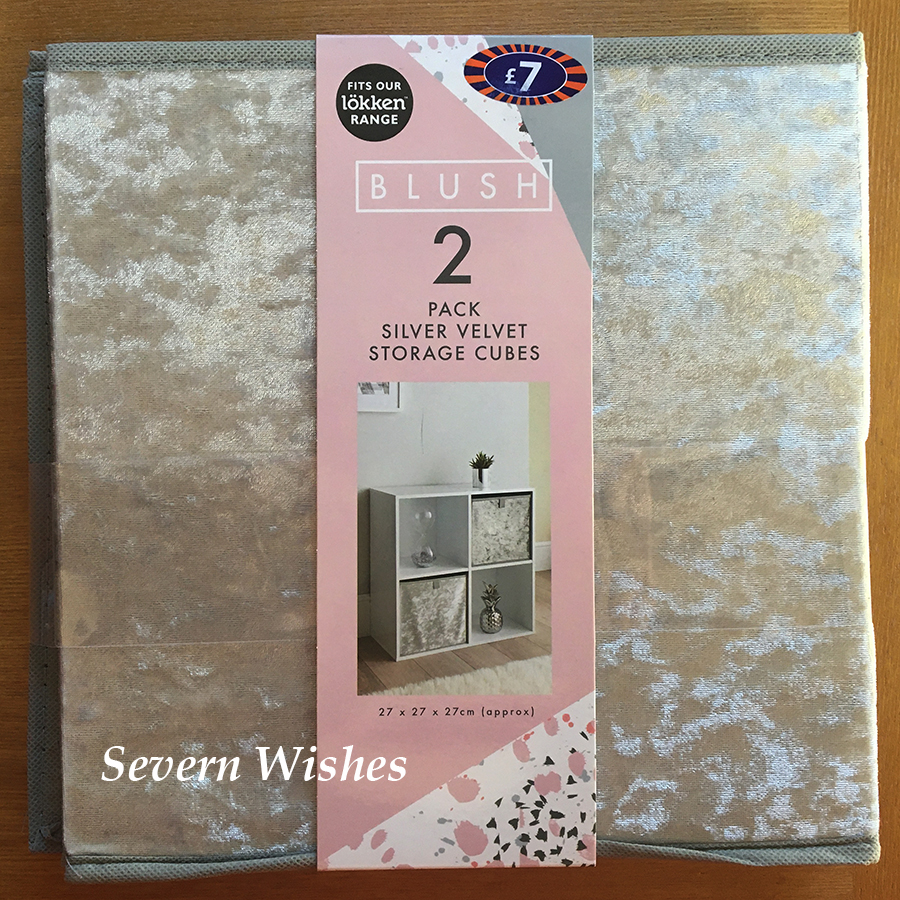
B & M – Fabric Boxes and Velvet Boxes, Good Quality but Less Choice Available (I only found Bright Pink, Blush Pink, Dark Grey and Silver). The Velvet ones were £7 for a pack of two and are very soft and of good quality. The fabric boxes are not as nice but definitely do the job well enough though and are ideal for toys, they were £5 for a pack of two.

Aldi – Special Buys Baby Event – Stars Boxes – Multiple Colours Available and were £3.99 each box. They were only available for a limited time.

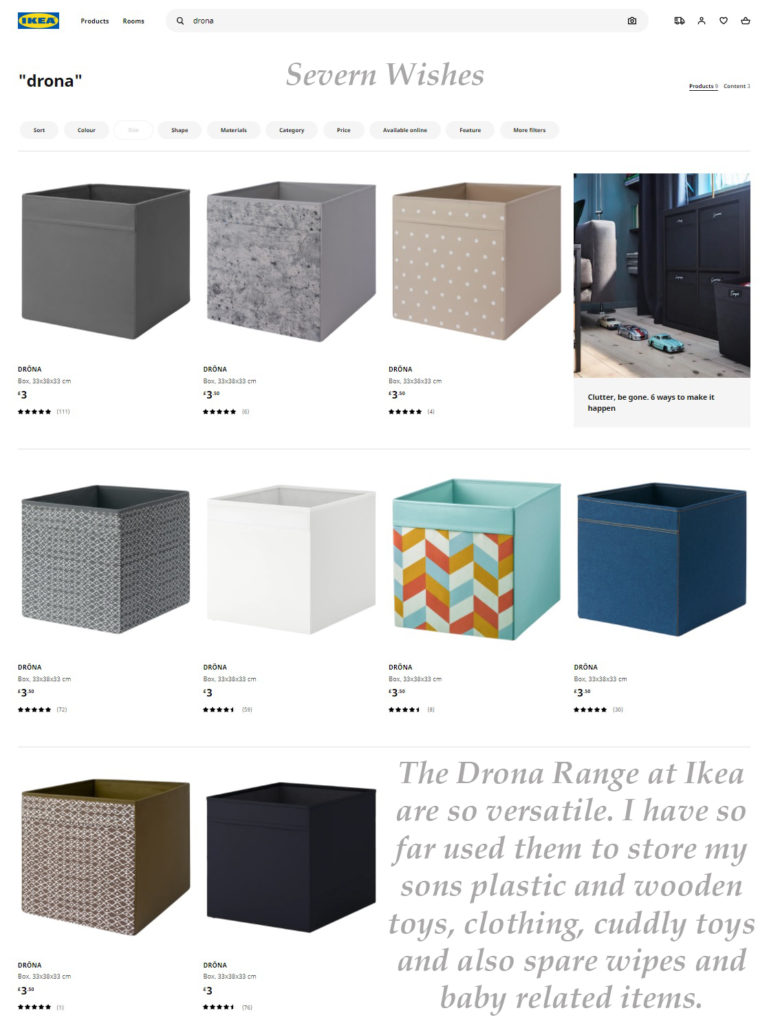
Ikea – Several styles of boxes and tubs available from Ikea and many colours and patterns as well. They range from £3.00 upwards for a single box and the range is called Drona.

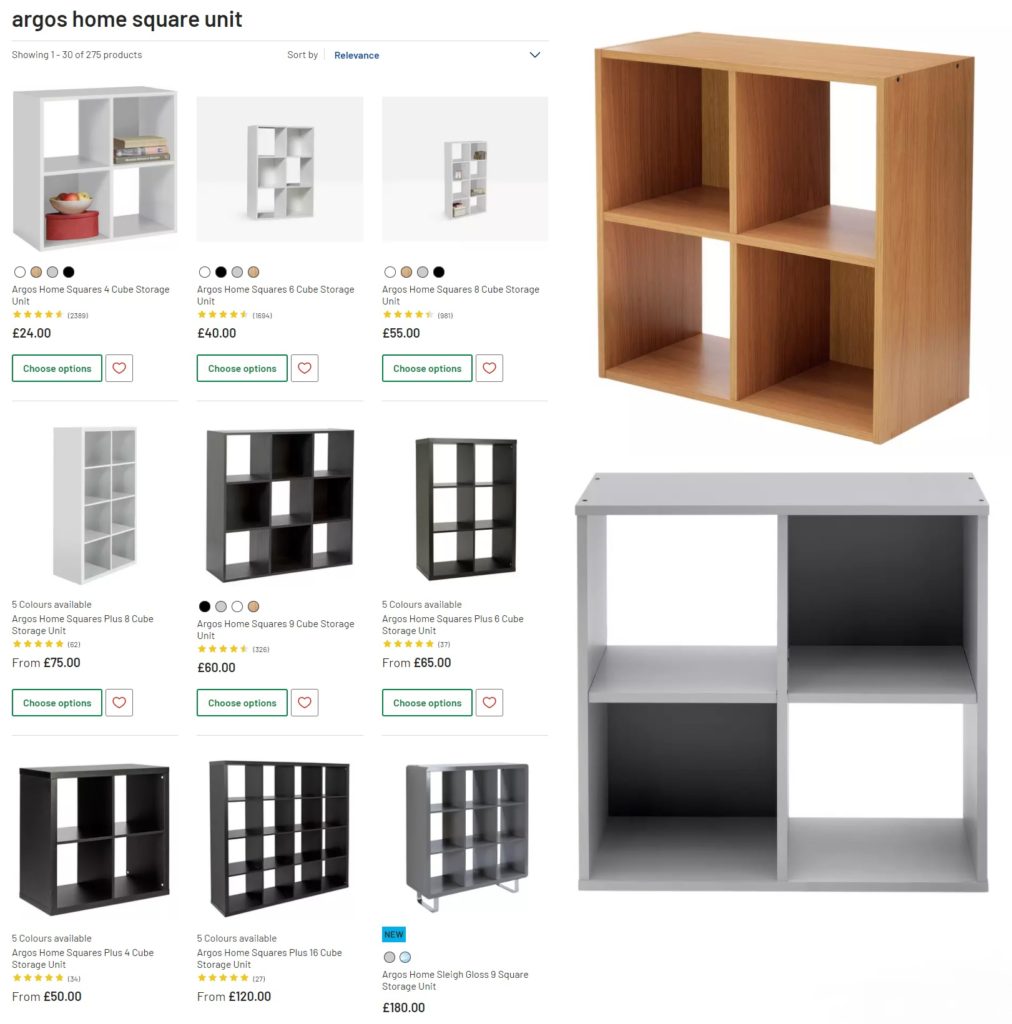
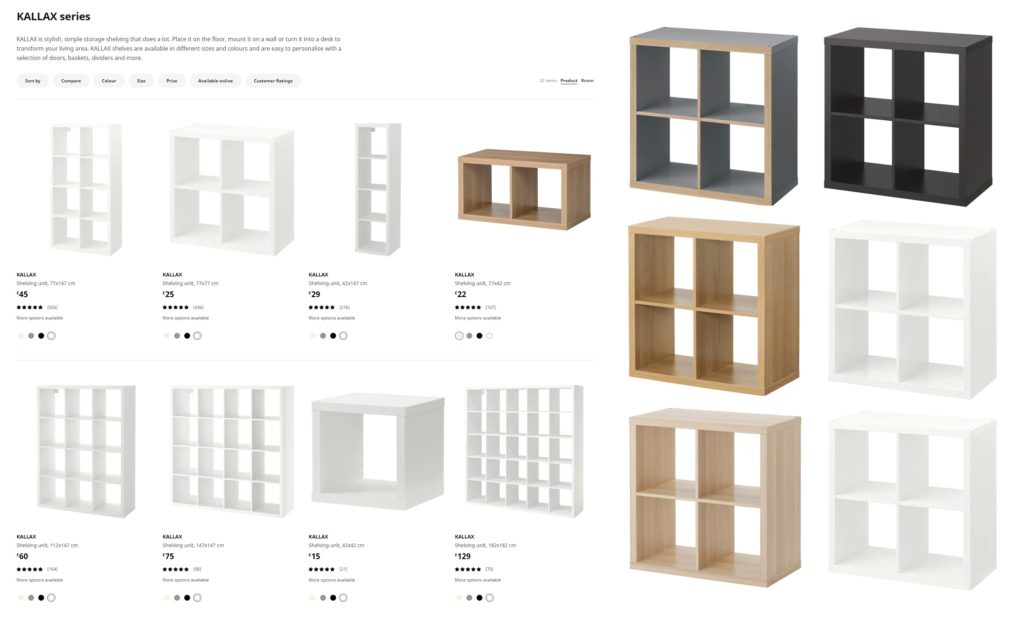
The furniture I purchased for my sons room is from Argos. But Ikea do a similar range as well named Kallax. Due to the Pandemic it has been far easier for me to get a delivery or click and collect option from my local Argos stores, mainly because its almost a two hour drive for me to get to an Ikea store, so I would rely on an online order and delivery.


My final TIP for keeping a house tidy is this, get one box out at a time, and teach your child/ren that once they are finished with that box, it gets packed up and placed back on to the unit or into the bedroom it came from. Then they can get another box of toys out to play with. In-still this idea at a young age and they should keep respecting their play space long enough to keep wanting to tidy up after themselves. These types of storage are so easy too, there isn’t anything complicated about it. You just need a system of what goes into what box, but you could always get labels for them too!

Great Value Square Furniture

Argos Home Squares range from £24 to £120.
Colours Available are Putty (Light Grey), Oak Effect, Black and White.

Ikea Kallax Square furniture range is from £19 to £129.
Colours Available are Black/Brown, White, High-Gloss White, Oak Effect, White Stained Oak Effect and Grey-Wood Effect.


Thank you for reading this blog post today, I hope I have given you some inspiration on how to make your own homes more tidy by using square storage to its full potential.

Check out my Instagram for more inspirational images on storage and tidiness.

✩ Sabrina ✩