Sabrina is a Lifestyle, Parenting and Product Review Blogger. A Writer, Photographer, Reviewer, Home Cook, Crafter & Nature Enthusiast. You will find a bit of all those categories here on Severn Wishes Blog, Welcome to Sabrina's Lifestyle Blogging & Honest Reviews.
Hello! I’m Sabrina and Welcome to my Blog Severn Wishes!
As I open the last Treatbox of the year for 2022 I’m greeted with Red paper and a Sticker that reads “Fa La La La La”! I have held off on bringing this Review to the website because of all the postal strikes, some boxes have arrived much later than expected. I didn’t want to spoil the surprise for anyone.
Don’t forget that you can click my “Treatbox” tab under my blog categories to look back through all of the Treatbox UK unboxing, Reveals and Reviews from the very beginning up to now.
Without further ado! Let’s get into this last unboxing of 2022! If you would prefer to watch my video recorded live when I first unboxed this one then please head to either my Instagram feed or my Facebook page.
What is Inside the December box?
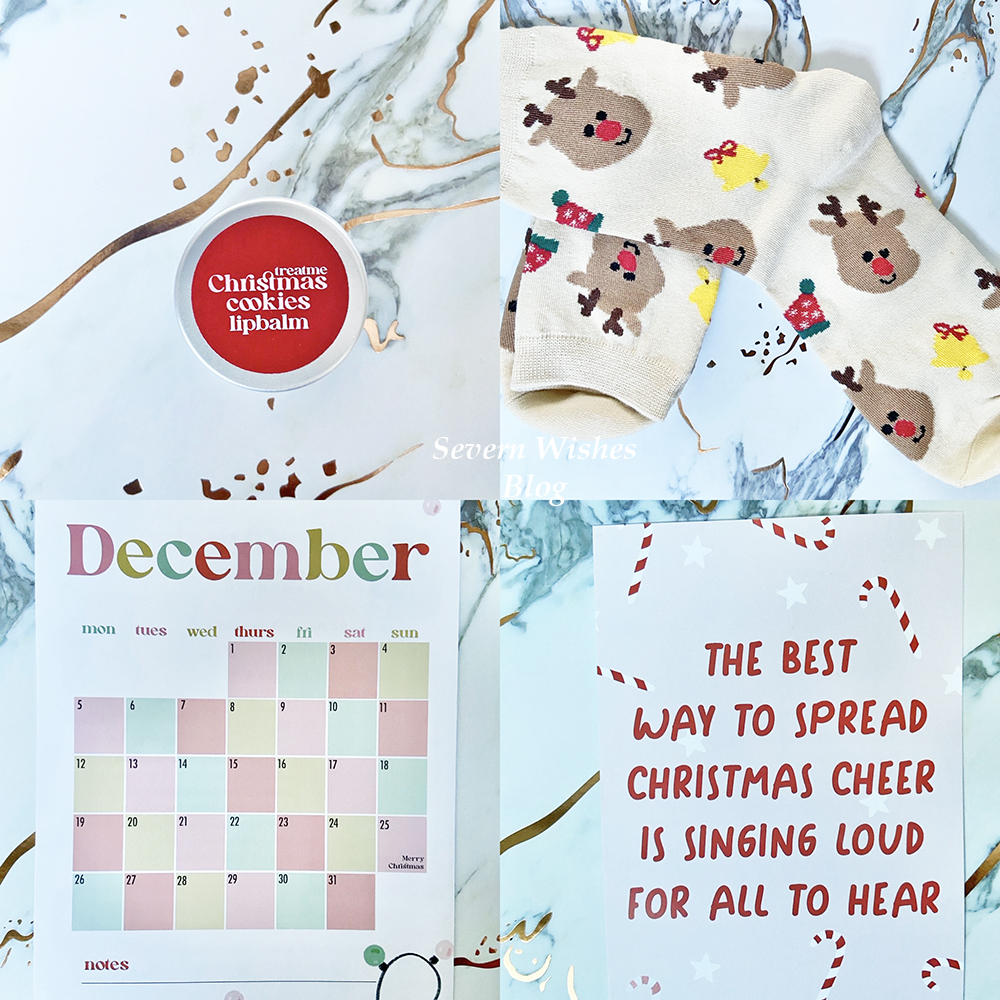
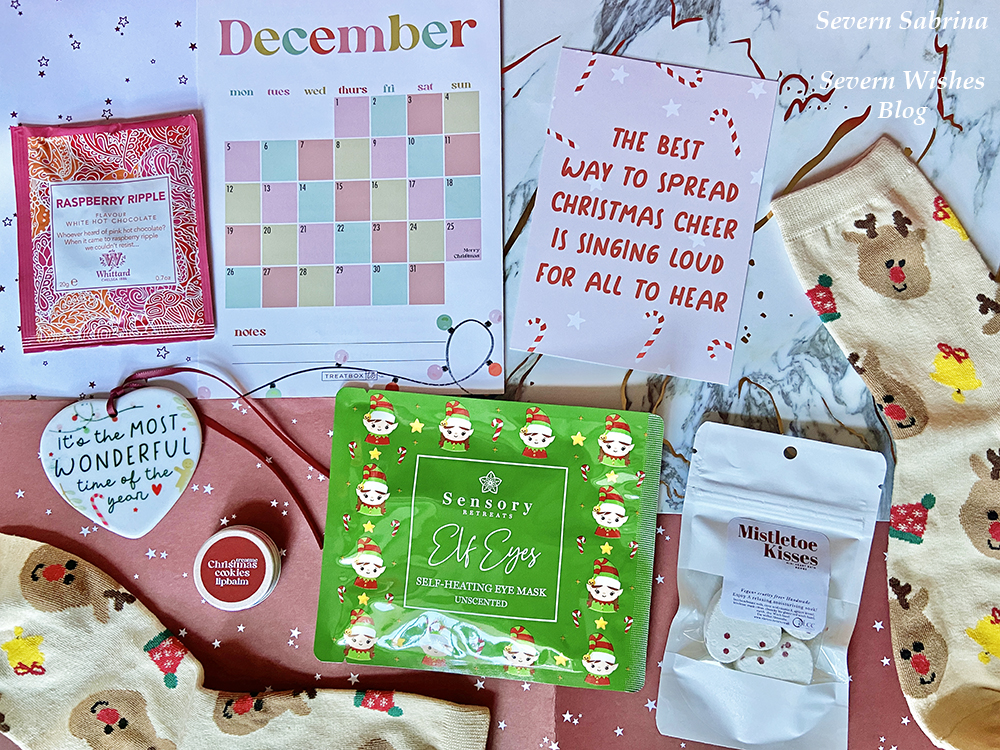
December Calendar Print Treatbox Original Pair of Socks – Beige Reindeer Rudolph Christmas Treatbox Original Christmas Decoration – Ceramic Heart “it’s the most wonderful time of the year” Treatbox Original Print A5 “The best way to spread Christmas cheer is singing loud for all to hear” Treatbox Original Wrapping Paper x 2 Large Sheets – 1 x White Stars & 1 x Red Stars Sensory Retreats Elf Eyes Self Heating Eye Mask – Unscented Whittard Raspberry Ripple flavour White Hot Chocolate Drink Mix 20g Mistletoe Kisses Heart Bath Bombs x 4 Christmas Cookies Vanilla Lip Balm Pot
My Opinion on this Box
Well there we have it, that was the final Treatbox UK Reveal and Review of 2022! It’s been a great box, one with a nice overall theme of Christmas and of Stars.
The items that I have liked the most this box have been the Hanging Decoration, the Socks, the Bath Bombs and the Lip Balm. I also love the Wrapping Paper because it is a sustainable paper item that can be recycled after use, or re-used for crafting. The assortment of products this month has been well considered and I really like the mix of self care and treats. My only wish would have been for an edible treat too like a tiny chocolate Santa!
We have something to drink, something to wear, something to put on our Christmas tree, something to keep track of the month, something seasonal to display and something to help us gift to others this festive season. Overall I really enjoyed unboxing this!
I will let you know on my social media when I get around to trying the hot chocolate and the bath bombs so watch out for those, I’m looking forward to some self care the other side of Christmas when I’m a little less busy!Today I am wearing last years Treatbox Christmas socks, it will be these lovely new Reindeer socks turn tomorrow!
Wishing all who read this a Merry Christmas and a Happy New Year too! Thank you for reading my Reveal and Review today.
The December 2022 TreatboxUK is the final box of this year, and I look forward to seeing what 2023 will bring, I hope you will be able to join me to find out.
Don’t forget to follow me on my social media for more updates and individual product reviews as well as witnessing the items in use too. Search #SevernSabrina or #SevernWishesBlog
✩ Sabrina ✩
✩✩✩ At the end of December I plan to write a blog post outlining the ✩✩✩ ✩✩✩ best of Treatbox UK seen throughout this year. ✩✩✩
I hope this blog post finds all of you well as you’re reading this!
So we are just over half way through the year now and it’s time for the July Treatbox UK Reveal and Review.
Thank you for joining me for this unboxing! It’s time to look at the products in this months box and for me to review them for you!
If you would prefer to watch my video then head to my Facebook or Instagram.
The July box features TB OR – Treatbox Original Products only available by ordering from Treatbox UK.
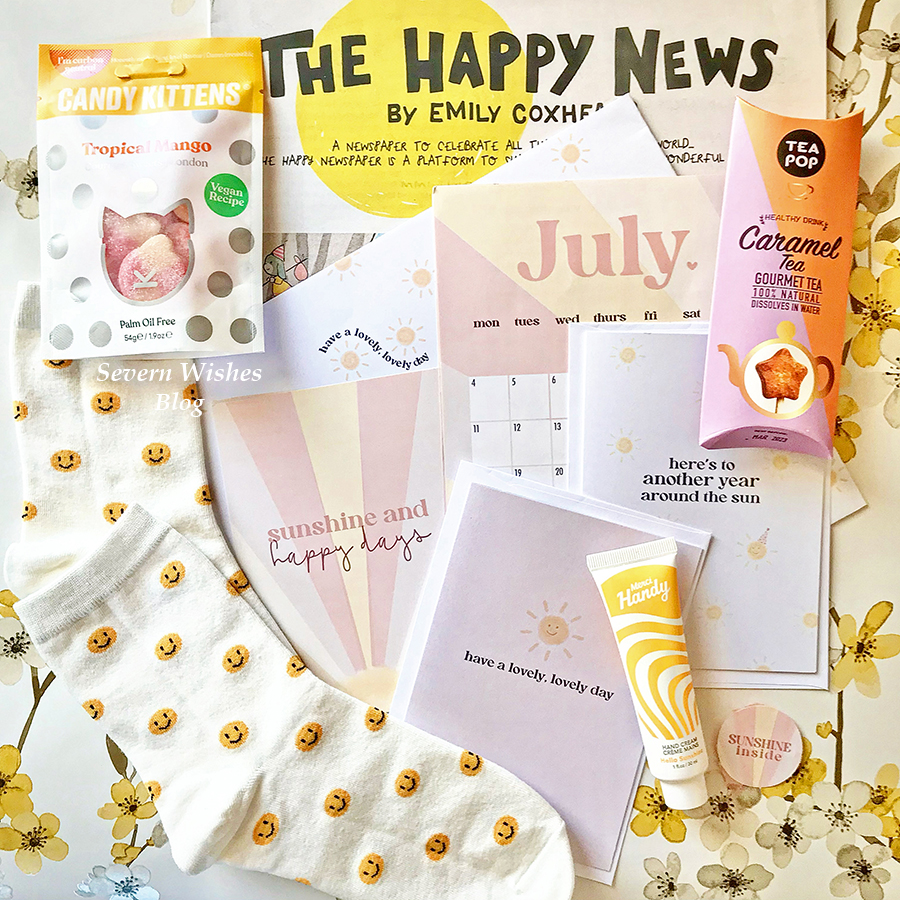
What’s Inside the July Treatbox UK?
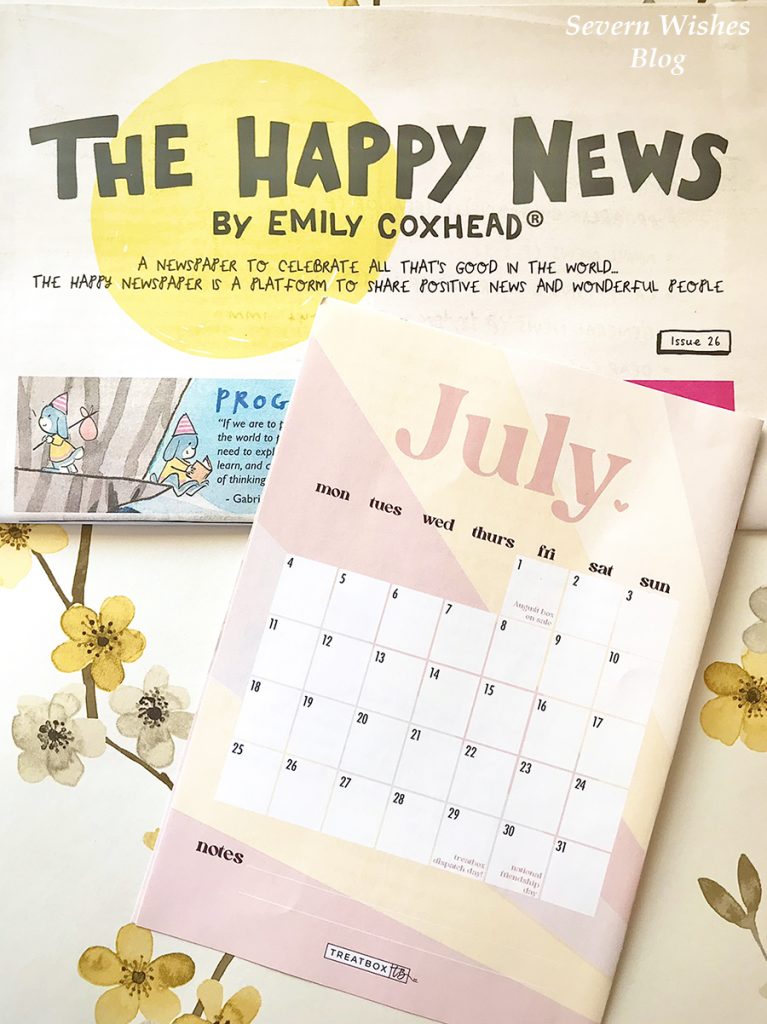
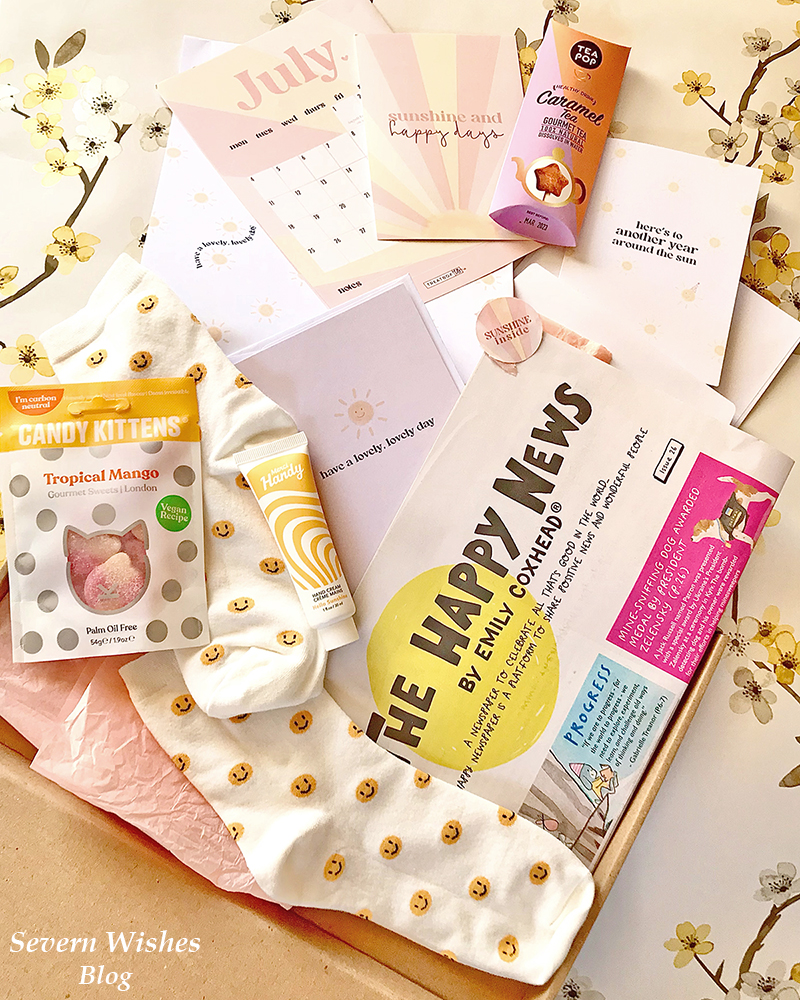
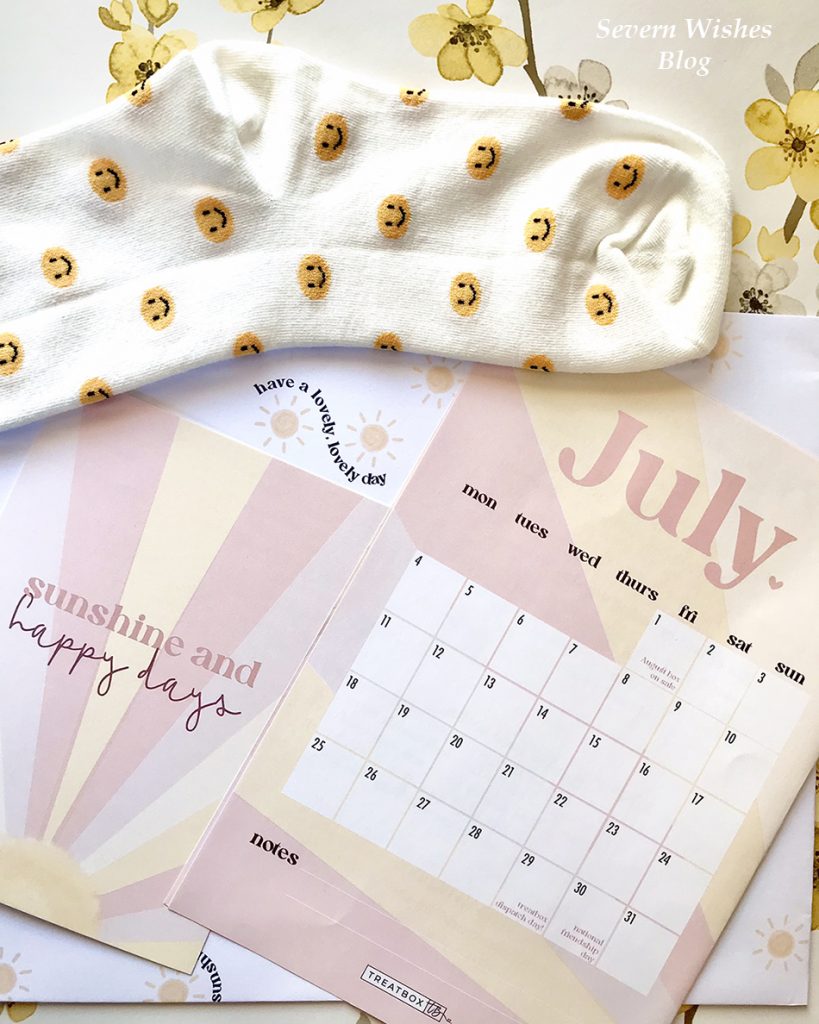
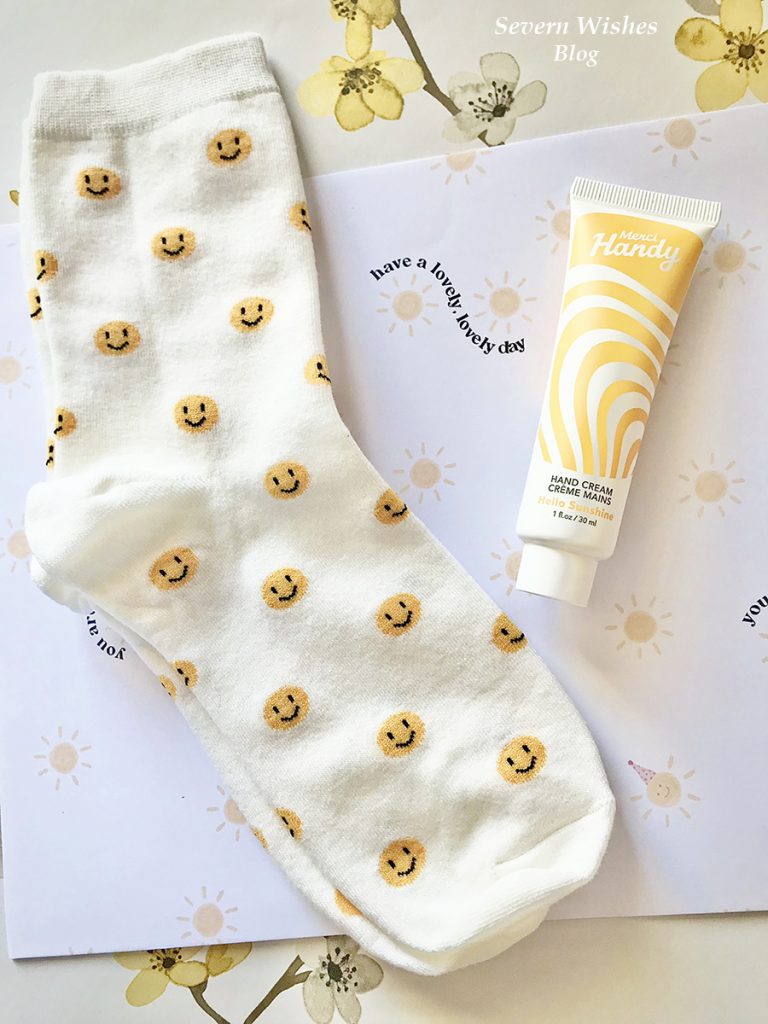
July Calendar Print TB OR A6 Print “sunshine and happy days” Smiley Face Socks TB OR Greetings Cards – 2 Cards for Passing on the Sunshine Merci Hand Cream in Hello Sunshine scent 30ml Candy Kittens – Tropical Mango flavour 54g The Happy Newspaper by Emily Coxhead issue 26 Tea Pop Gourmet Tea – Caramel flavour (in my box but may vary)
My Honest Opinion of the July box
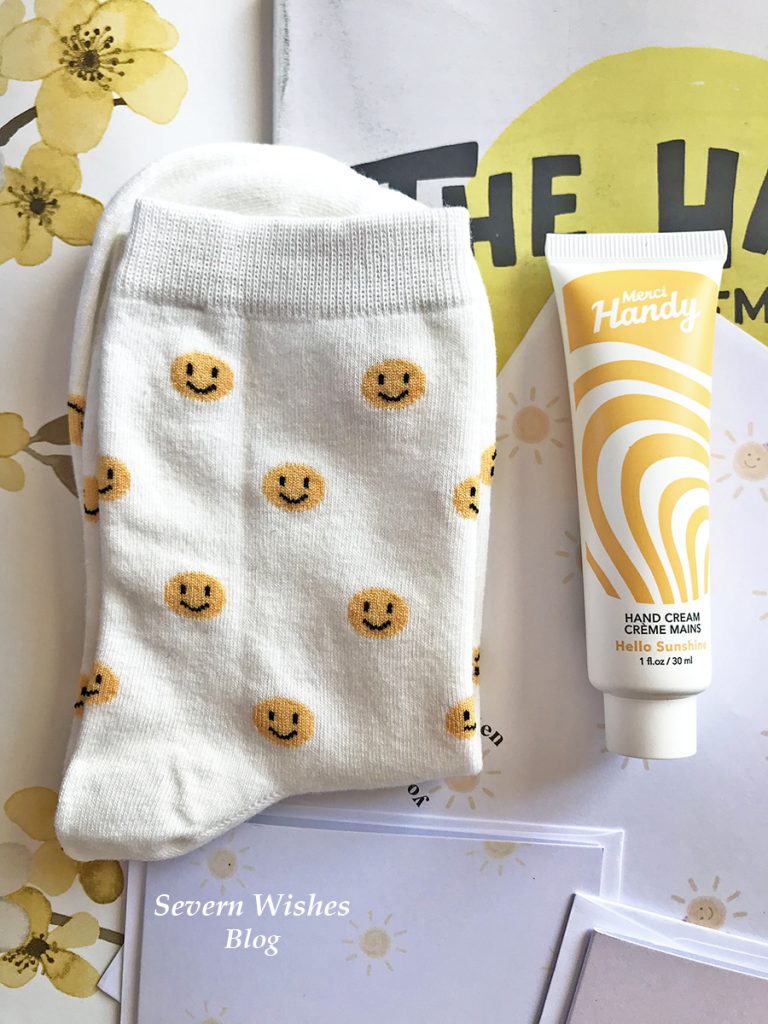
What a box of sunshine! When I opened up the Treatbox and I saw the theme was sunshine and happy vibes it was just what I needed to boost my week. We had socks again and I was really happy about that because I love the quality of the socks! They are soft and cute as usual with smiley faces on this time! And what I also loved was the fact that we can pass on the happiness and sunshine from our July box by sending the Treatbox UK cards on to someone we care about!
The Merci hand cream smells lovely like summer flowers on a sunny day, a light cream that melts into your hands and comes in a handbag size to boot! Perfect for use all year round! It made my skin feel very soft after I used it a couple of times.
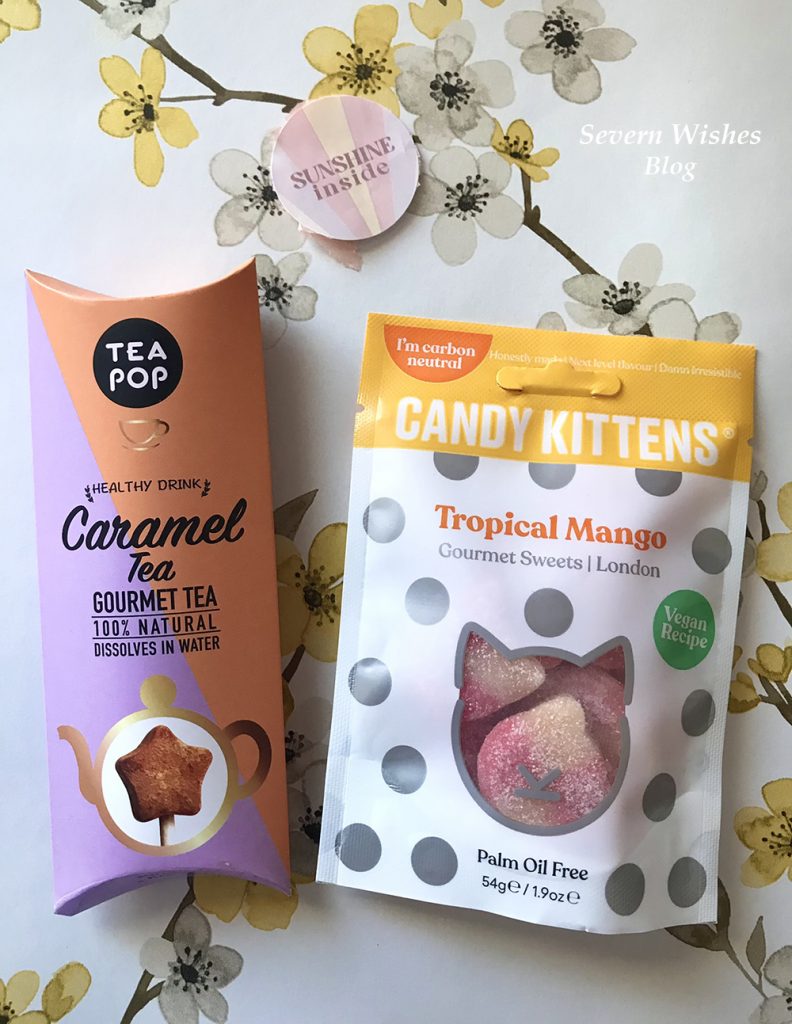
The Candy Kittens sweets are Vegan, Palm Oil Free and are now Carbon Neutral too! You get 54g to enjoy of this treat with natural fruit flavours in Tropical Mango. Yum!
We have the Happy Newspaper which I haven’t read all of yet, but hearing about happy stories and inspiring people is always a good thing. It’s important that we focus on some of the good things happening in the world even when times are hard, because if you look hard enough there is always some good news to find somewhere.
I haven’t had the Tea Pop yet because we are having a heatwave in the UK right now and I cannot stand drinking a hot drink when I’m already feeling very warm. However I did have an idea for this which was… make up the tea – I had Caramel flavour – and then pour it into an ice cube tray and freeze it! Pop these Caramel flavoured ice cubes into Pepsi Max or Water and make it a new flavour! Seeing as the heatwave is set to continue for yet another week I will make room in my freezer and do this! I will post about it on my Instagram and let you know how I get on!
Finally there are the Print, Wrapping Paper and the Cards – Treatbox Original Products – all made with the theme of sunshine! July is meant to be the happy and sunny month of the year (if we’re lucky) and so far we seem to be having just that! May the sunshine continue! I look forward to passing the cards on to people when it is appropriate to use them, and using the paper to wrap a present for someone.
Here are some more photographs now of the products I got within this box.
Thank you for joining me as I have unboxed and reviewed this July subscription box today. Treatbox UK is currently the only monthly box I am subscribed to and the reason for that is due to consistently great content and products that I hold in high regard. Providing items that are Vegan, Carbon Neutral, Sustainable and Healthy are very important to me. I get a treat but I’m also not harming the planet in the process.
I wish you a lovely month of July 2022! Please stop by again soon for another Reveal and Review!
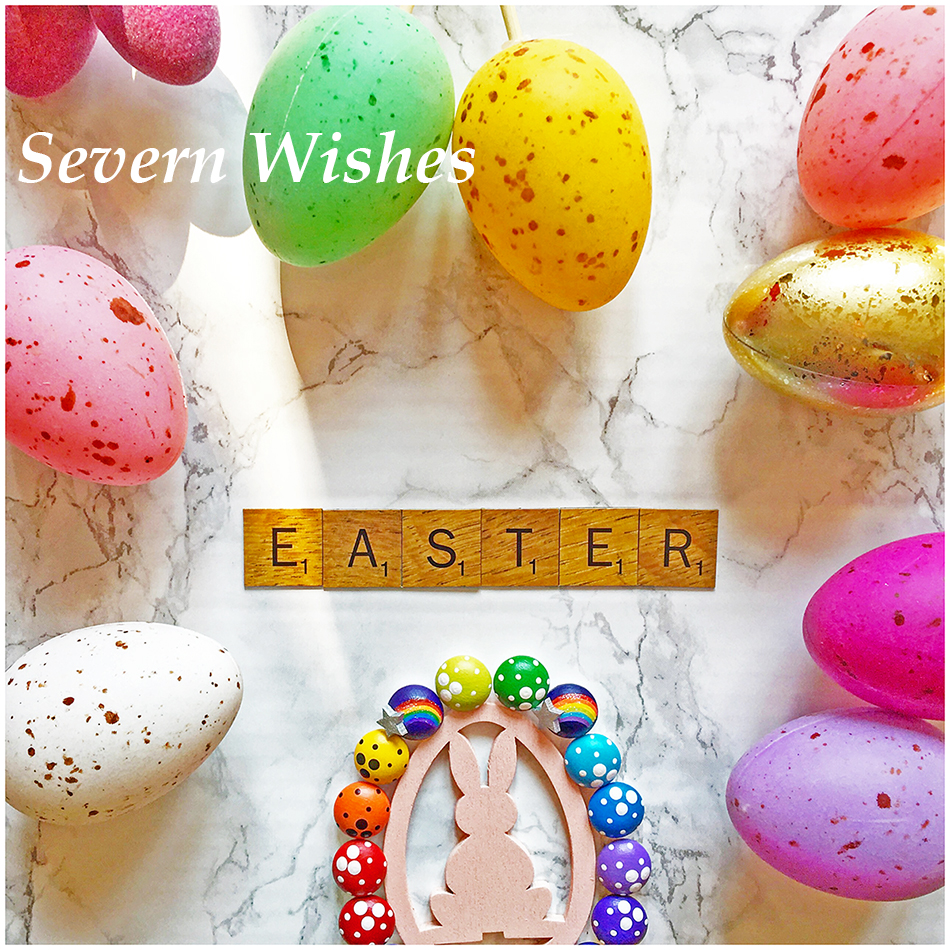
Fun to Make ~ Easter Art and Crafts ~ with Sabrina of Severn Wishes
I have wanted to do this blog post for the last three years, and I have always been too busy to complete it! Mainly because it is a mixture of writing the blog, creating and making the craft items, and then taking the step by step images, processing all of those and then putting the entire lot together in one blog post. It is both time consuming and a lengthy in process too. So what changed this year? Well for one thing, I was more determined to do some more craft this year, but isolation has also made me re-evaluate what’s important, and that is to make happy memories with my son. No matter what is going on outside our home, he doesn’t understand, and it is my job to keep things as normal as possible, so extra fun, extra learning and extra memories are all on the table at the present time. I’m so glad you could join me to hopefully make some memories of your own!
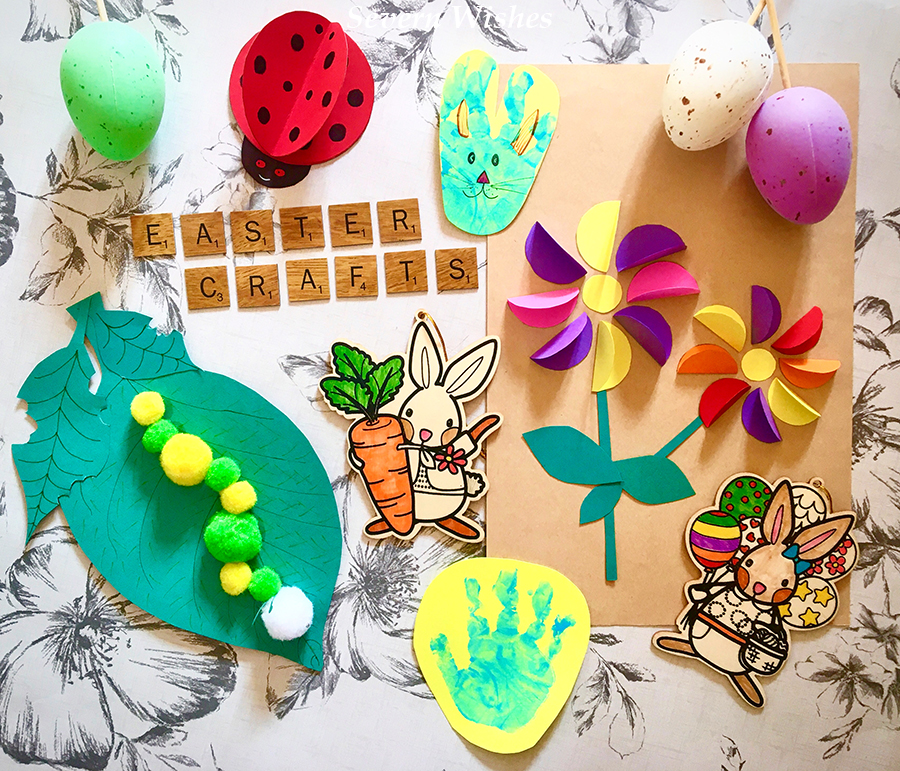
So without any further ado, let’s get our crafty fingers at the ready! Depending upon which Crafty Project you wish to undertake you will need a variety of items. My idea is this, pick an item from the four below, and then match the “You Will Need” items with what you already have at home. Providing you have all the necessary bits and bobs then feel free to scroll down to that Project and then get cracking with my Step by Step guides! Happy Crafting!
1. 3D Friendly Ladybird 2. Wiggly Caterpillar 3. 3D Paper Flower (Can be Framed or Made into an Easter Card) 4. Hand Print Easter Bunny Rabbit 5. Other Craft Ideas
1. 3D Friendly Ladybird
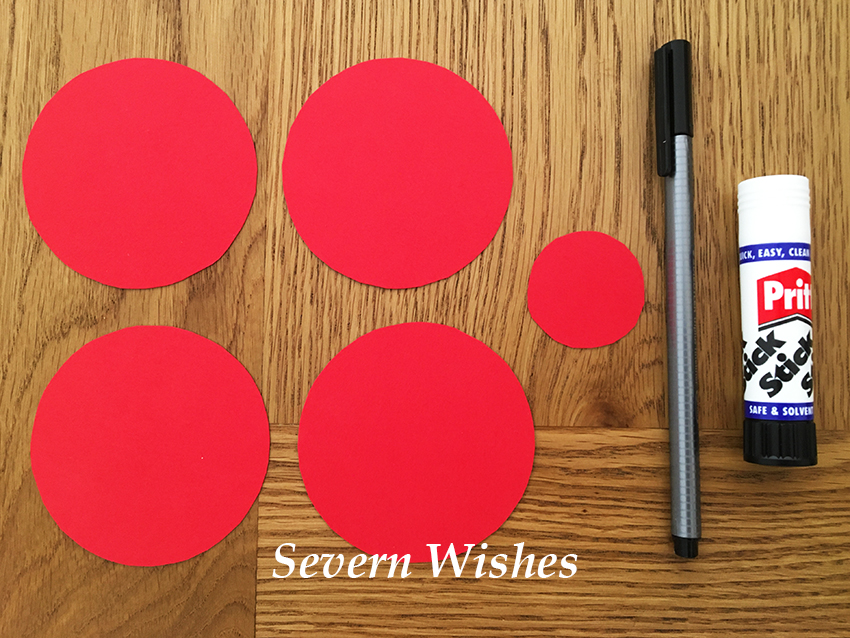
You Will Need Pritt Stick or Glue Coloured Paper and / or Card Circular Objects to Draw Around (This will determine the size of your Ladybird) Pencil Scissors Black Pen Googly Eyes (if you have some but not essential)
This is the easiest of my crafts today, and will take around twenty minutes to make. You can make it any size, any colour that you like. Why not make one for each member of the family? I am going to make several of them to put around my son’s bedroom. He loves Gaston from Ben and Holly’s Little Kingdom, so my son is the inspiration behind this particular craft project.
Step 1. Choose the Size of your Ladybird. Choose your colour. Draw around a Circular object so that you have 4 Circles the same size, and then you will need a smaller circle for the head, judge this depending upon the size of the body. Cut out these 5 circles and then you’re ready to begin.
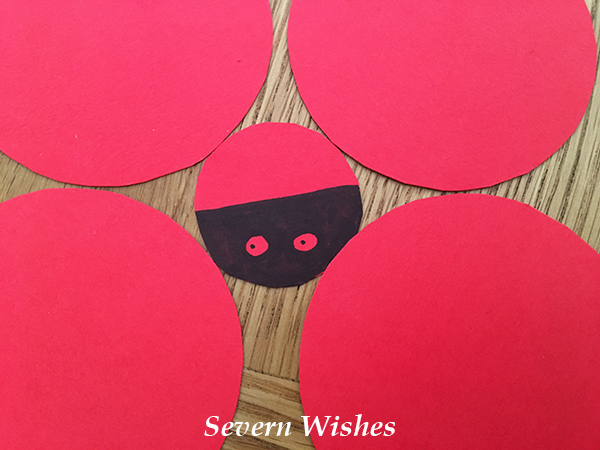
Step 2. On the small circle draw a line across the centre, you want to colour the half of this circle in with black pen. Don’t forget to draw eyes on it too like mine, if you don’t have any fun stick on eyes to hand! Then pop this face to one side you won’t need it now until Step 6.
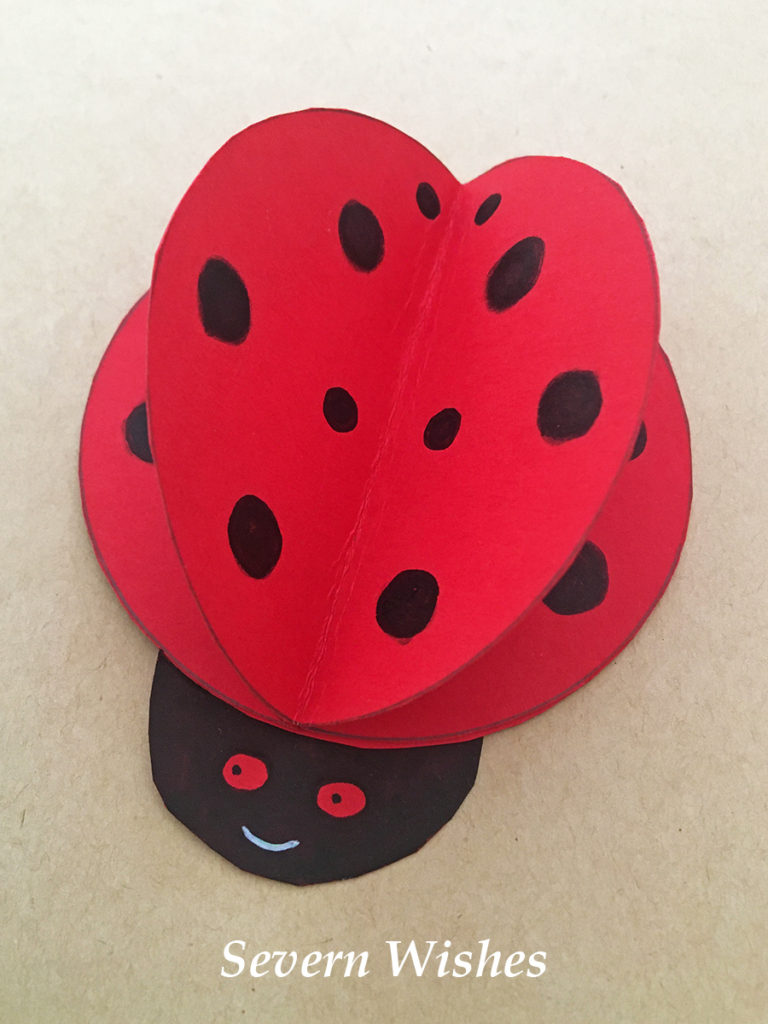
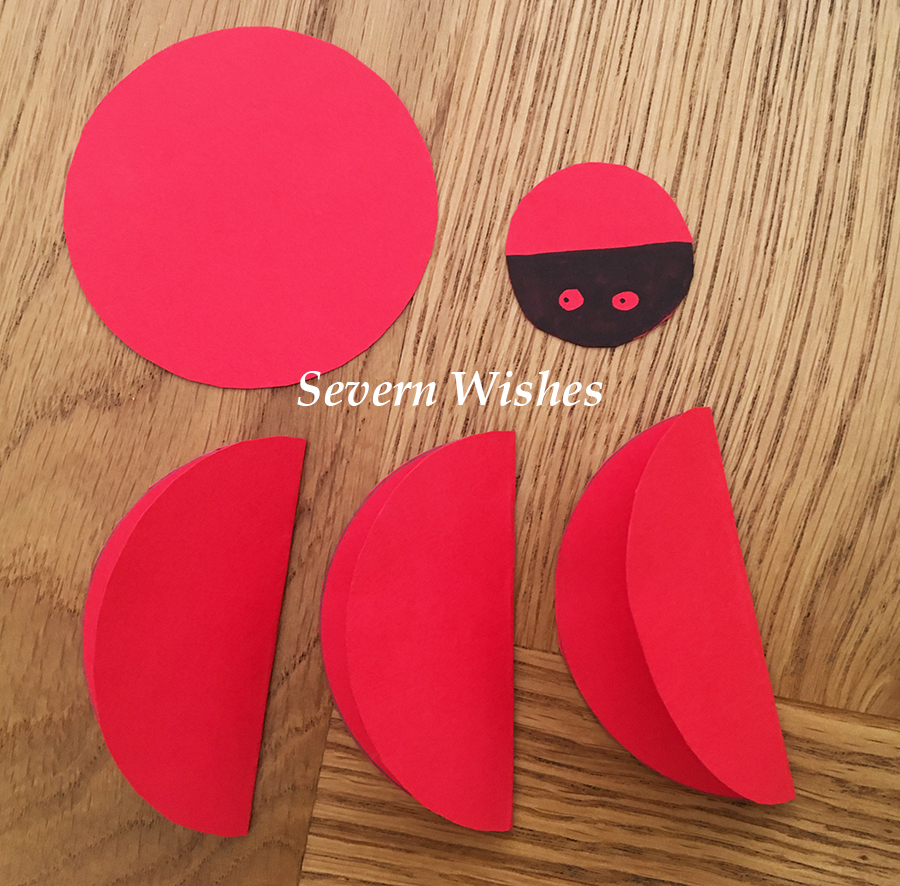
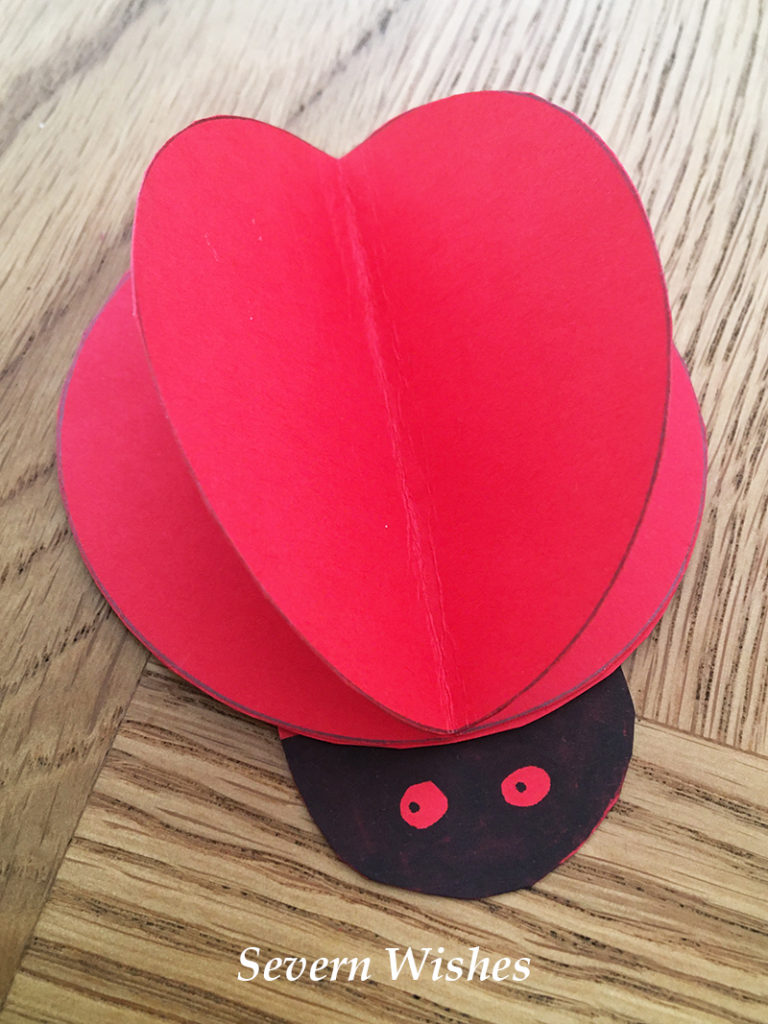
Step 3. Take 3 out of the 4 Large Circles and fold them in half across their centre. Gently crease them with your fingers, take a look at my image below to see how they should look.
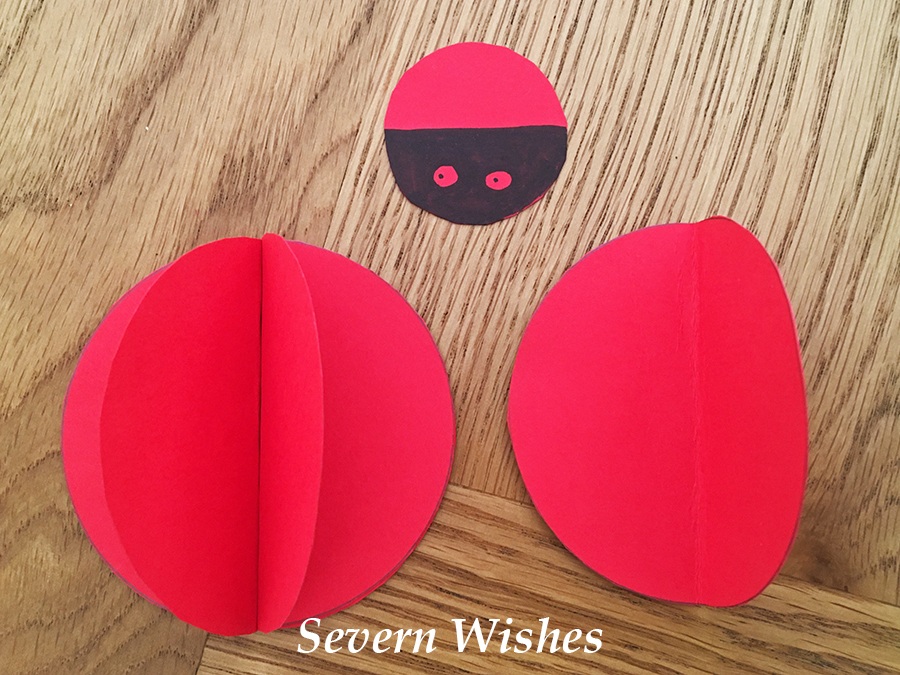
Step 4. Take the flat circle and cover it lightly in glue or pritt stick, I always prefer a glue stick when messing with card, less mess! Then take two of your folded circles, stick glue on their side that faces flat, place them back to back and glue them down on to the flat circle so that they make a V shape.
Step 5. Take the remaining Circle that is folded in half and cover it in glue before pressing it down into the centre of your Ladybird body, covering the two below neatly. You now have a finished insect body.
Step 6. You can now glue the head on by placing the glue on to the half you didn’t colour in, make sure you line it up with the V of the Ladybird to make it look right. See my image below.
Step 7. Push down all the flat surfaces of the Ladybird and leave for an hour or two for the glue to dry. Then using a Pen or Marker, draw on however many Spots you would like.
Step 8. Repeat steps for making other colours or other sizes if you have Card or Paper left over. If you need a base for your Ladybird to sit on, why not make him a cardboard leaf! (You need leaves for another of my crafts anyway!) 😉
CRAFT FINISHED
2. Wiggly Caterpillar (munching on a leaf)
You Will Need Pritt Stick and PVA Glue Green Paper or Card (Card is better) A Mixture of Green and Black Pens Poms Poms! All Colours Welcome! Googly Eyes or Stick on Sequins Scissors A Pencil A Piece of Cardboard (Cereal box is good!)
This is a fun craft to do with young children. They can make their Caterpillar whatever colour they want. All you need is some Pom Poms! You can follow my Steps or watch my video below!
Step 1. Draw and Cut Out a Leaf Shape (this is your main leaf) from your Cardboard. Then draw around this cut out piece of cardboard on to your green paper or card and Pritt Stick together.
Step 2. Draw your Leaf design on with Green pens. Set to one side.
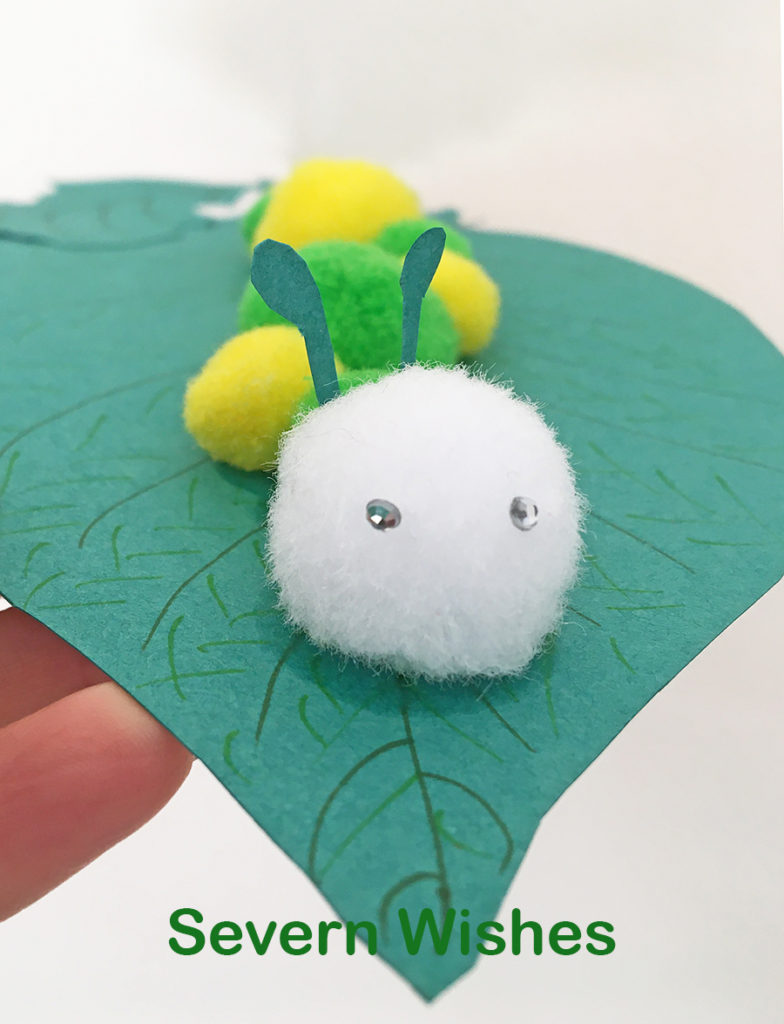
Step 3. Decide what Pom Poms you want to use and arrange them!
Step 4. Make some antenna and extra leaves and stick your eyes on to a Pom Pom ready to assemble your bug!
Step 5. Using PVA glue stick your Caterpillar together, don’t forget the extra leaves, arrange however you wish, then leave to dry in a warm flat place.
Step 6. Add any additional things to your bug once it has dried.
3. 3D Paper Flower (Can be Framed or Made into an Easter Card)
You Will Need Pritt Stick or Glue Different Coloured Cards or Papers A Piece of Card for Sticking to Scissors Pencil A Circular Object to Draw Around (it’s diameter will be half the width of the flower so choose wisely)
This idea is simple but looks so pretty when complete. It makes a great card.
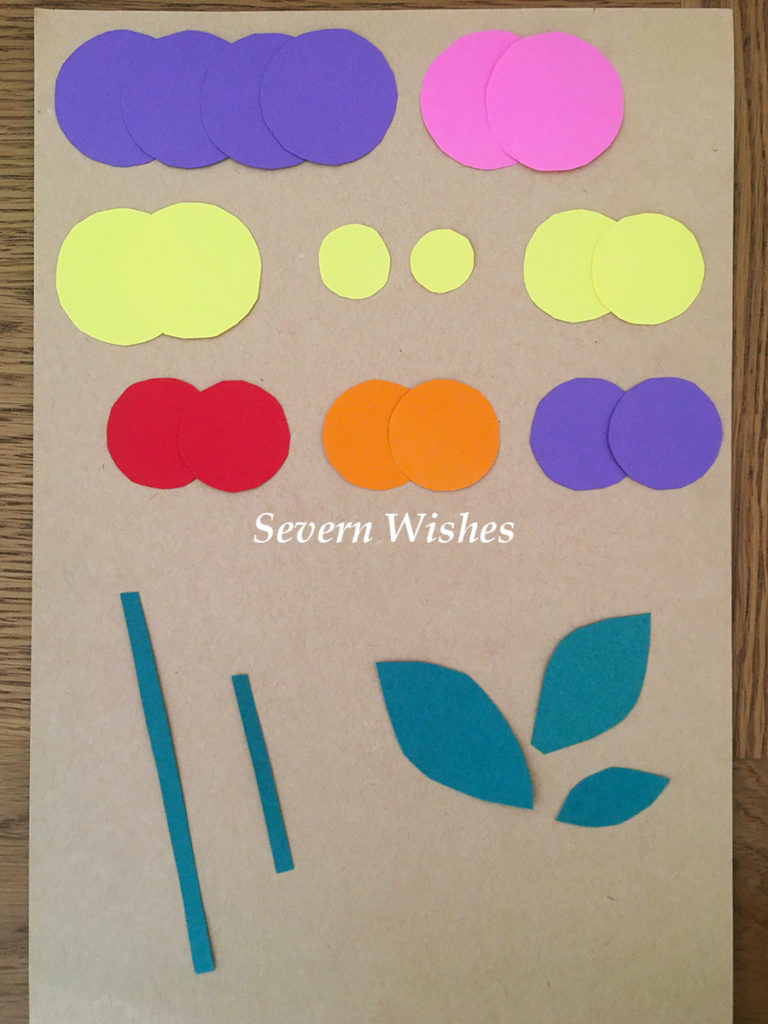
Step 1. Take a piece of plain card, this will be your base. Draw a Stem or Cut Green Card or Paper and create one. Make sure you leave plenty of room to stick the flower part. Cut out leaves and small circles of yellow paper to create the centre of the flowers. Be as creative as you like.
Step 2. Making the petals next, you need to cut circles of different colours, you will end up with 8 Petals in total per flower. I did two different sized circles to end up with two sized flowers.
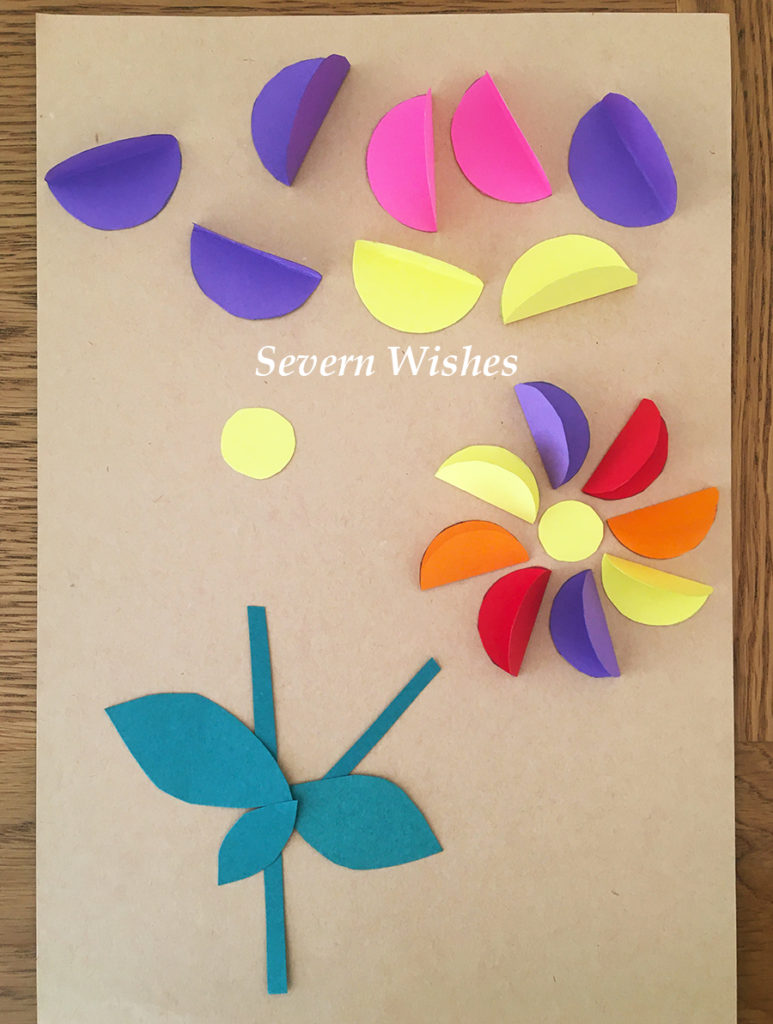
Step 3. Fold all of the petals in half so you end up with 16 halves with flat sides that stick up. This is how the petals will look 3D.
Step 4. Using Pritt Stick, stick the sides of the petals down so that they rotate around the centre of the flowers. You want them all to face the same way when you stick them around the yellow centre.
Step 5. Turn the flowers into a card if you like, or make other smaller flowers too using smaller circles, and make a pretty Easter meadow scene picture. Draw or Stick Easter Eggs and Rabbits and other Easter items along the edge like an Easter scene.
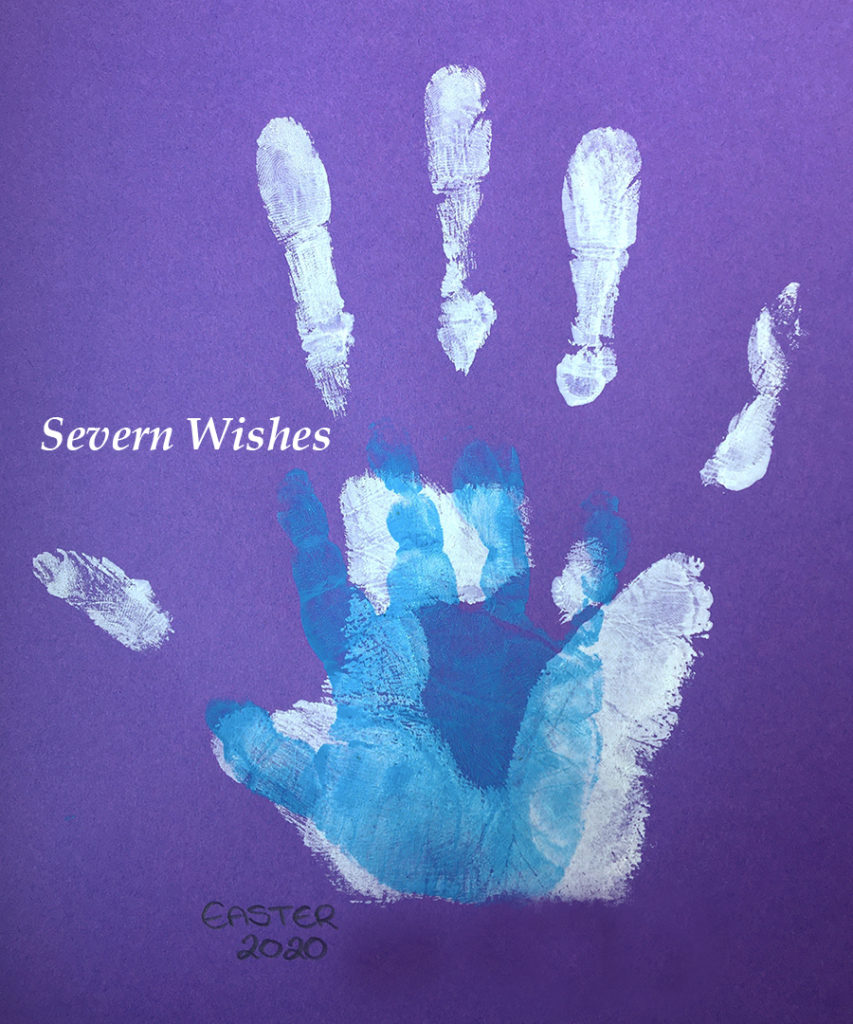
4. Hand Print Easter Bunny Rabbit
You Will Need Paper or Card Pencil Hands!!! Pens for the Details Scissors Paint
Paint works well for this one so you don’t have to colour in, unless you prefer to colour of course. It depends how much you’re painting, if you plan to do my hand prints picture (below) then you could do extra on different paper and make them into cute Rabbits!
Step 1. Draw around your hand and / or children’s hands. Or you can do a Hand Print on to Paper using Paint! MAKE SURE YOU LEAVE OUT THE THUMB! You want the shape to resemble a Rabbit head with two of each fingers being the ears! Keep two fingers together!
Step 2. Once dry you can cut the Rabbit shape out.
Step 3. Draw on Nose, Mouth and Eyes!
Step 4. Add any extras like whiskers, inner ears and freckles! Cut it out and hang it up or stick to a handmade card if you like.
FINISHED
Not the best hand print but you get the idea! My son was a bit reluctant to help out yesterday, ha ha!
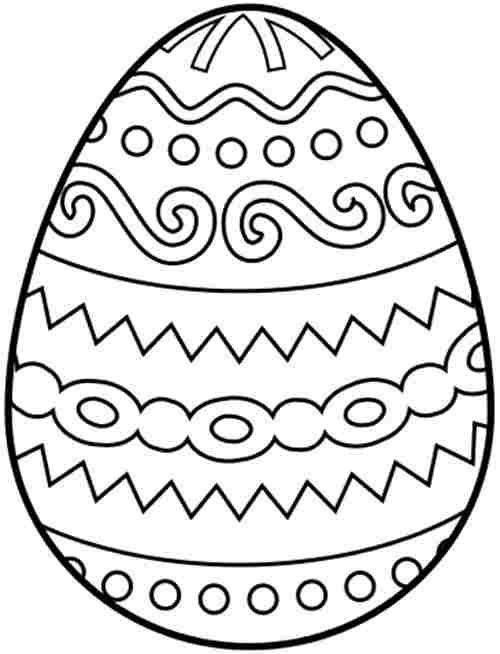
5. Other Craft Ideas If you want to just Print some Easter Egg patterns and do some Colouring in with younger children then here are a few that I really like that you can save and print 🙂
Alternatively you could do some Painting of Hands and do some Prints!
Layer the Prints of your Hands to make a nice picture.
Thanks so much for joining me for this blog post. I hope that you’ve had fun, maybe even a laugh at my crafty items. If you made something please share it with me on social media, tag me or my page! I would love to see them! What was your favourite? Would you like to see more Art and Craft? Leave me a comment. Have a wonderful fun and safe Easter!
I was recently asked to become a godparent, and not only was I honoured to do so, but I then wanted my godson to have something special to keep and remember the day forever by. I have been waiting to share this post with you all but I wanted all of the family to see the present I gave, before I shared it on my blog. Now that I am able to I’m going to show you the gift that I commissioned and was so pleased with!
After searching the internet and the pages of social media, I decided to go with a company who could fulfill my wishes to personalise a design to be in keeping with the day. I knew the sort of gift that I wanted made, but I had to find someone who would do a design that would fit my purpose.
This wonderful company is run by Caitlin and is called Paper Lace & Love. Specalising in Handmade Papercuts, that are then framed and personalised by her for your own unique circumstances.
I wanted a Christening gift to be specifically made with both my godson’s name and the date he was Christened on it. I was so impressed with the level of detail and also the professionalism of Caitlin for making the changes I requested with no questions or problems. I was more than happy to pay the extra for the alternatives and was very pleased with the final design.
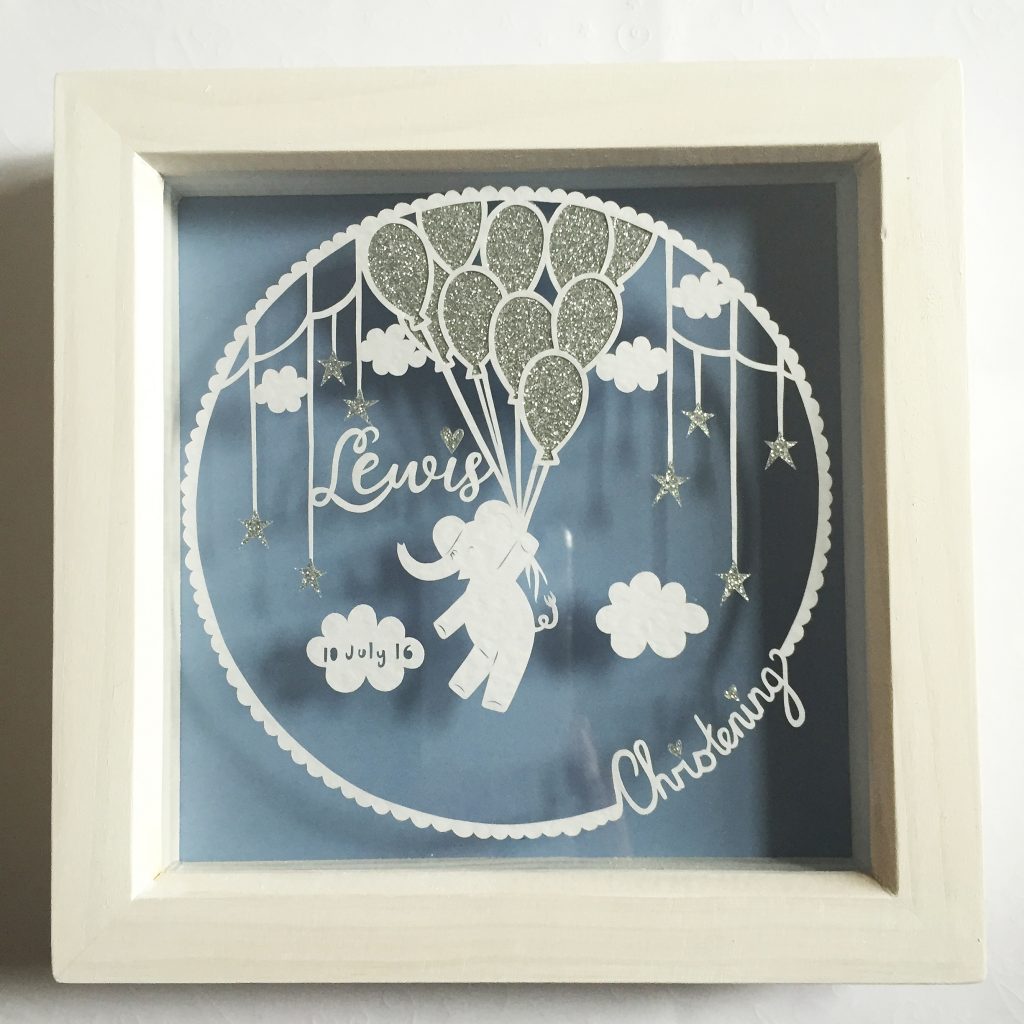
The parcel arrived on the day it was meant to, and the packaging was both professional and appropriate for keeping the item intact. Wrapped up in bubble wrap and tissue paper, the final look of the frame was excellent.
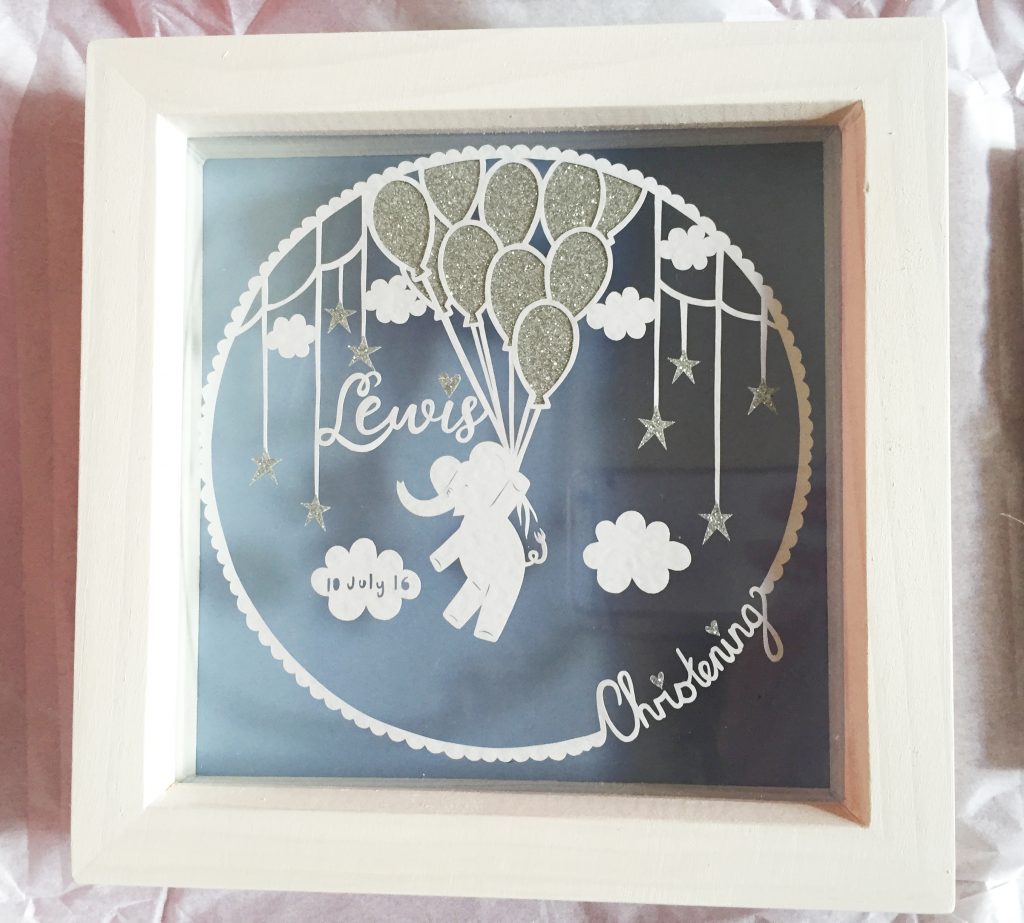
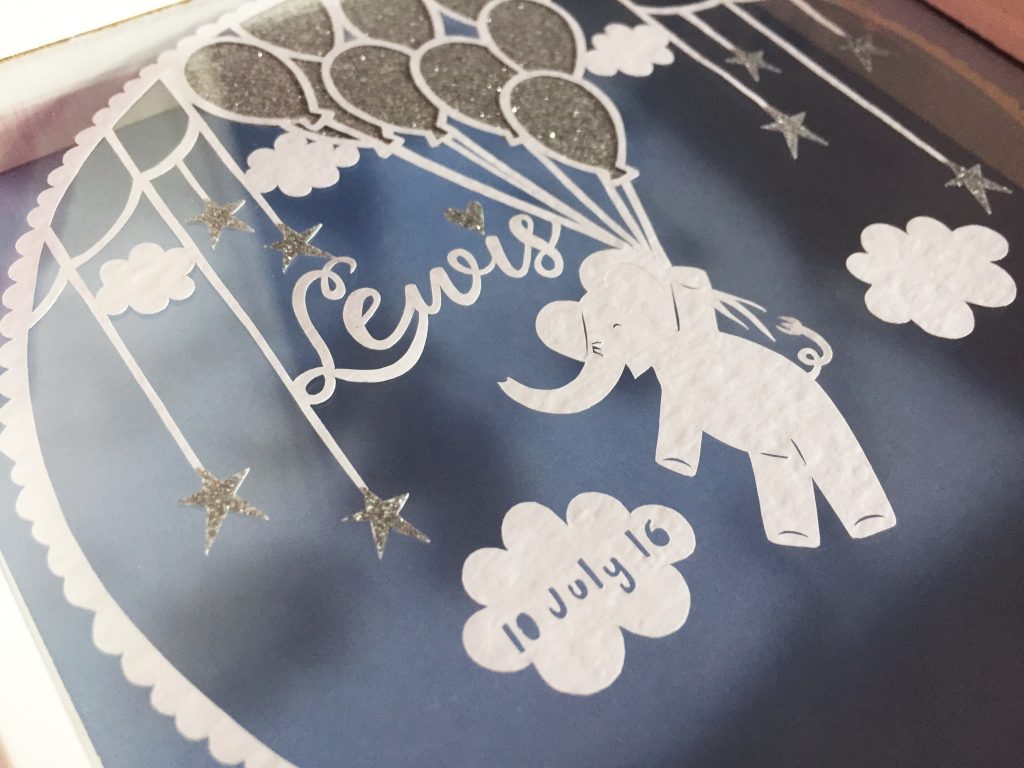
Here is the gift, professionally framed and about to be re-wrapped by myself to become the present. I chose a blue background, blue for a boy, but Paper Lace & Love stock a variety of styles and colours you can choose from. Caitlin is more than happy to find things for people to make it special and unique to their situations.
As you can see in the next image, the level of detail is incredible, and I am in awe of Caitlin’s talent for paper cutting. She must have a high level of patience and a great degree of creativity to make such beautiful pieces.
My chosen gift was well received and will hopefully be loved by all as my little godson Lewis grows up. A wonderful and creative way of remembering a special day for a very special boy.
I cannot thank Caitlin enough for fitting me into a busy schedule, sending my gift to me within plenty of time, and for making the commission fit my needs exactly. I recommend her business highly, and would purchase from her again in the future if I ever need gifts of this sort.
I really hope you have enjoyed my review, and I will leave some links at the bottom of this post for those who wish to look at the other paper cuts available for purchase by Paper Lace & Love.
By continuing to use the site, you agree to the use of cookies. more information
The cookie settings on this website are set to "allow cookies" to give you the best browsing experience possible. If you continue to use this website without changing your cookie settings or you click "Accept" below then you are consenting to this.