I have always had some creative flare, but one thing I had never done before was to make my own Christmas Present Tags! I came up with lots of ideas while spending time at home.
I took the plunge this November and ordered the things I would need to design them. I already had two awesome sets of Staedtler Pens in both fine line and bold. I also had various sequins. But I needed the tags and the string. I tried my best to use natural string and cardboard that was made from recycled materials.
What you could do if you can’t get any of these brown tags, is to cut up some old Christmas Cards and make them into similar shapes like these, add things like sequins in order to sparkle them up.
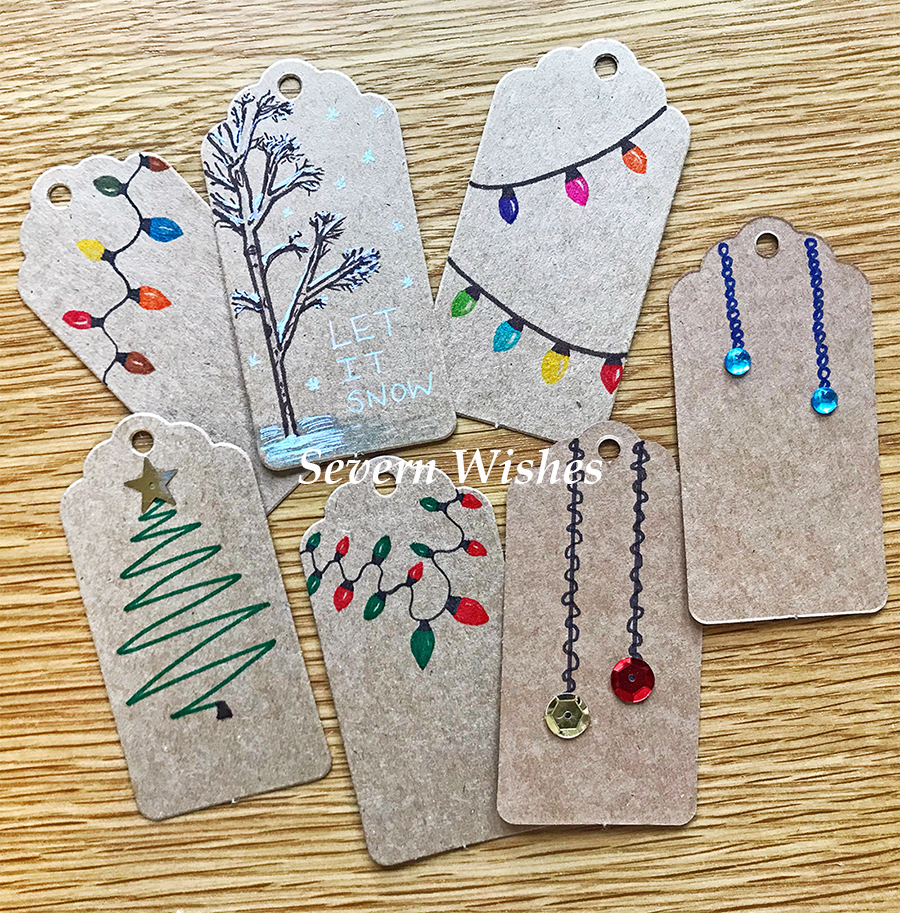
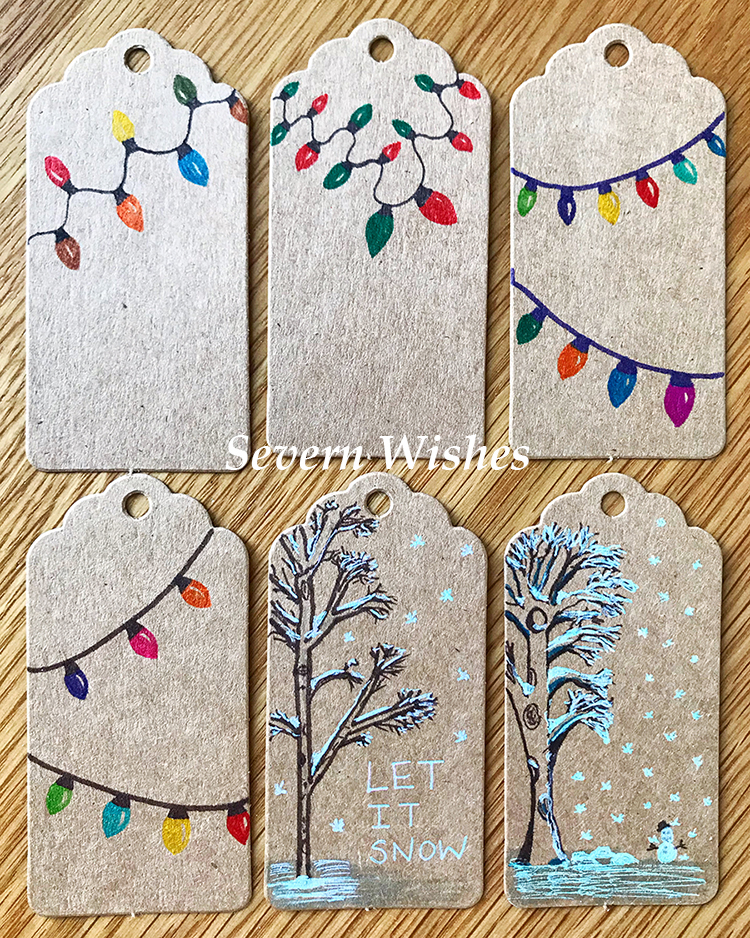
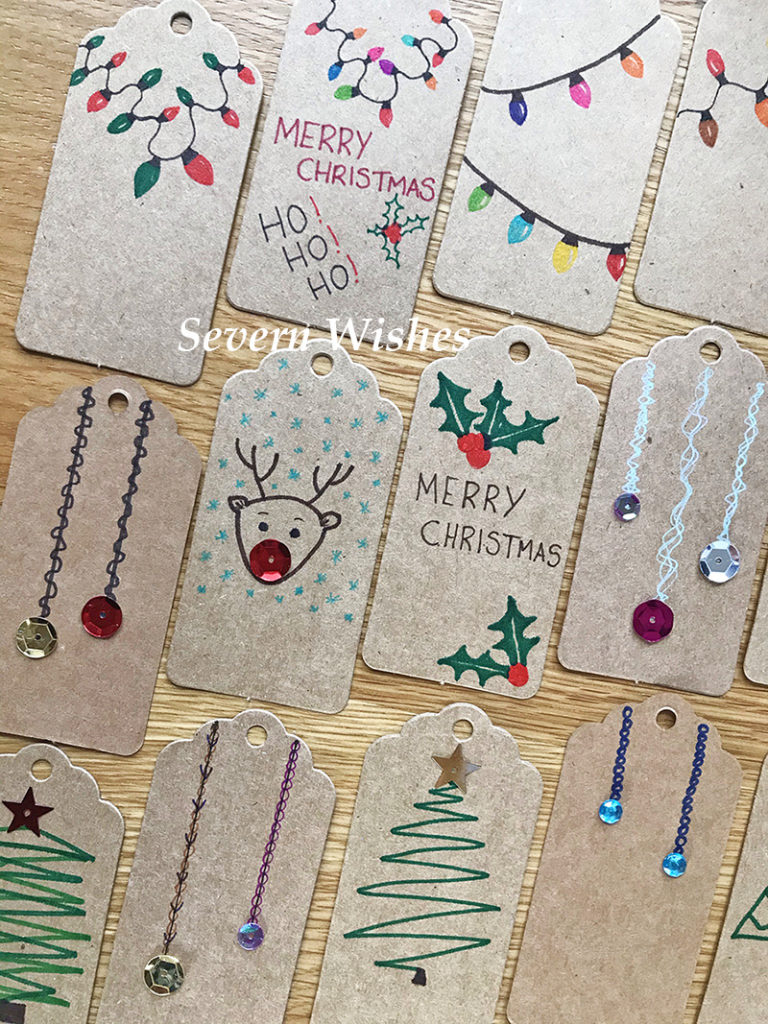
String Christmas Lights
The easiest of all my tag designs to make, you will need both thicker pens and fine pens of the same colour. The trick is to create the light shape with the finer pen and then colour it in with the same thicker style pen after. Make sure you leave the small crescent shape on one side of each light bulb so it looks three dimensional.
Begin by drawing the lines and bulb attachments with one pen, dark colours work best for this part. Then choose the pen colours you want for your bulbs. Ensure you don’t put the same shades next to one another and alternate colours like Red and Green for a Christmas look.
The size of your bulbs will depend on how many you want to do across your tag. If it’s just lights and no writing then you can fill up the space. If you plan to write “Merry Christmas” for example then perhaps do the lights top and bottom of the tag and leave the middle area blank.
Check out my images for some inspiration. Give it a go on a piece of plain paper and decide which way to do your bulbs, before doing them on to a tag.

Snow Scene with Tree
If you aren’t very good at drawing then you can still achieve something like this tag, just take your time and follow my instructions. Check out my videos on my Facebook Page too!
You need a brown pen, the finer the tip the better, and you want to start by drawing the outline of your tree. Fill in the branches afterwards, getting smaller to the ends. Next to add a 3D aspect to your tree draw circles for holes and darken undersides of larger branches and the trunk to add shadows. Use a silver, white or light blue mixture of pens now to create the snow. You could do a snow scene or just do the tree. Be creative and have fun! Look at mine below for some inspiration.
The Christmas Tree
I quite like the abstract or deconstructed Christmas Tree type of tags. Mainly because when I try to draw symmetrical and lifelike trees they never look quite right. If you’re good at drawing trees however, then putting one in the centre of a tag would look really great!
Use a nice dark green pen for your tree. Add either stick on crafty bits and pieces or draw on some festive decorations, or do a bit of both! PVA glue is best because it will dry clear! If you want to do a more 3D tag then glue dots or adhesive squares also work well too.
Me on the other hand, I prefer to do the continuous line and have a sequin star on the top, kind of a tree!
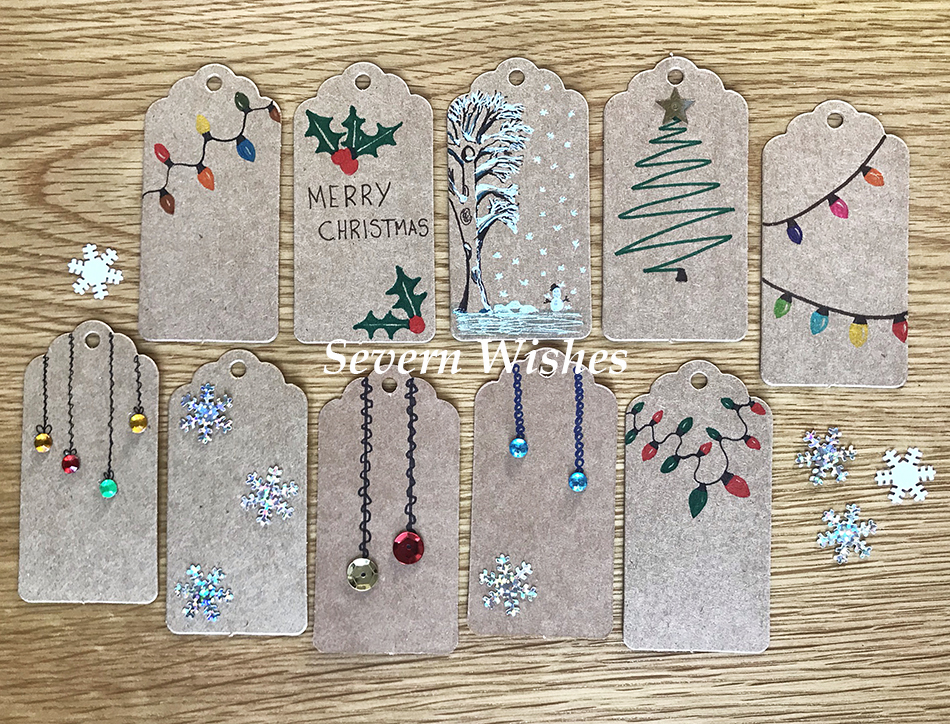
Christmas Sparkle
If you have various diamanté, sequins or sparkles you want to use on your tags then you need to come up with designs that suit them. Check out my tags below for some ideas. Hanging decorations or bauble type designs work best for rounded craft items. Think about when items hang on a tree, what they look like. Window decorations like a line of hanging stars or snowflakes are also very nice.
Sequins can be used on their own or accompanying pen lines. Use your imagination and design your thoughts on a piece of plain paper first using a pencil, once happy with it, you can then transfer the ideas to a tag.
You can purchase the brown tags in most craft shops, online at places like The Works, Hobbycraft and Amazon. Try and pick ones that are already made from recyclable material.
I had previously bought my pens online from Amazon, Sequins from The Works and my Glue is also from The Works too. Other crafty items have been purchased by me over the years from various shops and also Tesco superamrket, they had a nice range of sequins this year too.
Other fun tags include, “Merry Christmas”, Holly, Baubles, Rudolph, Robin, Christmas Trees, Christmas Lights, Snowflakes, Snowmen, Santa Claus, Snowy Scenes, Penguins, Stars and things such as “Ho! Ho! Ho!” and “Let It Snow”.
Thank you for reading this post today, if you do give making Christmas tags a go then I would love to see them! Tag me on social media using the hashtag #SabrinasChristmasCrafts
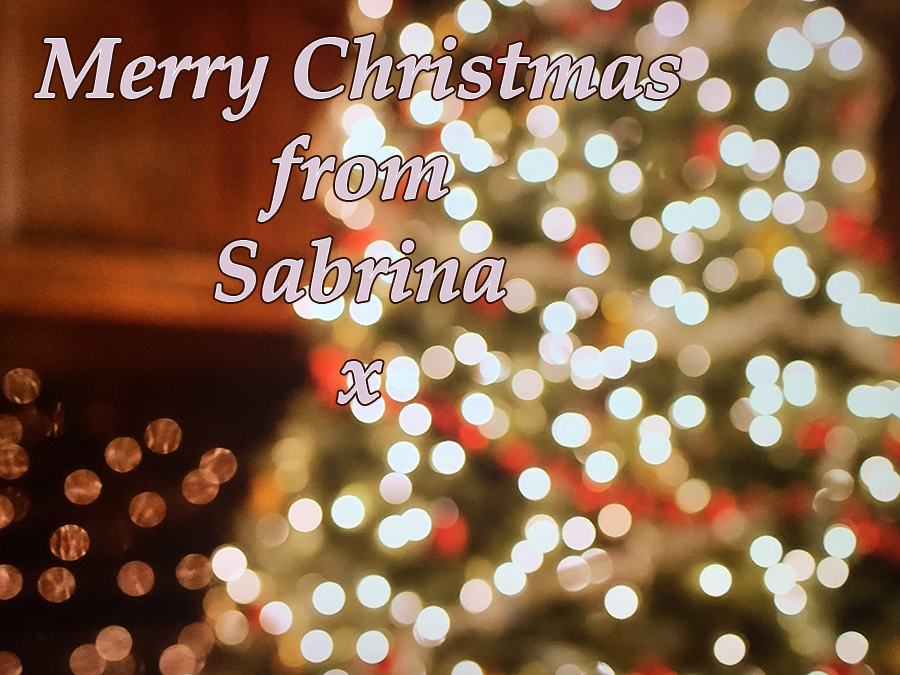
Have a great Christmas!
✩ Sabrina ✩
You can see my tutorial videos on my Facebook page here…