December 2021 Treatbox Reveal and Review

Hello December!


Wow didn’t December creep up on us! Happy December one and all!

As if I am sat here writing this blog post mid December! I had every intention of doing this post earlier in the month but I have had so much on and so much to do that the days have simply blurred into one

So my apologies for a late post this month, I will try and bring you the unboxing for January 2022 within the first week of the month!


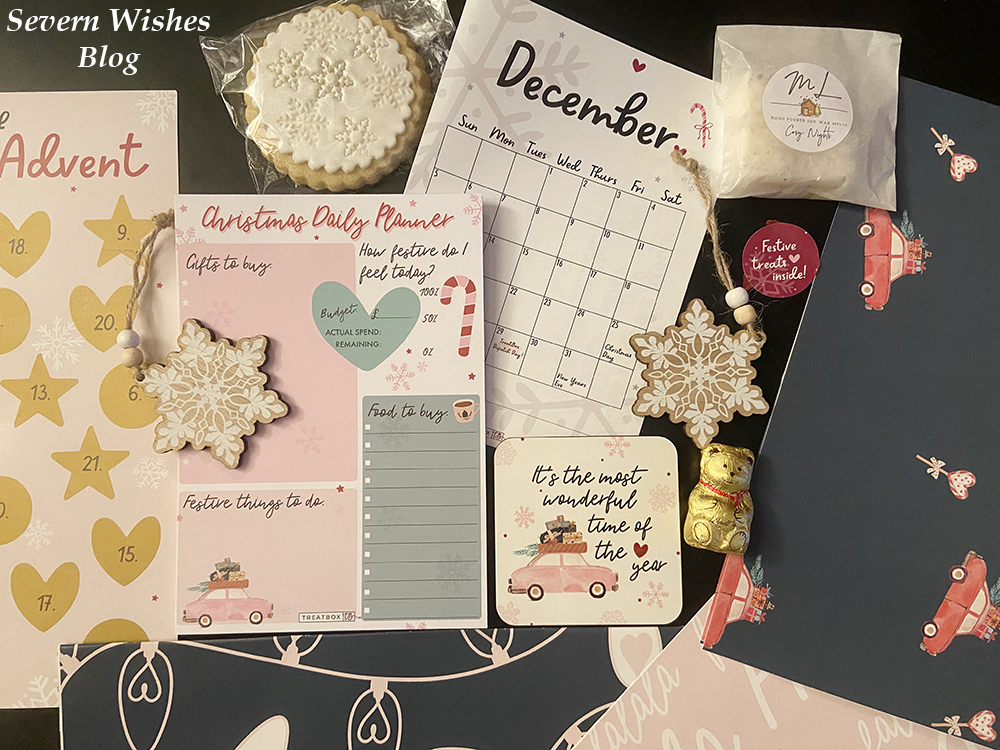
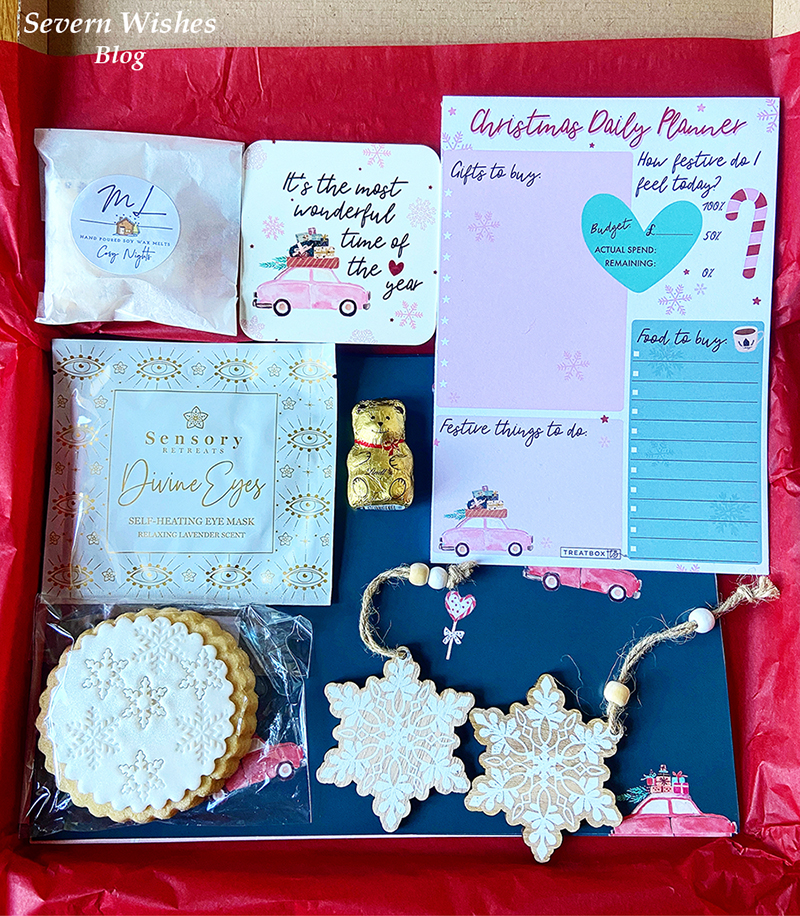
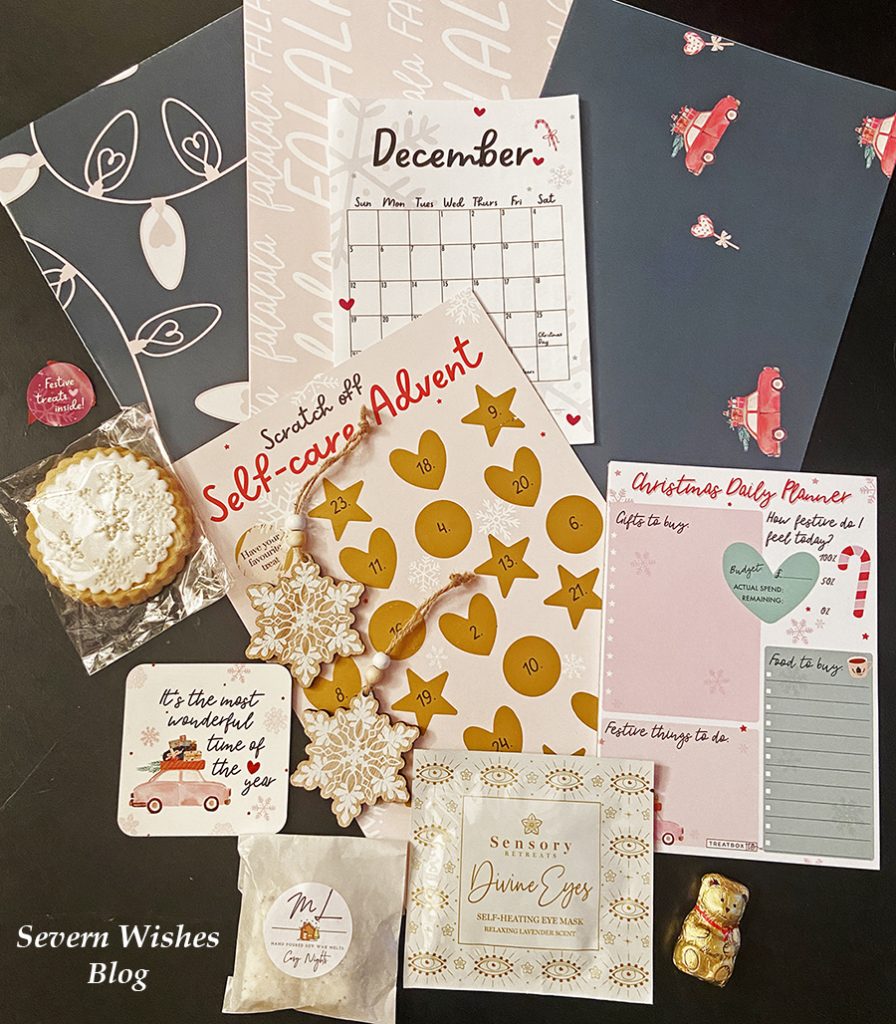
What was Inside the December 2021 Box

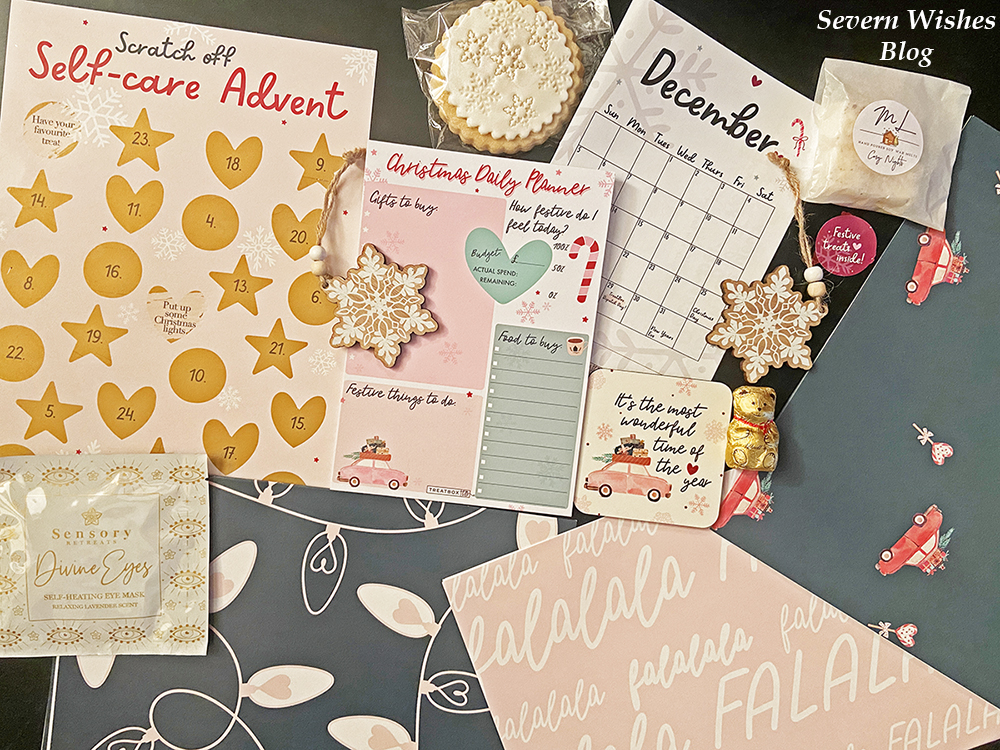
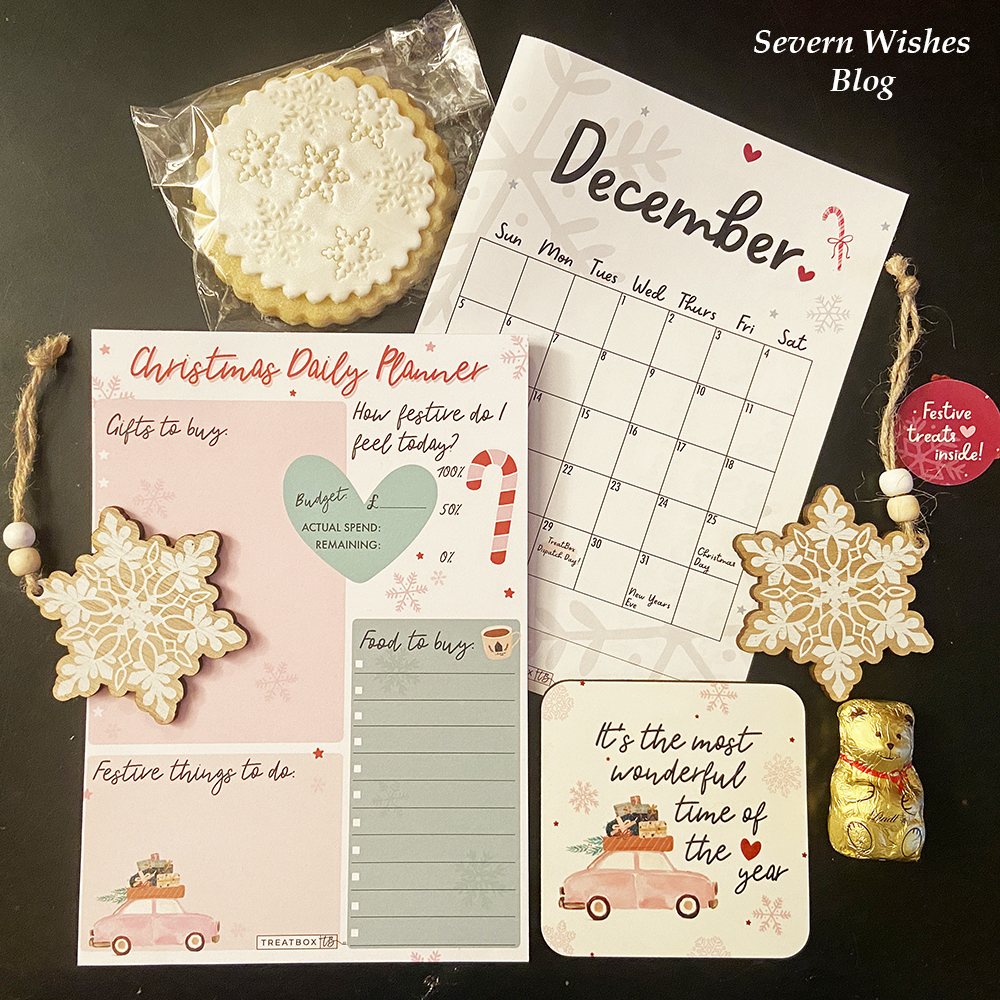
December Calendar Print
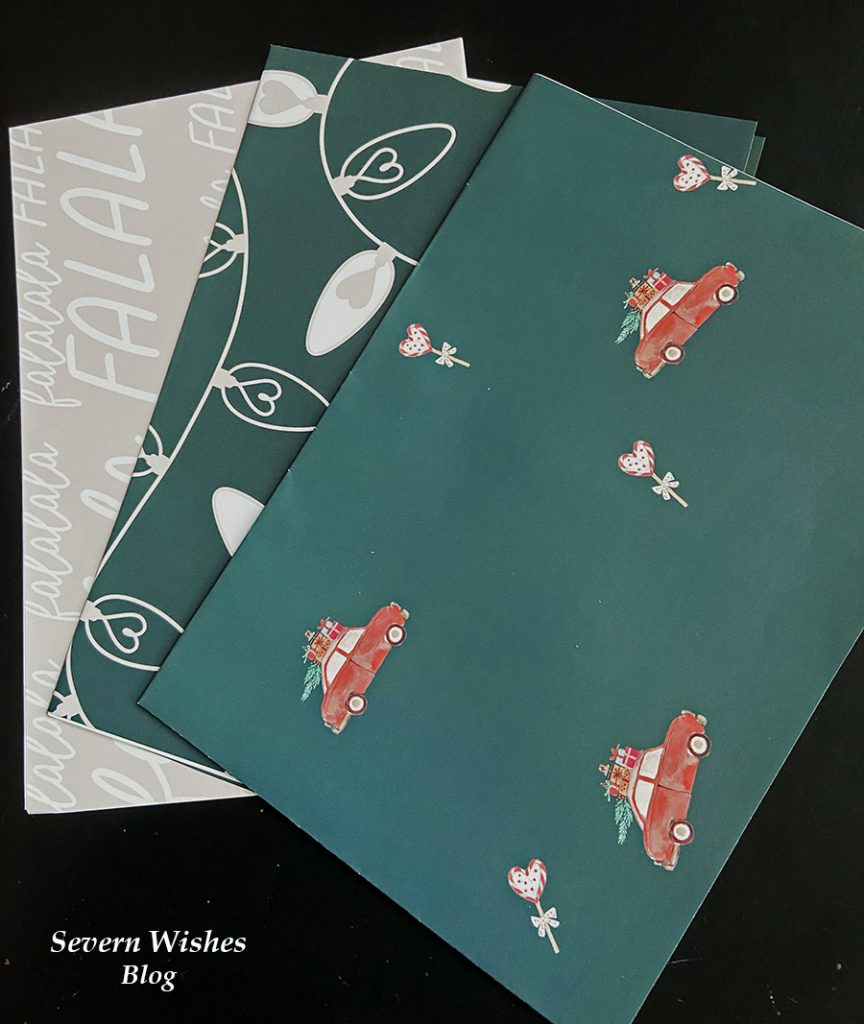
Treatbox Wrapping Paper – 3 Unique Sheets
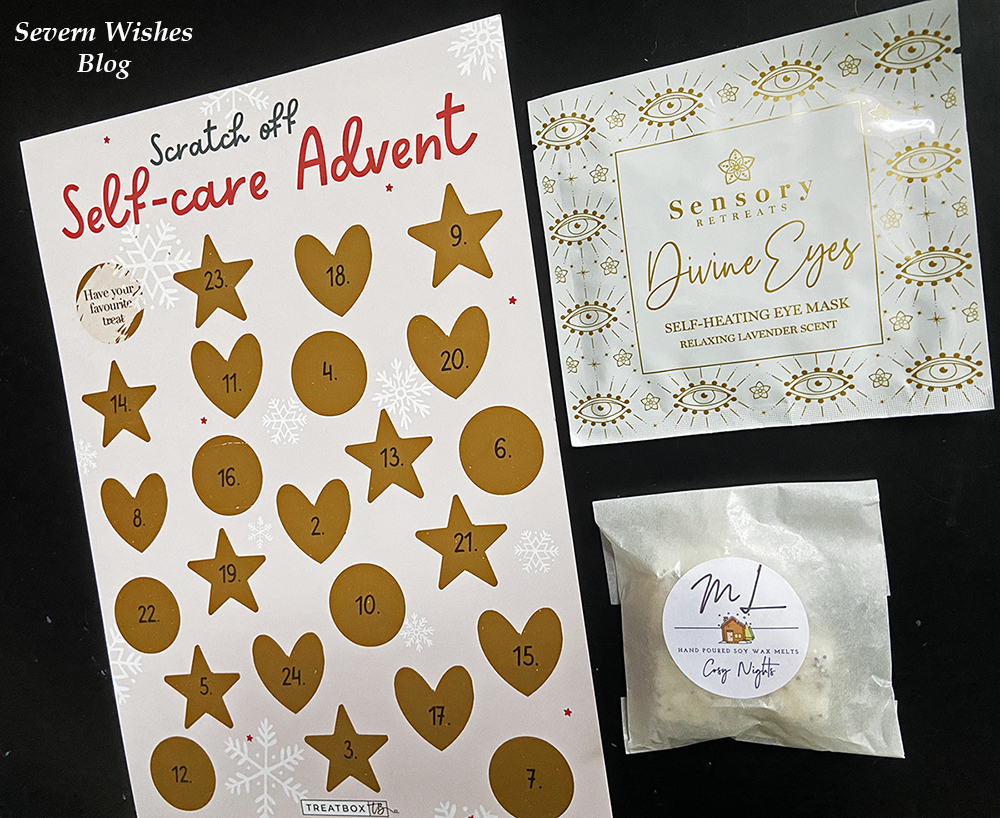
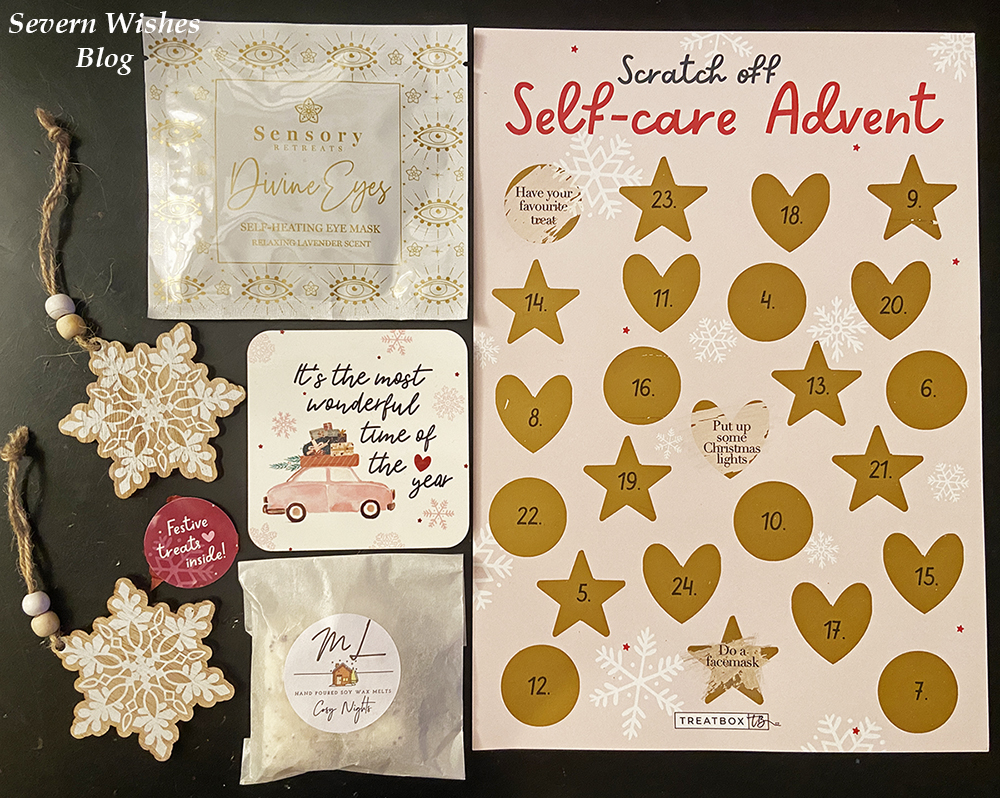
Treatbox Scratch Off Self-Care Advent Card
Two Wooden Snowflake Christmas Decorations
Sensory Retreats Divine Eyes Eye Mask – Self Heating
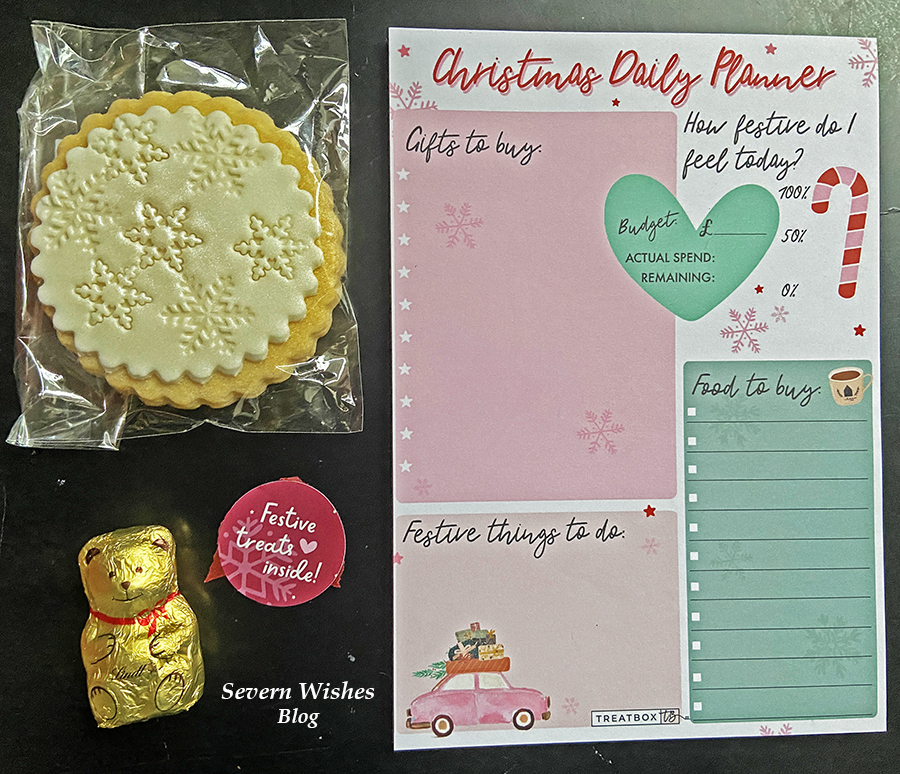
Treatbox Originals Christmas Daily Planner Notepad
Treatbox Christmas Coaster “It’s the most wonderful time of the year”
Tasty Treat of a Snowflake Biscuit
Mrs L Cosy Nights Wax Melts
Lindt Chocolate Teddy Bear


My Thoughts on the December Box

What a fantastic box! I really loved the contents of this month, from the wooden decorations to the organisation notepad and the fabulous TreatboxUK original wrapping paper! You can tell a lot of thought went into the preparation of this month’s box.
The self care card was also pretty cool, although I kept forgetting to scratch it off and then would do two in the same day! Oops!

Overall I feel like this is a strong box, even those who don’t love this time of year would find it hard not to like the contents. Who doesn’t love a beautiful wooden snowflake or a tasty biscuit treat? I know I do!
My favourite items are the decorations and the coaster. The quality of every single item in the box this month has been excellent. A great way to end the year of boxes and end TreatboxUK 2021 boxes on a high! I loved photographing this box and couldn’t decide which pictures to include in my Reveal so I chose them all! Enjoy! Have a great Christmas!


Wishing all who read this a happy and healthy end to the year. Thank you for reading this unboxing post and I hope Severn Wishes Blog has kept you entertained throughout the year. Please stick with us for 2022 because there are lots of exciting things coming up in the Spring time!

✩ Sabrina ✩

Sweet Treats Week – Day 5 – Sabrina’s Customisable Cookies

Welcome to Sweet Treats Week on Severn Wishes. This half term I wanted to share my top 5 baking treats with you all, hopefully you’ve got some time this week to make them with me! I cannot believe this is Day 5 already! I hope you’ve had as much fun baking these as I have!

Check out my Instagram and Facebook page for more food pictures, videos and future recipe ideas too!

Day 5 is Sabrina’s Customisable Cookies!

And the great thing with these is that you can literally add anything into them… I like mine to have chocolate chips. But you could put tiny marshmallows in them or different kinds of chocolate confectionery. Just follow my basic recipe and then add in whatever you feel like! This is a great one to get the children involved in too and perhaps they could each make two or three cookies just for them!

My recipe will make between 12 and 16 cookies with a prep time of 20 minutes and a fridge time of 3 hours. When you bake they take as little as 15 minutes and only a five minute cool time, so before you know it you could have cookies to enjoy as a mid afternoon snack today!

What You Will Need

A Flat Oven Tray or two
Baking Paper or Parchment
A Large Mixing Bowl for the main mixture
Small Mixing Bowls if your children are doing their own
A Wooden Spoon
A Tablespoon or Ice Cream Scoop
A Sieve
A Cooling Rack
Something To Store The Cookies In After They Are Cooled

Ingredients to make the Cookies

100g Light Brown Sugar
75g Caster Sugar
100g Butter / Dairy Free Spread (Melted)
1 Teaspoon of Salt
1 Egg
1 Teaspoon Vanilla Essence
1 Teaspoon Baking Powder
220g Plain Flour

Additional Ingredients

100g of Chocolate Chips

You can use other colourful confectionery like Smarties, M&Ms, Chocolate Chips of different sorts or even chop up your favourite chocolate bars and use those. (Get an adult to do this chopping up). You can use as much or as little as you want.

Step 1. Mixing Sugar and Butter and Salt

Method Steps

1. In a Large Bowl start by mixing the melted butter with the sugar and salt. You should have a thick brown liquid when it’s mixed enough.

2. Next you need to add the egg and once again mix thoroughly.

3. Make sure you sieve the flour and baking powder into the mixture and stir gently to combine as you do so. Once it’s all mixed in you can add your chocolate chips. If you’re doing different cookies you can now transfer some of the mix into smaller bowls and add the various confectionery. If your mixture is looking dry add one tablespoon of water at a time until it becomes more like cookie dough.

4. Place cling film over each bowl you have and let them cool in the refrigerator for up to 3 hours. TOP TIP While you wait you could play a game!

5. Then coming up to the end of the 3rd hour you can preheat your oven to 180’c and place some baking parchment onto a flat tray ready for your cookies.

6. In order to make your cookies the same size either use a tablespoon or an ice cream scoop to get a measurement out of the bowl. You want to make heaped almost ball shape but press them lightly to the baking paper. TOP TIP Leave at least 4 cm between each cookie! You may need 2 trays!

7. Bake the cookies but stay close by and keep an eye on them! I always have to rotate my tray half way! They will take between 12 and 15 minutes in a fan assisted oven, and you need to let them cool on a rack before you tuck in!

Step 6. Ready to Bake

TOP COOKIE TIPS

Don’t over handle your cookie dough!
Mix in your chosen confectionery into the dough but don’t over mix it.
When laying the cookies on the tray leave them heaped, they will flatten on their own.
Bake your cookies straight from the fridge for best results.
Keep an eye on them so they don’t over bake, it’s a fine line!

Cookies Freshly Baked and Cooling Down on the Rack

Thank you for joining me for Sweet Treats Week! I do hope you have enjoyed it and if you do make any of my bakes then please let me know how they turn out!

If you make any of my recipes be sure to tag me on social media, leave me a comment here on my blog. Any questions about a recipe please don’t hesitate to ask them! If you recreate this recipe somewhere else please credit me for it and name me and my blog, or even better link back to this original post too! Thanks everyone!

 Sabrina 

Sweet Treats Week – Day 4 – Sabrina’s Loaf Tin Cake

Lemon Loaf Cake

Welcome to Sweet Treats Week on Severn Wishes. This half term I wanted to share my top 5 baking treats with you all, hopefully you’ve got some time this week to make them with me! Check out my Instagram for more food pictures, videos and recipe ideas too!

Chocolate and Banana Loaf Cake

Day 4 is Sabrina’s Loaf Tin Cake

I know some people aren’t fond of eating loads of chocolate things so I figured I’d have to put my next favourite baking combination out there, which is Loaf Tin Cake! This can be my favourite cake which is a Lemon Drizzle cake! Or we can do a Banana and Chocolate Chip flavour!

I make this delightful and refreshing cake in a loaf tin because it’s easier to cook it, easier to cut it and easier to store it too! You have lots of options to customise your own cake too! I will be giving you two versions, Lemon or Banana and Chocolate, you can choose which to try or even do both!

When baking you’re looking for a gorgeous golden colour on top!

A loaf tin cake is much easier to judge than a round cake, I think!

It’s also easier to store, cut it into slices and it’s ready whenever you want a piece! One tin gives you around 8 slices! This cake keeps best for up to 3 days, but because there aren’t many slices it’s usually enjoyed during a day or two when it is at it’s best. TOP TIP Store this cake in a cake tin with a piece of kitchen roll underneath the baking parchment to help absorb any moisture.

Fresh Out Of The Oven

What You Will Need

A Loaf Tin
Baking Paper or Parchment
A Large Mixing Bowl
A Small Mixing Bowl
A Wooden Spoon
A Tablespoon
A Sieve
A Knife
A Whisk (Manual or Mechanical)
Something To Store The Slices In After They Are Cooled

Lemon Drizzle Cake
Banana and Chocolate Chip Cake

Author: Severn Sabrina
Prep Time: 20 Minutes
Cook Time: 25 Minutes
Serves: 6 people per loaf made
Allergens: Wheat Flour, Dairy, Egg and Soya (unless you use my alternatives listed below)

Ingredients To Make Any of Sabrina’s Loaf Cake Recipes

1 Free Range Egg (Fresh is best for baking)
125g Butter (or Dairy Free Spread) Melt in the Microwave
100g White Caster Sugar
50g Golden Caster Sugar
190g Self Raising Flour
1 Tablespoon of Vanilla Essence
1 Tablespoons of Milk or a Milk Alternative

Additionals to Flavour the Cake

Lemon Drizzle Cake
For the Cake: 30ml of Lemon Juice
For the Drizzle: 30g Icing Sugar, Lemon Juice, Lemon Rind (Optional)
In a small bowl Mix Lemon Juice one Spoonful at a time to Icing Sugar, how much you want to make depends on your personal preference.
Pour this over your cake when it’s baked.
Add the Lemon Juice at Step Number 2.
Add the Drizzle only when the Cake has cooled but still on its parchment.

Banana and Chocolate Chip Cake
For the Cake: 1 Banana – The Softer the Better! Mushed Up!
50g Chocolate Chips (I use Dark and Dairy Free)
25g Chocolate to Melt and Pour on Top of the Cooled Cake (Optional)
Add the Mushed Up Banana and Chocolate Chips at Step Number 2.

Method Steps

1. In a Large Bowl mix the egg and sugars together with a wooden spoon until smooth. Then add the milk and vanilla. Add the melted butter which has cooled and combine all these ingredients together using a whisk.

2. Now is the time to add your additional filling, use your small bowl to measure out anything you want, then transfer it to the large bowl and mix in.

3. Next you need to sieve the self raising flour into the bowl, do this a little at a time, stirring it together constantly mixing until the mixture is smooth.

4. Make sure you cut a piece of parchment to the correct size for your tin, it needs to stick out above the sides to allow the cake to rise and not spill over.

5. Bake this Cake at 160’c or 150’c (Fan) for 30 – 35 minutes. Check the cake at 25 minutes with a knife or skewer and then check it again at 30 minutes. The knife should come out clean and the top of the cake should be golden like my image below.

6. Once baked remove the cake from the tin by lifting it out using the parchment, and leave it to stand on a flat surface to cool down. Once cooled you can either add the additional options as outlined above or cut it and serve.

Chocolate Chip Loaf Cake

Thank you very much for joining me for Sweet Treats Week! I hope to see you again tomorrow for our final baking day!

If you make any of my recipes be sure to tag me on social media, leave me a comment here on my blog. Any questions don’t hesitate to ask them! If you recreate this recipe somewhere else please credit me for it and name me and my blog or even better link back to this original post! Thanks everyone!

Sabrina

Sweet Treats Week – Day 1 – Sabrina’s Extra Special Chocolate Brownies

Welcome to Sweet Treats Week on Severn Wishes. This half term I wanted to share my top 5 baking treats with you all, hopefully you’ve got some time this week to make them with me! Check out my Instagram for more food pictures and recipe ideas too!

Sabrina’s Chocolate Brownies

Day 1 is Sabrina’s Extra Special Chocolate Brownies

Brownies can be tricky, but if you follow my recipe one step at a time you should be able to recreate my incredible triple chocolate brownies! Since needing to go dairy free I’ve even made these brownies free from dairy by substituting the butter for a dairy free spread and then I swapped the triple chocolate chips for only dairy free chocolates, and they still taste incredible! So do whichever version you would prefer, the difference in butter doesn’t change the end result.

My recipe will make around 20 brownies once you cut them after they have cooled. They are quite rich which is nice because they will last longer! They will last around 3 days in a sealed container, the best way to keep them is to store them at room temperature. TOP TIP Reheat a square or two for between 10 and 20 seconds in the microwave and serve them with ice cream! Yum!

Sabrina’s Triple Chocolate Style Brownies (A.)

What You Will Need

A Glass Dish or Baking Tray measuring approx 26cm x 20cm (8 x 10″)
Baking Paper or Parchment
A Saucepan
A Large Mixing Bowl
A Wooden Spoon
A Metal Spoon
A Whisk – Manual or Mechanical
A Sieve
A Knife
A Cooling Rack
Something To Store Them Inside After They Are Cooled

Step 5. Once Smooth Add Your Chocolates To The Mix!

Ingredients

3 Free Range Eggs (Fresh is best for baking)
175g Plain Chocolate (for melting) (You can use dairy free chocolate too)
175g Butter (or Dairy Free Spread)
200g Caster Sugar
75g Plain Flour
50g Cocoa Powder

Additional Flavours or Additional Chocolates… There Are Endless Possibilities! What Would You Do? Here are my favourites…

Brownie Variations

A. Triple Chocolate Brownies require 75g of White Chocolate Chips and 75g of Milk Chocolate Chips (or use different varieties of dairy free chocolates). Add these at Step 5.
B. Chocolate Orange Brownies require 100g of Chocolate that is Orange Flavoured, dairy free choc orange bars from Asda are fab or a few broken segments of a Terry’s Chocolate Orange are best! Put these pieces in the mixture at Step 5 instead of chocolate chips.
C. Mint Chocolate Brownies require 75g of Chocolate that is Mint flavoured, with such a strong flavour of chocolate it can be used as part of the melted part at the start of the bake. For a more Minty flavour later on you could add some Aero Mint Chocolate Balls when the brownie is almost cooked! Push them into the top of the brownie before the top is solid leaving just a little sticking out so they don’t melt and or burn!

Sabrina’s Chocolate Orange Brownies (B.)

Method Steps

1. First you need to place your butter and plain chocolate into a saucepan. Break the chocolate into small bits so it melts faster. Only melt on a low heat slowly. Keep stirring the melting mixture frequently until it is smooth with no lumps left. TOP TIP I only have my hob one setting 1 or 2 for melting, you don’t want to burn the mixture! I don’t like melting chocolate in a microwave, it’s too easily burnt!

2. Set the melted chocolate mixture to one side and allow it to cool. You can now preheat your oven to 180’c, 160’c for a Fan Assisted or 350F or Gas Mark 4. Cut a piece of baking parchment for your tray and push it inside.

3. In a large bowl break the 3 Eggs, make sure no shell falls in. Using a wooden spoon mix them up, add the Caster Sugar gradually while stirring. You then need to Whisk them both up together until they are combined and smooth with a light and creamy colour.

4. Using a Large Metal Spoon, you now fold in the cooled melted chocolate and butter mixture, one spoonful at a time. Keep stirring it through the creamy mixture, keep going one spoon at a time until all of the smooth thick liquids are combined into one large one. It should be a lot and not lumpy. TOP TIP If the chocolate mixture is still hot it instantly cooks the eggs and you end up with a curdled concoction! Make sure its cool, lukewarm is best, and stick to my one spoon at a time method!

5. Finally you need to Sieve the Cocoa Powder and the Plain Flour into your liquid, again you do this gradually, shaking a little into the bowl and mixing it through until it disappears. Repeat until all the dry ingredients are in the bowl and the mixture should now be a thick pour-able liquid. Add your chocolate chips or buttons or other bits now! Mix them in thoroughly.

6. Pour the mixture entirely into your tray with the parchment inside it. The mixture should sit just over half way inside giving it a little room to rise up slightly. Add any toppings like chocolate chips now, or part way through if they are not bake stable. Shake the tray from side to side before pushing it into the oven, so the bake is level.

7. Bake it with the correct setting for your oven, you’re looking for an even bake with the slightly crisp topping, it should change colour, it should be soft but cooked in the centre. On average this bake takes between 20 and 30 minutes, depending upon tray used and oven type. Just keep an eye on it, take it out and stick a knife into it. When the knife comes out almost clean, pull the tray out. Leave it on top of your oven for ten minutes, try the knife again. Remember if you hit a melted chocolate chip you may think it’s not cooked when it is! For this reason don’t be tempted to over cook it! They should be soft with the additional chocolates melted inside when you cut it!

Remember to wobble the tray so the mixture goes flat!

Thank you very much for joining me for Sweet Treats Week! I hope to see you again tomorrow!

If you make any of my recipes be sure to tag me on social media, leave me a comment here on my blog. Any questions don’t hesitate to ask them! If you recreate this recipe somewhere else please credit me for it and name me and my blog or even better link back to this original post! Thanks everyone!

Sabrina

Sabrina’s Chocolate Orange Brownies (B.)