Sweet Treats Week – Day 1 – Sabrina’s Extra Special Chocolate Brownies

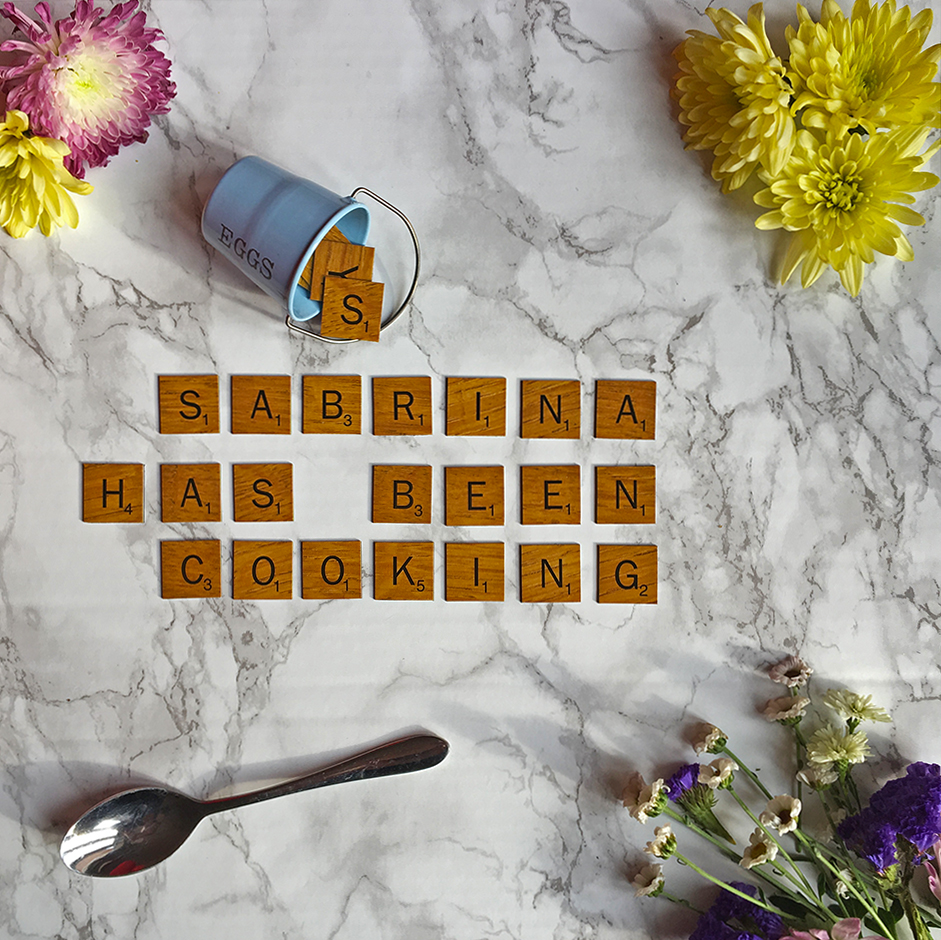
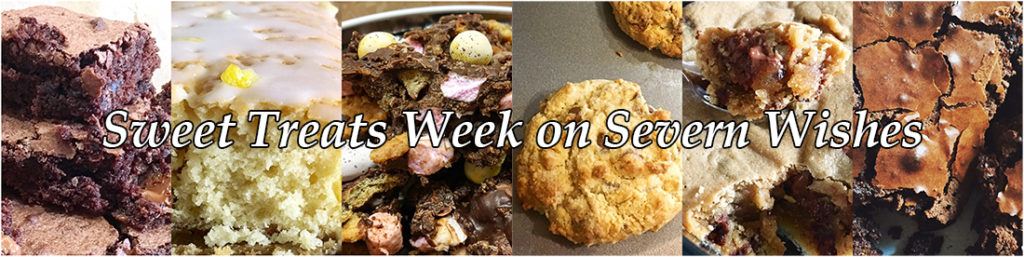
Welcome to Sweet Treats Week on Severn Wishes. This half term I wanted to share my top 5 baking treats with you all, hopefully you’ve got some time this week to make them with me! Check out my Instagram for more food pictures and recipe ideas too!

Sabrina’s Chocolate Brownies

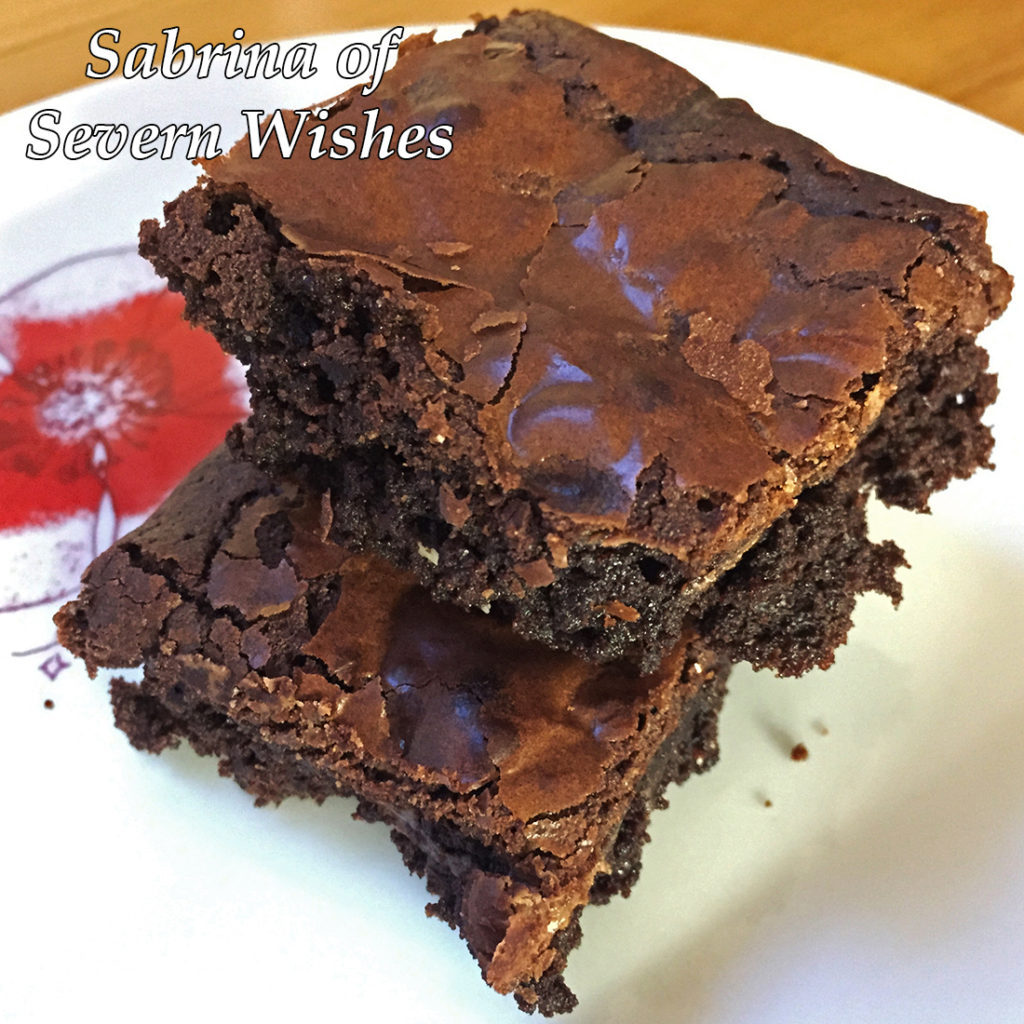
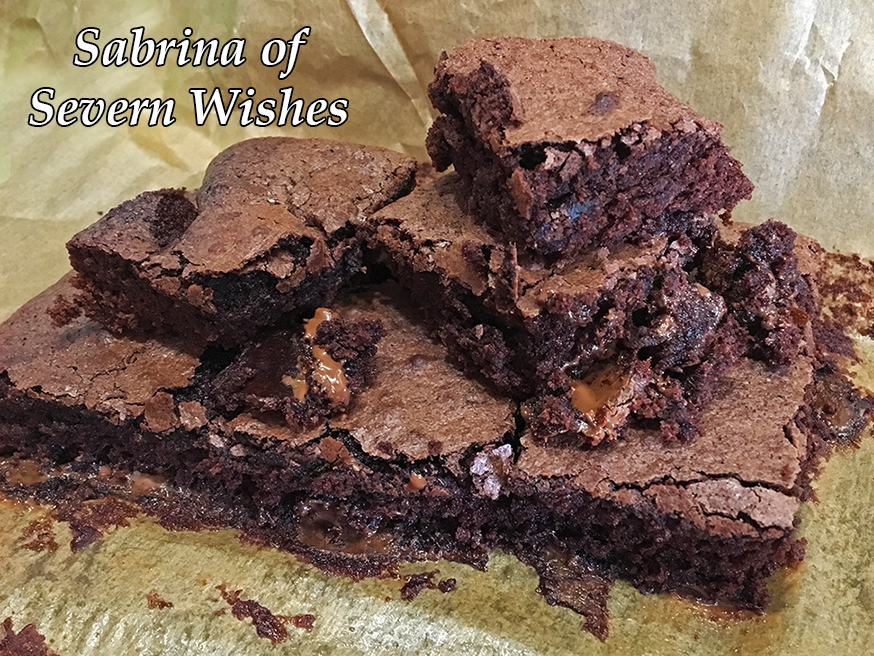
Day 1 is Sabrina’s Extra Special Chocolate Brownies

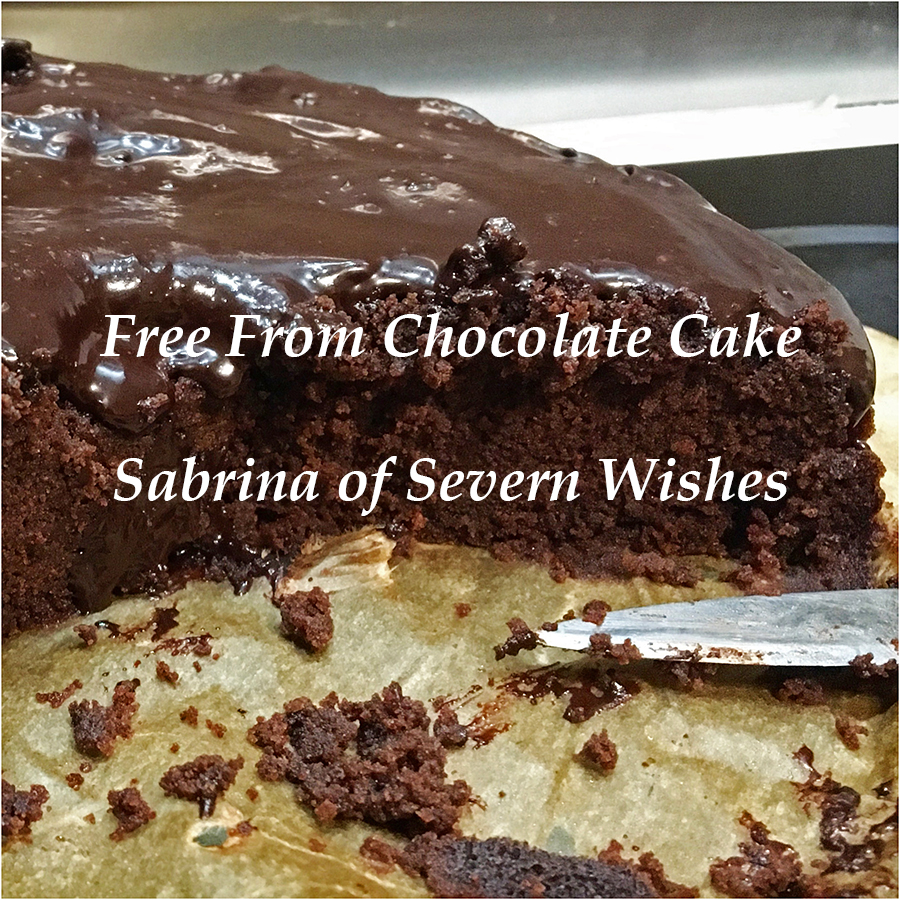
Brownies can be tricky, but if you follow my recipe one step at a time you should be able to recreate my incredible triple chocolate brownies! Since needing to go dairy free I’ve even made these brownies free from dairy by substituting the butter for a dairy free spread and then I swapped the triple chocolate chips for only dairy free chocolates, and they still taste incredible! So do whichever version you would prefer, the difference in butter doesn’t change the end result.

My recipe will make around 20 brownies once you cut them after they have cooled. They are quite rich which is nice because they will last longer! They will last around 3 days in a sealed container, the best way to keep them is to store them at room temperature. TOP TIP Reheat a square or two for between 10 and 20 seconds in the microwave and serve them with ice cream! Yum!

Sabrina’s Triple Chocolate Style Brownies (A.)

What You Will Need

A Glass Dish or Baking Tray measuring approx 26cm x 20cm (8 x 10″)
Baking Paper or Parchment
A Saucepan
A Large Mixing Bowl
A Wooden Spoon
A Metal Spoon
A Whisk – Manual or Mechanical
A Sieve
A Knife
A Cooling Rack
Something To Store Them Inside After They Are Cooled

Step 5. Once Smooth Add Your Chocolates To The Mix!

Ingredients

3 Free Range Eggs (Fresh is best for baking)
175g Plain Chocolate (for melting) (You can use dairy free chocolate too)
175g Butter (or Dairy Free Spread)
200g Caster Sugar
75g Plain Flour
50g Cocoa Powder

Additional Flavours or Additional Chocolates… There Are Endless Possibilities! What Would You Do? Here are my favourites…

Brownie Variations

A. Triple Chocolate Brownies require 75g of White Chocolate Chips and 75g of Milk Chocolate Chips (or use different varieties of dairy free chocolates). Add these at Step 5.
B. Chocolate Orange Brownies require 100g of Chocolate that is Orange Flavoured, dairy free choc orange bars from Asda are fab or a few broken segments of a Terry’s Chocolate Orange are best! Put these pieces in the mixture at Step 5 instead of chocolate chips.
C. Mint Chocolate Brownies require 75g of Chocolate that is Mint flavoured, with such a strong flavour of chocolate it can be used as part of the melted part at the start of the bake. For a more Minty flavour later on you could add some Aero Mint Chocolate Balls when the brownie is almost cooked! Push them into the top of the brownie before the top is solid leaving just a little sticking out so they don’t melt and or burn!

Sabrina’s Chocolate Orange Brownies (B.)

Method Steps

1. First you need to place your butter and plain chocolate into a saucepan. Break the chocolate into small bits so it melts faster. Only melt on a low heat slowly. Keep stirring the melting mixture frequently until it is smooth with no lumps left. TOP TIP I only have my hob one setting 1 or 2 for melting, you don’t want to burn the mixture! I don’t like melting chocolate in a microwave, it’s too easily burnt!

2. Set the melted chocolate mixture to one side and allow it to cool. You can now preheat your oven to 180’c, 160’c for a Fan Assisted or 350F or Gas Mark 4. Cut a piece of baking parchment for your tray and push it inside.

3. In a large bowl break the 3 Eggs, make sure no shell falls in. Using a wooden spoon mix them up, add the Caster Sugar gradually while stirring. You then need to Whisk them both up together until they are combined and smooth with a light and creamy colour.

4. Using a Large Metal Spoon, you now fold in the cooled melted chocolate and butter mixture, one spoonful at a time. Keep stirring it through the creamy mixture, keep going one spoon at a time until all of the smooth thick liquids are combined into one large one. It should be a lot and not lumpy. TOP TIP If the chocolate mixture is still hot it instantly cooks the eggs and you end up with a curdled concoction! Make sure its cool, lukewarm is best, and stick to my one spoon at a time method!

5. Finally you need to Sieve the Cocoa Powder and the Plain Flour into your liquid, again you do this gradually, shaking a little into the bowl and mixing it through until it disappears. Repeat until all the dry ingredients are in the bowl and the mixture should now be a thick pour-able liquid. Add your chocolate chips or buttons or other bits now! Mix them in thoroughly.

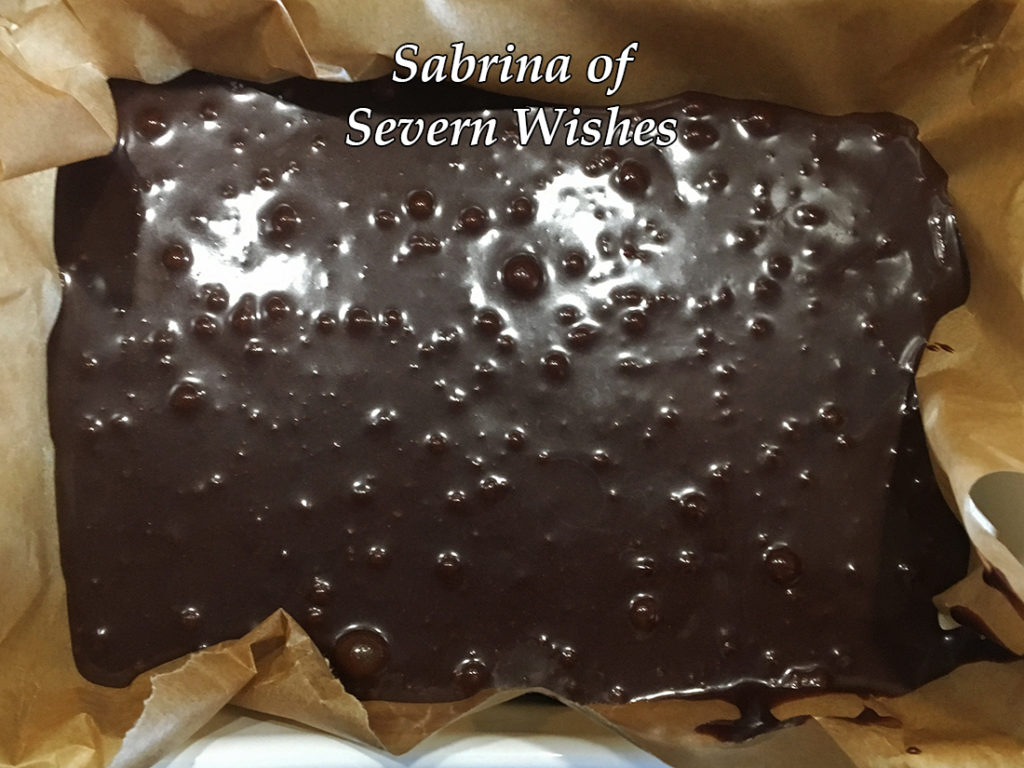
6. Pour the mixture entirely into your tray with the parchment inside it. The mixture should sit just over half way inside giving it a little room to rise up slightly. Add any toppings like chocolate chips now, or part way through if they are not bake stable. Shake the tray from side to side before pushing it into the oven, so the bake is level.

7. Bake it with the correct setting for your oven, you’re looking for an even bake with the slightly crisp topping, it should change colour, it should be soft but cooked in the centre. On average this bake takes between 20 and 30 minutes, depending upon tray used and oven type. Just keep an eye on it, take it out and stick a knife into it. When the knife comes out almost clean, pull the tray out. Leave it on top of your oven for ten minutes, try the knife again. Remember if you hit a melted chocolate chip you may think it’s not cooked when it is! For this reason don’t be tempted to over cook it! They should be soft with the additional chocolates melted inside when you cut it!

Remember to wobble the tray so the mixture goes flat!

Thank you very much for joining me for Sweet Treats Week! I hope to see you again tomorrow!

If you make any of my recipes be sure to tag me on social media, leave me a comment here on my blog. Any questions don’t hesitate to ask them! If you recreate this recipe somewhere else please credit me for it and name me and my blog or even better link back to this original post! Thanks everyone!

Sabrina

Sabrina’s Chocolate Orange Brownies (B.)

All The Free’s From Chocolate Cake Recipe

It’s time for another Free From recipe!

As most of you regular Severn Wishes readers will know, my son was born with a number of allergies. I love to cook and baking is something that I am gradually getting better at. I wanted to make up a recipe that was easy and that I could use with what I usually find in my baking cupboard. But not only that, it had to taste like proper chocolate cake. There’s nothing worse than it not resembling what you know and love!

This moist and soft chocolate cake recipe is egg free and dairy free. You could even change the flour to make it gluten free too if you like. I made it normally first, and then with gluten free baking flour when my sister (she’s coeliac) visited us, and both times it still baked as a soft sponge. Delicious! A great treat if you’re doing Veganuary this year! Why not make this Vegan delight at the end of the month? Give you a treat to look forward to!

This cake serves 10 people, you only want a small slice as it’s rich!
Time to Prepare, Make and Bake is… 1 Hour 30 Minutes
Preheat your Oven to a Temperature of 180’c or 360’F
You will need baking parchment to line your 8″ Tin
You shall need a Jug for the Sauce, one Large Bowl and one Small
You will also need a Sieve, a Spoon and a Whisk
And finally a Cooling Rack

Ingredients

For the Cake:

175g Flour – I used plain or a mixture of Plain and Raising, or use GF
200g Caster Sugar
50g Cocoa Powder
1 Teaspoon Baking Soda
1 Teaspoon of Vanilla Extract – You could use Mint Flavouring instead
240ml Tepid Water
120ml Vegetable Oil

For the Sauce to pour on top:

4 to 6 Tablespoons of Tepid Water
2 Tablespoons of Golden Syrup or Maple Syrup
2 Tablespoons of Cocoa Powder
130g of Icing Sugar

Sabrina’s Free From Chocolate Cake

Method – Making the Cake

Step 1. Sift the Flour, Cocoa Powder, Caster Sugar and Baking Soda together in a large bowl. Make sure you mix them together thoroughly to combine.

Step 2. In a small bowl mix oil, water and vanilla together and stir until mixed.

Step 3. Gradually stir your wet mix bowl into the dry ingredients. Once you have combined them use a whisk or hand processor in order to make the mixture smooth. Mix until all the liquid is combined with the dry mixture.

Step 4. Pour your smooth mixture into the lined cake tin and shake gently from side to side to make it even inside.

Step 5. Bake in the Centre of your Preheated Oven, between 26 and 32 minutes depending upon oven type. Keep an eye on your cake so that it doesn’t over bake, use a knife of skewer in the centre, when it comes out clean it’s baked.

Step 6. Once cooked gently transfer the cake to a rack so that it can cool. You don’t want to pour on your sauce until it is cooled. Make sure the cake is completely cool before serving, you don’t want your sauce running off!

Method – Making the Sauce

Step 1. Sift the cocoa powder and icing sugar together in a bowl. Mix with a spoon until combined and a brown colour over all.

Step 2. Pour the syrup of your choice and the water into the bowl, make sure you stir it immediately and keep stirring until the ingredients resemble a smooth consistency. Start with 4 Tablespoons of water, if it’s not resembling a sauce that is pour-able then you can add more, one spoonful at a time until it’s how you want it to be. It can vary on the size of the spoon you use for example. TIP: Always better to start with less water and add it gradually, if it’s too wet to start with then you’re going to be measuring out more sugar which is a consistency much more difficult to get right.

Step 3. Cover this sauce until your cake is cooled and ready to serve, cut your cake slices, plate them up and then pour the sauce on to each piece. It’s easy to make more sauce if you need it and only takes a matter of minutes!


Thank you for coming to Severn Wishes today to read this recipe blog post. I hope you have enjoyed it. Can you please leave me a comment on this post if you try the recipe, and let me know what you think!

Have a great week!

Sabrina

Sabrina’s Special Free From Curry

Sabrina’s Special Free From Curry

What makes my recipe different to others? My “Special” Curry is Free From for my family! The great thing about my recipe is that you can put any meat with it or even vegan alternatives such as Quorn with it. Whatever protein you fancy really! Even fish if you’re that way inclined! The combined flavours work well with everything, but I prefer Chicken and… Potato! Yes… you’ll see!

I use my nifty little food processor (Russel Hobbs Mini Chopper) to save chopping time but if you don’t have a processor then just chop the vegetables as small as possible with a knife and watch those fingers!

The Free From Bit! This curry recipe is DF, NF and GF and it serves 4-6 people. So many curries in the supermarkets contain dairy and nuts. Even local take away restaurants cannot guarantee things being free from certain ingredients. Our family has a wide range of allergies so I’ve learnt to cook my recipes alternatively and figure out what works without it including an allergen. This has been my best recipe to date! You can follow this and it be great for you and your family as well! Plus it’s 3 of your 5 a day!

What can you serve with it? You can serve this curry with a nice Rice, Basmati is a good choice or Pilau, and you can easily get GF rice these days, I recommend Tilda or Tesco’s own brand rice for their flavour! Naan Bread is delicious but obviously it’s not DF or GF so do be careful there! Poppadoms and Chutneys are a great accompaniment but again some of these will not be GF and some even contain Nuts!
If you don’t have any allergies then you can have any of these (or all of them) with the curry! If you choose all of the above you will serve at least 6 people…

Sabrina’s Special Free From Curry
Prep Time: Up To 60 Minutes
Cooking Time: 90 Minutes
Serves: 6 People (8 if you include side dishes)

Ingredients

500g – 600g of your chosen Protein into bite size pieces for frying

400g Tomatoes – use a tin of Plum Tomatoes for the Sauce, pop them into a food processor until smooth and a sauce like consistency, use plum will taste sweeter

1 Large Onion Diced Finely for the Sauce, you can pop this in the food processor before you prepare the tomatoes until shredded very fine

1 Large Onion Chop into bite size pieces ready for frying

2 Peppers – Chopped into short slices (Red or Yellow) ready for frying

4 Tablespoons of Tomato Puree for the Sauce

The Sauce needs to be made of the following spices and seasonings;
4 Tablespoons of Garam Masala
1 Tablespoon of Cumin
3 Tablespoons of Coriander Leaf
1 Tablespoon of Garlic
1 Tablespoon of Paprika
2 Tablespoons of Chilli Powder (Mild) (Use Hot if you can handle it)
30ml of warm water
Salt and Pepper to your taste.

Oil for Frying

400g – 500g Potatoes – Cut into bite size chunks and washed

Method

  1. Prepare all of the ingredients as stated above, diced and chopped.
  2. You need to have a large saucepan and a frying pan warming with a little oil in each. First begin by adding the chopped onion and peppers to the frying pan. Add the tiny diced onion and some garlic to the large saucepan.
  3. Fry off all the ingredients, once the saucepan with the diced onion is nicely caramelised, you can add the sauce ingredients from the list above and mix well. Leave the Onion and Peppers inside the Frying Pan to caramelise and then add the chicken.
  4. Put your plum tomatoes in a food processor and then once blended add them to your saucepan. Next you’ll need to continue frying off the protein and vegetables in the frying pan until thoroughly cooked.
  5. Add anything additional you require for the sauce, that includes the tomato puree and seasonings. Taste it before you add your meat and vegetables so you can tell if it needs more chilli or more salt and pepper.
  6. Simmer your sauce on a low heat, adding the contents of the frying pan which should now be nicely cooked and combined in flavour. You need to continue to simmer this for at least an hour for the flavours to coat everything and for the sauce to thicken up.
  7. Now is the perfect time to add the Potatoes! They will cook inside the sauce and do not need boiling before hand. Use fresh or tinned whatever you have at hand. Leave it to simmer for a while…
  8. Taste test at one hour to ensure the potato are cooked and the chicken is tender, stir occasionally during this hour of cooking time to ensure it’s not getting stuck to the bottom or sides. It should gradually thicken. If you don’t think there is enough sauce when you add all the contents and mix it then add 10ml of water at a time and mix in until the sauce covers everything.
  9. Serve immediately with Rice and any of the other sides I suggested.
Here is my curry when I served it with Pilau Rice and No Potato in this one either… you don’t have to add them it’s optional.

Thank you reading this post today, I really hope you like the look of my recipe, if you give it a go yourself then please tag me on social media to let me know and show me the end result too!

Sabrina

Sabrina’s Dairy Free Vegetable Nuggets

How To Make Delicious Dairy Free Vegetable Nuggets For All The Family To Enjoy!

Today I will be showing you how to make tasty, nutritious and dairy free vegetable nuggets that contain four different vegetables.
They are great fun for your children to eat as finger food and your older children can dip them in the sauce if they choose.
This recipe is ideal for weaning and beyond.

Veggie Nugget (broken so you can see the soft inside)


Ingredients for Sabrina’s Veggie Nuggets

3 Tablespoons of Tomato Ketchup
1 Tablespoon of Reduced Salt Soy Sauce
1 Tablespoon of Mixed Herbs
1 Large Egg (Beaten)
160 grams of Breadcrumbs (approx) roughly 4 slices of bread – I always use the 2 end bits if I have them!
6 Medium Carrots – Grated and Squeezed
2 Courgettes – Grated and Squeezed
100 grams of Swede Cooked First, then Diced Finely using a Chopper
1 Large White Onion Diced Finely
50 grams of Dairy Free Alternative to Italian Style Hard Cheese
Plain Flour (6 tablespoons approx) spread this onto a small plate ready for rolling…


Method

To make the sauce combine tomato ketchup and soy sauce together. Double the amount if you are preparing these nuggets for people to dip into the sauce straight after cooking them. Use half of the sauce for the vegetables mixture and leave half for the dip.

Once you have prepared all of the vegetable ingredients as directed above, you will need to ensure the mixture of vegetables isn’t too wet. Take a handful of the grated and chopped veg and place it between a few paper towels, a muslin cloth or a clean tea towel. Squeeze and press it in the cloth to squeeze out as much liquid as possible. Do this with all of the grated veg.

Get a large mixing bowl and crack the egg into it. Add the herbs and stir until combined. Next add some of the tomato dip. Next add the squeezed vegetables, then lastly add the hard cheese (or alternative) and the breadcrumbs, stir it all thoroughly. You don’t want lots of the same type of veg in each ball, try and mix it so you get a variant of all the ingredients. (I do my breadcrumbs in a small food mixer).

Place the flour onto a small plate ready to roll your nuggets in.

To make a nugget take a small handful of the combined mixture and roll between your palms. Top Tip! Do this with wet hands so it doesn’t stick to you! Roll them out into oval shapes, and then once happy you can roll each one in flour to coat it.

Have a large frying pan ready on your cooker with some oil getting hot. You should place the nuggets down gently so as not to break them or splash the oil. Fry each one until lightly browned all over. Top Tip! Use a pair of tongs to adjust them while frying to make sure you do all of the sides. Keep topping up the oil after every few nuggets.


Once they are cooked set the nuggets to one side on a piece of kitchen roll so as to drain any excess oil from them and let them cool a little, and then serve them while they’re still warm in a large bowl with the remainder of the tomato dip. They are great for a children’s party or a finger food family night in.

Squeezing the Veg so as to remove as much moisture as possible.
Veggie Nugget Mixture Ready For Mixing and Rolling

Vegetable Nuggets are ideal for children who are weaning at around 10 months and older, when they are learning to hold and bite into foods.
They are great for getting your children to eat vegetables.
The tomato dip provides a fun element for older children.
The leftovers can be frozen, defrost over night and re-fry them to give them a crunchy outside again.

My Recipe made me approximately 24 Nuggets.

Once you have rolled your nuggets between your palms you can get ready to fry them… My Top Tip is to have some done so you can fry one set while you make the next set…

Frying Tips

When frying the Nuggets take care and turn them frequently so that they cook evenly on all sides. You also need to maintain the oil so that they sit in a few millimetres at all times to avoid sticking to the pan.

Finished Veggie Nuggets

These Nuggets are great, and rather tasty too, that is providing you like the Veg I have chosen. You can substitute the Courgette for Mushrooms if you prefer those! And you can also do these without being dairy free by using a regular cheese like Parmesan if you wish.

Thank you for visiting, I hope you have enjoyed reading about this recipe, if you decide to give it a go then please leave me a comment with how it went afterwards… Check out my other recipes on the category list!

✩ Sabrina ✩