How to make Birthday Bags on a Budget

How to make Birthday Bags on a Budget – it can be done!

My son recently had his birthday and a part of me was disheartened by the fact that I couldn’t afford to throw him a birthday party, one where his friends could come. We had family things going on all week but nothing with his school friends.

After talking to him about it one afternoon a week before his birthday, I asked him if he would like to do anything for his birthday on the day besides attend school, He said that he would like to share his favourite things with his school friends. I thought it was a lovely idea so we chatted about what sort of items he would include. After a lengthy conversation I decided we could do some birthday bags, and I hunted around for the best bargains. I was on a strict budget to I checked where things were on offer and started making a list.

So how do you make up a birthday bag?

You need either a birthday bag or a party bag, there are many varieties available online. You can get them usually with a handle so they are perfect for little hands to hold.
I also chose to buy the plastic cones because I didn’t want Oreos to break up and/or go stale in the bags. This worked perfectly to break things up into sections, the Edibles and the Toys.

How do you stick to your Budget and get the best value?

✩ Sabrina’s Top Tips ✩

There are several ways to stick to budget and also find the best deals, here are my tips.
1. Decide your budget and make a list of what you need to buy.
2. How many are you buying for? Sometimes it’s cheaper to buy 50 bags than 20, bare this in mind.
3. Watch out for “lowest price in 30 days” and other useful slogans on offers.
4. Compare supermarkets online before you go out to do the shopping.
5. Use supermarket offers if you have a discount card with them.
6. Visit budget stores and compare the items you have seen online.
7. Always read the online reviews and filter by most recent as well.
8. Bulk Buy – Depending on whether you can reuse an item in the future for something else or even sell the remainder of the items on, bulk buying can be beneficial. (For us the Oreo’s were cheaper to bulk buy and so were the party bags). My son will happily eat any leftover biscuits let me tell you.
9. Work out the maximum you would like to spend, divide that by how many you are buying for, let’s say it’s 20 children. So divide your budget by 20, and you will understand how much it will cost to do a bag per child. Once you’ve made some essential purchases work out what is remaining of your budget and only spend what you have left. It might be that you have to buy a massive bag of sweets and divide them by hand into little sweet bags like I did with the Oreo biscuits.

Think smarter with your money and not buying things simply for convenience.

Why did we choose the items?


Picking for a mixture of genders is always tricky, but I don’t know a child who doesn’t love stickers and sweets / chocolate biscuits. Oreo is the choice because my son has food allergies but luckily he can eat original Oreo. The cars were because they were pull-back and super cool but also a car is gender neutral in my eyes, same goes for the bouncy balls. I asked all the parents (or my son told me) what peoples favourite colours were, and then labelled the bags and added the toys in accordingly. If I had someone who loved Red they got a red tie on their biscuit cone and they got a red car and a red ball. I would’ve loved to have included bubbles too but they would have sent me over budget. You could swap the bouncy balls for bubbles if your child would prefer those.

What did we include in the final bags?

20 Pull Back Cars cost £7
35 Bouncy Balls cost £7
Stickers cost £2.00 (50 sheets)
Oreo Biscuits cost £4
22 Haribo Sweets (Individual Packets) cost £3
100 Sweet Plastic Cones cost £3
40 Happy Birthday Bags cost £4

I divided the stickers between the children’s bags and kept the rest for my own reward charts at home, meaning each sheet only cost me 4 pence. Bargain!

Total Spent: £30.00
Total of Children: 16
Cost per Child: £1.79

I don’t think this was too bad, 16 happy children for less than £30 (as we had leftovers) and it was much cheaper than throwing a birthday party. My son got to share his favourite items with his friends too!

We have also got left over bouncy balls, birthday bags, cone bags, 6 sweet bags and 4 cars. The leftover pieces we can use whenever we like or give away at other occasions.

At the end of the day you can’t put a price on a child’s happiness and my son was over the moon to help me give out these little bags of joy to all of his friends at school, so that they could all celebrate his happy birthday together.

Thank you for reading this blog post today, I hope you have found it interesting and perhaps got a few useful tips in case you ever decide to do bags for your child’s birthday or a birthday party.

I hope I see you here again soon!

 Sabrina 

Sabrina’s How To Make Paper Flowers for all Occasions

Hello and Welcome! If you’re a regular visitor to Severn Wishes Blog then you’ll know that I love to do lots of Art and Craft! If you’re new here then hi, and after this blog post please check out the remainder of my fun Crafts in the section here.

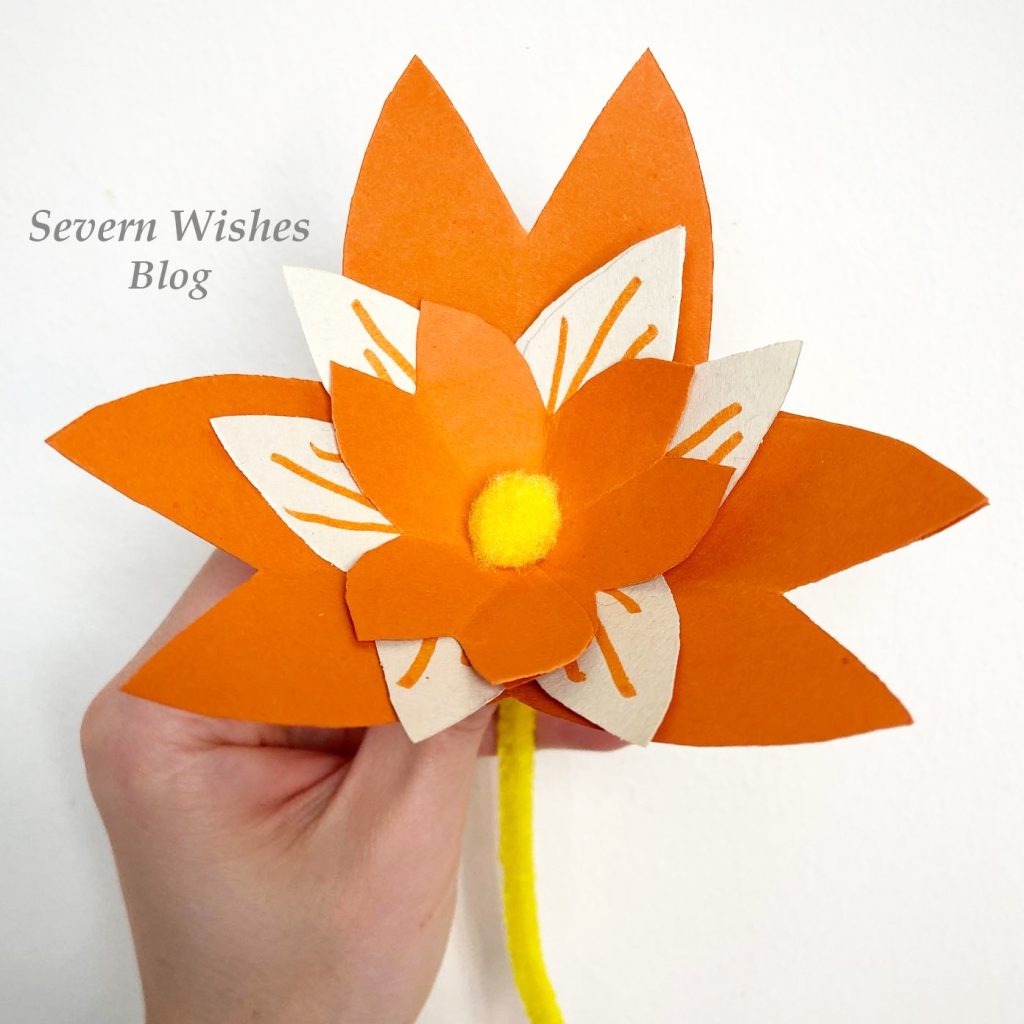
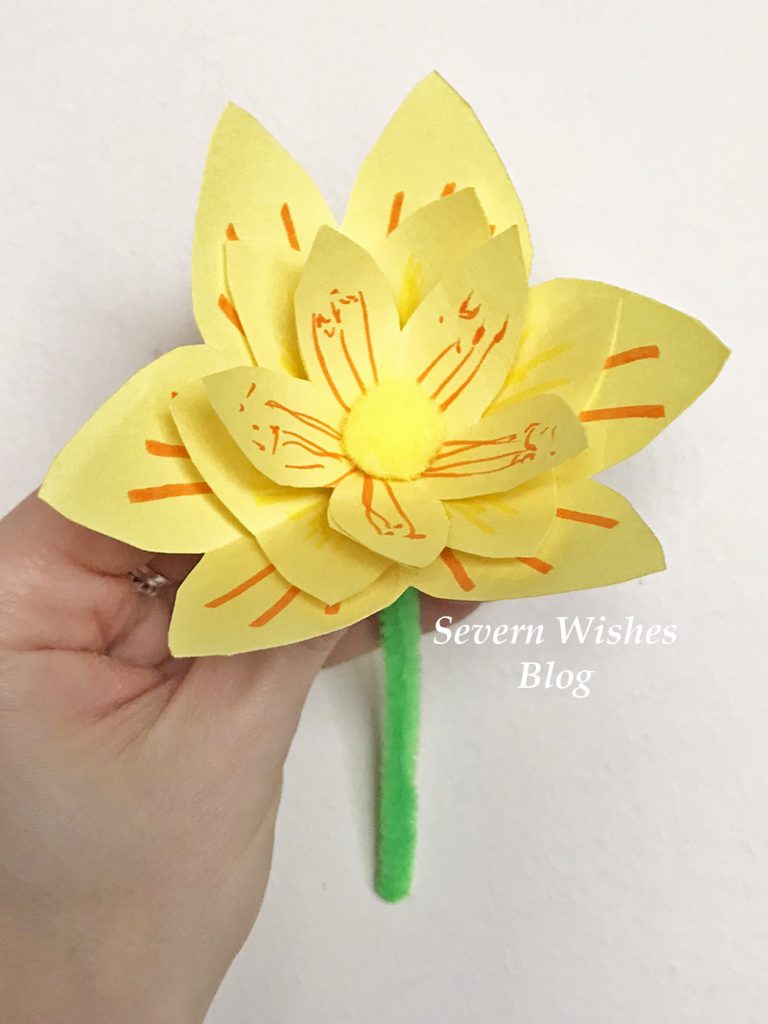
Paper Flowers are a wonderful alternative to buying fresh ones, the beauty of these homemade gifts is that they won’t wilt and have to one day be thrown away, these can be treasured by the loved one receiving them, forever! Give a single flower or make a bouquet it’s up to you!

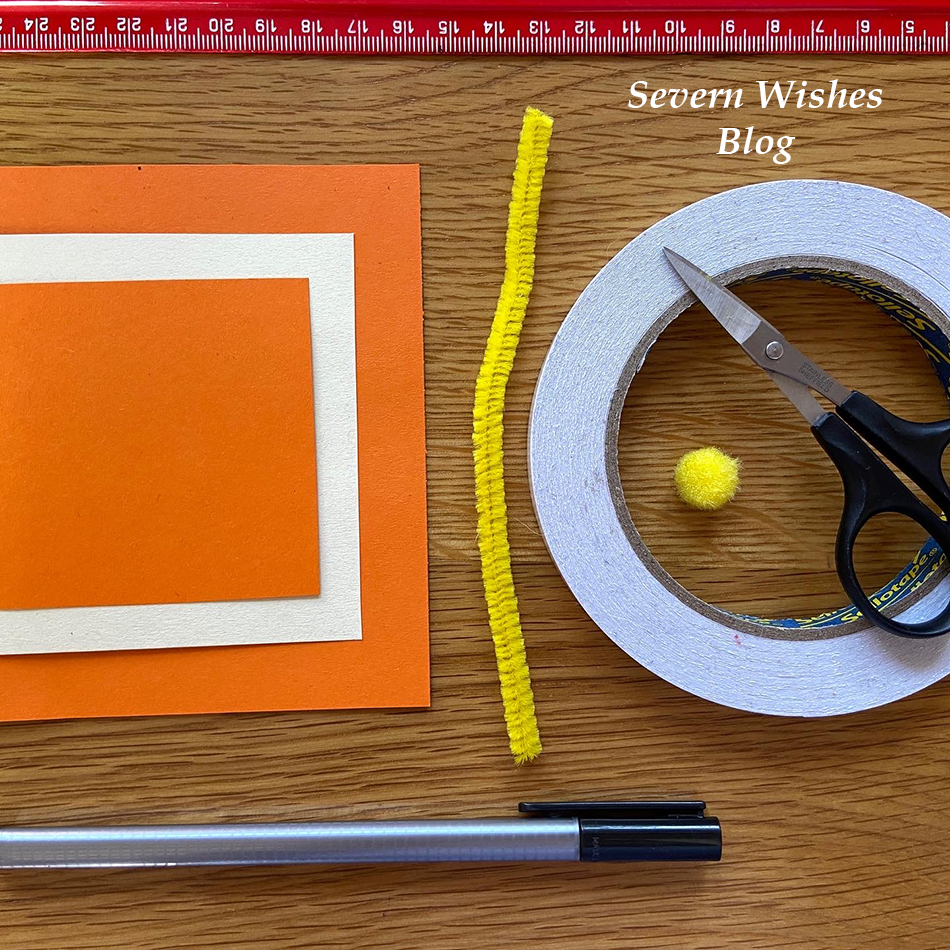
What Do I Need?

A Ruler (30cm)
A Pen or Pencil
Pipe Cleaners various Colours
Thin Coloured Card or Thick Coloured Paper
Pens for Decorating the Petals (optional)
Fluffy Craft Balls (Flower Centres)
Scissors

My Step by Step Visual Guide is really easy to follow, but I also uploaded videos to my social media if you would prefer to follow that! Carry on reading for my step by step and photographic guide.


SABRINA’S STEP BY STEP GUIDE

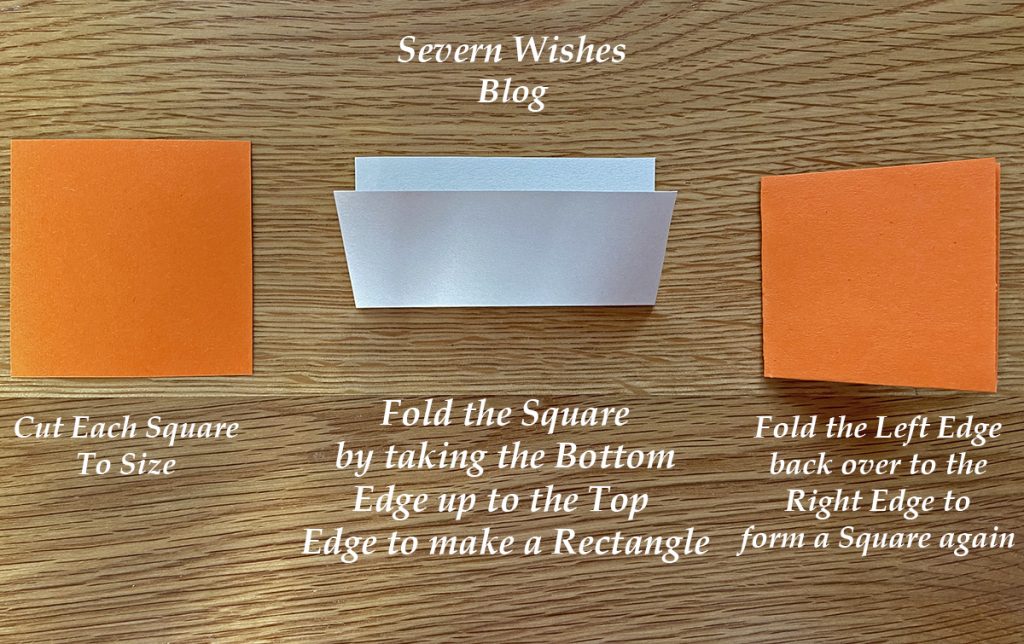
1. Cut Squares from your chosen Coloured Card. For example I made my Orange Flower with a 7cm, a 8cm and a 10cm Square. Three Squares is an ideal amount of layers but you can do just two or even more layers if you wish. Assemble these squares on a flat surface ready for the individual folding process. (See my images below for additional guidance).

2. Fold each square you have in half to form a rectangle, do this by folding the bottom line up to the top line and line up the crease and push flat. Repeat for every piece you have.

3. Next, you fold each rectangle back into a square shape by folding it from the left to right and flatten and crease down flat once again.

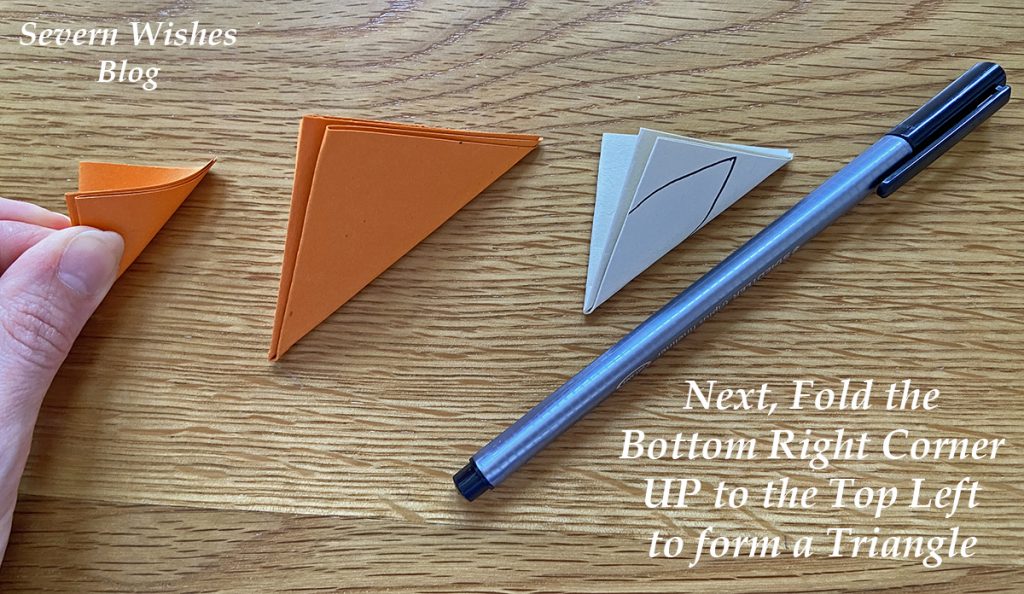
4. Finally you will have all your layers into folded squares, and these now need to be made into Triangles. But to do this correctly for the next steps you must not rotate them at all during the folding process. Make sure that you fold the bottom right corner of your squares up to the top left, flatten and crease.

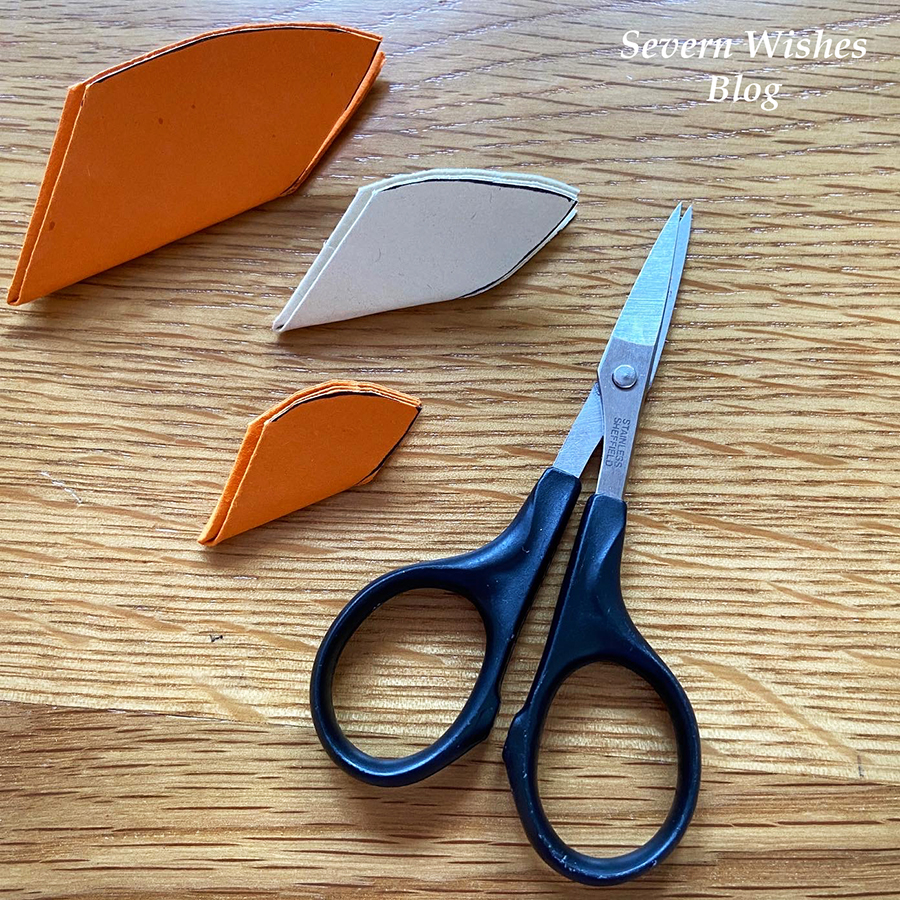
5. Next you need to draw a petal shape on every flattened triangle, make sure not to rotate it from when you folded it when you draw on it, otherwise it won’t cut intact during step 6.

6. Now you need to carefully cut out your shapes, gently follow the line and then discard these cut offs for the recycling because you don’t need them.

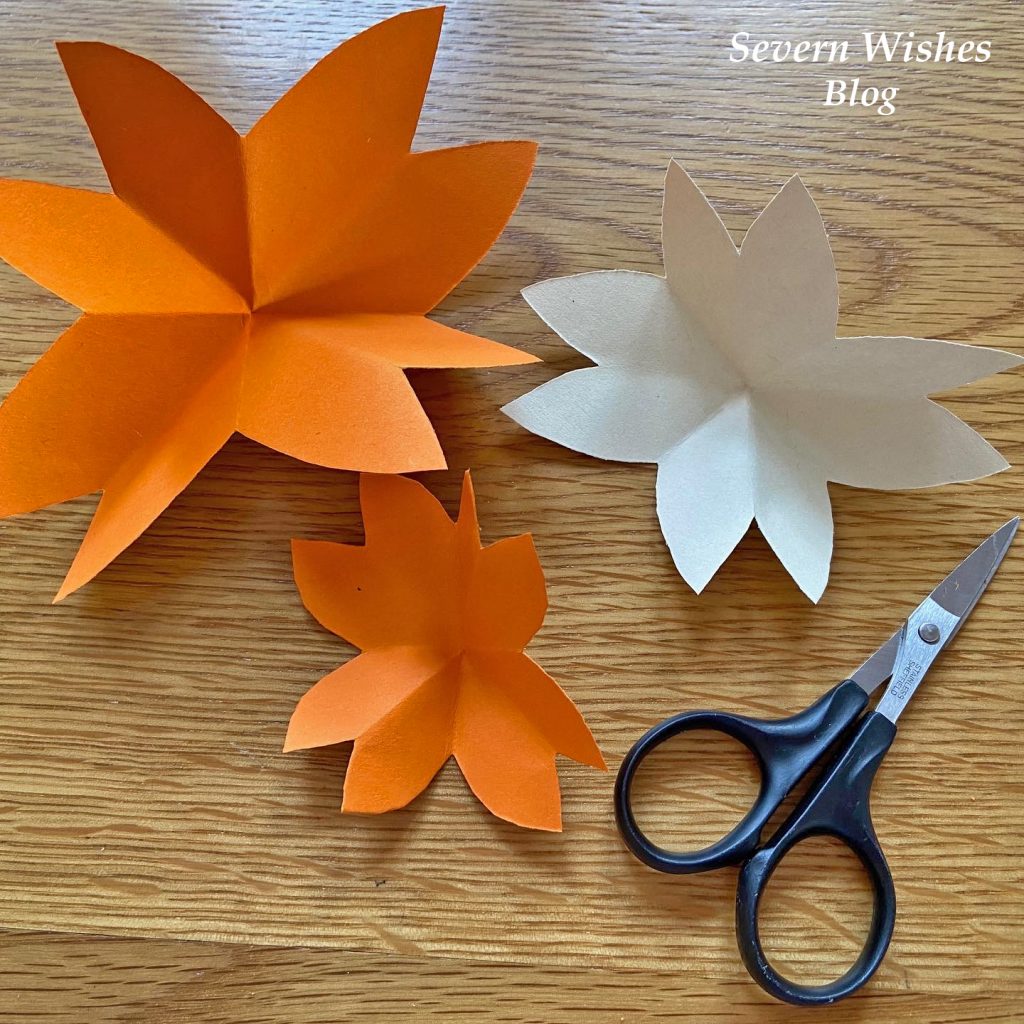
7. Time for the moment of truth, open out the flowers gently and slowly so as not to tear them. Lay them out flat and make sure they are an entire piece.

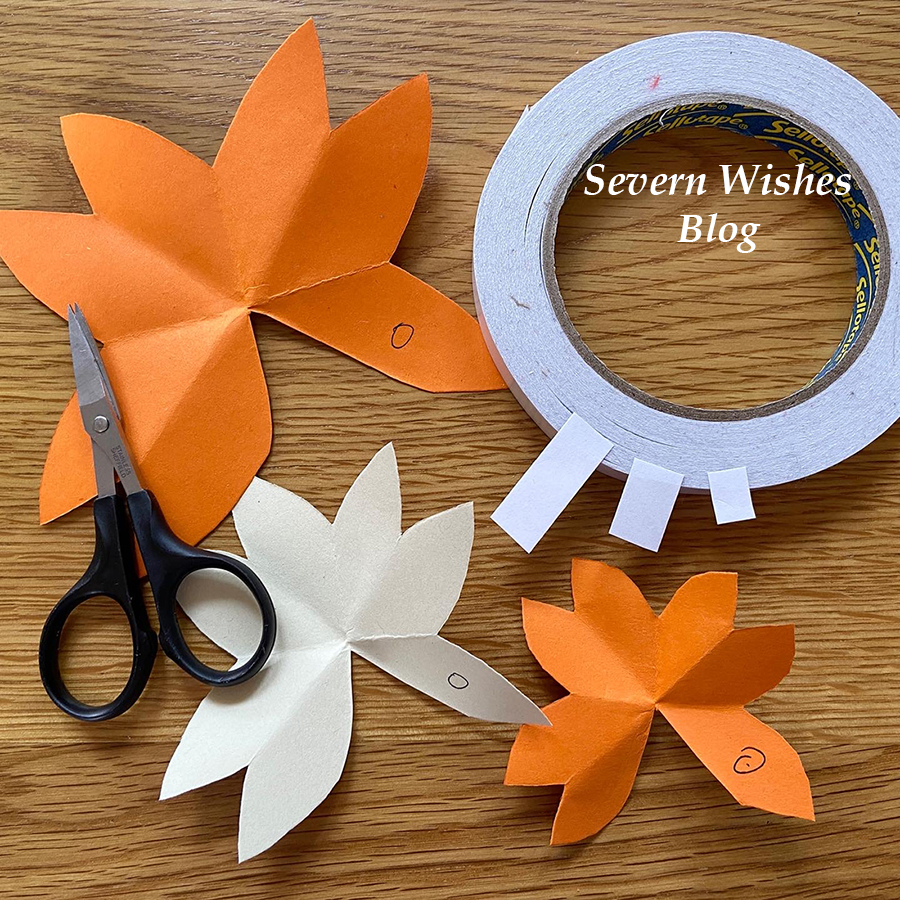
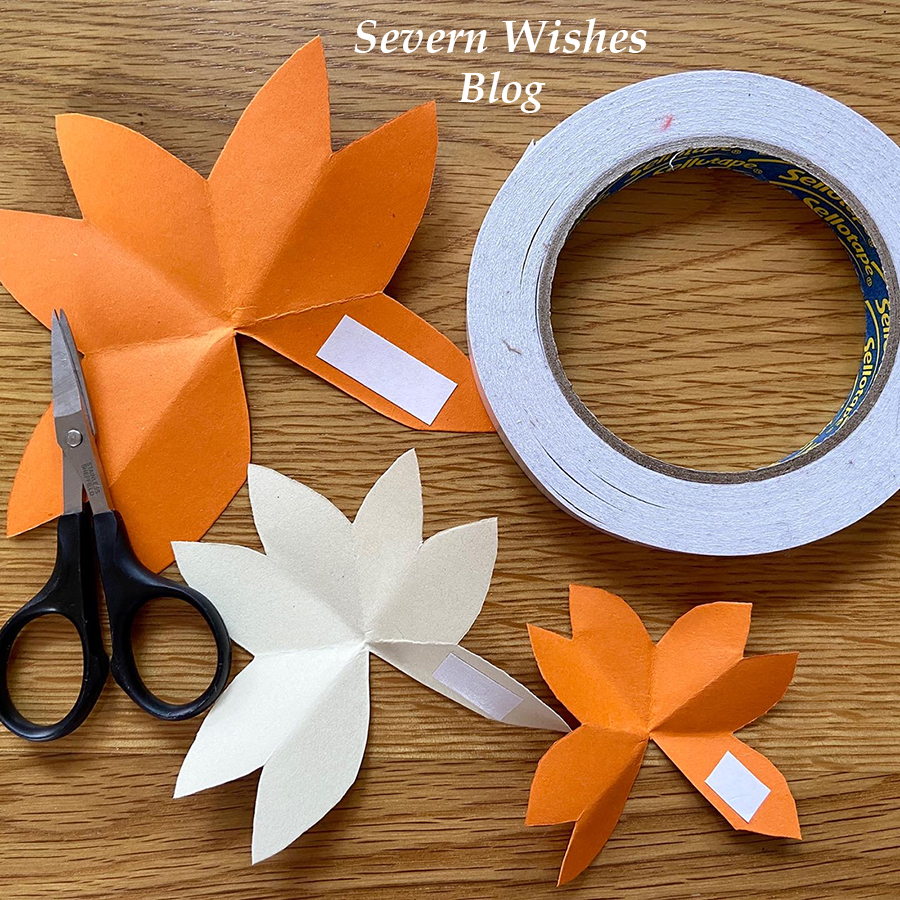
8. With the crease lines facing at each compass point you need to mark the petals that are in the South East corner of each flower. (See my images below if you are uncertain).

9. Carefully cut these petals away from the flower, be sure to only follow the crease lines of the folds when you cut and don’t be tempted to cut it too low in the centre, just enough for the spare petal to gently come free. You don’t need these now and these spare pieces can all be recycled at the end of your crafting session.

10. Next step is to mark the petal on the right of the one you just cut away, on each of your flower layers, and then stick a piece of double sided tape or a blob of glue on to that mark.

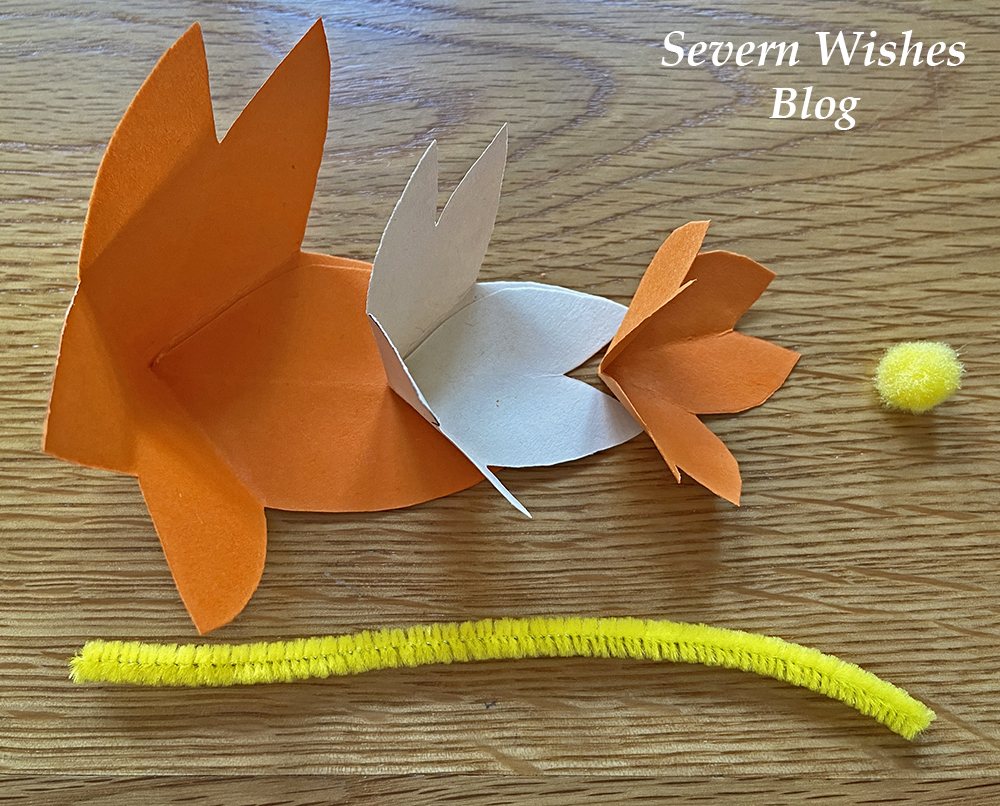
11. Doing each layer one at a time now, gently place the flower into your hand, and with the other hand carefully fold the petal on the left side over the petal on the right side. The creases and folds we made at the start should allow you to do this easily, if not gently fold the creases again and try again, the flower should (with some gentle persuasion) create a 3D flower with the shape similar to a cone. Push down on the glued part and make sure that you have aligned the petals and that it is stuck down. Repeat this for all flowers and layers that you want to make.

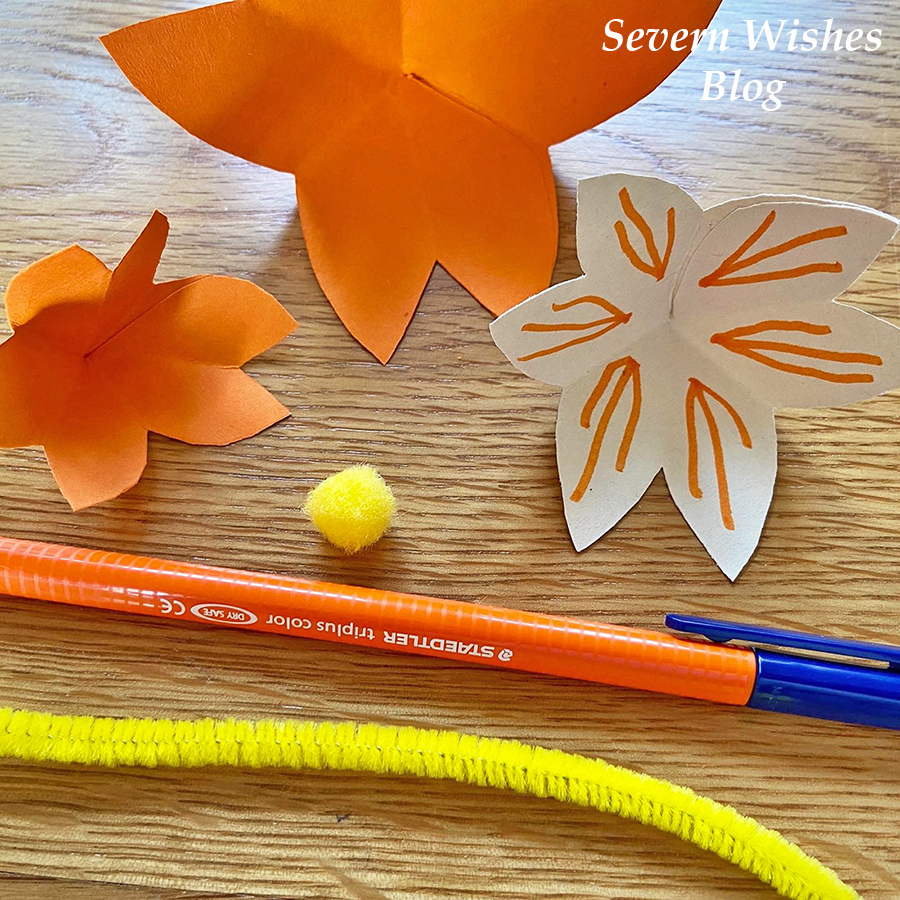
12. Carefully lay out each of the Flower layers now that they are 3D. You now need to decorate them if you want to with lines or dots before we assemble them. If making them with small children you may want them to decorate at Step 10, before you make them 3D.

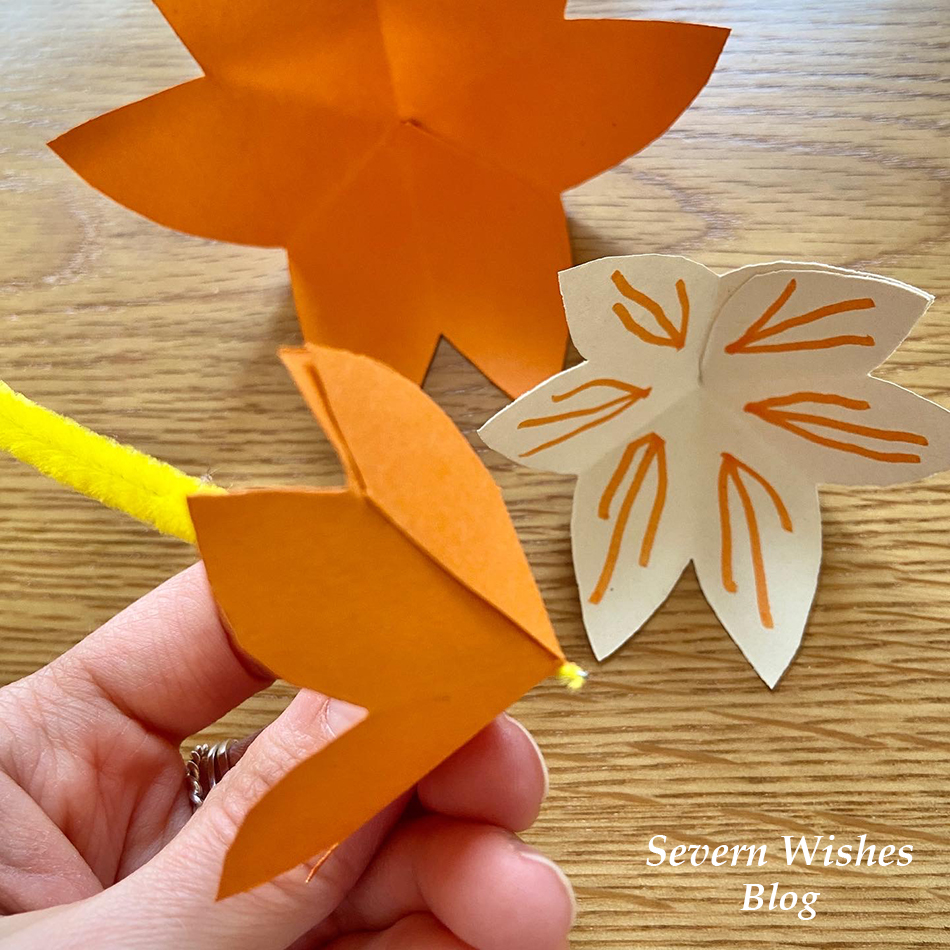
13. During this step you want to use the end of the Pipe Cleaner you have chosen to gently pierce through the middle of the Flower layers, take one at a time, and force the pin end of the Pipe Cleaner directly through the centre where the creases and folds meet. Once all of the layers are pierced you can now arrange them in order of size.

14. Assemble your finished Paper Flower by sliding the layers on to the Pipe Cleaner, you do want to leave about a 4mm bit of the pipe cleaner poking out so that you can push on a coloured fluffy craft ball (if you have one) and this neatens the whole look of the flower plus it covers the pointed end of the pipe cleaner.

15. Adjust the Petals by rotating the layers slowly on the pipe cleaner stem until you are satisfied with the flowers final look. I hope you are happy with your flower! You can play around and add other things too if you like! Be creative and I cannot wait to see yours! Tag me! #SabrinasHowToMake

✩✩

Thank you for reading this Craft related blog post today, I always love doing my “Sabrina’s How To Make’s”! And if you have any questions for me then please comment below on this post and I will happily answer them for you. If you make some flowers please tag me on social media using the hashtag #SabrinasHowToMake and I really look forward to seeing them!

✩ Sabrina 

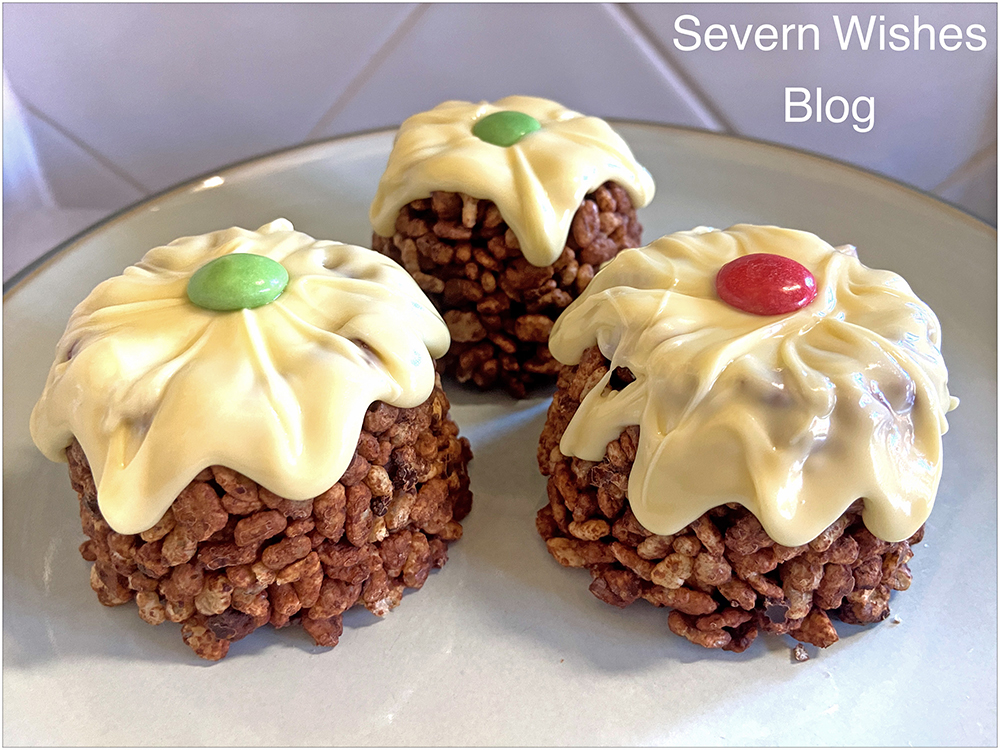
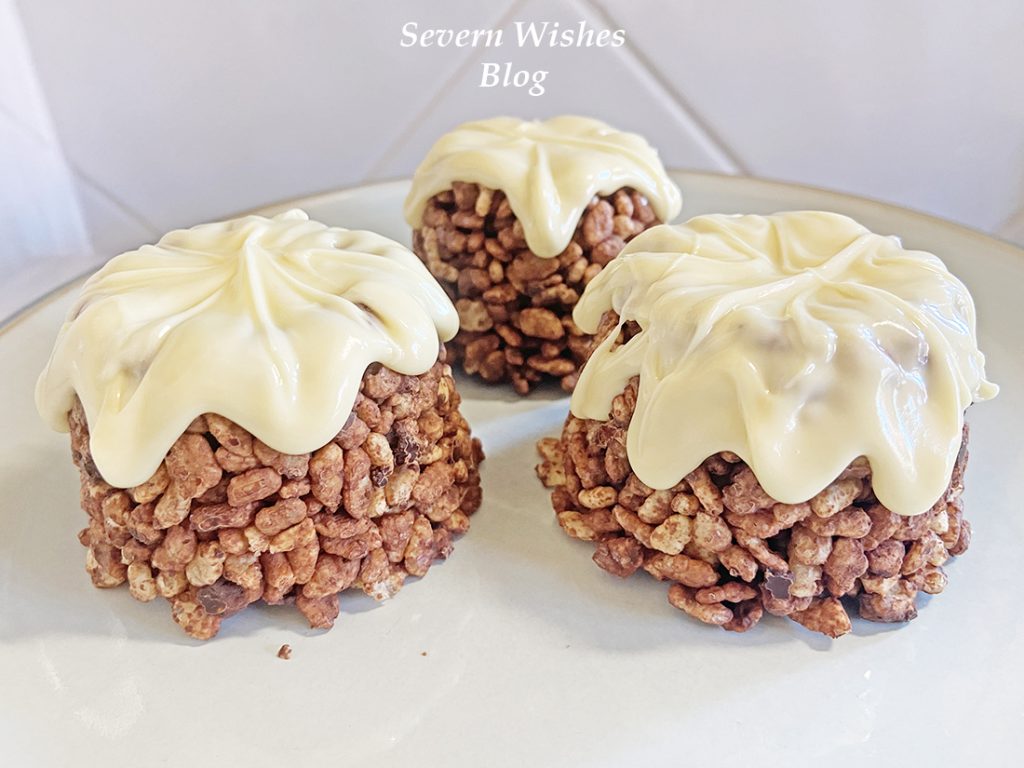
Children’s Chocolate Crispy Christmas Puddings

If you’re looking for a fun dessert for a Christmas Party that lots of children are attending then this might be the one for you! Look no further than these Christmas Puds! You can make them the day before and leave them to set overnight in a fridge. It will take just half an hour to make up to six Crispy Puds!

What You Will Need

Saucepan
Wooden Spoon
Rounded Moulds – I use an empty fruit pot that is from Tesco! They are the perfect size!
Teaspoon

Crispy Cereal 300g-400g (depends on how coated in chocolate you want them to be)
Milk or Plain or Free From Milk Chocolate 200g
White or Free From White Chocolate (for the topping) 60-100g
Decorative Item such as a Sweet or Smartie

How To Make

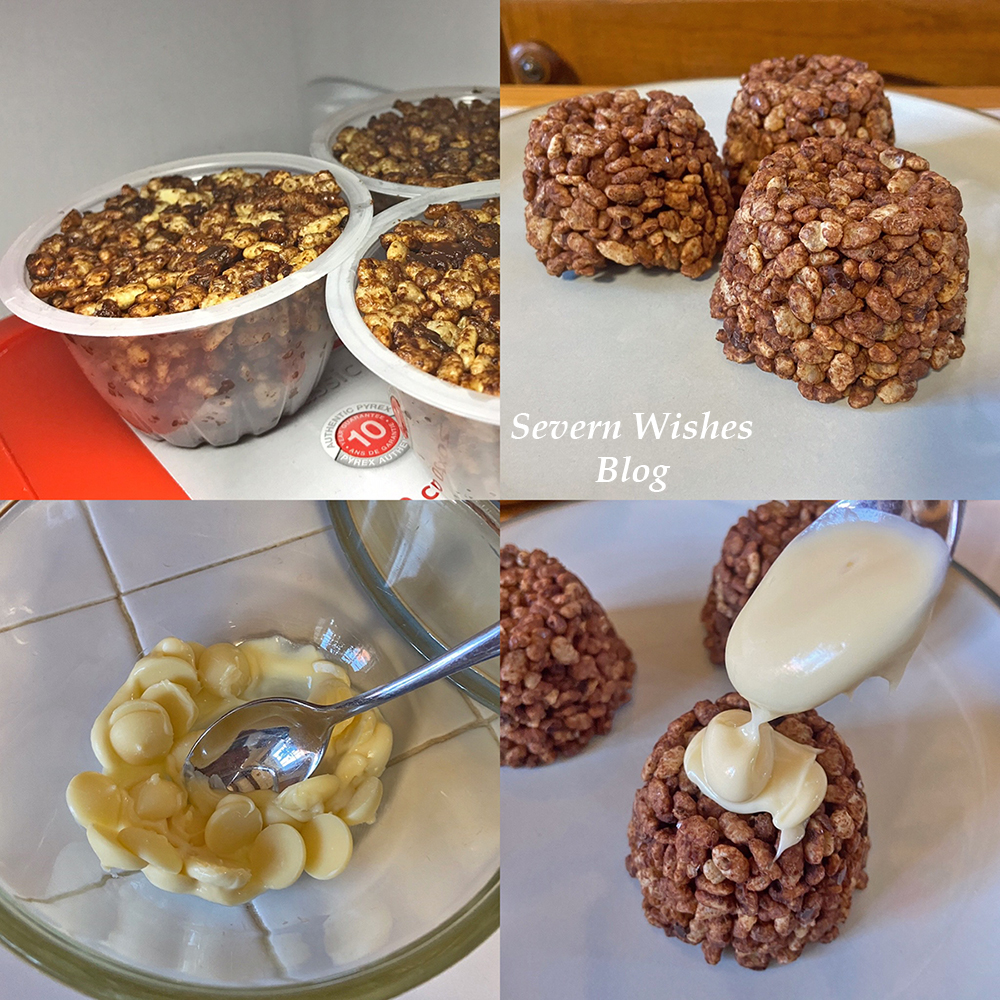
1. Melt the Chocolate on a low heat.
2. Once Smooth take off the heat and Stir in Crispy Cereal.
3. Push into Moulds of your Choice Firmly.
4. Refrigerate for a minimum of 4 Hours or Overnight.
5. Remove from Fridge, Turn Upside Down and Squeeze Gently to Remove from Moulds.
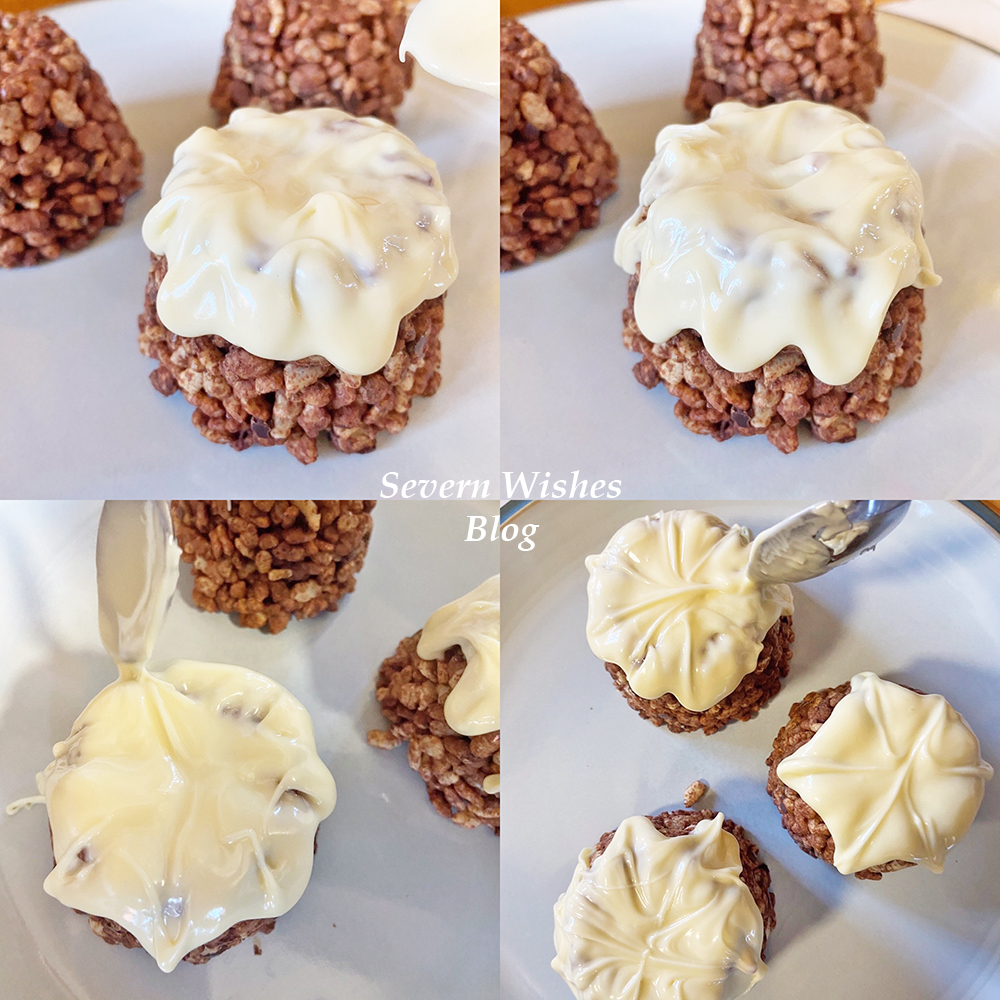
6. Melt the White Chocolate, Pour Over Each Pudding and Let it Drip down the Sides.
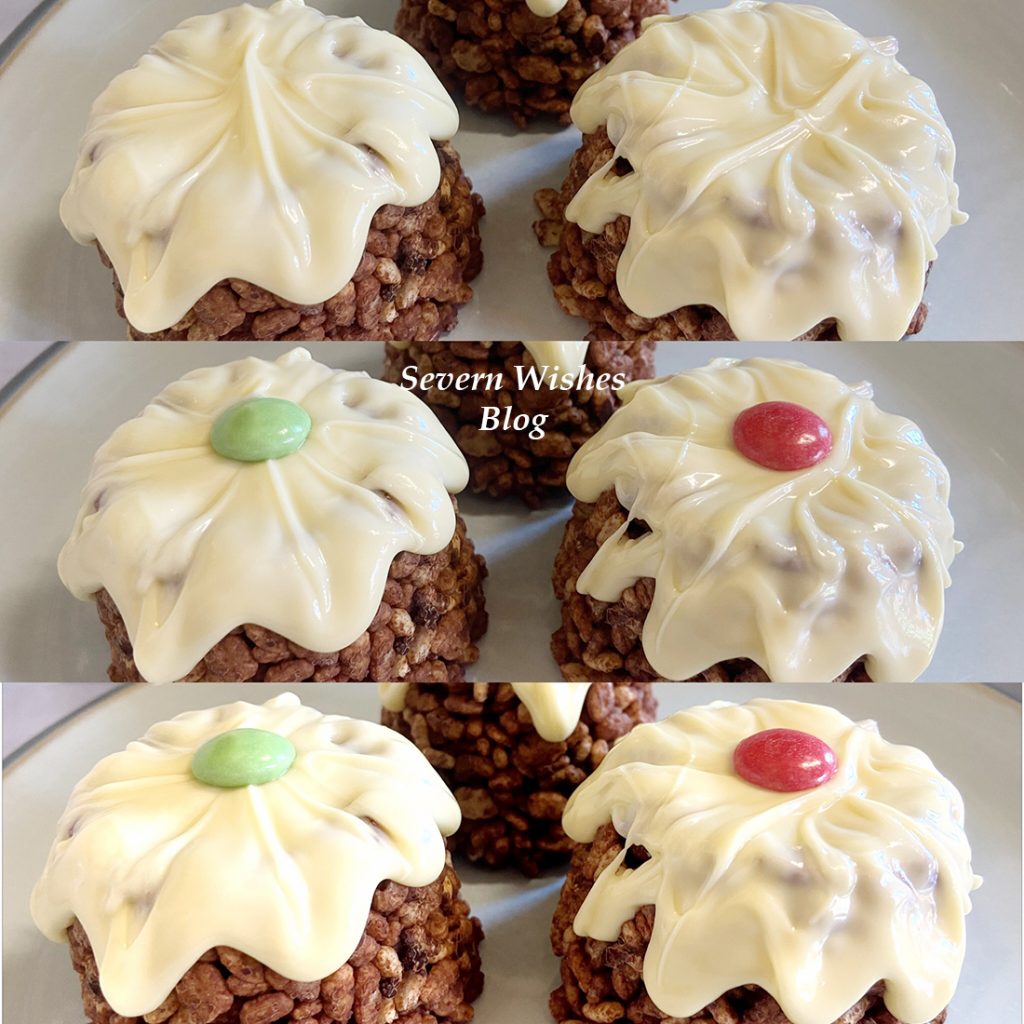
7. Using the End of a Tea Spoon Drag the White Chocolate to Form a Star Shape on Top of the Pudding .
8. Add a Sweetie or a Smartie on the Top to Decorate.
9. Pop Back in the Fridge until the Hour of Serving.
10. Keep in an Airtight Container for up to 3 days.

EASY PEASY!

Thank you for reading this blog post today, I hope that you like my recipe.
If you make any of these yourself I would love to see a photo of how they turn out!
Please tag me on Social Media! #SabrinasRecipes #SabrinasHowToMake

✩ Sabrina ✩

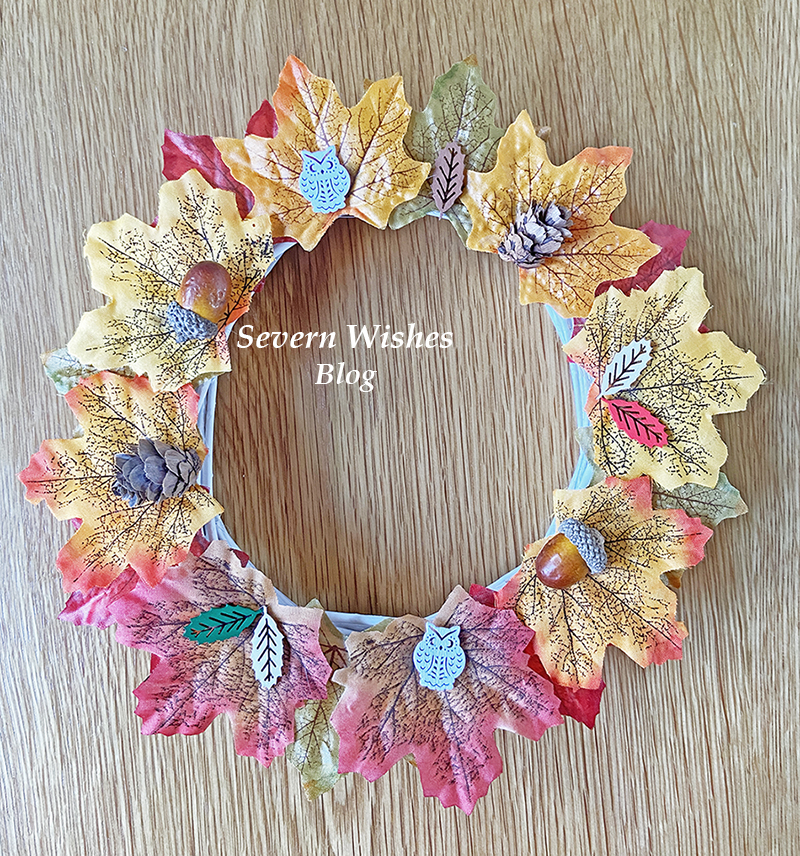
Sabrina’s How to Make an Autumn Wreath

Welcome to one of my latest Craft Project posts that I am very proud of.
I have been wanting to make a wreath for about four years now,
and I never got around to it until this Autumn. Oops!

Autumn Wreaths like this can be placed indoors flat or indoors hung up.
If you have a nice sheltered porch over your doorway you could even hang it outside!
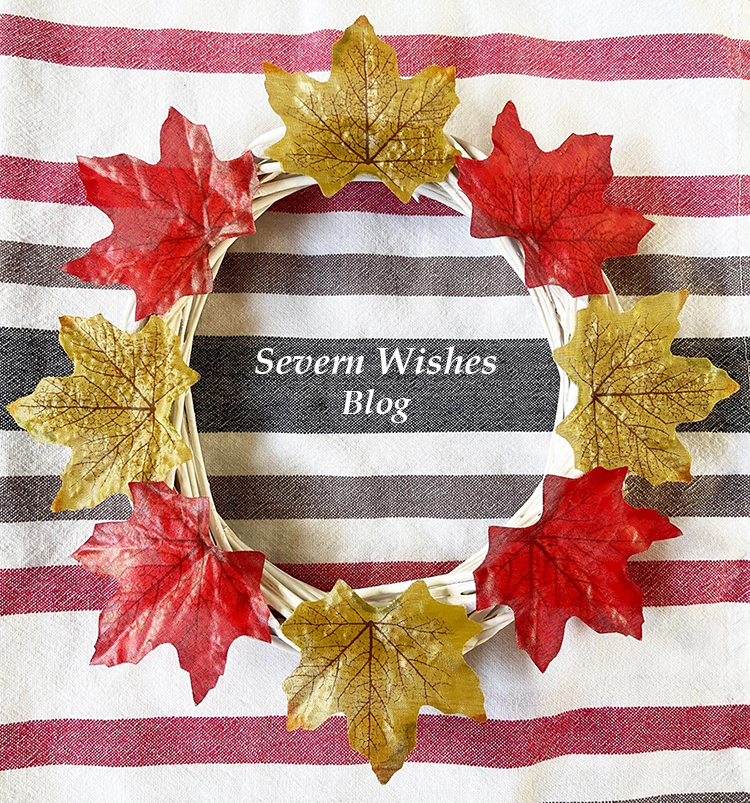
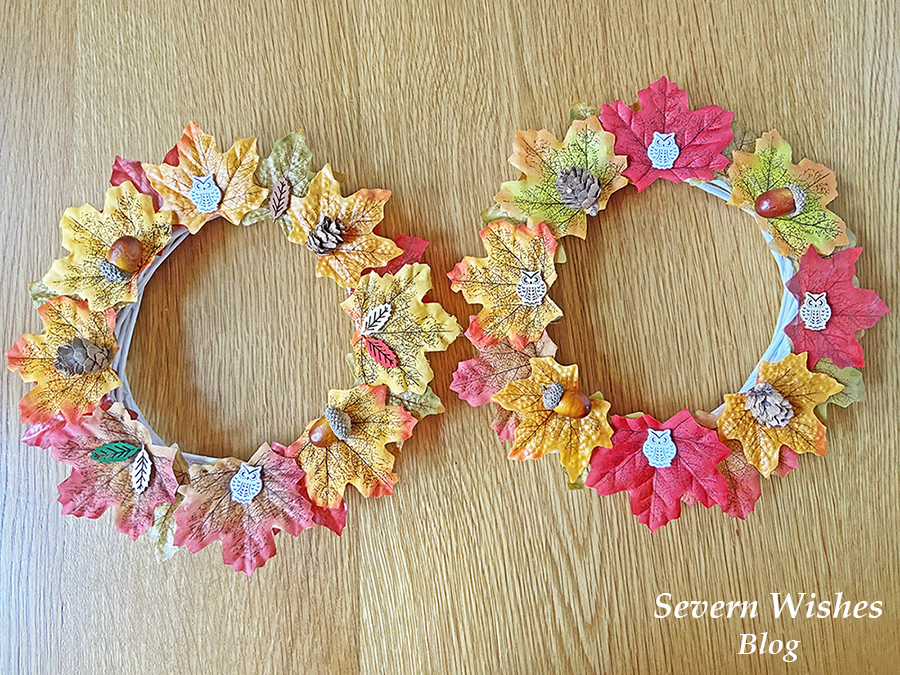
I chose to make an indoor wreath using false leaves, dried pine cones, acorns and wooden craft pieces.

Here are all the things I have used to make my two wreath rings.
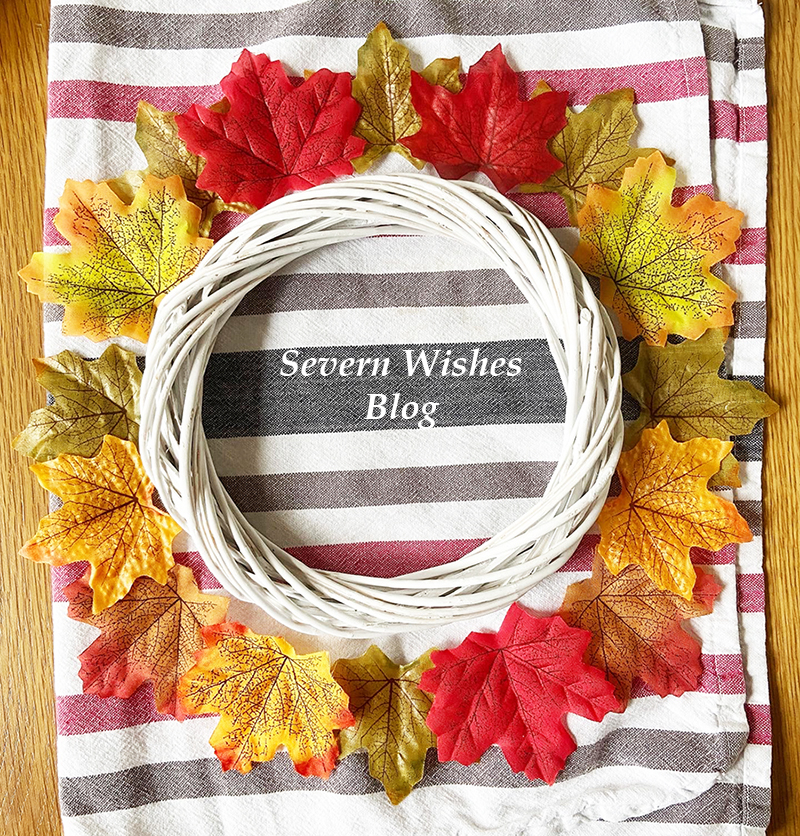
It’s a good idea to decide on your design before you start gluing anything, I place mine around the outside.

How to Make

Step 1. Prepare your design before you glue anything down.

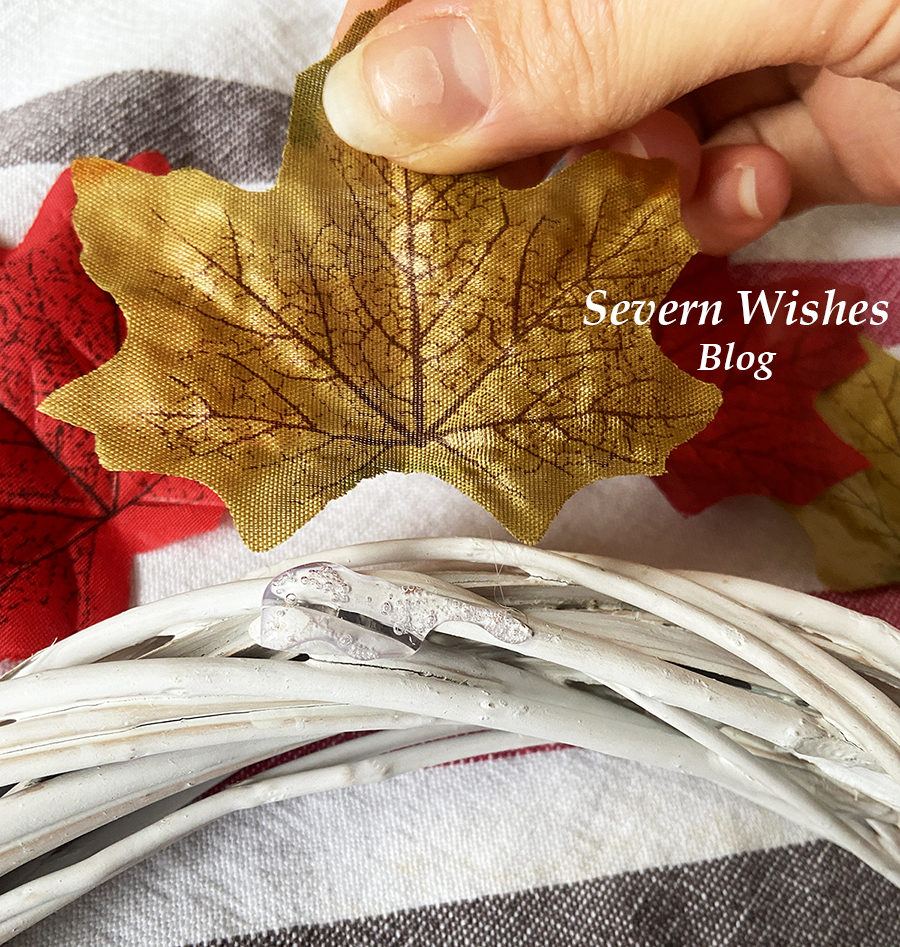
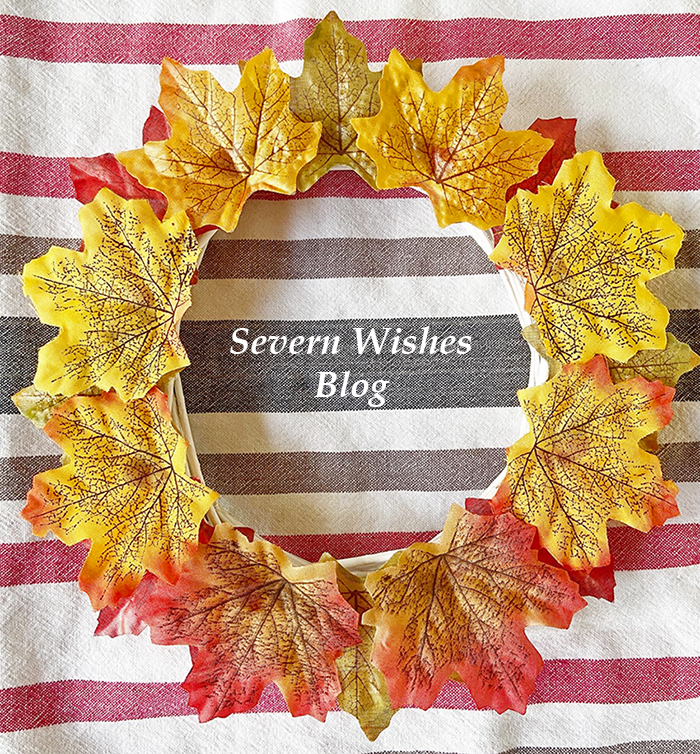
Step 2. Glue the first layer of items down using a glue gun and wait for that to dry and the glue to harden before you add the next layer. Use a blob of glue per item, just enough to stick it down because you don’t want lots of excess glue on the wreath.

Step 3. Repeat the second layer with the glue and take care when pressing down the items when it is hot. Layer by overlapping the leaves until all the white on the front is gone. Once you’ve done the leaves let the wreath dry a few minutes and the glue harden.

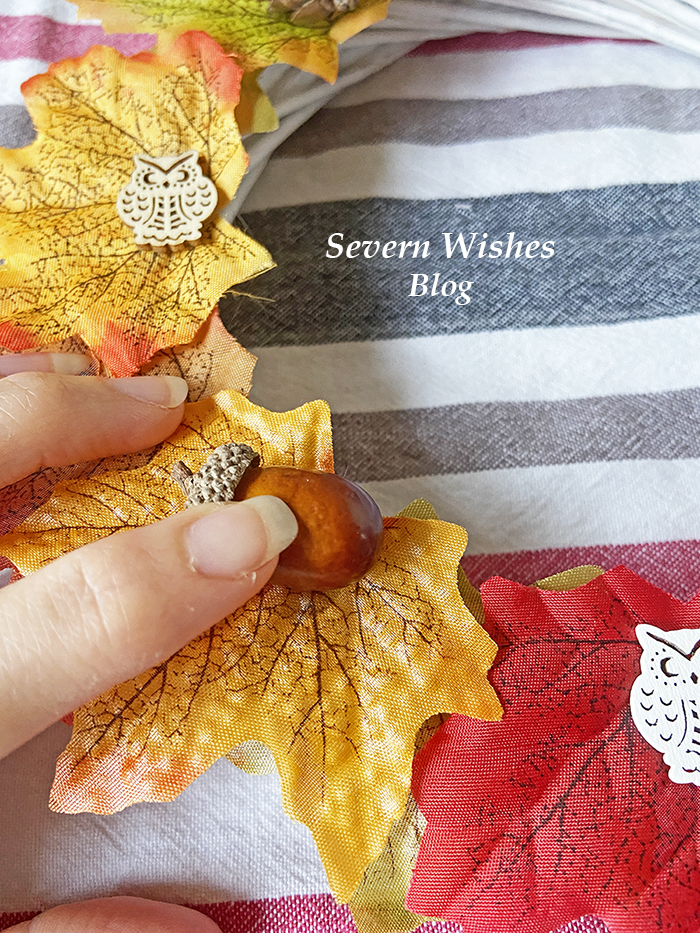
Step 4. Keep adding to your design and let the layers dry in between, it only takes a few minutes to dry each time. You can put as many layers on as you would like to, and then add the three dimensional items last.

Step 5. When the design is fully dry then you are able to either lay it out or hang it up in your home. If you are hanging it up on a window you may want to repeat the design on the other side so that you can see leaves on both sides.

Take Care when Pushing the Items on the the Hot Glue

TOP TIPS! Make sure you only use a little glue, it’s hot and a little goes a long way!

TOP TIPS! Layer the leaves up until you cannot see any more of the white,
overlap them slightly so as to create depth to the wreath ring.

Make sure to decide on where you want to put the items before hand so that you don’t make a mistake when gluing.

What You Need

Wreath Base – Wicker or Rattan or Wood Sticks
Glue Gun and Glue Sticks
Decorations or Naturally Sourced Dried Out Items (like Pinecones) or Both!

Where I Bought From

I did a Nature Foraging Walk with my son.
I got the wooden pieces like owls and leaves and the artificial leaves from The Works in their craft part of the store.
I got the Rattan Wreaths from eBay.
I got the Glue Gun and Sticks from Amazon.

✩✩

Thank you for reading this crafty and make blog post today, if you have any questions for me then please comment below this post and I will happily answer them for you. If you like my wreath please let me know!

✩ Sabrina 

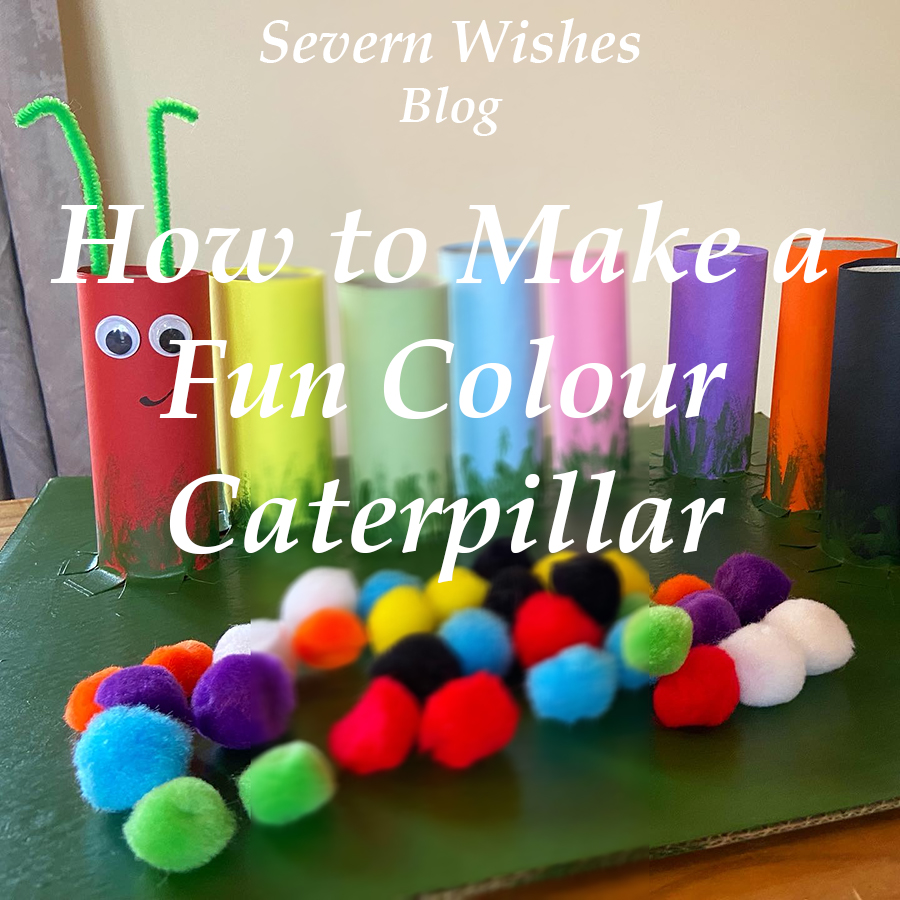
How I Made a Fun Craft Caterpillar to Teach my Child about Colours

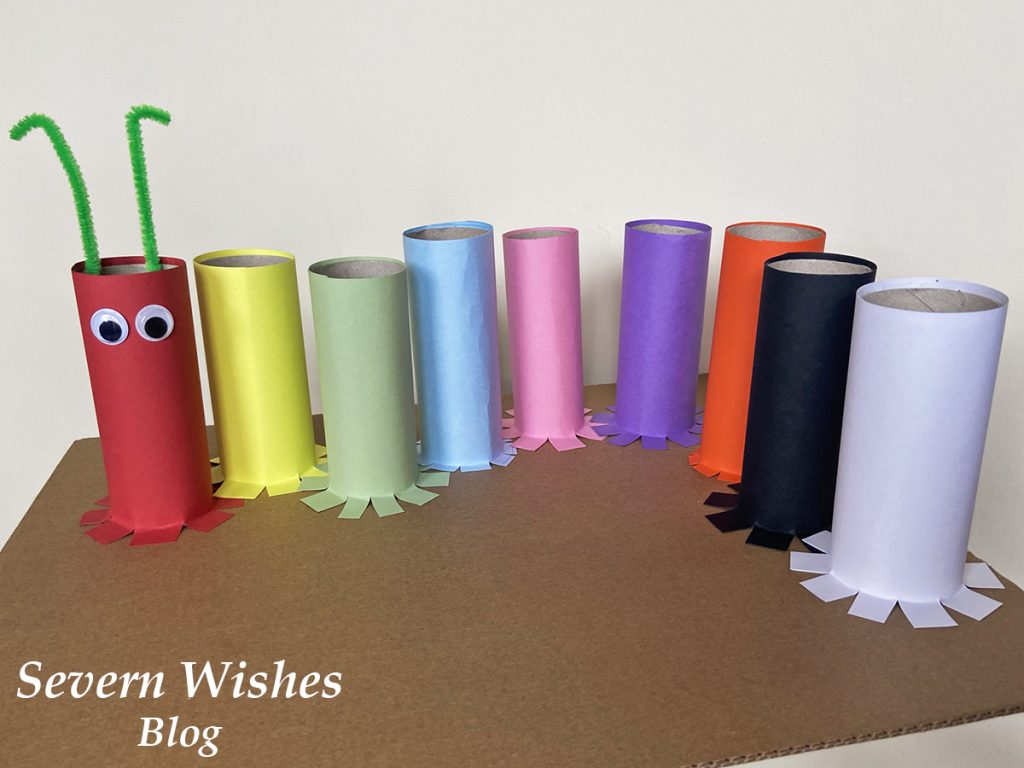
My Fun Craft Caterpillar is an easy to make craft project, that can help you to teach your toddler about colours and counting. You can make it any size you like and with only a few simple and non expensive items. Ideal for children aged two plus with good fine motor skills.

Designed for Age Group – 2 Years Plus (Supervised)
Parent Difficulty to Make – 3/5
Time it takes to Make – 4 – 6 Hours
Cost to Make – £10
Reasons to Make – Learning about Colours and Counting
. Helps Develop Fine Motor Skills.

When my son began having issues with delayed speech I came up with several things to aid him in his communication. One of which was a Caterpillar friend that I made into several different items. Today I’m going to be showing you how I made my Fun Craft Colours Caterpillar! He is cute and great for helping little ones learn about colours, counting out and developing fine motor skills.

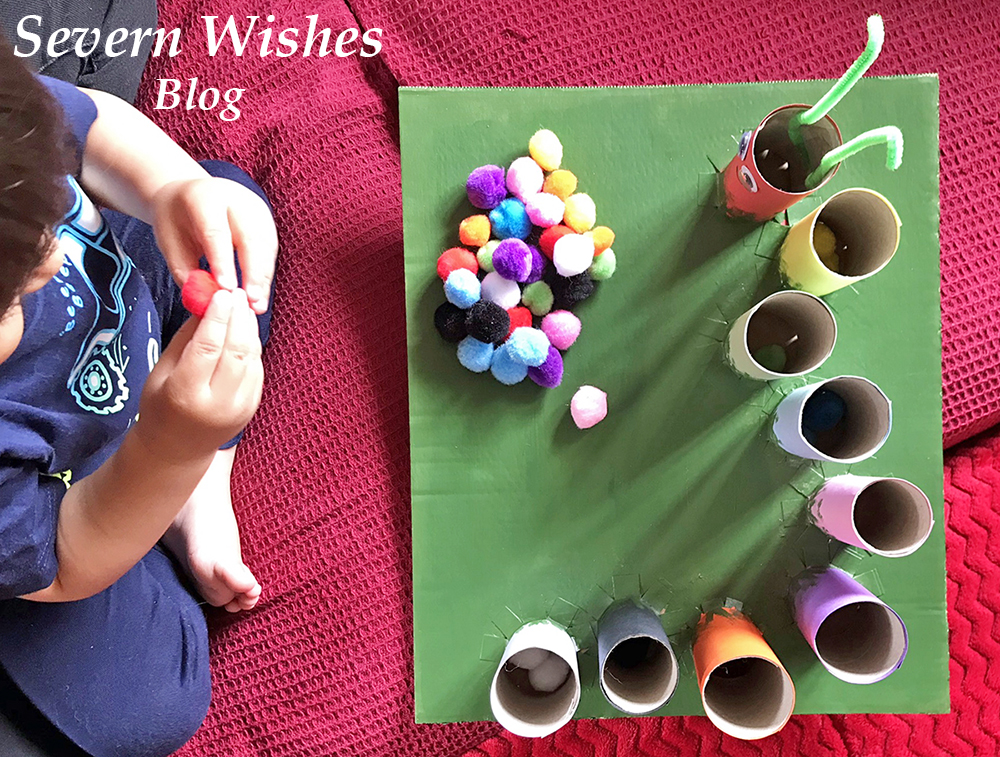
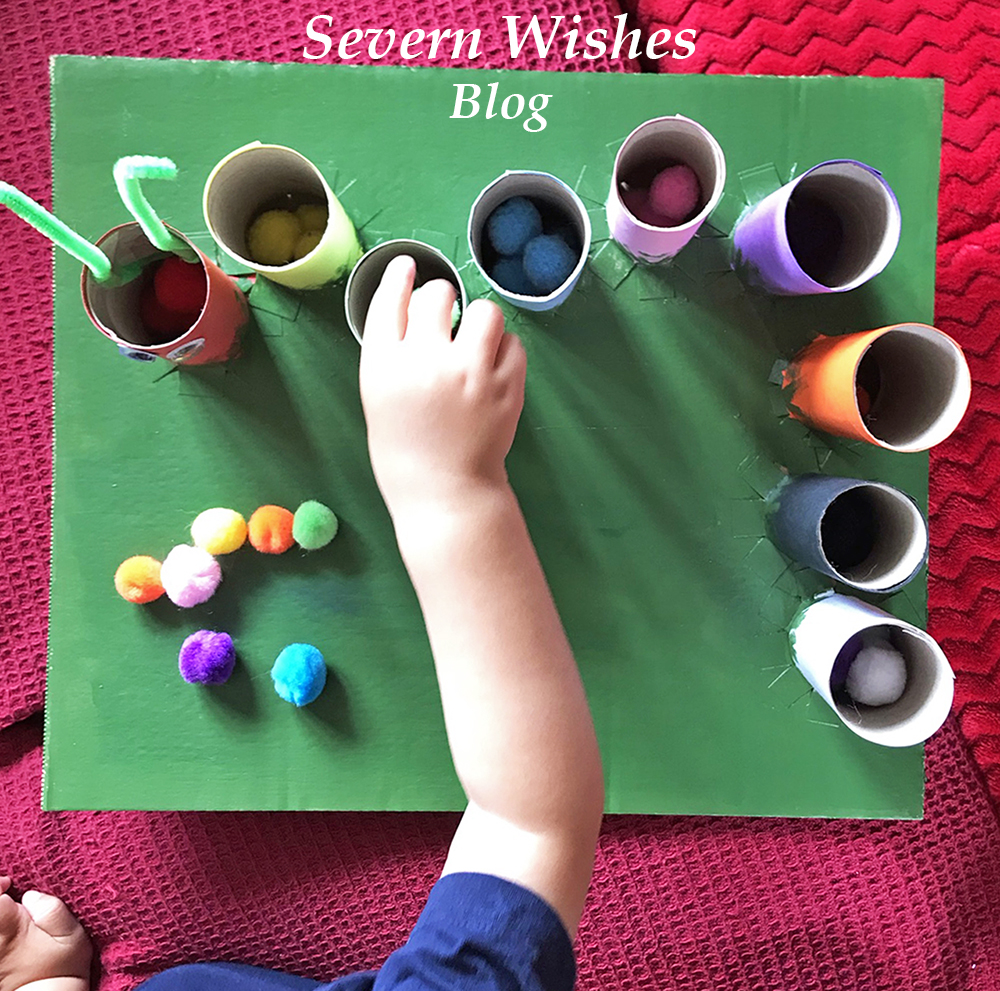
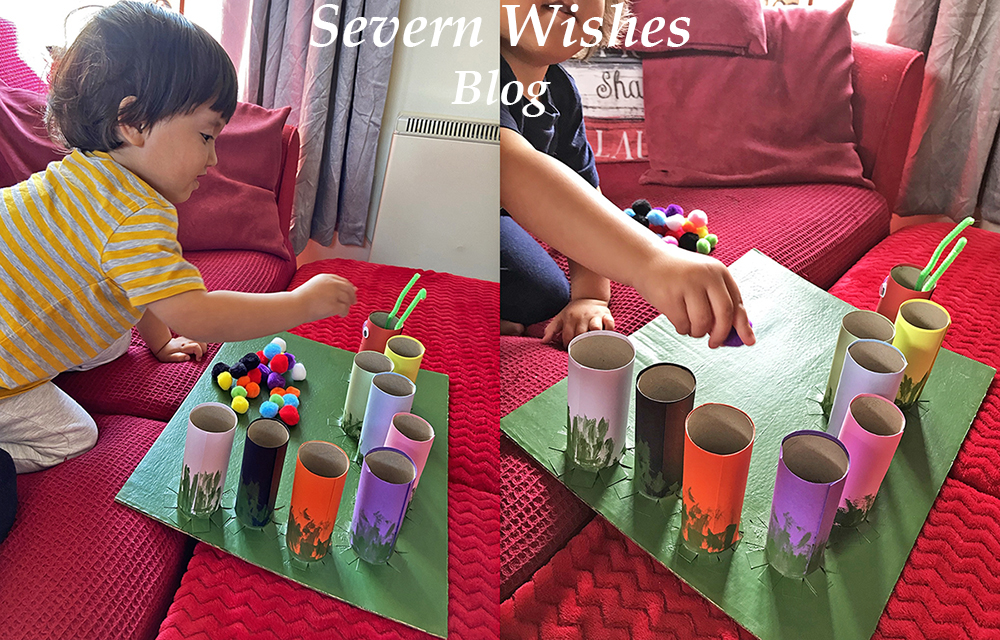
TOP TIP I wanted to help my son develop his fine motor skills as well as improve him saying different colours, picking up the Pom Poms and getting them to drop inside the correct tube does take some skills for little ones, so don’t worry if they have to learn how to do it. My son got the hang of it really quickly and was soon getting faster at doing it. One Tip is to show your little one what you want them to do, and then let them figure it out on their own a bit too. Always supervise but encourage and praise when they succeed.

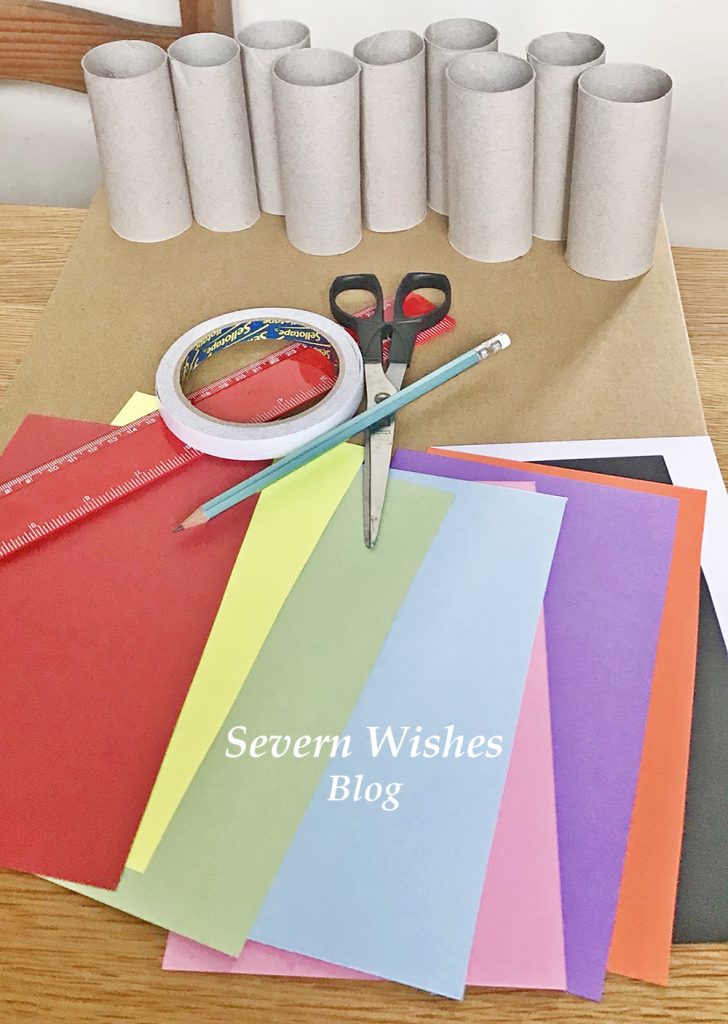
What You Will Need

Toilet Roll Tubes – You can use toilet rolls and kitchen rolls and just trim them so they are a similar height. Order your card and Pom Poms and work out how many rolls you will need, you require one roll per colour.

A Thick Cardboard Base – Do you have a sturdy box after going shopping or have had something delivered? You need a piece of strong thick cardboard either a Square or a Rectangle for your Base that the Caterpillar will stand on.

Coloured Card – You need to try and match the coloured card with the Pom Poms you are ordering. If you want to do a simple Caterpillar just go for a pack with Red, Yellow, Green and Blue mix, sometimes you get an Orange or a Pink in those packs. I bought two packs to ensure I got black, white, purple, pink and orange for my more complex Caterpillar.

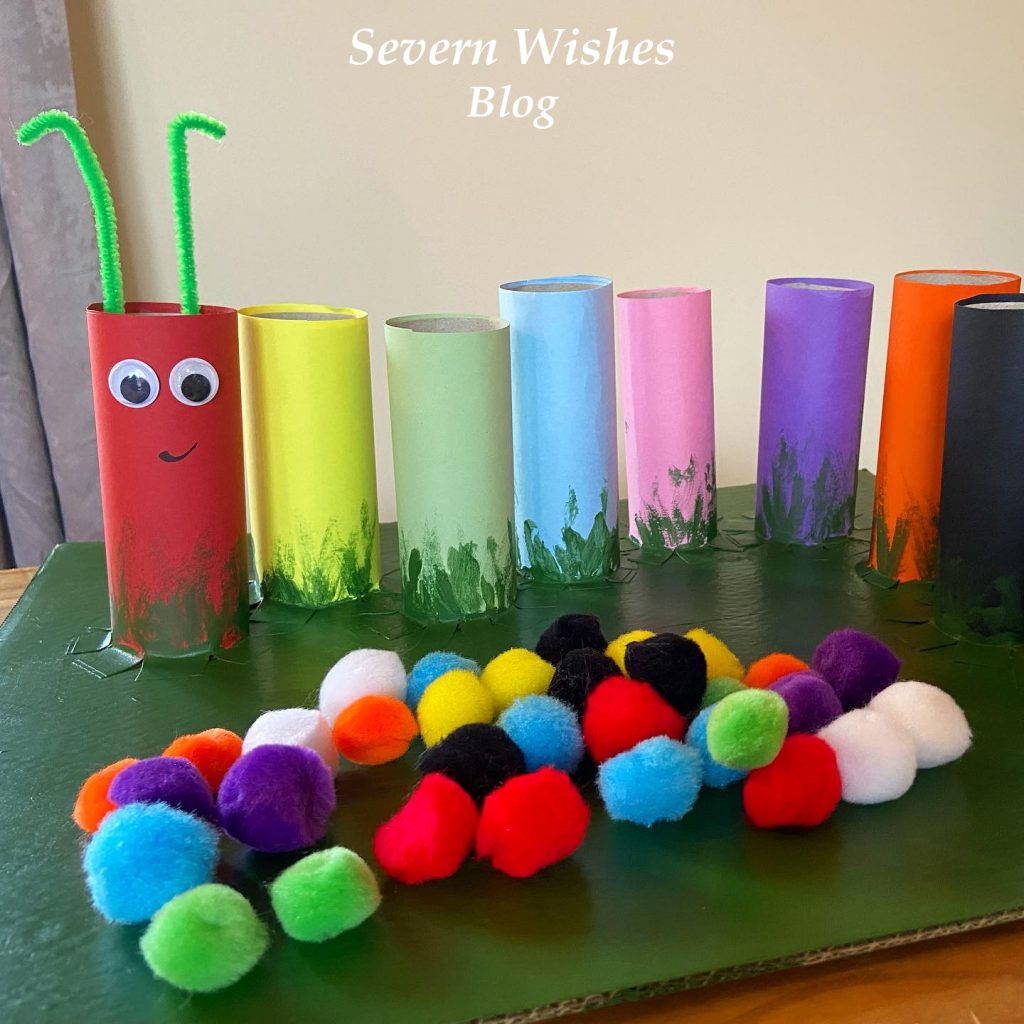
Coloured Pom Poms – A toilet roll tube is a certain width across, so make sure you only order Pom Poms that are less than this. My tubes are 4cm wide so I purchased a bag of mixed coloured 2cm Pom Poms. This means they are easy enough to tip back out after every use. Also ensure you get non toxic child friendly craft items from reputable companies.

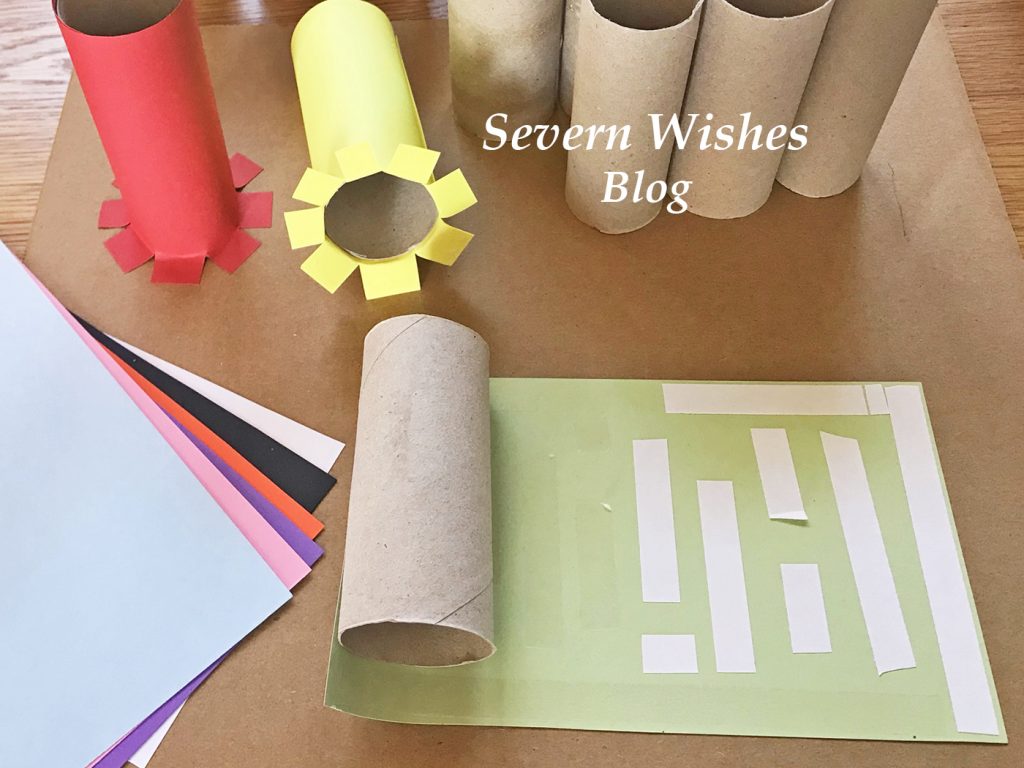
Double Sided Tape – You need this tape for cleanly applying your Card to your Rolls, this is the most time consuming of the craft build but it’s easier and less messy than waiting for lots of paint to dry. (See my How To below).

Paint for the Base – I chose to just paint my base Green, as if the Caterpillar were on a leaf or some grass. You can be as creative as you like! You only need to paint the base, once you have fixed on all your tubes (see my How To below for more clarity).

Stationery and Craft Extras – You may want to stick on googly eyes and feelers, or draw them on, it’s totally up to you, your Caterpillar, your choice! 🙂 You will also need a Pencil and a pair of Scissors.

Where I Got My Craft Items

Coloured Card Packs – Hobbycraft Online
Pom Poms – Hobbycraft Online
Goggly Eyes and Pipe Cleaners – Craft Bundle from The Works
Double Sided Tape – Tesco Store
Green Paint and Brush – The Works

How To Make Colour Caterpillar – Sabrina’s Step by Step Guide

Step 1. Assemble all of your items as described above and ensure you have enough of what you need. Place a tube, a piece of coloured card and your desired amount of Pom Poms (I used 4 per colour) into individual piles. See what you have and how many tubes with the right colours and Pom Pom matches.

Step 2. Arrange the plain tubes on your base, and see how you would like them arranged. You need a one centimetre gap between each roll where it will be attached to the base. Bearing this in mind, arrange your tubes and mark with a pencil on the base where you would like them to go.

Step 3. Satisfied that you have all the pieces you need you can begin the card craft. Start by marking the pieces of coloured card for your tubes. For example mine were 15cm high, so I marked the card at 16cm with a pencil leaving the gap of one additional centimetre. Then cut all the card pieces to size ready for wrapping around the tube.
TOP TIP ensure you leave enough card to wrap all the way around a tube with the extra at the bottom. You need at least a one centimetre section of card at the bottom of every tube for attaching it to the base.

SABRINA’S TOP TIPS: Don’t throw away pieces of card that you have left over from this make, I have plenty of Craft and Art ideas on my blog that you could use these bits for 🙂

Step 5. Cut strips of double sided tape, align them along the top and edges of the coloured card and down the centre, ensure there is enough at the edges. At what will be the base of the tube stack the pieces vertically, using a small gap between them, this will be cut in Step 7 to ensure an easy attachment to the cardboard base. Make sure you put tape on all of the coloured card pieces. TOP TIP Make sure to do this Step and on to Steps 6 to 7 at the same time and don’t leave the craft part way finished, otherwise the double sided tape will dry out before you can affix it to the base.

Step 6. Time to roll the card on to the tubes. Remove all of the double sided tape strips. Line up the top section of the cardboard with the edge of the tube, on a flat surface like a table, gently roll the tube along the card. The tape will stick well to the thin tube, using your thumb and first fingers you can smooth out the card as it sticks. Try keeping it in line at the top. Once you come to the end of the coloured card make sure the final line of it is secure to its tube, smooth with your fingers and hold the edge in place for a minute per tube making sure that its firmly stuck in place. Repeat this per tube, laying them down on their sides once you are finished.

Step 7. You now need to be cutting the base of each tube so that they can be attached to the base. Take the first coloured tube you want to attach to the base (I did a Rainbow so mine was Red) and using sharp scissors cut a one centimetre slice up into the card at the tube base. Rotate the tube around cutting vertical slices as you go. Then once cut all the way around, gently peel back the slices and make a base for your tube. Affix it into place on your cardboard base because they should already have the double sided tape attached. Press down firmly and hold for one minute. Repeat this action with all of the coloured tubes until they are all attached to the base. (See images above and below).

TOP TIP Painting the base last ensures the tubes stay in place after the double sided tape has helped stick them down on the base. It also neatens up any edges that may have tape sticking out or tubes that weren’t quite level.

Step 8. With all your coloured tubes attached to the base you can now consider adding anything else to your caterpillar, and also paint the base with whatever paint you choose. I added googly eyes and some pipe cleaners as my Caterpillar feelers.

Step 9. Leave your Caterpillar to dry overnight before showing it to your little one. Ensure that you only play with it supervised either by you or another adult. The Pom Poms should be stored inside something that little ones can’t get into unless you are doing the toy together. Most children wouldn’t eat them at this age but better safe than sorry. I recommend a small plastic box like the really useful ones with the clip over lid handles.

TOP TIP Your Caterpillar friend can now be used to teach colours and numbers! Ask your child to count how many body parts the Caterpillar has, how many Pom Poms fit in each tube, can they separate the colours correctly and add them to the correct tube? This craft project can be used for play and learning and will keep your child occupied for hours.


Have you enjoyed this Craft Project? I would love to know what you think!
Please leave me comments on the blog section below or on social media.
Please tag me if you make a Caterpillar of your own!
Use the hashtag #SabrinasCraftCreations

Thank you for reading this blog post today, I hope I see you again soon!

Best Wishes for a happy week ahead!

✩ Sabrina ✩

How to Make Pretty Mother’s Day Cards For Your Loved Ones and How to Create Beautiful Paper Flowers

With much of the United Kingdom still in lockdown and people unable to purchase their usual items for loved ones, I have decided to write this blog post to help people out. Mother’s Day is a special day for everyone who is classed as a Mummy, whether that is to furry children, human children, step children or children who may still reside inside us. It’s for Grandmothers, Nan’s and Great Grandparents too don’t forget, so why not make a loved one a card and let them know you’re thinking of them.

I have several ideas that should suit most people, because Mother’s Day Cards are usually floral or feminine, but you can personalise your design to fit the people in your life. If you can draw then even better! I’m not very good at drawing so I prefer to use paper and card to create pretty cards instead. This blog post is all about how I make cards using coloured card and paper.

WHAT YOU WILL NEED

Coloured Paper and Coloured Card
A Pencil
Items to Draw Around – to make the Circles for the Flowers
Scissors
Coloured Pencils or Crayons if you are Drawing
Pens – Mixed Colours and Thickness
Glue or Sticky Tape
Ruler
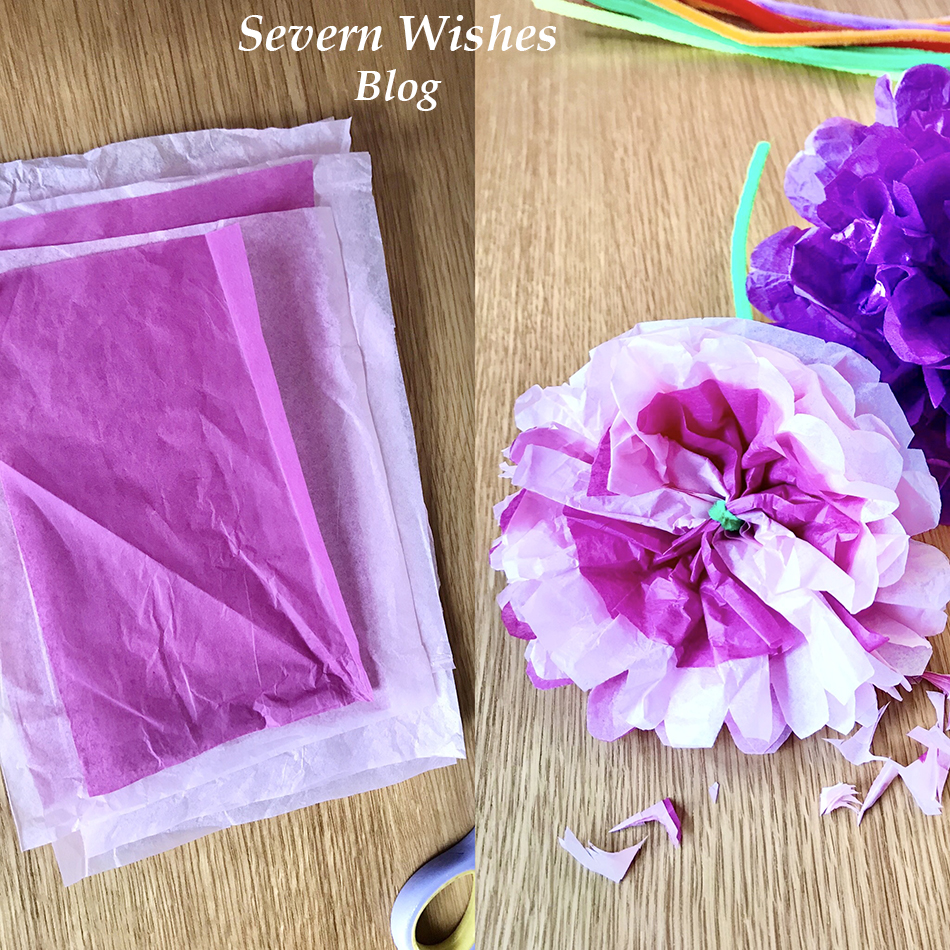
Coloured Tissue Paper
Pipe Cleaners

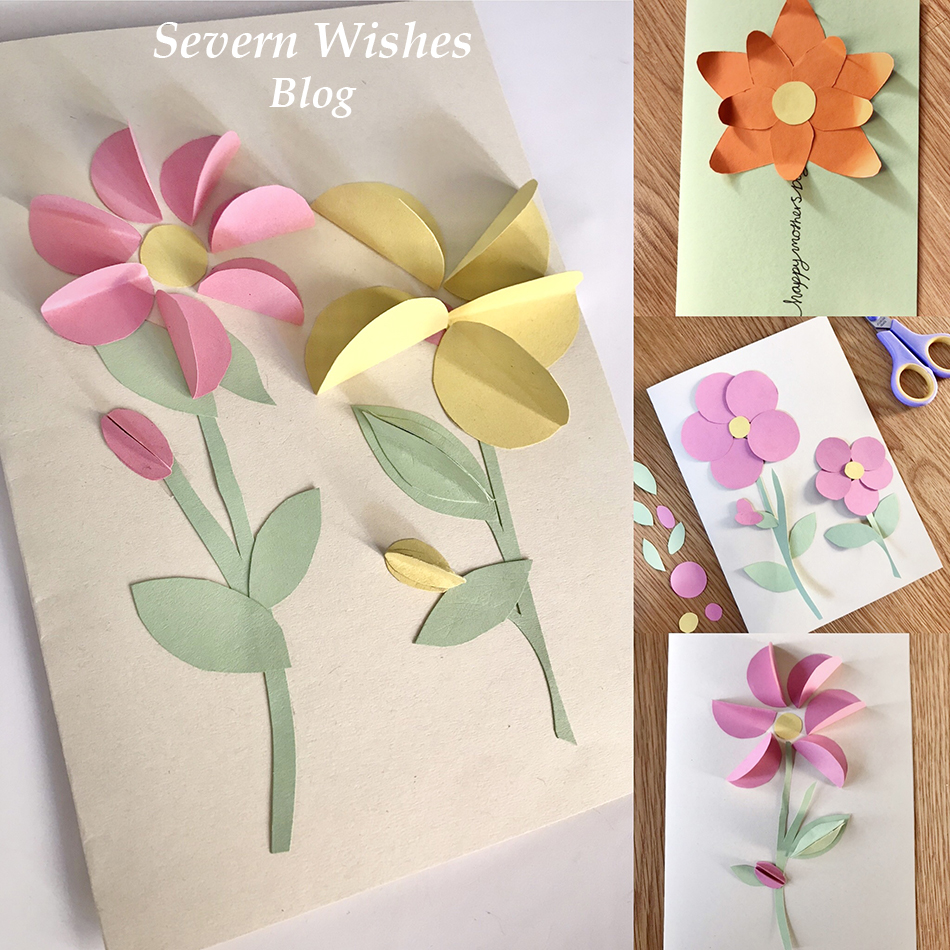
HOW TO MAKE YOUR CARD – 3D FLOWERS

Step 1. Take a piece of pale coloured card and fold it in half to get your card shape. Decide if your design is going to be a landscape or portrait style.


TOP TIP 1. When you come to make your shapes maximise the paper by doing them close to one another and along one edge. It makes it easier to cut them out but also and more importantly you’re not wasting any of the paper, and the leftovers can be used on your next awesome project!

Step 2. Draw around circular items in order to make your petals. Carefully cut them out and then fold them in half to create your three dimensional petals.


TOP TIP 2. The ideal size for the petals for an A4 Card design (an A5 when it is folded) are the size of a Nail Varnish bottle. Draw around the base of the bottle when it is stood up on the card. Another tip is to cut out one shape and use that as a guide to cut out the other petals so you get them the same size.

Step 3. Arrange your design on the Card first before gluing anything down, so as to make sure it all fits nicely.


Step 4. Glue or Stick the Card pieces down and finish decorating with any details or wording that you choose.

HOW TO MAKE A TISSUE PAPER FLOWER

You Will Need;
A Coloured Pipe Cleaner
Sheets of Coloured Tissue Paper

Step 1.
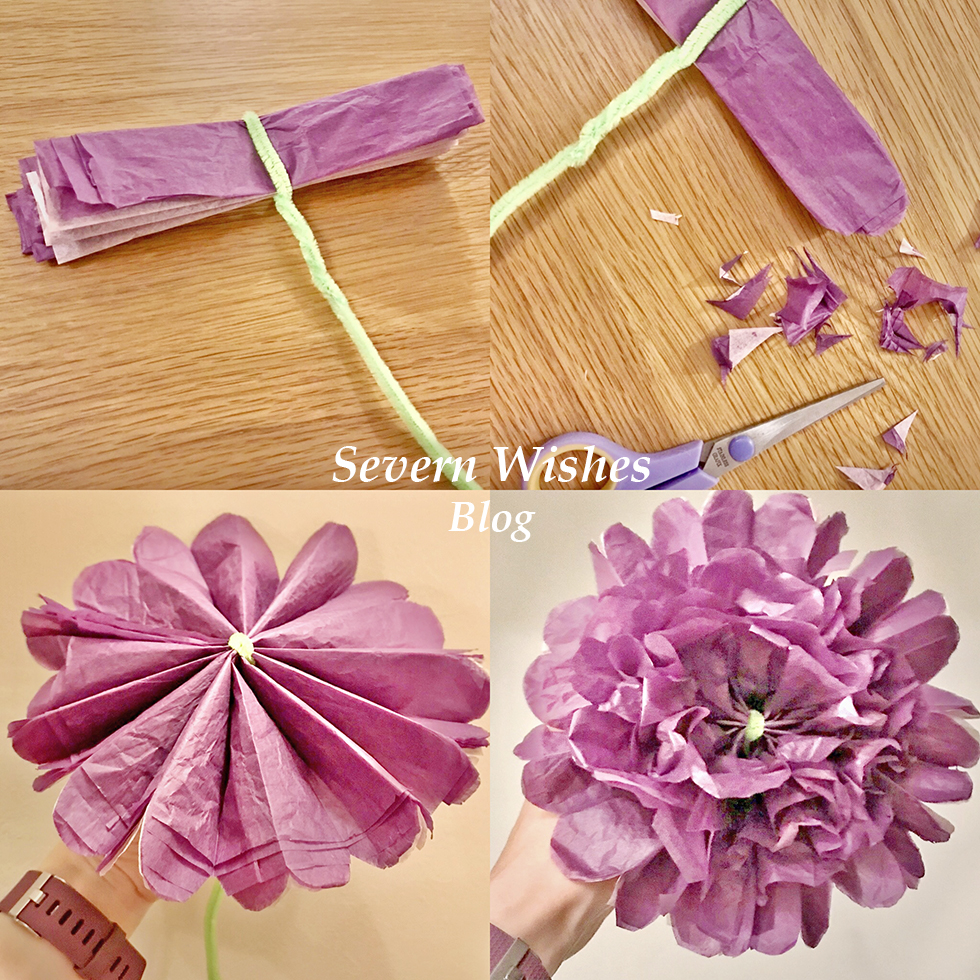
Lay out your tissue paper flat, you want to cut it into equal rectangles. Once cut you stack them one on top of the other.

Step 2. Fold the tissue paper stack into a concertina, like a fan, until it is all folded and flatten it down. Stick the pipe cleaner in the middle, folding it over and under the stack, then wrap the remainder of it around.

Step 3. Next you need to trim the edges of the tissue paper, you can round them off or make them pointed, it depends on how you would like your flower to look like at the end. This determines the shape of the petals of your flower.

Step 4. Once the ends are trimmed lay the flower concertina across your hand with the pipe cleaner part pointing down. You want to gently and carefully tease the layers of the flower up and out. Once they are all up spread them out and make it look like the petal layers of a real flower.

(There is a video tutorial on this on my Facebook page as well).

Check out my images below!

My Tips for Opening your Flower: Open the tissue paper out gently and carefully, you should start to see a fan shape at first, and then you can raise the inner layers of the flower, just start by pulling upwards towards the middle part where the pipe cleaner is so as to make the flower look three dimensional.

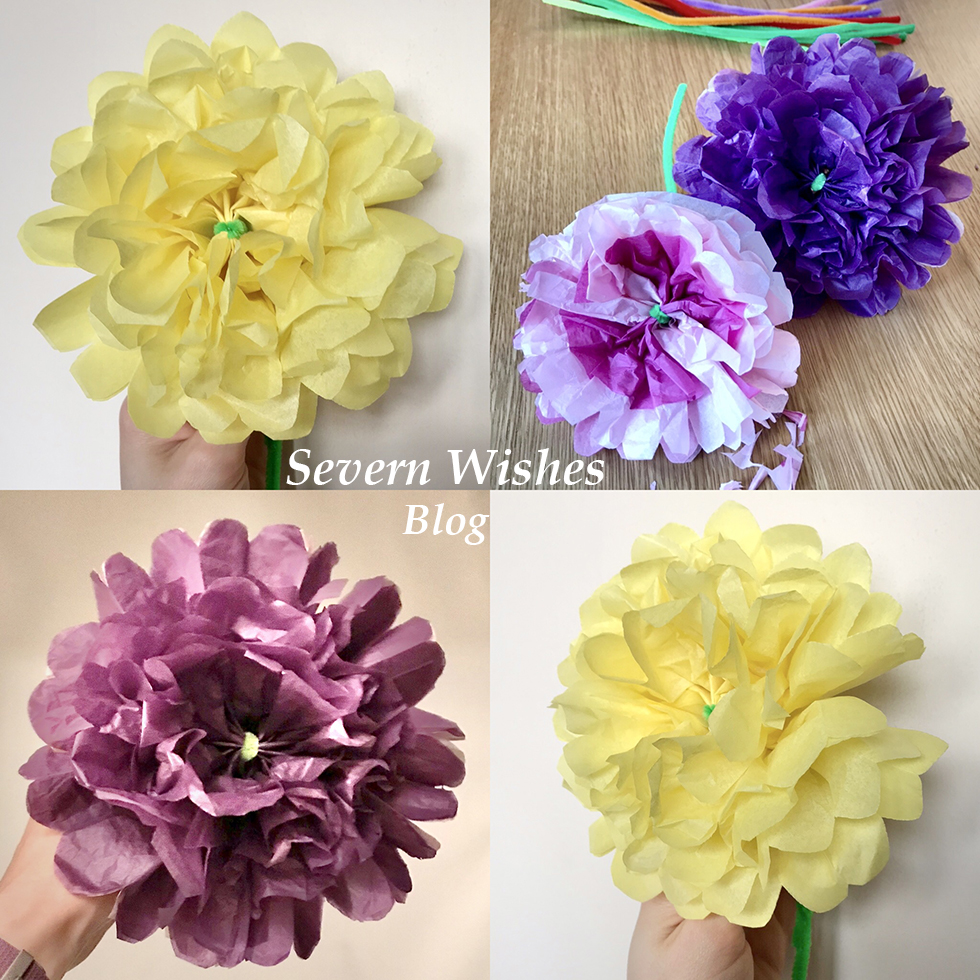
Step 5. When you are finished it should look like my images below. Bend the pipe cleaner a little to make it look like a flower. Fan the petals out gently to make it three dimensional.

Paper Flower Dimensions

It depends upon how much you trim on the ends to create the petal shapes of your flower, but here are some rough dimensions of the size that your flowers will be. The larger the flower the easier it is to fluff up. Why don’t you experiment like I have below with different shaped petals and layering different colours of tissue paper too!

Rectangle Size 20cm equals a 17cm flower
Rectangle Size 15cm equals a 12cm flower
Rectangle Size 7.5cm equals at 7cm flower

HOW TO MAKE YOUR CARD – Happy Mother’s Day – Their Favourite Flower or Favourite Item

Step 1.
Work out what your loved ones favourite thing is, then you want to write the words Happy Mother’s Day either vertical or horizontal on the folded A5 card. You incorporate those words into the item, such as the stem of the flower, or the base of an item like a slice of cake. (See my photo below for inspiration).

Step 2. To make a flower you need to cut twelve identical coloured card petals. Layer them up on the card to make the flower, don’t forget the middle bit either.

TOP TIP 3. If you want the petals to all be the same cut one and then use that one to draw around to make the additional ones.

Step 3. Other things you could do include a slice of cake with a triangle piece of card decorated with smaller shaped pieces. Or draw an outline and let smaller children colour them in.

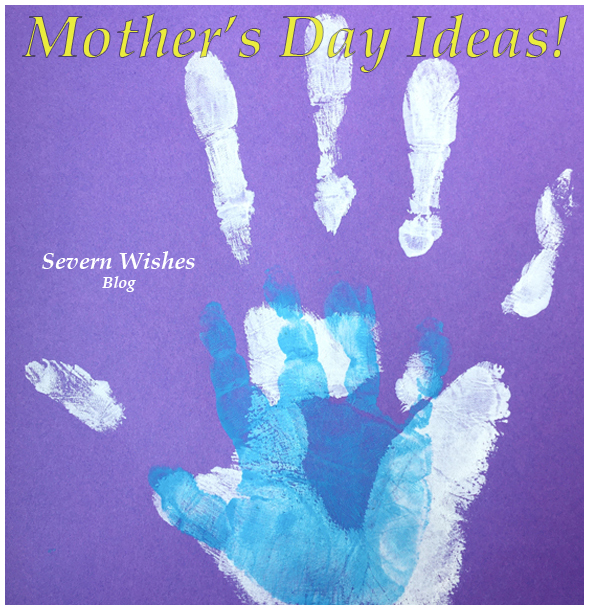
Another easy thing to do is a card of family hand prints.

Other Card Designs that are Easy to Achieve are…

Flat Flowers
Three Dimensional Flowers
Drawing Bouquet of Flowers
Family Hand Prints
Cake Slice Drawing
Favourite Animal

Use a Ruler and Pen to make the stem lines and the bow, colour them in with pens and draw little flowers on the end of the stems. I did daisy like shapes, but if you can draw better then me be creative with it! Do any colour combination that you like. Add some wording around your design like “Happy Mother’s Day”.

I really hope that you have enjoyed this blog post and find it beneficial. If you do make some cards I would love to see them! Please tag me on any of my social media using the hashtag #SabrinasArtandCrafts

Thank you and I wish you all a lovely Mother’s Day.

✩ Sabrina ✩

Sabrina’s How To Make Your Own Unique Gift Tags This Festive Season

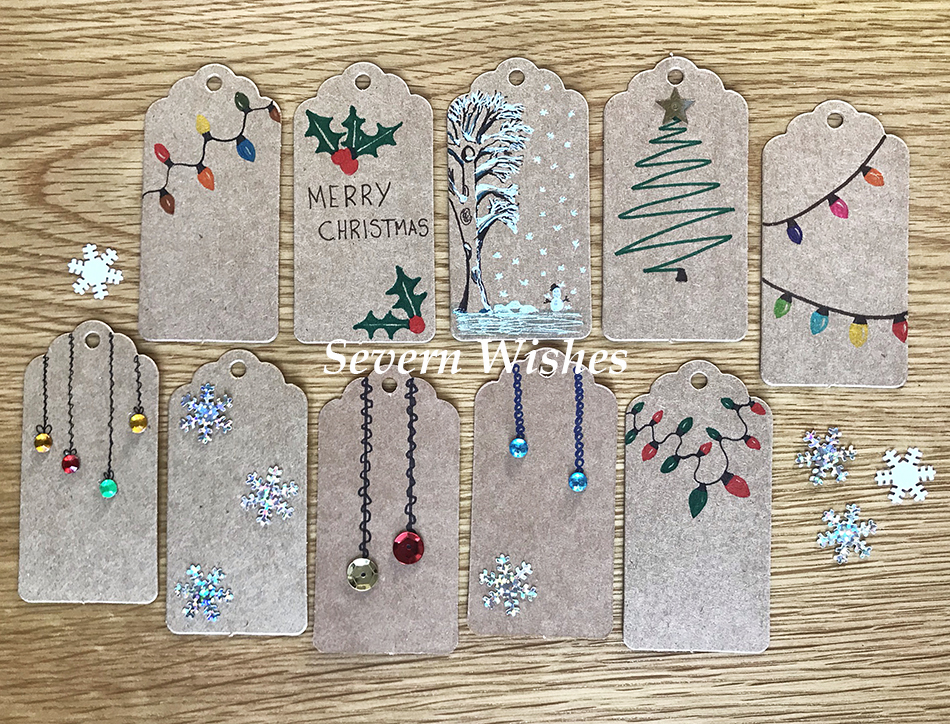
I have always had some creative flare, but one thing I had never done before was to make my own Christmas Present Tags! I came up with lots of ideas while spending time at home.

I took the plunge this November and ordered the things I would need to design them. I already had two awesome sets of Staedtler Pens in both fine line and bold. I also had various sequins. But I needed the tags and the string. I tried my best to use natural string and cardboard that was made from recycled materials.

What you could do if you can’t get any of these brown tags, is to cut up some old Christmas Cards and make them into similar shapes like these, add things like sequins in order to sparkle them up.

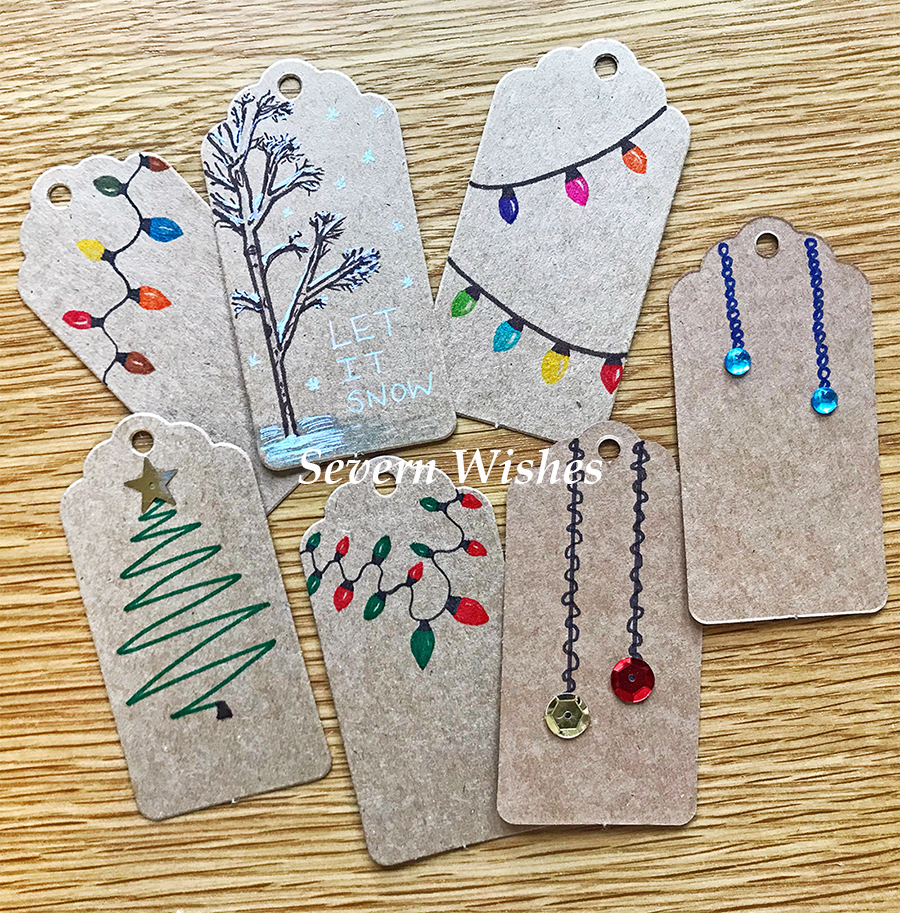
String Christmas Lights

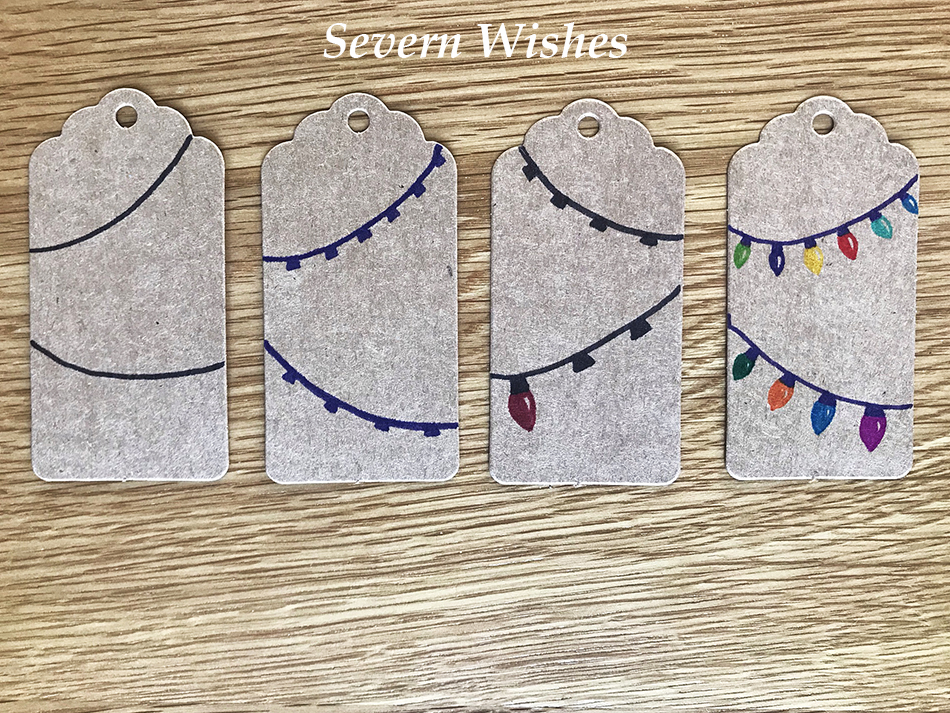
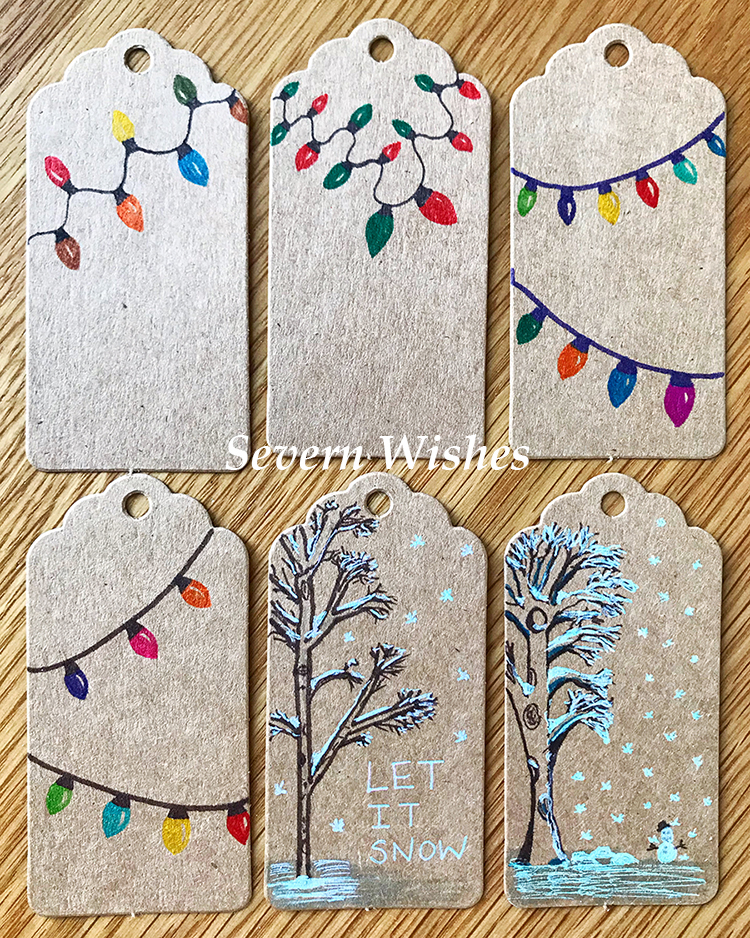
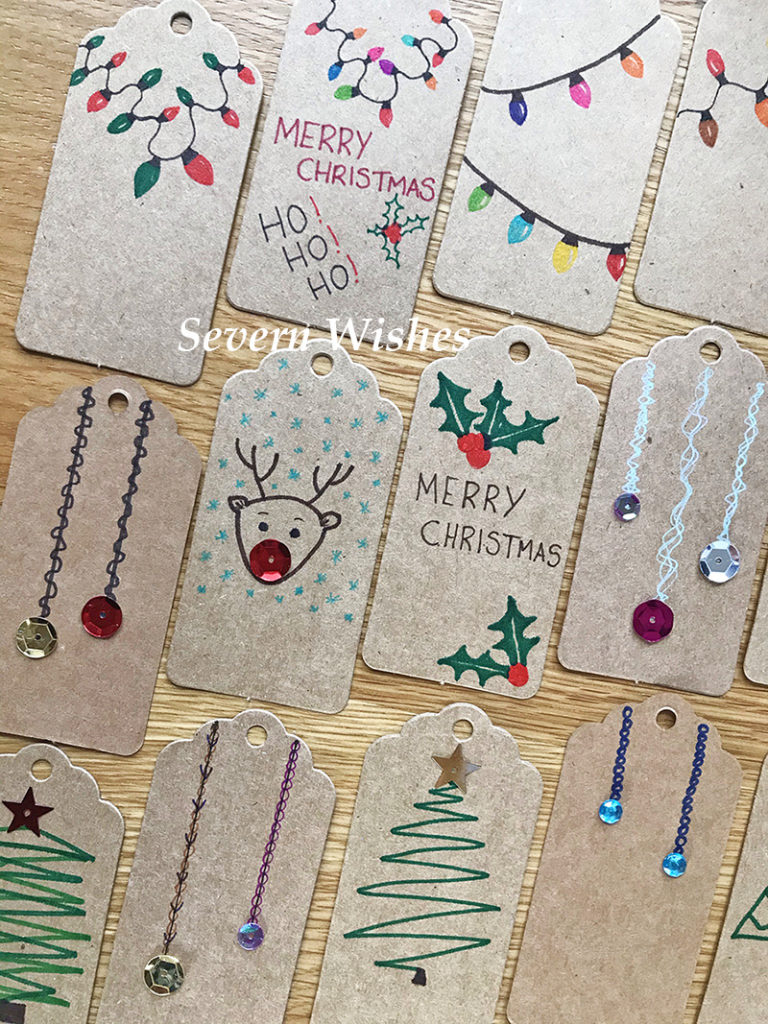
The easiest of all my tag designs to make, you will need both thicker pens and fine pens of the same colour. The trick is to create the light shape with the finer pen and then colour it in with the same thicker style pen after. Make sure you leave the small crescent shape on one side of each light bulb so it looks three dimensional.

Begin by drawing the lines and bulb attachments with one pen, dark colours work best for this part. Then choose the pen colours you want for your bulbs. Ensure you don’t put the same shades next to one another and alternate colours like Red and Green for a Christmas look.

The size of your bulbs will depend on how many you want to do across your tag. If it’s just lights and no writing then you can fill up the space. If you plan to write “Merry Christmas” for example then perhaps do the lights top and bottom of the tag and leave the middle area blank.

Check out my images for some inspiration. Give it a go on a piece of plain paper and decide which way to do your bulbs, before doing them on to a tag.

Snow Scene with Tree

If you aren’t very good at drawing then you can still achieve something like this tag, just take your time and follow my instructions.
Check out my videos on my Facebook Page too!

You need a brown pen, the finer the tip the better, and you want to start by drawing the outline of your tree. Fill in the branches afterwards, getting smaller to the ends. Next to add a 3D aspect to your tree draw circles for holes and darken undersides of larger branches and the trunk to add shadows. Use a silver, white or light blue mixture of pens now to create the snow. You could do a snow scene or just do the tree. Be creative and have fun! Look at mine below for some inspiration.

The Christmas Tree

I quite like the abstract or deconstructed Christmas Tree type of tags. Mainly because when I try to draw symmetrical and lifelike trees they never look quite right. If you’re good at drawing trees however, then putting one in the centre of a tag would look really great!


Use a nice dark green pen for your tree. Add either stick on crafty bits and pieces or draw on some festive decorations, or do a bit of both! PVA glue is best because it will dry clear! If you want to do a more 3D tag then glue dots or adhesive squares also work well too.

Me on the other hand, I prefer to do the continuous line and have a sequin star on the top, kind of a tree!

Christmas Sparkle

If you have various diamanté, sequins or sparkles you want to use on your tags then you need to come up with designs that suit them. Check out my tags below for some ideas. Hanging decorations or bauble type designs work best for rounded craft items.
Think about when items hang on a tree, what they look like. Window decorations like a line of hanging stars or snowflakes are also very nice.

Sequins can be used on their own or accompanying pen lines.
Use your imagination and design your thoughts on a piece of plain paper first using a pencil, once happy with it, you can then transfer the ideas to a tag.

You can purchase the brown tags in most craft shops, online at places like The Works, Hobbycraft and Amazon. Try and pick ones that are already made from recyclable material.

I had previously bought my pens online from Amazon, Sequins from The Works and my Glue is also from The Works too. Other crafty items have been purchased by me over the years from various shops and also Tesco superamrket, they had a nice range of sequins this year too.

Other fun tags include, “Merry Christmas”, Holly, Baubles, Rudolph, Robin, Christmas Trees, Christmas Lights, Snowflakes, Snowmen, Santa Claus, Snowy Scenes, Penguins, Stars and things such as “Ho! Ho! Ho!” and “Let It Snow”.

Thank you for reading this post today, if you do give making Christmas tags a go then I would love to see them! Tag me on social media using the hashtag #SabrinasChristmasCrafts

Have a great Christmas!

✩ Sabrina ✩

You can see my tutorial videos on my Facebook page here…

Fun Easter Crafts

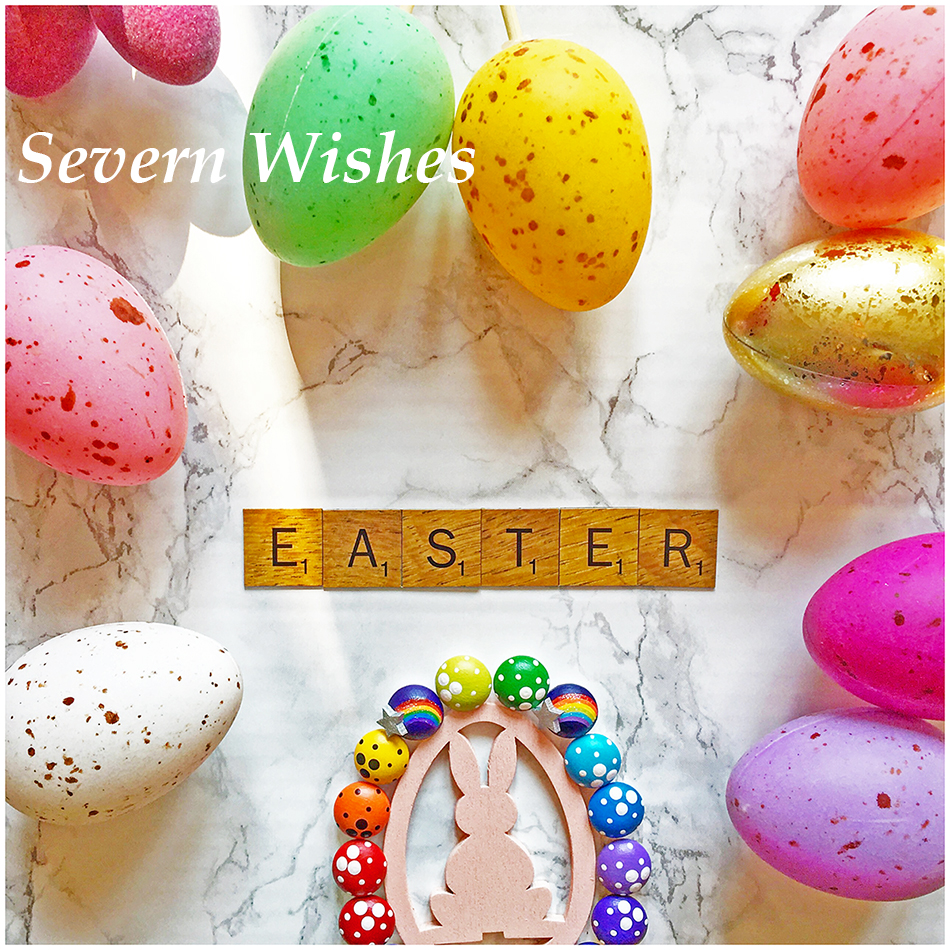
HAPPY EASTER FROM SEVERN WISHES

Fun to Make ~ Easter Art and Crafts ~ with Sabrina of Severn Wishes

I have wanted to do this blog post for the last three years, and I have always been too busy to complete it! Mainly because it is a mixture of writing the blog, creating and making the craft items, and then taking the step by step images, processing all of those and then putting the entire lot together in one blog post. It is both time consuming and a lengthy in process too. So what changed this year? Well for one thing, I was more determined to do some more craft this year, but isolation has also made me re-evaluate what’s important, and that is to make happy memories with my son. No matter what is going on outside our home, he doesn’t understand, and it is my job to keep things as normal as possible, so extra fun, extra learning and extra memories are all on the table at the present time. I’m so glad you could join me to hopefully make some memories of your own!

So without any further ado, let’s get our crafty fingers at the ready! Depending upon which Crafty Project you wish to undertake you will need a variety of items. My idea is this, pick an item from the four below, and then match the “You Will Need” items with what you already have at home. Providing you have all the necessary bits and bobs then feel free to scroll down to that Project and then get cracking with my Step by Step guides! Happy Crafting!

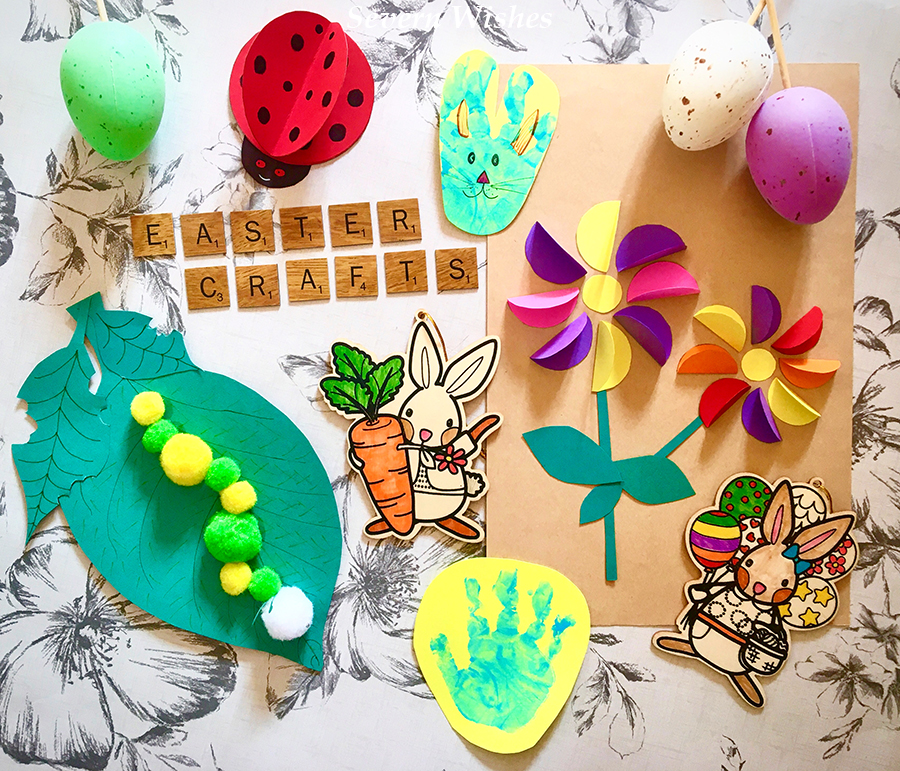
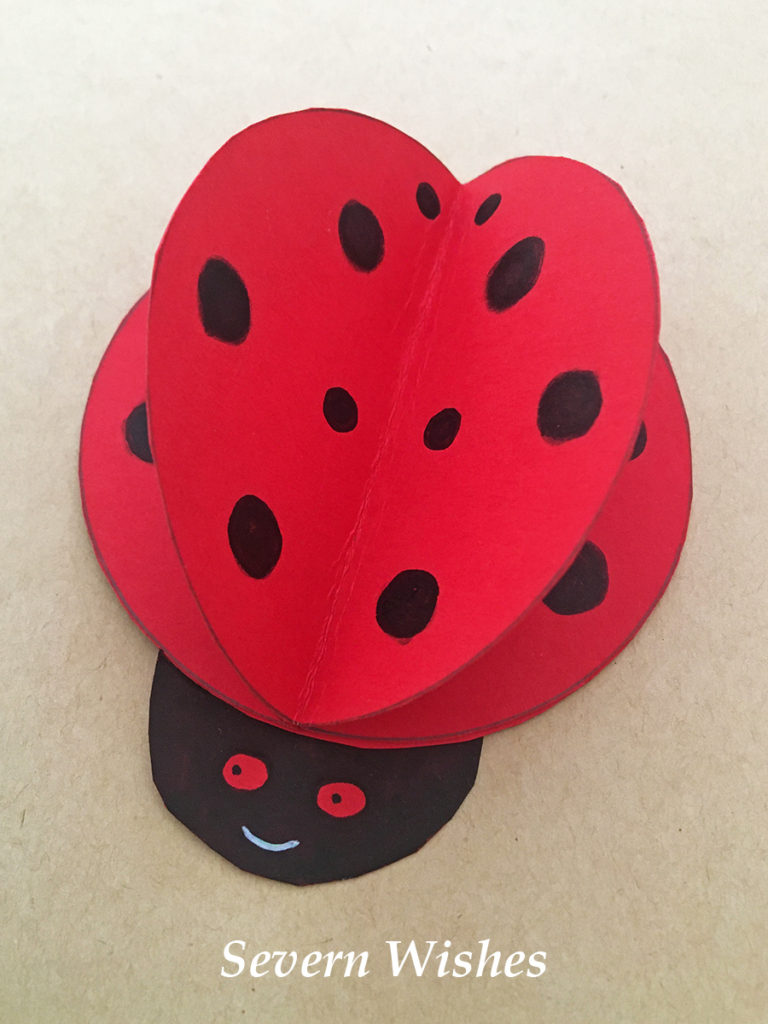
1. 3D Friendly Ladybird
2. Wiggly Caterpillar
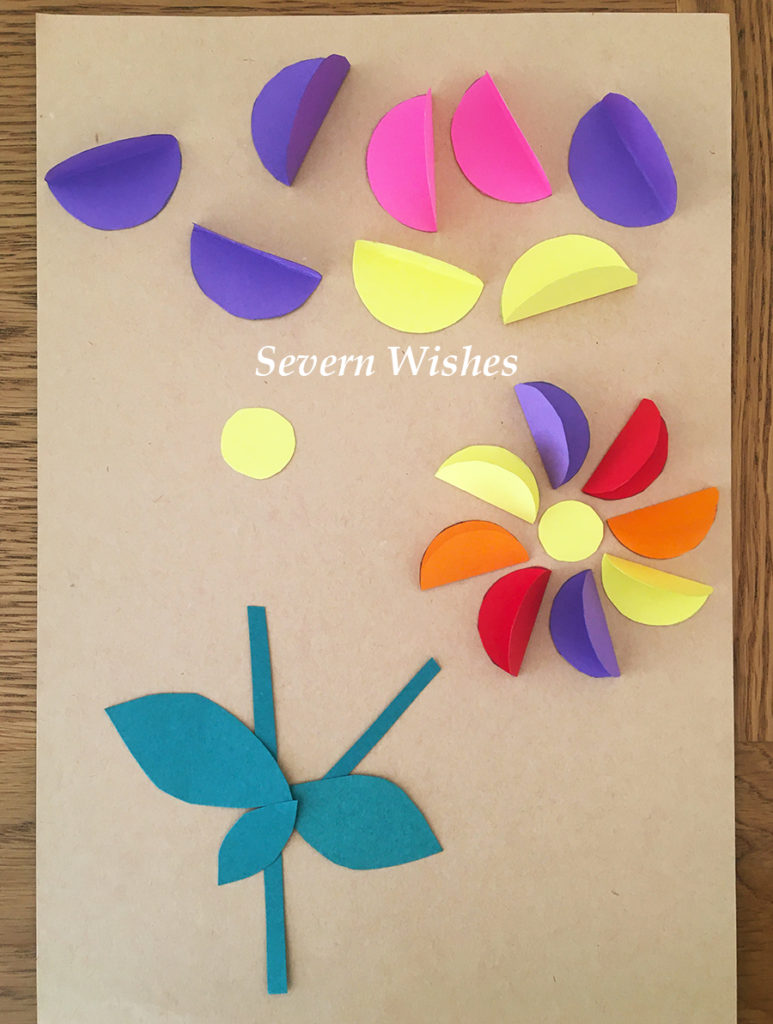
3. 3D Paper Flower (Can be Framed or Made into an Easter Card)
4. Hand Print Easter Bunny Rabbit

5. Other Craft Ideas

1. 3D Friendly Ladybird

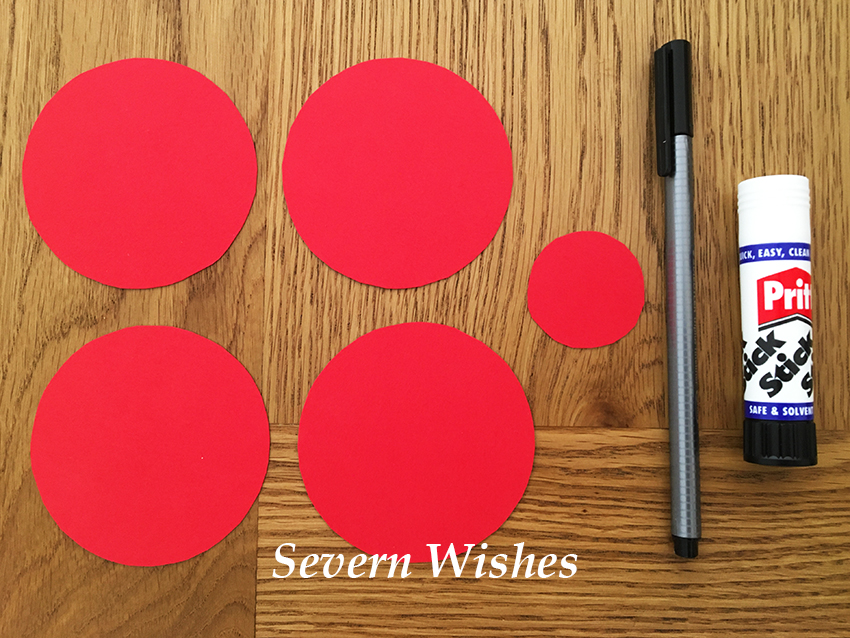
You Will Need
Pritt Stick or Glue
Coloured Paper and / or Card
Circular Objects to Draw Around (This will determine the size of your Ladybird)
Pencil
Scissors
Black Pen
Googly Eyes (if you have some but not essential)

This is the easiest of my crafts today, and will take around twenty minutes to make. You can make it any size, any colour that you like. Why not make one for each member of the family? I am going to make several of them to put around my son’s bedroom. He loves Gaston from Ben and Holly’s Little Kingdom, so my son is the inspiration behind this particular craft project.

Step 1. Choose the Size of your Ladybird. Choose your colour. Draw around a Circular object so that you have 4 Circles the same size, and then you will need a smaller circle for the head, judge this depending upon the size of the body. Cut out these 5 circles and then you’re ready to begin.

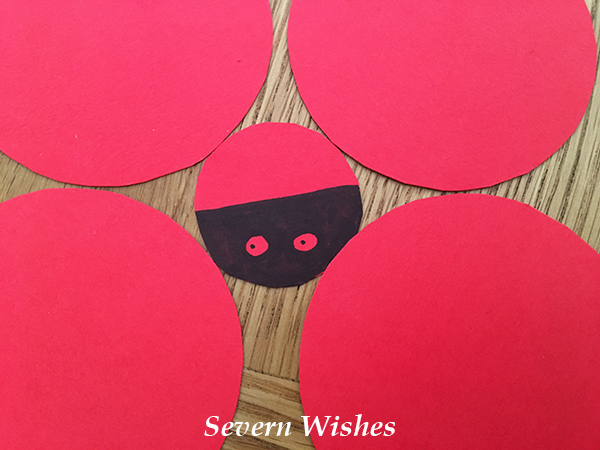
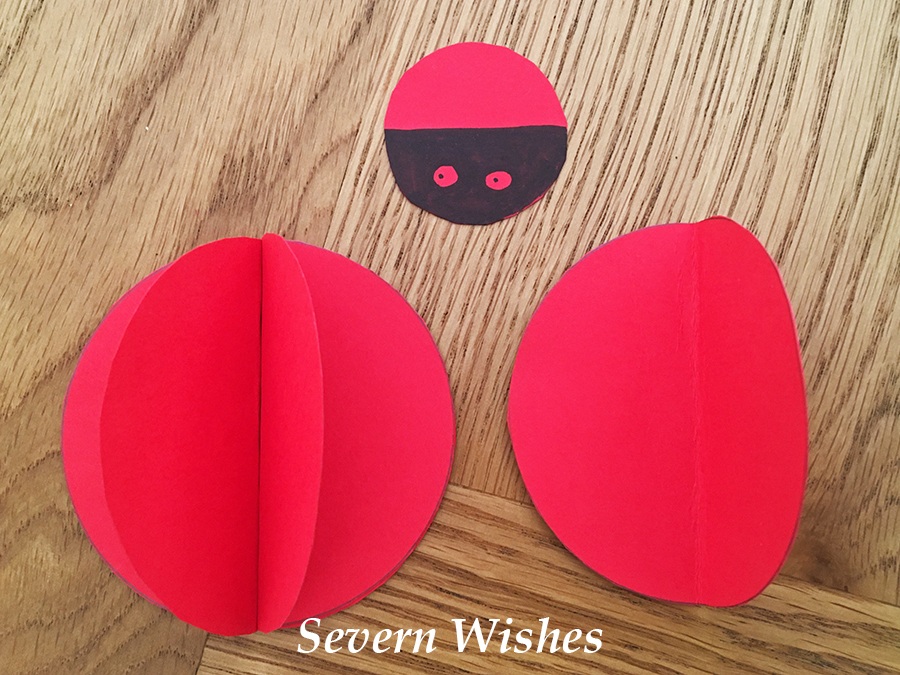
Step 2. On the small circle draw a line across the centre, you want to colour the half of this circle in with black pen. Don’t forget to draw eyes on it too like mine, if you don’t have any fun stick on eyes to hand! Then pop this face to one side you won’t need it now until Step 6.

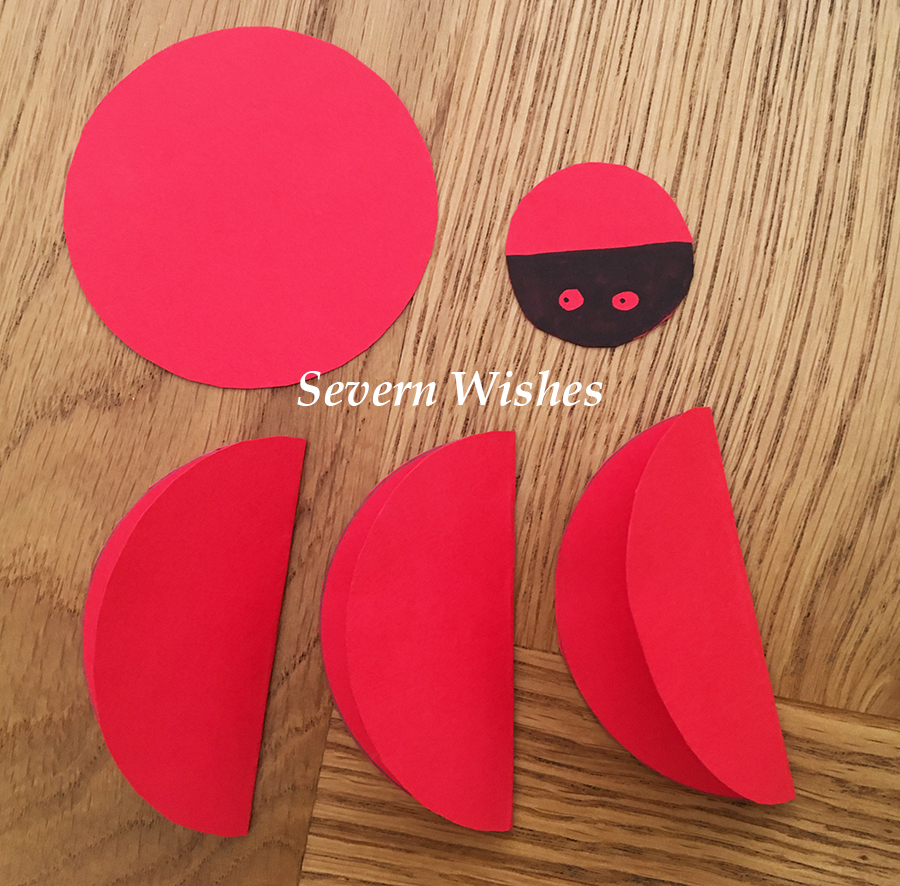
Step 3. Take 3 out of the 4 Large Circles and fold them in half across their centre. Gently crease them with your fingers, take a look at my image below to see how they should look.

Step 4. Take the flat circle and cover it lightly in glue or pritt stick, I always prefer a glue stick when messing with card, less mess! Then take two of your folded circles, stick glue on their side that faces flat, place them back to back and glue them down on to the flat circle so that they make a V shape.

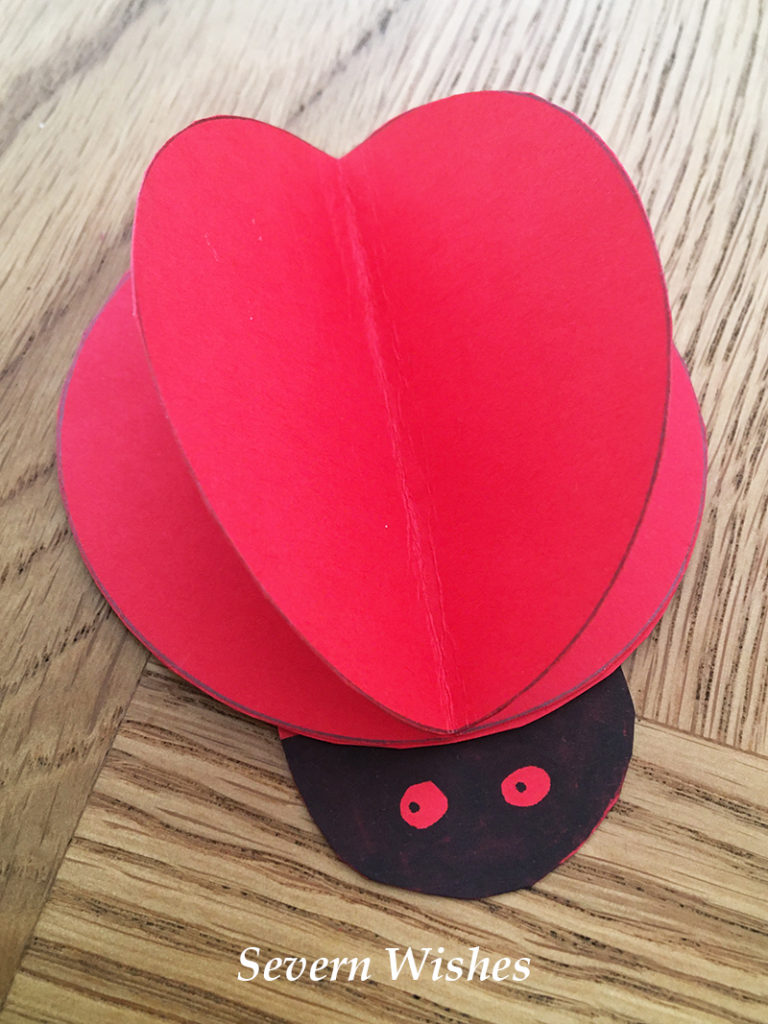
Step 5. Take the remaining Circle that is folded in half and cover it in glue before pressing it down into the centre of your Ladybird body, covering the two below neatly. You now have a finished insect body.

Step 6. You can now glue the head on by placing the glue on to the half you didn’t colour in, make sure you line it up with the V of the Ladybird to make it look right. See my image below.

Step 7. Push down all the flat surfaces of the Ladybird and leave for an hour or two for the glue to dry. Then using a Pen or Marker, draw on however many Spots you would like.

Step 8. Repeat steps for making other colours or other sizes if you have Card or Paper left over. If you need a base for your Ladybird to sit on, why not make him a cardboard leaf! (You need leaves for another of my crafts anyway!) 😉

CRAFT FINISHED

2. Wiggly Caterpillar (munching on a leaf)

You Will Need
Pritt Stick and PVA Glue
Green Paper or Card (Card is better)
A Mixture of Green and Black Pens
Poms Poms! All Colours Welcome!
Googly Eyes or Stick on Sequins
Scissors
A Pencil
A Piece of Cardboard (Cereal box is good!)

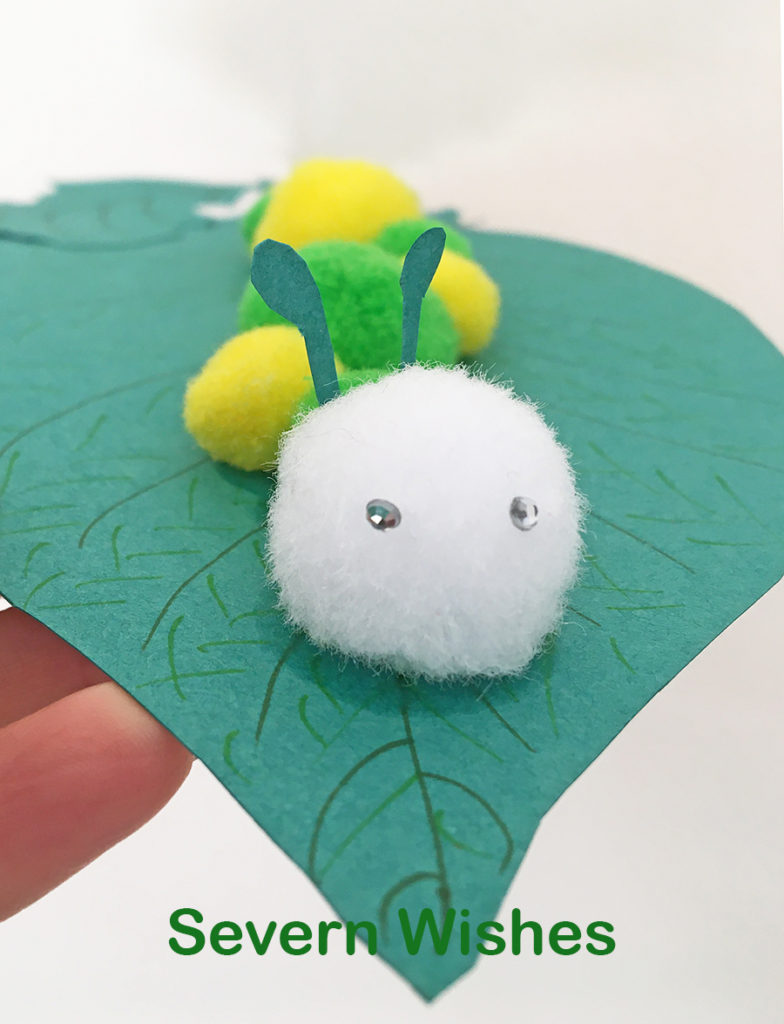
This is a fun craft to do with young children. They can make their Caterpillar whatever colour they want. All you need is some Pom Poms! You can follow my Steps or watch my video below!

Step 1. Draw and Cut Out a Leaf Shape (this is your main leaf) from your Cardboard. Then draw around this cut out piece of cardboard on to your green paper or card and Pritt Stick together.

Step 2. Draw your Leaf design on with Green pens. Set to one side.

Step 3. Decide what Pom Poms you want to use and arrange them!

Step 4. Make some antenna and extra leaves and stick your eyes on to a Pom Pom ready to assemble your bug!

Step 5. Using PVA glue stick your Caterpillar together, don’t forget the extra leaves, arrange however you wish, then leave to dry in a warm flat place.

Step 6. Add any additional things to your bug once it has dried.

Caterpillar Video

3. 3D Paper Flower (Can be Framed or Made into an Easter Card)

You Will Need
Pritt Stick or Glue
Different Coloured Cards or Papers
A Piece of Card for Sticking to
Scissors
Pencil
A Circular Object to Draw Around (it’s diameter will be half the width of the flower so choose wisely)

This idea is simple but looks so pretty when complete. It makes a great card.

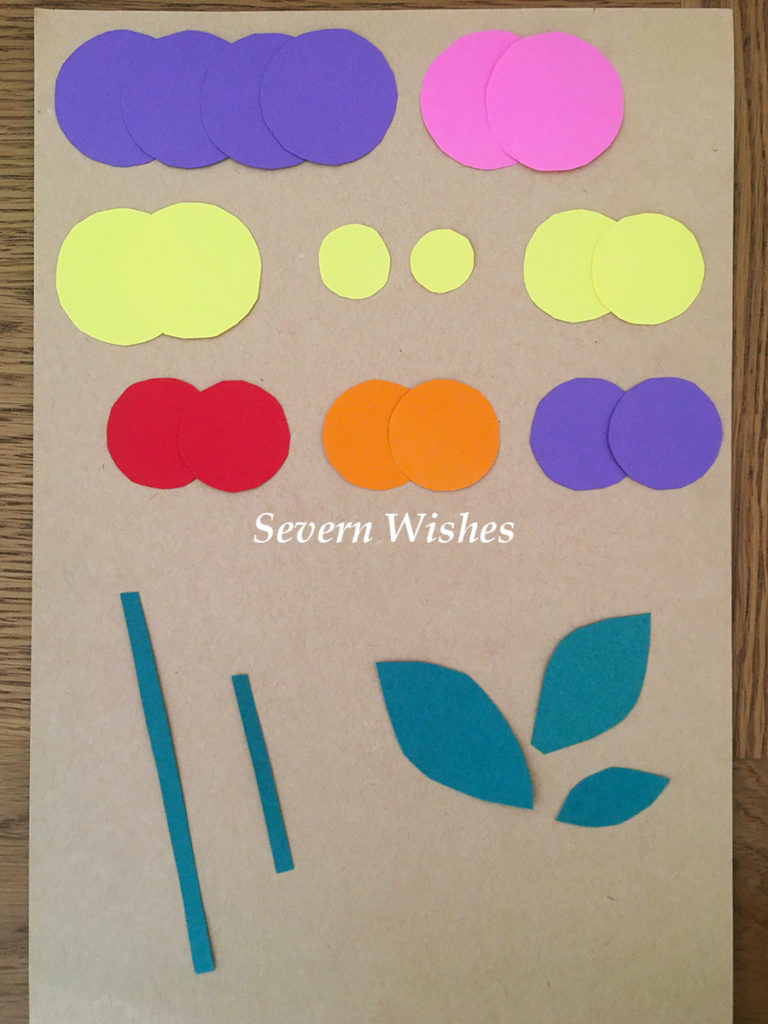
Step 1. Take a piece of plain card, this will be your base. Draw a Stem or Cut Green Card or Paper and create one. Make sure you leave plenty of room to stick the flower part. Cut out leaves and small circles of yellow paper to create the centre of the flowers. Be as creative as you like.

Step 2. Making the petals next, you need to cut circles of different colours, you will end up with 8 Petals in total per flower. I did two different sized circles to end up with two sized flowers.

Step 3. Fold all of the petals in half so you end up with 16 halves with flat sides that stick up. This is how the petals will look 3D.

Step 4. Using Pritt Stick, stick the sides of the petals down so that they rotate around the centre of the flowers. You want them all to face the same way when you stick them around the yellow centre.

Step 5. Turn the flowers into a card if you like, or make other smaller flowers too using smaller circles, and make a pretty Easter meadow scene picture. Draw or Stick Easter Eggs and Rabbits and other Easter items along the edge like an Easter scene.

4. Hand Print Easter Bunny Rabbit

You Will Need

Paper or Card
Pencil
Hands!!!
Pens for the Details
Scissors
Paint

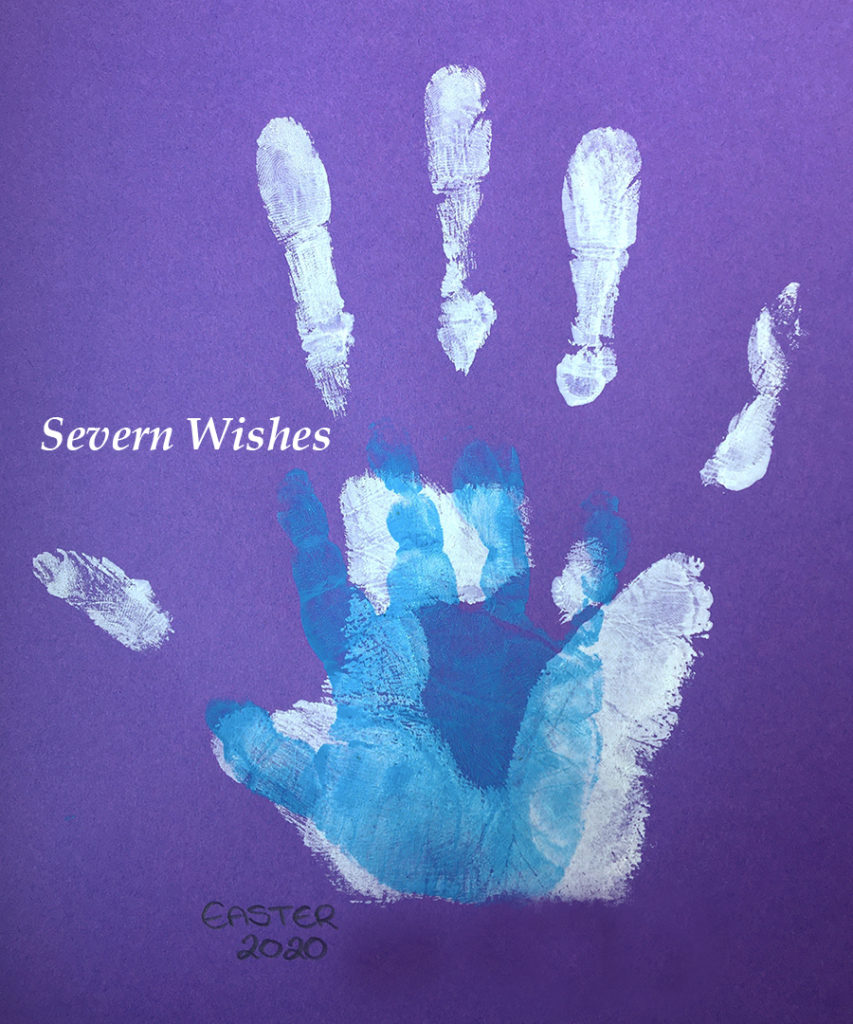
Paint works well for this one so you don’t have to colour in, unless you prefer to colour of course. It depends how much you’re painting, if you plan to do my hand prints picture (below) then you could do extra on different paper and make them into cute Rabbits!

Step 1. Draw around your hand and / or children’s hands. Or you can do a Hand Print on to Paper using Paint! MAKE SURE YOU LEAVE OUT THE THUMB! You want the shape to resemble a Rabbit head with two of each fingers being the ears! Keep two fingers together!

Step 2. Once dry you can cut the Rabbit shape out.

Step 3. Draw on Nose, Mouth and Eyes!

Step 4. Add any extras like whiskers, inner ears and freckles! Cut it out and hang it up or stick to a handmade card if you like.

FINISHED

Not the best hand print but you get the idea! My son was a bit reluctant to help out yesterday, ha ha!

5. Other Craft Ideas
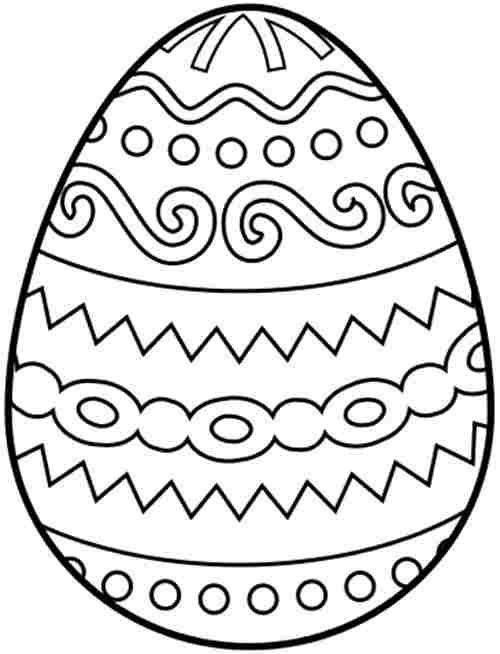
If you want to just Print some Easter Egg patterns and do some Colouring in with younger children then here are a few that I really like that you can save and print 🙂

Alternatively you could do some Painting of Hands and do some Prints!

Layer the Prints of your Hands to make a nice picture.

Thanks so much for joining me for this blog post. I hope that you’ve had fun, maybe even a laugh at my crafty items. If you made something please share it with me on social media, tag me or my page! I would love to see them! What was your favourite? Would you like to see more Art and Craft? Leave me a comment. Have a wonderful fun and safe Easter!

Best wishes from me!

Sabrina

Sabrina’s Tips On How To Make Your Food Go Further

Chicken Stir Fry with Noodles and Peppers

If you’ve been following my blog for a while then you’ll know that food is a huge passion of mine. Coming up with new recipes and experimenting is a hobby of mine. But today, with all this talk about panic buying amidst this deadly virus, I couldn’t help but think, what can I do now to help others…

My epiphany was this! My Ideas On How To Make Your Food Go Further!

There are certain things that most of us keep in our kitchen during week to week shops or our larger monthly stock ups, so I wanted to focus on those to begin with. The issue right now is that due to bulk panic buying some of our staples are very hard to get a hold of. Take a look at the meals below to see if any of them would appeal to you or your family. Then see how you can make them go further with my recipe adjustments.

All of these recipes are my own, so if you wish to recreate one please credit me and notify me on where you have used it, thank you.

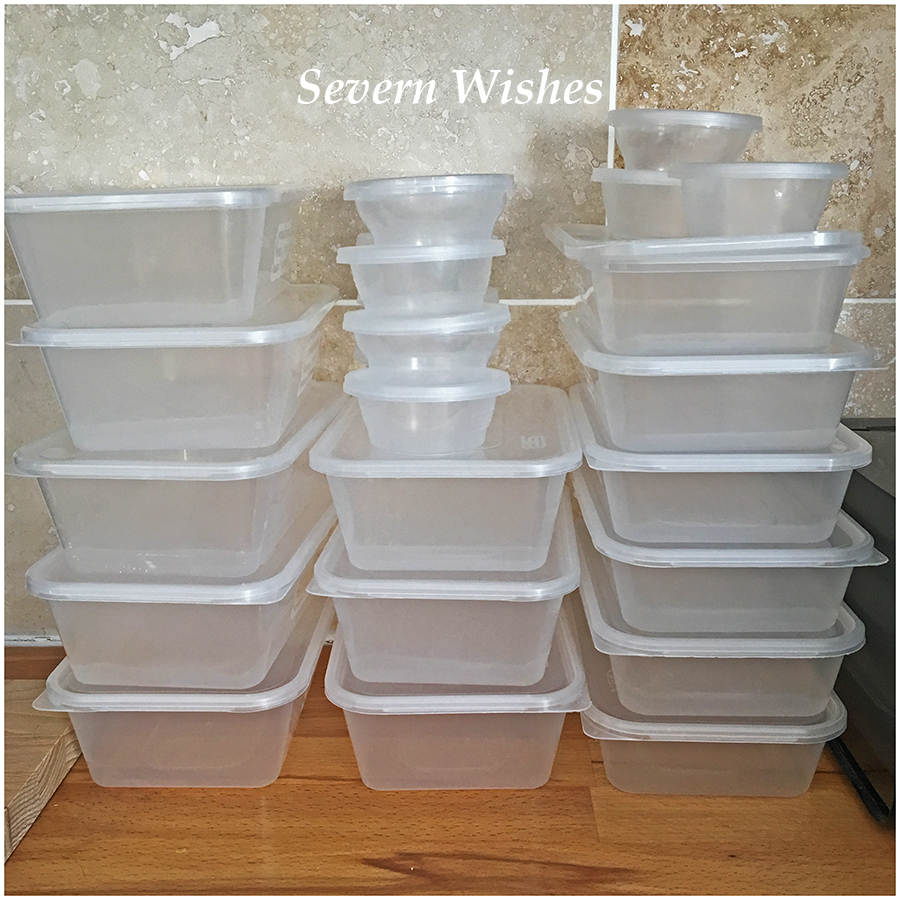
Keep those handy takeaway boxes ready to freeze any leftover freshly cooked meals, extra vegetables or leftover homemade sauces.

Author: Severn Sabrina
Prep Time: 45 Minutes
Cook Time: 40 Minutes
Serves: 4 to 6 people
Allergens: Wheat Flour, Barley and Soya in the Gravy Granules

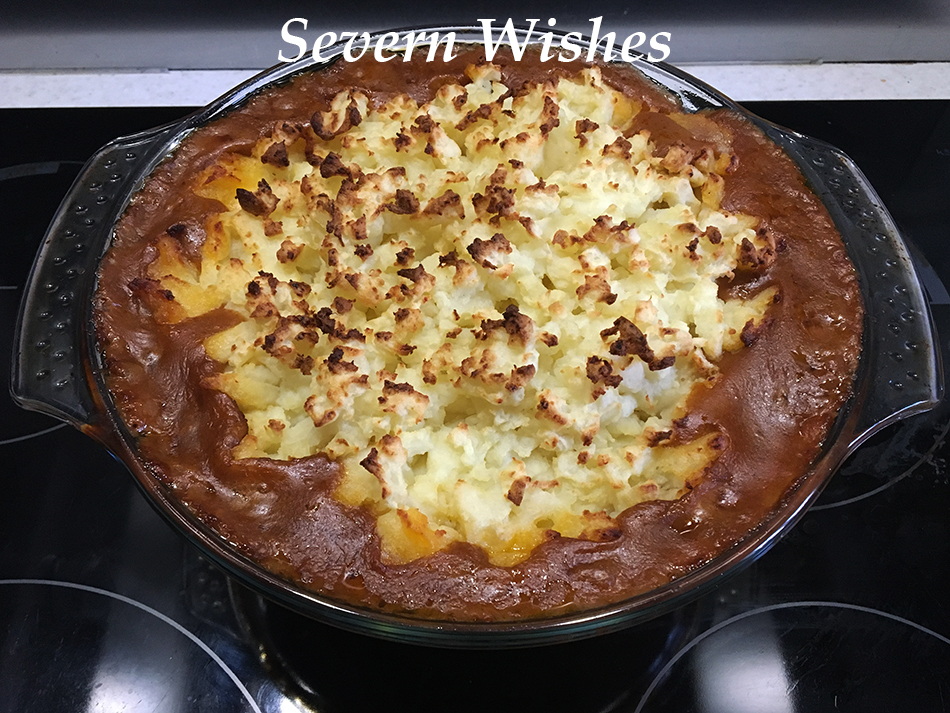
COTTAGE PIE
Serves 4 to 6 people (sometimes with leftovers if its children’s portions)
Ingredients

1 or 2 Large White Onion – Diced
3 or 4 Large Carrots – Diced
500g Mince Beef – Cooked & put through a processor to make smaller pieces
1kg Potatoes – Cooked and Mashed
Gravy Granules – I use the Bisto Onion Gravy Granules
Additional foods to add to make it go further…
Baked Beans x 1 Tin
Mixed Dice Vegetables x 1 Cup
~~~
Most people will have a bag of frozen veg or veg that needs to be used up. Dicing it up small and adding it to your cottage pie gravy is a great way to get extra veg into children as well as help an adult get their 5 or more a day! Same with the tin of beans! Pour off a little sauce if there is lots in the tin, but the tomato sauce actually helps you to get a lovely gravy. The beans bulk out the cottage pie filling while adding your veg in take. You can even add all of this into a large casserole dish, and cook it in the oven for an hour, even the veg if cut small enough will cook in the gravy, locking in all the vitamins…

My Cottage Pie is a family favourite! If you cannot get fresh meat then using a tin of Minced Beef and Onion would work just as well!

Author: Severn Sabrina
Prep Time: 30 Minutes
Cook Time: 30 Minutes
Serves: 4 to 6 people
Allergens: Dairy will be present in Naan Bread if you choose it as a side

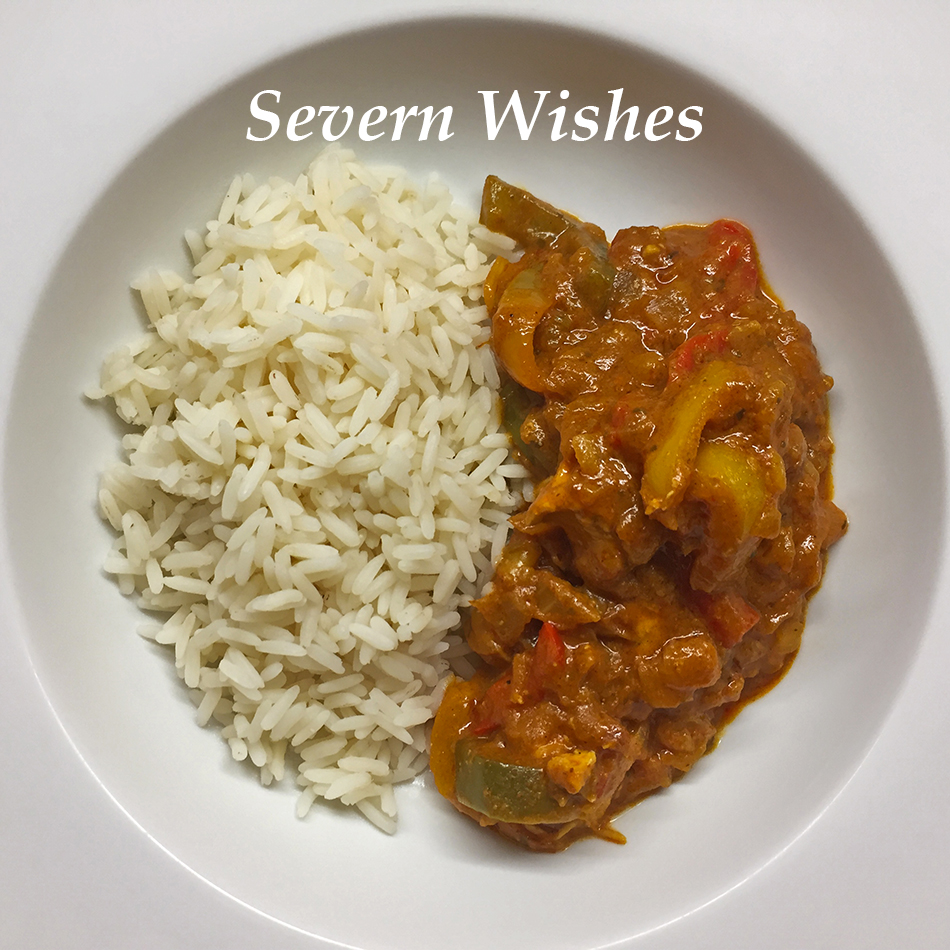
CHICKEN CURRY
(You can use one of my Recipes already on my blog for the method)
Serves 4 to 6 people (sometimes with leftovers if its children’s portions)
Ingredients

2 Large White Onion – Diced and Chopped into two sizes
50g Tomato Puree (this is for your homemade sauce)
2 Tin of Chopped Tomatoes (for your sauce)
500g of Chicken cut into bite size pieces
100g of Yoghurt, I use Dairy Free Coconut Yoghurt
Serve with Rice and / or Naan Bread
Sauce – I prefer to make my own to my taste but you can use a jar of sauce, but if you do use a jar you only need 1 Tin of the Chopped Tomatoes. You then add curry spices like Cumin, Paprika, Garam Masala and Chilli. As well as Garlic and Coriander usually! (See my Recipes for more on making sauce and a method for the curry too).
Additional foods to add to make it go further…
New Potatoes x 1 Tin (They’ll cook in the sauce on a low heat for 20 mins)
1 or 2 Peppers Sliced thinly (fry these a little with your onion then add)
Cauliflower Diced up x 1 Cup (Chopped small it will cook in the sauce)

Here is one of my recent Curry dishes, this one was with extra Peppers and Potatoes

Author: Severn Sabrina
Prep Time: 25 Minutes
Cook Time: 40 Minutes
Serves: 4 to 6 people
Allergens: Check Jar if you purchase a sauce, otherwise none.

CHILLI CON CARNE
Serves 4 to 6 people (sometimes with leftovers if its children’s portions)
Ingredients

2 Large White Onion – Diced
4 Large Carrots – Diced
1 Tin of Plum Tomatoes (they are sweeter but you need to chop them)
1 Tin of Chopped Tomatoes (you could use 2 of these and no plum if easier)
500g Mince Beef or Pork or both – Cooked & then put through a processor to make the pieces of meat smaller – or use Quorn or Soya Mince
1 Tin of Red Kidney Beans
Serve with Rice
Sauce – I use a packet or a jar for convenience but you can make a sauce, you have done the basics with the tomatoes already. So add the tomatoes to a bowl, then add Cumin, Garlic and Chilli to your own taste.
Additional foods to add to make it go further…
Baked Beans x 1 Tin (some people don’t like Red Beans so you could use Baked Beans (Haricot Beans) instead.
Peppers – as many or as little as you like, if one needs using up do it!
Mixed Dice Vegetables x 1 Cup (You can add other basic veg if you don’t have enough or you want to do a vegetarian style chilli).

✩ ✩ ✩

Author: Severn Sabrina
Prep Time: 25 Minutes
Cook Time: 30 Minutes
Serves: 4 to 6 people
Allergens: Check the Jar of Sauce if you buy one.

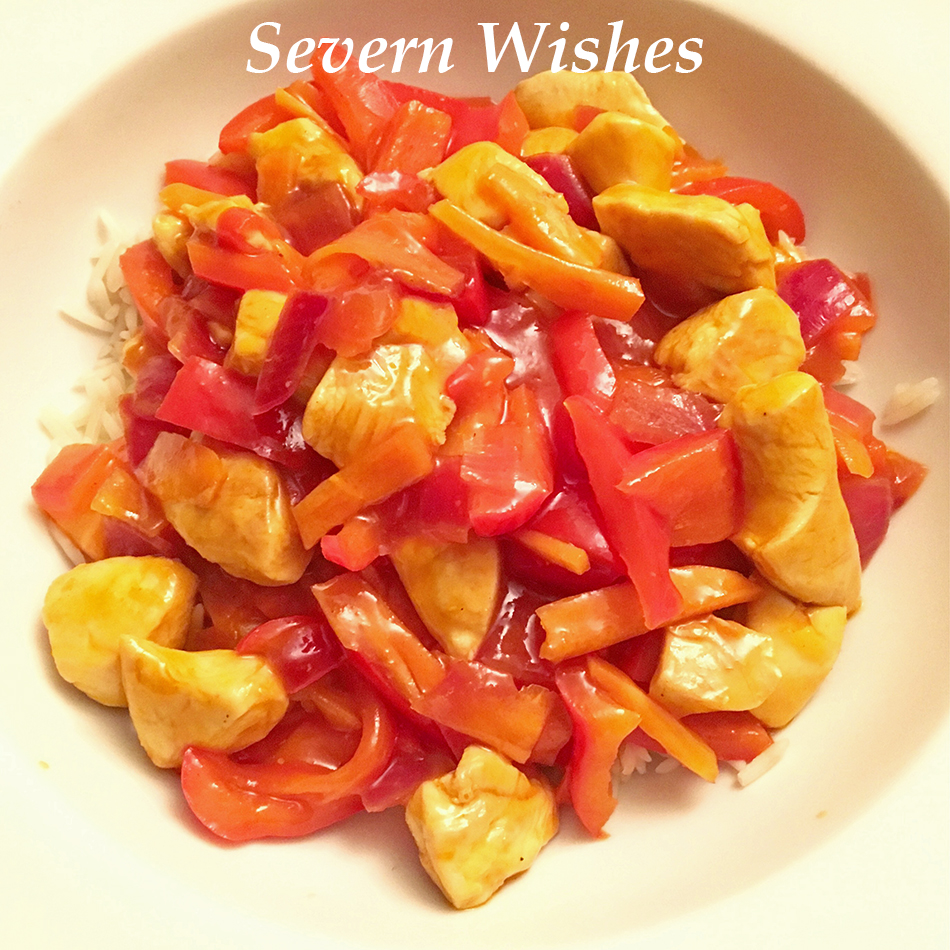
SWEET AND SOUR CHICKEN
Serves 4 to 6 people
Ingredients
500g Chicken Breast (Diced) or a Vegetarian Alternative
Tin of Pineapple – Cut into Small Chunks – 1 Ring per person
Peppers – 1 Yellow and 1 Red Cut into Small Long Pieces
1 Large Onion – Diced into Small Long Pieces
2 Carrots – I Peel and Slice them with the Peeler into long thin shards!
Serve with Rice
Sauce – I always buy a cheap jar of sauce, the cheaper the better!
Alternatives
This dish is so easy to make and these flavours are quite specific, if you aren’t keen on that much pineapple then do one ring total or leave it out but then you should add more of the other ingredients.


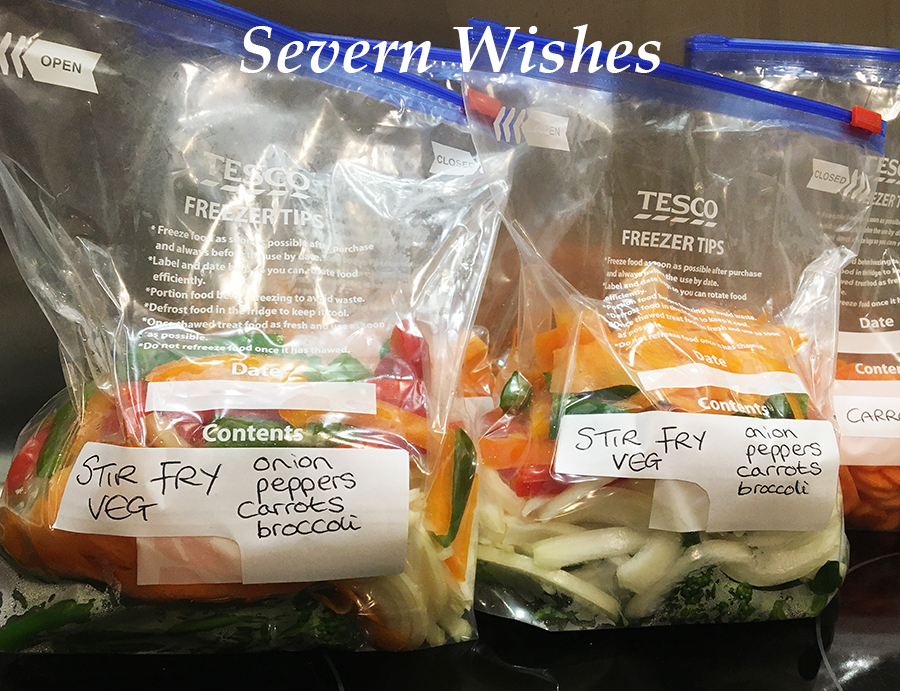
Fresh meat, fresh fruit and fresh vegetables are hard to get hold of in my area right now. When I did a home delivery order most of what I asked for was either out of stock or I was given a substituted alternative closest to what I wanted. This was very inconvenient and I have ended up spending 4 hours in total, chopping, peeling and bulk freezing some of the fresh veg before it went bad. I created mixed veg bags including a stir fry mix!

TOP TIP: Only make a freezer portion size for what you or your family members would eat at a meal time! Then there is no waste when you defrost it to use!

Washed, Chopped and Sliced, Ready to Freeze. MY TOP TIP always squeeze the air out of the freezer bags before popping them into the freezer to save space!

You can make 6 portions of Vegetable Stir Fry using the following raw vegetables, washed, chopped and ready to cook or freeze:
3 Coloured Peppers – 1/2 a sliced pepper per portion
1 Broccoli Head – cut into thin stems
1kg Carrots – I use a peeler to slice mine into strips
1 White Onion for every 2 Portions – Diced into small chunks
~ Add any of the following to make it go further and become 8 portions~
Water Chestnuts – I use Tinned x 1
Bamboo Shoots – I use Tinned x 1

Adding Noodles OR Rice on the Day you make the Stir Fry for extra bulking out of your food. Either use 1 Packet of Stir Fry Noodles once your veg is cooked, or a packet of Microwave Noodles or a Microwave Rice (all down to your preference) and one of these makes this meal double in amount.

Using a bought Sauce or Making a Sauce?

Adding a bought sauce to this stir fry is great, but if you’re feeding more than 4 people then 1 jar is only just enough. TOP TIP: Make sure you add 2 cm of warm or hot water to the bottom of the jar, replace the lid and give it a good shake, add this to your stir fry, no sauce left in the jar and wasted!

Don’t be scared of not using all the sauce, you can you half, replace the lid and use the rest within 2 or 3 days usually (always check the label).

Alternatives for Sauce… Make your own!
You will need… Garlic fresh or paste, Ginger fresh or paste, Sweet Chilli Sauce or Chilli Sauce (if you like it hot!) Salt, Pepper and Chinese Five Spice! I prefer the pastes as it makes things so easy!

In a small bowl mix up a tablespoon of everything above! Less of the hot chilli though unless you like it spicy! Add more or less and experiment with the taste until it’s to your preference. Add this to your stir fry when you add the noodles. One of each paste does me around 7 or 8 stir fry’s or Chinese orientated meals. Chinese Five Spice goes a long way too!

A Pasta Bake is also a great way to use up Vegetables about to go stale and any leftover sandwich meats or leftover sausages for example. This is a firm fave of mine, bacon chunks, peppers and tomato!

I really hope I have given you some inspiration on some family favourites and ideas on how you can make them go a lot further during this difficult time. You can of course substitute the meats for vegetarian alternatives or swap out the vegetables you don’t like for others too.

Experiment with what you’ve got to use up and so long as you’re making healthy meals with vegetables in you’re already winning for the day! If you liked any of my meals after making them please leave me a comment, I would love to know how you got on.

Is there anything you would like to cook but need some help with? I’m an experienced cook and perhaps have experience of the dish, please comment and ask me 🙂 I’m happy to help!

Stay In and Stay Safe Friends. I might go do some baking now I’m done with my savoury cooking! If you’re after sweet treats check out those recipes that are on my blog already too!

✩ Sabrina ✩

Fun Crafts With Children This Christmas

Hello everyone, today I’ve gone all arts and crafts on you! Most children break up from school today and I’m sure a lot of you are trying to come up with ways you can entertain everyone without it being Christmas movie after Christmas movie. Hands up if I’m right!

So what about some crafting! You can choose whichever one of these that you already have the necessary items for!
Pick one or do them all over the festive season! They make great tree decorations or cards, and perfect gifts for family members too!

Top Tip: Pop your little ones name and the year in the corner of the decoration if you’re keeping it, make one every year and compare the sizes!

It’s amazing what you can make out of a few bits of card, a pack of mixed pens and some washable paints! Why not give one of these awesome craft ideas a go with your little ones this Festive Season!

I always love the idea of doing cards! You can combine any of the below ideas and then simply cut out your finished design and stick it on to a piece of card.

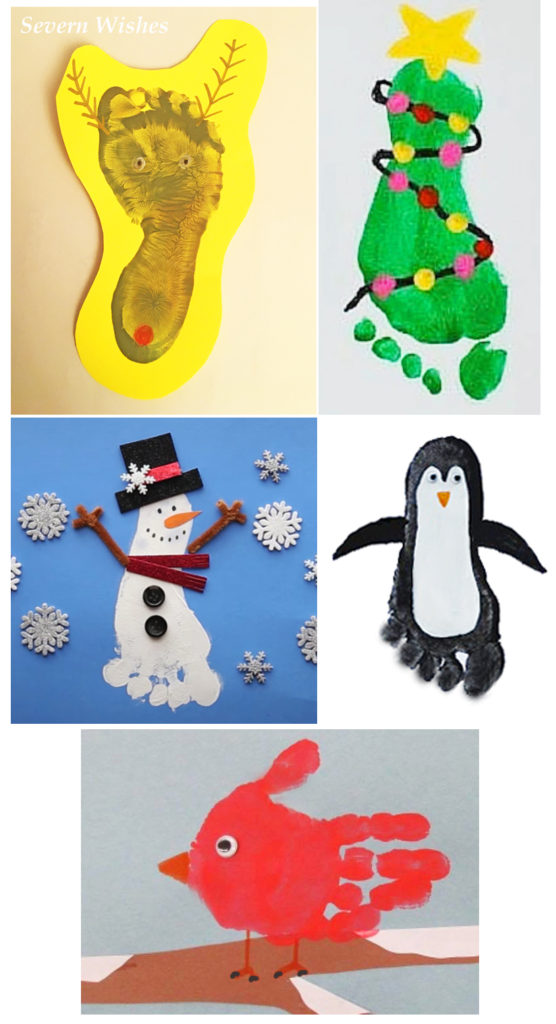
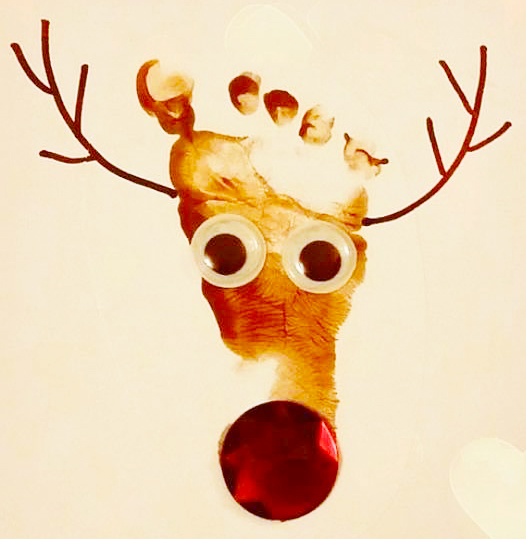
Reindeer Foot Print
Penguin Foot Print
Snowman Foot Print
Christmas Tree Foot Print


Reindeer Hand Print
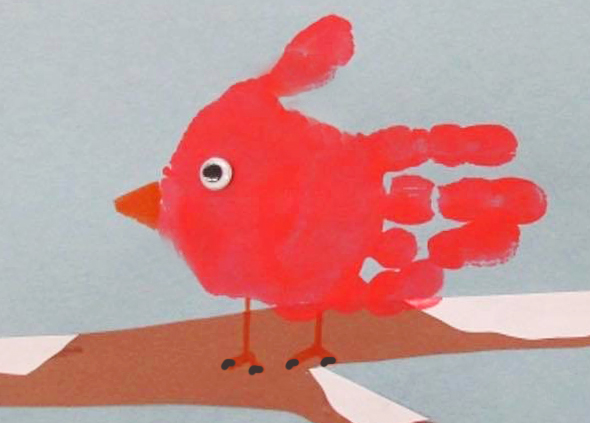
Robin Hand Print

What Will You Need:

A Sensible but Fun Adult 😉 with Baby Wipes at the ready!
Coloured Paper and Card
Pack of Mixed Coloured Pens, Glitter Pens are also cool too
Double Sided Tape or Pritt Stick or Glue

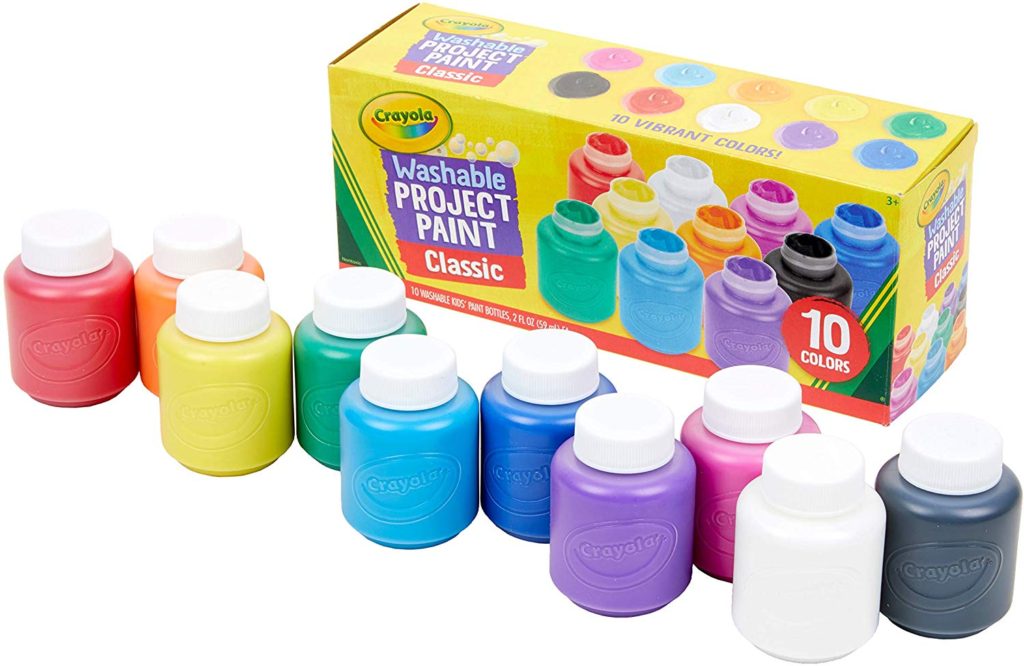
Washable Paints in mixed colours – I like the Crayola ones
A few different sized paint brushes or a sponge for skin application.

Scissors (one reason you need an adult)
Stickers if you want to add those or some googly eyes for your print animals

You may need a ruler, a hole punch and string or ribbon if you plan on making anything into a hanging decoration.

Use Washable Paints and some Card to make your very own Tree Decorations or Christmas Cards. It’s easy to do Hand Print Robins, Wreath or Reindeer! Or Footprint Trees, Snowmen, or Penguins!

How To Make It…

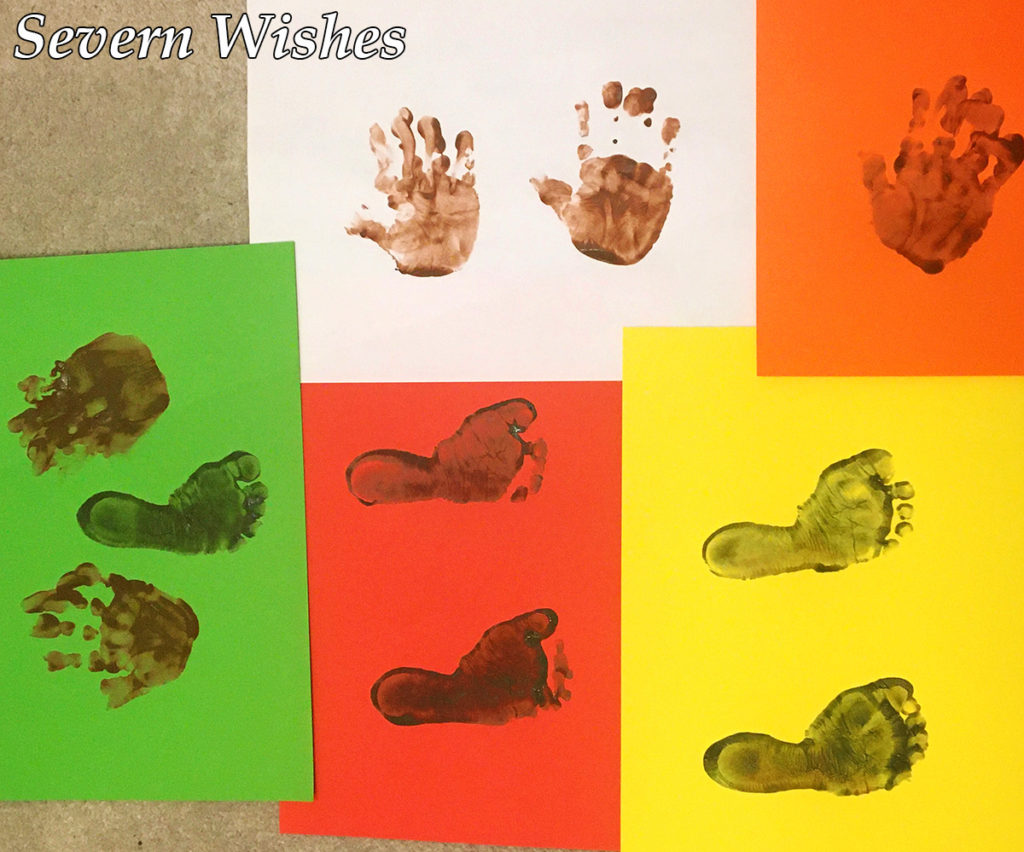
Paint your child’s Hand or Foot and carefully press it down on to your chosen card or paper.
Let it dry overnight somewhere warm.
Flatten the design for the next few hours once it’s dry.

Next you need to decide which Christmas theme to go for!
Paint, Draw or Stick on your favourite bits to make your design real!
Get an adult to do any cutting parts that are needed to make it into a decoration or card.

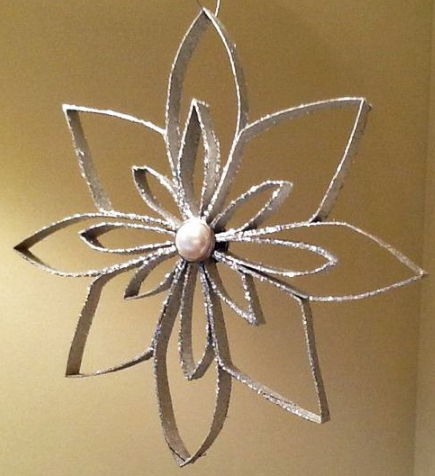
Toilet Roll Snowflakes are great to do too!
You need two toilet rolls per snowflake, glue, scissors, paint and glitter!
Tip One: Paint the Toilet Roll and Glitter it up first and then let it dry before cutting, at least overnight!
Tip Two: Cut all the pieces the same width and arrange it before gluing!
Tip Three: Tie some Ribbon or String to the top and hang in your home!

Thank you for visiting Severn Wishes today, I hope you enjoyed this Arts and Crafts post. Hopefully I will to see you here again soon. Have a great Festive Season!

✩ Sabrina ✩

Reindeer Child Foot Print