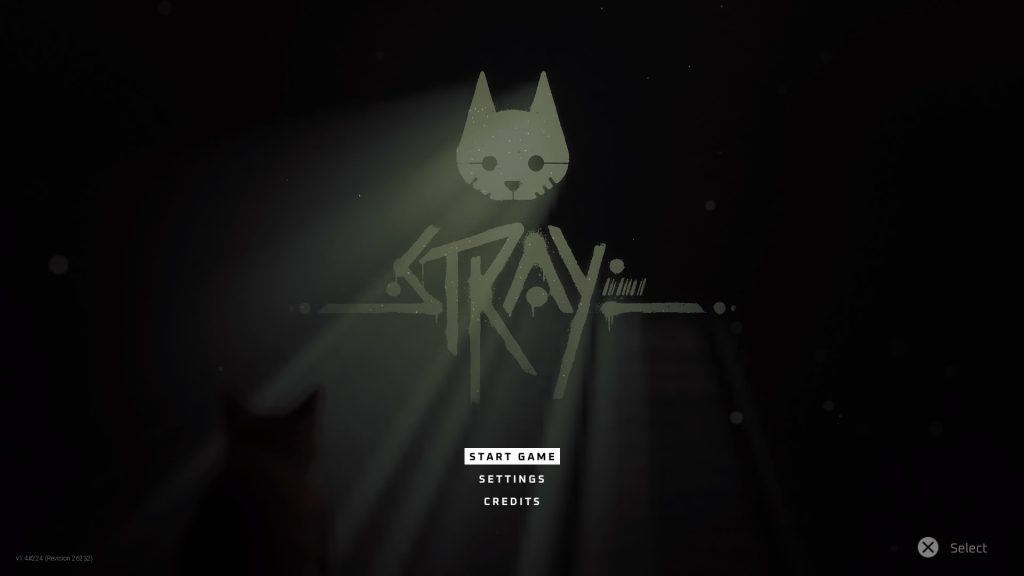
Stray is a game like no other

“STRAY” GAME REVIEW

At the end of 2022 I was able to get my hands on a game called Stray for my PlayStation, this was luckily through download included in my yearly subscription to the PlayStation Store. I had heard good things about this particular digital adventure and I eagerly waited to play it after Christmas when I wasn’t so busy. Starting the game between Christmas and New Year, but I didn’t complete it until January due to other commitments. I liked this game so much I knew I wanted to Review it for everyone who was interested to hear about my honest opinions of it.

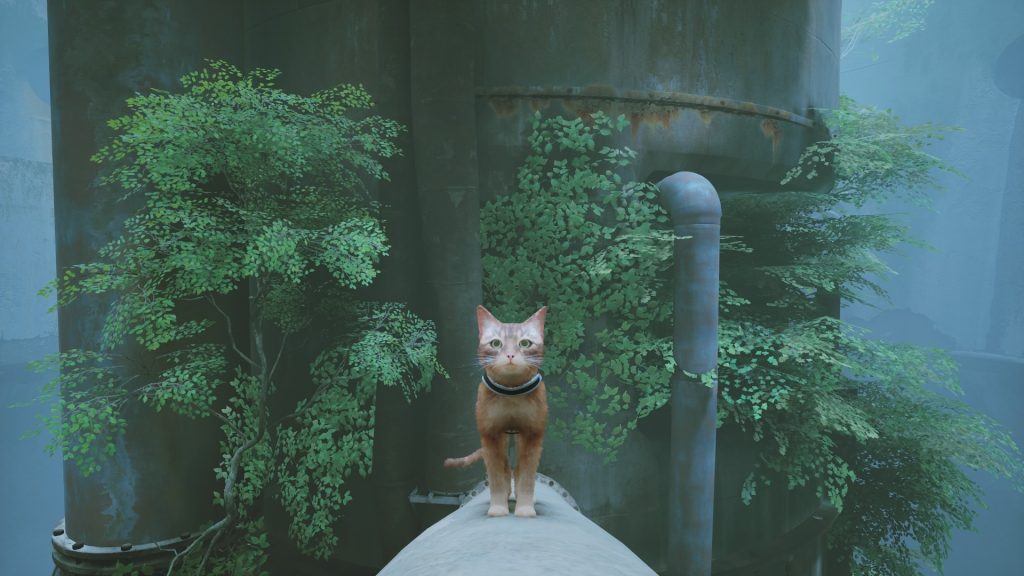
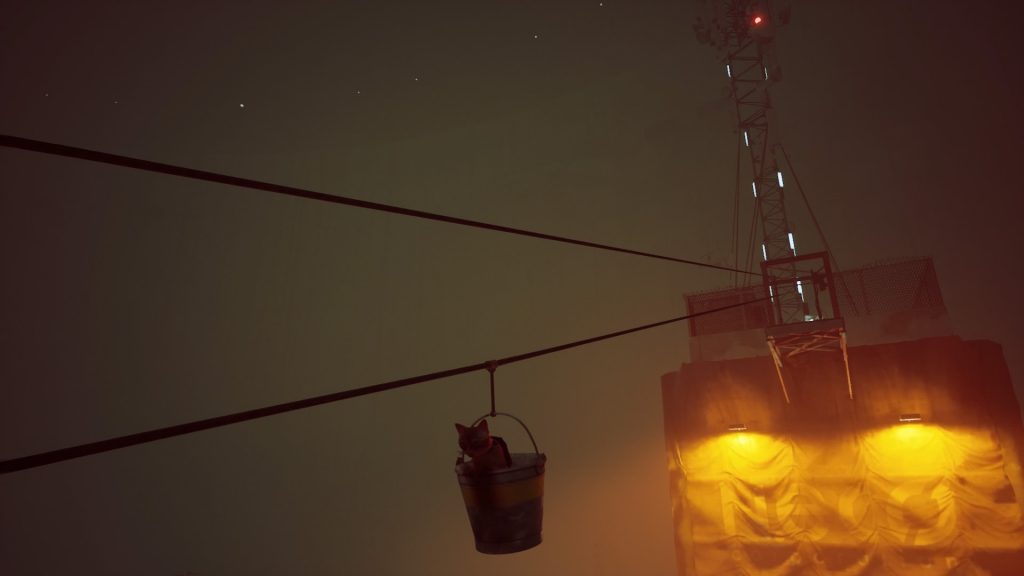
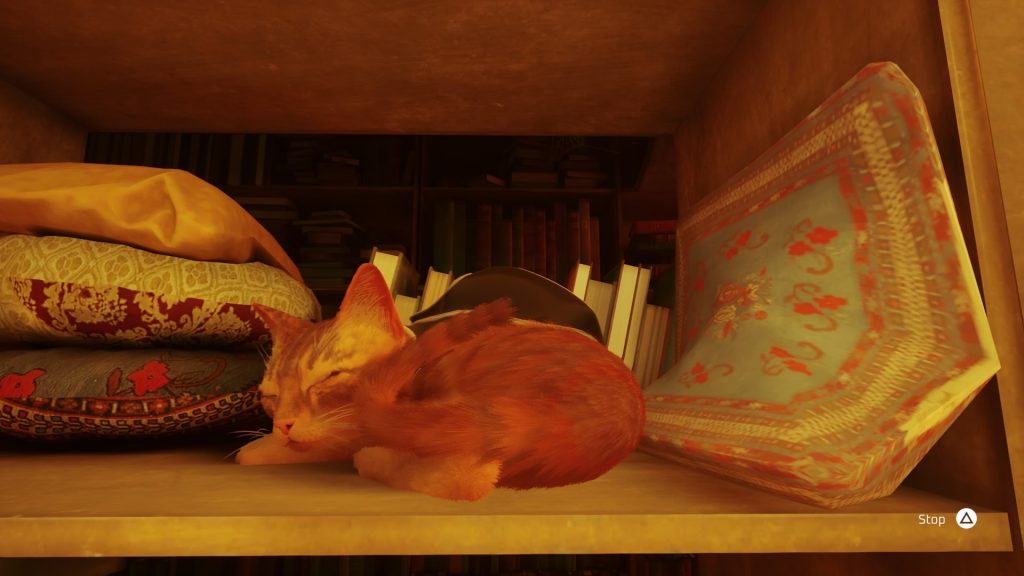
Also check out the pictures throughout my post, they are all screenshots from my PS4 from when I was playing the game as Stray the Cat, and I think you will agree that the level of detail is phenomenal in some of them. And I must mention one more thing before we jump headfirst into this review, and that is that both of my cats sat in front of the television during my initial hour of gameplay, watching the screen, tapping on the screen, responding to the meows from Stray, it was so funny.

When I first heard about this game I knew I wanted to play it, it was the chance to be a Cat (albeit a Stray one) and take an adventure as an animal I loved, that is what I found so appealing about Stray. There might be a few minor spoilers in my main Review so if you don’t want to know about those then perhaps skip down to the final paragraph titled “My Honest Opinion” to see what I thought overall once I had completed the game. Let’s get started on what Stray is and what my thoughts were as I played it.

What is Stray about?

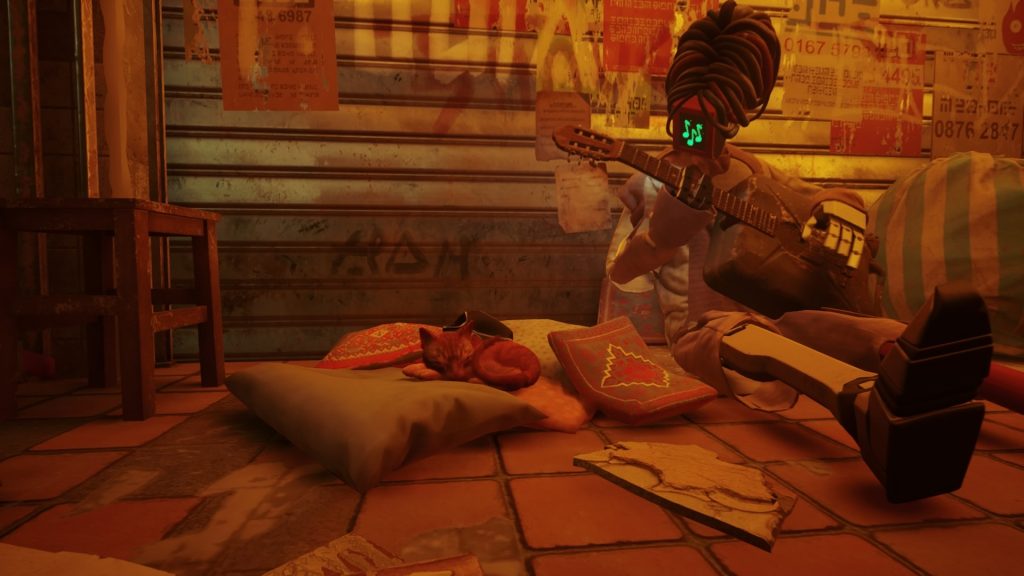
Set in a dystopian future where a sealed dome city houses robots, machines and deadly mutant bacteria the Robots call Zurks. The Stray finds out human civilisation has died out from a pandemic and that people were sealed inside these domed cities for their safety but ultimately it was their undoing. Stray is set when most living things are now gone and almost long forgotten about. The Robots cannot believe their computer eyes when they first see you enter their slum city, and you soon win over their metallic hearts. Stray is about discovering what happened to humanity, helping the Robots, while they in turn try to help you get back to the surface and out of the city. It’s a very different “end of the world” scenario, where Robots have evolved and built themselves to resemble the humans they once served. Each main character has a quirk to it and you’ll meet a lot of Robots along the way, Scientists, Musicians, Bar Keeps, and one incredible little Robot called B-12.

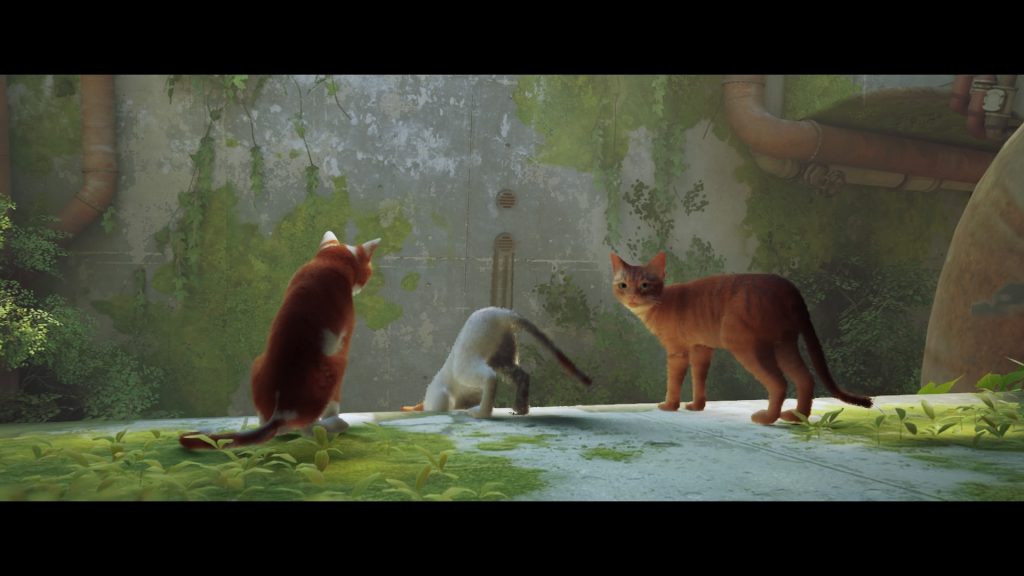
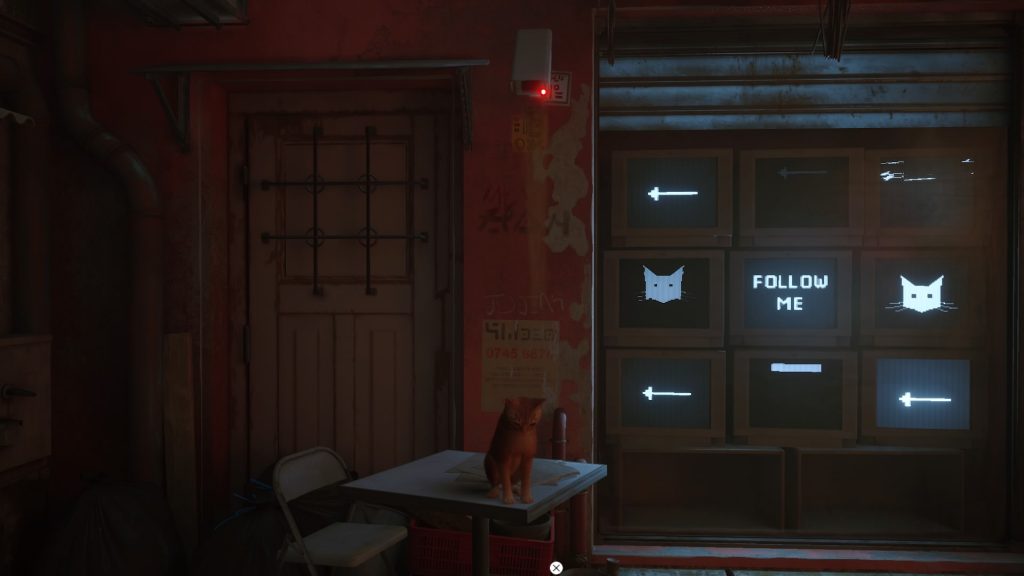
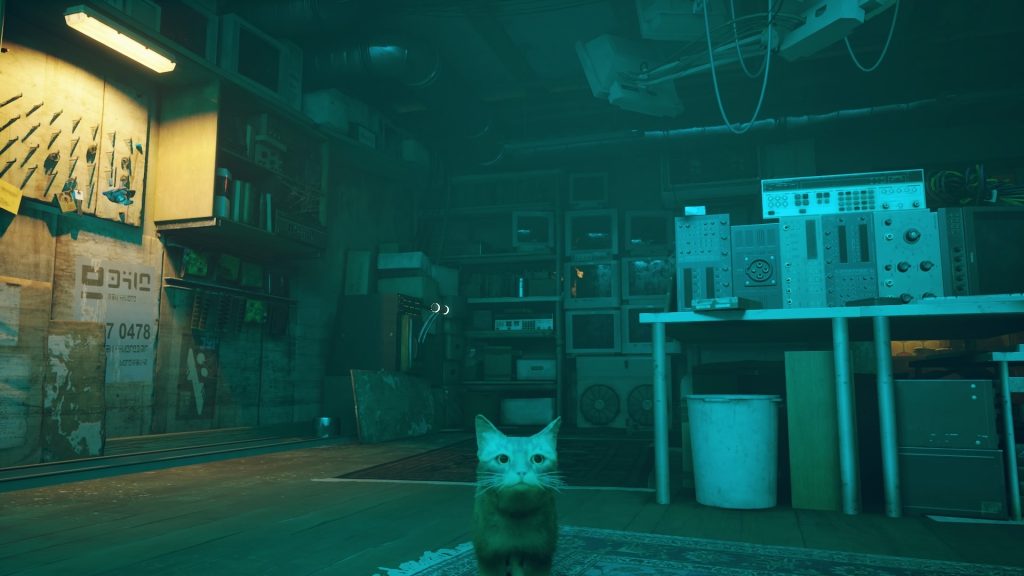
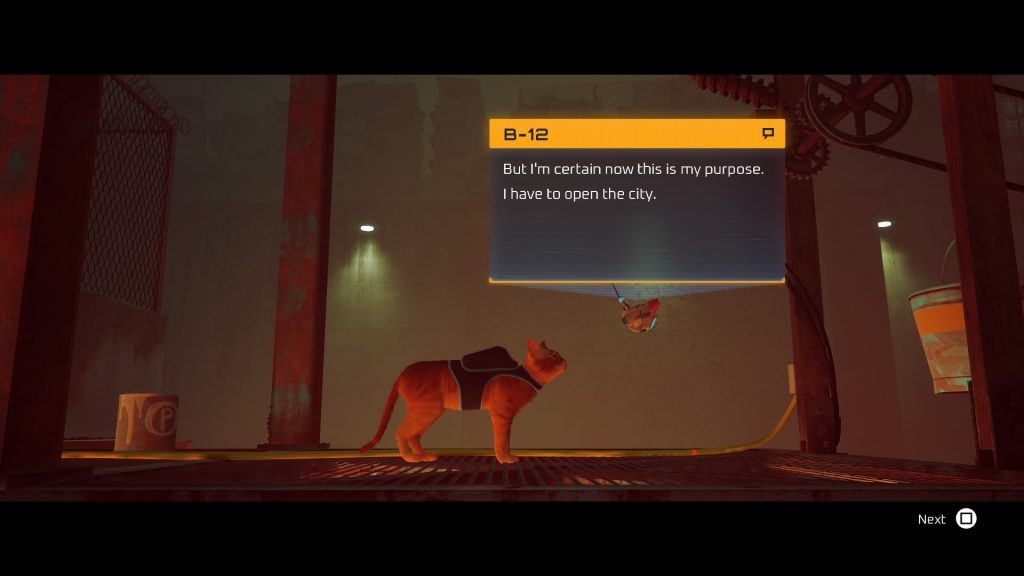
Your story begins with you exploring the world with your siblings, high above the city where nature is slowly reclaiming things humans once built. Suddenly you fall down inside when a plank gives way and your life changes forever. Trapped with no way to climb out, and injured, you have no choice but to push forward through the depths of this abandoned place. As you wander the streets you end up taking any route you can, until you find a building where you can finally drink some water and get some rest. Meowing is also something fun to do! You end up exploring where you meet a new friend who calls himself B-12. This cute little robot even makes you a backpack so he can ride inside it while you use your Cat agility to scale buildings and find safe passage through. B-12 cannot remember much at the beginning, but you can help him remember by collecting memories and scanning parts of this neon city. Soon a picture of what life used to be like starts to emerge.

Don’t forget to be a Cat while you play this game, scratch things, jump into things, curiosity is vital for Stray! Press buttons and batter things with those paws! Meow a million times (just not when you’re sneaking past Zurks) and do what a Cat does!

With B-12 promising to help you and you happy for company, Robot and Cat take off across the city in search of a way home. Passing neon signs and technology still in use, you finally encounter signs of life, however these are not friendly. The Zurks are mutant bacteria and other than our friendly Cat are the only living things left inside the sealed city. Escaping for your life you end up in the city slum and discover that it is filled with humanoid robots. Getting into places only a small creature can go, you are soon put to work by the Robots – who all have names by the way! And you begin exploring and getting into mischief.

The Robots are shocked to see a living creature; it’s been hundreds of years since they last saw anything alive. You make new friends, talk to dozens of Robots using B-12’s help, and by searching the slum and collecting things with B-12 by your side you begin to build a picture of what life were like before the Zurks. Some Robots trade items with you to help on your journey, this is an important part of the game. However sometimes it means putting yourself in danger in order to help others which is a real sacrifice, but without help you’ll never get home, so you must try.

B-12 and his back pack are essential to your journey. As you collect and trade and gift things to the Robots you build up what you need to move on through the story, and once you have successfully helped the Robots too, you can then leave the slum on your journey to continue to the surface.

Getting out of the slum city is only the beginning for Stray, as he navigates avoiding Zurks in order to help the AI’s, helping more and more Robots to get what they need in order to defeat the Zurks, and helping B-12 to realise how important he is through helping him regain his memories. But not all Robots are your friends either, some are Sentinels out to get anyone disobeying the rules and you have to use your Cat stealth on many occasions too.

There are many ups and downs in Stray, tear jerking moments of realisation, and a sombre thought about what life could resemble if humans did die out. Would Robots continue on without us? Fixing their own parts? Building things to better aid their own survival? Stray raises lots of questions, but as you progress in the game things become more and more clear, until the final realisation, when you are able to get what you need in order to open up the city roof. Robots have built a civilisation all their own down there, they remember the humans and continued where they left off, but how much longer can they continue without real purpose?

(BIG SPOILER) B-12 helps Stray to navigate all the layers of the city, and once into the control room at the end of their journey, B-12 makes the ultimate sacrifice so that Stray can finally go home and live its life outside of the city walls once again. This pulled at my heart strings when B-12 realised his world was gone and he had nothing left except the capacity to help this Stray Cat to live.

This game was touching, beautifully designed and skilled with both story and layout. It was complex and simple all at the same time, but challenging enough that I didn’t get bored once. I played slowly taking everything in and trying to complete all of the side mission quests also. Roughly it took me between 6 and 7 hours from start to finish. Though there were times I let Stray Cat sleep on a cushion and just watched him for like five minutes at a time, ha! He’s just so cute! Okay cute is just the word I would use because it’s adorable and so lifelike in movement too, that was something that I loved, even down to the jumping and landing of the Cats body it’s been developed really well.

My Honest Opinion

I honestly loved this game, throughout each section I explored and learned about the world Stray had fallen in to. There were poignant aspects and references back to humans which were both quirky and forlorn. It gave me lots to think about and enjoy as I ventured around as a Cat. If you played it through without doing any side missions you could do it in 2-3 hours. If you take your time and enjoy the scenery and details it’s a 6-8 hour game. I enjoyed the side missions, and there were two of them I didn’t complete so I would love to replay Stray and achieve them one day. Helping the Robots get what they need to succeed is quite satisfying.

Lots of you might be reading this to find out if Stray is a sad game, well, that depends on to whom you are referring to. I will just give you this one tiny spoiler, which is Yes the Stray Cat does survive and get out of the city in the end but you might accidently get it killed several times along the journey thanks to the Zurks (but it’s a good job he has 9 lives!) you’ll see what I mean when you play it. Those Zurks are fast and savage!

Would I recommend it to people as a game?

Yes I would, if you love Cats, play it, for dystopian future nerds, you would like it, people interested in what our world might look like hundreds of years after mutant bacteria causes a pandemic and wipes out humans as we currently know it… (Too soon?). This game was developed during the Pandemic, so hats off to them. I played this at the end of 2022 and start of 2023 (because I’m a single parent who doesn’t have the time to sit down and play a game in one session – even a relatively short one). Despite it being short in game time terms, it’s definitely worth playing due to the sheer amount of effort that has gone into making it. Little quirky things really made this game great for me, references to items that I use even now, things that still work technology wise in a dystopian future, and the thought that Cats will outlive humans… well… that’s fab in my eyes. The lifelike aspects of Stray the Cat is amazing and I believe one or more of the developers must have Cats at home in order to have gotten that movement and its mannerisms spot on. I loved every second of being an adorable ginger cat and I would love to see them make another one, perhaps when the Robots venture out of the now opened city? Maybe there is another City close by that needs saving too? If you need some story ideas hit me up I’ve got tons and you can pop my name on the Credits of the sequel! Ha! Ha! Definitely my cup of tea as a Game and hats off to the creators for doing a wonderful job!

Stray is a game that will have you thinking, reminiscing and contemplating so many aspects of life. If you love the look of this cute little Cat then you won’t be disappointed. Due to the themes and peril I would suggest this game for ages 12 and over and the game does think 12 is an appropriate age as noted on the purchase details. You can find this game online or on the PlayStation Store.

Thank you for reading this game review today, I hope that you have enjoyed hearing about Stray, and please let me know if you have played this or are planning to play it in the near future.

I will bring you more game reviews soon, now I’m off for a cat-nap! Only kidding! That’s my cats napping next to me while I type up this blog post! Ha! Until the next review then, bye for now.

✩ Sabrina ✩

If you are looking for the ideal Stationery Gift this Season then why not check out the Gift Company Journal Sets

Hello and Welcome to another of my Product Review Collaborations! This month I am ecstatic to be working with Gift Company again, as I review their wonderful Journal Stationery Gift Sets.

I am thrilled to be bringing you this collaboration with Gift Company this November, I have been asked to review some of their incredible value Gift Sets! Each set of products has been sent to me in order for me to complete this honest testing and review. I wanted something versatile and unisex and this was what we decided upon.

On the Gift Company website there are four sets to choose from, they include a Robin, Cat, pair of Giraffes and a Bee. I chose the three sets that contained exactly the same items so that I could compare their design and quality. Overall I have been very impressed with them, so let’s take a look at what’s inside each of the decorative display boxes for this stationery set.

Here are some of my photographs to show the quality of the stationery up close.

The gift set is very well presented inside the box which is also decorated front and back with the design that you chose.

Each of the Journal Gift Sets contains:
1 x Journal (with blank date headers to fill in as you please)
A Selection of Cards and Envelopes both personalised with set picture

1 x Shopping List Notepad with a Magnetic Back
1 x Notebook on a Ring Bound Coil
1 x Decorative Bookmark with black tassel
1 x Black Ballpoint Pen


Cat Journal Gift Set LINK
Robin Journal Gift Set LINK
Giraffe Journal Gift Set LINK

Shopping List and Pen
Notebook

My Honest Opinion

Overall these Gift Sets are of extremely high quality, the way the set is designed means that you receive the decorative box as well as the six individual items inside it. A set has every product made to a high standard, be it the manufacturing and final finish of the product, as well as the paper within them, it’s a decent thickness of all the paper products. The image that you decide upon for your set is bright throughout the products and the font on the quotes is easy to read and is clearly defined.

You could choose to gift the set as is, or you could split the set up and divide it into smaller gifts, you can give the journal and pen to one person for example. While offering the cards and envelopes to another loved one. Perhaps you have a family member who always does the food shopping, this list would be perfect for them. Is there an avid reader in your family as well, because this decorative bookmark would be a great addition in their Christmas box.


Considering you get six high quality items and a decorative box for only £10, I think it is definitely great value for your money. If you are on a budget this year, I would consider purchasing two gift sets and dividing the items between four or more different people. You could even buy a gift set and a pack of pens and give every item to a loved one, along with a pen.

You wouldn’t have to gift this set for Christmas though, it’s a perfectly acceptable gift for a variety of occasions such as a Birthday or an Anniversary too.
Do you know someone who is going off to University? Or somebody who recently started a new job? A gift like this might be both useful and very well received by people who will need to use stationery items such as these.

I personally love being organised and using stationery definitely helps me to do just that. If you know of someone in your life that does the same thing, then this gift would be perfect for them. And finally as a parent, you can never have enough notebooks and a journal to keep your year ahead organised.

Cards and Envelopes
Shopping List

My Review Scores

Functionality 5✩

Product Design 5✩
Versatility 5✩
Product Quality
 5✩
Value for Money 5✩
Universal 5✩

Journal Cover
Journal Inside
Bookmark

Thank you to Gift Company for the chance to do this review, it’s great to be working with you again.

For anyone who isn’t aware of Gift Company, they are a long standing British based company with shops across the country, as well as their website which houses a wide range of Gifts and Furniture too.

If you would like to know more you can find Gift Company at the following links and on social media.

Gift Company Website
Gift Company Facebook
Gift Company Instagram


You can also watch my Review Video as I show the products off, and that can be
viewed on my Instagram channel by clicking the image below.

Thank you for visiting Severn Wishes Blog today and reading my collaboration review.

Have a wonderful final few days of November 2022!

✩ Sabrina ✩

World Bee Day 2022 on May 20th

Happy World Bee Day!

Here is a Photo montage of Bee’s that I have taken this past year…
as a Nature Photographer I am constantly making images.

AWESOME FACTS ABOUT BEES

Bees are insects that have 6 legs and 5 eyes.

Bees have been around for approximately 30 million years.

Here in the United Kingdom we house around 270 species of Bees.

Worldwide there are more than 20,000 species of Bees.

Honey made from Bees was found inside the tombs of Egyptian Pharaoh’s and it would still be edible today.

Honey Bees communicate with one another through dancing moves!

Bees can fly up to 20 MPH!

Male Bees are called Drones.

Female Bees are called Worker Bees.

The Queen Bee can lay up to 2000 eggs a day and a hive will only have one Queen.

A Honey Bee will only make 1 Tablespoon of honey in their lifetime.

Some species of Bee are solitary and live alone except for reproduction moments, these often live underground too!

On average a Bee will fly 32,000 miles in their lifetime and visit more than 1 million flowers!

Honey Bees live in Bee Hives where they work together to make Honey.

If a Bee loses its stinger it will die – so make sure not to hit them and let them just fly around you and fly off again – once they realise you’re not a flower you won’t interest them anyway!

SABRINA’S HOW TO MAKE A 3D BEE!

I thought what better way to immortalise the Bee than to make your very own 3D craft version of one! I came up with this last year but sadly I missed the deadline for World Bee Day 2021, so I have saved it all for today! World Bee Day 2022! They are fairly easy to make and I will now tell you exactly what you need before we begin the how to method!

One Sheet of A4 Thin Yellow Card or Thick Paper
One Scissors
One Piece of Cereal Box Card
Pens – black and brown
A Permanent Pen – Black with a Fine End (for the Wings)
Double Sided Sticky Tape
A Piece of Thin Plastic (mine was off some toy packaging) (for the Wings)
Two Circular Objects to Draw Around – 1 for the Small Bee Head and 1 for the Body Circles

Step 1. Cut All of Your Circles Out – You need 1 head, 1 main body out of box card and four out of the yellow card. The yellow and the body have to be the same size, but the head needs to be 1/4 of the size. Put some double sided sticky tape on the cereal box card circle because this will be your base to work the rest up on. Put the other yellow circles down on a flat surface ready for their details.

Step 2. Draw some sections on the 4 yellow circles that will become the Bee body, you will need to have 3 sections that are lined horizontally and similar in size to each of the other matching circles (See image below). Colour these in Brown. The best thing to do is to have them on top of one another, mark the section the same and attempt to line them up with the opposite side. With the small Circle that is yellow (the Bee head), you need to draw two large Oval Eyes in Black, and then do some vertical lined streaks in brown so it looks like fur. Leave the top section of it Yellow, we will be sticking it to the body shortly.

Step 3. Stick the Head to the Body using double sided tape with only 1/4 of it attached to the Card and the rest sticking out. Now place the Bee in front of you, with the head facing you (facing South). You want to now take one of the striped yellow body sections, choose the one that is least lined up. Put some double sided tape on the back of it and stick it down on to the main card body, covering the edge of the head, with the stripes going horizontally across the Bee body. Place this beneath something heavy for a few minutes so as to stick it all into place while we do steps 4 and 5.

Step 4. Take your Plastic now and Scissors and permanent pen. You want to draw out two identical wings, Bee wings tend to have some ridged ends but you can just do ovals with a pointed end if you’re not confident (See Images below). Look at my Bee montage at the start of this blog post for wing inspiration! Once you are happy with the drawing cut them out, and make sure they’re the same size by overlapping them and trimming any overhanging edges.

Step 5. Draw some lines down the wings with the permanent thin pen, try to match the Bee wings (again take inspiration from my pictures at the start but be creative too this is your own Bee!) and match each other, make the same marks on both wings by having them side by side as you create the lines. Place them off to one side to fully dry. (If you use normal pen on plastic it will likely rub off).

Step 6. Now it comes to the tricky part, you need to take your Bee body parts and fold them in half, all three of them with the coloured lines on the inside of the half fold. Make sure that the centre is through the middle of the horizontal lined sections. Do this for all three and also make sure they are folded the same across the sections so when stacked together they are the same (or close as you can).

Step 7. Once you have folded them and they do match best they can, you need to take two of them to start with, and place some double sided tape strips on the one side of each one, so that is one taped only the left underside and one taped only on the right on the yellow underside of each of them. Take a look at my photograph below for clarification on the folds and the tape.

Step 8. Take your folded Bee body circles and place one on either side of the main Bee body with the head. Line them up with the circle that is already on it, the one you put the tape on the left underside goes on the left, and the right taped side on the right. When you push the body middles together they should be flush and straight in the centre and aligned with the head. Make sure the stripes line up and are horizontal to the head that is facing south, and the crease line for your folds should be straight up from that facing north. If this is accurate you can now remove the double sided tape, stick one side down at a time, to the main body. Then do the opposite side (see Step 7 and 8 images) and this leaves you with the other half of each circle standing up on end. The final circle you still have will go in between them causing the body parts to stand up 3D.

Step 9. Attaching the final circle on to the body is just about lining it up. First you need to put some double sided tape on to the pieces that are already attached to the Bee body that you stuck down in Step 8. (See image Steps 9 and 10 to clarify this next step). With the double sided tape now in place but not removed the tabs yet, you first line up the circles, look at it and think do the edges match and is it horizontal across the body? If the answer is yes then remove the tape tabs and stick that final circle on to the top of the Bee in between the other pieces.

Step 10. Press and hold the Bee body firmly now, gently run your fingers down each of the sides to press the circles fully together and ensuring the tape grips flush. Once they look like they are fully stuck with no gaps anywhere you can now make sure your wings are dry from earlier.

Step 11. Take your plastic wings from before, line them up with where you want them to go on the Bee body (they are usually attached to the middle section of a bee’s body). Then take two thin strips of double sided tape and match those up on either side, stick down the tape. (See Step 10 and 12 image for wing tape placement).

Step 12. Attach the wings now and make sure you press them down on to the tape for at least a minute to ensure the plastic gets a really good grip. Hold the Bee upside down and make sure they don’t come loose, if they do then press again.

Step 13. Tidy up any lines on the Bee and trim any edges with scissors that aren’t in line to neaten her up. Then you have your Queen Bee! You could hang her up somewhere or make her a little hive…

HAPPY WORLD BEE DAY!
You now have a friendly Bee to live in your home and remind you of their importance, coolness and cuteness.

WHAT CAN YOU DO TO HELP THE BEES?

Make a wildflower pot, planter or corner of your garden and attract bees and help them with their pollinating. You can get wild flower seeds free with some things such as “30 Days Wild) and Brands often give them away with food products too.

Don’t pull out all of your weeds, leave a few because bees need them especially because weeds are usually the first flowers of the new season.

If a Bee comes into your house leave it alone, open some windows and let it find its way out, do not attack it or attempt to catch it because it may sting in fear and then it will sadly die. Most Bee’s will head straight back out a door or window when they smell the fresh air.

Visit a local Apiary and But Local Honey products when possible.

WOULD YOU LIKE TO MAKE A CRAFTY BEE HIVE?

What You Will Need


Tiny Craft Wooden Bees (Found in The Works craft shop)
A Narrow Sided Box or a Lid from Something (Rectangle is best)
Disposable Dehumidifier Pot Lids – doesn’t matter what colour as you will Paint them
Brown Paint and a Paintbrush

Step 1. Paint your box and the humidifier pot lids you have collected, they should be brown or a mixture of brown and black and yellow.
Step 2. Leave them to dry somewhere flat overnight at least.
Step 3. Place something to resemble honey and nectar between the lids, maybe tissue paper?
Step 4. Stick the Two (or more) lids together to form mini hive type structures.
Step 5. Stick the lids into the box and stick your Bee’s around. Done!


Thank you for taking the time to read this blog post today, I hope you have enjoyed it. If you make any Bee’s please share your pictures with me on social media, use the hashtag #SevernSabrina and #SabrinasHowToMake or tag me on them using @Severn_Sabrina or @SevernWishes Blog.

Have a wonderful World Bee Day 2022!


✩ Sabrina ✩

If You Want To Get An Awesome And Unique T-Shirt Then Look No Further Than The Designs You Can Find At Qwertee

Have you heard of Qwertee? Qwertee T-Shirt Designs are fabulous and unique, a huge range of choices and sizes. The one thing though is that designs don’t stay available for long, so if you see one you like then you have to be fast!

You can check them out on social media or their website, you can also get the newsletter email every evening which tells you what the brand new 24 hour only Tee’s will be!

Qwertee bring out a brand new unique T-shirt design every 24 hours! Talented Artists and Design Students are just some of the many people who help to create the Qwertee t-shirts! You can even design one and submit it for review, if it gets passed the voting stage it could be made into a t-shirt!

I chose a Fox and Cherry Blossom T-shirt! Two things I love on the same shirt! I recently won a competition of theirs over on Twitter and I chose this as my prize. I found the overall quality to be excellent. I am a Size 6-8 so I chose the Small size tee and it fits me perfectly, but it is quite a snug fit. If you are between sizes right now, or you prefer them to be a little baggy then I would suggest buying the size up.

Here is a close up photograph of the details on the T-shirt. The colours are also vibrant.


Overall Appearance in Use 5✩
Overall Product Quality 5✩
Product Fit to Size 4✩
Unique Design 5✩
Delivery 5✩

Would I recommend Qwertee to my followers and friends? YES I would! They have T-shirts that are good quality and unique in the marketplace, and they ship all over the planet so you can buy them from wherever you’re reading this from! They also make great gifts for people as well providing you know their sizes! Would I buy from Qwertee? Yes I would!

Thank you for visiting Severn Wishes Blog today to read this Review, I hope I see you again soon!

✩ Sabrina ✩

✩ ✩ ✩
This product review features an item that I have won in a competition so I have not paid for this product. It is my own choice to review the item once I had received it to give the brand a shout out.

Sabrina’s Easter Craft Ideas 2022

Happy Easter! I hope you’re having a wonderful long weekend!

If you’ve already been out and about and are now looking for something to do within your home to keep the children entertained, then why not check out all my craft pieces below, show your children and they might want to give them a go! They are all really easy and just need a few minutes of your time as the adult to deal with some scissor cutting and poking holes, and then they can begin! You won’t need any fancy craft equipment for any of these either, just gather the following items on my list below and you’re good to go!

If you were wondering what it cost me to make all of the craft items I have done in recent posts it was about £15. That includes all of the double sided tape, various packs of white and coloured card, good quality colouring pens, craft balls and pipe cleaners among other things. But I have lots of them left over from these purchases too for use in future craft projects. I actually have more crafty items in the works and I’m still using up the same items and haven’t needed to buy any additional ones.

Sabrina’s TOP TIP: Making up a Craft box is a great idea, it will keep everything neat and tidy. Throw in left over pieces of card, toilet rolls and crafting left overs. I recommend a Really Useful Box or a similar one which has a tight fitting lid. These are also really strong and stackable for easy storing away.

✩✩✩ What Will We Need for all these Projects ✩✩✩

Toilet Rolls
Cereal Box Cards
Pens to Decorate
Scissors
A Pen or Pencil
A Ruler
Pipe Cleaners
Fluffy Craft Balls
Coloured Card
Googly Eyes
Double Sided Tape
Pritt Stick or PVA used sparingly

✩✩✩

How to Make Sabrina’s Fluffy Craft Easter Animals

These cute and fluffy animals were made using cereal box card, double sided tape and a bag of craft balls! In all it cost me about £2! And we have a ton of balls left over which we can use as flower middles and things like that – I use them in other projects too. This one is easy for little children, you do the templates and then add the glue on and then they can go to town with all the sticking!

Step 1. Draw on a cereal box, inside on the flat side piece, whatever shape you like, a Rabbit, a Chick, an Easter Egg, whatever you like or your children want.
Step 2. Cut out your templates, make them as big or as small as you like.
Step 3. Use PVA or Pritt Stick or Doubled Sided Tape to coat your template with glue.
Step 4. Provide a clean and flat surface for your little ones to sit and stick the fluffy craft balls to their card template.
Step 5. Add googly eyes or card beaks or any other items you want to finish them off.
Step 6. Let them dry overnight, place a piece of kitchen roll or newspaper on a flat surface, add the template, add another layer of tissue or newspaper, and then place a heavy book on top overnight to flatten them down and help the balls to stick.
Step 7. Next day you can display them around your home.

✩✩✩

How to Make Sabrina’s Toilet Roll Flowers

My easy toilet roll flowers are so simple to do! They only take about ten minutes to make once your toilet roll is decorated and dry. You could make a load of these, if you have a kitchen roll tube you may even get 3 flowers worth of petals from one tube! I would like to try and make a Rainbow of these!

Step 1. Let the Children decorate their toilet rolls and let them dry.
Step 2. An adult then cuts the toilet rolls into equal width pieces to make the petals.
Step 3. An adult also then uses the pointy end of their open scissors to poke holes that are 1cm up from the end and through both sides of each petal. (See my photo).
Step 4. The petals can now be opened out and gently threaded on to a pipe cleaner through the holes made with the scissors. Push them on until they hit the middle of the pipe and keep adding round.
Step 5. Curve the Pipe Cleaner round as you go, after each petal, and then after the final one is added you push the ends of the pipe back through the final petal holes to neaten it up. Line it up spaced between the petals while it is flat on a table and then push a fluffy craft ball into the middle.
Step 6. Hang your flowers up around your home on ribbon or string for a nice decoration.

Step 3 – 1 cm in from the petal end
Step 3 – making holes through the petals
Step 4.
Step 4 to 5.
Step 5.
Step 6.

✩✩✩

Step 2 – Cut the Decorated Roll into 5 Pieces

How to Make Sabrina’s Toilet Roll Easter Bunny

My cute toilet roll bunny’s are great for the Easter break! And they should stand up all by themselves! They are a little trickier than the flowers, but lots of fun still! They all start with a decorated toilet roll anyway so make sure you just save them up and get little ones to colour them in.

Step 1. Children decorate toilet rolls and let them dry.
Step 2. An adult cuts the toilet rolls into 5 pieces, a base, two ears, a middle and a head. (See Photo).
Step 3. An adult uses the pointy end of scissors to poke holes in the pieces, each one is specific. So…
Base is one hole, central on one side. Middle piece is two holes, one top one bottom just push the card flat together and the scissor end straight through. The Head piece needs one hole in the base at the centre, and off centre at the top it needs two holes. Each ear needs two holes, both on the same side at either end before the point. (See My Photo).
Step 4. Using a Pipe Cleaner push it on to the base and bend the end, attach the fluffy tail.
Step 5. Add the Middle to the pipe cleaner, push it down until it is flush and flat against the base.
Step 6. Take the Head piece, thread it on through the single hole, make it flush on the Middle piece of roll and then push another fluffy ball down the pipe cleaner until it sits in the middle of the roll.
Step 7. Push the pipe cleaner up through one of the holes in the top, and curve the pipe cleaner round, make sure the bunny parts are all flush and together for the body.
Step 8. Add each ear by pushing the pipe cleaner up through one side with the holes on, in through the bottom hole and out of the top hole, bend the pipe cleaner round and then through the top hole of the final ear and down through the bottom hole.
Step 9. The final step is to push the rest of the pipe cleaner down through the second hole on the bunny head, if you have more than 1cm of pipe left cut it off, then push the last 1cm into the fluffy ball within the roll bunny head, this neatens it up and gets the pointy end of the pipe cleaner hidden away.
Step 10. Adjust your bunny feet base and middle parts so that the bunny is aligned and he should stand up all by himself!

Step 3 – use my guide to make the necessary holes
Step 4 – Base and Tail
Step 7 and Step 8 – Threading the Ears

My bunny making video tutorial can be found on my Facebook page if you get stuck which is right here

✩✩✩

How to Make Sabrina’s Circle Petal Flower Card

This one is nice and easy and once all the cutting out is done, children can stick them down however they like to design their own flowers.

Step 1. Fold a Piece of Card in half for your card base.
Step 2. Draw around a circular object many many times on some different pieces of coloured card.
Step 3. Cut out these circles carefully and assemble flat.
Step 4. Every circle needs to be folded in half.
Step 5. Assemble your Flower by arranging the petals with one side sticking up to make it 3D.
Step 6. Cut out a small circle in a bright colour for the centre of each flower.
Step 7. Once happy with the design either pritt stick or double sided tape each petal down to the card.
Step 8. Make leaves or stems from card, or use pens to decorate your card.

✩✩

Thank you for reading this (long) Craft related blog post today, I always showing you my latest “Sabrina’s How To Make’s”! And if you have any questions for me about how to do something you’ve seen on my blog then please comment below on this post and I will happily answer them for you. I hope that you have seen something you would like to try and make yourself!

If you do make any of my craft items please tag me on social media using the hashtag #SabrinasHowToMake I really look forward to seeing them!

✩ Sabrina 

Check out my previous How to Make Craft posts for these beautiful 3D paper flowers!

Argos Tester Review of the Playmobil 6765 1.2.3 Floating Take Along Noah’s Ark Set

I am very fortunate to be an Argos Tester, this means that I often get items sent to me for the purpose of an online review. I test products and take photographs of them before submitting my findings and thoughts to Argos. For April I was offered one of a selection of Children’s Toy Sets. I love testing something that my young son would be allowed to partake in, his reactions and opinions would matter to me during the reviewing process.

The item I am reviewing today is the Playmobil 6765 1.2.3 Floating Take Along Noah’s Ark Set.


#ArgosTester #ArgosTesters #ArgosTestersCommunity

I have written this article about a product that I have been supplied for free, in order to test and then review it. This is my experience with said product and my honest review about the product which is listed below. I have already submitted my product review to the Argos Website when this post has been published on my blog.

Product Details

Product Name: Playmobil 6765 1.2.3 Floating Take Along Noah’s Ark Set

Product Details: A Red and Orange Boat / Ark with Animals and People for Imaginative Play. For Ages 18 months plus.

Product Dimensions: H20cm W30cm D12.5cm

Product Description: A fantastic set for young children to learn about animals. The set includes four sets of paired animals and two birds, two people, a food bag and water trough and a ramp. The Ark itself features a top piece and a bottom half, all of the pieces fit inside it for convenient storage. The top half features a carry handle easy enough for young children to use. The Ark can be used in the bath or in a paddling pool, it does float on water but it is advised not to use it in water that has had things added to it like soap, and not to use the Ark in direct sunlight for prolonged periods of time, as this will affect the condition and colour of the toys. Two clips, one at either end of the boat, hold the two pieces in place, they are quite tight so it is advised to supervise your child when they want to play with this toy.

Argos Website Link: Playmobil 6765 1.2.3 Floating Take Along Noah’s Ark Set

Argos Website Price: £30.00 (Price Correct as of 24th April 2021).

My Son and his Reactions

I got my son to help me with this review, his reaction to the toy allowed me to give a more detailed review. He instantly loved the animals, they were a nice size for him to hold and he was happy that they came in pairs too. He is a little too young to understand the “Two by Two” Scenario but he liked how he could place the pairs together on his play mats and then move them on to the boat. With my help we managed to get all of them on to the top deck with clever positioning! He loved to pick it up by the carry handle and it got easily transported around our home.
My son couldn’t open the locks at either end of the boat, they were stiff, but I wonder if over time and with use they will get a little easier to open. Until then I ask him if he wants the boat open or closed dependent on how he is planning to play. Overall it has been a big hit and is a beautiful and colourful set for young children to learn about animals and have imaginative play time.

My Argos Tester Review Submission

Very impressed by the overall quality of the Playmobil set. Animals are accurate in both colour & pattern & great for small hands. The Ark has nice features such as the handle for carrying, the ramp to re-enact the “two by two” scenario & the fact that all the pieces fit neatly inside for storing away when not in use. My son loves animals & really loved how he could stand these up and they wouldn’t easily fall over. A fab set that has captured imagination & also teaches children about animals.

My Overall Honest Opinion

There is a strong carry handle on the top of the Ark for children or adults to carry the set. This is a great idea in order to transport the set around the home or to a grandparents house for example. The clips on either end are strong so as the pieces don’t fall out of the Ark during transportation. But they are a bit stiff, too much for children to open up, maybe they get easier with frequent use. The accurate colourful pieces and bright vibrant boat make for fun imaginative play for children.

Having studied the pieces in detail they are beautifully made, smooth with no sharp edges or danger of any small parts. A great set for young children and great up to around the age of 5 or 6. The animals could still be used after that age however, just in other imaginative play. A fantastic set overall with lots of nice attention to details such as the lines on the Ark deck and simple decorations on the animals.

There is only one issue I have with the animals, and that is they all have a hole in one leg which would allow water inside if you were to use the set in water. I am always concerned about mould growing inside toys that are used to get wet. Therefore we will not be using this set in the bath, and instead using blue play mats to pretend that it the water.

If you are interested in finding out more about this product then please click the link above in my Product Details section to go to the Argos website.

Thank you for reading this review, have a lovely day.


✩ Sabrina ✩

Owl and Brolly Wall Stickers Let Imagination Run Free with their Incredible Quality, Unique Style and Beautiful Watercolour Designs

Owl and Brolly Stickers are Unique, Colourful and Imaginative

Hello Severn Wishes followers. Today I have the pleasure of bringing a special review to you all. Owl and Brolly is a company who specialise in Wall Stickers, mainly for children’s bedrooms and play rooms. I have known Sue at Owl and Brolly for several years now, we bonded through an Endometriosis group and found we had mutual things in common. When I found out she was an incredible artist and saw her beautiful work, I wanted to shout about her talent.


Sue knew that I had just moved house into a rental property, and I couldn’t take the chance of ruining the paintwork in my son’s bedroom. So the plan was to do some tester stickers, an hour, twenty four hours and finally seven days. And luckily for me there was nothing wrong with the paint and I tried the stickers on several walls just to make certain. I can guarantee that it is a good idea to do the Tester Sticker when you may not know the condition of the walls in your home.

Delightful Christmas Bear

This lovely Bear is for my son’s bedroom, he hasn’t given him a name just yet, ha, ha! But the quality of this sticker just amazed me. Not just the printing of the sticker itself but the design. Owl and Brolly stickers are all drawn and designed by hand. What a talented woman behind such a wonderful creative business.

What I love about the Owl and Brolly range is the creativity and the infinite imagination that stems from items like these stickers. Any child would be lucky to have some of them on their walls.

Here are some examples of the beautiful Wall Stickers Owl and Brolly currently offers. I will be providing links to social media and the website itself at the end of this article. Check out these incredible works of art!

I will now give you some background about the company and how it all came about. As a small British Business they are always looking for support from fellow UK citizens who appreciate all the talented people in this country, and especially now during the pandemic, it’s a great idea to think about purchasing locally for Christmas this year. Perhaps my blog post will inspire you to buy from Owl and Brolly.

Sue studied a HND in Natural History Illustration specialising in watercolour, she enjoyed a creative career until Endometriosis forced her to change her way of working. In order to move with the times she made the decision to become more of a digital based artist than making art with traditional paintings. Her drawings are incredibly detailed and she has a unique style.

It was after helping a start-up company with their designing that Sue went on to illustrate her own range of wall stickers for nursery walls and kids rooms. She began combining her own special watercolour techniques and using some digital media to create the sticker designs. It was a decision that brought out her artistic skills and she is doing what she loves every single day. It was at this time that she started her company, and Owl and Brolly was born.

The stickers are all printed on a high quality removable and reusable fabric wall sticker, rather than a single use PVC vinyl. This allows them to be used more than once and are easily removed (gently) and then repositioned. Sue has a passion for wanting to create illustrations that will help to inspire children’s imaginations. Her beautiful watercolour designs are not only highly detailed but they look unique. They are printed to such a high quality that they look good on any wall space and have already made so many children (and their parents) happy with the designs.

The Stickers are thin but excellent quality, printed onto removable and reusable fabric.


Please visit Sue over on Owl and Brolly to see all of the wonderful things that she has to offer. There are so many beautiful stickers on the website I couldn’t possibly show you all of them on here. You’ll have to pop over to the page or website and become even more inspired.

I highly recommend the customer service, the quality of the items and the overall finish of the products available. Sue will also work on special designs if you have something in mind, just send her a message on her social media and see if her commission’s books are currently open. She is working hard every day to accommodate people’s orders despite the pandemic and she is a very talented woman who deserves so much success.

You can find Owl and Brolly across these links below:

Owl and Brolly WEBSITE
Owl and Brolly FACEBOOK
Owl and Brolly INSTAGRAM


Thank you again to Sue for giving me the opportunity to review her wonderful products, I have thoroughly enjoyed this collaboration.

And thank you for visiting Severn Wishes today, I hope you have enjoyed this product review, thanks for reading.


✩ Sabrina ✩